Ropa de otoño para este verano // Autumn clothes for this summer

 
ottobre makes www.studiocostura.com

Hola! Ya lo sé...este post empieza con un abrigo! En pleno mes de julio! Pues así estamos aquí en el polo norte...con una media de 15 grados y viento todo....este..."verano". Si lo lees en Madrid te va dar un calor sólo en pensar en esta tela de softshell que he usado, jajaaa. Pero aquí vamos...porque no todo el mundo tenemos la suerte de estar en la playa. Pensando en positivo...por lo menos no hay que sudar todo el rato, jajaa. (Estoy practicando muy bien lo de pensar en positivo porque hay una cosa sobre mí que igual no sabéis: siempre prefiero antes el calor que el frío, jaja)

Hey! I know...this post starts with a jacket! In July! Well, this is how we roll here at North Pole...an average of 15 degrees and wind during all...the..."summer". If you're reading this post in Madrid it must make you feel bad even to think about that softshell fabric I've used for this project, hahaa. But here we go...because not everyone's so lucky to be at the beach now. And well...positive thinking: at least you don't have to sweat here all the time, haha. (Really practicing that positive thinking because here's a fun fact about me: I always choose hot weather over the cold one, hahaa).

ottobre makes www.studiocostura.com

Así que cuando llegué a mis "vacaciones en el norte" me di cuenta que la niña no tiene ropa adecuada para poder estar fuera jugando como tiene que ser, me había olvidado que hacía tanto frío. Otra vez. . Así que antes de cualquier cosa me puse a hacer un pequeño conjunto "capsulo" para ella (ya lo sé...igual lo normal sería ir a H&M pero os recuerdo que estáis leyendo a un blog de costura, escrito por una loca de costura, jaja). Para empezar hice este gorro y bufanda, los dos son del Ottobre Design 4/2015 y se hacen muy rápido. La tela es punto de algodón con 5% de elastán, comprado en Tallinn, el estampado es monísimo!

So when I arrived to my "vacations in the North" I saw that my kid didn't have proper outerwear clothes to play outside...I had forgot that it's that cold. Again. So before sewing other stuff I made a little capsule wardrobe for her (I know...the normal thing would be to go to the H&M but let me remind you that you are reading a sewing blog, written by a sewing nerd, haha). To start with I made this beanie hat and a scarf, both of them are from Ottobre Design 4/2015 and they are very fast makes. The fabric is a cotton knit with 5% elastan, bought in Tallinn and the print is so cute!

ottobre makes www.studiocostura.com

Segundo proyecto: pantalones para poder sentarse en el cesped o en la arena sin mojarse el culo...así tal cual. En casa tenía un softshell negro por fuera y gris por dentro y decidí hacer un par muy sencillo con esa tela. Usé el patrón "Up and Run" del Ottobre Design 1/2017 ya que está hecho para telas sin elasticidad. No hice los bolsillos ni la falsa bragueta como en la versión original y la cinturilla la hice añadiendo 4 cm a las piezas para poder doblarlo y meter allí directamente la goma elástica. Los puños son también de un puño-tubo que tenía por casa y aunque en azul marino, le vale para este pantalón. 

The second project: pants to be able to sit on the grass and sand without getting your butt wet...quite straight forward, right. I had this softshell fabric at home in black and grey on the inside so I made a very easy pair with it. I used the "Up and Run" pattern from Ottobre Design 1/2017 as it's made for fabrics without elasticity. I didn't sew the pockets nor the mock fly as in the original version and I made the waistband casing adding 4 cm on the upper edge to be able to turn it under and put the elastic tape directly in there. The cuffs are made from a cuff tube I had at home and altough it's navy blue it does the job anyway.

ottobre makes www.studiocostura.com

Y ahora por la chaqueta. Ya sé que lo hice yo y blablabla, pero es tannn bonita, jajaa!!! Igual os suena esa tela porque la usé ya antes para otra chaqueta, se puede ver en este post. Lo que pasó la última vez es que realmente el patrón que usé era para una prenda más ajustada, una sudadera. Y no tenía mucha holgura y con lo rápido que crecen los niños...esa chaqueta por desgracia se quedó pequeña en nada de tiempo. 

And now the jacket. I know it's me who made it and blablabla but it's just soooo cute, hehe!!! Maybe you remember that fabric because I used  it before for another jacket, you can see it in that post. What happened the last time was that the pattern I used was actually for a closer fitting garment, for a hoodie. It didn't have a lot of ease and as children grow so fast...unfortunately this jacket ended up beaing too small really quickly.

ottobre makes www.studiocostura.com

Esta vez fui más inteligente (lee: usé mi cerebro) y usé un patrón diseñado para telas de softshell, el "Warm Inside" de Ottobre Design 4/2015. Quiero decir gracias a Auxi quien me mandó las instrucciones en castellano porque mi revista está en ruso y el gorro y la bufanda, pues vale, pero este proyecto no lo iba a adivinar así tan fácil. Qué bueno es tener amigas costureras para ayudarte en apuros así!!

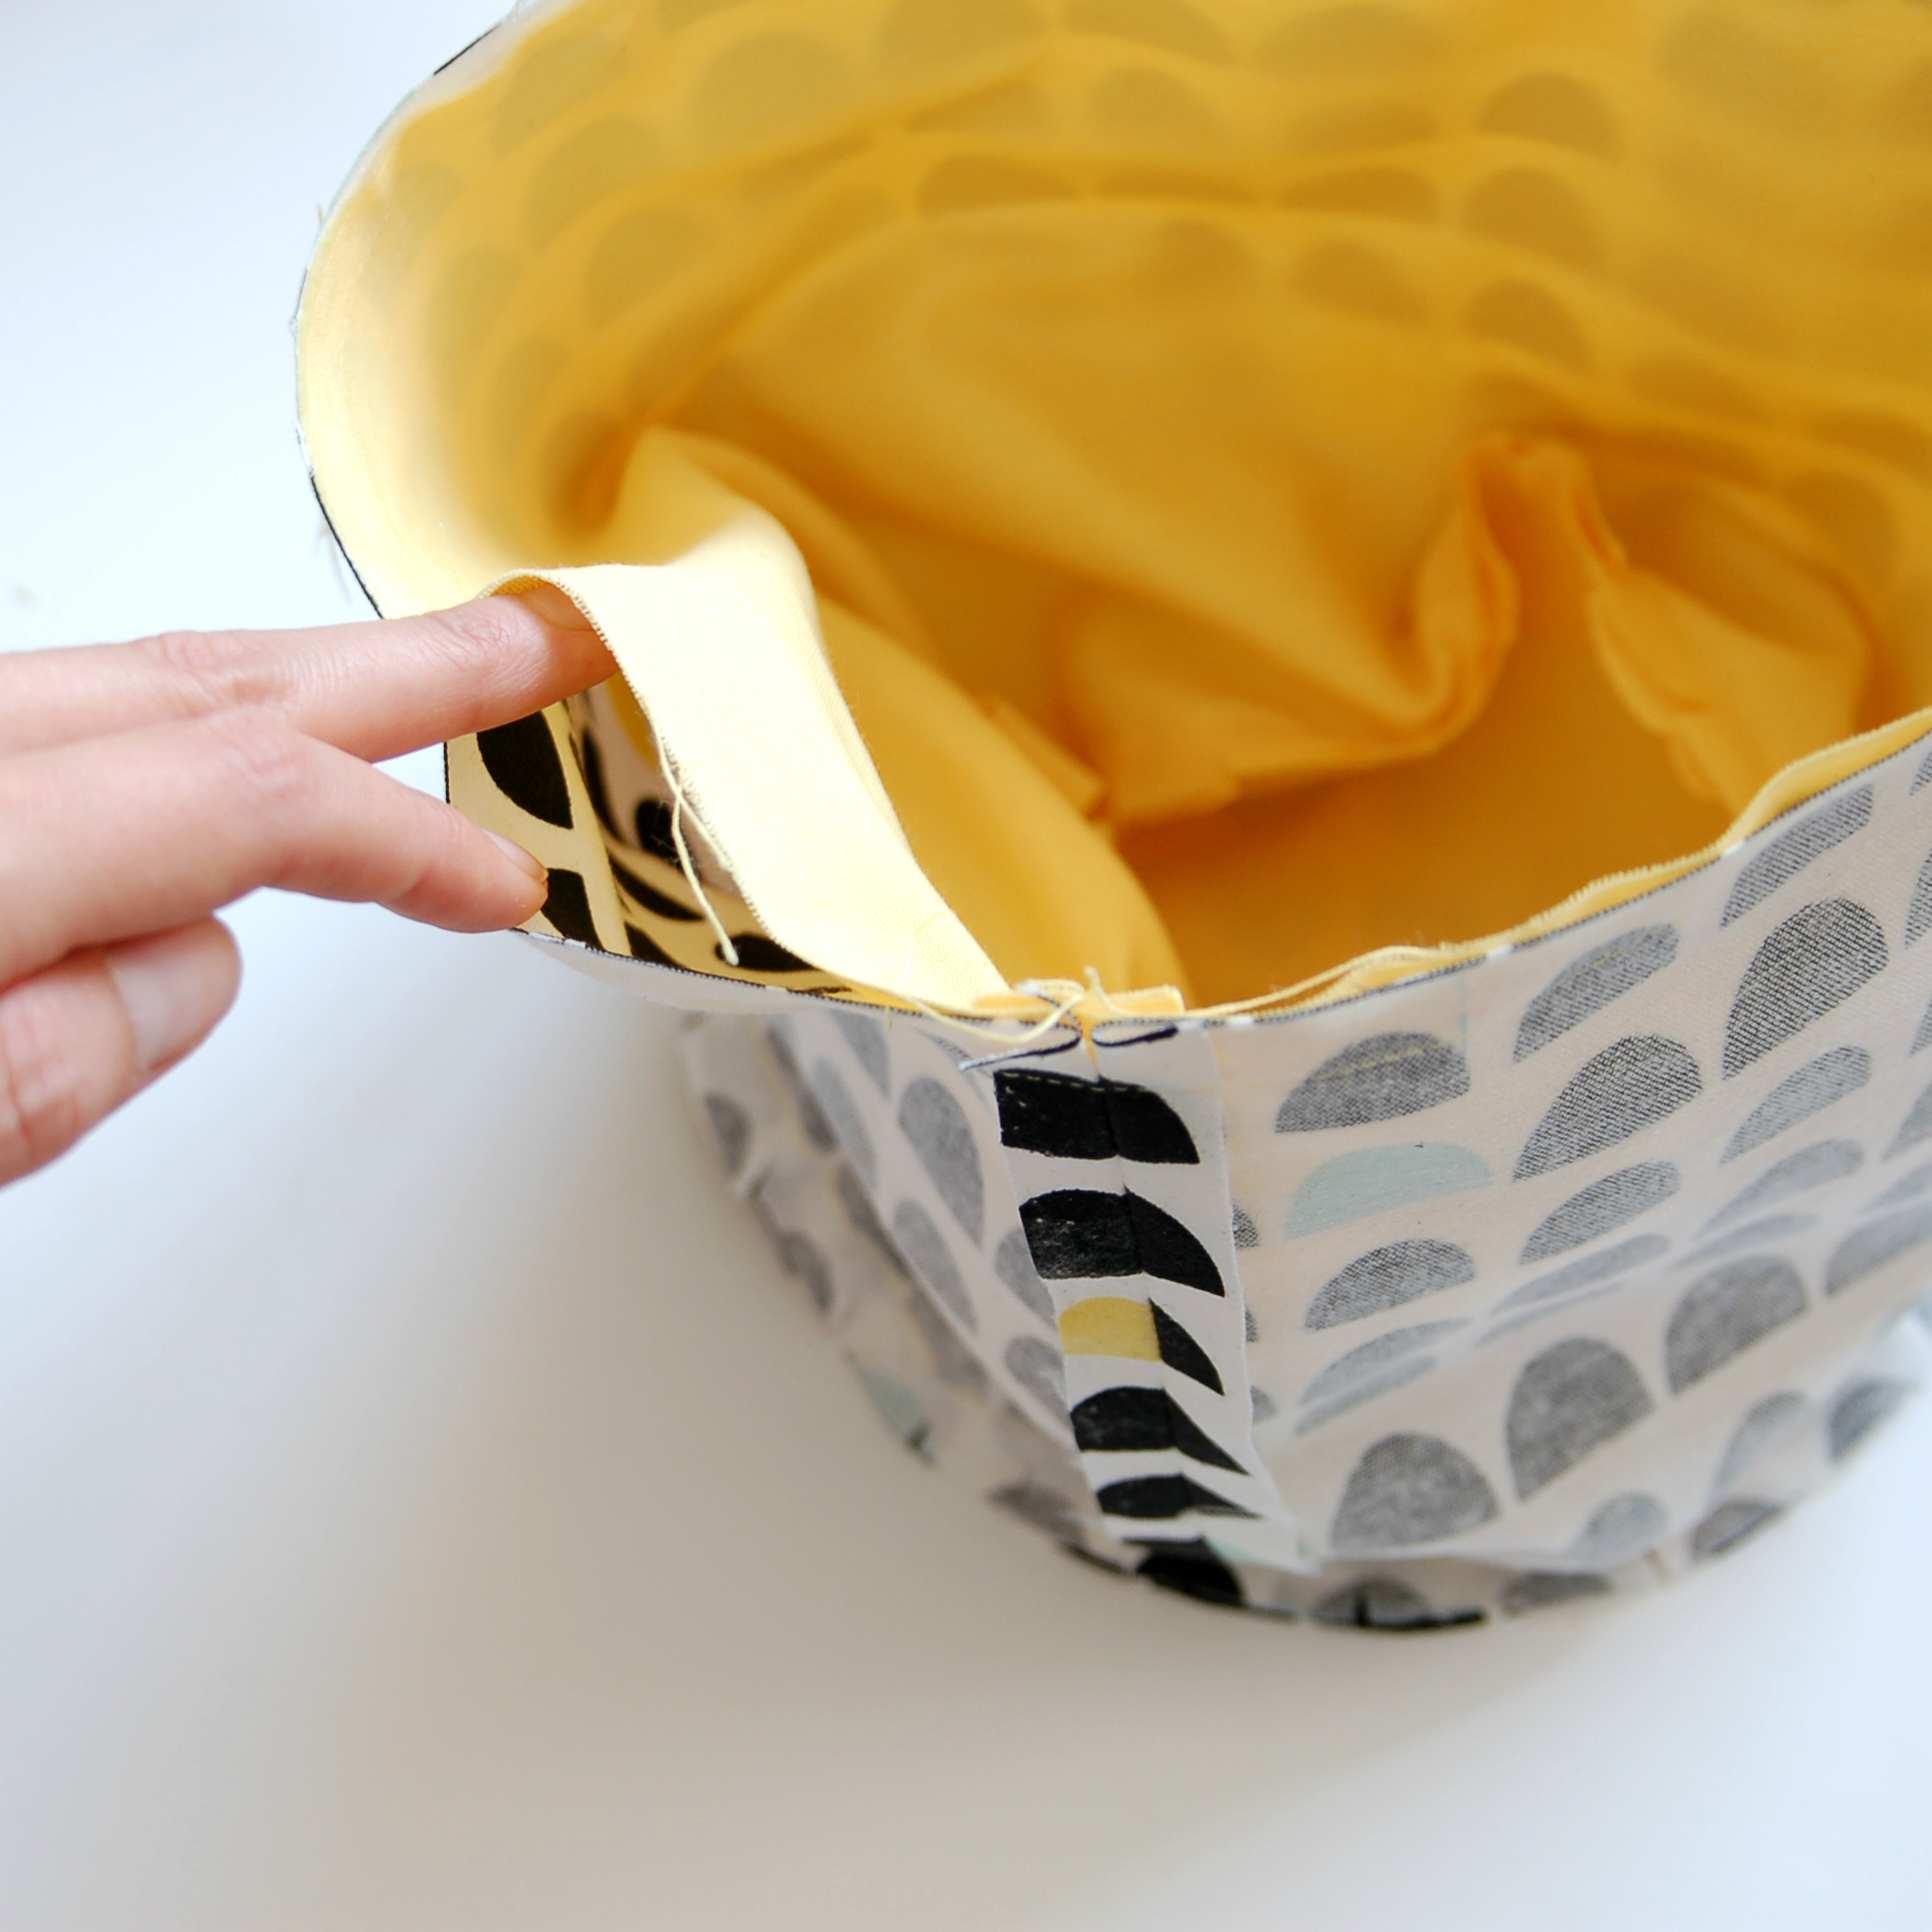
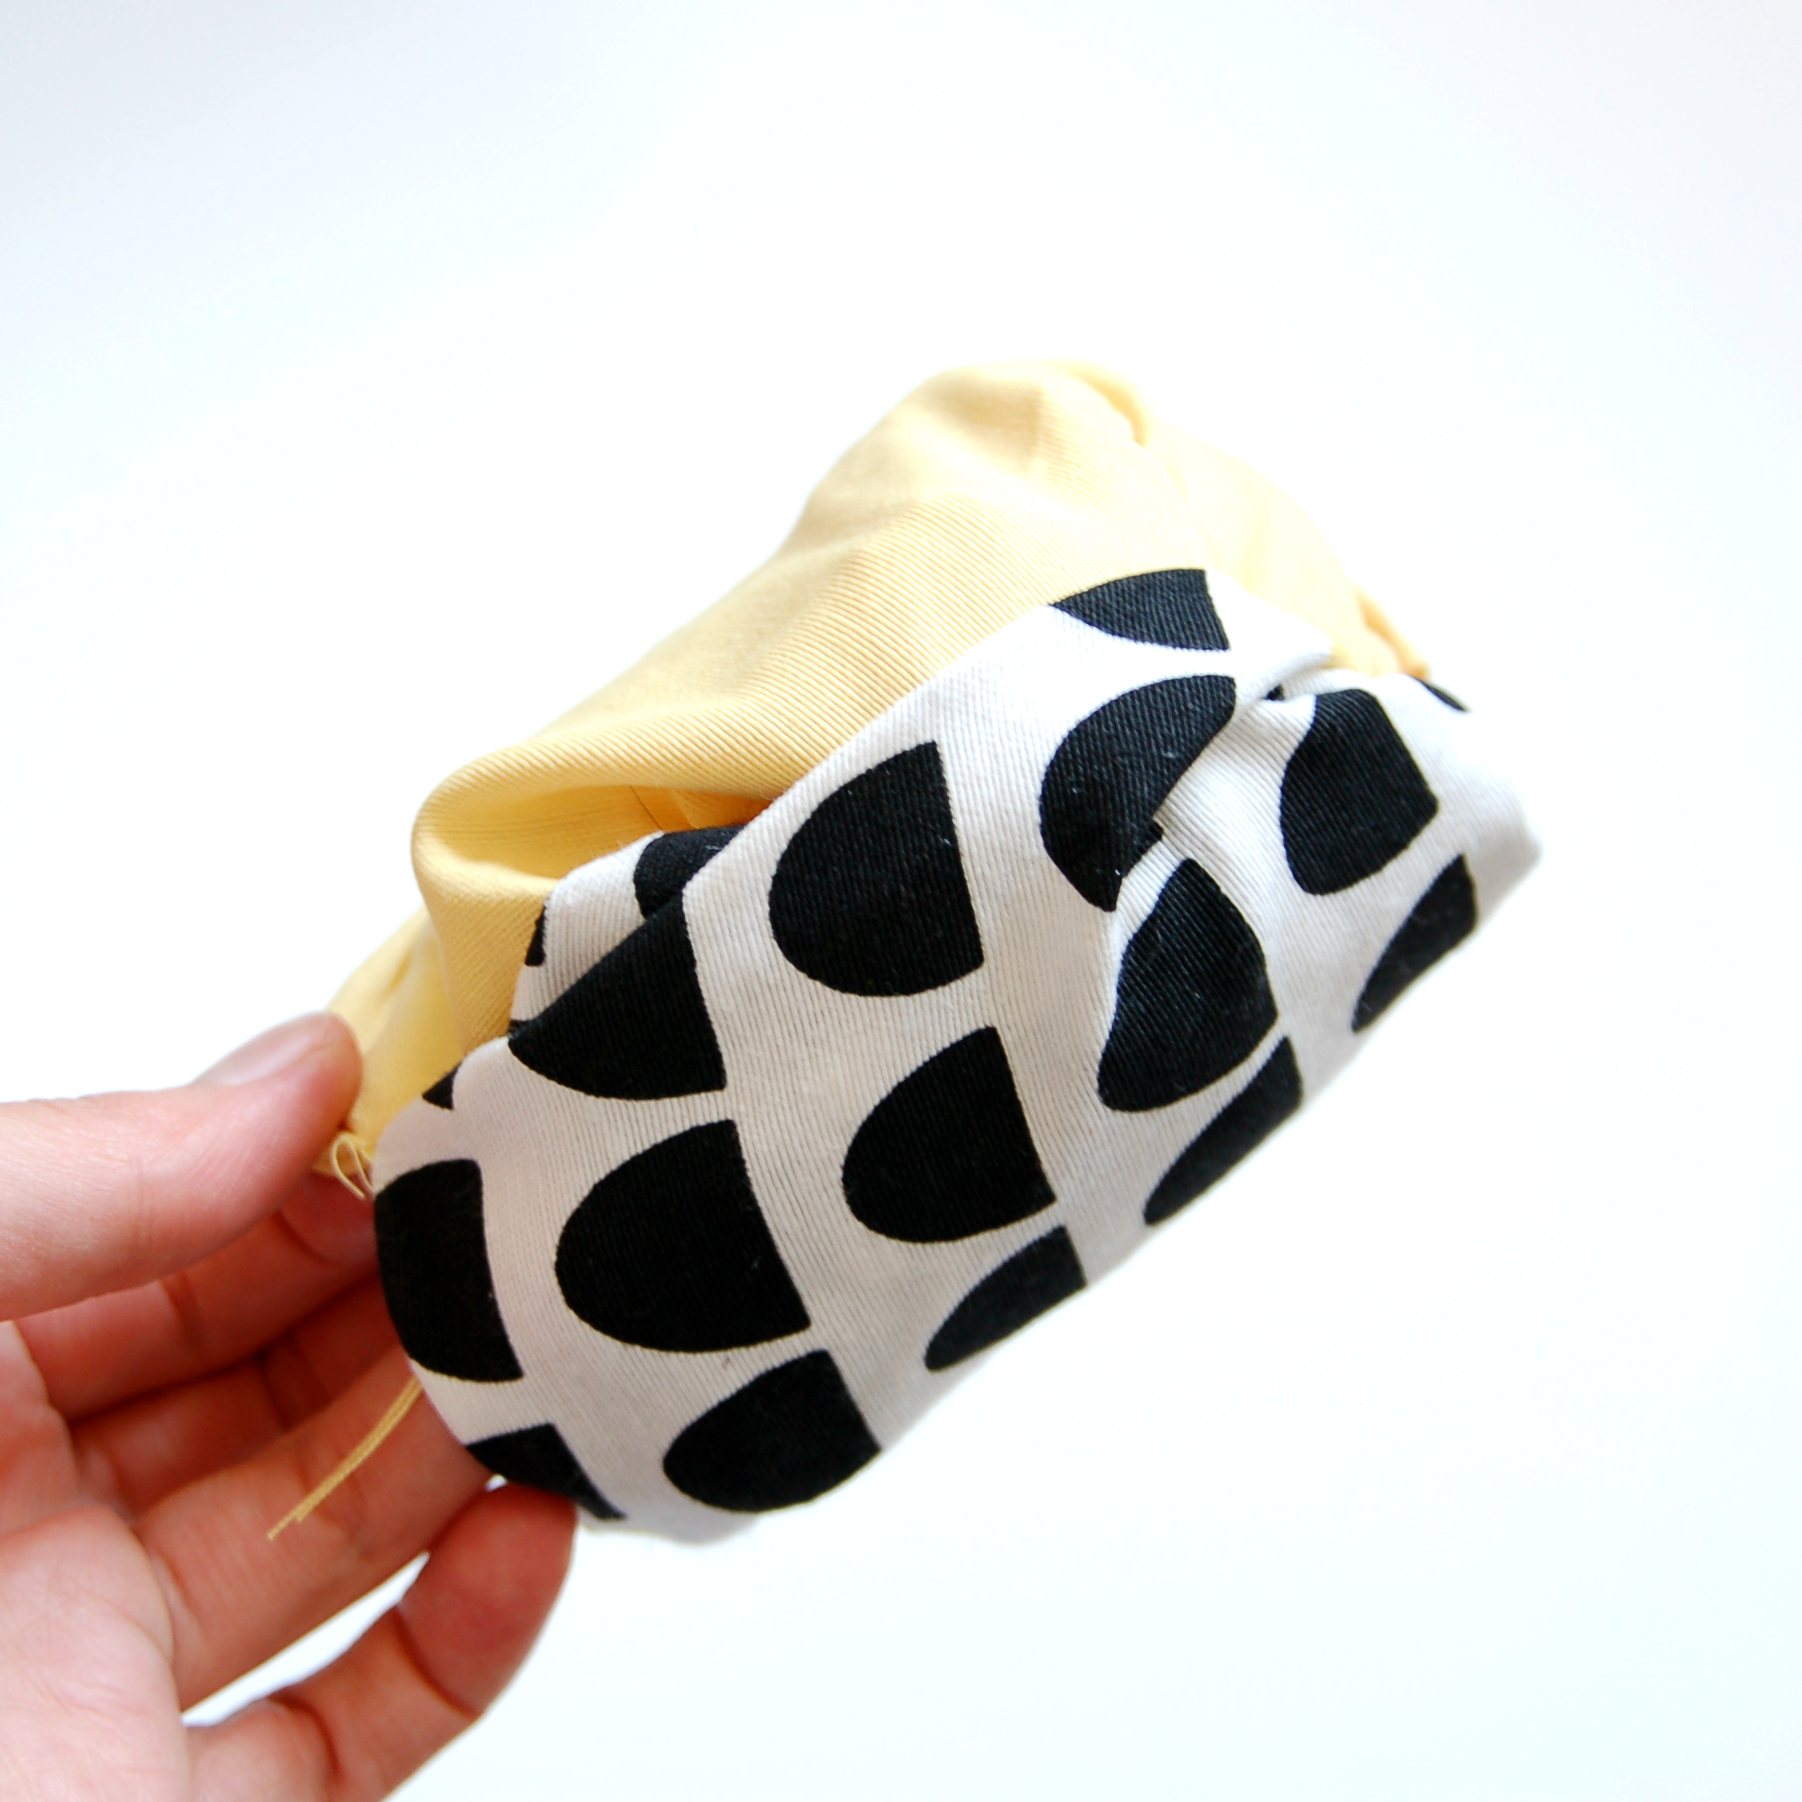
Hice todo según las instrucciones menos unas tiras en las mangas que no me parecieron ni útiles ni bonitos. Como ya dije, la tela es un softshell muy bonito con estampado por fuera y rosa por dentro (comprado en Tallinn). Para las vistas había que usar algodón pero para combinar mejor los colores tenía una loneta azul-verde mint que me gustó más y opté por usarla. Los puños son de punto de puño verde mint. 

This time I was more intelligent (read: I used my brain) and used a pattern designed for softshell fabrics, the "Warm Inside" from Ottobre Design 4/2015. I'd like to thank Auxi for sending me Spanish instructions as I only had the magazine in Russian and well the hat and the scarf were OK, but this project needed some more in depth instruction reading. How nice it is to have sewing friends for these occasions!! 

I made the jacket according to the instructions apart from the part of the bands on the sleeves that din't seem very practical nor beautiful to me. As I said before the fabric is a pretty softshell with print on the outside and pink color on the inside (bought from Tallinn). Tha pattern called for a cotton fabric for the facings but I had a light weight canvas type of fabric that matched better with the color so I used that one instead. The cuffs are made from a rib knit in mint.

ottobre makes www.studiocostura.com

Otra cosa que hice diferente era no ponerle cremalleras para estos bolsillos ya que mi niña es demasiado pequeña como para darles mucho uso...ya sabes, las llaves, el movil... Pero en general me gusta mucho como han quedado los bolsillos con ese toque de color. Además hay que decir que softshell es una tela muy agradecida para coser porque como no deshilacha, todo es mucho más cómodo y rápido sin remallar. Ahora sí, lo que coses se ve, al descoser tienes los agujeros, así que...cuidado con estos pespuntes vistos!

The other modification I made was to not put zippers on those pocket openings as my kid is too small to actually use them...you know for keys and a cellphone and that stuff... But in general I like a lot how the pockets turned out, this pop of color is really cute. And also just to mention in my opinion the softshell fabric is really good for sewing as it doesn't fray and everything is easier and faster without serging the seams. The downside of course is that when you need to unpick you'll have permanent holes...so be careful with that visible topstitching!

ottobre makes www.studiocostura.com

Al principio cuando empecé a coser la chaqueta estaba pensando si podría unir la capucha directamente con el cuello ya que sabía que de todas maneras sería muy raro que lo quitase y realmente no necesitaba todo el tema de automáticos de presión allí. Pero luego recordé que igual no merece la pena modificar un patrón que no has usado antes (gracias, experiencias malas del pasado) y hacerlo por una vez tal cual está escrito y después vemos qué pasa, jaja. Pues estoy muy contenta porque aparte de que parece todo más profesional, no sé cómo describirlo pero de esa manera se queda la capucha mucho mejor. De hecho, lo he notado con mi Kelly anorak, que me gustaría que esa zona de cuello y el cierre etc fuera de otra manera, igual así con los automáticos. Así han hecho por ejemplo en el último Ottobre Design 4/2017 un abrigo de chicas...se podría copiar de allí la capucha "para mayores". Los automáticos de presión son de Prim, del tamaño "Anorak". 

At first when I started to sew the jacket I was wondering if I could directly put the hood and the collar together as I knew I'd hardly ever take it away so all the snap action there would be a bit unnecessary. But then I remembered that maybe it wouldn't be very wise to alter a pattern you've never used before (thanks bad memories from the past) and I should do as I'm told and later see how it goes, hehe. Well, I'm happy I did it so as apart from looking more professional, also I'm not sure how to describe it but the hood sits way better that way. Actually I noticed this on my Kelly anorak too, I'd like that collar and hood zone there to be sewn in some other way, maybe with snaps like these ones. For example in the latest Ottobre Design 4/2017 there's a girls coat that's made like this...maybe I can copy the "grown ups" hood from there. The snaps are Prim Anorak style.

ottobre makes www.studiocostura.com

Así que creo que eso es todo sobre los detalles de la chaqueta. Normalmente no publico aquí fotos de la pequeña pero está tan mona con su nuevo abrigo que esta vez haré una exepción, jeje. Del tamaño esta vez la cosa ha salido muy bien, hay espacio para este verano nordico y el otoño de Madrid que nos espera también.

Espero que os ha gustado tanto como a mí! Ahora voy a empezar a juntar las telas y demás para algún abrigo para mí también...

So I think that's it abut the jackets details. I normally don't put up photos of my girl but she looks so cute in it and I just have to share, hehe. The size this time is perfect with ease and there's enough room for this Nordic summer and for the upcoming autumn in Madrid.

I hope you liked it as much as I did! I'll be preparing the fabrics now to sew myself a jacket too...


Bata kimono y lencería // Kimono robe and lingerie

 
kimono robe www.studiocostura.com

Hola! Hoy traigo algo con más color de lo normal para mí, es la bata kimono del patrón de Nairam Kitty DIY*. Al principio tenía la idea de coserlo para mi madre pero al final a ella le pareció demasiado corto y a mí me encantó el resultado así que me lo quedé sin protestar, jaja.

Hey! Today I'm bringing you something a bit more colorful than usual for me, it's a kimono robe with a pattern from Nairam Kitty DIY*. At first I was going to sew it for my mother but in the end she found it too short for her and I loved the result so I kept it without any protests, hehe.

kimono robe www.studiocostura.com

Para empezar, la tela es una viscosa estapada comprada en Tallinn y tiene un tacto como siempre muy suave. La diferencia con las viscosas que se encuentran normalmente es que ésta tiene un grosor medio, o sea no es tan fina y lo elegí especialmente por eso, porque aquí el verano no siempre significa calor (de eso más en el siguiente post donde os voy a mostrar toda la ropa que cosí para mi niña para que pueda jugar fuera con ese frío que hace, jaja). Fui a buscar la tela especialmente para este proyecto y esas flores me llamaron rápido la atención, tienen un aire oriental, verdad?

To start with, the fabric is a viscose print bought in Tallinn and it has a very soft hand as usual. The difference with most of the commonly found viscose fabrics is that it's not so delicate and fine, it has a middle weight and I chose it exactly because of that, because summer here doesn't always mean that it's hot (more about that in the next post where I'll show you all the clothes I've been sewing for my kid so she can play outside in this horrible weather, haha). I went to look for this fabric specially for that project and this one caught my eye quickly, don't you think it has a little oriental vibe there?

kimono robe www.studiocostura.com

El patrón de bata kimono es sencillo y tiene una sola talla ya que es amplio y se cierra con tiras de tela que se ajustan según tus medidas. Cosí todas las costuras con costuras francesas para que quede bien rematado tanto de dentro como de fuera. No hice ninguna modificación de largos y me parece que para mí tiene justo la medida perfecta (mi altura es 173 cm, creo...jaja). El patrón viene con instrucciones en castellano en formato video en el canal de Nairam Kitty así que lo véis bastante claro allí.

The pattern for this kimono robe is easy and it has one size as it's quite large and closes with fabric straps to adjust to your size. I sewed everything with French seams to make it look good both on the inside and on the outside. I didn't modify any lengths and I find the general fit perfect for me (I'm 173cm tall...if I remember well..hehe). The pattern comes with Spanish instructions in a video tutorial format in Nairam Kittys channel so you can see the steps pretty clearly.

kimono robe www.studiocostura.com

Ha sido la casualidad que me quedo con el kimono ya que lo pensé hacer para el regalo pero estoy muy contenta porque es super cómoda (bueno, hay que reconocer que ya que es una bata, es bastante obvio que es cómoda...). Hice las fotos por la mañana a primera hora (se nota en mi gran peinado...) y luego me quedé con él puesto durante un par de horas más, es que parece como una segunda piel. Nunca acabaré de adorar a las viscosas, jajaa.

Esta bata kimono me hace sentir femenina y todo (será porque la única bata que tengo es de forro polar, con estampado de zebra y la cupcha lleva orejas...), incluso me hace pensar que debería hacerme algún camisón de estos con encaje o algún pijama bonito. Ya que estamos, verdad, jajaja. Así que eso, me parece un proyecto muy bonito que sirve también para regalo (y autoregalo!) y mola mucho para el verano.

So it was a a coincidence that I kept the kimono as I made it for a present but I'm really happy because it's super comfortable (well, it's a robe after all, it's kind of obvious that it's comfortable...). I took the photos early in the morning (you can see that great morning hair there...) and later left it on for hours, it just feels like a second skin to me. I guess I'll never stop admiring viscose fabrics, hehe.

This kimono robe makes me feel quite feminine (maybe because the only robe I have is made from fleece, has a zebra print and ears on the hood...), it even makes me think about sewing a lace camisole or a pretty pajama or something. While in the mood, right, hehe. So that's it, I think it's a beautiful sewing project, ideal for giving as a gift (or for a gift for yourself!) and it's great for summer.

lingerie www.studiocostura.com

Más cositas: también le hice a mi hermana un bralette y una braguita para el conjunto. Ella me pidió que le copie un bralette que había comprado y que le gustó mucho y así lo hice. Es un modelo todo de encaje y lleva copas de foam para que sea más práctico. Las copas en el bralette de la tienda son preformadas de una pieza, pero yo usé el foam que se puede coser e hice las copas de dos piezas. Sólo lleva elástico en todo el contorno bajo el pecho tanto en el delantero como en la espalda. Ese tipo de bralettes son ideales para mujeres con poco pecho, ya que no necesitas casi el apoyo de aros ni tejidos firmes...al mismo tiempo la copa de foam da una imagen más discreta y me parece cómodo. Estoy pensando en hacerme uno para mí también, el resultado es muy bonito.

More makes: I also made my sister a bralette and panties to go with it. She asked me to copy a rtw bralette that she really liked and so I did. It's a whole lace pattern and it has foam cups to make it more practical. The cups on the rtw bralette were in one piece pre formed ones but I used cut-and-sew foam and made the cups in two pieces. It has elastic only under the bust both on the front and back pieces. This type of bralettes are ideal for women with small bust as they don't need the support from wires and firm fabrics...but at the same time the foam cup creates a nice discrete image and it's also comfortable. I'm thinking about making myself one too as the result is very pretty.

lingerie www.studiocostura.com

La braguita está basada en el patrón de  Lola panties de Ohhh Lulu y lo adapté a encaje con un par de cambios. El encaje de blanco con oro es realmente bonito y suave...es ideal para lencería en un color básico como blanco pero con ese toque especial dorado. El encaje es de mi tienda que ahora está de vacaciones de verano (en agosto volvemos!).

The panties are based on the Lola panties pattern from Ohhh Lulu and I adapted it for lace. The white and gold lace is really pretty and soft...it's perfect for lingerie in a basic color like white but with this extra touch of gold it looks more like something special. The lace is from my shop that's on vacations at the moment (returning in August!).

lingerie www.studiocostura.com


Para terminar, hice un par de cosas antes también que no publiqué aquí en el blog, sólo en mi Instagram. Unas braguitas muy bonitas con una tela lila que parece a encaje pero es muy muy suave y queda genial con sus transparencias. El patrón es lo mismo de antes.

To finish off I also made some things before that I haven't shown here in the blog, I only shared them over at my Instagram. Those panties are really pretty, made with a lilac stretch fabric that's a lot like lace but has a very soft hand and beautiful transparencies. The pattern is the same as for the previous pair.

lingerie www.studiocostura.com

Y luego un conjunto de bikini. Para la parte de arriba usé el patrón gratis de Sierra bra de Madalynne que realmente es para un bralette pero lo usé para el bañador. Era la versión de prueba y no tenía el cierre para la espalda así que le dejé lazos para atar tanto en el cuello como en la espalda. La parte de abajo es la braguita de Watson bikini. Pensaba hacer una entrada aparte sobre cómo adaptar estos patrones para bikini pero creo que ahora estoy en modo "hace tanto frío y sólo pienso en abrigos" así que por el momento voy a pasar de eso y os dejo la foto. Pero igual para el año que viene...jeje.

And then a bikini. For the upper part I used a free Sierra bra pattern from Madalynne which actually is a bralette pattern but I used it for swimwear. It was a test version and I didn't have a closure for the back so I left both the neck and the back with fabric straps to tie them together. The bottom is a Watson bikini. I thought about making a separate post about this make and write about how to adapt a lingerie pattern to a swimwear one but I'm currently really on the mode of "it's so cold, I only can think of coats and jackets" so at the moment I'll pass and just leave you the photo. But maybe next year...hehe.

lingerie www.studiocostura.com

Bueno, eso es todo por hoy. Estoy cosiendo mucho-mucho-mucho estos días de vacaciones aquí en casa de mis padres...hace mal tiempo, tengo canguros para la niña y estoy de vacaciones, así que no necesito más excusas. La semana que viene como prometido: ropa para niños.!

Well,that's it for today. I'm sewing a looot these days as I'm on vacations here at my parents house...it's cold outside, I have babysitters and I've got free time, so I really don't need any more excuses to do it. Next week as promised: kids clothes!


*El patrón de bata kimono me lo mandó Marian de Nairam Kitty DIY para que colabore con ella, no he pagado por él pero las opiniones son mías independientemente del origen del patrón.

*Marian from Nairam Kitty DIY sent me this pattern for a collaboration, I didn't pay for it but my opinions are independent and not affected by this


El año de clases de costura // A year of sewing classes

 
clases de costura www.studiocostura.com

Hola! Hoy un breve post para resumir un poco este año "escolar". Llevo exactamente una semana de vacaciones aunque debo de decir que Madrid ya parece años luz de lejos, jaja.

Hey! Today a short post to recap a bit this "school" year. I've been on vacations exactly one week now although I have to admit that Madrid feels light years away already, haha.

clases de costura www.studiocostura.com

Quiero dar gracias a todas mis alumnas (que este año han sido sólo chicas y puedo hablar en femenino) por venir a coser conmigo. He conocido a muchas mujeres increíbles este año que me han enseñado muchas cosas. Yo les guíe para que empiecen a coser y ver cómo funciona la máquina y ellas en cada clase me aportaban su punto de vista, me preguntaban cosas que me hicieron replantear muchos temas para poder explicarlos mejor. Había días cuando yo no estaba con muchos ánimos para entrar a clase pero al verlas siempre me contagiaban con su energía y con sus ganas de crear y aprender...la verdad es que tengo la suerte de tener un trabajo estupendo.

I'd like to thank all my students to have come to sew with me. I've met so many incredible women this year who have taught me lots of things. I helped them to start sewing and to know the machine from the beginning and they gave me their unique point of view in every class and asked questions that made me rethink many aspects to be able to explain the topics better each time. There were days when I didn't really feel like going to teach the class but as soon as I saw them enter by the door, their energy was contagious and they were so ready to create and learn...I have to admit that I really have an amazing job!

clases de costura www.studiocostura.com

Han cosido cosas muy bonitas y no tengo ni una pequeña parte de las fotos que quisiera tener de sus creaciones. Pero os muestro algunas que hemos hecho en el taller para que lo veáis. Me alegro mucho de ver cómo han avanzado en las clases, cómo poco a poco van haciendo cosas cada vez más complicadas y qué contentas están al terminar algo nuevo.

They have sewn so many beautiful things and I only have a little part of the photos. But I'll show you some of them that we made during the class so you can see their makes. I love seeing how they make progress and little by little sew up every time more complicated projects. Their happiness when they finish something new is empowering!

clases de costura www.studiocostura.com

De nuevo quiero agradecer a todas ellas por compartir estos momentos conmigo, para mí ha sido un placer conoceros. El curso que viene seguimos con más cosas y más gente nueva!

Again I'd like to thank all of them for sharing those moments with me, it has been a pleasure to get to know you all. Next year we'll continue and there will be more new people for sure! 

IMG_20161111_142642.jpg
 

Tutorial: funda de macetero / flower pot cover

 
tutorial diy macetero flower pot www.studiocostura.com

Hola! Hace mucho que no escribo un tutorial, así que hoy os traigo uno muy fácil y práctico. Tengo varias de estas fundas para los maceteros y me parecen muy bonitos. Esta vez tenía que hacer un regalo para una persona que me cae muy bien pero la verdad es que no la conozco mucho (la profe de mi niña, jaja), así que se me ocurrió que una planta bonita sería una buena idea. Y si se le añade algo hecho a mano, pues mejor. Así que aproveché para de paso hacer el tutorial y compartirlo con vosotros por si alguien más se anima a coser este proyecto que se hace rápido y queda muy mono.

Hey! It's been ages since I wrote a tutorial around here, so today I'm bringing you a real simple and useful one. I have many of those flower pot covers and I think they are really cute. This time I had to give a present to someone I like a lot but I don't really know her (my kids teacher, hahaha) so I tought that a plant would be  a good gift. And if you throw something handmade in too, well it's even better, right? So when sewing it I also prepared a tutorial for you guys if anyone is up to try it out too, it's a very fast make and looks good.

tutorial diy macetero flower pot www.studiocostura.com

He usado telas tipo loneta, el de estampado es de Black Oveja y el liso es de Tejidos Paredes. Se puede usar todo tipo de telas, mejor que sean más bien fuertes como loneta, telas de tapicería etc pero también puedes aprovechar algodones más finos si usas entretela para darles un poco más de grosor. Yo he usado dos telas distintas para tener un poco de contraste, pero también puedes hacer el exterior e interior de la misma tela. La cantidad depende del tamaño de tu maceta.

I used a canvas type of fabric, the print is from Black Oveja and the solid one is from Tejidos Paredes. You can use many types of fabrics, middle weight would be a good choice, like canvas for example or home dec fabrics etc, you can also use lighter weight cottons if you interface them to give them a bit more stability and weight. I used two different fabrics to have a bit of contrast but you can of course use the same fabric for the inner and outer shell. The quantity you need depends on the size of your flower pot.

tutorial diy macetero flower pot www.studiocostura.com

Para empezar mide el diámetro de tu maceta en la parte más ancha y añadele un poco más de margen para que sea cómodo de poner y sacar la planta. También mide el alto de la maceta para saber cuánto va a medir tu funda. Yo lo he hecho un poco más alto para que pueda doblar el borde y que se vea la tela amarilla.

To start with, measure the widest part of your pot and add a bit extra room to be able to take the plant out later. Also measure the height of the pot to know how high your cover will be. I added a bit of height there to be able to fold down the border for the color effect.

tutorial diy macetero flower pot www.studiocostura.com

El diámetro (más margen de comodidad) de mi maceta es de 20 cm, he dibujado el círculo de base sabiendo esto. Luego para calcular el lateral necesitas calcular la circunferencia de tu base, y sería el diámetro multiplicado por π (3,14). En mi caso es 20 x 3.14 = 63 cm.

Así que tengo mi base que dibujé en papel sabiendo que el diámetro es de 20 cm, luego le añadí 1 cm de margen de costura alrededor. Y la pieza lateral mide 63cm x 20 cm (el alto de la maceta más un poco para doblar). A esta pieza también le doy 1 cm a todos los laterales para margen de costura después. Yo prefiero siempre primero calcular cuánto miden las piezas y después añadir margen a todo, sino me lío con el tema de la circunferencia y los margenes etc.

The diameter (and the extra space) of my pot is 20 cm, I've drawn the circle based on that measurement. To calculate the size of the body piece you need to know the circumference of the base circle and this would be the diameter multiplied by π (3,14). In my case it's 20 x 3,14 = 63 cm.

So I have my base pattern drawn on the paper knowing that the diameter is 20 cm, I then added the seam allowance of 1 cm around that. The body piece is 63 cm x 20 cm (the height of the pot and some extra to fold down). I also added 1 cm seam allowance to that piece later. I prefer to first calculate everything and then add the seam allowances to not mess up with the circumference etc.


tutorial diy macetero flower pot www.studiocostura.com

Con los cálculos hechos corta una pieza de base y una pieza de lateral de la tela exterior y exactamente las mismas piezas también de la tela interior: dos bases y dos laterales.

With all the calculations made, cut a piece of the base and a piece of the body from the outer fabric and exactly the same pieces from the inner fabric too: two bases and two bodys.

tutorial diy macetero flower pot www.studiocostura.com

Para empezar, dobla las piezas laterales por la mitad, derecho con derecho, para coser la costura lateral para formar un tubo. Lo haces una vez en la tela interior y una vez en la tela exterior. Plancha abierta esta costura para que haya menos bulto luego.

To start with, double the body piece right side with right side and sew the side seam to form a tube. It's done one time with the outer fabric and one time with the inner one. Press the seam open to reduce bulk later on.

tutorial diy macetero flower pot www.studiocostura.com

Ahora divide tu base en cuatro partes iguales: doblas primero el círculo por la mitad y marcas dos puntos y luego lo doblas por otro lado y marcas los otros dos puntos. La pieza lateral que ahora es un tubo también tiene que estar marcado en cuatro partes de la misma forma. 

Now it's time to divide the base circle in four equal parts: fold the circle in half and mark the two points and then fold it again in other direction and you'll have the other two points. The body piece that's now a tube needs to be divided in four parts the same way.

tutorial diy macetero flower pot www.studiocostura.com

Ahora es fácil unir todos los puntos que marcaste entre sí, así sabes que todo el círculo está repartido igual. La base y el lateral se unen entre sí derecho con derecho. 

Now it's easy to fit the base and the body together using the same marks, the space will be divided equally. The pieces need to be put right isdes together.

tutorial diy macetero flower pot www.studiocostura.com

Ahora se une la base con los laterales. Yo prefiero coser teniendo la pieza de lateral encima y el círculo abajo, me parece que es más fácil unir la parte recta a la parte curvada al hacerlo de esta manera. Coses todo alrededor.

Now it's time to sew the base and the body together. I prefer to sew with the body piece on top of the circle piece as it seems to be easier to sew a straight edge to a curved one that way. Sew all the way around.

tutorial diy macetero flower pot www.studiocostura.com

Una vez hecho esto, le das unos piquetes para que el margen esté más "libre" y que no tire.

Repites el mismo proceso con la otra parte de la funda.

Once this is done, clip the seam allowances a bit to relax the fabric.

Repeat the same step with the other shell.

tutorial diy macetero flower pot www.studiocostura.com

Ahora tienes dos fundas ya montadas independientes. Para cerrar la funda se mete uno dentro del otro, primero dale la vuelta a una de ellas y ponlo dentro del otro, tienen que estar derecho con derecho. Se cose todo alrededor de la parte de arriba, dejando un hueco de aprox 5 cm para dar la vuelta.

Now you have two separate shells sewn up. To finish the cover you have to put one inside the other: first turn one of them the around because they need to be with right sides together. Sew all around the upper edge leaving a aprox 5 cm long opening to be able to turn your work around.

11.jpg

Allí está el hueco para dar la vuelta. Si prefieres, este hueco lo hubieras podido dejar también en la costura lateral (la primera que hicimos) del forro de la funda, pero yo entre que siempre me olvido de hacerlo antes, casi prefiero que esté allí arriba porque de todas maneras voy a dar un pespunte después que va a cerrar este hueco.

There's the hole to turn the work around. If you like, you could leave the opening in the side seam of the lining shell of the cover (the first one we sew), but as I always forget to do it, I also prefer to leave it in the upper seam as I anyway will sew another row of stitching that will close it.

tutorial diy macetero flower pot www.studiocostura.com

Da la vuelta a tu funda a través del hueco y plancha un poco el resultado (que suele ser arrugado, jeje).

Turn the project inside out and press it a bit (it tends to be full of wrinkles at that point, hehe).

tutorial diy macetero flower pot www.studiocostura.com

Para terminar, cose un pespunte en el borde superior para asentar esa costura y de paso cerrar el hueco que usamos para dar la vuelta antes. Yo subí un poco el forro para este efecto de color que se vea un poco, pero también puedes mantener los bordes exactamente iguales y dar el pespunte. A veces también uso el bies para rematar este borde y también queda bonito, allí ya cómo cada uno quiere.

To finish it off, sew a topstitching row in the upper part of the cover to make the seam flat and also to close the opening we left before. I raised the lining a bit to have this color effect there but you can also just leave both of the shells on equal heights and sew it that way. I also use bias tape sometimes and it's a very cute finishing method too, you have lot's of choices there.

tutorial diy macetero flower pot www.studiocostura.com

Y ya está! Como veis, es muy sencillo pero queda muy bien y puedes usar todo tipo de estampados chulos que has comprado pero no sabes muy bien qué hacer con ellas (ehmmm...alguien adicta a las telas de Ikea por aquí?). Y como comenté antes, me parece buena idea de regalo cuando no sabes muy bien qué regalar pero quieres dar una sorpresa bonita. Espero que os haya gustado!

That's it! As you can see it's so simple but looks good and you can use all those cool prints you've been hoarding and don't know what to do with them (ehmmm...any more Ikea fabric addicts around here?). And as I told you before, I think it's a good gift idea when you're not very sure what to give but you need a cute surprise. Hope you liked it!

DIY tutorial flower pot cover /funda de maceta www.studiocostura.com