"Little Things to Sew" from Oliver + S

 
Little things to Sew www.studiocostura.com

Hola! Hoy os quiero mostrar un libro muy bonito que tengo ya desde hace unos meses pero no me había dado tiempo de coser nada de él hasta ahora (también ya lo recomendé en el post sobre los regalos que hice en las navidades pasadas). Aprovechando que pronto está el carnaval, le hice a mi nena un gorrito del libro y así de paso os enseño otros proyectos que hay allí dentro.

Hey! Today I'd like to show you a beautiful book I've had for some months now but I didn't have time to sew anything from it until now (I also already recommended it in the gift guide post last Christmas). As the carnival season is here and I needed to make a costume, I used a hood pattern from the book to make my kid one and it's also a good time to show you other proyects that are in the book.

Little things to Sew www.studiocostura.com

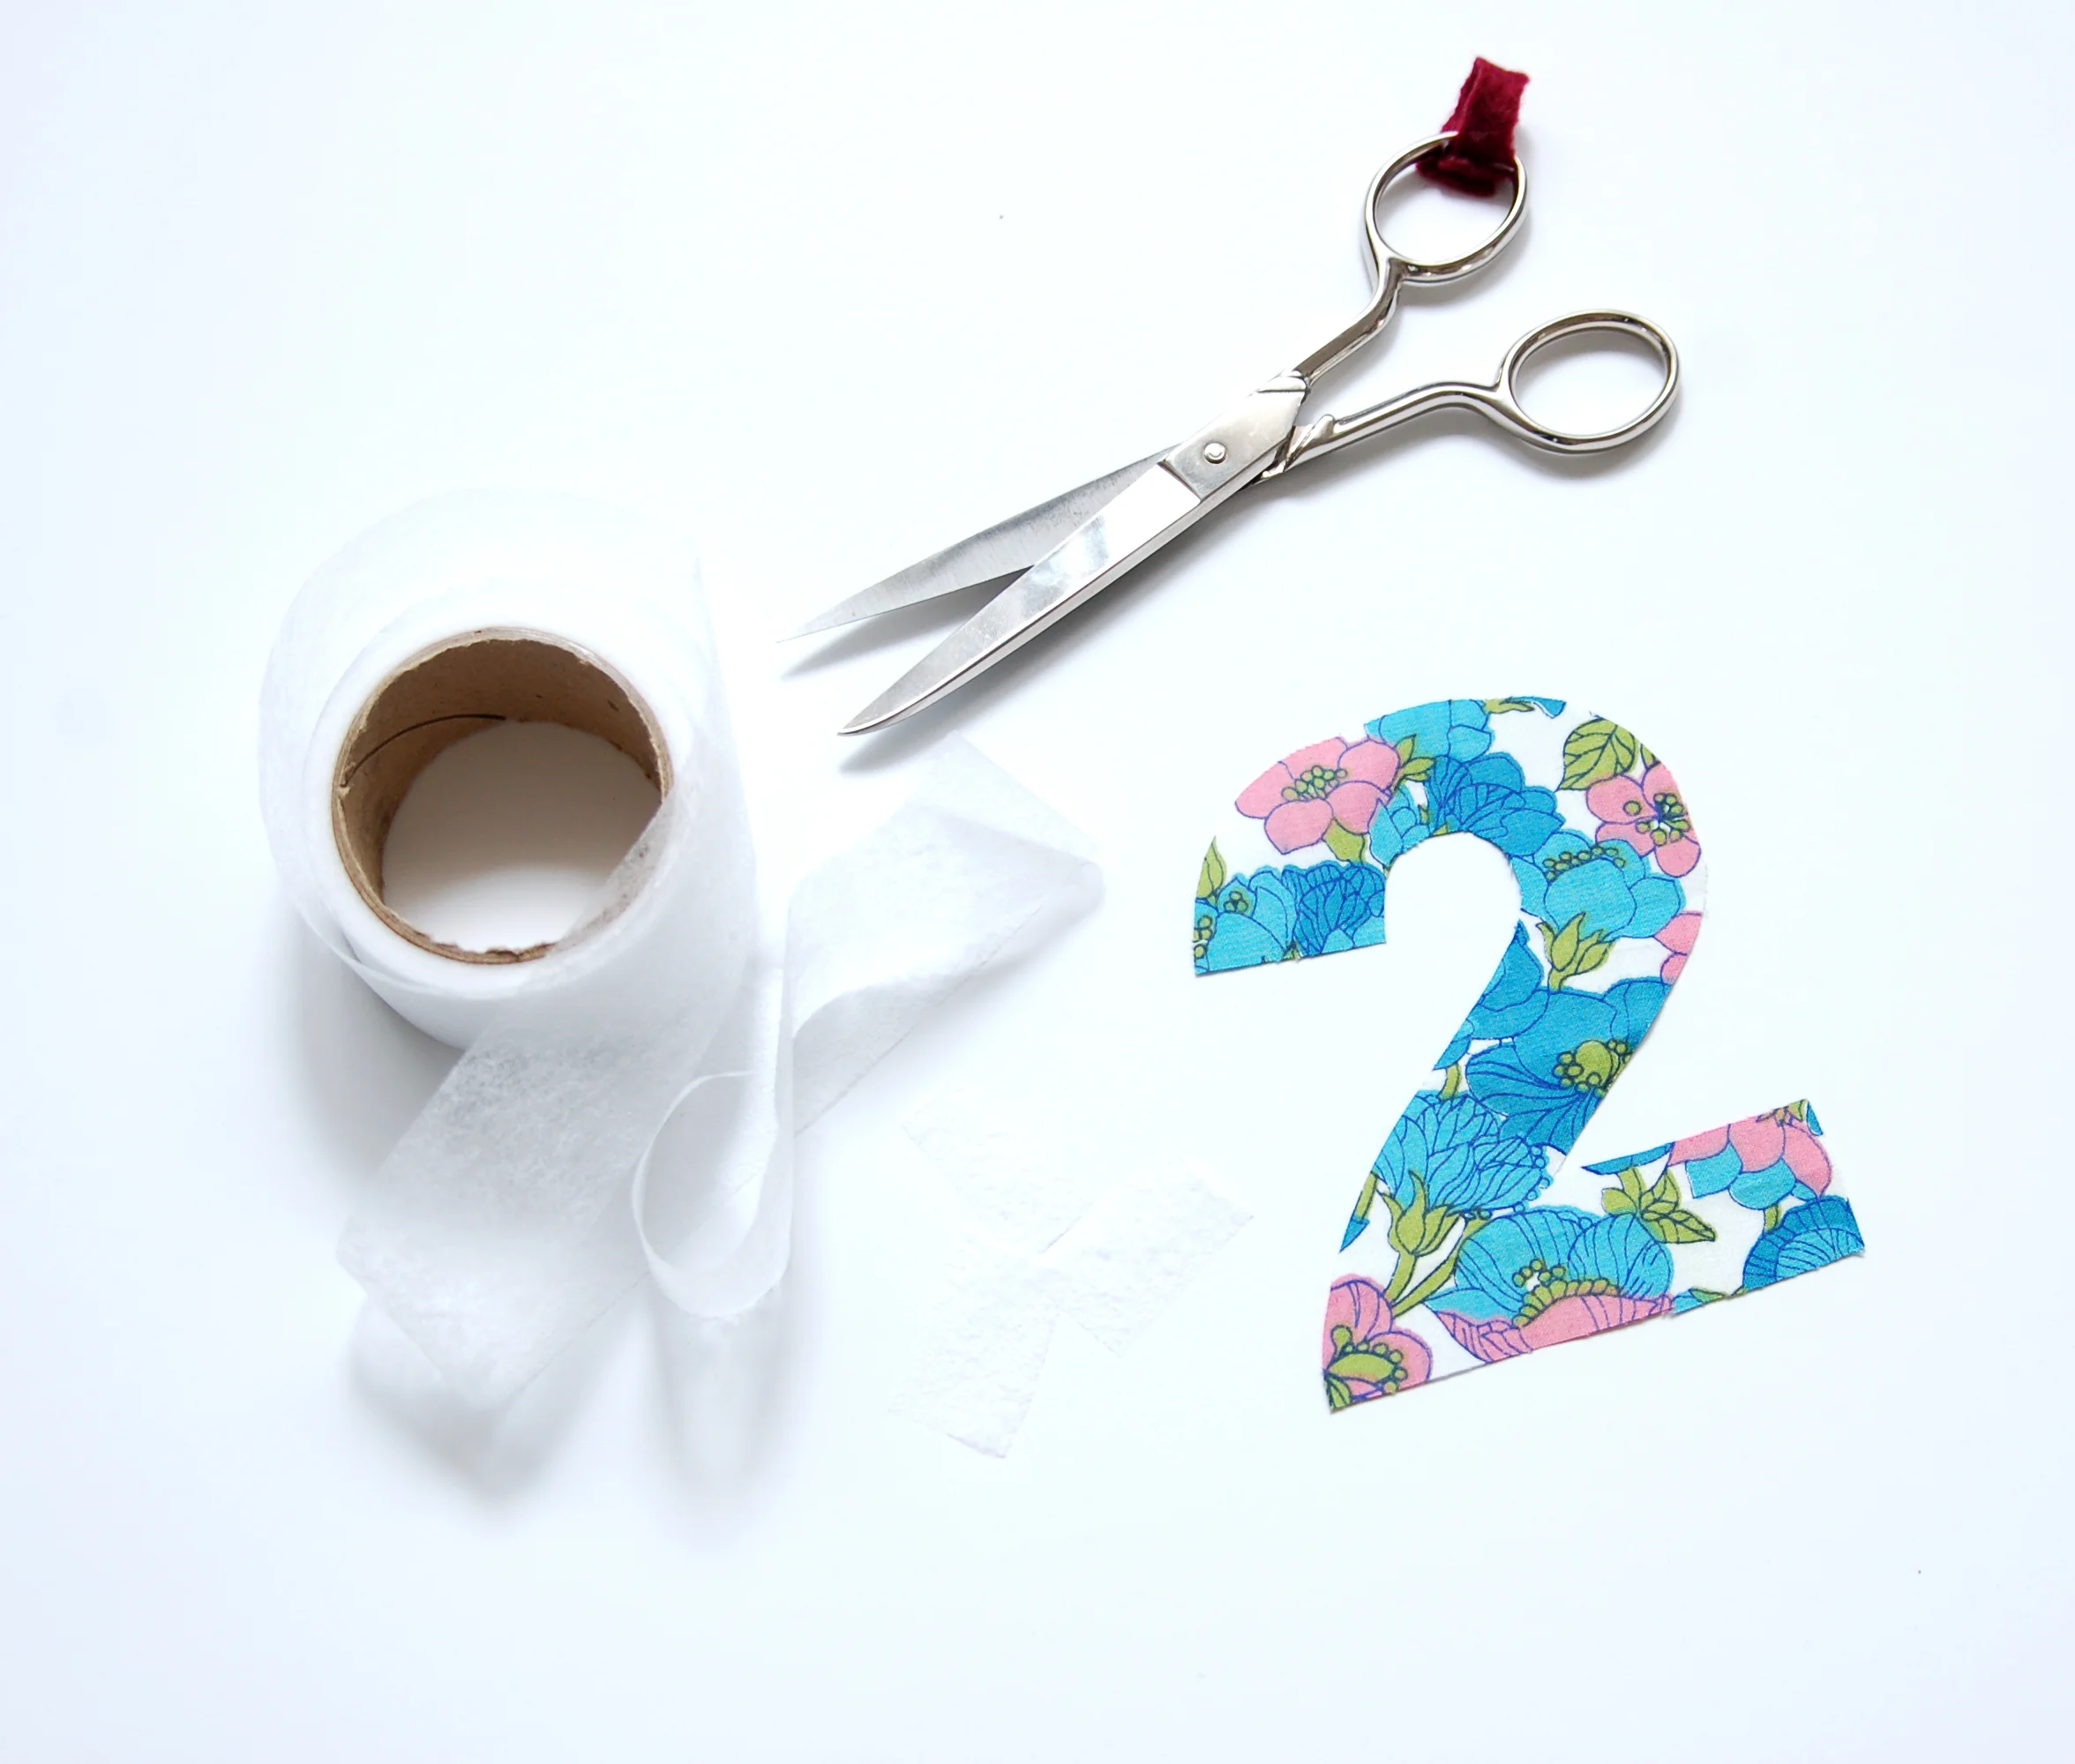
El libro se llama “Little Things to Sew” y está escrito por Liesl Gibson, la mujer detrás de la marca de patrones de costura Oliver + S. Yo ya había hecho unos gorros del mismo libro con el patrón que está gratis en su web (es muy recomendable para el verano!). El libro tiene 20 proyectos de costura para los más pequeños, hay tanto accesorios como juguetes, todos con sus tutoriales explicados paso a paso y patrones que puedes calcar en diferentes tallas.

The book is called Little Things to Sew and its written by Liesl Gibson, a woman behind the sewing attern company called Oliver + S. I actually already made some summer hats with a pattern from this book earlier, they have it for free on their website (it's really good for summer!). The book has 20 sewing proyects for kids, there are both accesories and toys, every one of them with step by step tutorials and patterns you can copy in different sizes.

Little things to Sew www.studiocostura.com

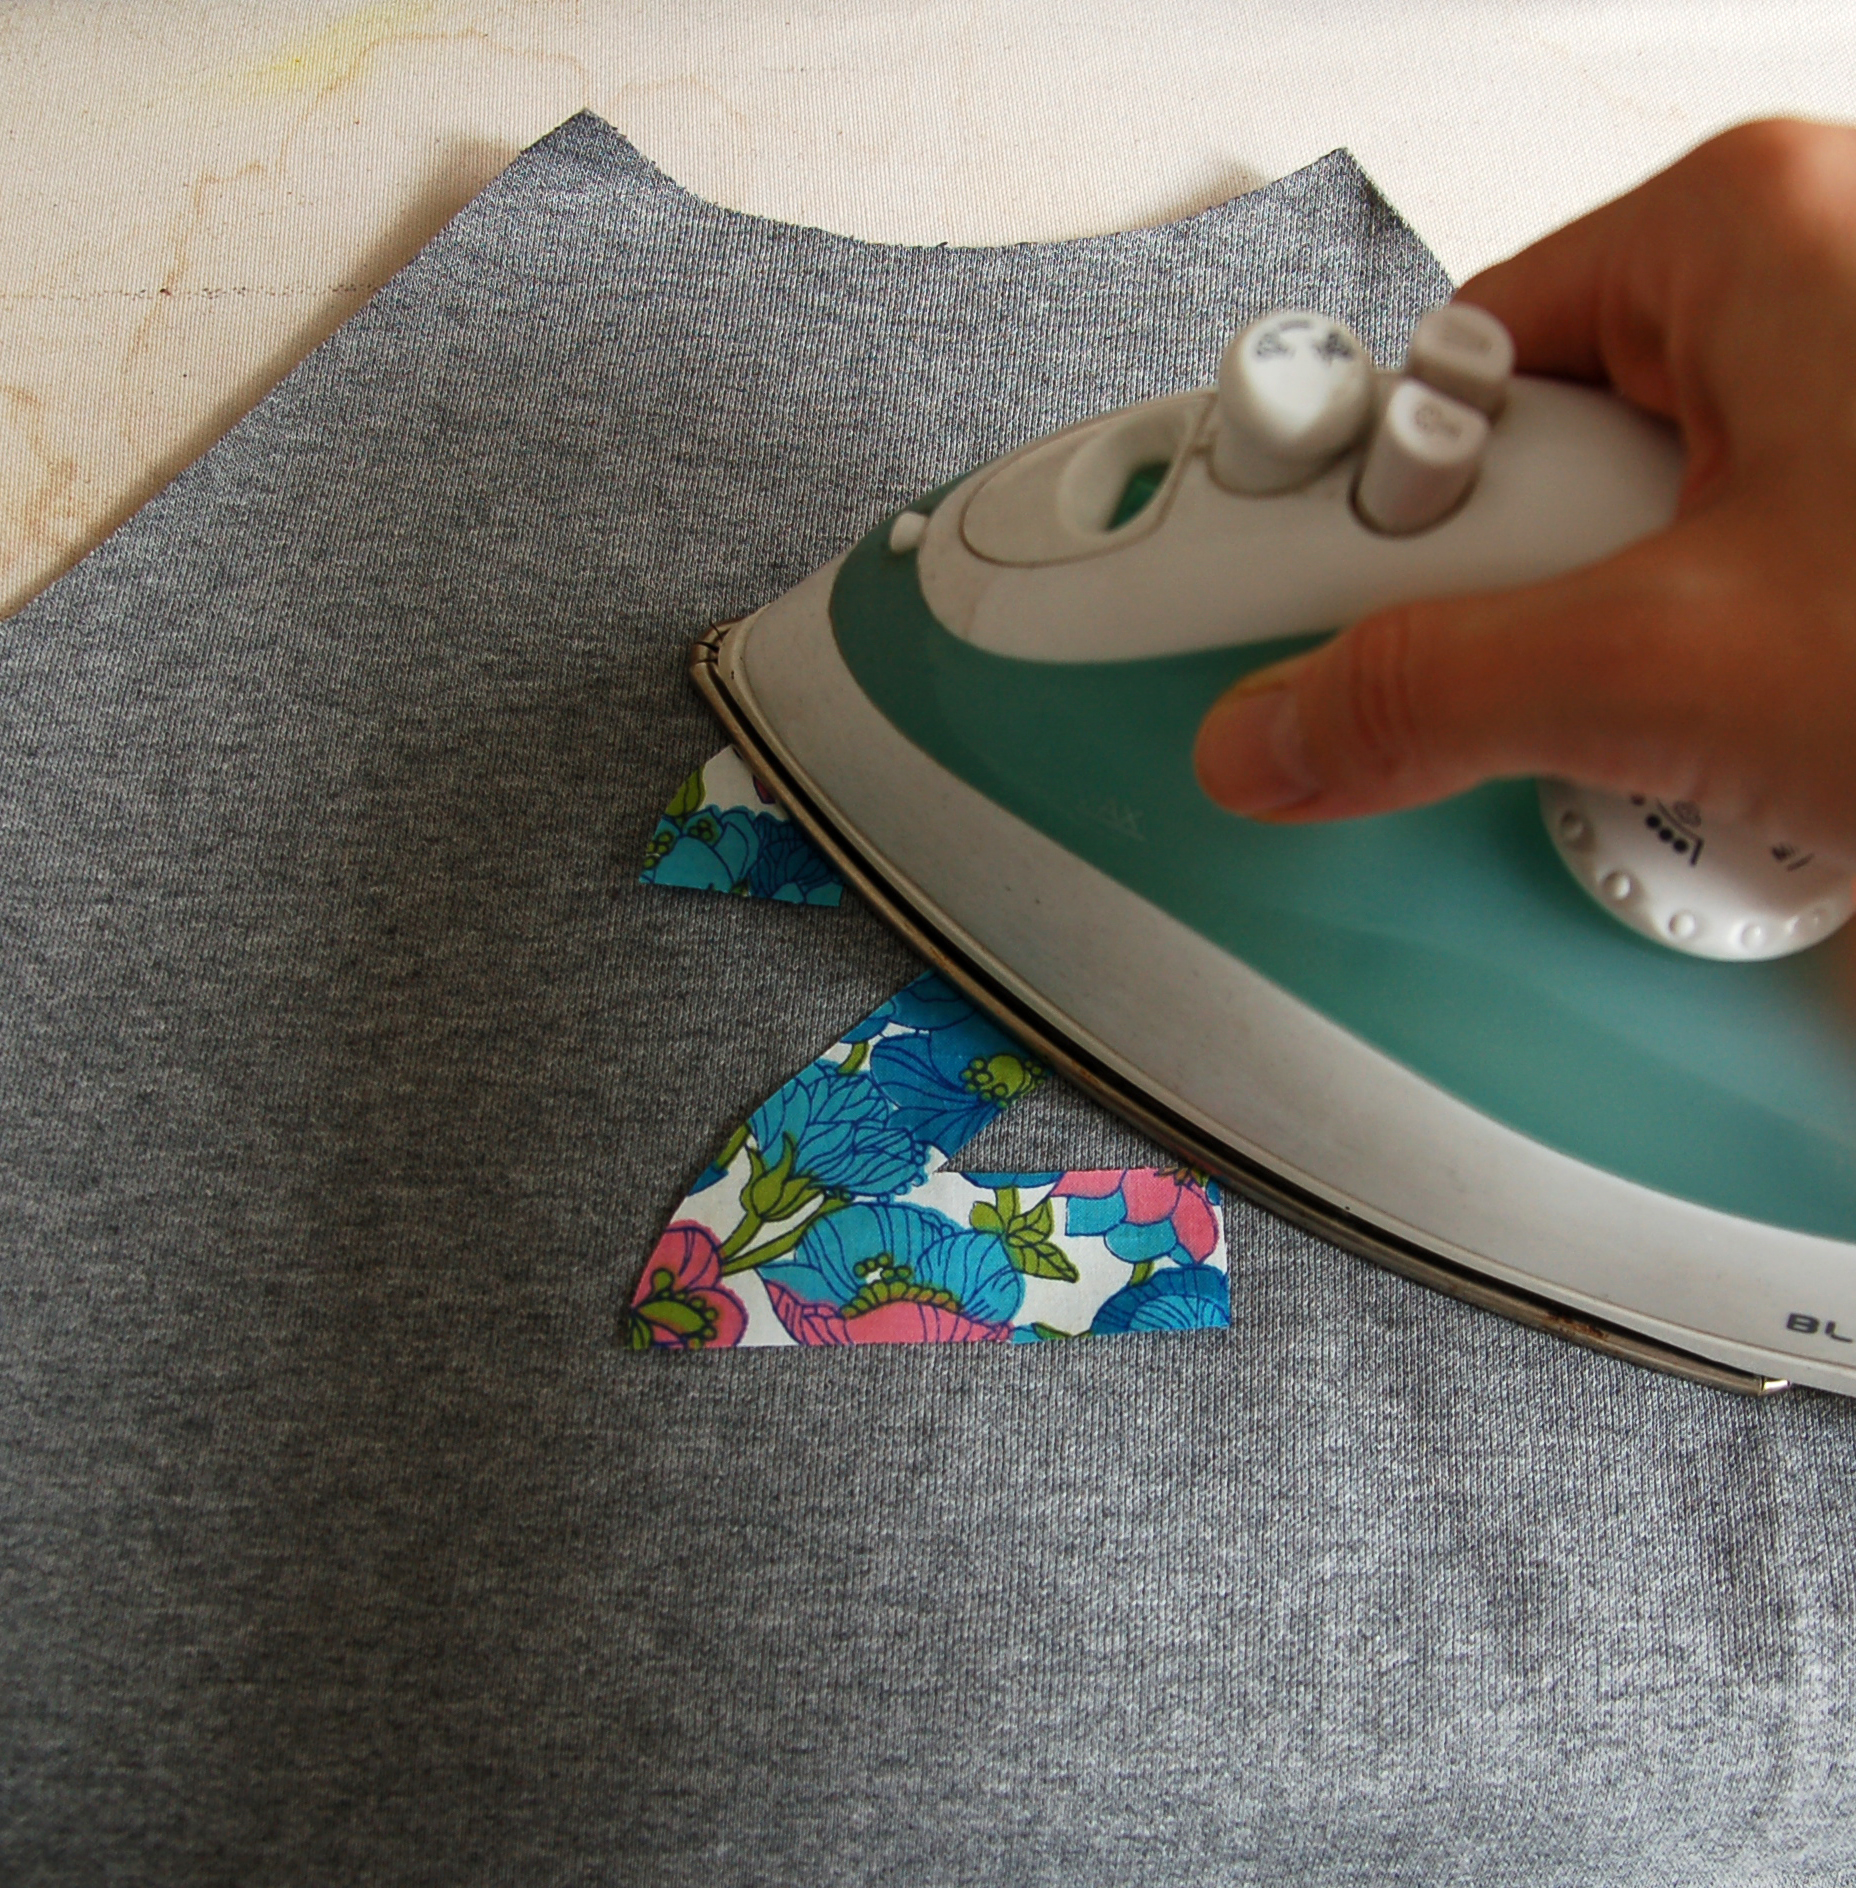
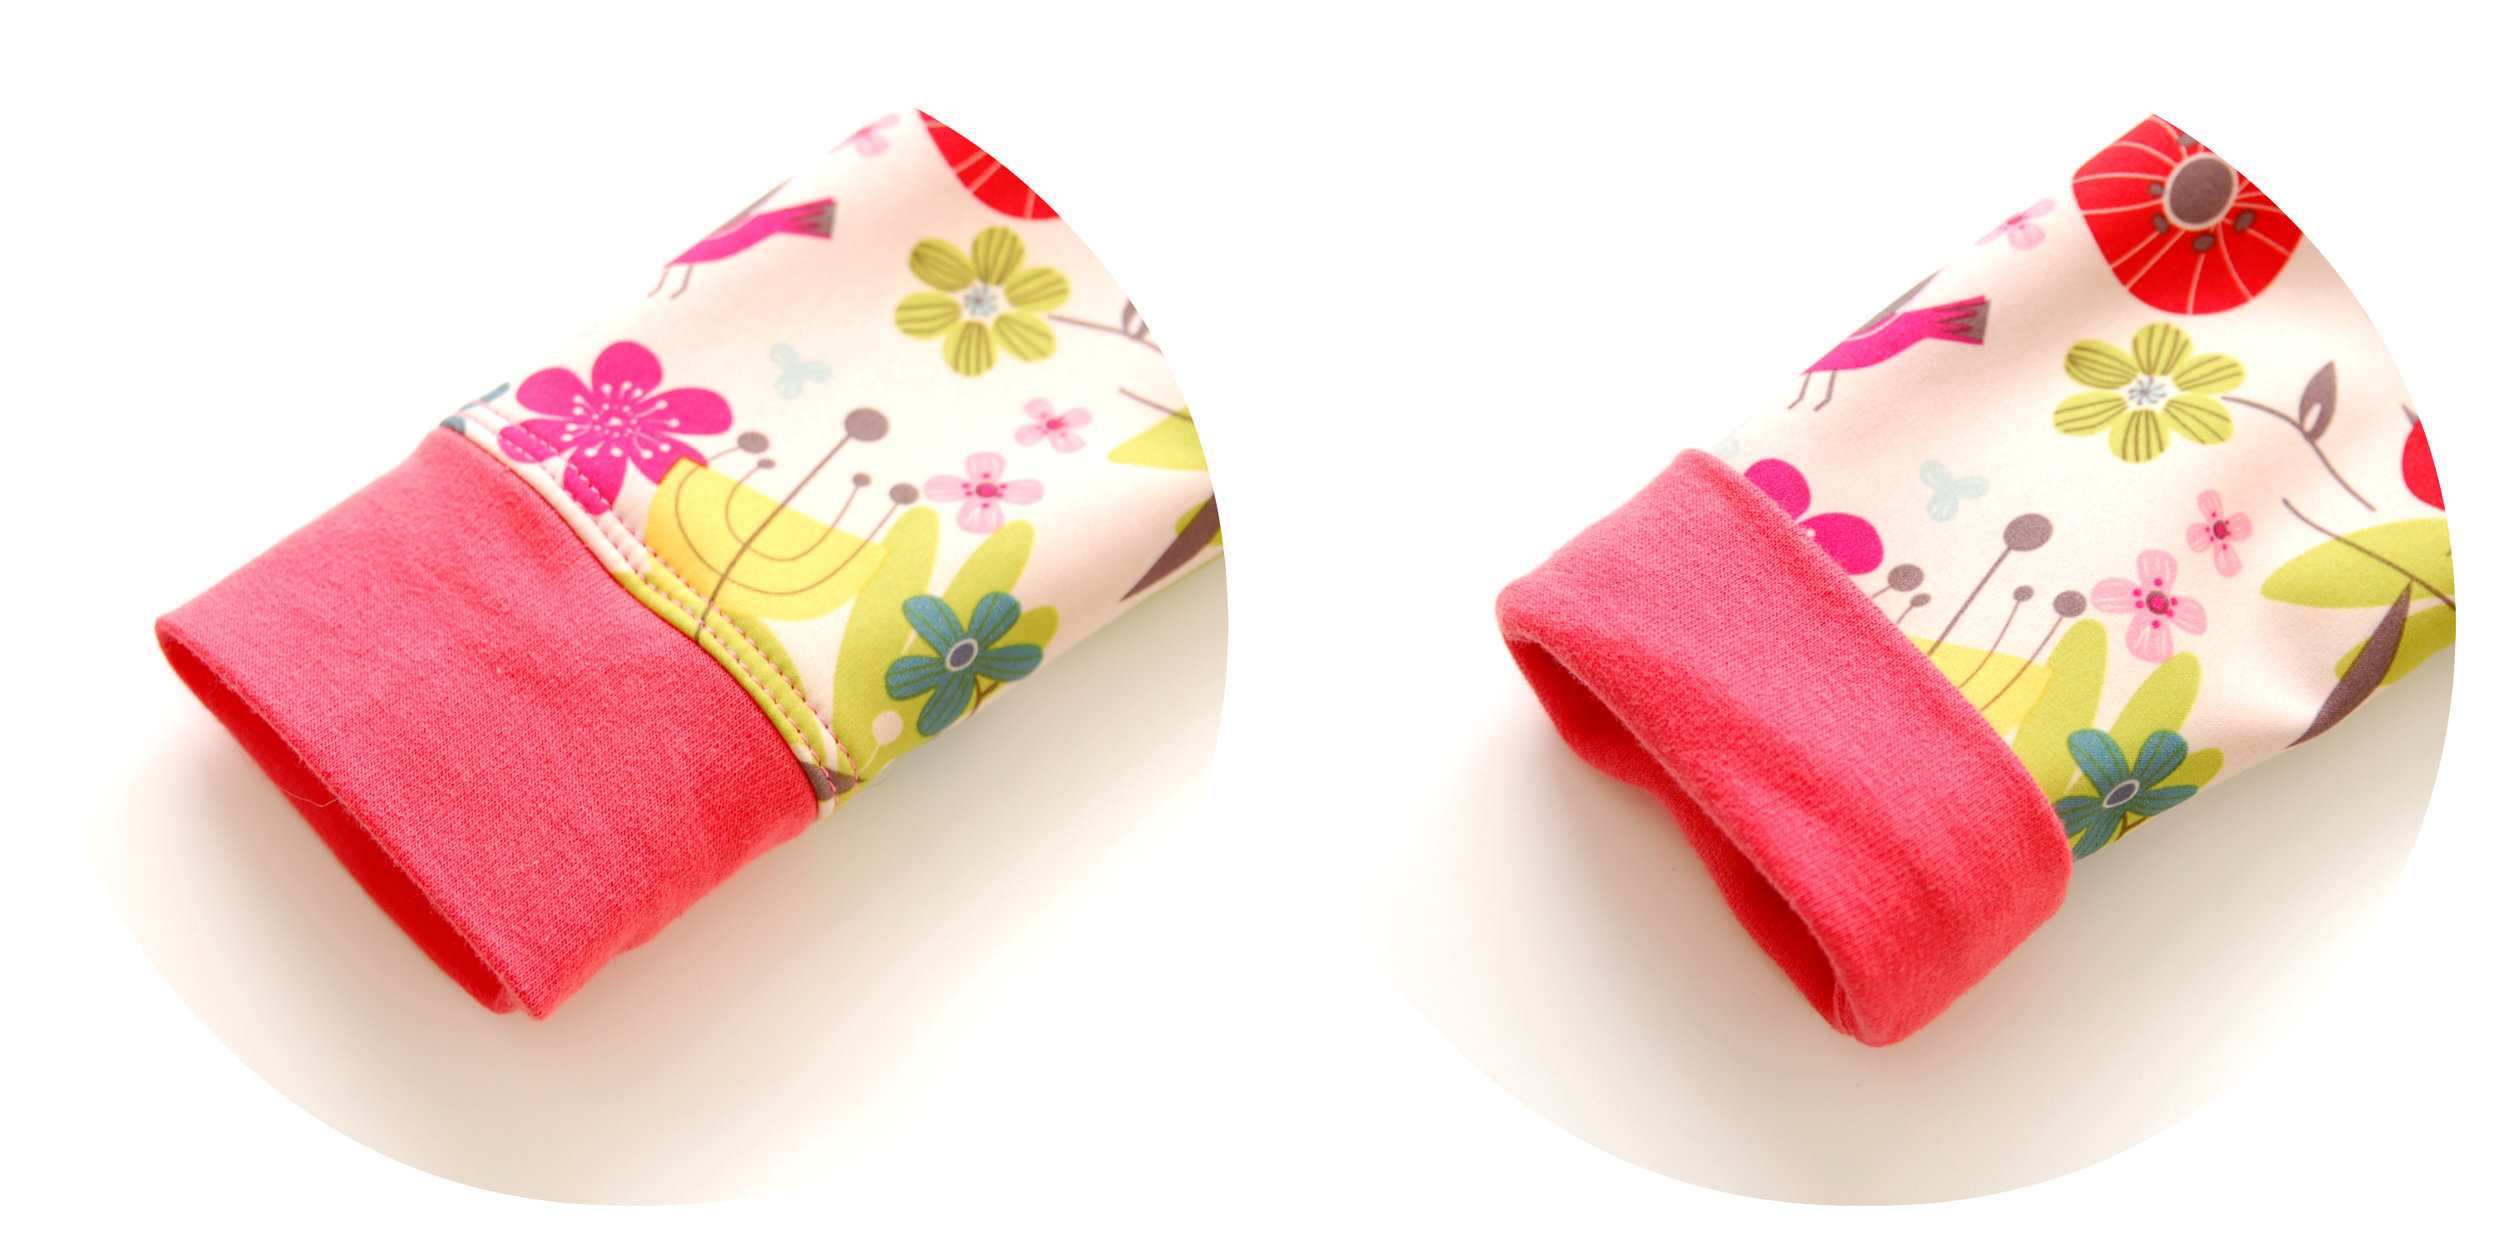
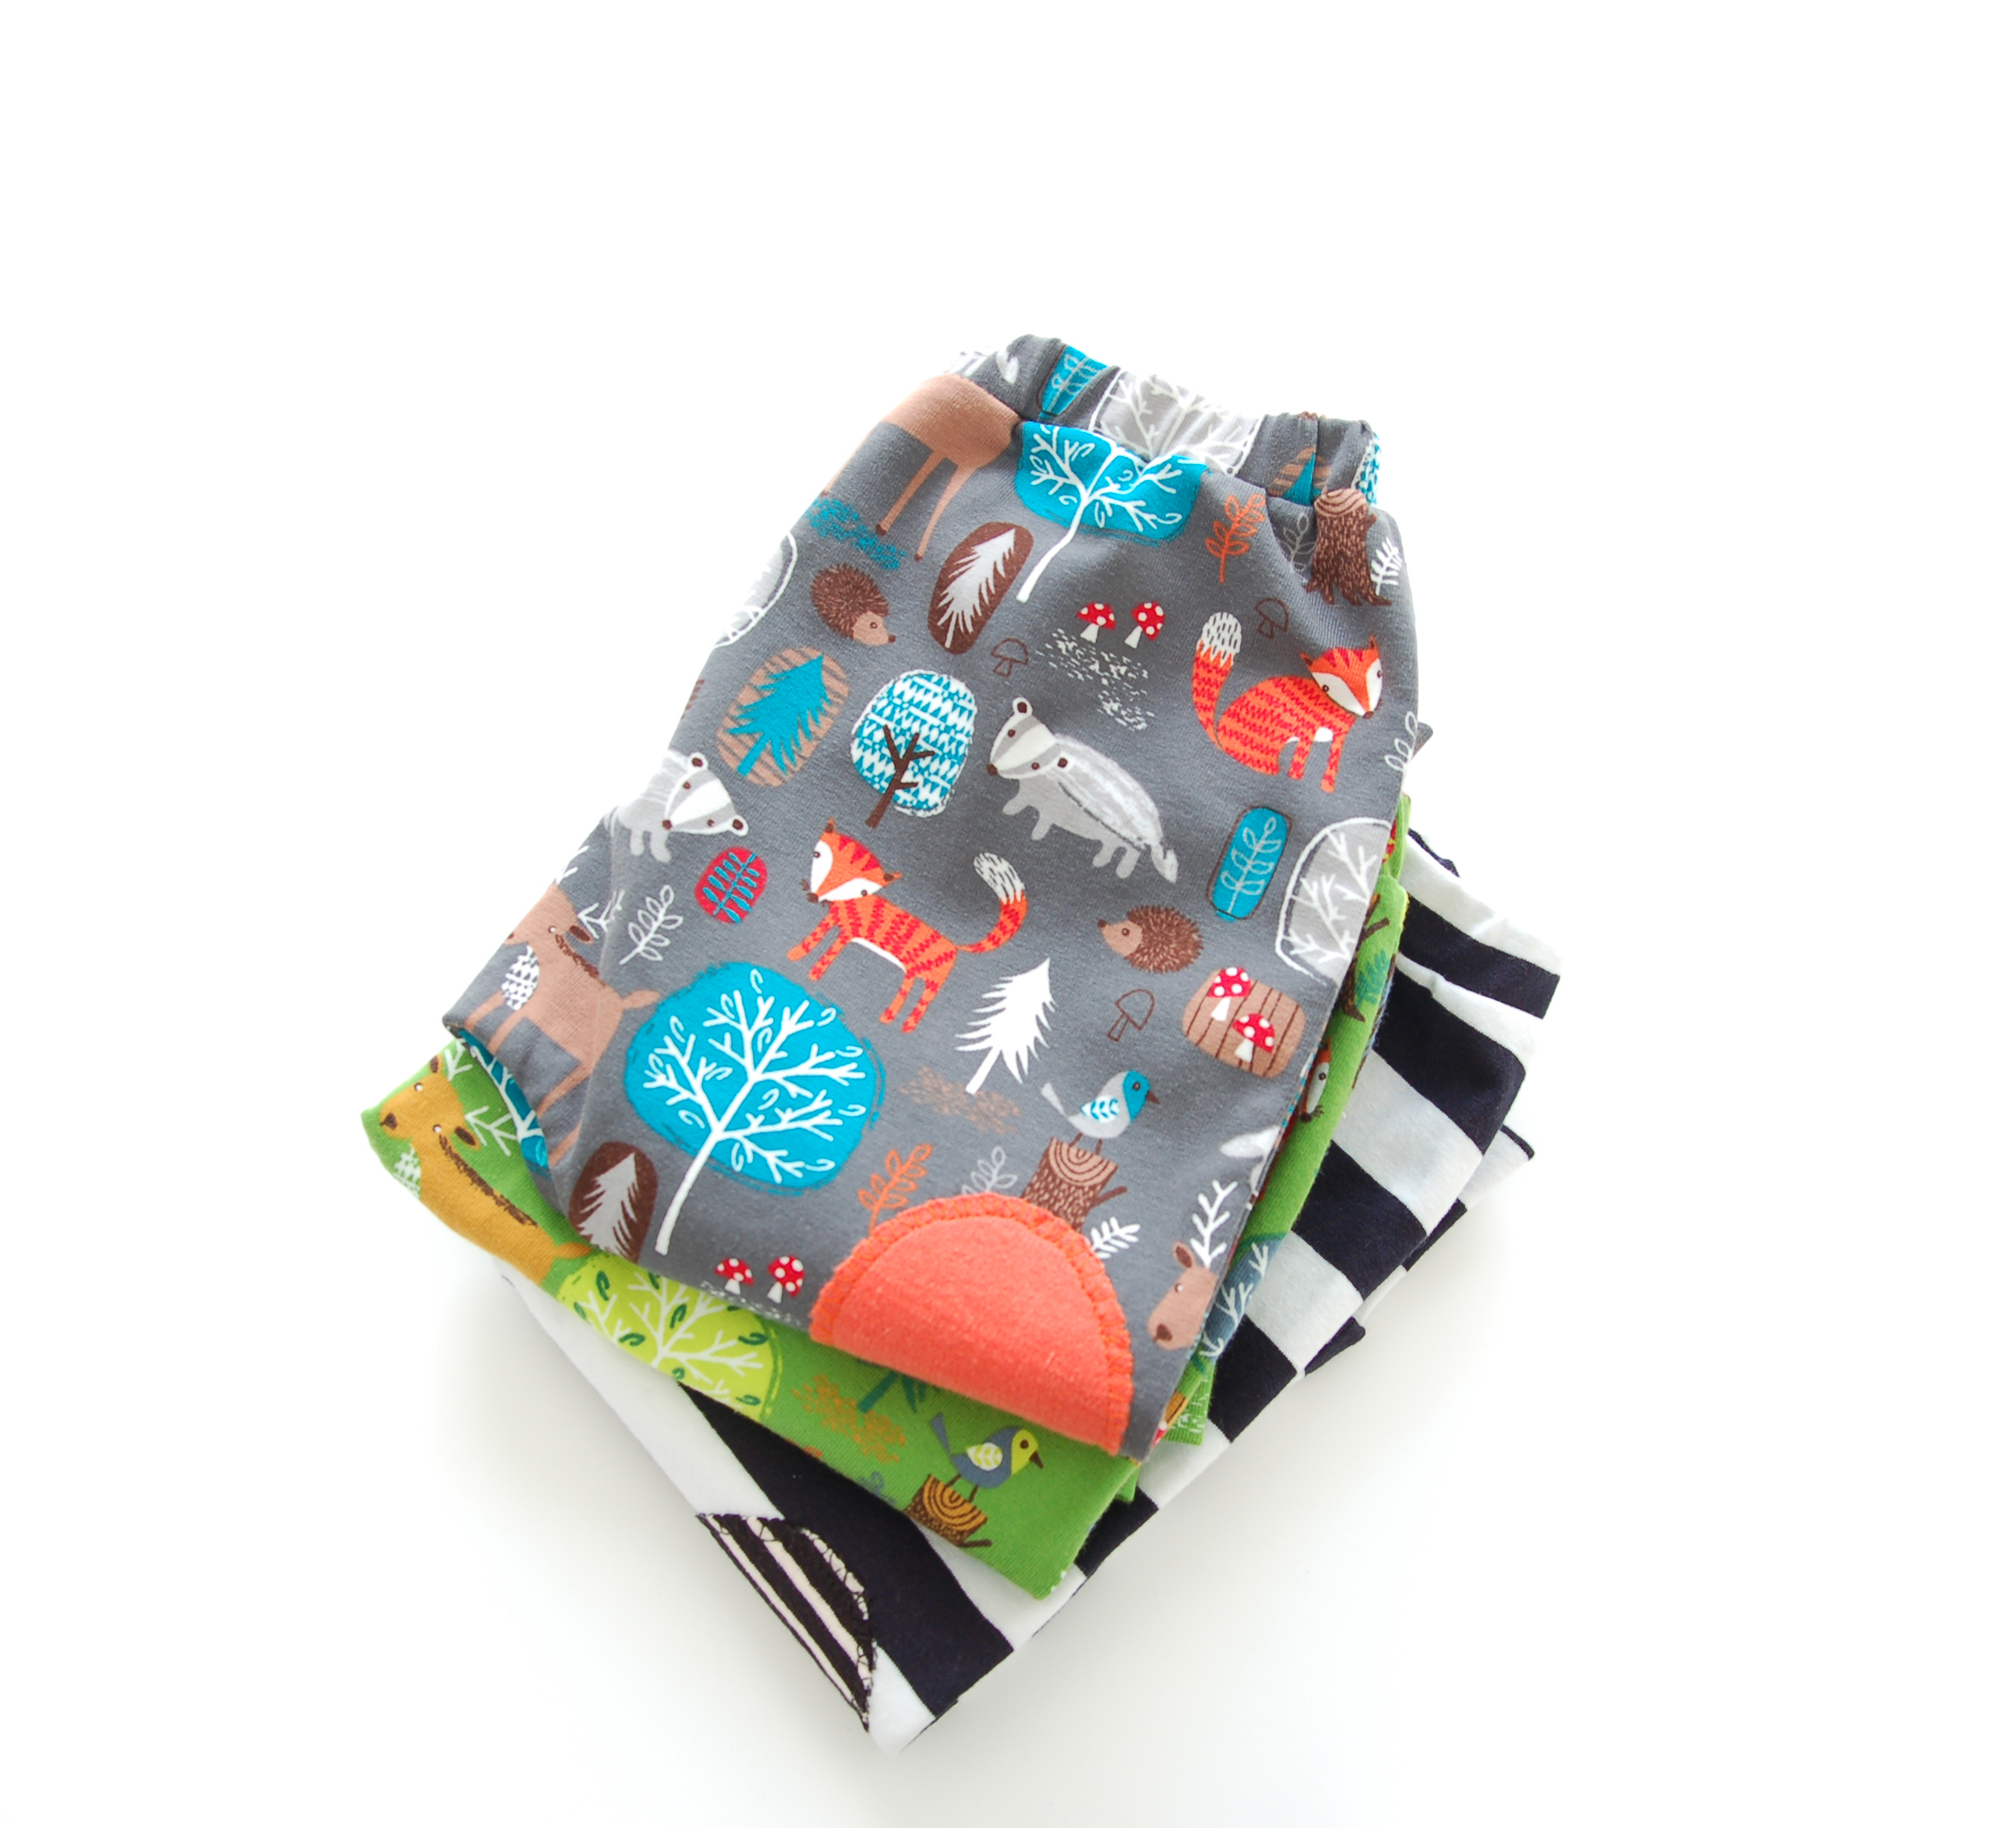
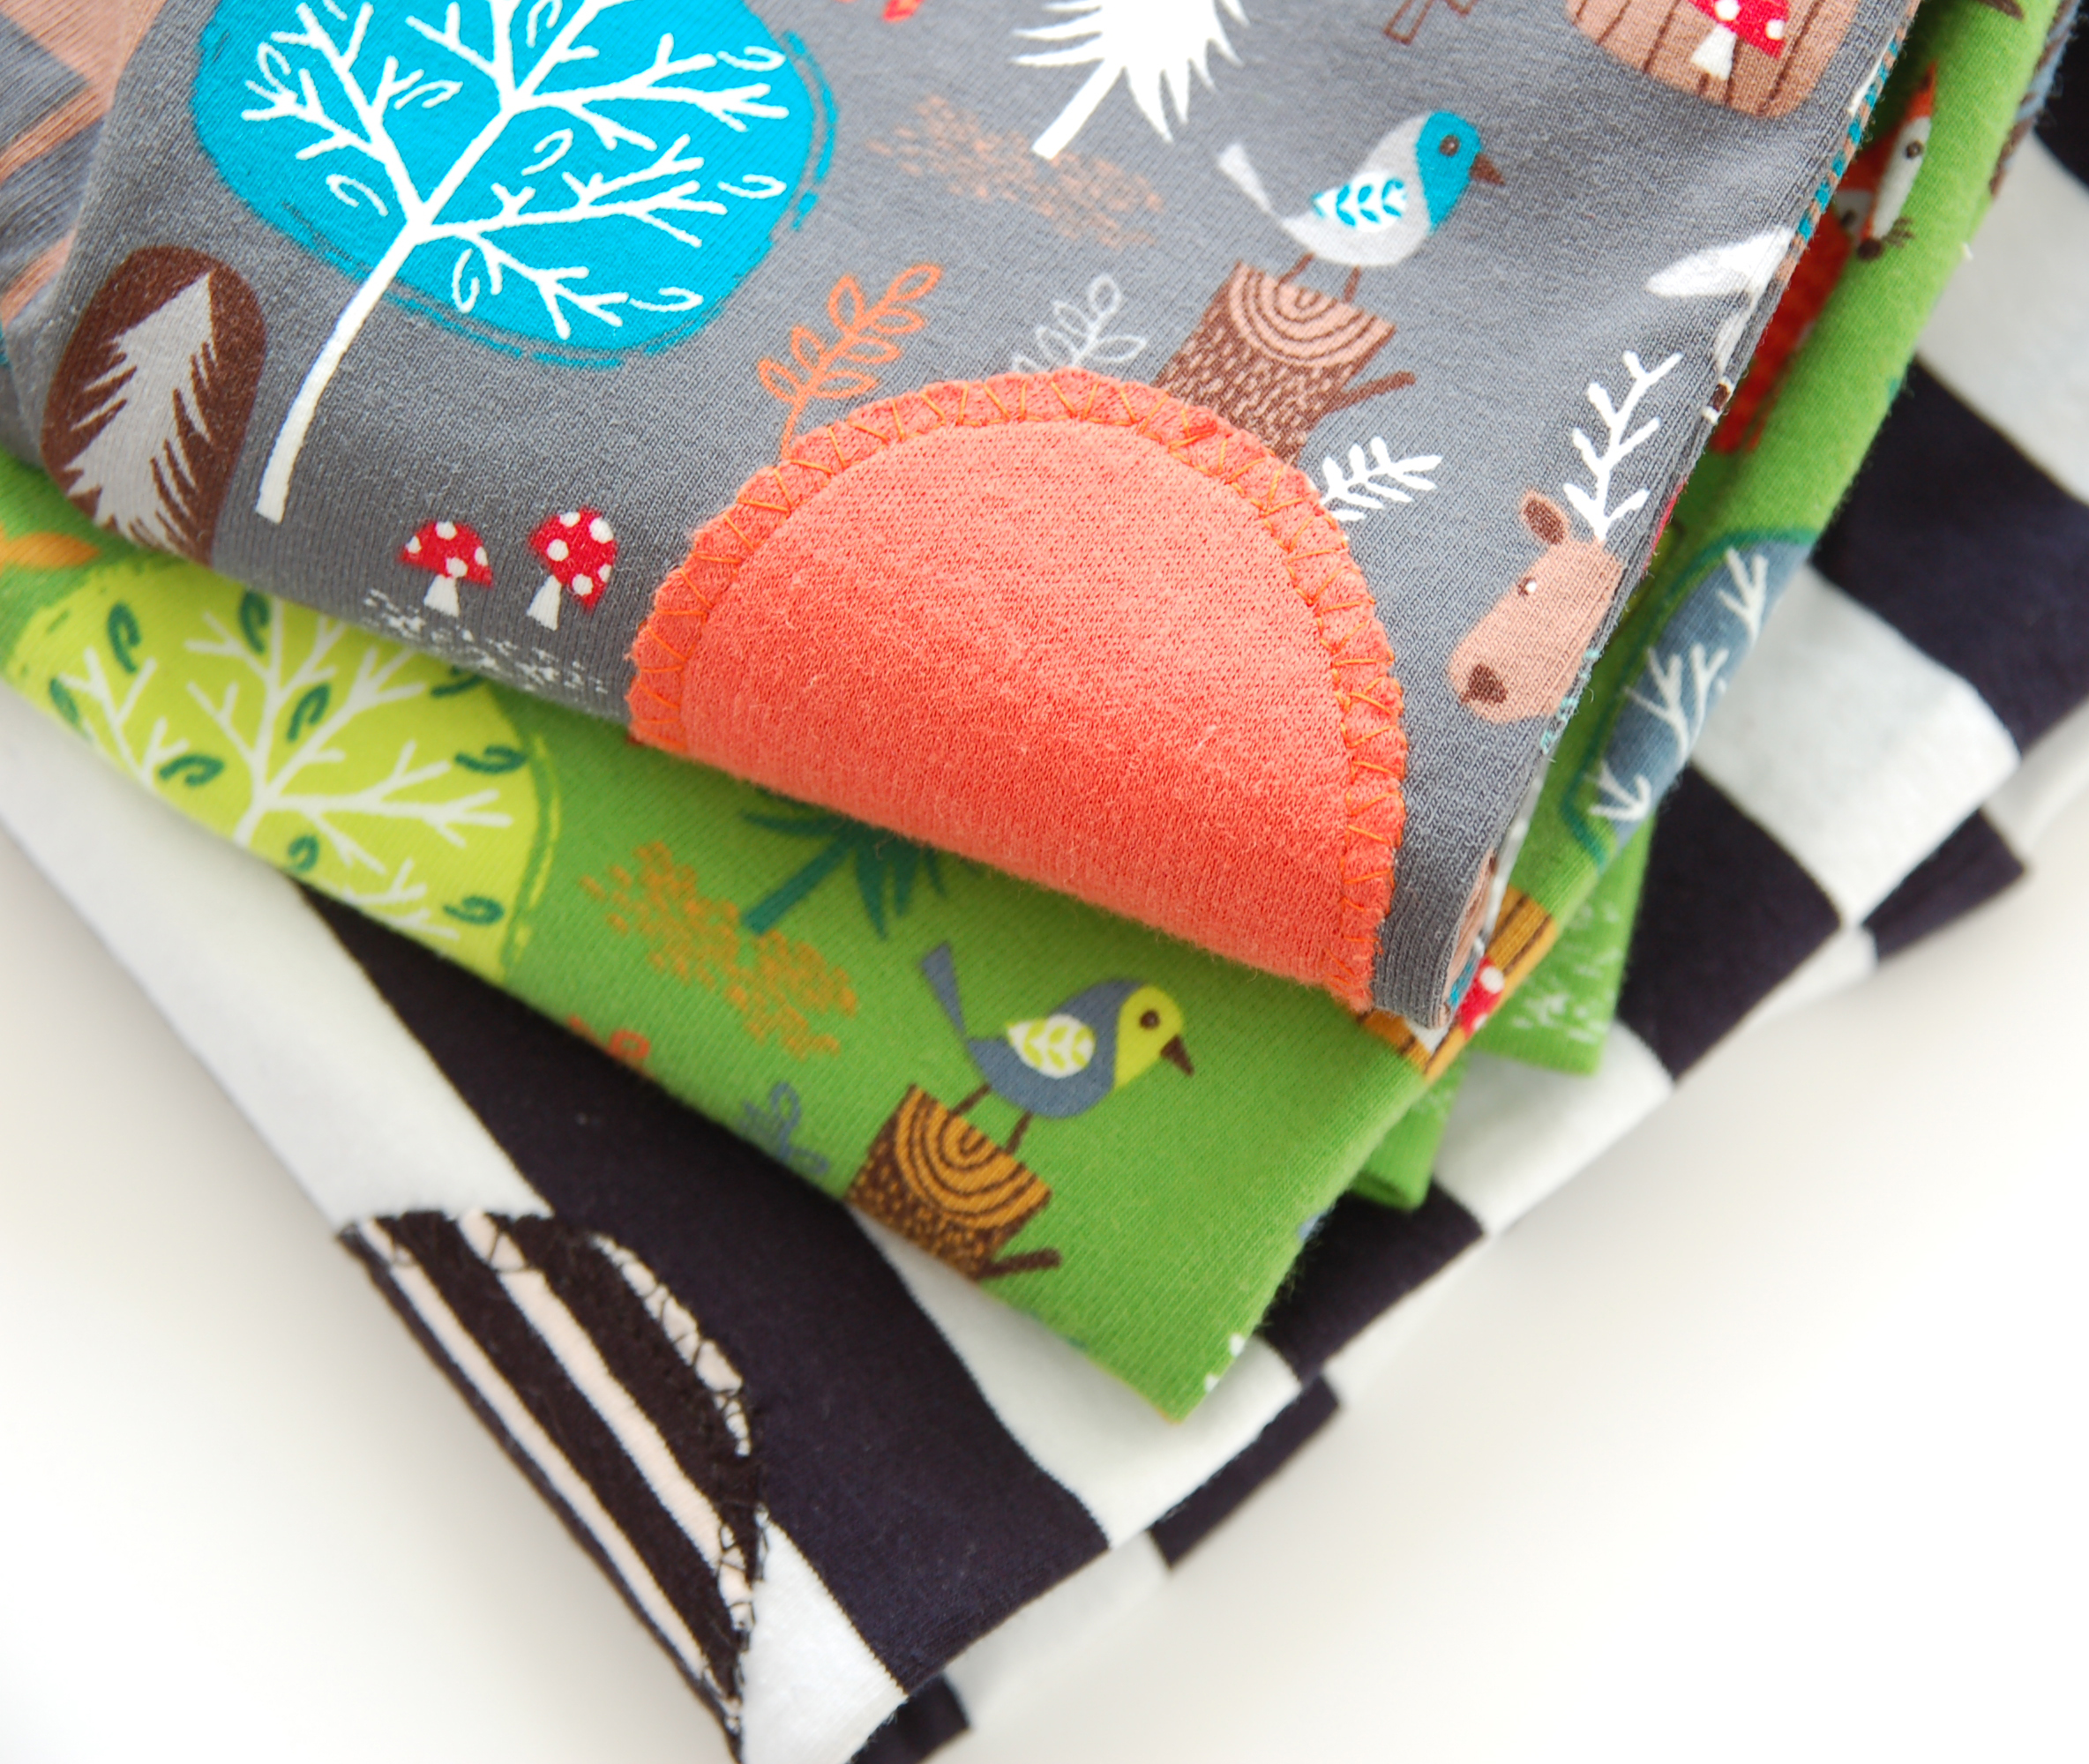
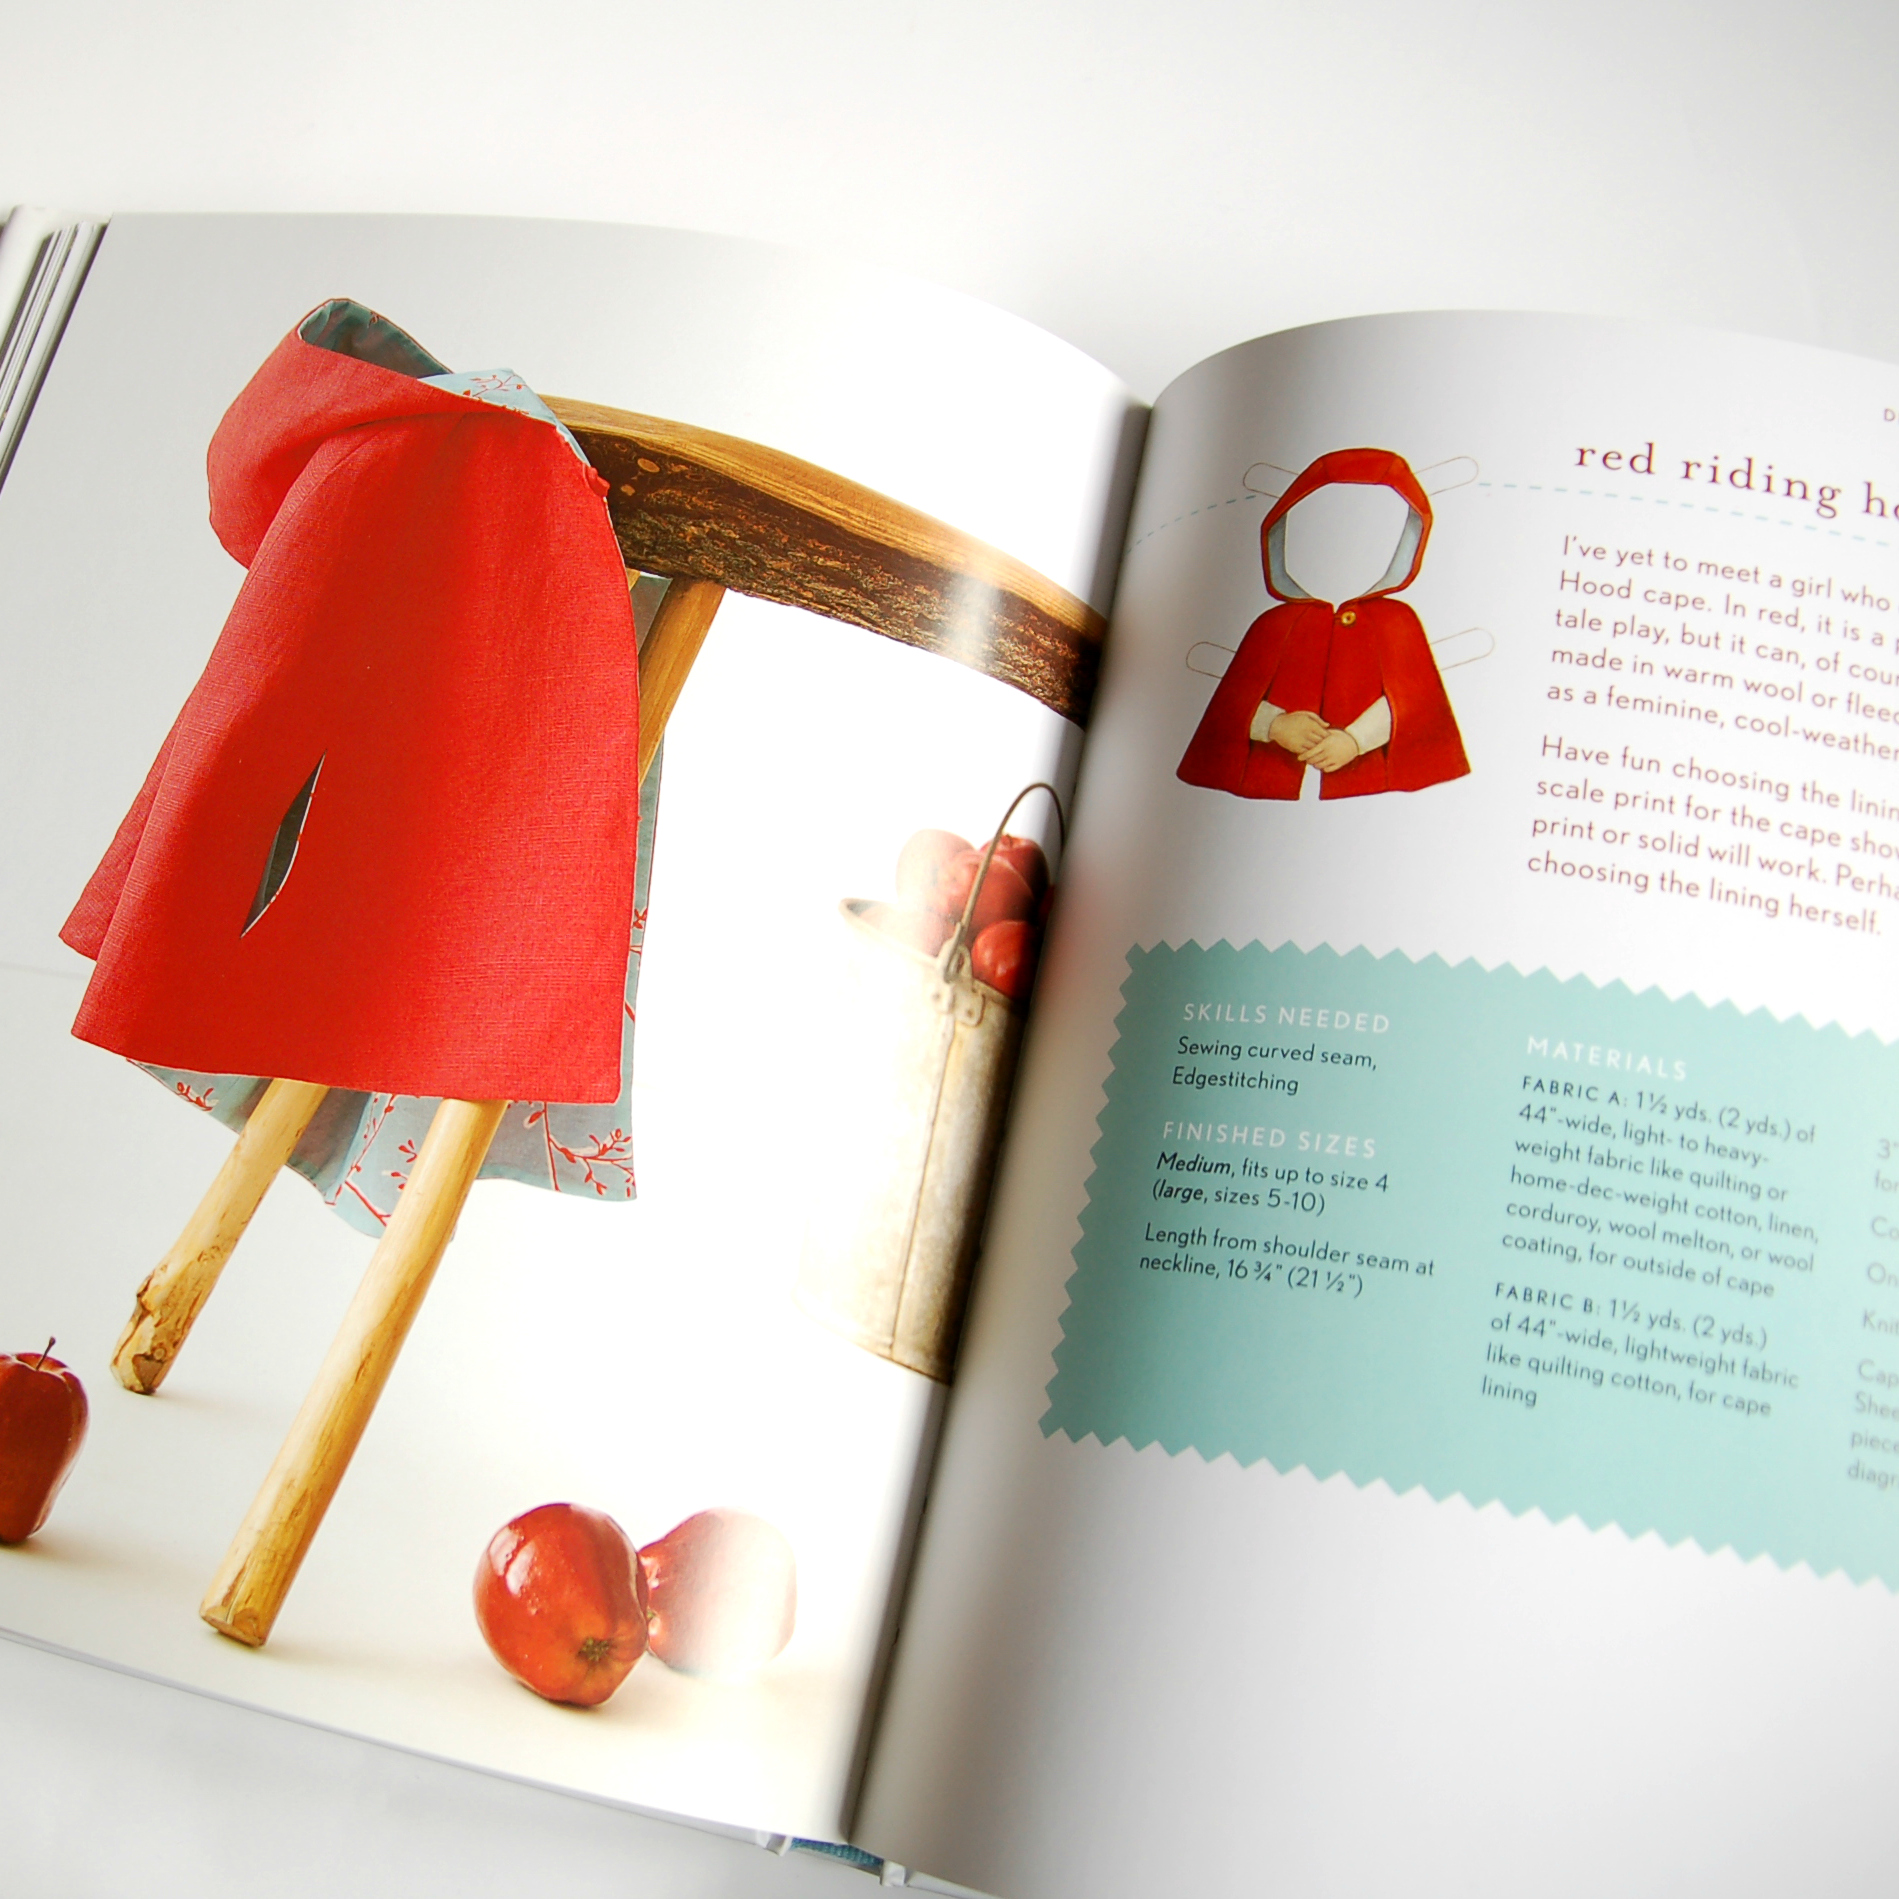
Yo usé el patrón del gorrito de animal para hacerle a la niña uno de lobo porque así tienen que ir este año en su guarde. Modifiqué la forma de las orejas para que sean un poco más puntiagudas y usé tela de punto de sudadera por fuera y punto jersey por dentro. Como la única cinta de algodón que tenía en casa era roja, pues vamos así al estilo Caperucita Roja, jeje. Este proyecto es súper fácil de hacer y me parece genial porque creo que me va a ser de mucho uso para todo tipo de disfraces de animales que habrá que hacer en el futuro, le cambias las orejas y listo, jaja.

I used the winter hood pattern to make my girl a wolf hat as this is what they have to dress up in the daycare this year. I altered the ear pattern to be more wolf-like and I used a sweatshirt knit for the outer layer and a jersey knit for the lining. As the only ribbon I had at home was red, it's a funny mix bitween a wolf and the Little Red Riding Hood, haha. This proyect is so easy to sew and I think it's also great because it will be very useful in the future to easily dress up as any kind of animal, just change up the ears and go, hehe.

Little things to Sew www.studiocostura.com

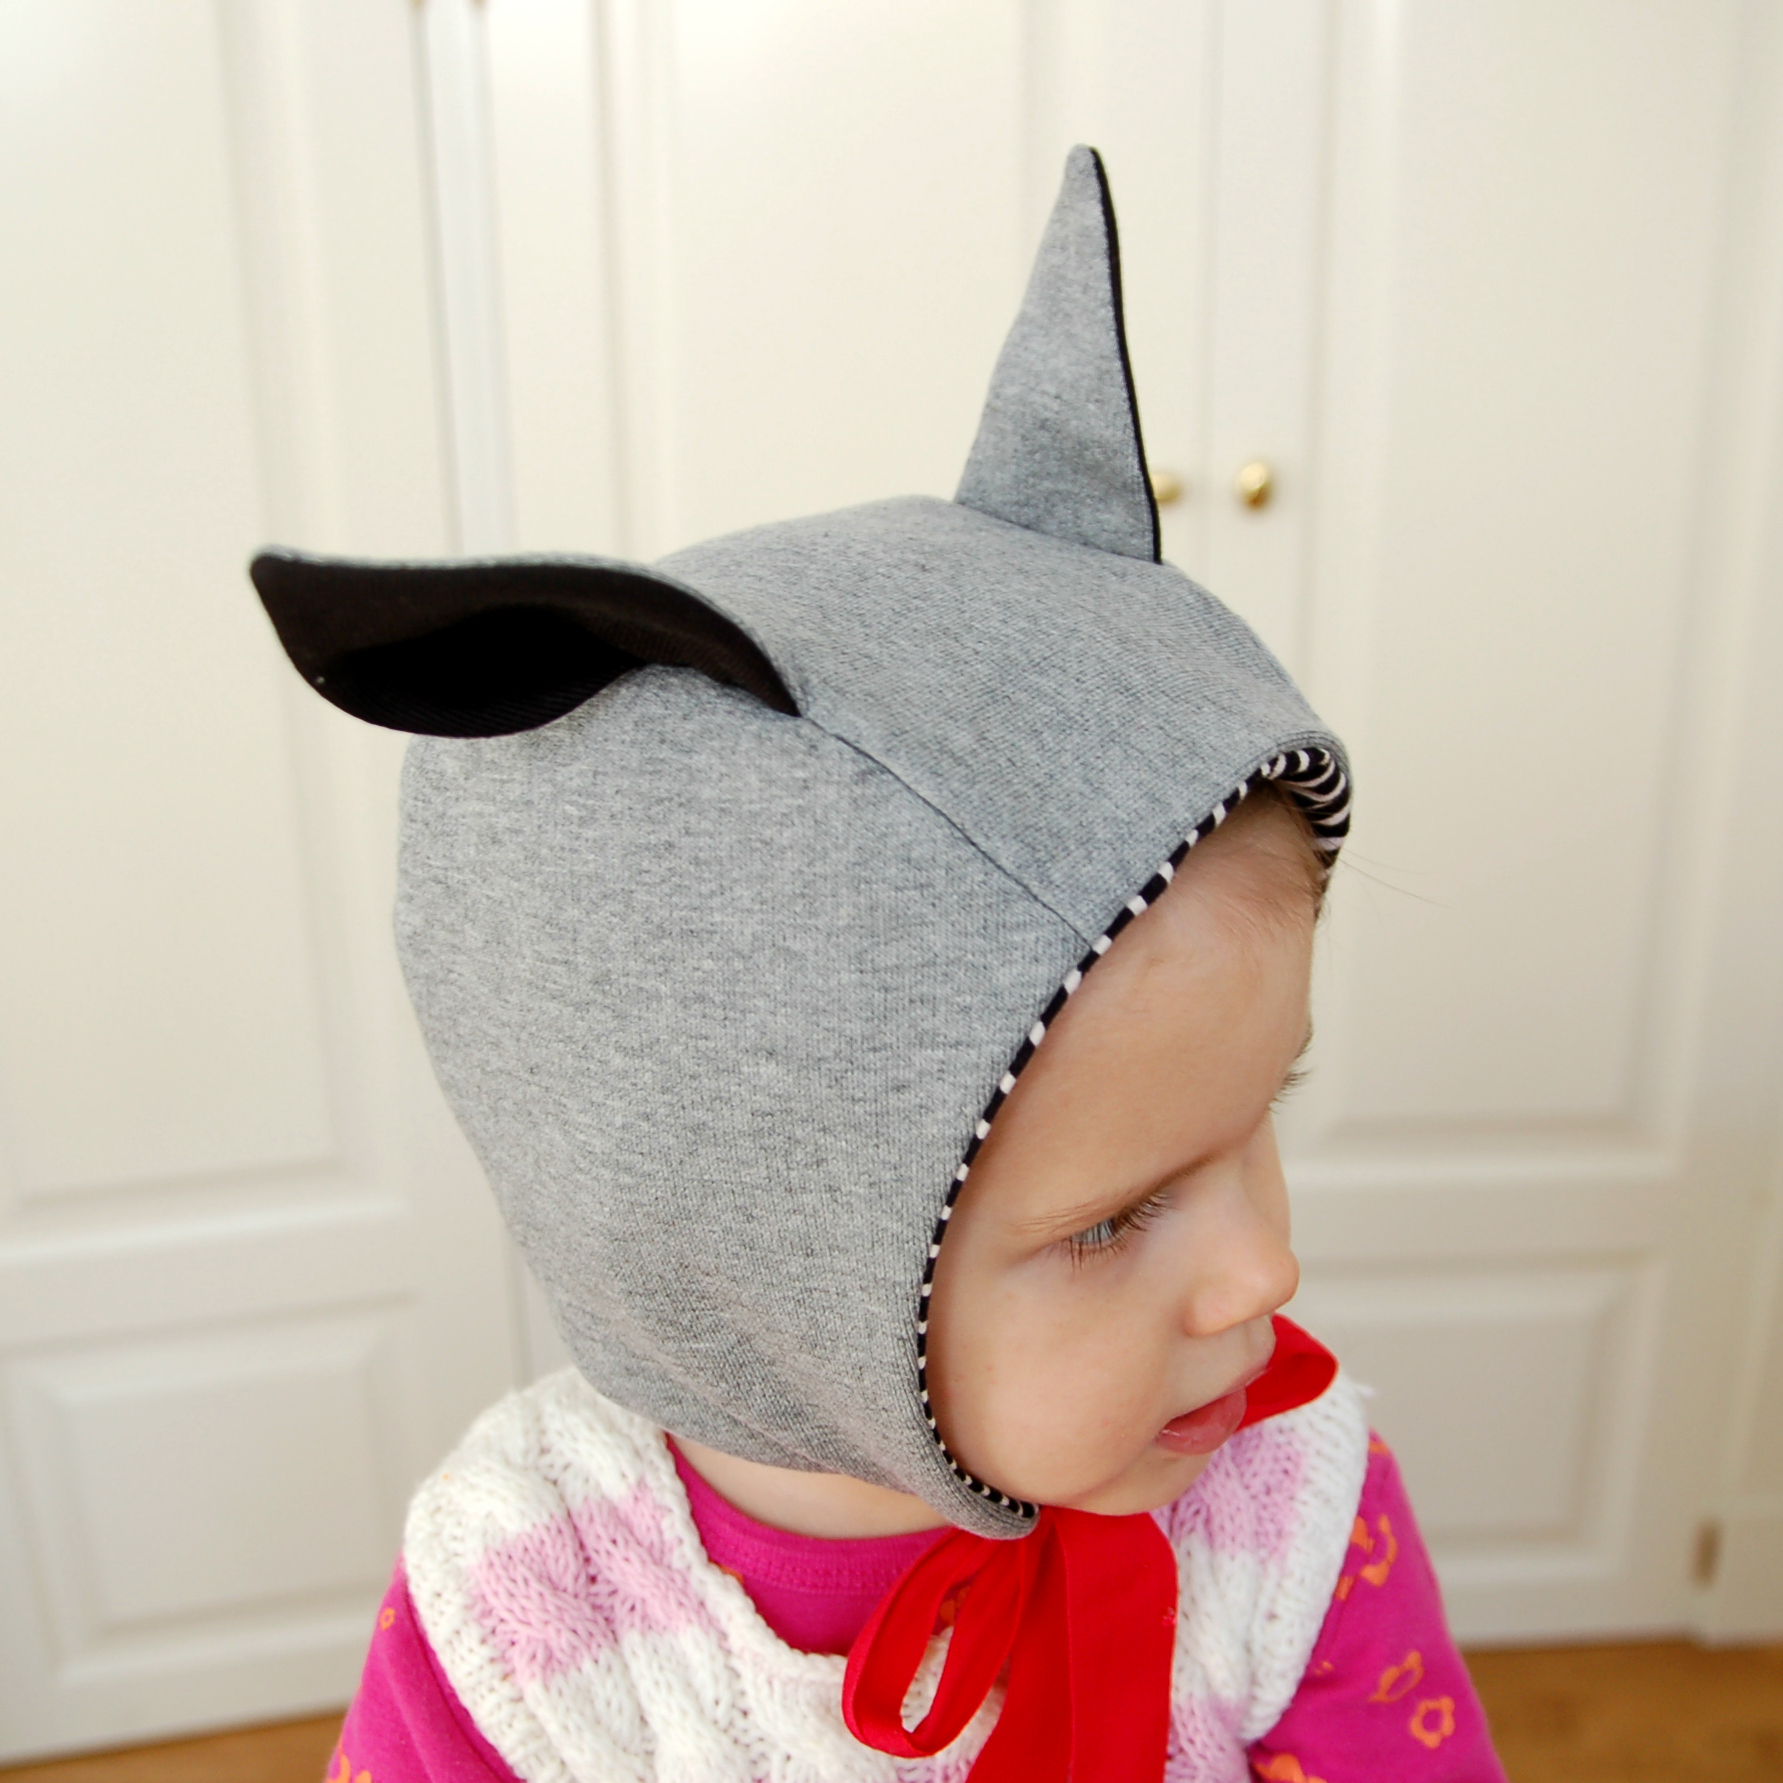
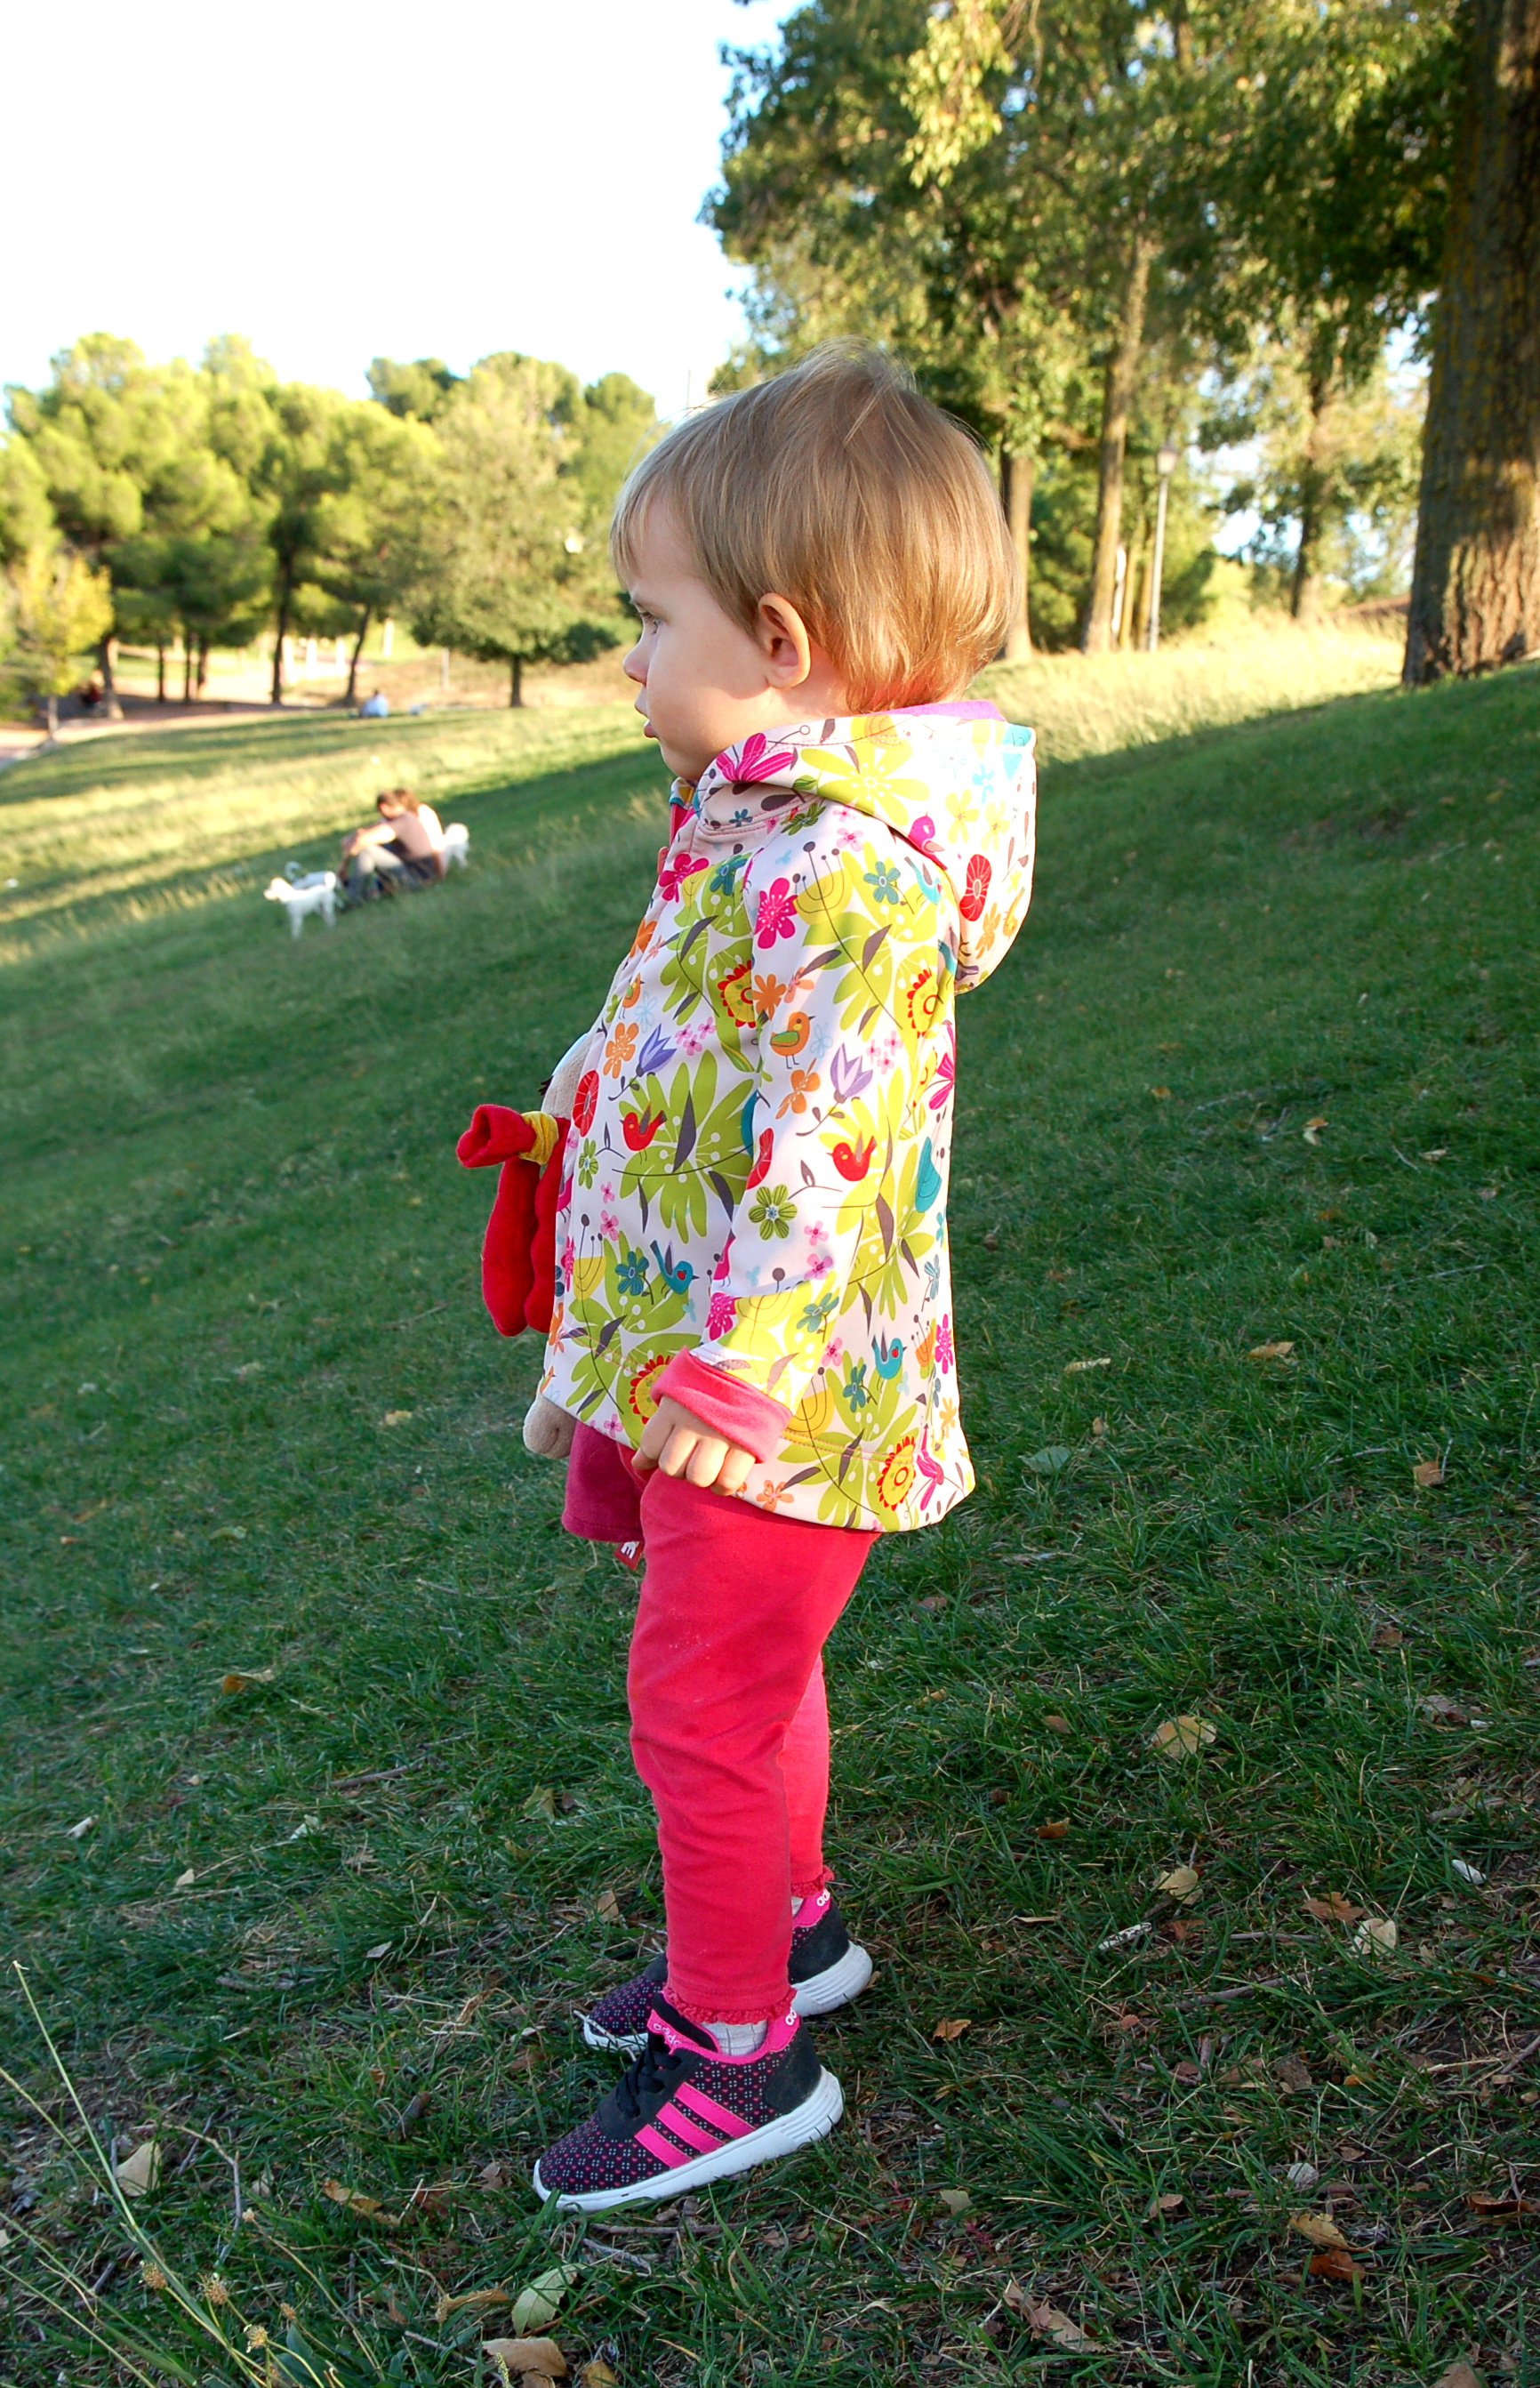
Aquí está ella probando su gorro que va a estrenar el viernes.

Here she is, trying out the hat for Friday.

Little things to Sew www.studiocostura.com

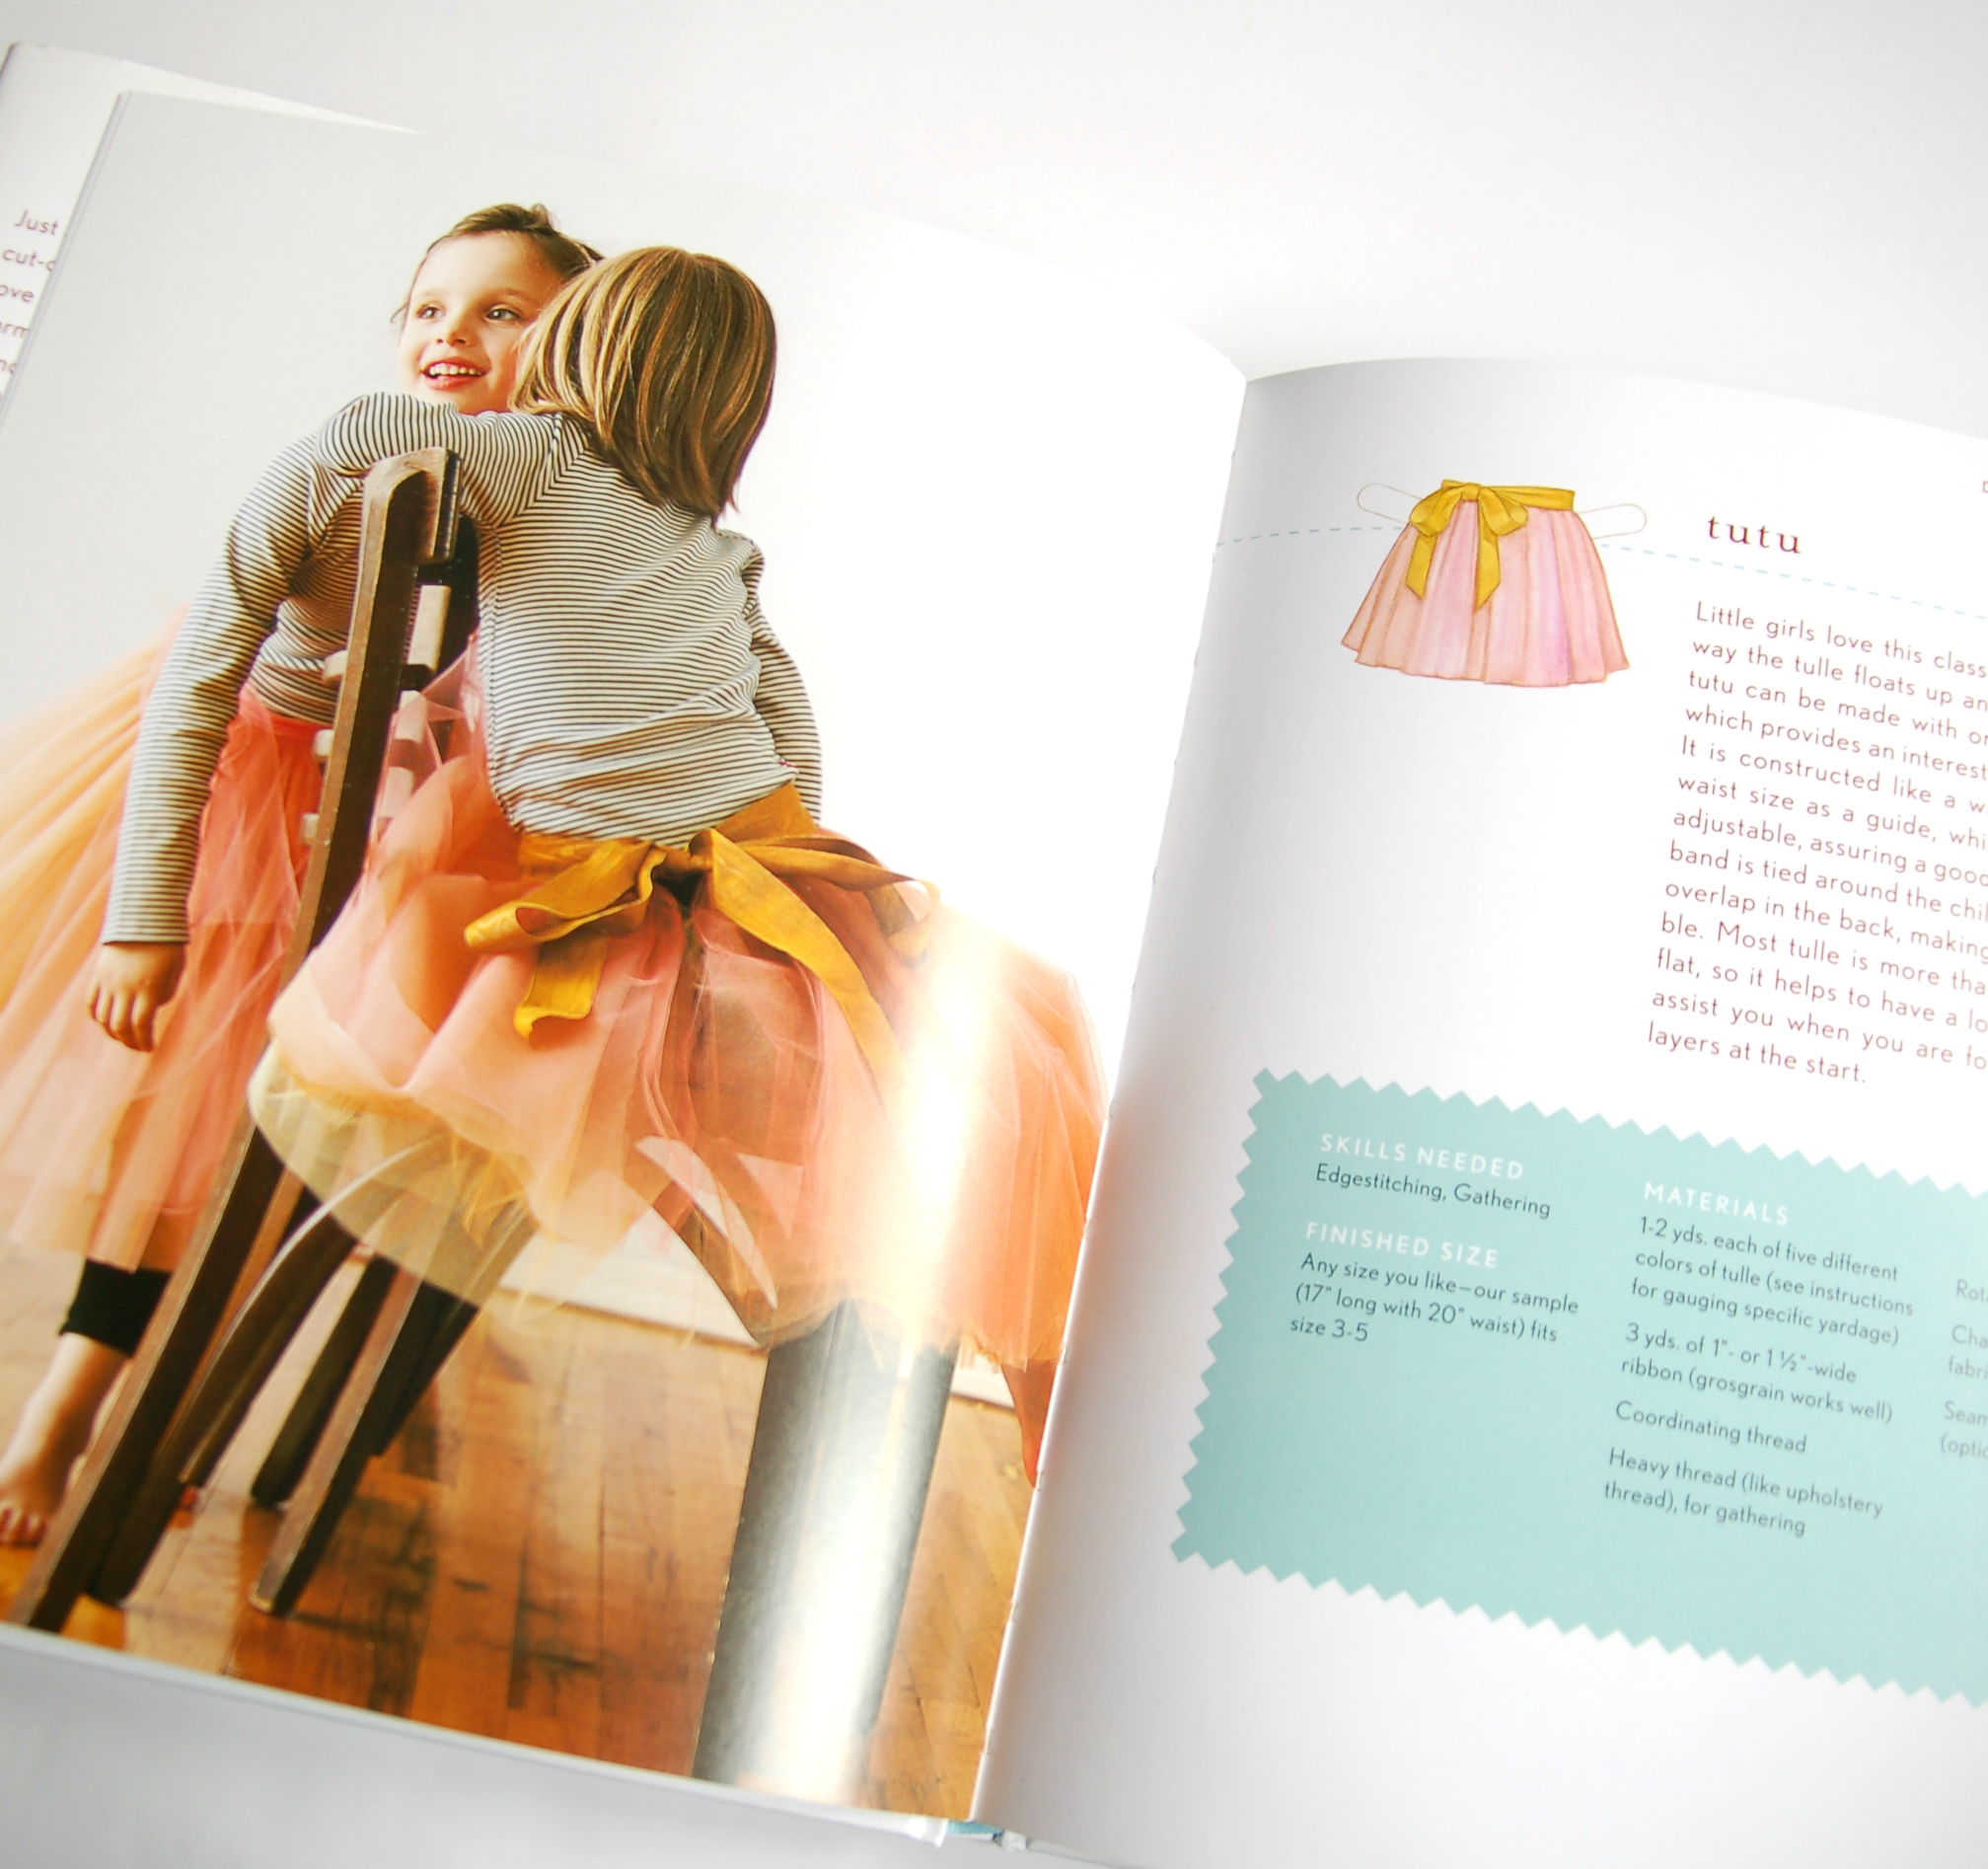
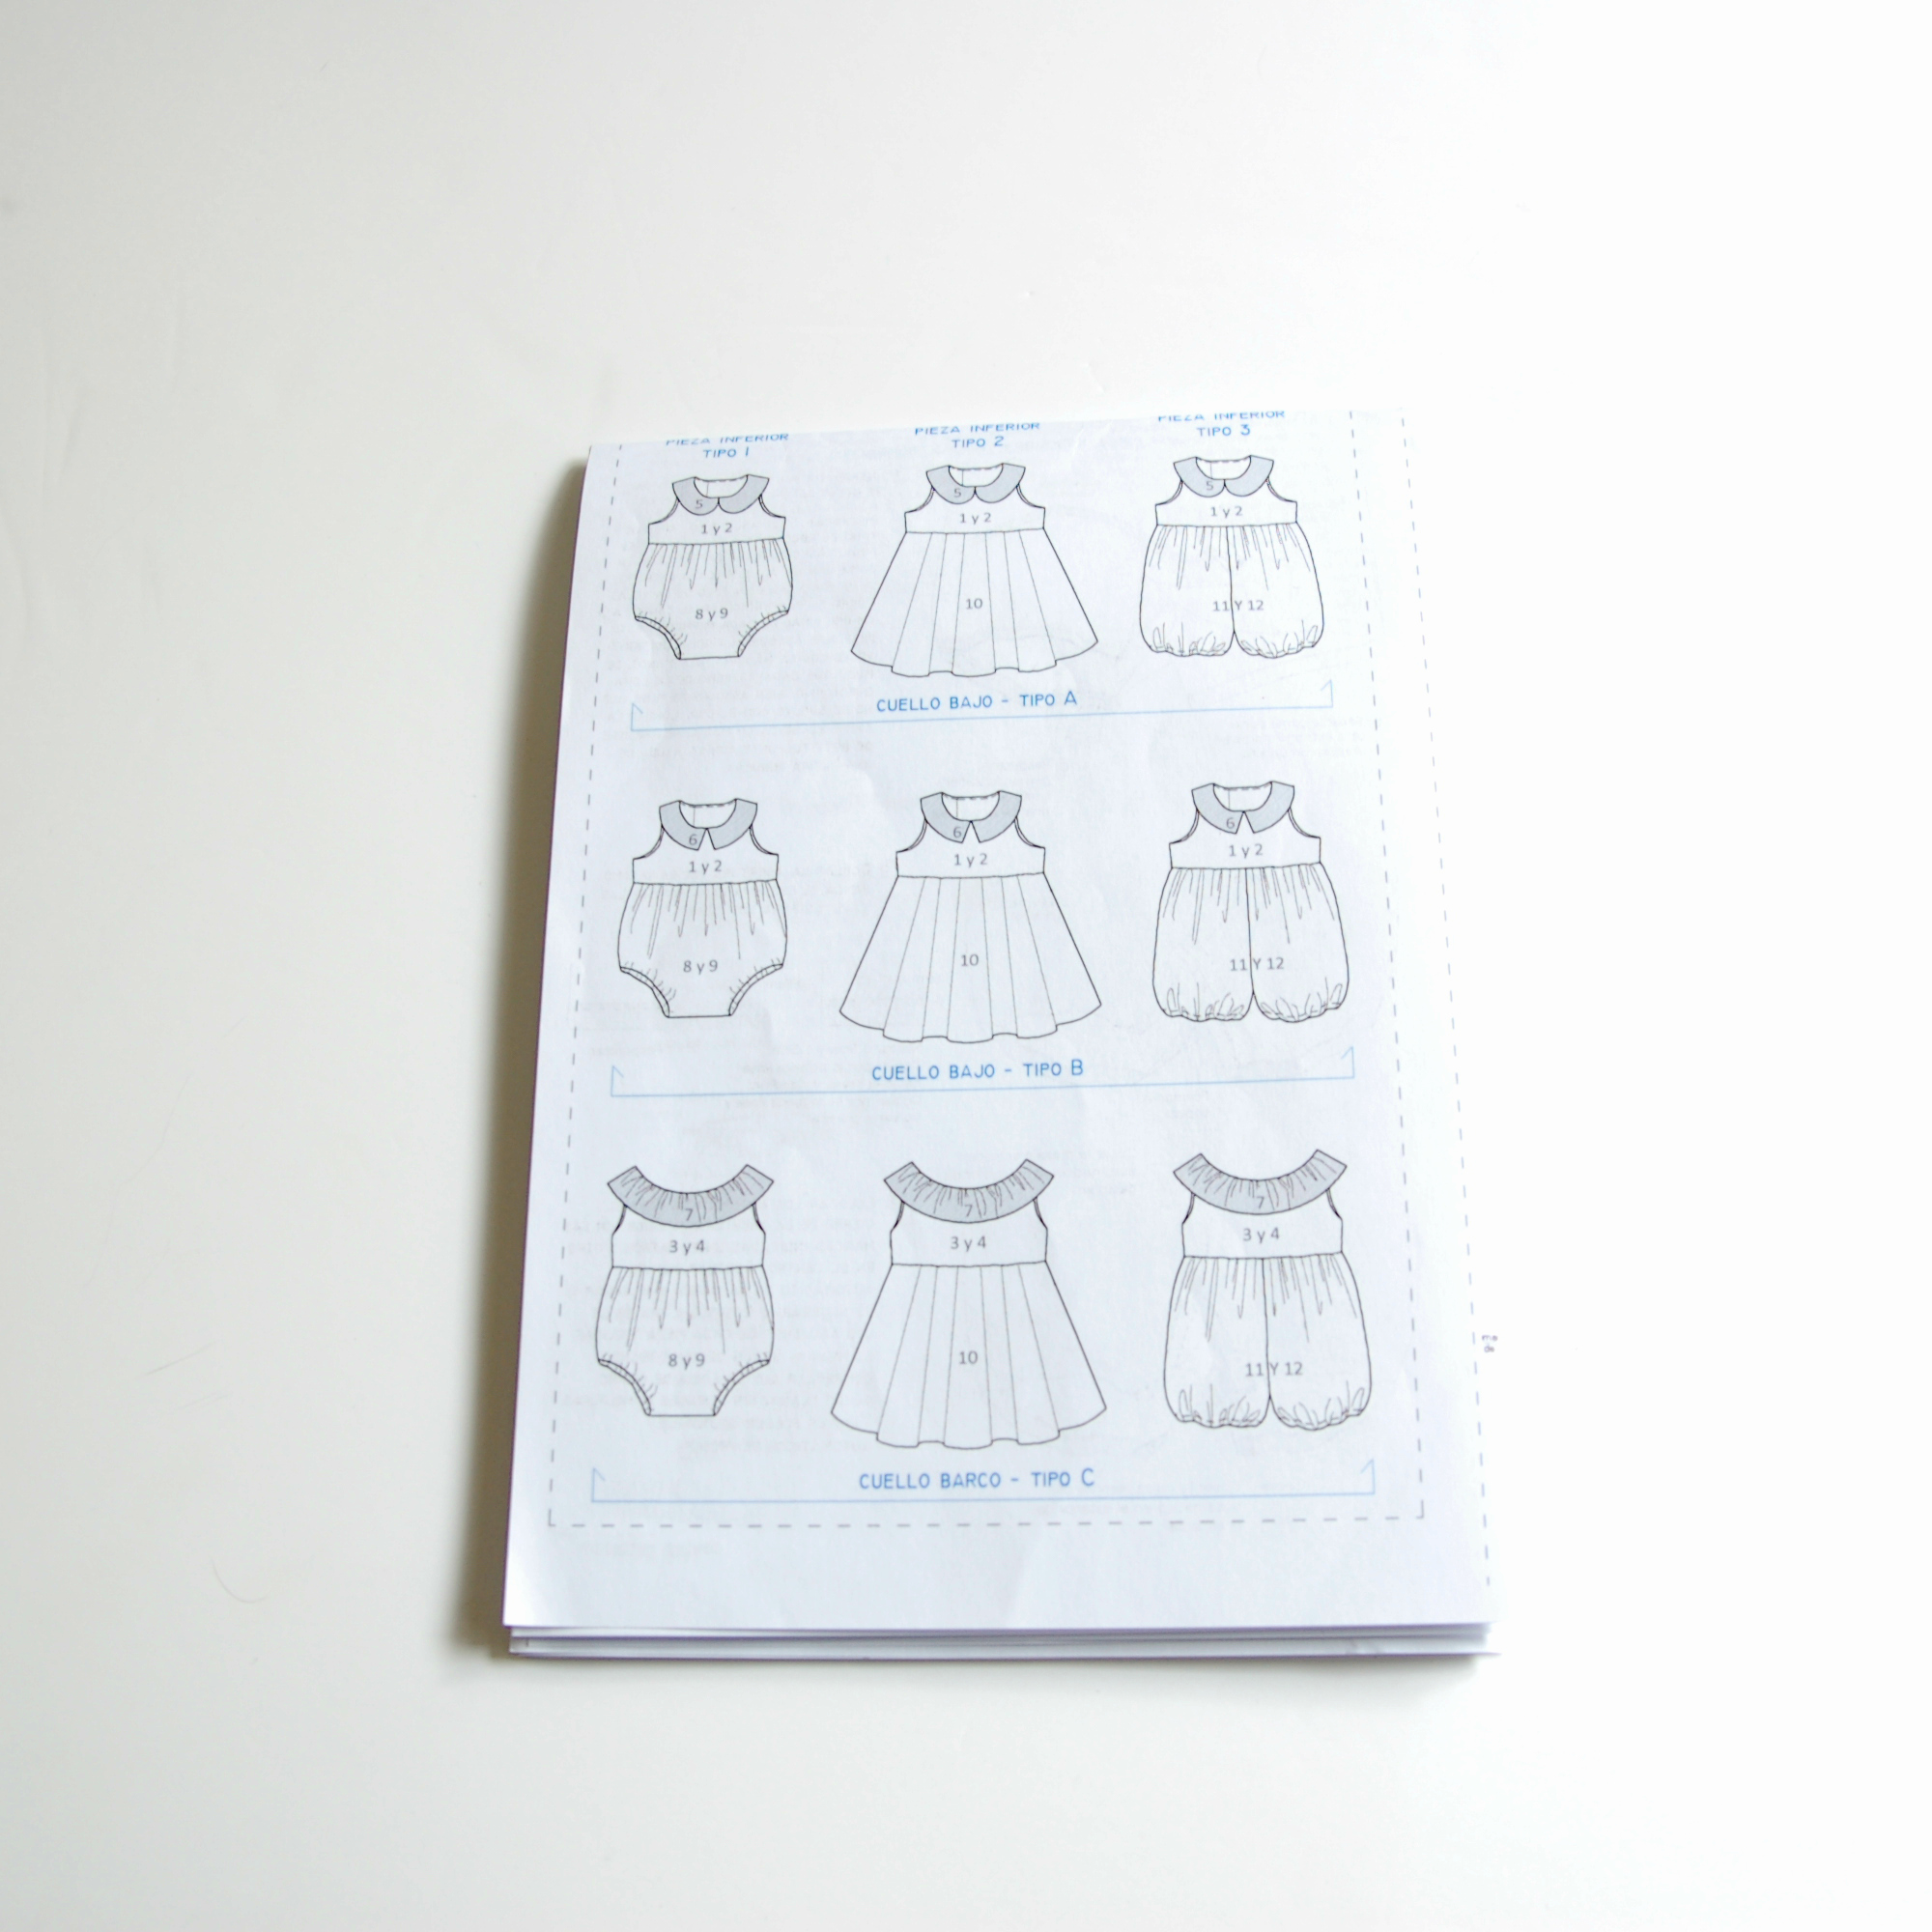
El libro es muy muy bonito...me parece ideal para regalar a alguien a quien le guste coser. O coser cosas de allí para regalar a niños! Todos los proyectos dan mucho juego para hacer algo a tu gusto y las explicaciones son precisas, hay pasos que llevan también dibujos.

The book is very beautiful...it's a perfect gift to give to someone who likes to sew. Or to sew things from there to give as a gift for kids! All the proyects can be made depending on your likes and the instructions are clear, some of them also have drawings.

Little things to Sew www.studiocostura.com

Todas las fotos en el libro son bellas pero lo que más me gustan son las ilustraciones de la portada. Además vienen en el libro unas plantillas de muñecos de papel que puedes recortar y luego usar las mismas ilustraciones de los proyectos que vienen en el libro...es un detalle muy bonito para los niños.

All the photos in the book are beautiful but what I like the most are the illustrations of the cover. There are also paper dolls in there you can cut out and the children can play dressing them up with the same projects from the book...it's a lovely little detail.

Little things to Sew www.studiocostura.com

Ya sé que Pinterest está lleno de tutoriales gratis para todo tipo de proyectos de costura pero yo personalmente tengo una gran debilidad por los libros, y si puedo, intento ahorrar cada mes un poco para comprar uno y así voy completando mi pequeña biblioteca de libros de costura. Algo de eso de coger el libro y sentarte en el sofá para mirar las fotos y pensar en el próximo proyecto me parece muy placentero. Y bueno, también me parecen muy útiles a la hora de aprender nuevas técnicas porque siempre me interesa cómo decide cada autor solucionar el proceso de construcción del objeto...hay mil formas para eso!

I know...Pinterest is full of free tutorials for all kinds of sewing projects but I personally really like books and if I can, I try to save up every month so I can buy one and step by step I keep growing my little sewing book library. There's just something about taking the book and sitting on a sofa to look through the pretty photos and find time to imagine the next project. And well, I also find those books very helpful to learn new techniques because I'm always interested how different authors solve the construction part of the objects...there are so many ways to do it!

Little things to Sew www.studiocostura.com

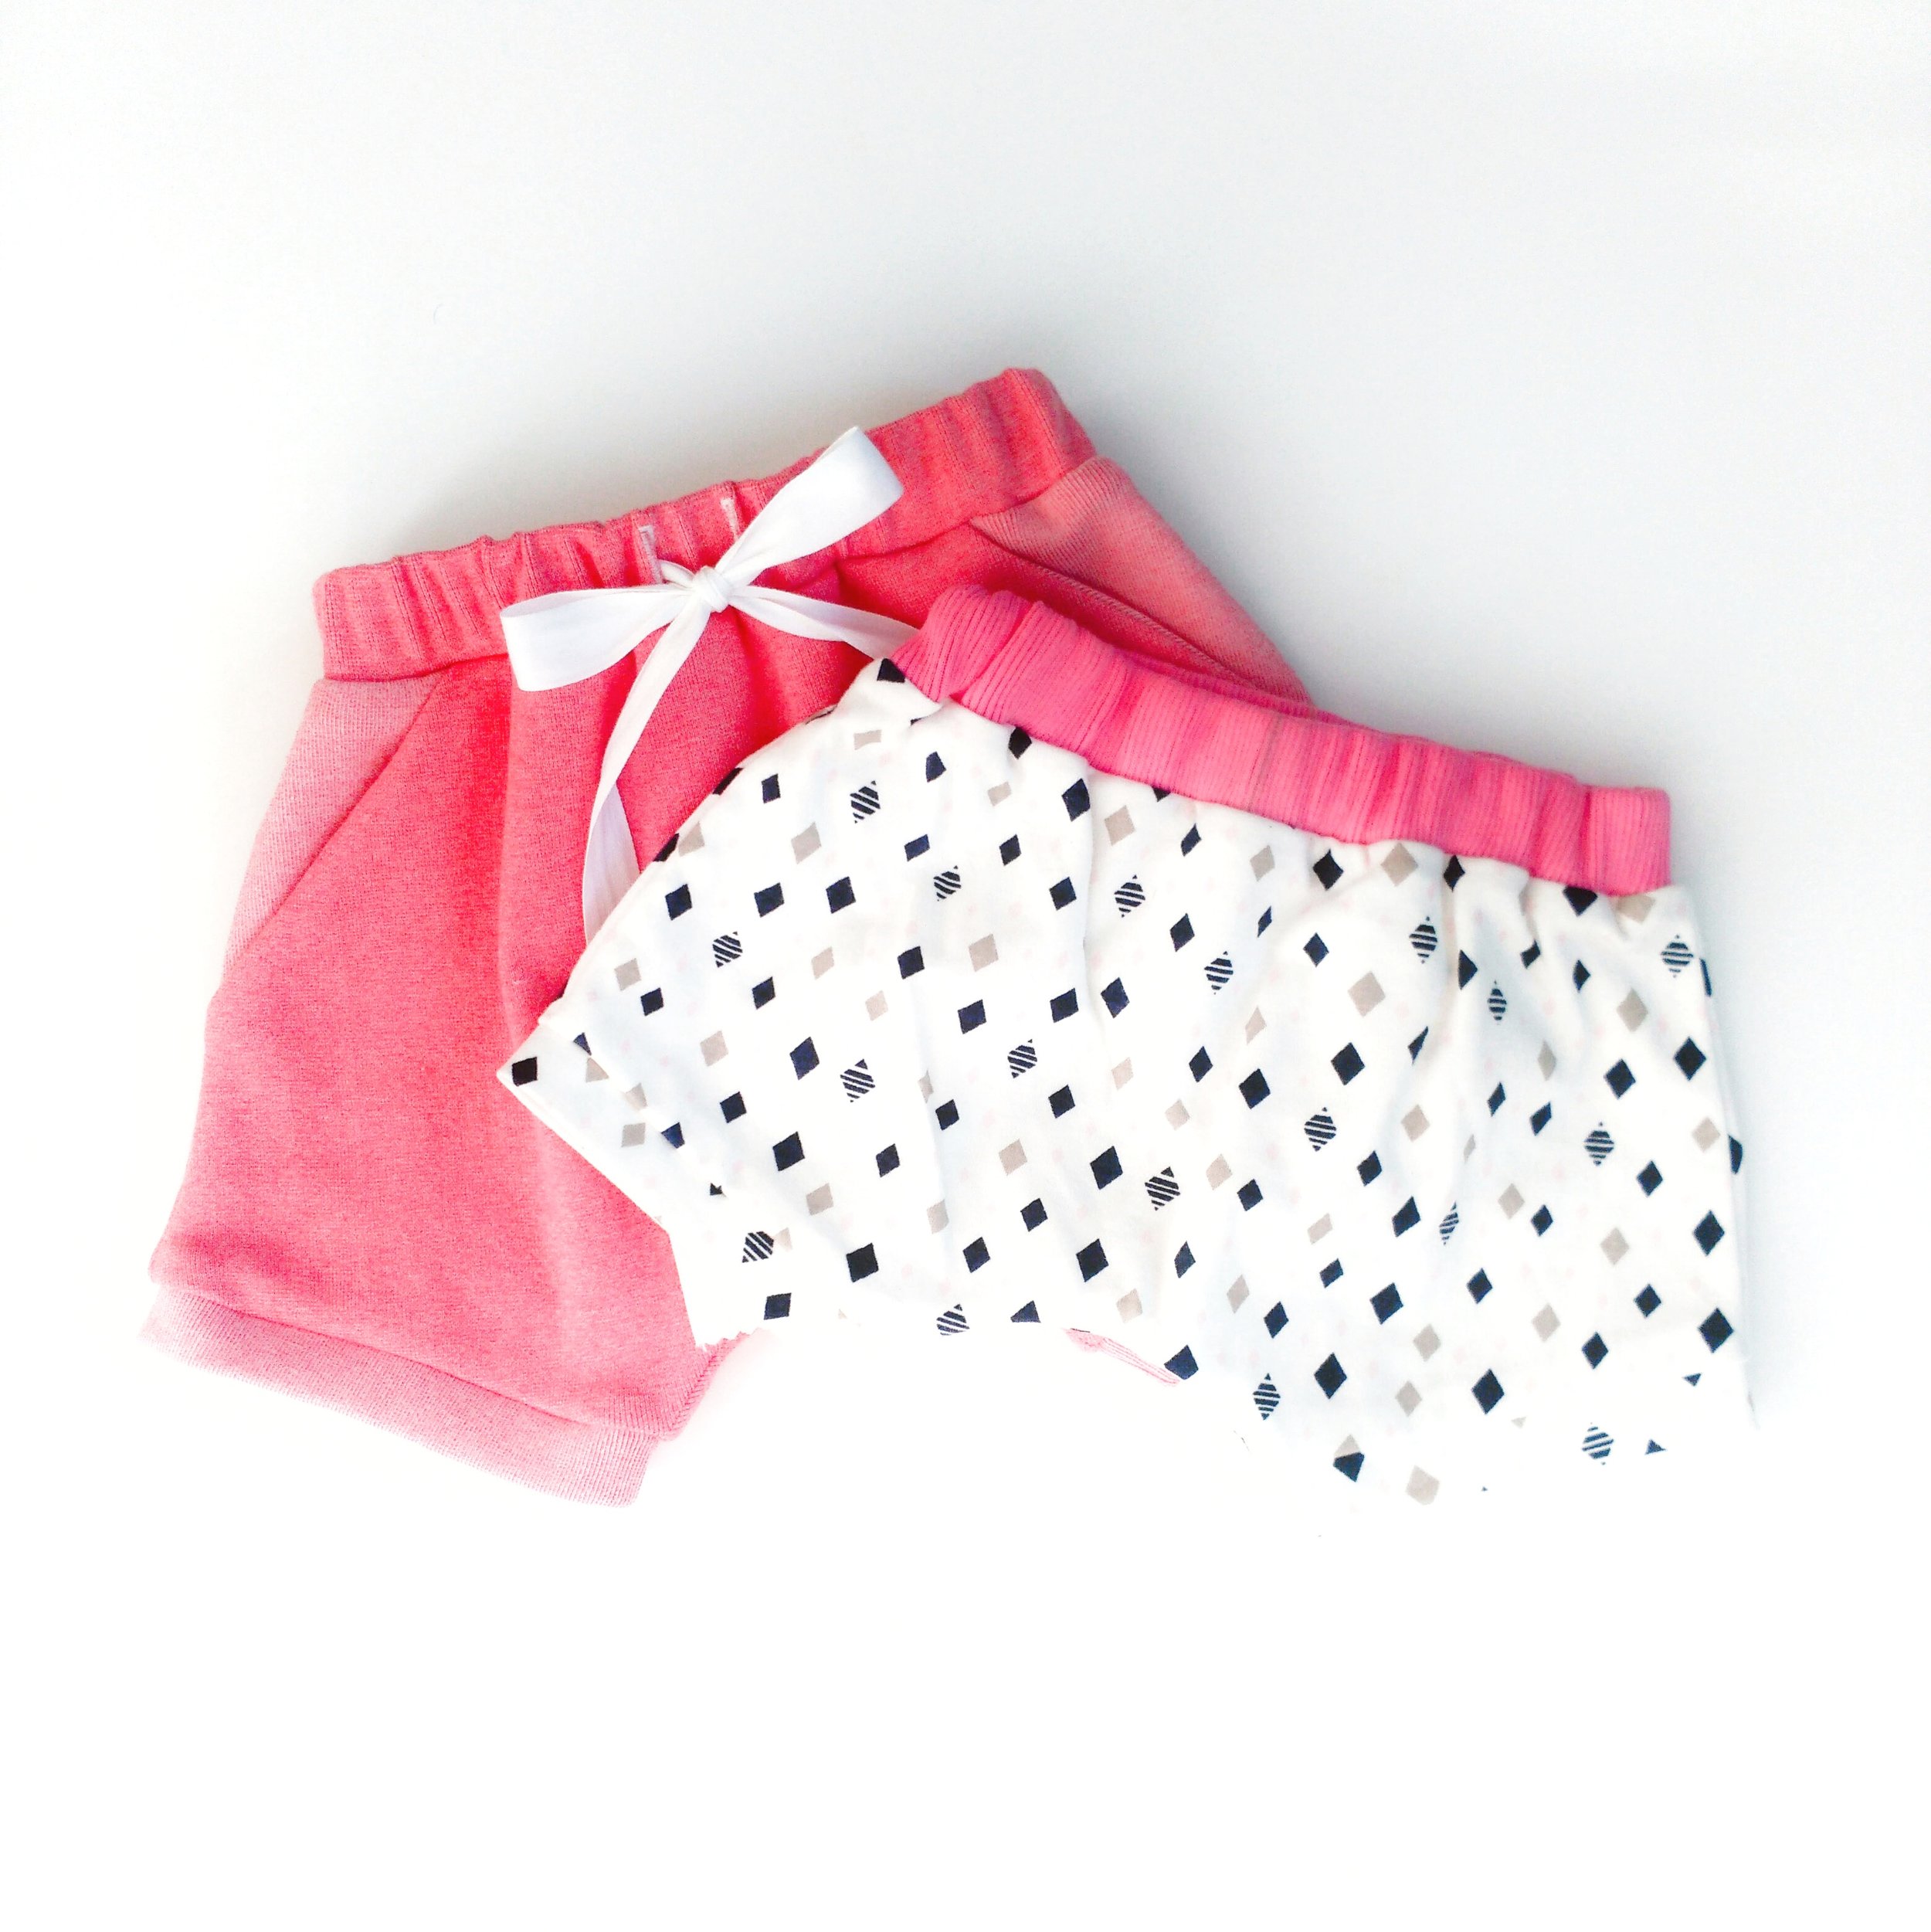
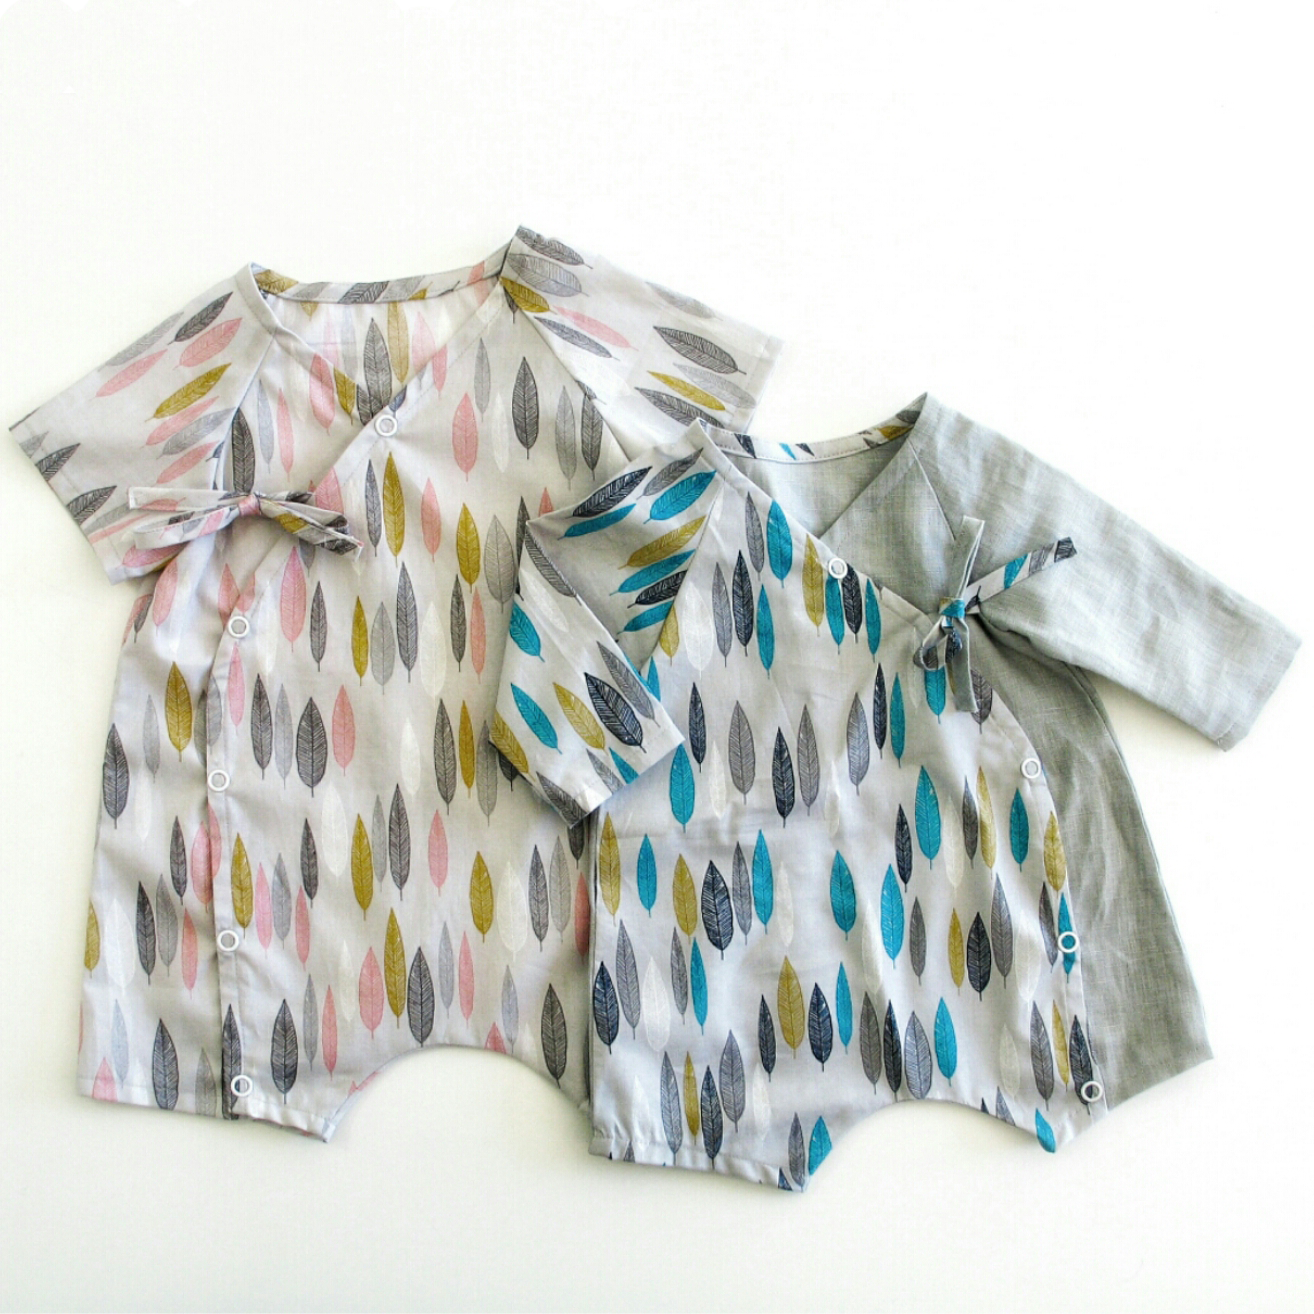
Así que estos son algunos de los proyectos que vienen en el libro, espero que os gusten. El otro libro de Oliver + S que se llama "Building Block Dress" también tiene muy buena pinta: es sobre cómo modificar los patrones de vestidos de niñas para crear cualquier diseño que quieras. También puedes echar un ojo a su blog y en el apartado de patrones gratis.

Que lo paséis bien en los carnavales <3

So these are some of the projects that are in the book, hope you liked the photos. The other book from Oliver + S is called Building Block Dress and it looks really good too: it's about pattern alterations for girls dresses so you can come up with any design you like. You can also take a look at their blog and free patterns page.

Happy carnival, sewing friends <3


Si quieres recibir en tu correo electrónico una selección de noticias de costura, tutoriales y más cosas que me inspiran y que creo que te van a gustar a ti también, apúntate al newsletter de Studio Costura AQUÍ.

If you'd like to recieve in your inbox a selection of sewing news, tutoriales and other things that inspire me and I think you would appreciate too, sign up to the Studio Costura newsletter HERE.


Lara Sanner Sewing Patterns

 
patrones de Lara Sanner www.studiocostura.com

Hola! Hoy os traigo después de mucho tiempo algo de la sección infantil. He cosido una ranita con el patrón de Lara Sanner y os voy a contar un poco sobre sus patrones y mi experiencia con éste en particular.

Hey! After a long time today I'm bringing you something from the kids section. I've made a romper with a sewing pattern from Lara Sanner and I'll tell you a bit about her patterns and about this one in particualr.

patrones de Lara Sanner www.studiocostura.com

Este otoño conocí a Lara  en persona, pero su trabajo ya lo había visto antes por internet. Es una chica muy maja que hace patrones de costura para bebés y niños y también enseña en las clases de costura en Black Oveja en Madrid. Está poco a poco empezando a sacar más modelos y me gusta mucho su estilo moderno y diferente.

This autumn I had a pleasure to meet Lara in person but I had seen her work online before too. She's a really nice person who makes sewing patterns for babies and kids and also teaches sewing classes in Black Oveja in Madrid. She's launching more patterns these days and I really like her clean and modern style.

patrones de Lara Sanner www.studiocostura.com

Cuando me quedé con ella intercambiamos cositas: ella me dio un patrón suyo y yo le di un kit de lencería de los míos. Así que no he comprado este patrón pero mi valoración del patrón no tiene que ver con ese hecho, jeje.

En este patrón vienen diferentes modelos: vestido, mono y ranita en tallas de 0-24 meses. Aunque a mi nena le valdría probablemente todavía por ejemplo el vestido, tengo que reconocer que me da mucha pereza planchar y evito a toda costa que ella tenga ropa que no sea de punto (#malamadre) y por eso decidí mejor hacer la ranita para regalar a un bebé más pequeño.

When I met her we exchanged some things: she gave me this pattern and I gave her one of my lingerie kits. So this means I didn't buy this pattern but my opinion is not affected by that fact, hehe.

This pattern has three variations: a dress, a jumpsuit and a romper in sizes 0-24 months. Altough my girl could probably fit into the dress in that pattern, I have to say that I'm super lazy about ironing clothes and I always try to avoid making/buying her clothes that are not made from knit fabrics (sorry, lazy mom here) and that's why I decided to make this romper for a baby boy as a gift instead.

patrones de Lara Sanner www.studiocostura.com

Lo que mola de los patrones de Lara Sanner es que tienen todo explicado paso a paso. Y si digo todo, es porque es TODO. Estaba leyendo las instrucciones y hasta me hice con palabras técnicas nuevas gracias a entender los dibujos al lado. Las revistas Burda y Patrones...allí voy que ahora me entero (un poquíto más) que decís en vuestras explicaciones en castellano, jajaaaa.

The cool thing about Lara Sanners patterns is that everything is explained step by step. And by everything I mean EVERYTHING. I was reading the instructions and actually learnt some new tecnical sewing terms in Spanish thanks to the drawings next to the text. Burda and Patrones magazines...here I come as I might even understand (a bit more) your instructions in Spanish, hahaa.

patrones de Lara Sanner www.studiocostura.com

Aparte del texto, como he dicho, vienen los dibujos técnicos que ayudan mucho y hacen muy claro el proceso y por eso me parecen patrones muy guays para gente que empieza a coser porque son fáciles de entender desde el principio hasta el final.

As I mentioned, apart from the text there are nice drawings to clear the steps out for you so that's why I think these patterns are very beginner friendly because you can really understand the process from the beginning until the end.

patrones de Lara Sanner www.studiocostura.com

Las técnicas generelaes como fruncir o coser botones a mano también tienen su sitio en las explicaciones, es muy completo todo y parece un pequeño libro de costura. Me alegro mucho de ver algo así en castellano!

The general sewing techniques like gathering or sewing buttons by hand also have their separate space in the instructions, it's really a complete guide and looks like a little sewing book. I really love seeing something like that in Spanish!

patrones de Lara Sanner www.studiocostura.com

Así que me ha parecido muy guay el concepto de este patrón. Me lié un poco con el cuello y estaba un rato pensando cómo encajarlo bien del todo pero creo que al final conseguí que esté de manera correcta. También aunque no vino en las explicaciones puse entretela también en la entrepierna para hacer más fuerte la parte donde van los snaps. Usé snaps tanto allí como en la abertura de la espalda porque es más fácil que coser ojales y porque los padres de este pequeño me van a dar las gracias cada vez que NO tienen que luchar con los botones para abrir la prenda (quizás todavía recuerdo demasiado bien como lo odiaba mi nena, jaja).

So I think the concept of her patterns is really cool. I was a bit confused with the collar part and where to attatch it exactly but I guess I fugured it out after some thinking (it's not too hard, right, haha). I also put inetrfacing both in the back opening and the opening between the legs to make it stronger for the snaps. I used snaps on both of the openings instead of buttons and buttonholes because it's easier for me and the lil' guys parents will thank me every time they DON'T have to fight with the buttons when changing the clothes on their baby (I guess I remember too well how my girl hated the dressing part, hahaa).

patrones de Lara Sanner www.studiocostura.com

Llego a escribir este post justo cuando Lara ha sacado más patrones y esta vez de punto, aleluya! Eso sí que alegra a los padres y a los bebés también, porque oyes, ser un bebé al final es como pasar el día en el gimnasio...que si gatear, que si subir, andar, caer... Así que en mi humilde opinión las prendas de punto son lo más.

I'm writing this post exactly when Lara is launching new patterns and this time for knit fabrics, haleluyah! This should make parents and babies very happy because come on, being a baby in the end is like you'd pass the day in the gym...crawling, standing up, walking, falling down... So in my humble opinion the clothes made with knit fabrics are the best thing.

Me alegro mucho de haber conocido a Lara y que haya gente que hace un trabajo tan bonito y acerca la costura a más gente que empieza con esta afición, a través de patrones e instrucciones bien hechos. Enhorabuena Lara por tus nuevos patrones y te sigo cerca para ver qué más está por llegar!

I'm really happy to have met Lara and that there are people who do this kind of great work and make sewing more accesible to beginner sewists through this kind of easy to read patterns. Congrats Lara for your new patterns and I'll follow you along to see what more is coming up!


Ropita de cumpleaños y tutorial para coser aplicaciones // Birthday garments and an appliqué tutorial

 
Appliqué tutorial www.studiocostura.com

Hola, parece que mis posts van intercambiando entre lencería y costura infantil jeje...(y efectivamente el siguiente es algo sobre lencería otra vez). Hoy os escribo un poco sobre las dos prendas que hice para mi pequeña por su cumple! 

Quería hacerle algo que ella pueda poner en la guarde el día de su cumple y como los vestidos no son del todo cómodos allí, pensaba en algo como sudadera o blusa. Encontré esta tela gris que ya había usado el año pasado para hacerle un mono que no ha salido por el blog pero quedó super bien y el invierno pasado lo usó mucho en el parque. Yo soy muy friolera y siempre le quiero poner ropa que no se le destape la espalda y me horroriza ver niños pequeños con sus abrigos cortítos enseñando el ombligo en pleno enero...por eso la mía iba con el mono, el gorrito y esta bufanda redonda hecha a mano que me regaló una alumna muy maja.

Hello, looks like my posts interchange between lingerie and sewing for kids, hehe (and the next one by the way is about lingerie, oh well...). Today I'm going to tell you about two little pieces I made for my girl for her birthday!

I wanted to make her something she could wear at the daycare on her birthday and as the dresses aren't really the most comfortable things to wear there I was thinking about maybe a blouse or a sweatshirt. I found this grey fabric that I used for an overall (not blogged) for her the last year, it was so cute on her and she used it a lot. I'm really not a cold wather person and I always try to dress her the way she wouldn't have her back exposed and that she wouldn't get gold out there and I kind of panic with those kids with their short winter clothes and their bellies out there in the wind in the middle of the winter...so my kid was going out with her jumpsuit, a beenie and a scarf that is a handmade gift from one of my nice students.

www.studiocostura.com

El patrón del mono es de Ottobre Design (no recuerdo ya el número...uno del año pasado probablemente). El gorro también es de Ottobre.

The pattern for the jumpsuit is from Ottobre Design (I don't remember the number anymore...but from last year I guess). The beenie is also from Ottobre.

Appliqué tutorial www.studiocostura.com

Así que se me ocurrió la idea de hacerle una sudadera con el "2" para su cumple. El patrón es el mismo que usé para las sudaderas que hice este verano, pero esta vez sin capucha. Le quité 1 cm a las piezas en la parte del cuello para que quepa mejor por la cabeza. De hecho es una talla 80 pero bastante grande.

So it occured to me that I could make a sweatshirt with a "2" on it for her birthday. The pattern is the same one as the hoodies I made this summer, but this time I took away the hood. I cut away 1 cm or so in the neck parts of the patterns so it's not so snug there. It's size 80 but it's kind of big anyway.

Appliqué tutorial www.studiocostura.com

Hacer la aplicación realmente es muy fácil y así puedes hacer cualquier cosa que se te ocurra con la tela: números, letras, simbolos. Yo vi esa técnica en el blog de Grainline Studio y voy a hacer un pequeño tutorial aquí también para que lo veáis.

Sewing the appliqué is actually really easy and you can use it in so many ways: for making numbers, letters, symbols. I saw this tutorial in Grainline Studios blog and I'm just going to recap a little bit here about the process too.

Appliqué tutorial www.studiocostura.com

Lo primero es cortar la pieza que vas a usar para tu aplicación. Puede ser tanto de telas planas como de punto. Yo imprimí en papel un 2 grande y lo usé como patrón. Recuérdate de cortarlo al revés, si no se te queda luego con el estampado al revés. El primer paso que hago es cortar un poquito de Fliselina en trozos pequeños para pegar la aplicación a la tela para que no se mueva mientras coso. El que ves en la foto viene en formato de tira y es como entretela pero de dos lados, así se pega entre las dos telas y tienes tu pieza fija. 

Puedes encontrar Fliselina como tela por metro y así podrías directamente cortar la misma pieza sin tener que usar trocítos como yo. También lo he visto en formato con papel en una cara, así primero lo pegas a tu aplicación y luego con las dos capas ya juntadas lo pegas a donde quieras que vaya. Y por último ahora parece ganar popularidad también un producto que se llama Wondertape o una cinta que cumple la misma función pero luego desaparece con el lavado. Lo que tengas a mano vale para este proyecto.

The first thing to do is to cut out the piece you are going to use for your appliqué. It can be done both in normal fabrics and knits. I printed out a big 2 on paper and then used it as a pattern. Remember to cut the pieces out mirrored, otherwise you'll have the print on the other side. First I cut out some Fliseline stay tape in small pieces so I can fix my piece in place and it won't move when I sew. The one you see on the photo comes in a tape version and it's like a interfacing but with the two sides that can be glued on the fabric, you just iron it between your pieces and that's it.

You can also find Fliseline per meter like fabric and then you just cut out your appliqué piece and  you don't have to use scraps like I did. I also saw it in a verison with one side having like a paper layer on it so you can first iron one side, then tear off the paper and iron the other side too. And one more version that you can use is the Wondertape that does the same thing but later dissapears when you wash your garment.

Appliqué tutorial www.studiocostura.com

He colocado el 2 en su sitio y le puse pequeños trozos de Fliselina abajo, no muchos, pero suficiente como para que se quede más o menos fijo. 

I've put the 2 in the place I want it to be and then added some Fliseline scraps between the two layers, not too many, but enough for it to stay where I want it to be.

Appliqué tutorial www.studiocostura.com

Un poco de plancha para que se peguen entre sí.

Press a little and the layers glue together.

Appliqué tutorial www.studiocostura.com

Y ahora a coser. Lo que hago es que le paso puntada de zigzag todo alrededor de los bordes, estando segura de pillar bien la orilla de la pieza. Yo usé un zigzag de 0.5 largo y 3 de ancho. Básicamente es la puntada de ojal si en tu máquina no puedes controlar el ancho directamente. Mi tela de sudadera es algo gruesa y no tuve problemas de que la máquina no quiere coser, pero si usas punto tipo camiseta puede que te pase que la tela se engancha en los dientes de la máquina. Pues no pasa nada, para eso hay un truco: pon entre tu trabajo y los dientes trozo de papel de seda o similar y la máquina va mucho mejor teniendo como una barrera para no "comer" tu tela.

Now the sewing part. I just sew a narrow zigzag stitch all the way around the pattern piece, making sure I catch the borders of it well. I used a zigzag with 0.5 lenght and 3 wide. Basicaly it's a buttonhole stitch so if your machine doesn't have so many different ones just use your buttonhole setting. My knit fabric is medium weight so I didn't have any problems when sewing it but if you use lighter weight knits you might have problems with fabric getting stuck between the feed dogs. No worrys, there's a trick for that: put some tracing paper between your sewing project and the feed dogs and the machine goes way better having something to block the feed dogs from "eating" your fabric. 

Appliqué tutorial www.studiocostura.com

Ahora toca rodear toda la pieza con el zigzag teniendo un poco de cuidado en las esquinas para que quede bonito. Lo que hago es seguir un poquito más después de llegar a la esquina de la aplicación, entonces clavo la aguja y giro para ver si tengo bien el ancho para que quede una esquina correcta. Nada más: así de fácil es coser este tipo de cosas y la verdad es que las posibilidades son infinitas!

En algunas telas de punto que tienen más elasticidad te conviene usar algo para estabilizar esa zona, hay entretelas que se pegan primero en el revés de la tela y después de coser la aplicación se quitan tirando las partes que no pillaste con tu costura, así se queda más reforzado. En mi caso no lo he usado porque mi tela es bastante estable pero sería una opción con telas más finas. Tengo para probar también un producto que es como plástico pero pensado también para bordar a máquina...ya os contaré.

Now you just have to stitch all the way around your piece making sure you sew beautiful corners. I just sew a bit past the corner and then put the needle down, turn the work to the next direction and see if I'm on a right width from my previous stitching line. That's it: it's quite easy to sew this kind of things and you have so many possibilities!

In some stretchier knits it's a good idea to use tear away stabilizer in that area, it's like a intercafing that is applied on the wrong side of the fabric before sewing and you tear away the parts that you didn't sew on after making your appliqué. In that case this area will be more stable. In my case I haven't used it as my fabric is quite stable, but it's sure a good option for light weight knits. I also have some clear elastic like product here for machine embroidery that I haven't tried out yet but I'll tell you when I do that.

Appliqué tutorial www.studiocostura.com

Mis puntadas no son perfectas porque al ir a veces más despacio y a veces más rápido al girar en las curvas pues es lo que tiene, igual si vas más despacíto tus puntadas salen más uniformes. Pero a mí me vale...normalmente la gente no anda con la lupa mirando las costuras, jaja.

My stitches aren't perfect because I went in some parts slower and the other ones faster when turning the curved sides, when you go slowly all the way around it sure is more beautiful. But I'm OK with that...normally people don't observe your appliqué stitching too much, hehe.

Appliqué tutorial www.studiocostura.com

Otra cosíta que cosí es este vestido en punto. Era para el día del cumple familiar. Descubrí que había que coser un vestido la noche anterior y aunque estaba muerta de cansancio decidí esforzarme por la buena causa (y para que en el futuro tenga fotos de todos los cumples de ella con los vestidos, claro, qué te crees, jaja). Dos horas desde sacar el patrón, modificarlo, cortar y coser. Remalladora, eres mi mejor amiga! Nada especial, pero algo así quería: que lo pueda llevar día a día pero que sea bonito también.

En el día del cumple se tiró encima un vaso de agua así que durante la fiesta su vestido estaba secando. No digo nada...

The other garment I made was this knit dress. It was for the family birthday party. I found out I had to sew a dress the night before and altough I was very tired I made an effort for the good cause (and that I would have photo of her in all her birthday dresses in the future, of course, hehe). It took me two hours to copy the pattern, alter it, cut the fabric and sew it up. Serger, you really are my best friend! Nothing special but it's as I wanted it to be: so she can wear it daily but that it would be pretty too.

At that day she spilled a glass of water on the dress and during the party the dress was drying out there. No comments...

Appliqué tutorial www.studiocostura.com

El patrón es de Ottobre Design 1/2015 (ojo con el ruso, jaja) y lo que cambié es que hice un corte bajo la sisa y aumenté el el ancho del patrón para tener esa falda con frunce. Usé elástico transparente para fruncir y me encanta porque hace un frunce muy uniforme. La tela es suave punto de algodón con 5% de elastán y muchos corazones.

Esto es todo por hoy, te animo a probar lo de aplicaciones, que queda muy bonito!


The pattern is from Ottobre Desing 1/2015 (Russian in your face, haha) and my alteration was to cut the bodice and widen the skirt so it would have some ruffle. I used clear elastic tape to shir the skirt and I love it as it makes really pretty shirring. The fabric is soft cotton and 5% spandex knit with lots of hearts on it :)

That's it for today, I recommend you to try out sewing appliqué, it's really pretty!


Alerta de estampados (lee: la ropa nueva de mi nena) // Print alert (read: my girls new clothes)

 
new kids clothes Sewing blog: www.studiocostura.com

Buenas, buenas! Hoy algo diferente para variar un poco del tema de lencería que ha invadido este blog de costura. Vamos con la actualización de armario de mi nena!

Hey hey! Today something different from the lingerie theme that's all over this sewing blog. Let's see my girls wardrobe upgrade!

new kids clothes Sewing blog: www.studiocostura.com

"Como ya ha llegado el otoño y su tiempo fresquito..." me gustaría empezar así este post. Pero no es verdad! Hace un sol por el mediodía en Madrid que flipas. No hay ni rastro del otoño. Pero no me quejo, soy más de calor, jaja. Eso sí, gracias al calentamiento global me ha dado más tiempo para preparar el cambio de temporada en el armario de mi nena. Oyes, pensamiento positivo, no? Total que encontré esta tela de softshell monísimo y también este patrón de sudadera que van juntos muy muy bien. El patrón es de sudadera (de la revista Ottobre Design  3/2016) para telas de punto pero con pequeñas modificaciones lo conseguí coser con mi tela también.

"As the autumn has arrived and the weather is getting cooler..." I'd like to start this post with these words. But it's not true! The sun at noon time here in Madrid is kicking hard. No sign from fall. But I don't complain, I'm more of a warmth fan anyway, hehe. Thanks to the global warming I've had more time to prepare my girls wardrobe for the seasonal change. Hey, positive thinking, right? So I found this cutest softshell fabric and also this hoodie pattern and they match up pretty good. The pattern is a hoodie (from Ottobre Design magazine 3/2016) drafted for knit fabrics but I made some small modifications and managed to use it with my fabric too.

new kids clothes Sewing blog: www.studiocostura.com

La tela es una maravilla, es súper ligera, no pesa nada! Está ya hecho de tal manera de que la capa exterior es con una superficie que protege contra viento (y algo de humedad me imagino...) y el otro lado es un forro polar muy finito. Así que no hay que forrarlo ni nada, como no se deshilacha dejé las costuras tal cual después de hacer pespuntes más bien decorativos en el lado derecho de la prenda.

The fabric is really nice, it's so light weight, it really is like air! It's made with a windproof (and I guess with somewhat humidity proof too...) exterior layer and a soft thin fleece layer on the inside. So no need for lining and as it doesn't fray, I just sewed the seams as usual and then topstitched them down from the right side.

new kids clothes Sewing blog: www.studiocostura.com

Las modificaciones que hice al patrón eran mínimas. Añadí más margenes de costura en general (1 cm) y algo más que eso para el doblez de la capucha y de la manga. No usé elástico transparente para el borde de la capucha porque por una parte me olvidé y por otra no sé si quedaría bien al no ser de punto. Hubiera podido hacer unos ojales para meter cordón para ajustar la capucha pero volvemos al punto uno: el olvido. Luego, como esta tela no tiene elasticidad, cambié la tela en los puños por una tela de punto y así mantiene su forma cómoda y se puede subir muy fácil para las manitas pequeñas. Y luego bajar los puños cuando crezcan. Y así la prenda dura un poquiiiito más porque crecen tan rápido estos bitchitos y cualquier truco me vale.

La talla que hice es de 80 cm y le queda bien (ella mide 83 cm ahora) con algo de manga corta o un body de manga larga abajo. Como esta tela no se da de sí, al hacer algo tipo abrigo se puede usar una talla más grande por si acaso, eso sí. Este abrigo está pensado para el tiempo un poco fresquito y no voy a poner un jersey abajo, si quisiera hacer eso, seguro que habría que coger la talla siguiente

The pattern alterations I made were minimal. I added more seam allowance (1 cm) and some more for folding back the hood and the sleeves. I didn't use clear elastic on the hood edge, first because I forgot and second because I'm not sure if it would be a good idea with a non knit fabric. I could have made some buttonholes for drawstring to adjust the hood but then again going back to the first point: bad memory. I then changed the cuff fabric for a knit one because the main fabric doesn't have stretch, so the cuffs are still comfortable to fold up for those little hands. And then  you can fold them back down when they grow. So the garment actually lasts a tiny bit more time as these little bugs grow up so fast, any sewing trick is good for me.

I made the size 80 cm and it suits her well (she's at 83 cm right now) when wearing something short sleeved or with long sleeved body under the hoodie. As this fabric doesn't have strtech you could go up a size for sure. This one is meant to be worn on chilly autumn days but I'm not going to put a sweater under it, if I wanted to do so, I'd definitely have to choose the next size.

new kids clothes Sewing blog: www.studiocostura.com

Obviamente hice mis errores con el abrigo, cómo no. Primero cosí mal la manga ranglán. Ya sabes, esa cosa relativamente fácil de unir las mangas con el cuerpo y luego el costado. Pues no, para qué facilitarte la vida. Total que pude arreglarlo sin descoser (yeahh) y conseguí también coser los pespuntes en toda regla. Luego la vista del bajo lo cargué también, para rematar. Un pliegue pequeño no me va a matar...lo repasaré a mano ya que está dentro. Lo malo de esta tela es que si descoses se ven las puntadas. Lo bueno es que es una buena excusa para mí para no descoser...

Obviously I made some mistakes with this hoodie. First I sewed the ranglan sleeves wrong, of course. You know that easy thing to attatch the sleeves to the bodice and then sew together the sleeves and the sides. Well no, why make your life easier? Anyway I could still save my poor work without unpicking (yeahhh) and I topstitched the whole thing quite like a pro. Later I also sewed the hem facing wrong just to finish it off great. A little fold doesn't kill me though...so I'll just hand stitch it somehow as it's on the inside. The bad thing about this fabric is that when you unpick, the stitches made will still be visible. The good thing is that this is a perfect excuse for me to not unpick...

new kids clothes Sewing blog: www.studiocostura.com

La sesión de fotos no ha sido muy fácil. La modelo quería ir a comer galletas. O helado, si no hubiera galletas. Y hacía calor!!! Es todo un falso otoño en las fotos. Tenía que limitar la sesión a cinco minutos porque la pobre iba sudando. Soy una madre muy maja, verdad??

The photo session was not a success. The model wanted to go to eat cookies. Or ice cream if there were no cookies available. And it was too warm!!! It's totally a false autumn you see on the photos. I had to limit the photo session to five minutes because the poor girl was sweating inside the hoodie. I'm the nicest mom, right?

new kids clothes Sewing blog: www.studiocostura.com

Por cierto, siempre le coso cosas con colores "de chico". Hoy vamos de rosa: saludos a la abuela, por favor!

By the way, I always sew her the clothes in "boy colors". Today we're pink: greetings to her granny, please!

new kids clothes Sewing blog: www.studiocostura.com

Y aquí la segunda parte de los estampados! Tres pares de leggings recién salidos del horno. No voy a contar con el detalle que los empecé a coser hace un año. Slow fashion al límite, jaja. Por cierto: parece que necesito urgentemente un clavo para colgar la percha para las fotos...

So now the second part of the cool prints! Three pairs of leggings hot off the oven. Not counting with the fact that I started to sew them a year ago. Slow fashion on the limit, hehe. By the way: looks like I urgently need a nail on my wall for the hanger on my photos...

new kids clothes Sewing blog: www.studiocostura.com

Vale, el cuento es que ya hace un año y más que le hice un montón de leggings con telas de estampados súper guays. Me gustaron tanto que pensé que voy a coser más para venderlos. Compré la tela y empecé a hacer muestras ya en tallas más grandes. Fin de la historia.

Otras cosas por el medio y nunca llegué a realizar el proyecto pero las muestras que sólo les faltaban las cinturillas se quedaron allí. Y ahora un año después los he terminado, van justo para la nena ahora con su altura.

So the story is that a year or so ago I made my girl a lot of baby leggings with the coolest prints. I loved them so much that I thought that I'd make some more and sell them. I bought the fabric and started to make the samples in bigger sizes. End of the story.

With other things on the way I never finished the project of the samples and there they were with their waistbands waiting to be attatched. And now one year later they are exactly  in the right size for my girl.

new kids clothes Sewing blog: www.studiocostura.com

Así que de los tres pares mi gran trabajo ahora ha sido coser las cinturillas, jaja. Me gusta mucho el detalle de los parches en las rodillas. Una cosa sí que aprendí con mis primeras muestras también. Primero los cosí con el mismo método que he compartido en este tutorial para coser curvas. Pero cuando regalé un par a mi amiga, lo que pasó es que su bebé en la fase de gateo/arrastre todoterreno intensivo lo primero que destrozó eran los parches. Como tenían costuras con bordes ligeramente más altos pues eso enseguida se descosió! Menos mal que lo descubrí antes de hacer un montón de pares así. Eso dicho con los 8 pares o así que usó mi nena nunca pasó lo mismo y hasta hoy día (ahora de formato "casi pantalón corto") los tiene en una forma muy aceptable y algún enanito podría perfectamente usarlos de nuevo.

So the big sewing task of mine on these three pairs has been attatching the waistbands, hehe. I really love the knee patch deatail. I actually did learn a lesson when making the samples too. At first I used the same way I've described in this tutorial to sew the patches on. But when I gave a pair as a gift for one of my friends, what happened was that her baby who was on the phase of crawling/rolling around all day every day, destroyed the knee patches immidiately. As the edges of the patches were slightly higher they were ripped off fast. That was actually a good thing to discover before sewing up a lot of pairs. That said my girl used the same pants and nothing like this happened and until today (now on the "almost shorts" version) the leggings are in a good shape and some little person could easily use them again.

new kids clothes Sewing blog: www.studiocostura.com

Así que esta vez simplemente corté los parches y los cosí con una de las puntadas de falso coverstitch que tiene mi máquina normal. Cómo no deshilacha pues está guay, creo. Otra cosa más. El patrón es mío y al principio puse los parches en el medio de la rodilla pero luego vi que siempre se veían como demasiado en el interior de la pierna una vez puestos. Por eso después medí el sitio exacto ya puesto el pantalón y los coloqué allí, así cuando están puestos quedan justo en la rodilla. Antes de coser los pegaba con la Friselina de doble cara con la plancha para que no se muevan al coser.

So this time I just cut the patches and sewed them on using a mock coverstitch stitch on my reular machine. As the knit fabric doesn't fray I think it's ok. One more thing. The pattern was drafted by me and first I put the patches at the center of the knee but later I saw that they seemed too much on the inner side of the leg once the baby was wearing them. That's why I later sewed them more on the side of the knee so they end up exactly on the right spot when wearing them. Before sewing I ironed them on with some double side Friseline stay tape to prevent them from moving around when sewing.

new kids clothes Sewing blog: www.studiocostura.com

Tanto los puños del abrigo igual como la parte de abajo en los leggings los coso de forma de que uno antes la pieza en círculo y luego lo doblo y entonces lo uno con la prenda, con el derecho con derecho. De esa manera al doblarlo arriba se ve todo bonito y limpio. Y venga, otra vez más tiempo usando la ropita!

I sew all my hoodie cuffs and leggings bottom parts in a way that I first close the piece as a circle, then fold it in half and then attatch it to the main piece, right sides facing. That way when you fold it up it still looks pretty and clean. And again, more wearing time for the little ones!

new kids clothes Sewing blog: www.studiocostura.com

Aquí pongo una foto del verano 2015 de las chicas con sus leggings puestos haciendo malabares. 

Here's a photo from summer 2015 with those two girls playing around in their leggings.


Y para terminar, mirad a quienes conocí el finde pasado! Sonia del blog La Pequeña Aprendiz y Arancha de What Aran Loves pasaron por mi taller para comprar sus kits de lencería y charlamos sobre costuras, patrones y mucho más, esas chicas son majísimas. Las dos son blogueras de costura viviendo aquí en Madrid y me alegro un montón por haberlas conocido en persona!!! 

And to finish things up, look who I met last weekend! Sonia from La Pequeña Aprendiz and Arancha from What Aran Loves passed by my atelier to buy their lingerie kits and we talked about sewing, patterns and much more, they are so sweet. Both of them live in Madrid and write sewing blogs and I'm so happy I finally met them in person!!!