

Today I’m sharing with you my newest make - this softshell anorak! I’ve already written about several softshell jackets I’ve made (see this first one for my daughter here and the Serra jacket and another jacket I made for her here) so you probably already know that I like this fabric a lot.
If you are not familiar with this fabric I’ll tell you a bit about it. This fabric is ideal for lightweight fall/spring jackets as it’s wind and rain proof (it’s not entirely waterproof so you can’t really use it in pouring rain but I have used it without an umbrella with light rain and it worked well). The exterior layer is a technical fabric that makes the fabric wind and rain proof and the interior layer is a lightweight fleece and the combination is just perfect for casual outerwear. You’ve probably seen this fabric used a lot for activewear!
There are several places you can get softshell these days but I will mention the shop I ordered it this time, it’s called Active Fabrics. I already mentioned this online shop (based in Germany) in my boiled wool post as we also tried their wool which is great and very reasonably priced (Laura used their wool for this pretty Clare coat). I ordered my softshell from this shop too as they have several types and lots of solid colors to choose from. The one I chose is the Arctic Softshell but I also ordered swatches for other types of softshell they have available and all of them looked just fine. The flat rate shipping is a bit expensive as they send the orders with DHL but we did order many different fabrics among the students at the academy so it was well worth the money and they delivered to Spain really fast!

So now about my anorak. I knew I wanted to make myself another fall jacket in softshell but in a more “neutral” color. I’d say that the print I used for my Serra jacket wasn’t the craziest I’ve seen (and as it was me who picket it, I obviously liked it, hehe) and I’ve been wearing the jacket a lot...but you have probably already noticed my tendency to wear more neutral colors so I was left with an itch to have another more “combinable” jacket too.
I’ve actually made an anorak style jacket before (this Kelly anorak) which I liked a lot but as I used a quite random canvas fabric when I made it several years ago it started to have some pilling and I knew I had to make another one. I actually wanted initially to use the Kelly pattern but the yoke and two part sleeve aren’t such a good fit with this activewear fabric. Also, I knew I wanted the zipper to go up until the raised neckline of the hood for maximum warmth.
When I received the latest Ottobre Design women's issue (5/2020) this summer I knew that the anorak pattern was just perfect for me...and I also liked the dark green color as I already have some outerwear in this color and I find it super easy to mix with all my other neutral/boring color choices, haha (I chose the Olive color from the shop for my jacket). The pattern in the magazine is not directly made for softshell but it’s very easy to adapt as sewing with softshell is very comfortable: you don’t need to worry about any seam finishing (well, I did use some bias tape but more about that below) as the fabric doesn’t fray.
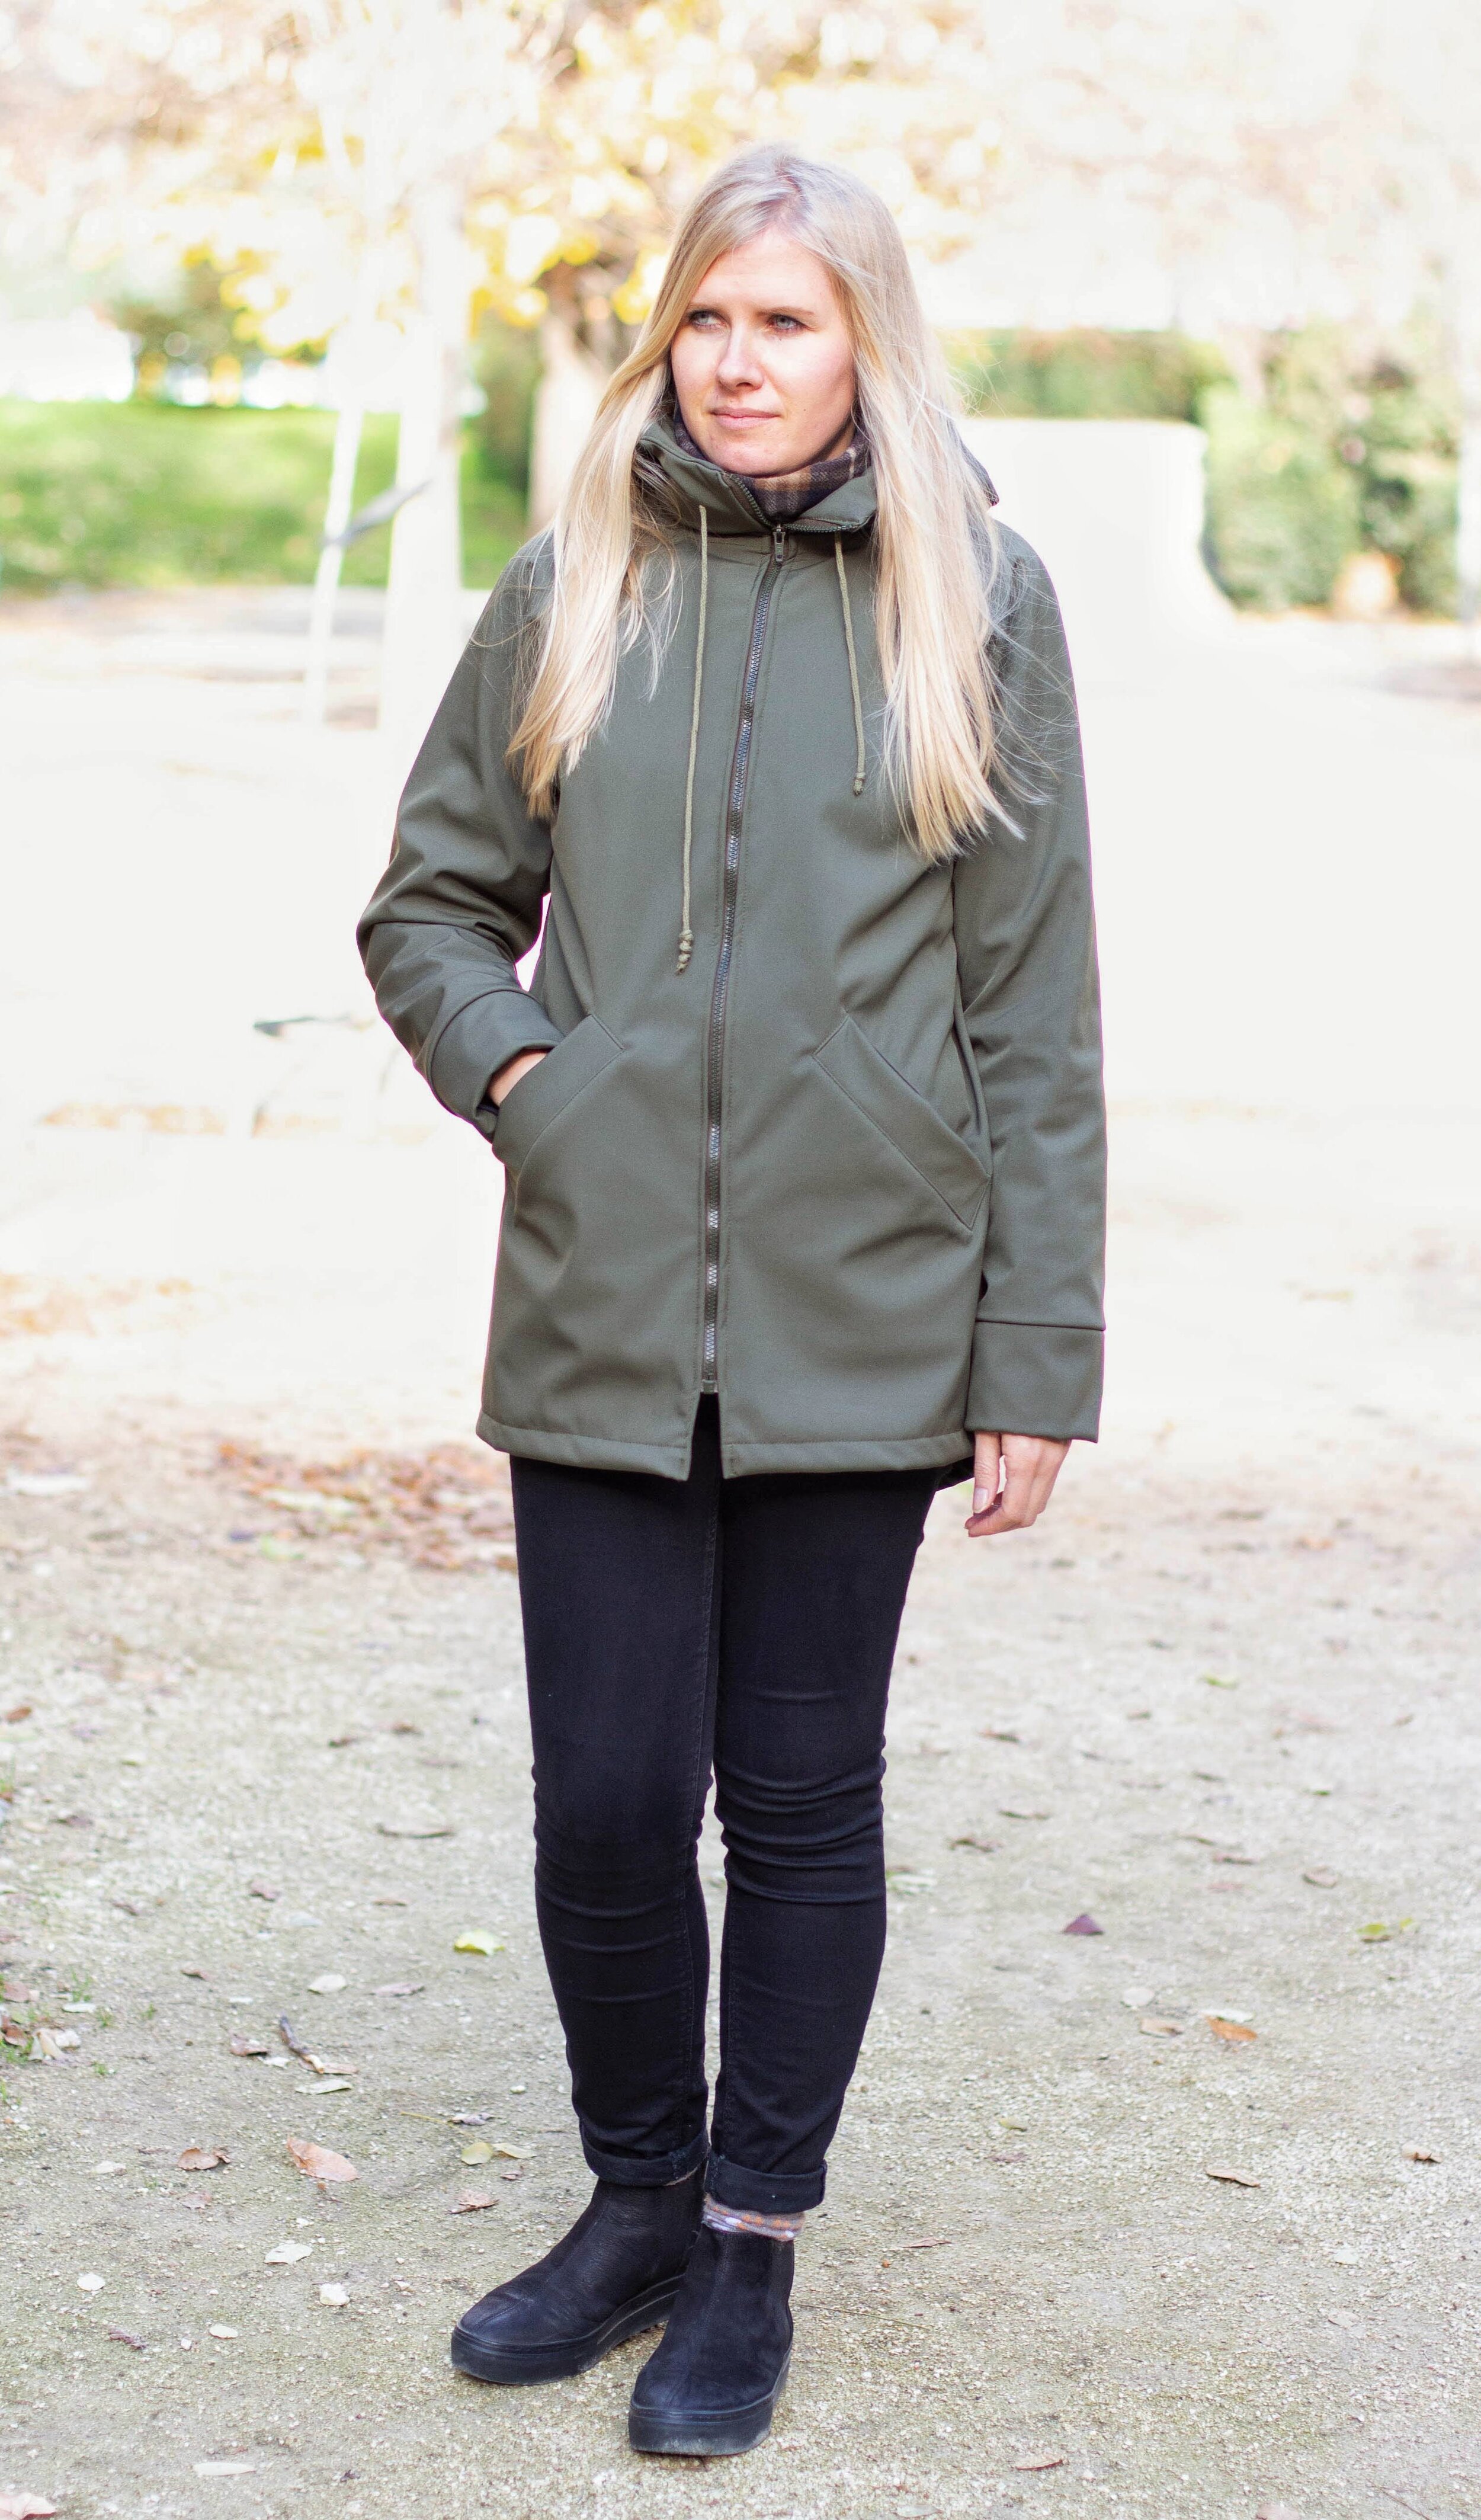
I of course made some changes...the first one being adjusting the pattern to have raglan seams instead of dropped shoulders. This modification is a bit complicated to explain here without diagrams but it’s not super hard to do for relaxed fit like in this anorak. But...if you’re like me and forget stuff, you can easily almost ruin your project, haha. I did modify the raglan seams a bit in a hurry (to cut the pieces at the academy so I could sew at home during the weekend with my industrial sewing machine) and forgot one crucial step which I found out about when I had already sewn together the body and the sleeves.
Long story short: I almost didn’t finish the project because I had some crazy wrinkles in the armhole area due to my poor patternmaking mistake but I somehow managed to correct this by cutting the sleeves off (yes, cutting, not ripping the seams, I was that devastated, haha) and recutting the armhole shape. I had to sacrifice about 5-7 cm of the sleeve and general length with this “hack” but it wasn’t that bad because I could just add cuffs for the sleeves and be OK with the body being a bit shorter (although my daughter made jokes about seeing my butt from the hem opening on the back piece…). Anyway….after being able to save the project everything else was quite easy, haha.

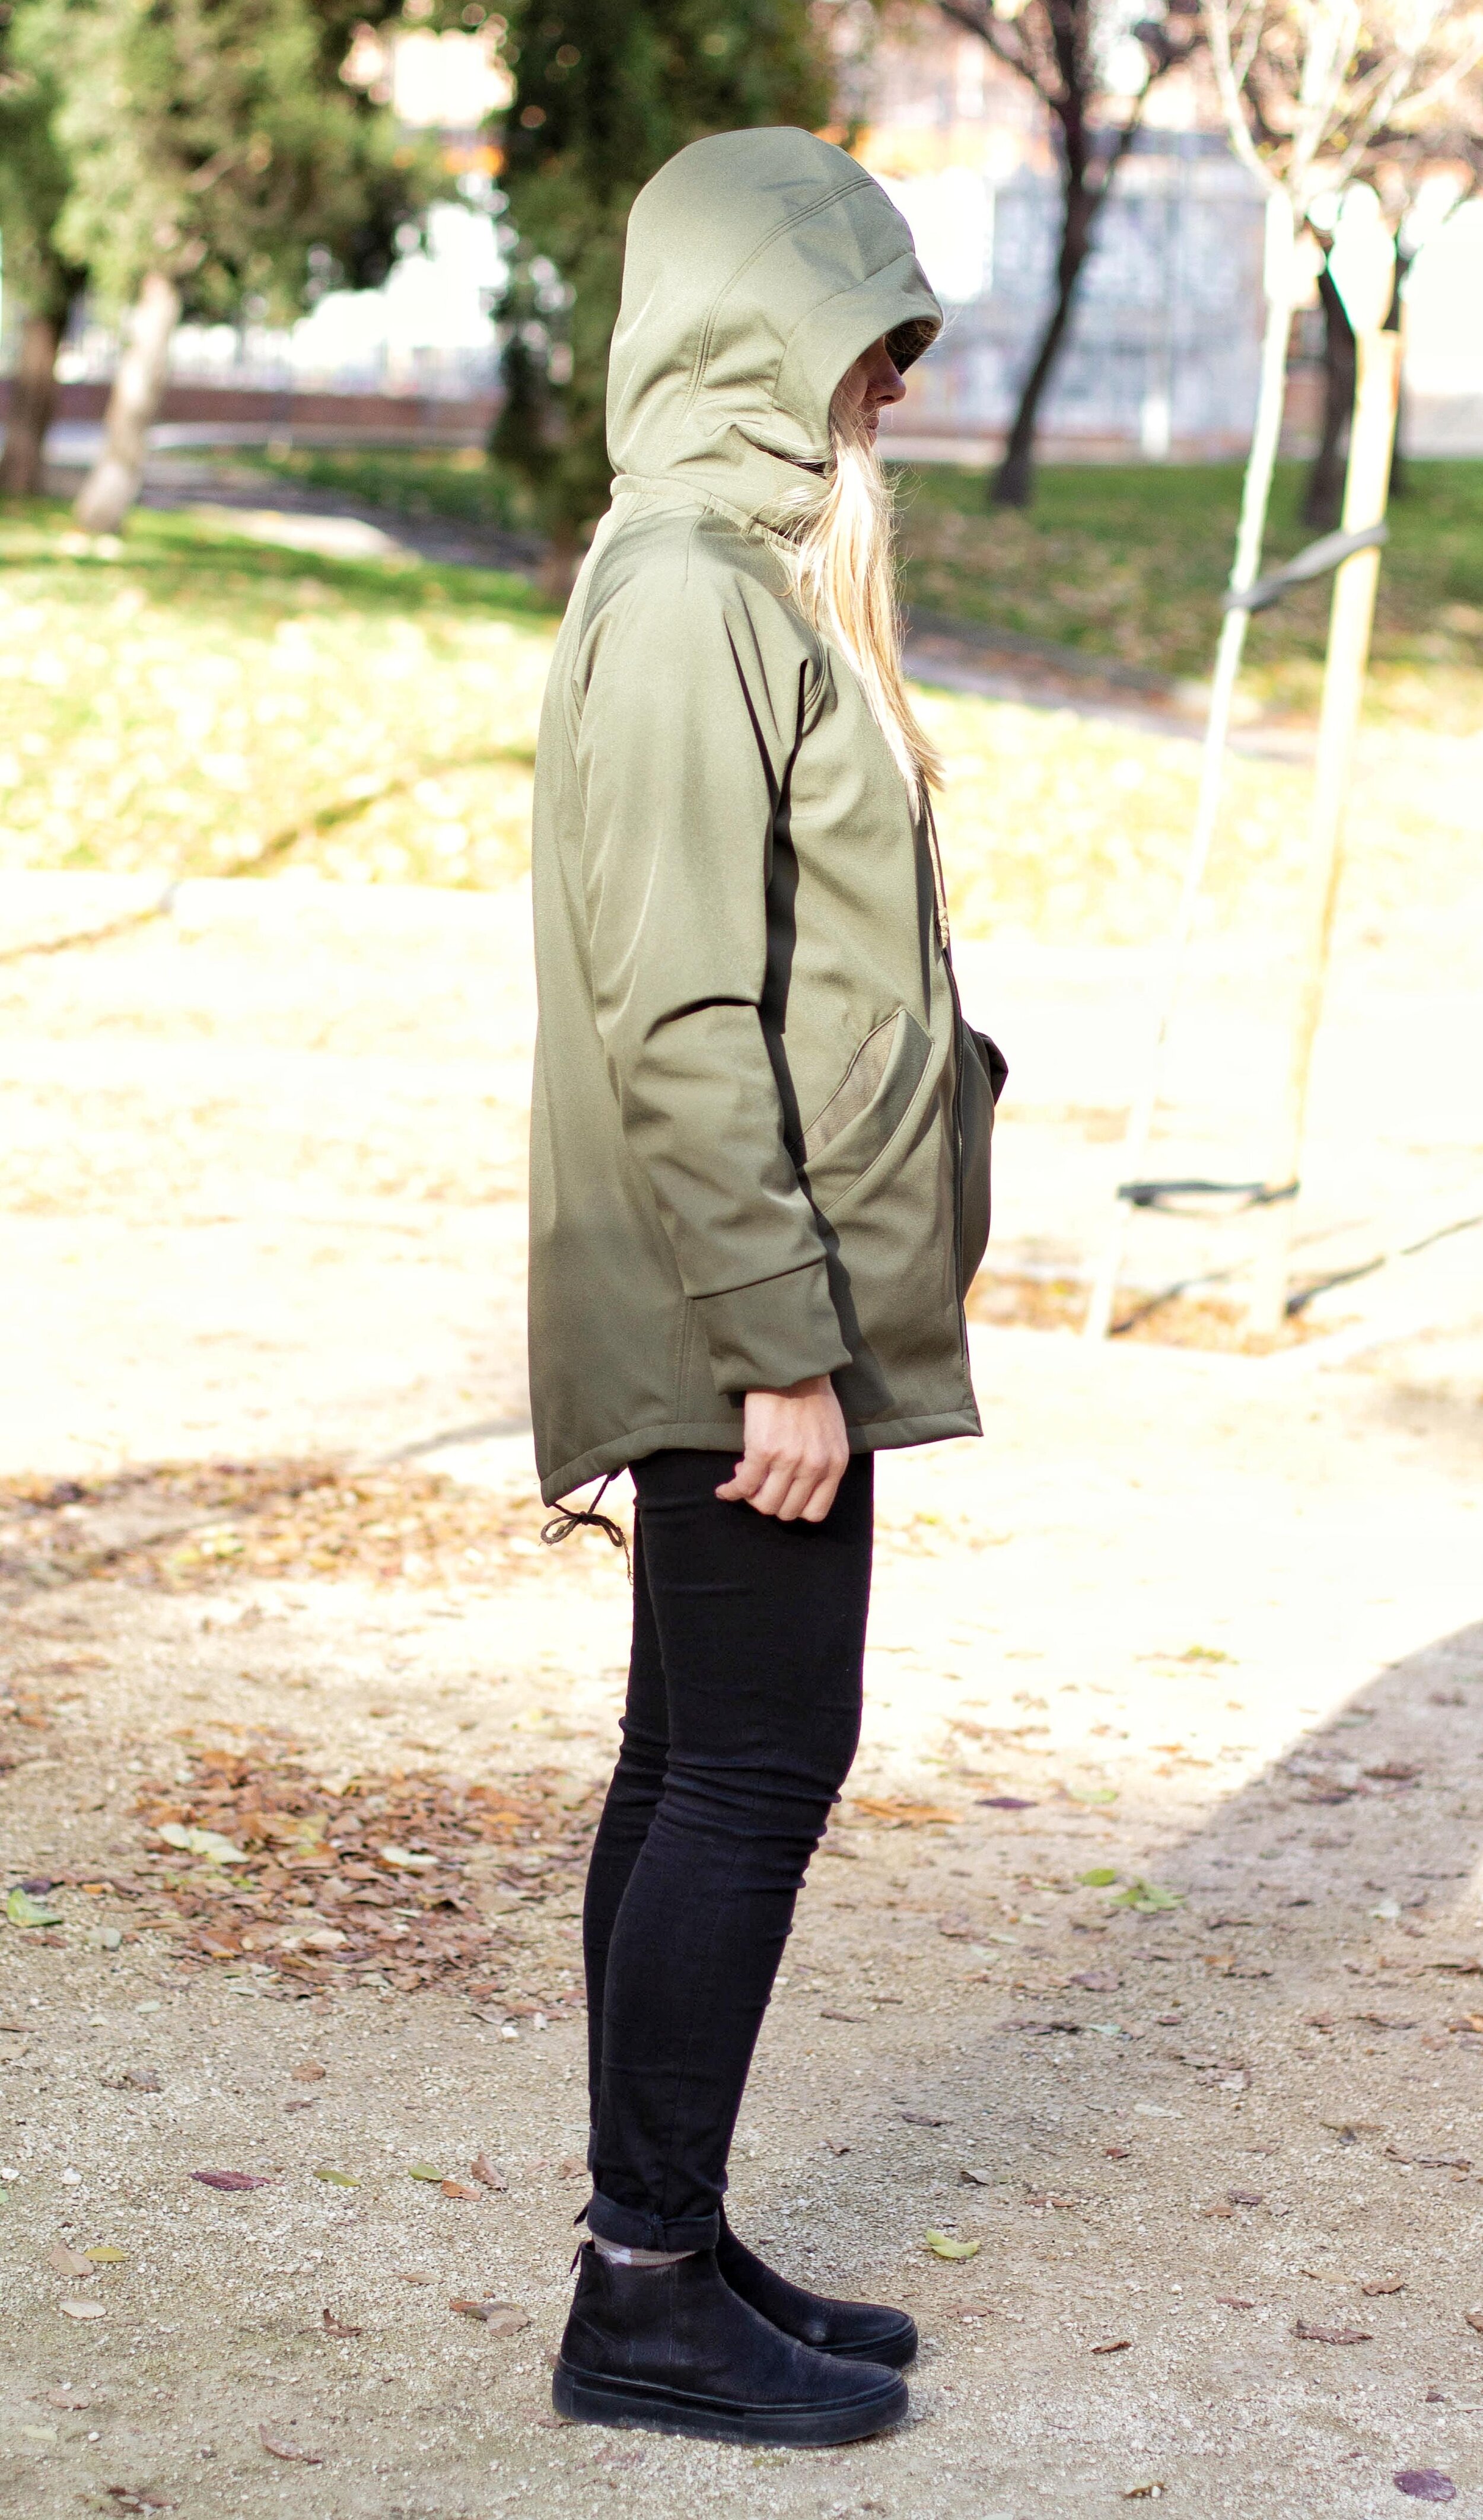
I didn’t use the original pockets as I wanted to have bigger welt pockets. Also, sewing welt pockets is way more exciting as you actually have to cut into your almost finished project (if you’re like me who’s basically winging it and marks/sews the pockets as the last thing, haha) so you can be scared about making a mistake you can’t really fix, hahaha. Anyway, I managed to make the pockets with quite a lot of success and the best part is that I used the soft fleece side of the fabric for the interior lining of the pockets so it’s super nice to put my hands in the pockets now! Also, you can check out the welt pocket tutorials (and other neat sewing techniques) on this resources page over at Ottobre Designs website (I already mentioned this page in one of my newsletters...if you want to get my best finds about nerdy sewing stuff in your inbox you can sign up here!).
The cuffs were a happy accident due to my sleeve wrinkle incident but I actually like them a lot this way and I don’t think I would have thought about doing this cuff detail otherwise. You can’t really see it but on the inside these cuffs also have a ribbed knit cuff...because you’ve got to keep this body warm, hehe. Rib knit cuffs are super comfortable and you can really add them to any sleeves, with or without cuffs!
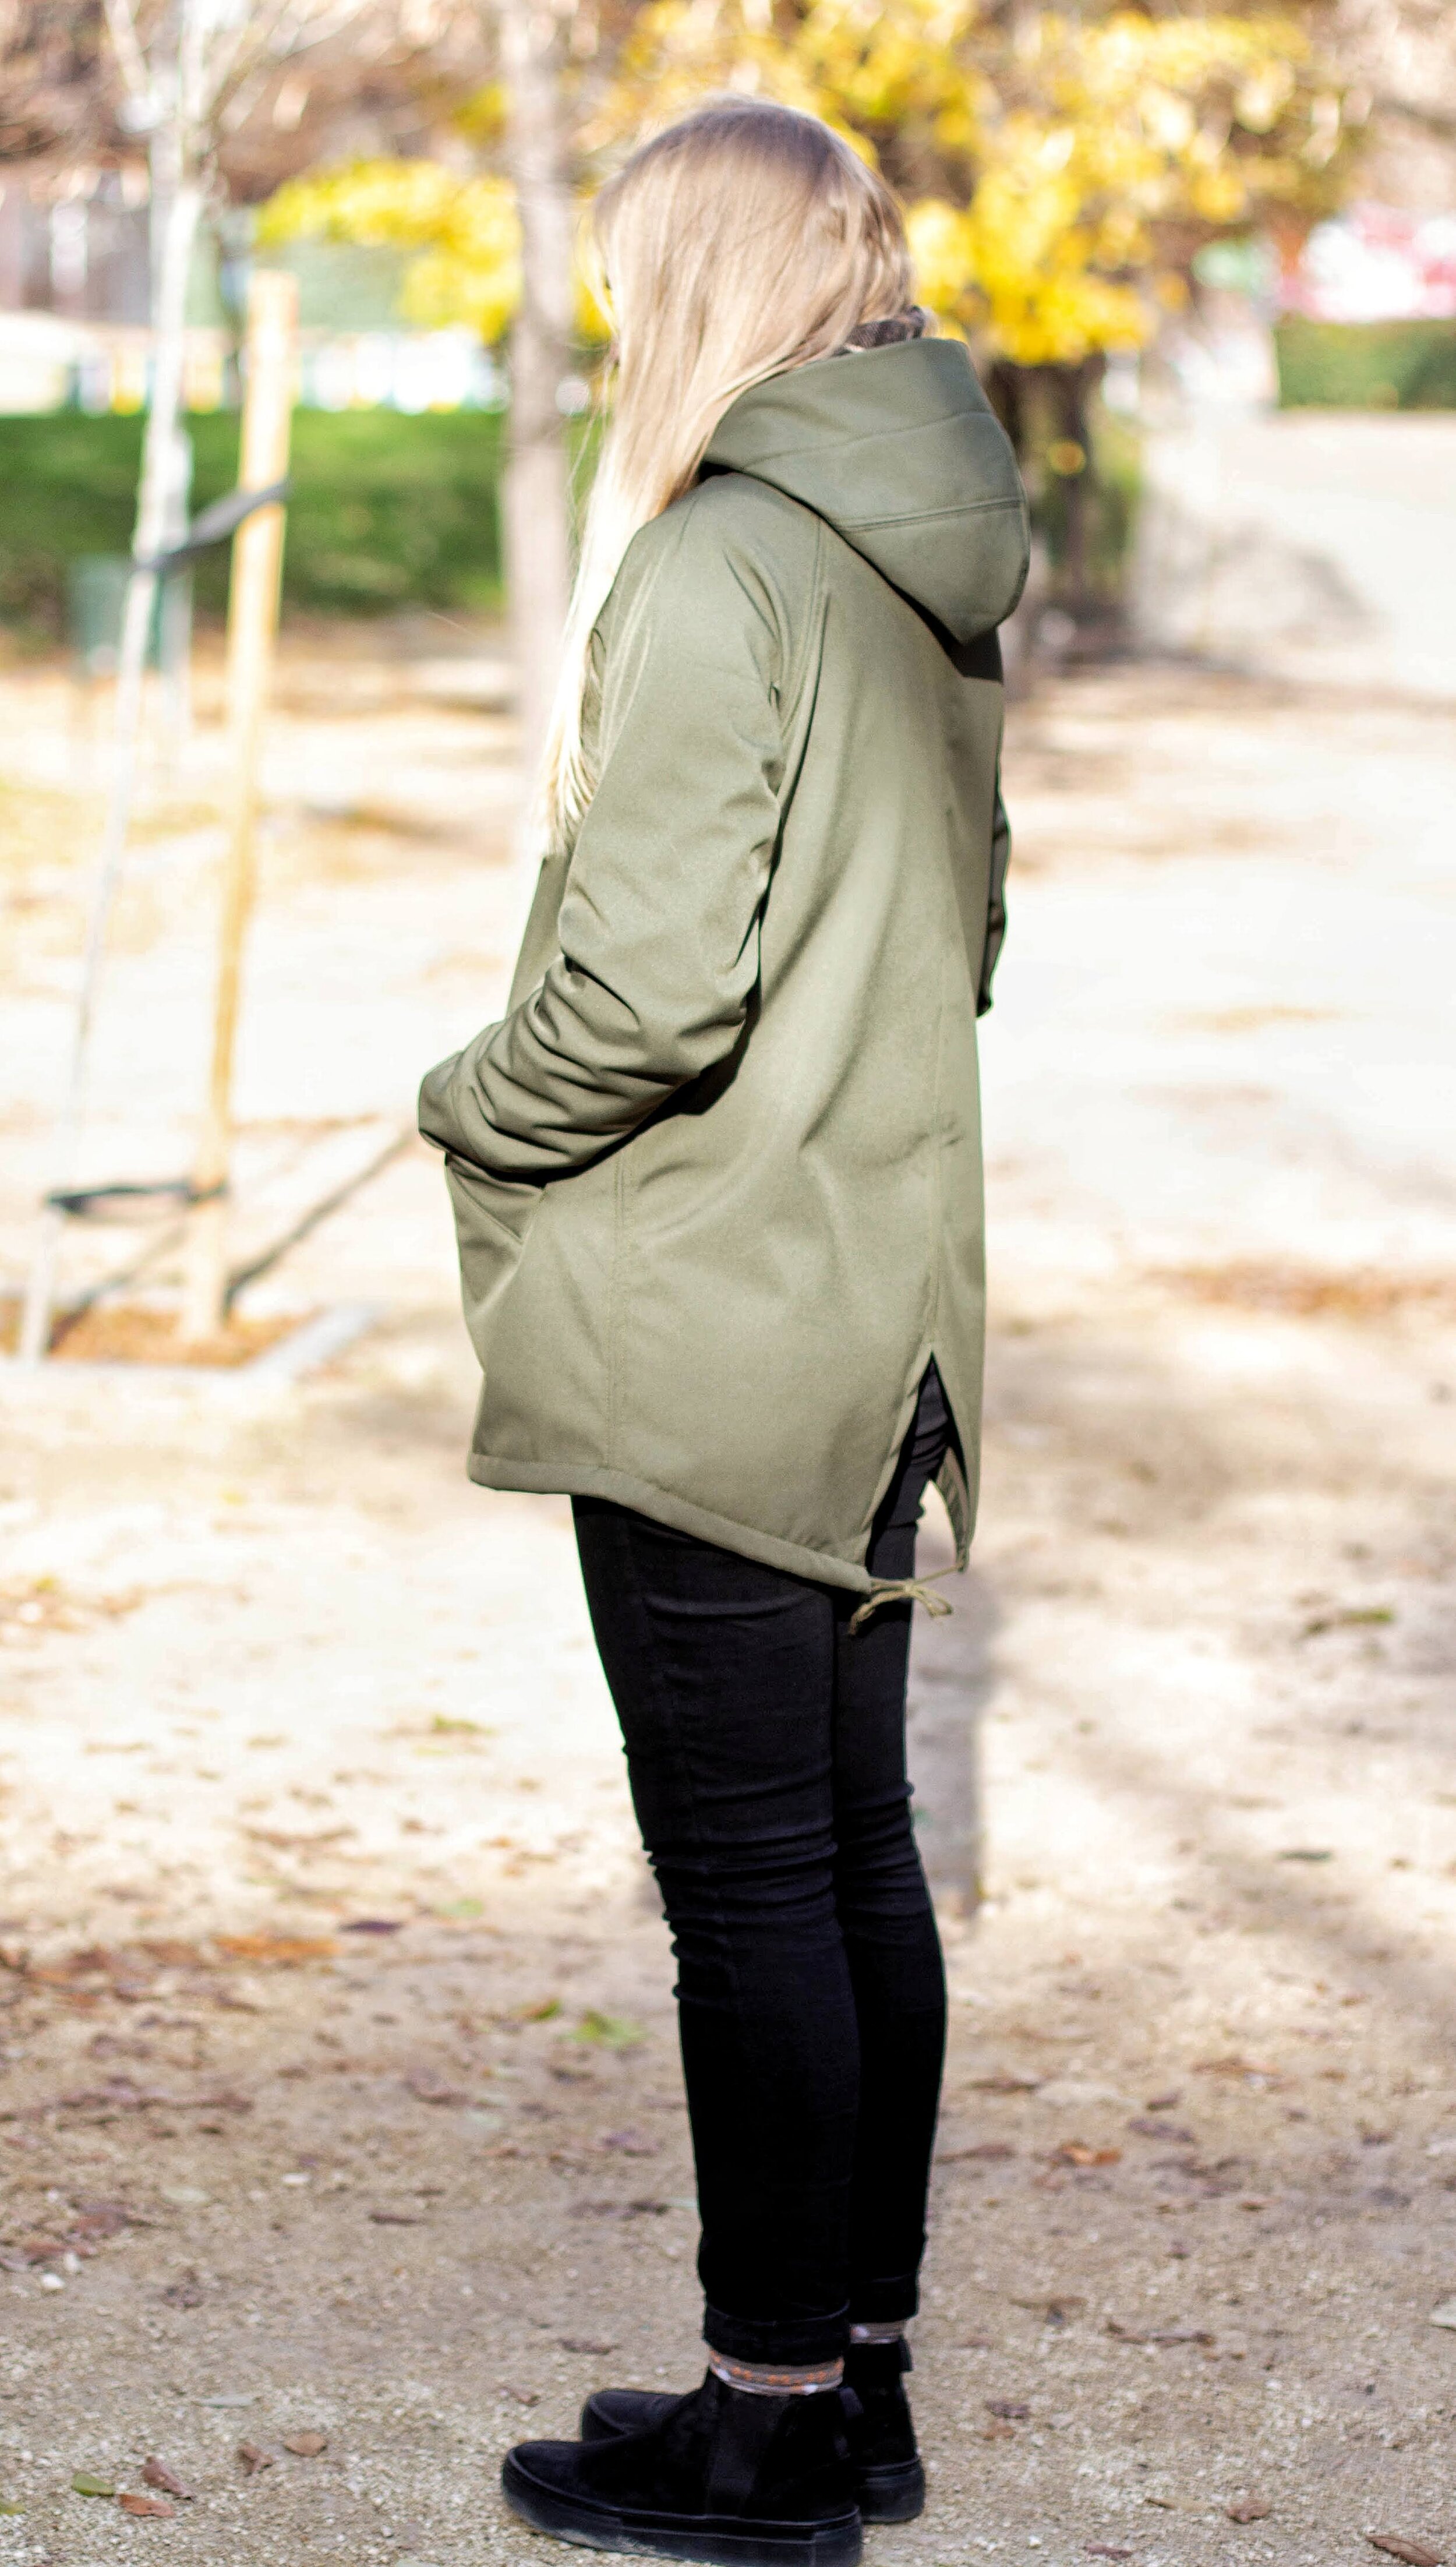
As I mentioned before the fabric doesn’t fray but as usual when sewing with softshell fabrics I did open the seam allowances and topstitched through both layers on the right side of the fabric. I like how it looks and the fabric will lay nice and flat this way too. I did use bias tape to cover the body/hood seam as it gets kind of bulky and I like to cover it for a neater finish. I also used this Circa 2020 label from KTML to remember this very weird year!
I really like how this anorak came out and I’ve been wearing it a lot since I finished it! The fit is really good, I like the color a lot and these roomy soft and warm pockets make it so nice. The hood could be a bit smaller but it’s OK...I don’t know what’s up with my hood lately, haha, I always prefer bigger hoods but then they end up too big and they just fall on my eyes when I actually wear them. Oh well...at least it doesn’t rain so much in Madrid :)
So yes, I’d definitely suggest you try sewing something with softshell if you haven’t tried it out yet! I think the result is really professional and also comfortable + you can choose between many different styles. Thanks for reading and I’ll see you around here in two weeks when I’ll publish my annual project recap post. I’m really glad that this versatile piece is one of the makes of 2020 :)
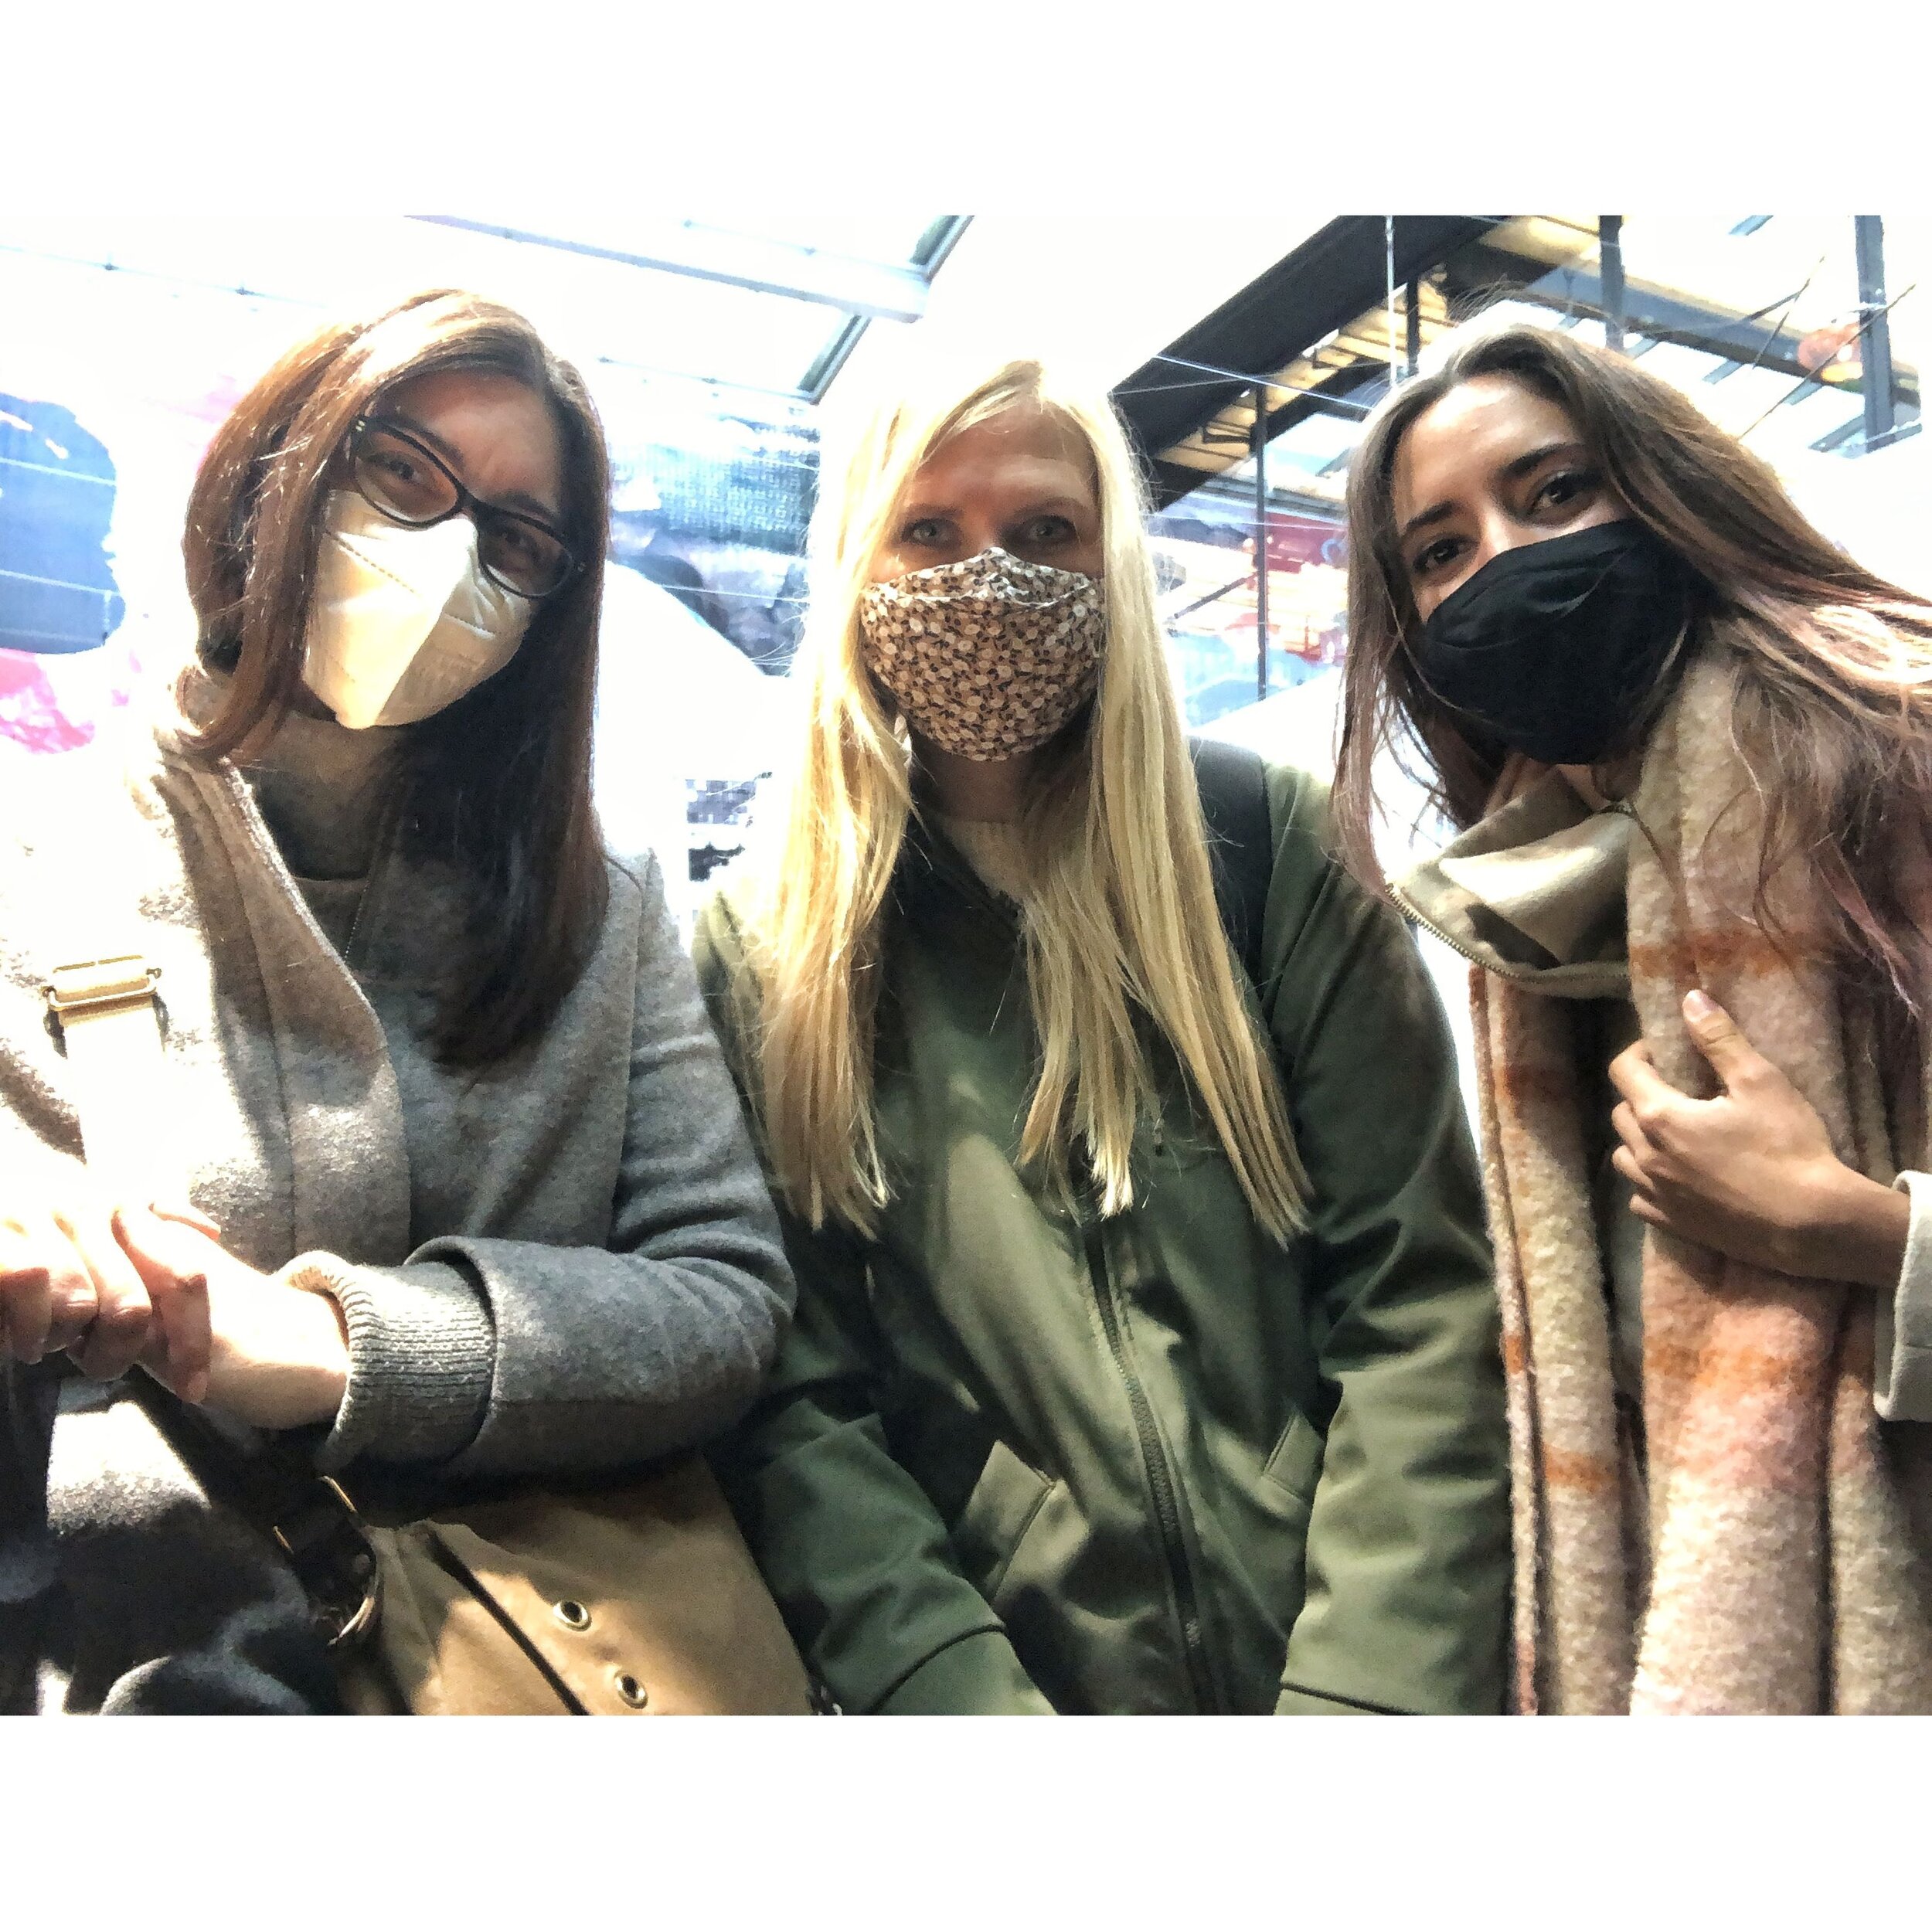
I also wanted to add this photo of Alex, Laura and me from this Friday! We went to an exhibition at the San Antón market in Madrid organized by Instituto Iberoamericano de Finlandia. The exposition was about Finnish textile design and it’s open until 15th of December if you’re in Madrid :)
