
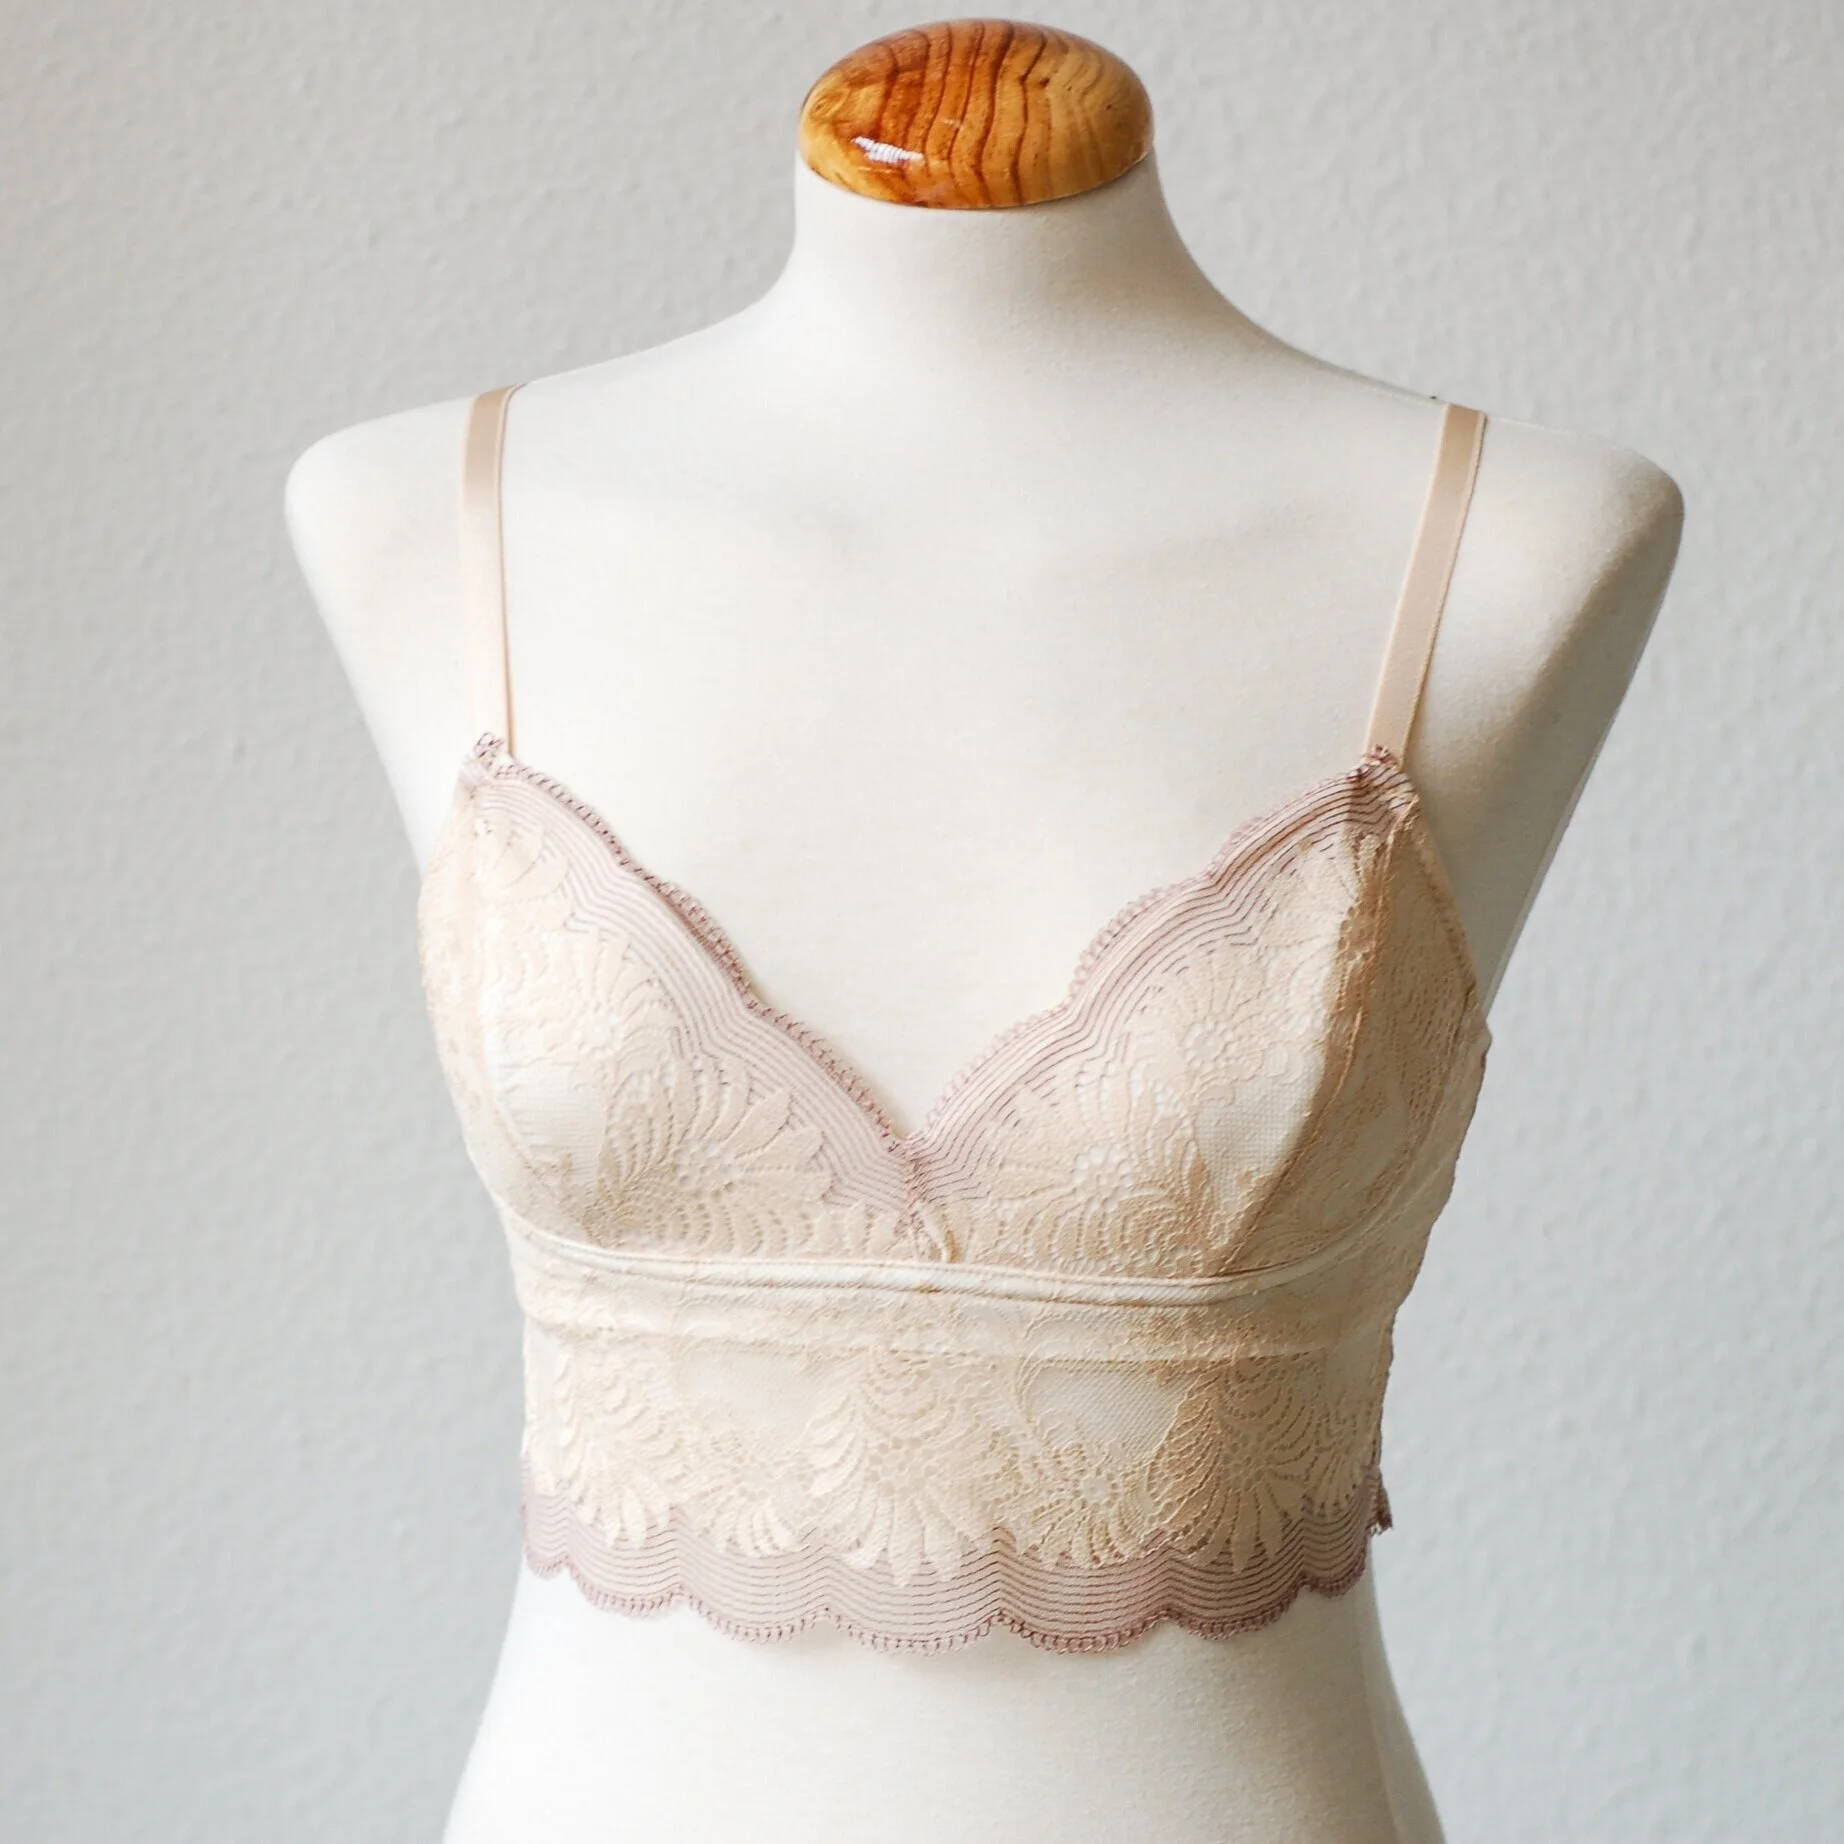
Ha llegado el turno de presentaros el tutorial sobre cómo modificar el bralette Mara para coserlo con puntilla ancha en la banda. Para muestras de este tipo de bralettes puedes ver este post sobre la inspiración de Mara donde recopilé un montón de ideas que son super bonitas. Cuando diseñé este patrón dejé la parte de la banda a propósito recta para que se pueda fácilmente modificar.
Os voy a enseñar la manera cómo hacerlo pero este solo es un metódo entre muchos que se pueden usar para conseguir este efecto. Yo he usado una banda bastante ancha para que se vea el bonito encaje (uno que me mandó Ying de Tailor Made Shop cuando hicimos el intercambio de encajes) pero también podéis usar el mismo método para bandas más estrechas pero con puntilla visible igual.
It’s time to show you the tutorial about how to hack the Mara bralette sewing pattern so you can use wide scalloped edge lace for the band part of the bralette. You can check out different inspiration ideas about this hack in this Mara inspiration post where I gathered a lot of cute photos. When I designed this pattern I left the hemline straight so it can be easily modified to make an asjustment like that.
I’ll show you the method I use altough there are of course others that you can try out. I lengthened the band quite a lot so this beautiful lace really shows off (this one is from Tailor Made Shop, Ying and I had a lace swap and she sent me this lace…I had this lace in my stash for a long time now and I was waiting for a special project to use it up). You can also use the same method for narrower bands when you want the scalloped edge to be seen.

En esta versión lo que he hecho es dejar el encaje y el forro de la banda en capas separadas, el forro tiene el ancho normal para luego poder poner el cierre de un tamaño “normal” que sino habría que usar un cierre más ancho si se prefiere (usando por ejemplo este tipo de cierres que se pueden cortar a medida). Las dos capas se cosen por separado y el encaje forma una capa superior que es ligeramente más ancha para que tenga buena caída . Te cuento las modificaciones que he hecho, las partes que modifico son las piezas de la banda delantera (C) y la banda trasera (D), el resto de las piezas, o sea las copas, se quedan como su forma original.
1) el largo del patrón depende del ancho de tu encaje y el largo que tú quieras que tenga la banda. La mía mide aprox 10 cm, he añadido este espacio debajo de las dos piezas.
2) para que la capa de encaje sea “flotante”comparado con el forro he añadido 5 mm de margen extra en los bordes que luego se cosen como el lateral (la parte izquierda de la banda frontal C y la parte derecha de la banda trasera D)
3) en la parte del cierre (en la parte izquierda de la banda trasera D) en el nuevo bajo le doy 10 mm de margen hacia la izquierda porque una vez que el encaje y el forro están unidas en la parte de arriba (punto 8 de este tutorial) y tienes el bralette puesto, el encaje al ser suelto tiene la tendencia de “caer” hacia los lados. Para que el encaje se quede en “recto” le doy estos 10 mm para compensar ese giro natural. Este paso puede quedar confuso ahora mismo pero lo verás bien después.
In this version I left the lace and the lining pieces as separate layers, the lining has the same size as the original pattern in order to use a regular width bra closure (but you could use a wider closure, for example this closure tape). The layers are sewn separately and the lace layer is a bit wider so it will be comfortably “hanging” on top of the lining. I’ll show you the modifications I’ve made, the pattern pieces I’m changing are the front band (C) and the back band (D), the rest of the pieces, the inner and outer cups, will be cut as in the original version of the pattern.
1) the new lenght of the pattern pieces will depend on how long you want the band to be. Mine measures aprox 10 cm, I’ve added this amount to my original pattern pieces.
2) to make the exterior “floating” lace layer I’ve added 5 mm to the side seams on both pieces (the left side of the front band C and the right side of the back band D)
3) on the closure part (on the left side of the back band D) I’m adding 10 mm on the new hemline on the left because once the lace and the lining are sewn together on the upper part (step 8 of this tutorial) and you are wearing the bralette, the lace layers will be “falling” towards the sides. In order to have the lace “fall” straight I’m compensating the pattern with these 10 mm of extra space. This part can be a bit confusing right now but you’ll it see once we get there.
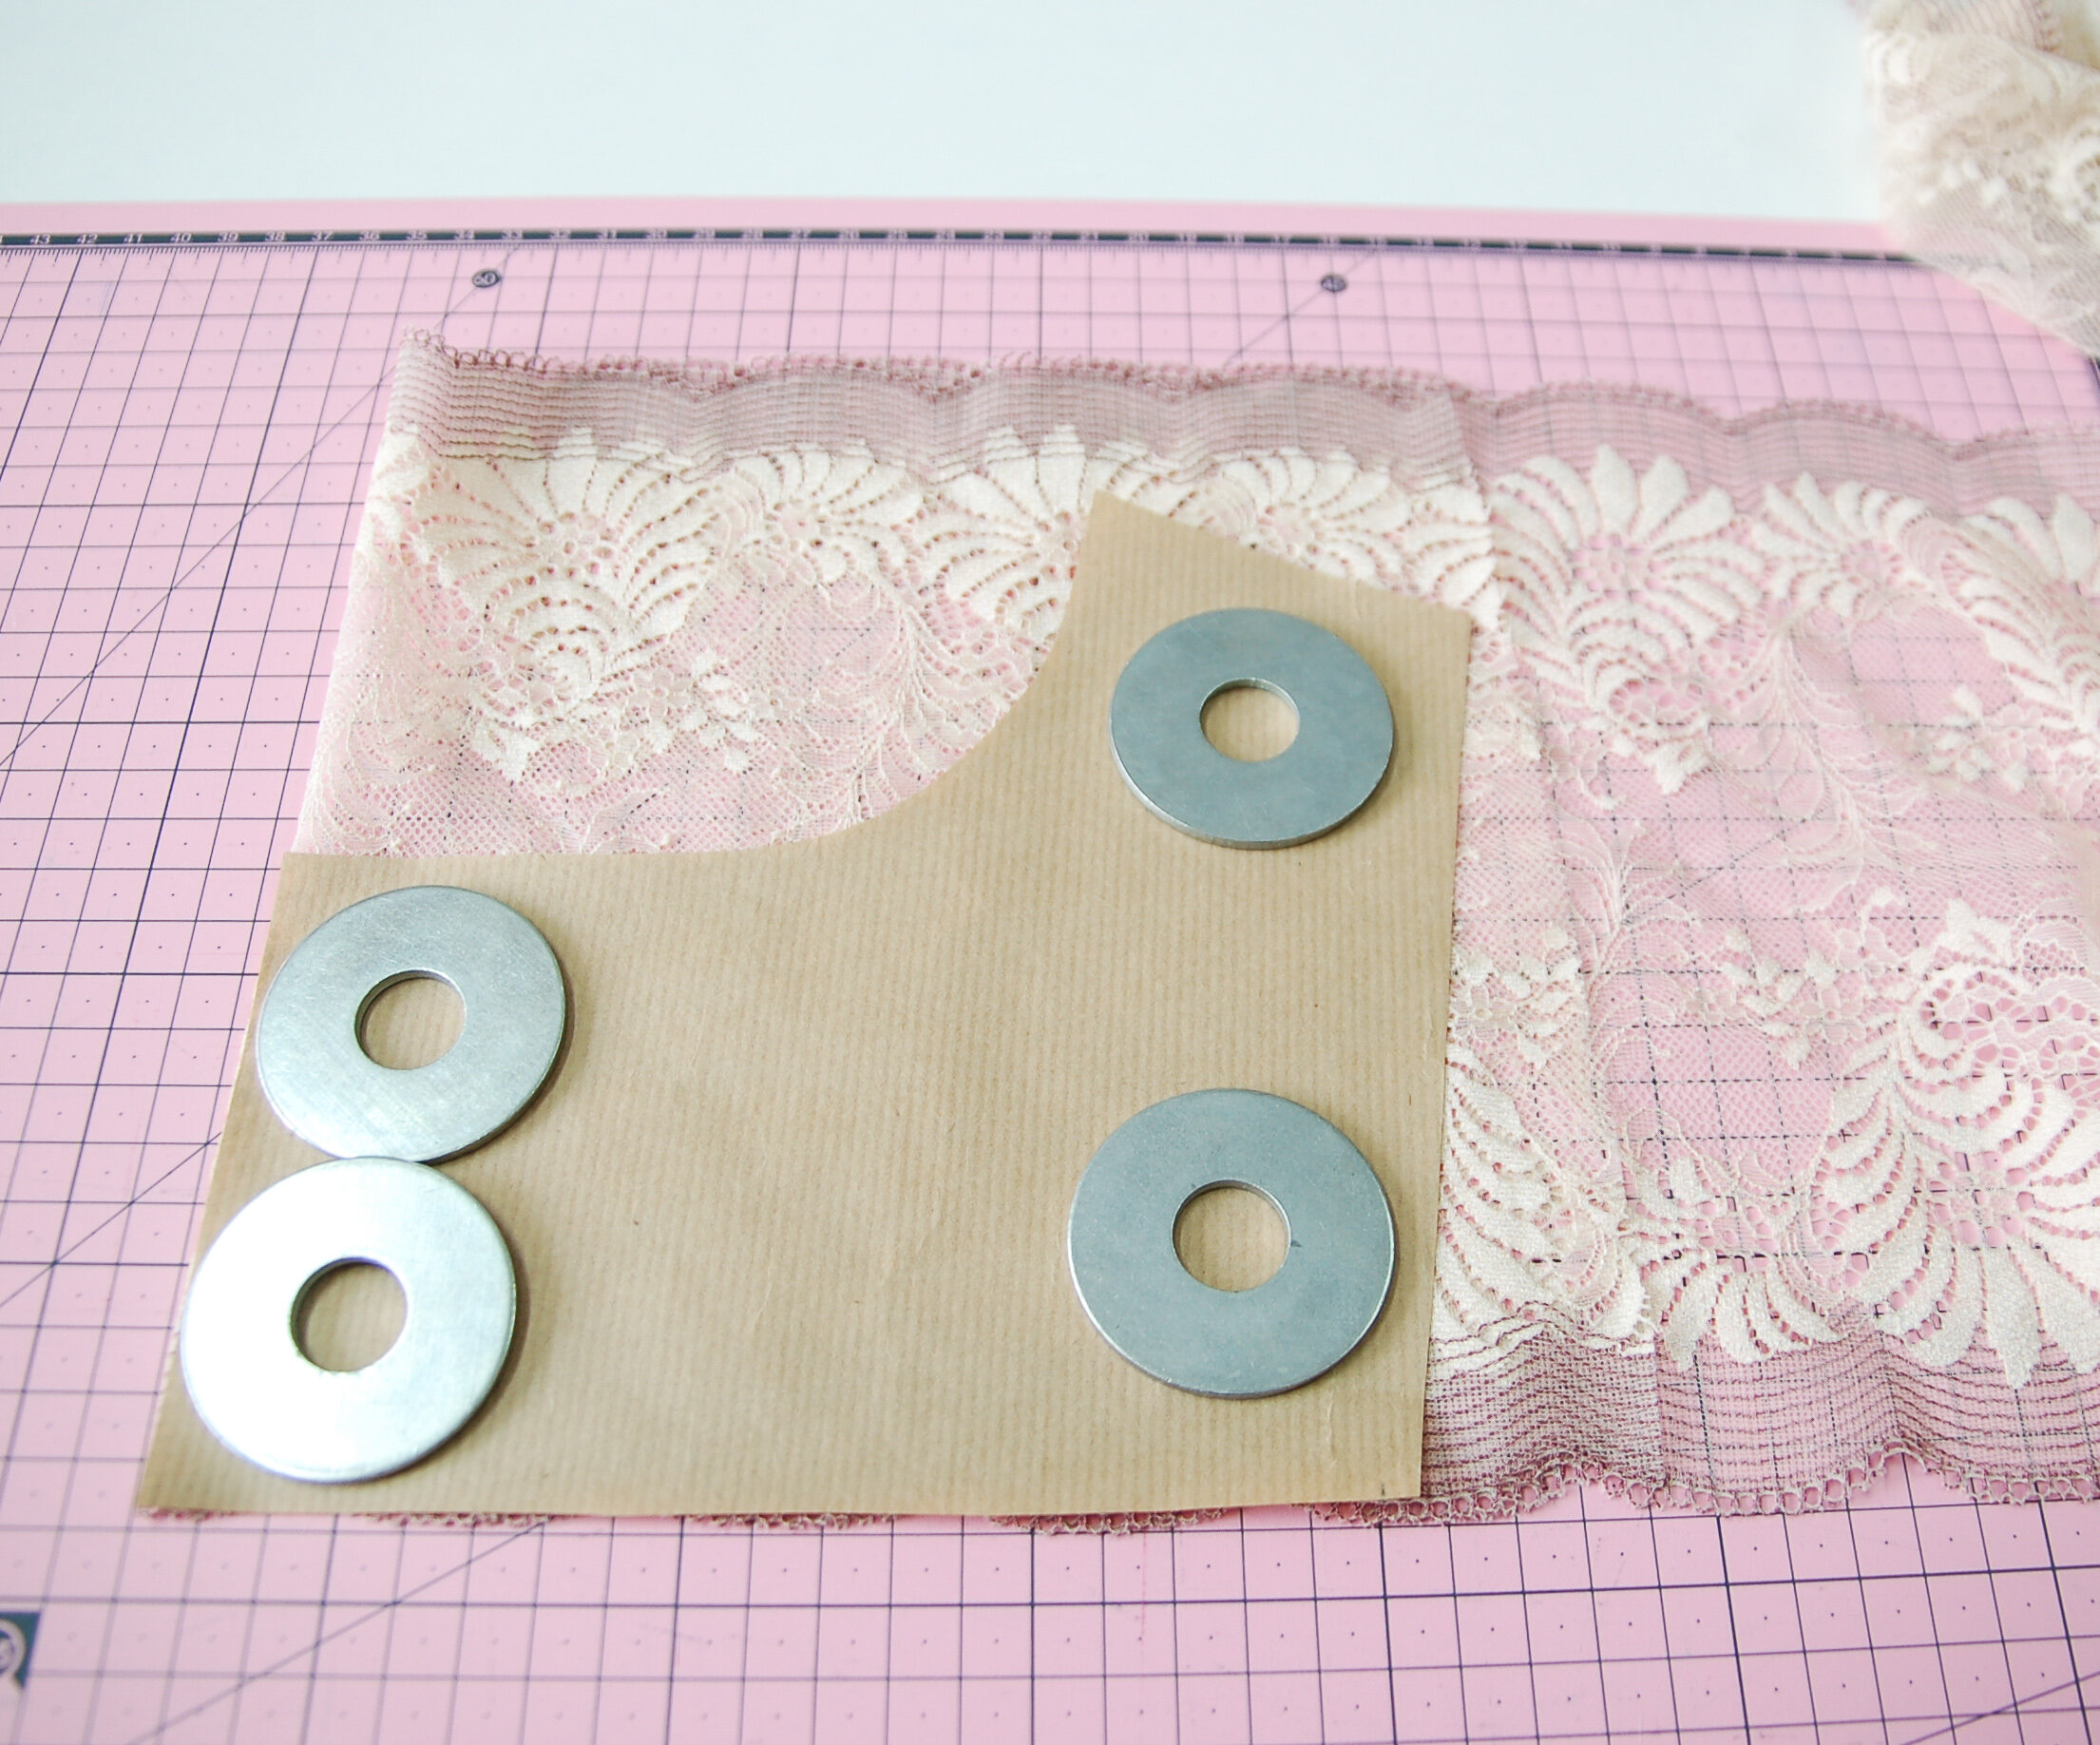
Con los nuevos patrones vamos a cortar las piezas de encaje, primero la banda delantera. Coloca el encaje doblado con la puntilla hacia abajo, normalmente si la puntilla tiene ondas muy pronunciadas como este encaje, lo que hago es que lo doblo justo en la mitad de una onda para que se quede a la mitad y la pieza se simétrica.
Marca un piquete en tu patrón en la parte derecha a 6 mm del borde de costado para saber dónde va la costura de unión. Este paso nos ayuda a colocar el encaje de la manera que luego al cortar las piezas de la banda trasera los largos del costado sean iguales. Por eso en vez de colocar mi nuevo patrón al ras de la parte baja de la puntilla como siempre cuando corto encaje, esta vez para no equivocarme lo coloco donde se acaba la puntilla, asegurándome de que mi piquete del costado también esté en la parte donde se acaba la puntilla (y no en al parte más baja de la puntilla). Corta la banda en doblez.
With the new pattern pieces we’re going to cut out the lace pieces, first the front band. Put your lace on fold with the scalloped edge facing you. If the lace has big scallopes, like this one, I usually fold it just in the middle of one of the scallops, this way the piece will be symmetrical.
Make a mark on your pattern piece on the right side 6 mm in on the side seam so you know where you will sew. This helps us to put the pattern piece correctly on top of the lace and the side seams will be the same length on the front and back sides. I usually cut the lace with the pattern piece laying on top of the lower (inner) part of the scallops but this time I’m putting the piece on the border of the scallops to know that my pieces match up exactly. The notch has to be on the border of one of the scallops (and not somewhere on the inner part of the scallops). Cut the piece on fold.

Para colocar la banda trasera también ponlo con en lado recto donde se acaba la puntilla. Esta vez coloca primero el piquete del costado a la derecha (que de nuevo tienes que marcar antes) donde acaba la puntilla, así los dos costados, el trasero y delantero, son iguales. Por otra parte en la parte de la izquierda haz otro piquete en tu patrón a 5 mm, es donde se hará el dobladillo de acabado. El punto donde cae el piquete debería también estar en el borde de la puntilla porque al doblar el margen hacia dentro para rematarlo no quieres que ese margen sea más largo que el punto donde se dobla (punto 5 de este tutorial).
To cut out the back band put it again on the border of the scallops. This time first put the side seam notch (that you have to mark again on your pattern piece) on the border of the lace that’s how the side seams will align well. Then mark a notch on the left side of the pattern, 5 mm in from the edge. This is where we’ll fold the lace edge in (the closure part). This point should be also on the lace border as you don’t want the folded edge to be longer than the point where the fold itself is (step 5 of this tutorial).

Después de cortar las piezas modificadas de encaje, corta las piezas de copas de encaje de la manera normal. Corta las piezas como en la versión original del forro también, allí no tienes que cambiar nada.
Cose como siempre hasta el paso 18 cuando terminas de poner la cinta recubrearos debajo de las copas.
After cutting out modified lace pieces cut the cup pieces as usual. Cut the lining pieces as usual, you don’t have to change anything there.
Sew as always until the step 18 where you’ve attatched the underwire channeling under the cups.

Cose las piezas de forro de la banda delantera y la banda trasera juntos dejando la costura de unión hacia el interior del bralette.
Cose las piezas de encaje entre sí con los derechos juntos.
Sew the lining band pieces together leaving the seam allowances towards the inside of the bralette.
Sew the lace pieces together with right sides together.

2. En la capa de encaje (solo en el encaje) haz un pespunte a 2 mm desde la costura que acabas de hacer para sujetar el margen de costura hacia la banda trasera.
2. (Only) on the lace layer topstitch the seam allowance 2 mm away from the seamline pushing it towards the back band.

3. Solo en la capa de forro cose la cinta recubrearos como en paso 21.
3. Only on the lining sew the underwire channeling on this seam as explained on step 21.

4. Cose el elástico de bajo como en los pasos 22-28 pero hazlo solo con la capa de forro. Coloca el forro como si fuera ya el bralette terminado, primero coses el elástico en el otro lado del forro (el lado que se queda entre las dos capas) y luego lo doblas hacia dentro como siempre. Es normal ver que el forro parece más pequeño que encaje, eso pasa porque al estirar el elástico como hay que hacerlo la pieza “se encoje”.
4. Sew the band elastic as explained on steps 22-28 but only on the lining layer. Use the lining as it was the whole bralette, first sew the elastic on the other side of the lining (the one that is between the two layers) and then fold it on the inside as always. It’s normal to see that the lining now looks smaller than lace as once the elastics are sewn in the pieces “get smaller”.

5. Dobla el margen de 6 mm del final del encaje hacia dentro y coselo con la puntada recta. (Yo no veo mucho sentido en remallar/hacer el zig-zag antes en ese borde ya que el encaje en general no se deshilacha)
5. Fold the 6 mm seam allowance on the lace piece under and sew it with a straight stitch. (I don’t think that previously using a serger/zig-zag stitch would be very important at this point as the lace edge in general won’t fray)

6. Igual que en el punto 29 comprueba que tu pieza de la banda de forro tenga el ancho correcto según el ancho de tu cierre.
6. As on step 29 check if your closure fits well with the lining band ending.

7. Coloca tu borde de encaje a 6 mm desde donde acaba tu forro y sujétalo con un alfiler. Esto lo hacemos para que el encaje “empiece” después del cierre, estos 6 mm van a estar allí para colocar el cierre.
7. Pin your lace edge in place 6 mm from the end of the lace piece. We’re doing this so the lace layer “starts” after the closure, the remaining 6 mm of the lining will be inside the closure.

8. Estirando el forro para que esté en el mismo sitio que el encaje trabaja las piezas como si fueran una y cose el elástico de sisa como en el paso 30. Repite con el otro lado.
8. Stertching the lining so it will match with the lace and treat them as one layer. Sew the underarm elastic as on step 30. Repeat on the other side.

9. Termina el resto del tirante y coloca el cierre como en los pasos 35-37 uniéndolo solo en el forro. Así tendrás el encaje como una capa separada pero está bien rematado y sujeto con el elástico de sisa. Si quieres puedes ahora unir las dos capas donde se acaba el cierre cosiendo a través de las dos telas también.
9. Finish the straps and sew the clousre on as on steps 35-37 using the lining seam allowance. This way the lace is like a separate layer but it will still be well attatched with the underarm elastic. You can also sew a line of stitching to unite these two layers just where the closure ends if you want to.
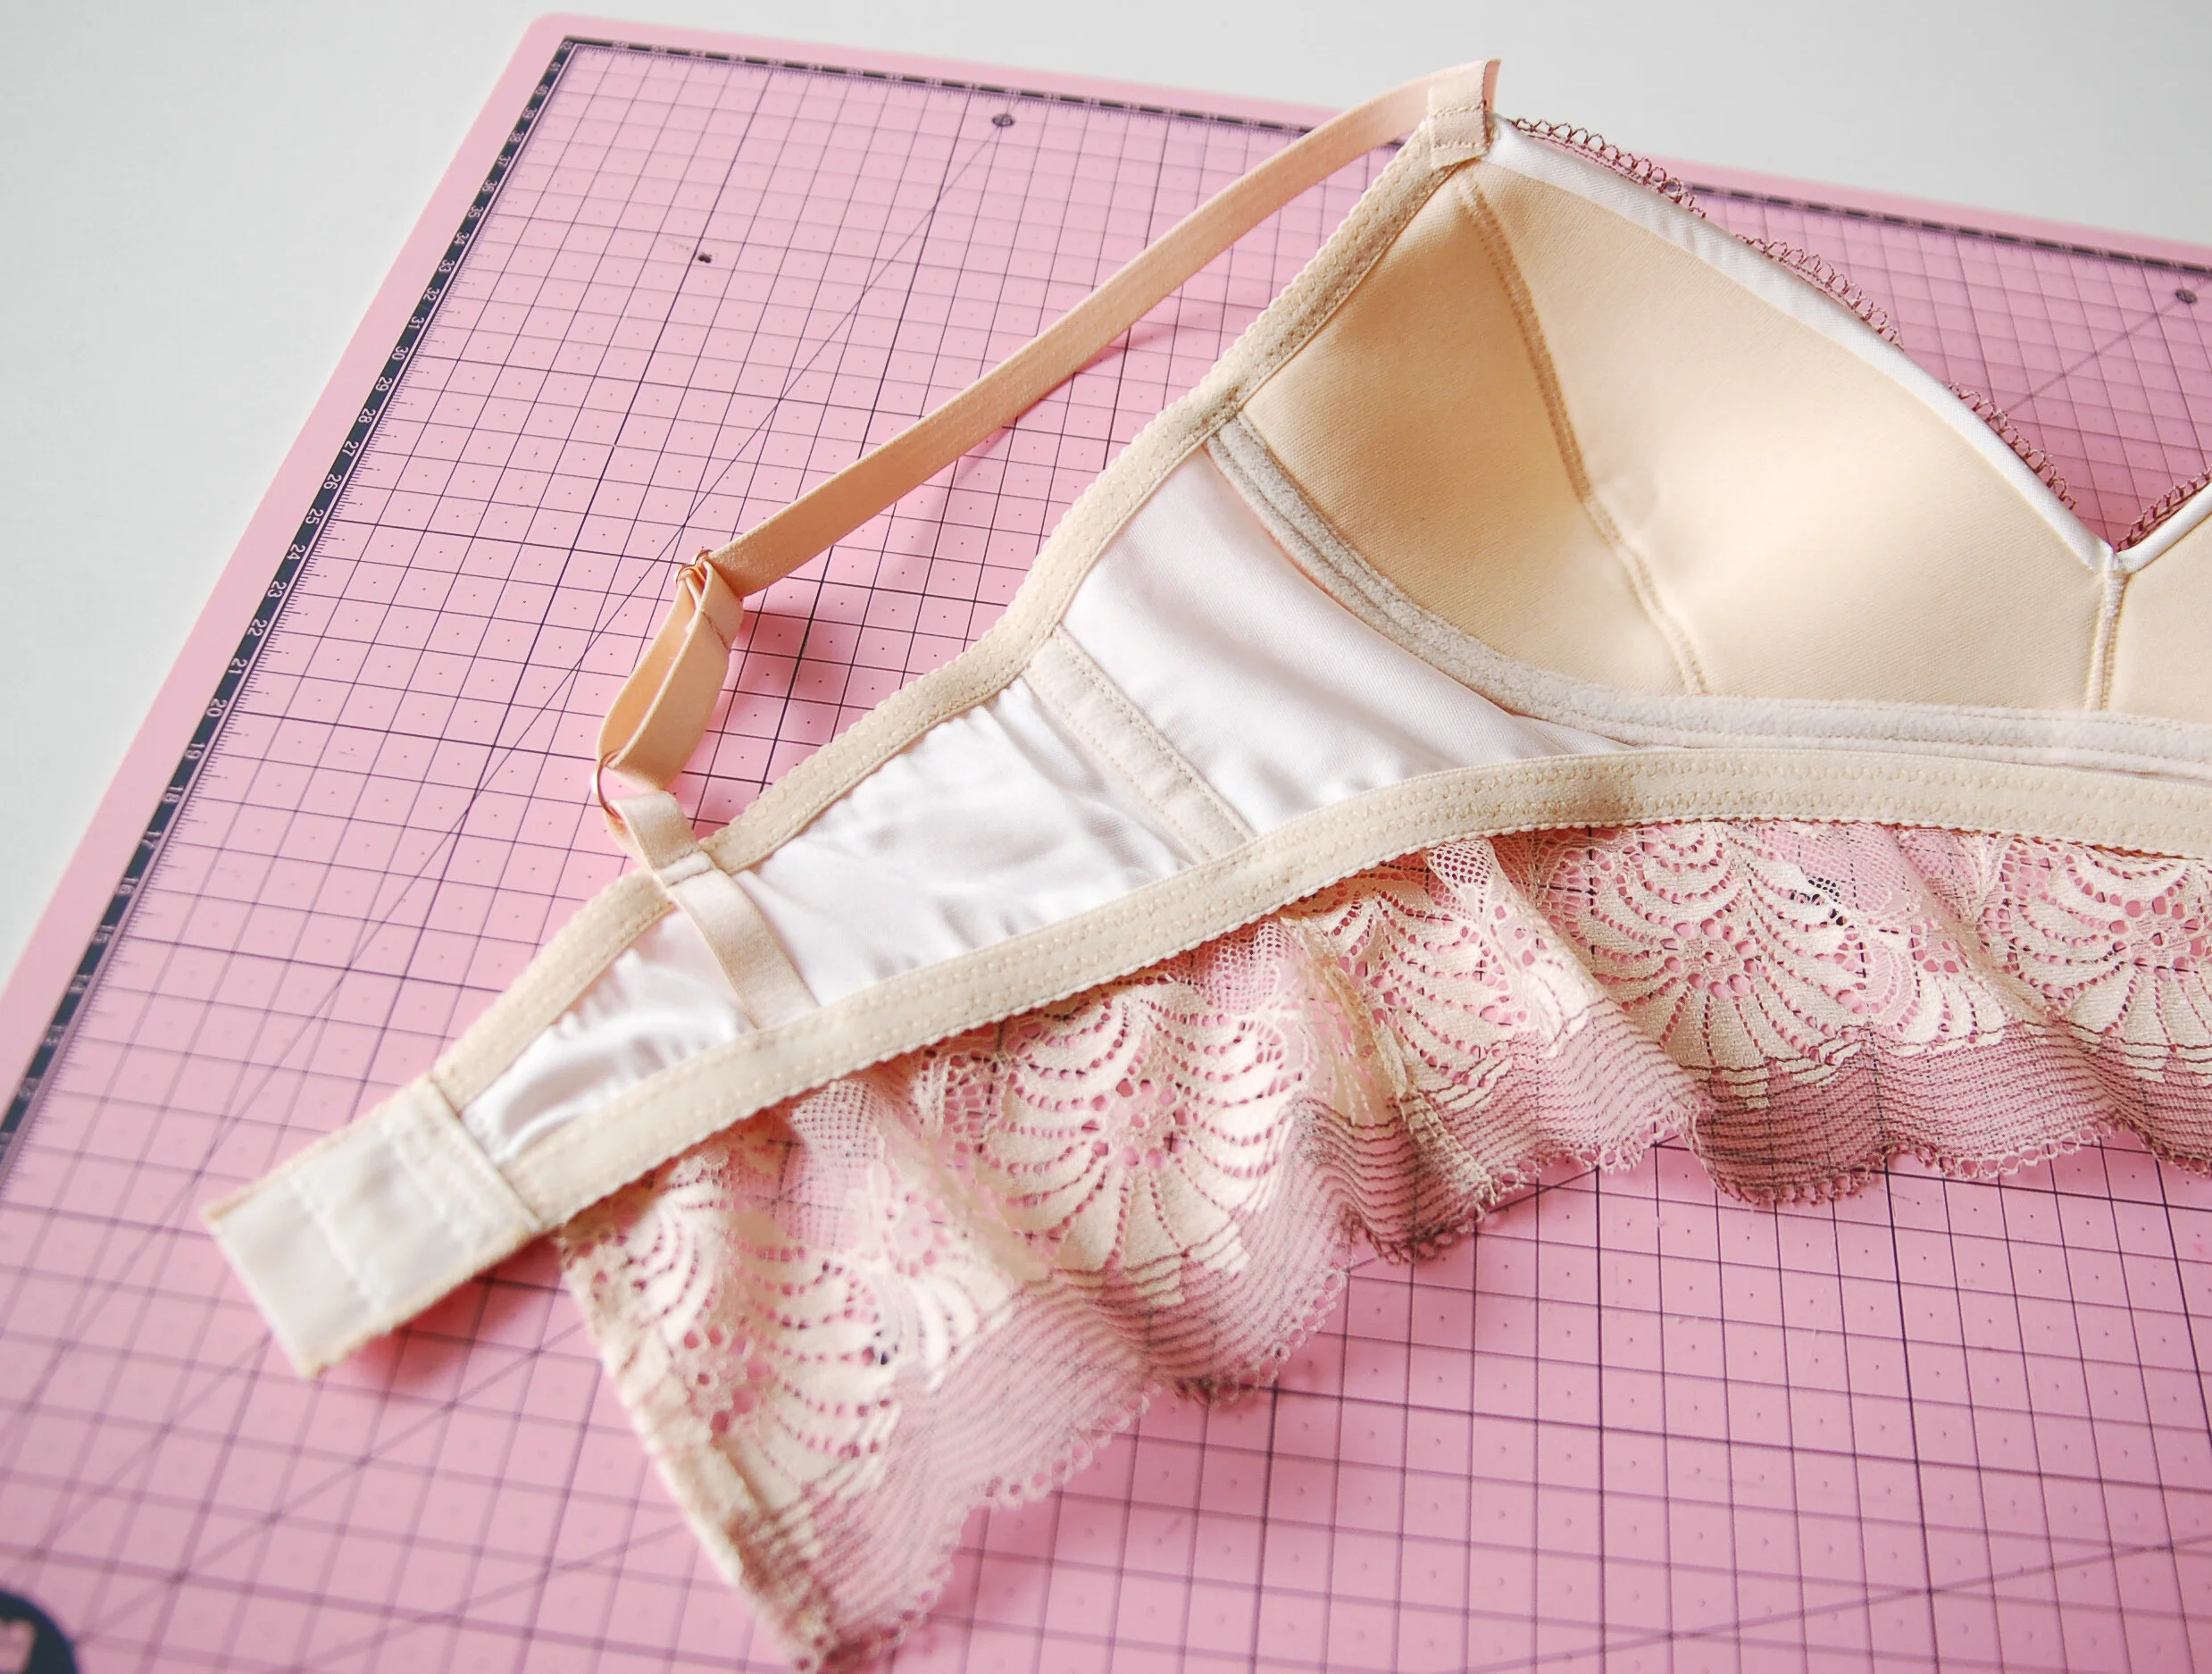
Y ya está! Por dentro aún así tenemos el acabado limpio y por fuera la bonita banda ancha de encaje.
That’s it! On the inside there’s a pretty and neat finishing and on the outside there’s a beautiful lace layer.
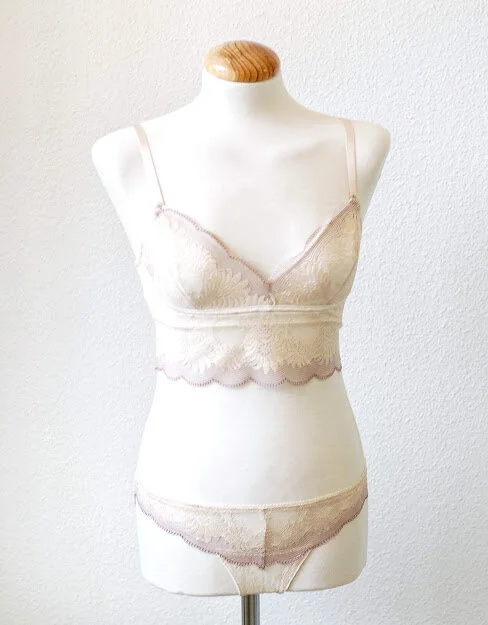


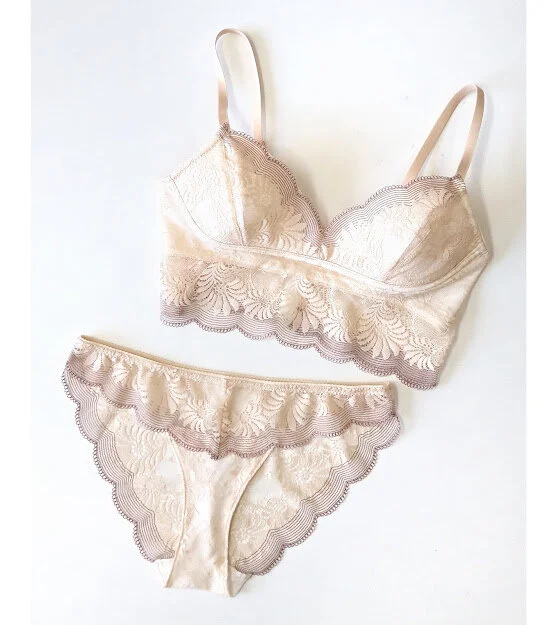
Yo usé esta vez también foam para las copas (el tutorial sobre foam lo tenéis en la página de Coseconmigo de bralette Mara) y me gusta mucho el resultado. Para el conjunto también hice un par de braguitas Vera en la versión 2 de encaje.
I used foam for the cups (there’s a foam tutorial on the Mara bralette sewalong page) and I really like the result. I also made a matching pair of lace panties using version 2 of Vera panties.
La verdad es que se me ocurren un montón de maneras bonitas cómo usar el encaje ancho para este bralette: puedes dejarlo más ancho, más corto o incluso dejar el forro más largo que el encaje que queda muy bonito también. Espero que os haya servido este tutorial :)
I think that there are so many cute ways to use this hack for making more bralettes like this: you can leave a longer lace edge or a shorter one or you can even make the lining longer and let the lace sit on top of the lining for more contrast. I hope you liked this tutorial :)
