
En este post del coseconmigo de bralette Mara vamos a coser las piezas por fin! Este método de confección hace posible que todos los márgenes de costura estén ocultos entre las capas, solo tienes que seguir unos pasos para conseguir acabados bonitos tanto por fuera como por dentro.
In this post in the Mara bralette sewalong we’ll be finally sewing together the pieces! This construction method makes a pretty end result with clean seams both on the inside and on the outside of the bralette, you just need to follow some specific steps.

Primero se unen las piezas de la copa interior entre sí, las piezas de encaje y las piezas de forro. Se coserá directamente a través de las cuatro capas así que el orden de las piezas es importante. Primero colócalas en la mesa con los derechos hacia arriba.
First we’ll be joining the inner cup pieces, there are lace and lining pieces. You’ll be sewing directly through four layers so the order of the pieces is very important here. First put all the pieces with the right sides up on your table.


Junta las piezas de encaje derecho con derecho y haz lo mismo con las piezas de forro. Después coloca las piezas de encaje encima de las piezas de forro. Une con alfileres la costura central. Las piezas de forro son un poco más cortas que las piezas de encaje porque se cortaban al ras del borde de patrón (y en las piezas de encaje sobresale la parte de la puntilla).
Put the lace pieces with right sides together and then put the lining pieces with right sides together too. After that put the lace pieces on top of the lining pieces. Pin the central seam. The lining pieces are a bit shorter as you cut out the lining just like the pattern (and the lace pieces have the extra scallop edge there).

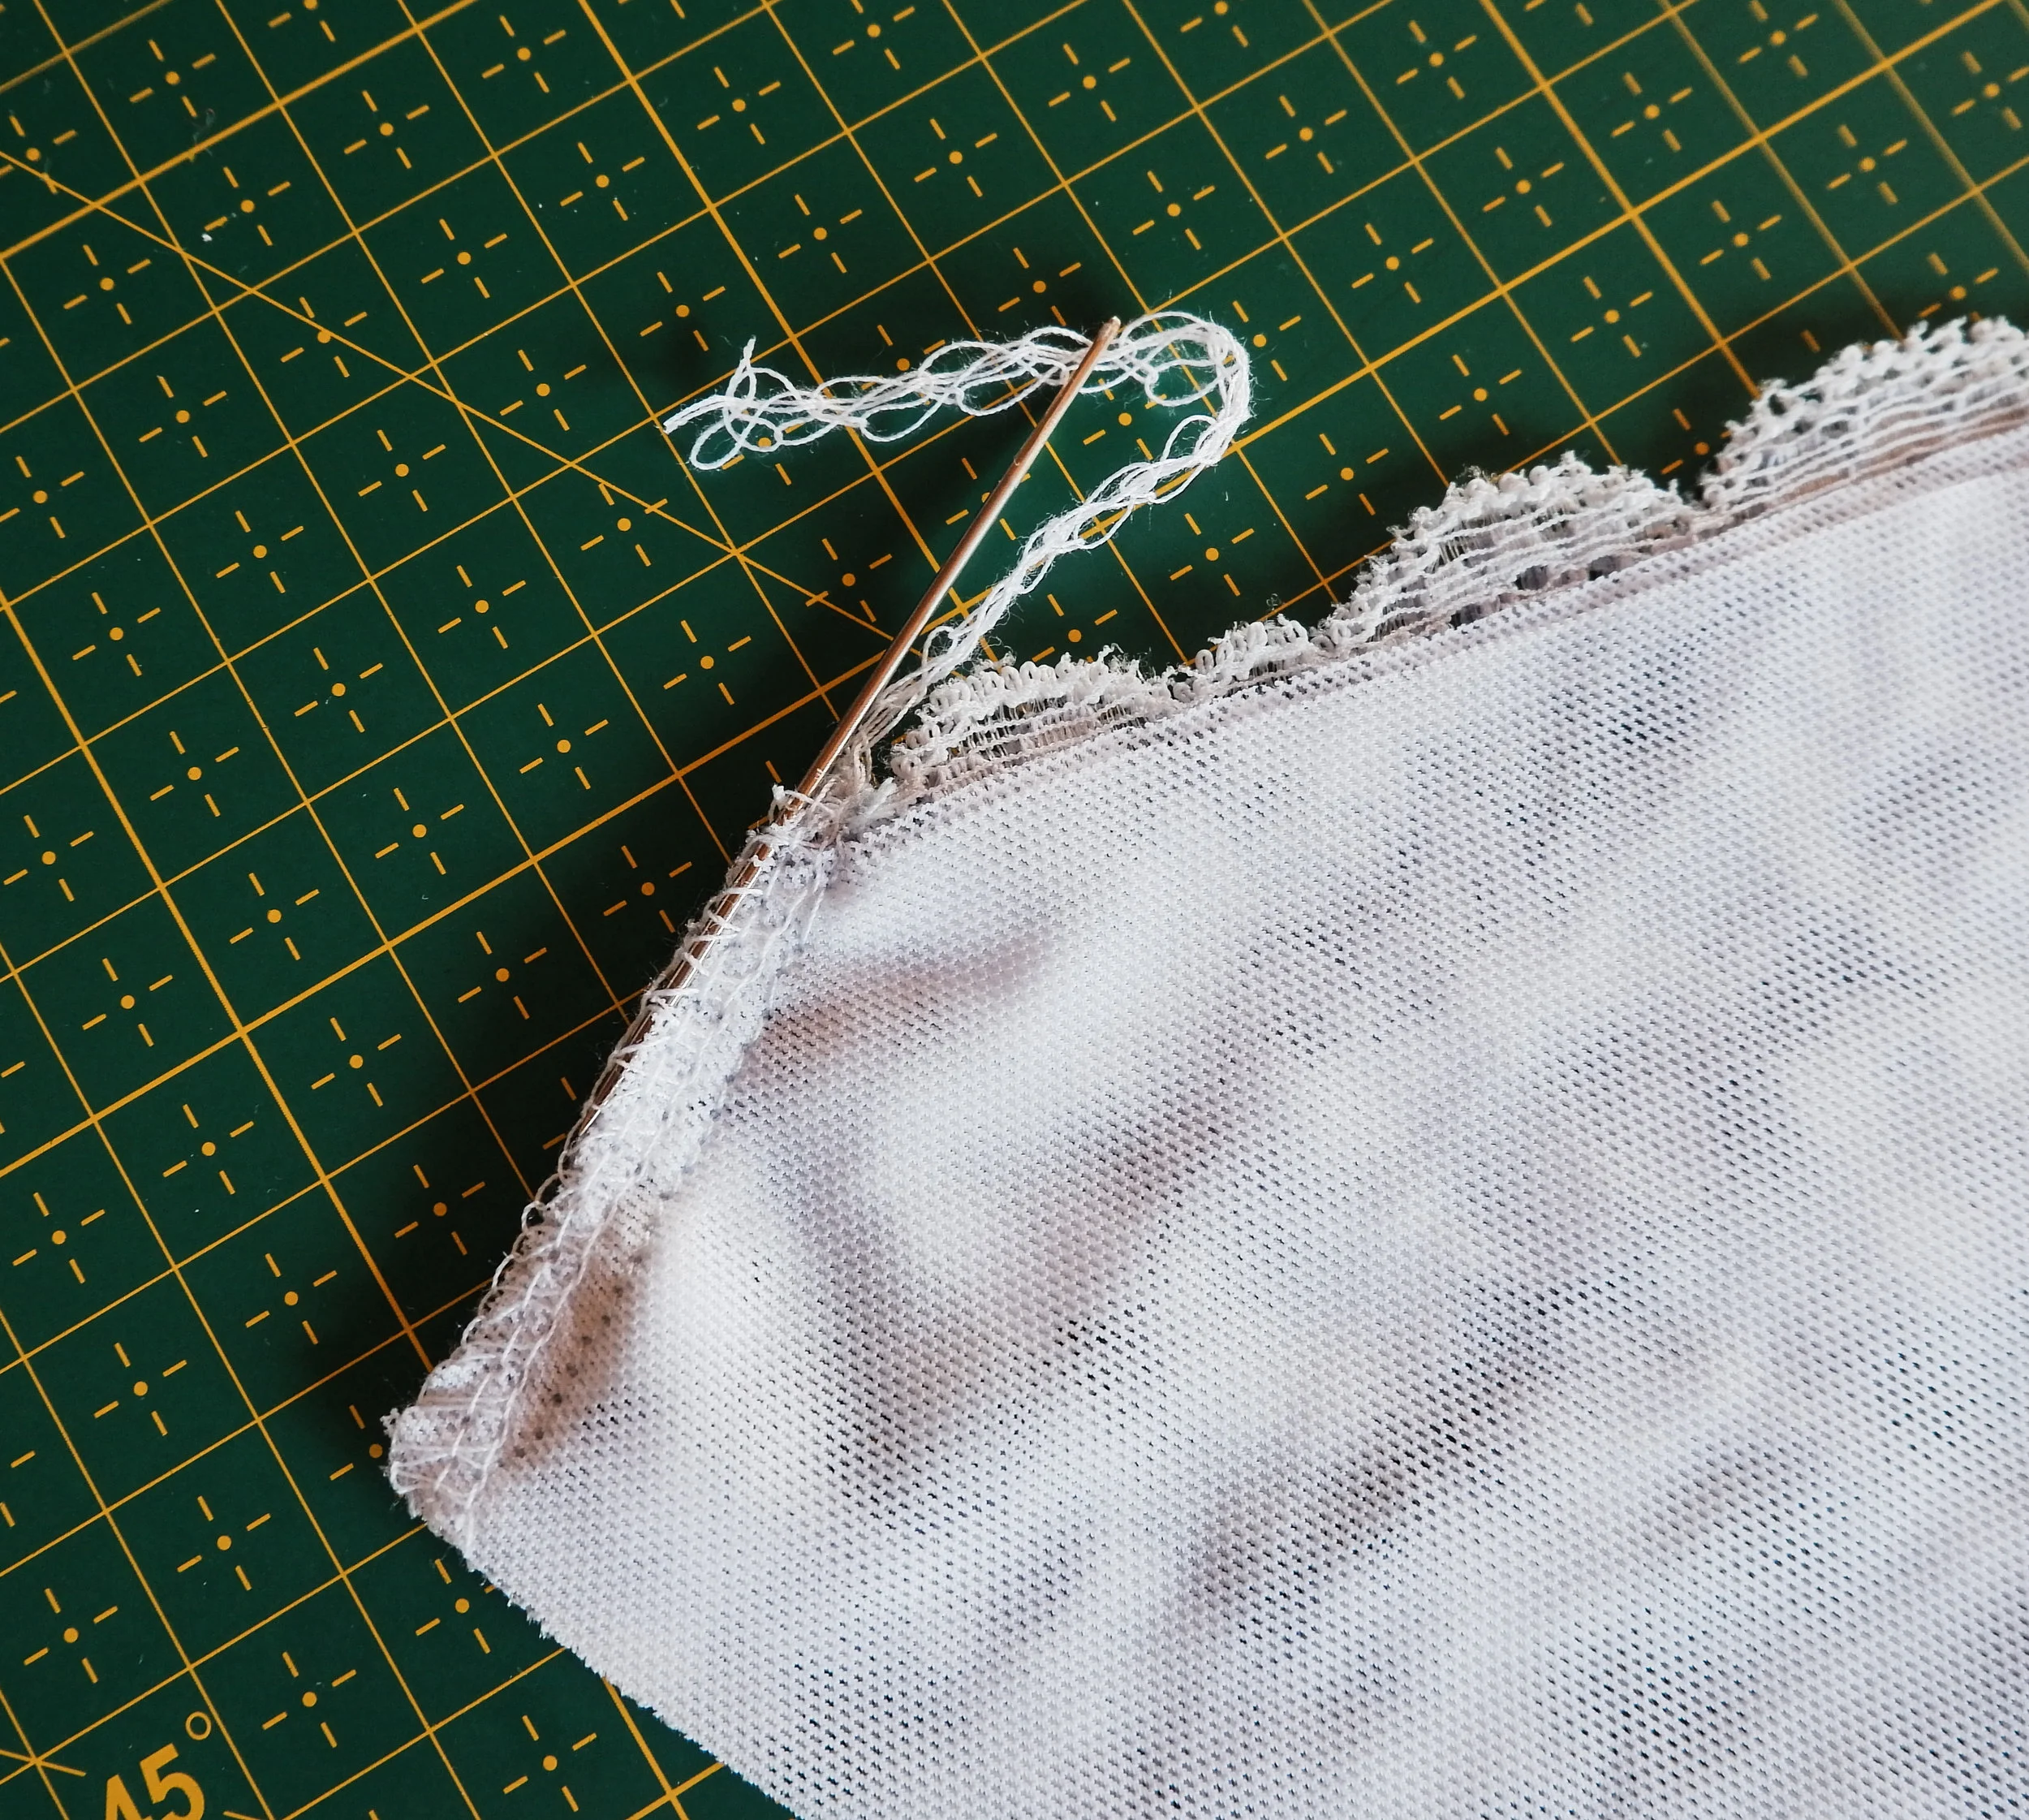
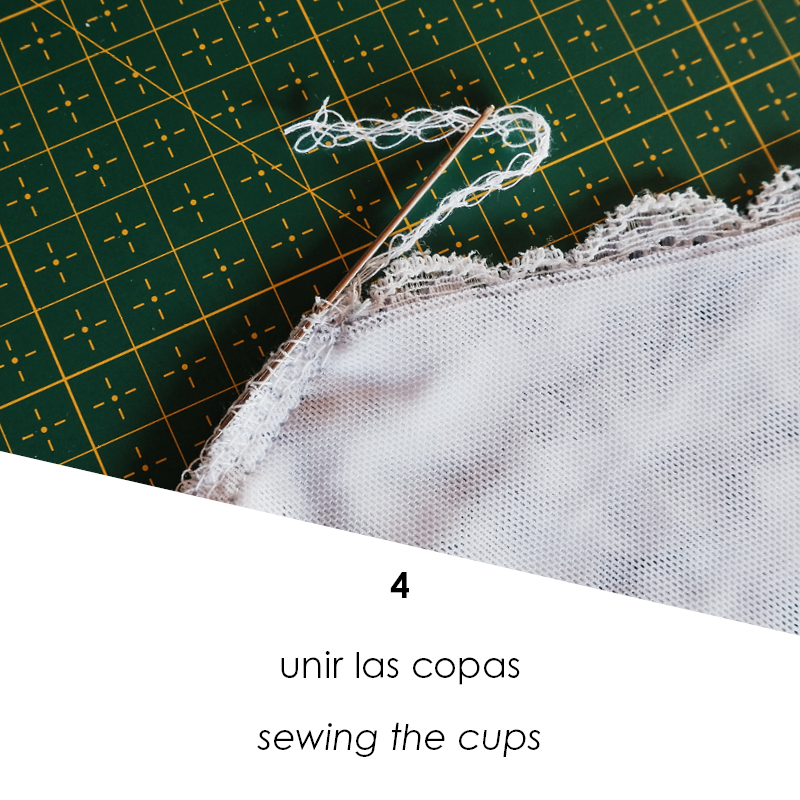
Recuerdas del piquete en el centro que usamos a la hora de cortar, allí colocamos justo el comienzo de la puntilla? Los márgenes de costura son de 0,6 cm y justo donde dejaste el piquete vas a coser hacia abajo. Se puede coser con puntada recta, con un zig-zag pequeño o remallar, tú decides tu método favorito. Normalmente siempre se dice que hay que coser las telas de punto con el zig-zag (o con la remalladora) ya que esta puntada es elástica y así no se rompe la puntada una vez que estiras tu prenda…pero en lencería si la costura es vertical se puede hacer la excepción y coser con la puntada recta. Nunca se me ha roto la puntada allí como realmente no se estira en esa dirección (es el contrario al ancho donde sí que se estira). En el caso de usar remalladora deja los hilos largos en la parte de arriba y escóndelos dentro de la misma costura con una aguja lanera.
Remember that notch close to the center seam that helped us when cutting out and mirroring the lace pieces? The seam allowances are exactly 0,6 cm (1/4 in) and it’s exactly there where the notch is where you’ll sew the central seam. You can use a straight stitch, a small zig-zag stitch or you can serge the seam, you’ll decide your favourite method. I normally always suggest using zig-zag stitch or serger when working with elastic knit fabrics as this way the stitches won’t pop once you pull the elastic fabric…but in lingerie I find there’s one exeption: the vertical seams! I’ve never had a stitch popping when sewing a vertical cup or side seam with straight stitch as this part really won’t stretch so much, it’s not on the “stretchy” horizontal direction. When using a serger leave your thread tails long on the upper part and hide them inside the seam with a large eyed needle.

Una vez hecho la costura, coloca las piezas en su sitio, deberías tener un resultado limpio tanto por fuera como por dentro (el margen de costura de la costura central se queda entre las piezas). En el derecho del trabajo pasa un pespunte encima del margen de costura de la costura central para dejarlo más plano, deberías hacerlo aprox 2 mm desde el borde.
Once you’ve sewn the seam put all the pieces in their place, you should have a clean result with the seam being hidden between the layers. On the right side of the work topstitch on top of the seam allowance to make it flat.

Después vamos a coser el elástico para juntar el forro y el encaje en la parte superior de la copa interior, de paso se estabiliza esta zona también. Puedes usar elástico de lencería (algo más fino como el elástico de braguitas, de 4-8 mm de ancho) o también puedes usar el elástico transparente de silicona.
After that we’ll sew elastic to join the lace and lining layers on the neckline. You can use narrow lingerie elastic (the one we use for panties for example) or transparent clear elastic.

Usando la puntada de zig-zag cose el elástico justo donde se termina el forro, abajo de la puntilla. Si el elástico tiene un lado suave, déjalo hacia arriba (se va a quedar hacia tu cuerpo después). En este punto no suelo estirar el elástico, es solo para estabilizar este borde. Cose desde un extremos hasta el centro, recorta el elástico y vuelve a coser desde el centro hacia el otro borde.
Sew the elastic just where the lining ends under the scalloped lace edge using a zig-zag stitch. If the elastic has a plush side it should be up (it will be towards your skin once you’ll wear the bralette). At this point you shouldn’t pull the elastic, it’s there just to stabilize the lace. Sew from one side to the center, cut the elastic and sew again from the center to the other side.

Ahora tienes las piezas de las copas interiores preparadas, falta juntarlas con las copas exteriores. Se hace de la misma manera como antes para que las costuras queden limpias. Coloca las piezas de encaje derecho con derecho y debajo de ellos las piezas de forro derecho con derecho también. Como ya tienes las dos capas unidas de la costura anterior tienes la mitad del trabajo hecho.
Now you’ll have the inner cup pieces ready to join them with the outer cup pieces. You’ll be doing this in the same way as before so the seams will be hidden between the layers. Put the lace pieces with right sides together and under these put the lining pieces with the right sides together too. As you have the inner pieces sewn together already it’s easier this time.


Junta las piezas con alfileres uniendo primero los piquetes en las cuatro capas, después los principios y los finales, estira para evitar arrugas. Cose con la puntada recta o remalla.
Pin the four layers together first joining the notches then the beginnings and the ends. Stretch slightly to avoid wrinkles and sew with straight stitch or use a serger.

Una vez unidas las copas haz un pespunte como antes en el centro.
Once you’ve sewn together the cups, topstitch the cup seams in the same way as you did with the center front.

Ahora vamos a unir las copas con la banda frontal. Coloca la pieza de forro de la banda frontal con el derecho hacia abajo en la mesa y coloca la pieza de encaje de la banda frontal con el derecho hacia arriba encima del forro. A mí personalmente no me gusta usar spray temporal de pegamento textil en lencería pero hay gente que lo prefiere, ahora podrías unir el forro y el encaje primero para trabajarlos como una pieza. Yo prefiero usar alfileres para mantener las dos capas juntas :)
Now we’ll join the cups with the front band. Put the front band lining with the right side down on your table and put the front band lace with right side up on top of it. I’m not really a fan of temporary fabric glue or spray but you could join these two layers before you start sewing with them. I prefer using pins to keep the layers together :)

Coloca las copas y la banda frontal (las dos capas de ella) el derecho con derecho y junta con alfileres uniendo los piquetes, el centro y los finales. Con cuidado y estirando ligeramente en las curvas de las copas reparte todo el tejido para que no se formen arrugas. Cose con la puntada recta.
Put the front band pieces (the two layers) together with the cup pieces, right sides together and pin together the center, the notches and the beginning and the end of the seam. Carefully ease the cup curve into it’s place avoiding wrinkles. Sew with straight stitch.

Así es como queda el bralette con las copas ya unidas a la banda frontal, ya tiene pinta verdad? En el próximo post cosemos la cinta recubrearos y uniremos la banda trasera!
Now it really starts to look like a bralette, right? In the next post we’ll attatch the underwire channeling tape and the back band pieces!