

This week I’m showing you how to hack your panties pattern for yet another different style. Ready to make some cute undies?
Esta semana os enseño un truco para modificar los patrones de braguitas para crear otra nueva versión. Preparadas para coser braguitas bonitas?

I’m showing you how to make two different versions of the same “concept”. I got the idea of making a tutorial about this hack after posting this image of the beautiful yellow set (found on Pinterest) to Studio Costura Shops IG feed. I explained briefly about the steps you need to take to sew a pair like this and as you guys really liked that photo I thought it would be a great idea for a full tutorial.
Voy a enseñar cómo hacer dos diferentes versiones de un mismo “concepto”. Tuve la idea de hacer este tutorial después de compartir en la cuenta de Instagram de Studio Costura Shop esta imagen de un conjunto amarillo muy bonito (encontrado en Pinterest). En la foto expliqué brevemente cómo coser un par así pero ya que os gustó mucho el modelo pensaba que estaría bien hacer un paso a paso por aquí también.

The panties on the original photo are made with stretch mesh, two pieces of double layer mesh are overlapped and there’s a strap detail on the front waistline. When I was thinking about which supplies to use for this tutorial I figured that this hack would also look very cute with lace (of course, haha)...so here are two different versions for you to try out.
Las braguitas en la foto original están hechas con tul elástico, dos piezas de doble capa de tul están cruzadas con un detalle de tirante en la cinturilla. Cuando pensé qué materiales usar para el tutorial pensaba que esta modificación podría quedar muy bonito también con encaje (claro, jaja)...así que aquí van dos diferentes versiones para que lo probéis.

Let's start with the mesh version! You need stretch mesh for that but I guess you could try it out with fine knits too. It’s just that you will have four layers of fabric on the overlap so make sure it won’t be too bulky. I’m using the Lili thong pattern for this version. You also need some strap elastic, two rings and one slider.
First you need to make a simple pattern adjustment. Trace your full front piece of the panties on a separate paper (you need the full piece as you need to make the overlap). Then just decide where you want your overlap to be. It really depends on you, if you want a smaller or bigger exposed area on the center front, try out different line positions until you have something you like. The new line you just drew is the fold line of the mesh pieces. Cut out the new pattern piece, you’ll be cutting out two pieces on fold with the same front pattern.
Empezamos con la versión de tul! Para esto necesitas tul elástico pero supongo que podrías probar a hacerlo también con un punto finito. Lo que pasa es que tendrás cuatro capas de tela en la parte del cruce así que asegúrate de que no sean telas demasiada gruesas. Estoy usando el patrón de tanga Lili. También necesitas un poco de elástico de tirante y dos arandelas y un regulador.
Primero tienes que hacer una modificación fácil del patrón. Copia la pieza delantera entera en un papel separado (necesitas que sea entera para poder hacer el cruce). Después decide dónde quieres que vaya el cruce. Realmente depende de ti, si quieres que la zona que se queda “libre” en el centro sea más grande o más pequeño, prueba diferentes posiciones de la línea de cruce hasta que tengas algo que te guste. La nueva línea que acabas de hacer va a ser la línea de doblez en las piezas de tul. Corta la nueva pieza de patrón, vas a cortar dos piezas delanteras en doblez con este mismo patrón delantero.
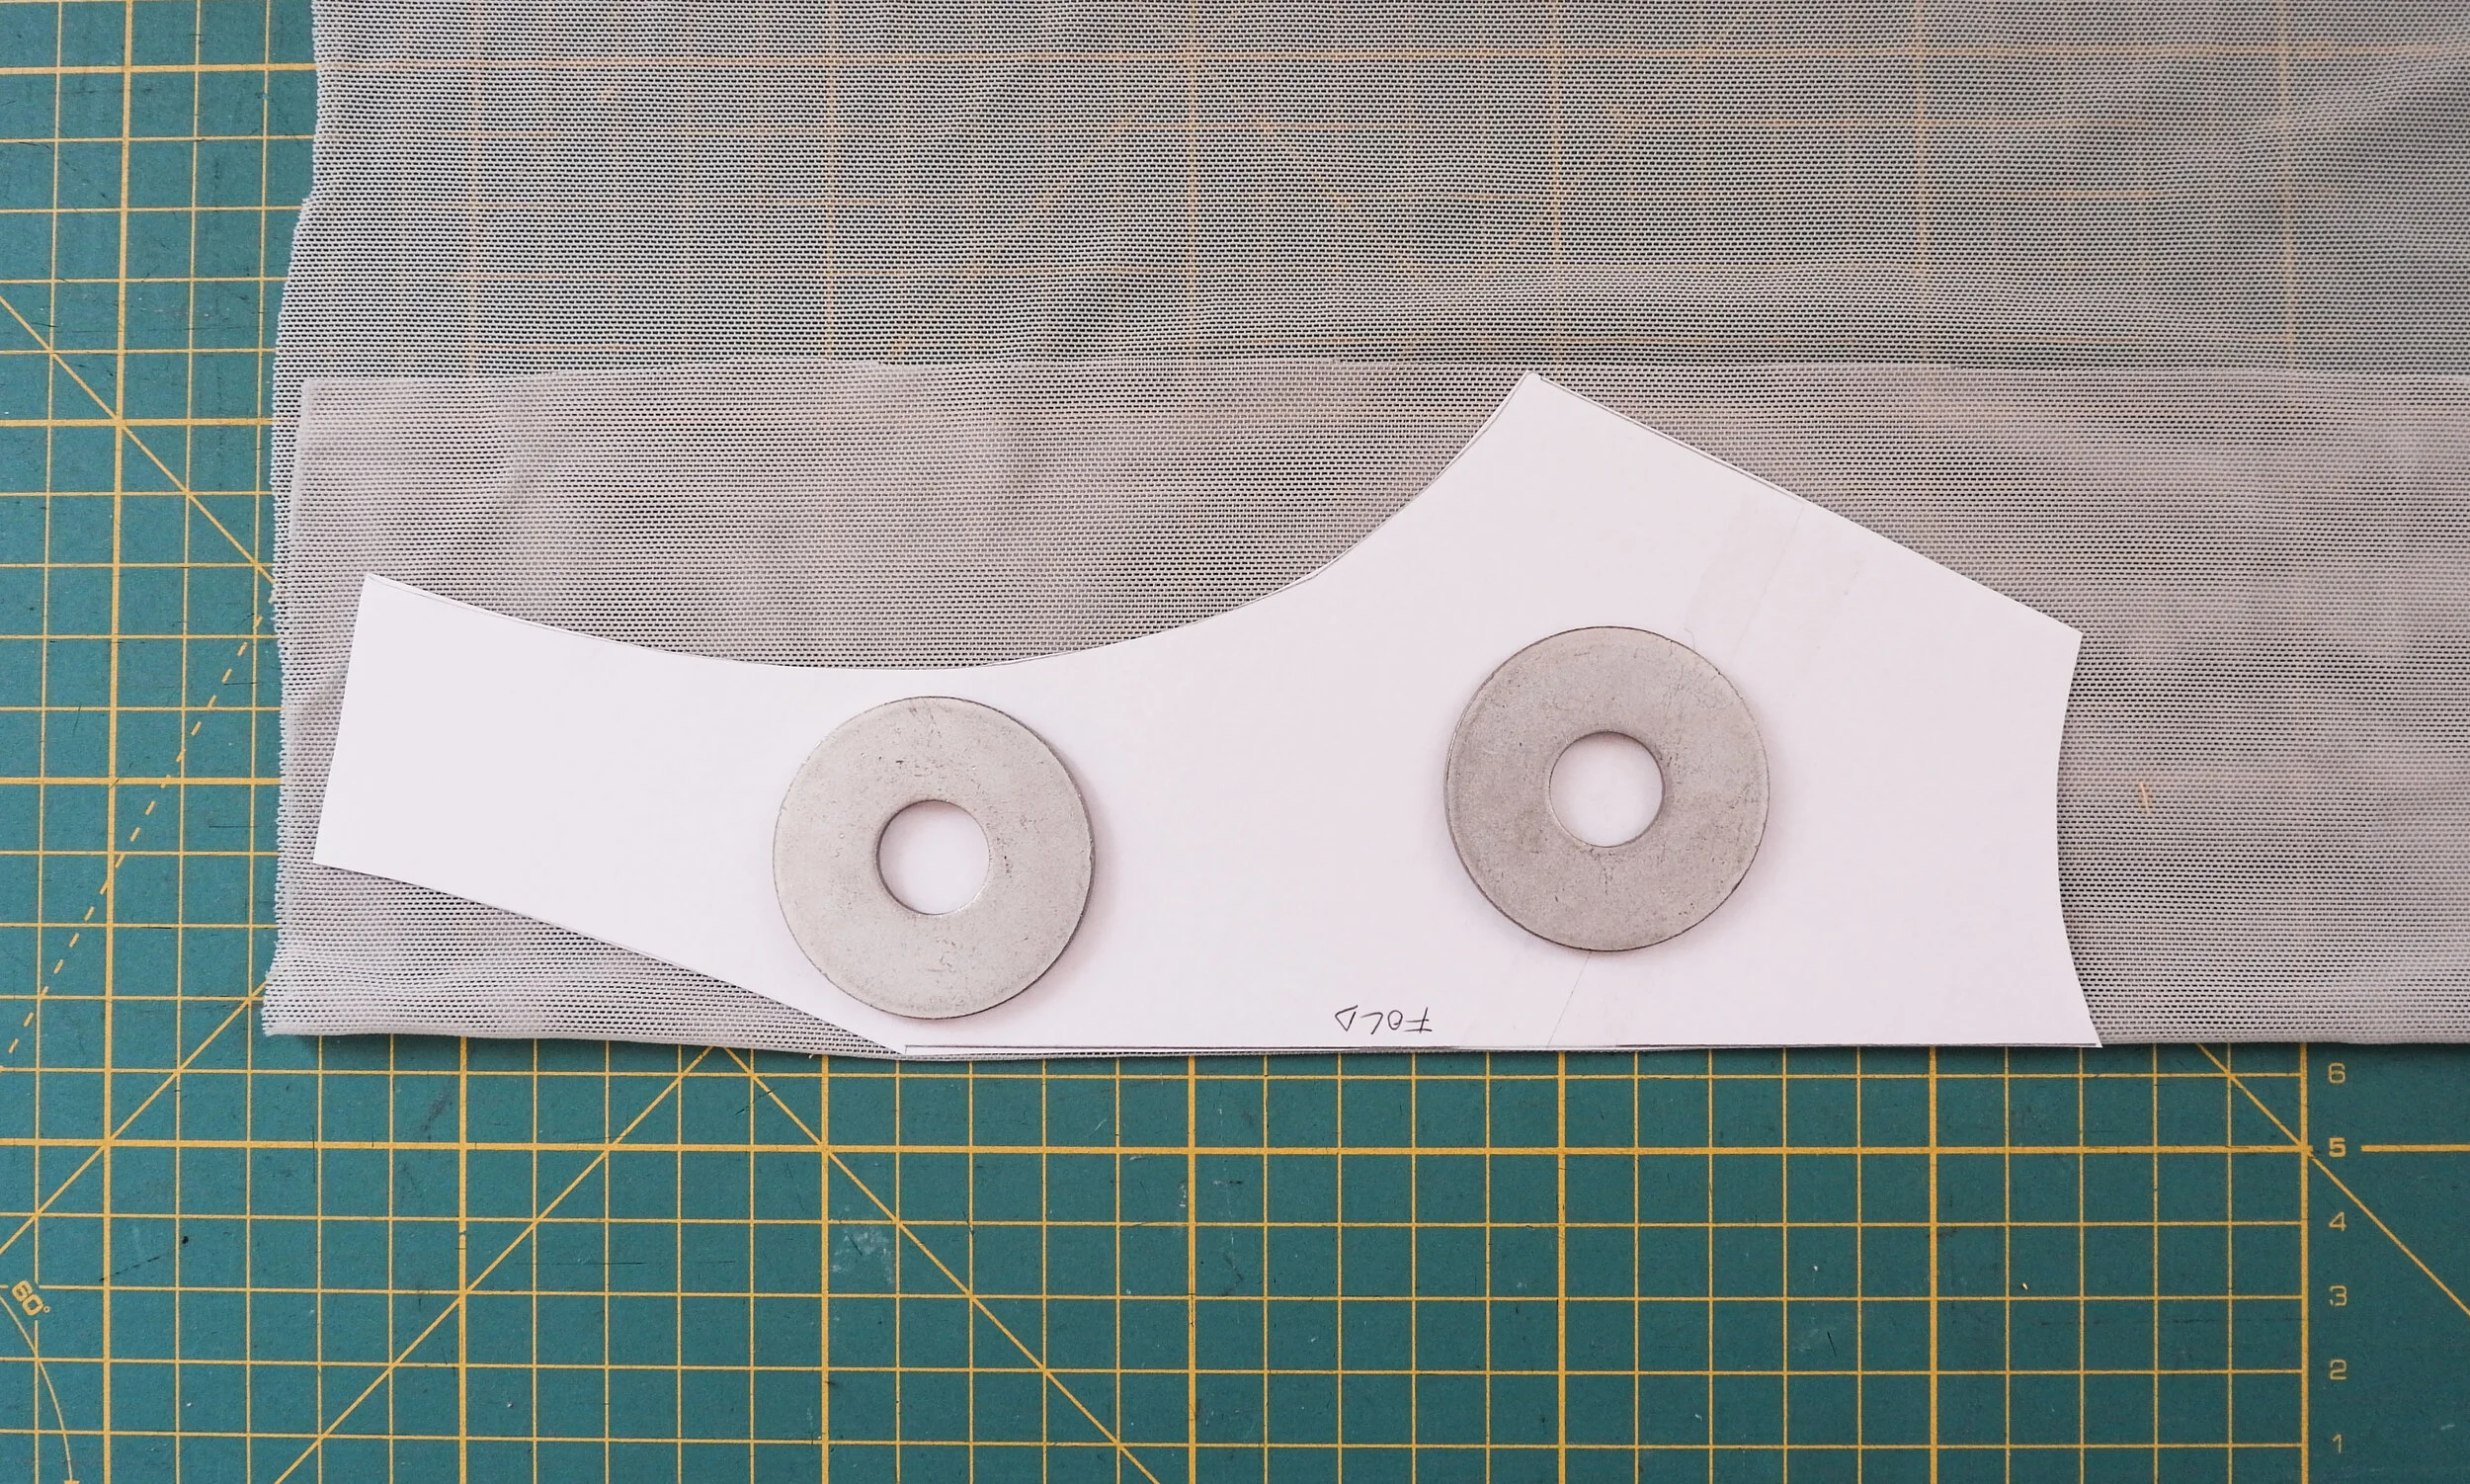
Put a double layer of mesh on your cutting table and align the fold line of your new pattern piece with the fold of the fabric. Cut out the front piece and repeat with the other front piece.
Pon la tela en doblez en tu mesa de corte y coloca el patrón con la línea de doblez encima de ella. Corta una pieza delantera y repite con la otra pieza.

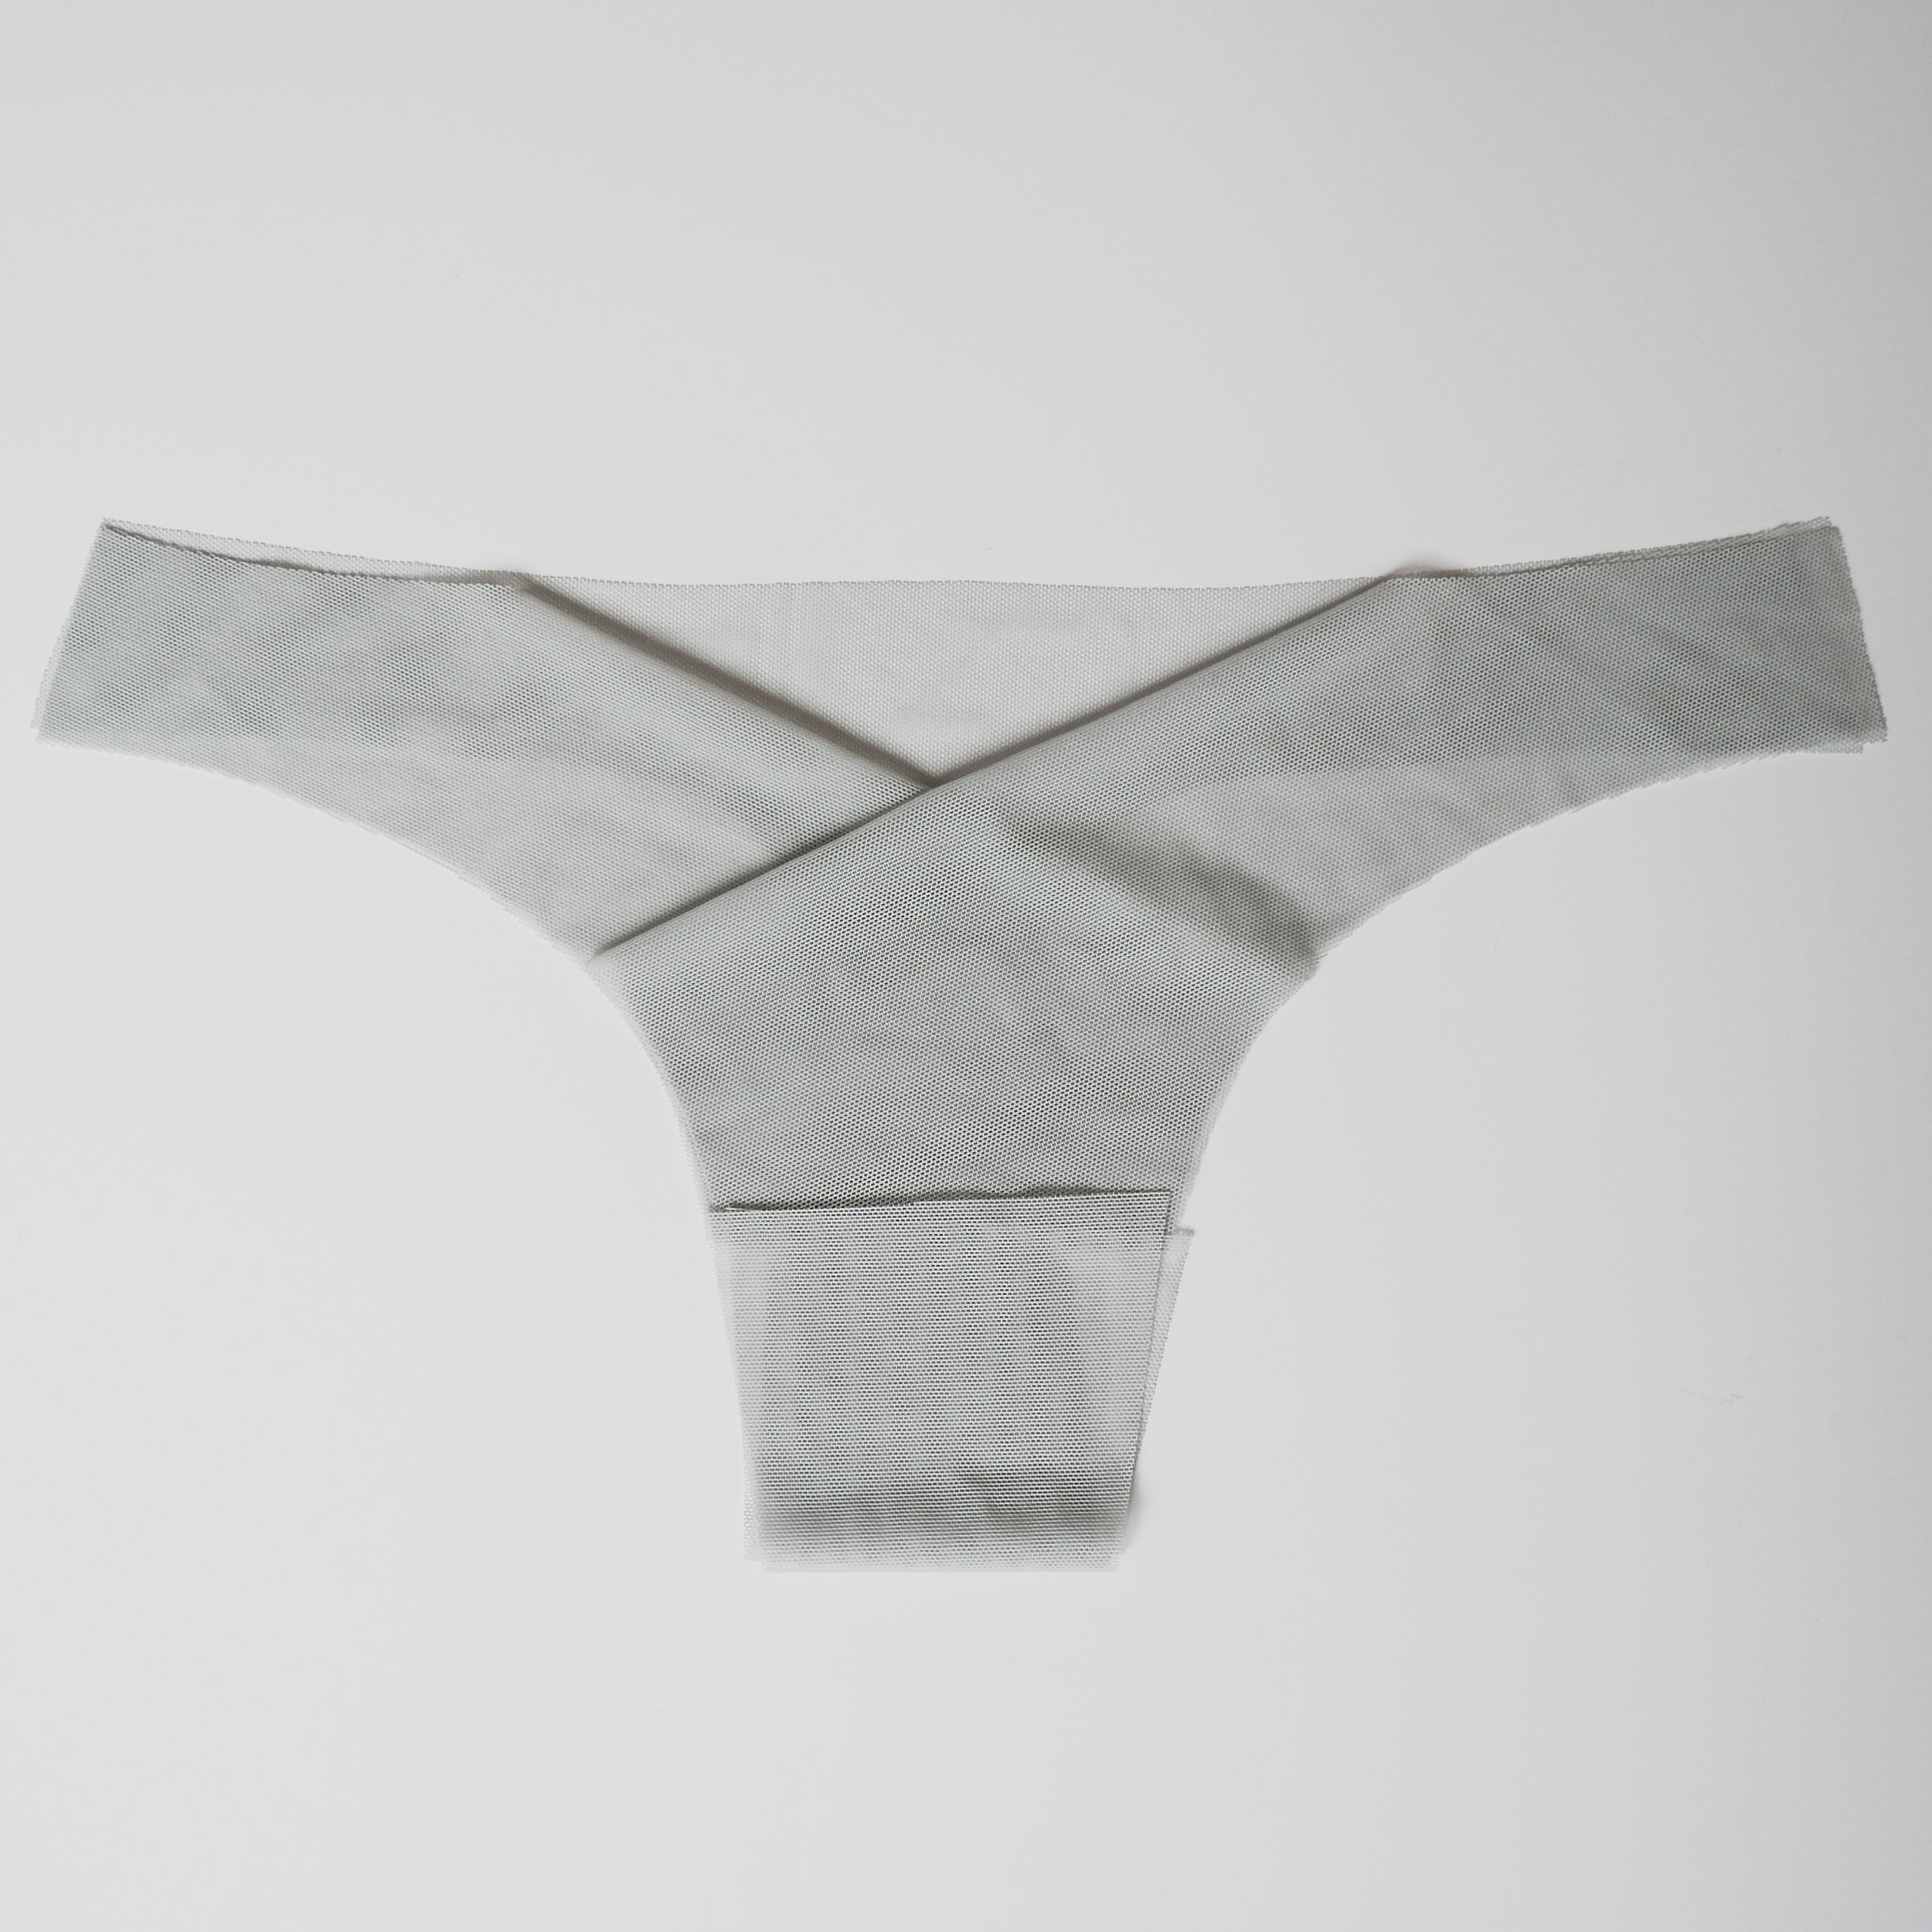
Once you have your front pieces cut out you can overlap them to see the effect.
Cuando tengas tus dos piezas delanteras puedes colocarlos ya en cruce para ver el efecto.
Cut out the other pieces as usual.
Corta el resto de las piezas como siempre.

Sew the pieces together as usual and attach the elastic for the leg openings. You can first sew the two front pieces together on the overlapping edges (the sides and the bottom edge) so they won’t move around, you’ll be working with the front as one full piece. First sewing together the four layers where they intersect makes this easier.
Attach the elastic for the waist as usual too but leave the elastic ends about 2 cm (¾ in) longer than the edge of the pieces, this way you will have enough elastic to fold under in order to attach rings on both sides.
Cose las piezas juntas como siempre y cose el elástico a las aberturas de las piernas. Puedes primero juntar las dos piezas delanteras con una costura en la parte que se cruzan (los laterales y al parte de abajo) así no se mueven tanto, estás trabajando con el delantero como si fuera una misma pieza. Si unes primero las cuatro capas que se cruzan va a ser más fácil.
Cose el elástico a la cinturilla como siempre pero deja en los extremos unos 2 cm de elástico extra, así tendrás suficiente margen para doblar el elástico hacia el revés cuando colocas las arandelas.


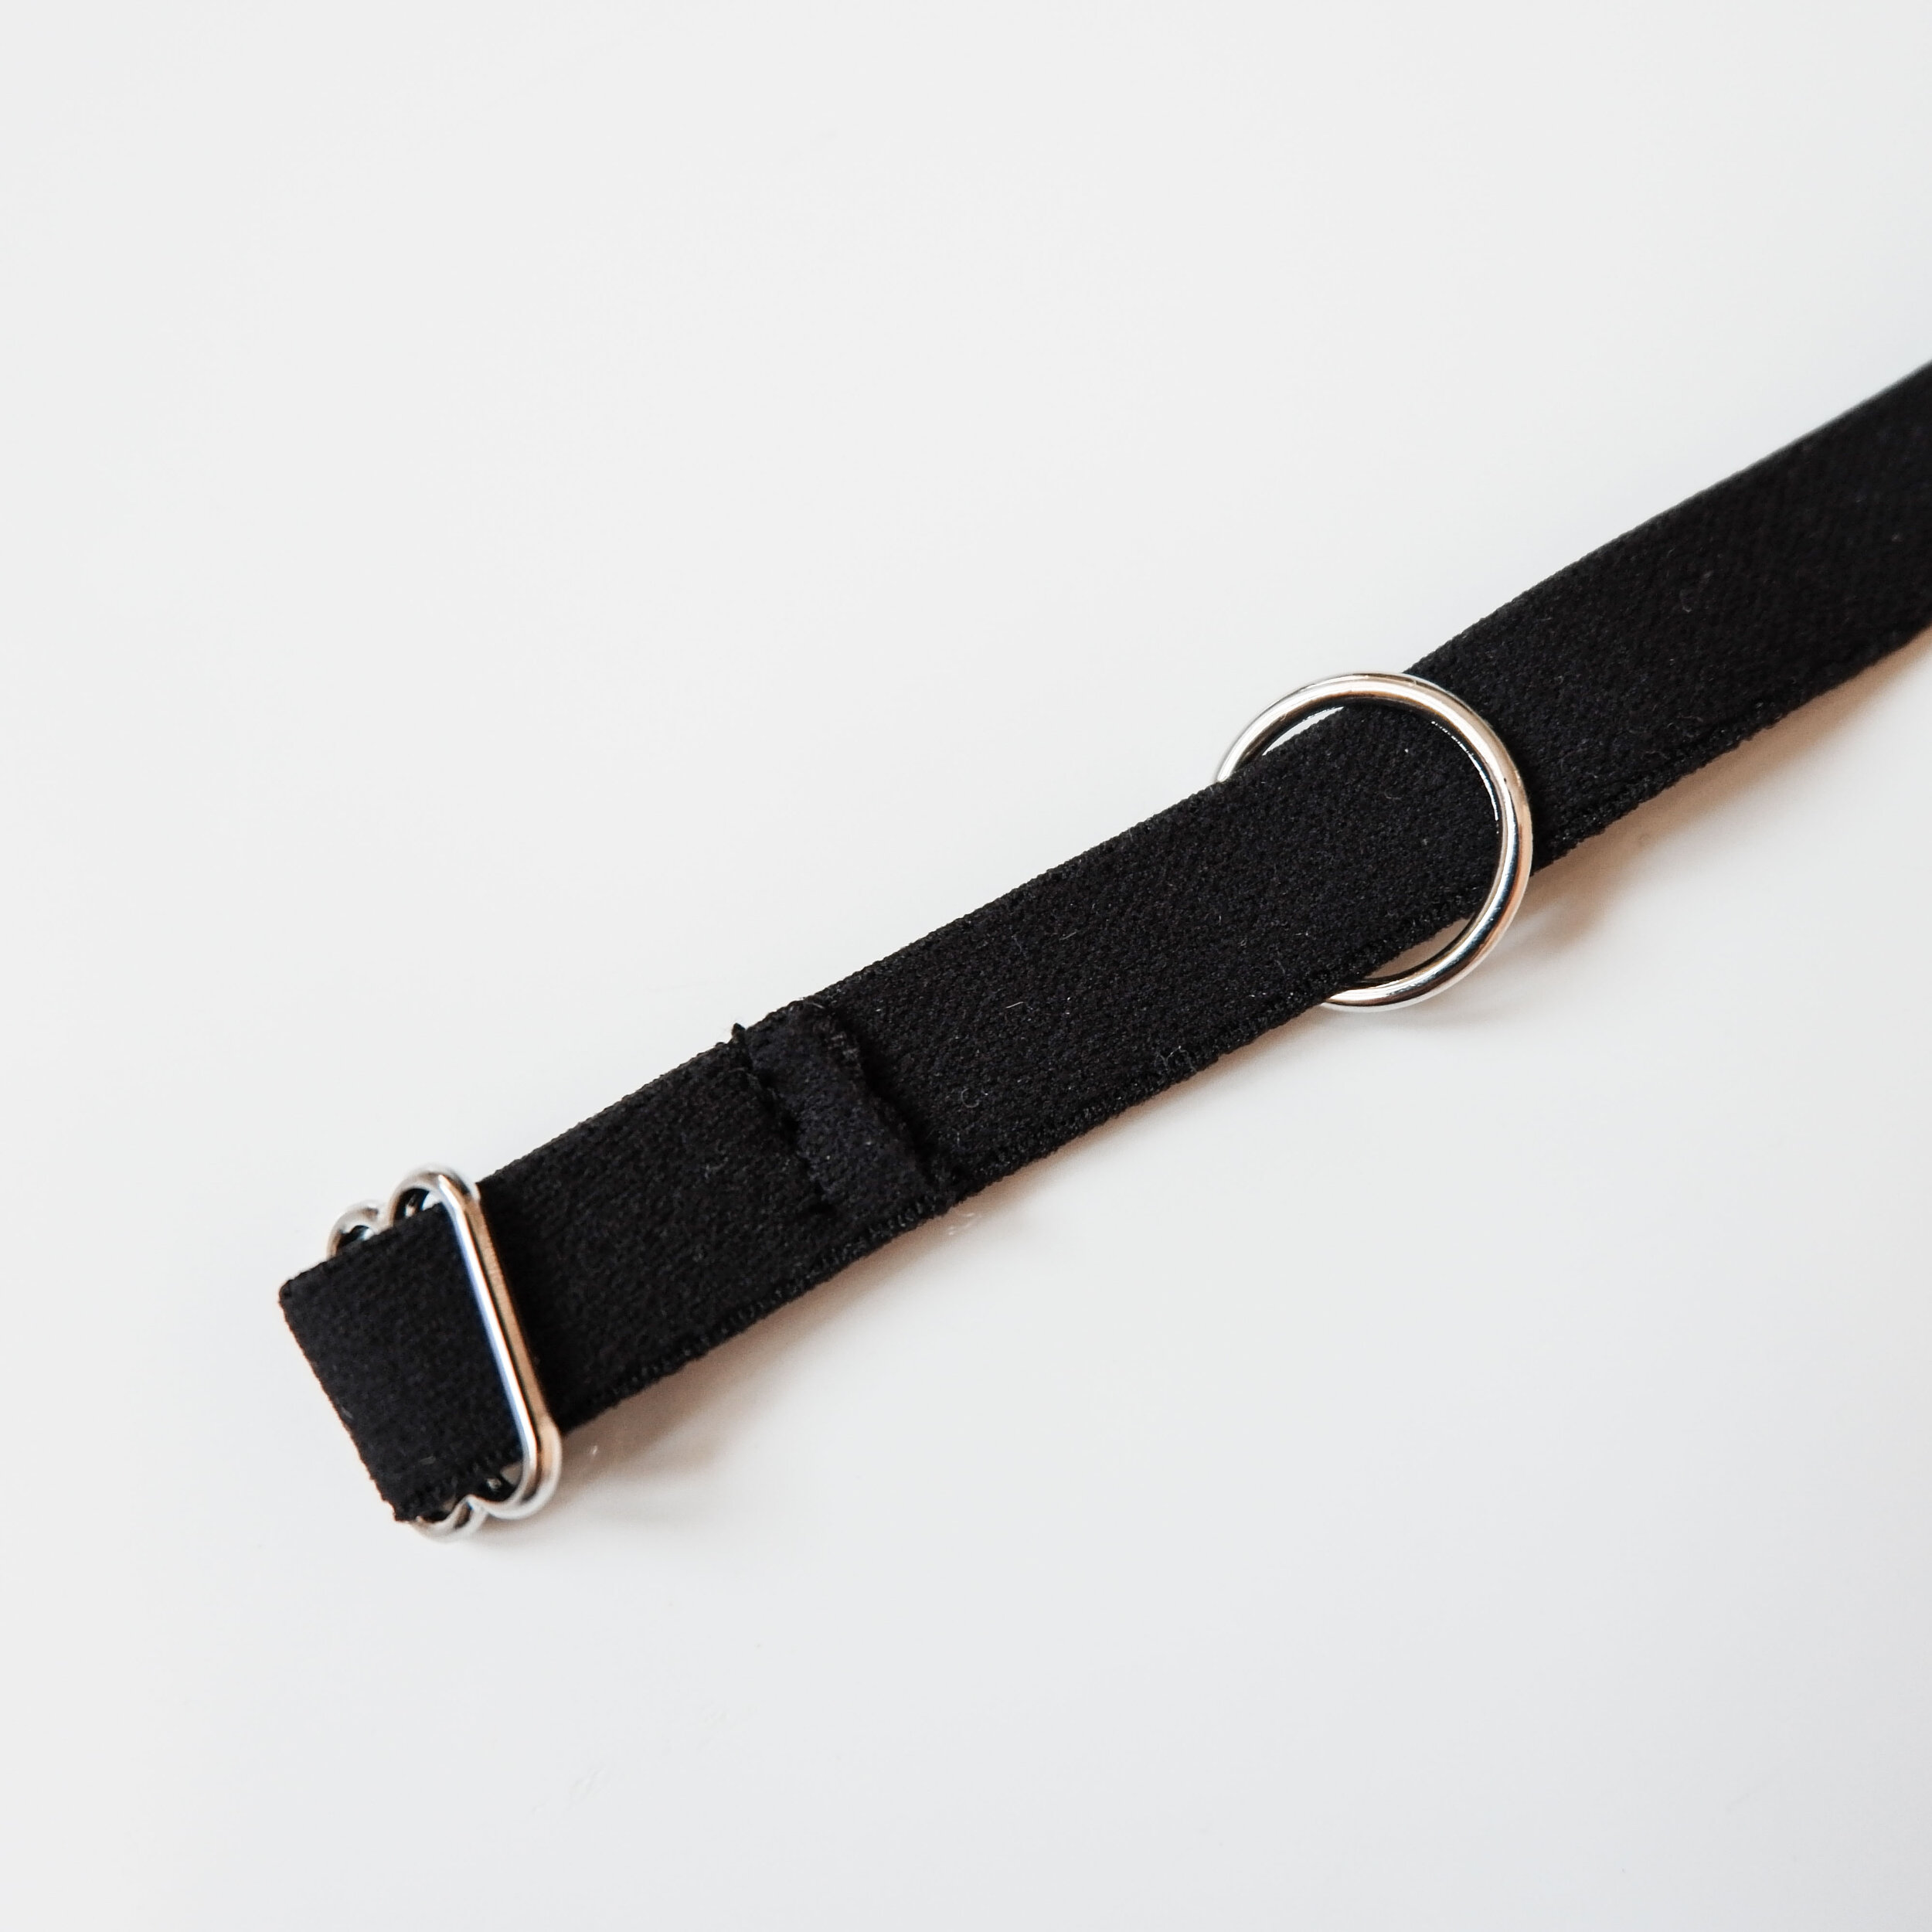

Prepare the strap: cut a strap with the same length as the remaining opening + about half this measurement. First pass the strap elastic through the slider and fold the eding under, sew with a straight stitch to secure the ending in place on the wrong side of the elastic. Then pass a ring through the free end of the elastic and pass the free end through the slider again in the same way you did in the first step. You now have a regulatable strap!
Prepara el tirante: corta el elástico de tirante de mismo largo que la abertura + aprox la mitad de esta medida. Primero pasa un extremo del elástico de tirante a través de la arandela y dobla el final hacia el revés, cose con la puntada recta para asegurarlo en su sitio en el revés. Después pasa la arandela a través del final libre del elástico y vuelve a pasar el final libre a través del regulador como antes. Ahora tienes un tirante regulable!

Pass the ring through the elastic ending on the waist of the panties and fold the elastic under, sew with the straight stitch to secure it in place. Use another ring to do the same on the other side: pass the strap elastic through the ring and fold the elastic under, stitch. Then pass the waist elastic through the ring and fold it under, stitch. You are done!
Pasa la arandela por el final del elástico en la cinturilla y dobla el elástico hacia el revés, cose con la puntada recta para asegurarlo en su sitio. Usa la otra arandela para hacer lo mismo con el otro lado: pasa el elástico de tirante a través de la arandela y doblalo hacia el revés del tirante, cose. Después pasa el elástico de la cinturilla a través de la arandela y doblalo debajo de sí mismo, cose. Ya está!

This is how the finished result looks like. I really like the different grades of transparencies of mesh!
Así es como se ve el resultado final. Me encantan cómo quedan los diferentes grados de transparencia en tul!

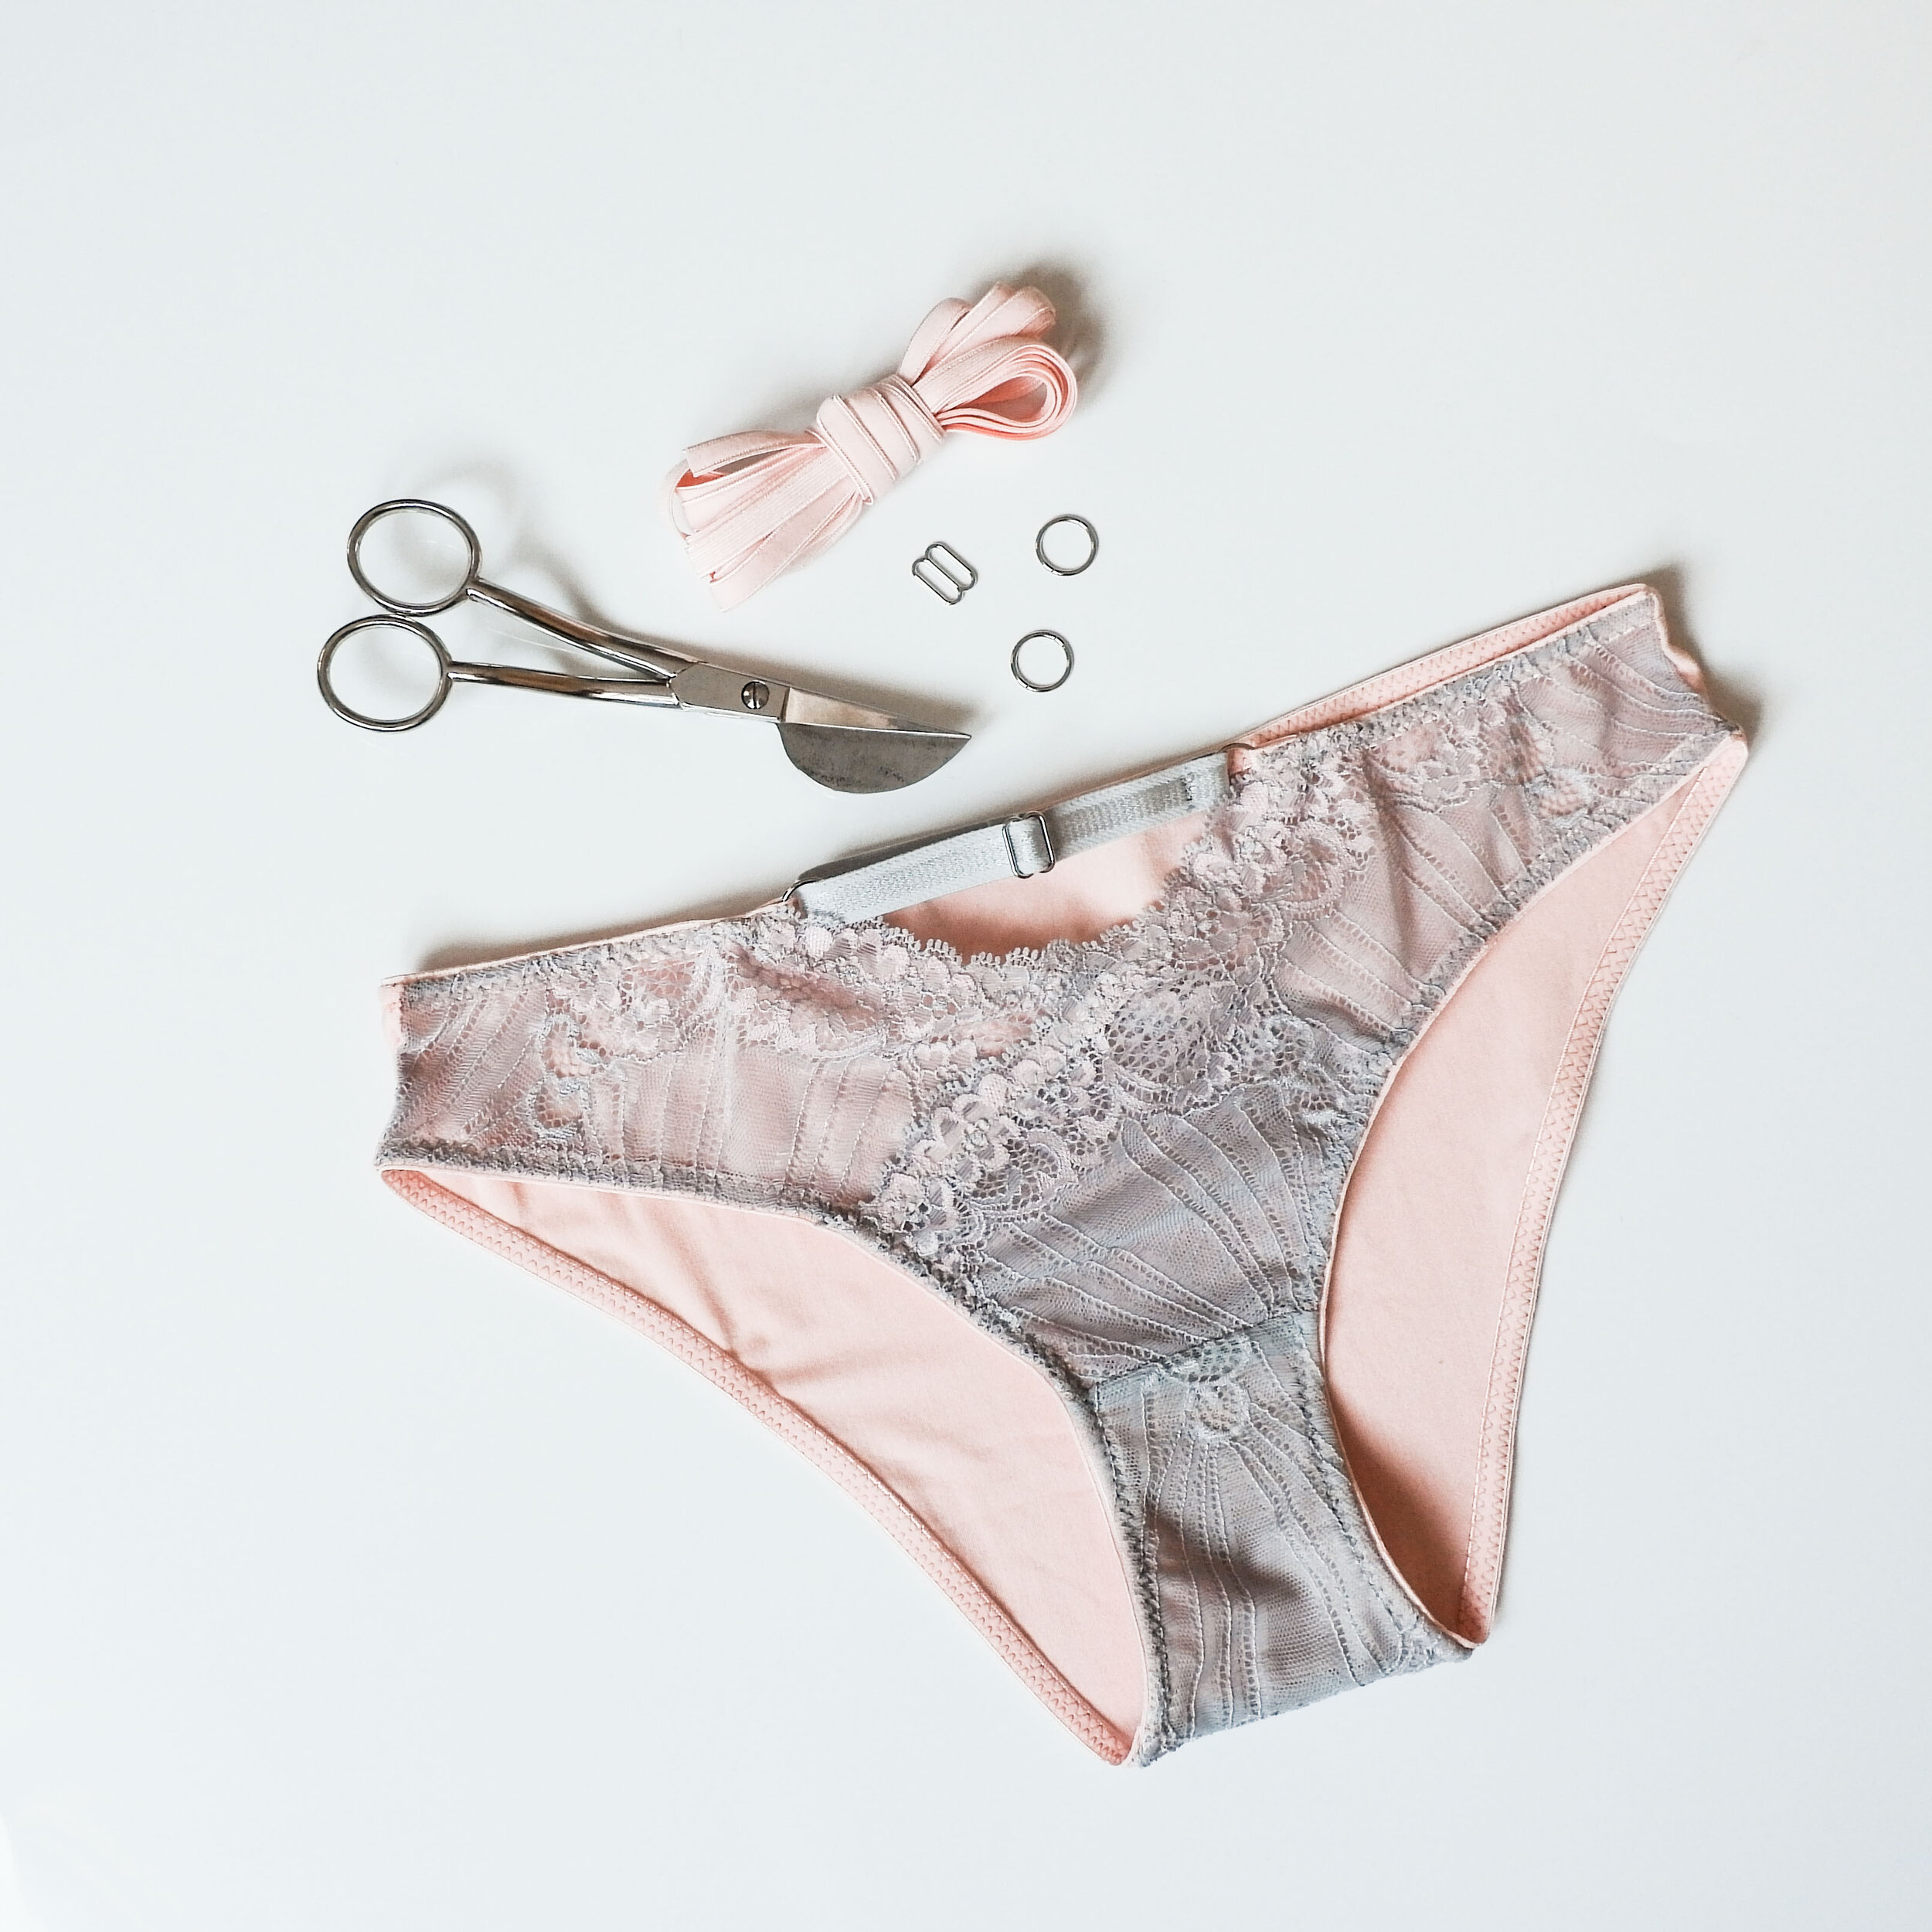
For the second version I’m using scalloped stretch lace with the Vera panties pattern.
The pattern adjustment is exactly the same but this time you won’t cut the fabric on fold. You will use the new line to cut the front piece out of lace, aligning the straight edge of the pattern with the lower part of the scallops and later using the mirroring method to cut the second piece (all my patterns have instructions on how to do that correctly).
Para la segunda versión he usado encaje elástico con el patrón de braguita Vera.
La modificación es igual que en la primera versión, solo que esta vez no cortas la tela en doblez. Vas a usar la nueva línea para cortar el delantero de encaje, colocando la línea recta del patrón junto a la parte baja de la puntilla y luego usando la primera pieza para cortar la segunda en espejo para tener la simetría (las instrucciones para cortar encaje así vienen en todos mis patrones).

This time I’m attaching a lingerie elastic for the lace pieces, I think that this way everything will be more stable. I’m using a narrow lingerie elastic but you can also use clear elastic. Just sew the elastic on the wrong side of the lace just below the scalloped edge using a zig zag stitch. You don’t need to stretch the elastic, it’s there to stabilize the lace edge.
Esta vez he usado elástico de lencería para las piezas de encaje, me parece que de esta manera todo es más estable. He usado elástico fino pero puedes usar también el elástico transparente. Simplemente cose el elástico en el revés de las piezas de encaje justo debajo de la puntilla usando el zig-zag. No hace falta estirar el elástico, está allí para estabilizar el encaje.

Then just cut out the rest of the pieces and sew using the same method as explained on the mesh version. One thing I didn’t do but you can also try is sewing a small stitching line to keep the overlap from moving apart, I’d try on the panties and see if this needs to be done and then you can just make a bartack just where the pieces overlap, it won’t be visible and it will hold the pieces together.
Después corta el resto de las piezas y cose igual como está explicado en la versión de tul. Una cosa que puedes hacer también es coser un remate justo donde el cruce para que las piezas no se muevan, yo probaría las braguitas y si ves que este paso hace falta lo puedes hacer, con el encaje no se va a hacer y las piezas se quedan bien juntas.

One more thing I thought you might find interesting: for this particular pair of panties I used this pretty grey and pink lace together with a super soft peach viscose knit fabric. I was going to use a layer of lace and a layer of knit for the crotch piece but I saw that there was a color difference that was quite visible between the front and the crotch as the two lace pieces that overlap on the front were darker than the combination of lace + knit for the crotch. What I did was that I added a layer of grey mesh that is between the knit and lace crotch pieces, this made the crotch piece a bit darker and it then matched with the front. It’s not a super important thing to do obviously, hehe, especially as it won’t be probably even visible when wearing the panties but I think it’s a good trick if you ever need to alter the lace color in some way. I have used the same trick with foam cups that were too dark for the lace etc, as the mesh is very light weight it can be useful for this kind of things.
Una cosa más que pensaba que os puede resultar interesante: para este par de braguitas usé un encaje gris y rosa muy bonito junto a un punto super suave de viscosa en melocotón. Iba a usar para la entrepierna una capa de encaje y una de tela de punto pero vi que había una diferencia de color bastante notable respecto al delantero ya que allí se cruzan dos piezas de encaje y se queda un color más oscuro. Lo que hice era añadir una capa de entrepierna de tul gris que está entre la capa de encaje y de punto, esto hace que la entrepierna sea de un tono más oscuro y así tiene el mismo tono que el delantero. Obviamente no es algo super importante, jeje, además probablemente ni siquiera se ve cuando llevas las braguitas pero creo que es un buen truco por si alguna vez necesitas cambiar el color de encaje de alguna manera. He usado el mismo truco para copas de foam que eran demasiado oscuras para el encaje etc, ya que el tule es un material muy fino va bien para este tipo de casos.
So that’s it, a very easy hack but the result looks very pretty. You can play around with this a lot more: try covering the edges of overlapping pieces cut on single layer of fabric with FOE or sew a lingerie elastic as usual (when using lingerie elastic remember to add seam allowance according to the width of your elastic), this way you can create pretty contrasting effects too and you can do it with knit fabrics of your choice, you don’t need mesh or lace for that. You can also use the same hack for the back of the panties if you wish.
Así que ya está, una modificación sencillo para un resultado muy bonito y diferente. Puedes experimentar mucho más con este tipo de cosas: prueba usar el bies elástico FOE o elástico de lencería (en este caso recuerda que tienes que añadir margen de costura según el ancho de elástico que uses) si cortas las piezas en una sola capa de tela de punto. Así puedes usar bonitos efectos de contraste también y no necesitas ni tul ni encaje, puedes hacerlo con telas de punto que te gusten. También puedes usar el mismo método para cambiar la pieza de espalda en vez del delantero.

I hope you found this tutorial useful, you can find more tutorials about sewing panties in my e-book (sign up for my newsletter to get it for free). And you can find all my sewing patterns at my Etsy shop if you want to try out sewing your own lingerie.
Espero que te haya resultado útil este tutorial, puedes ver más tutoriales sobre cómo modificar los patrones de braguitas en mi libro electrónico (apúntate al newsletter para tenerlo gratis). Y todos mis patrones de costura los puedes encontrar en mi tienda de Etsy.
