Newsletter

 
studiocostura.com

Hola, no es un post sobre algo nuevo que he cosido pero quería recordaros que de vez en cuando (intentando que sea una vez al mes...) sigo mandando mi newsletter. Allí pongo enlaces que os pueden interesar e igual os inspiran para vuestros proyectos de costura etc. Puedes leer el último que mandé esta mañana abajo y si te mola, puedes apuntarte pinchando aquí

Y prometo post costuril en breves <3


Hey, this is not a post about something new I've made, I only wanted to remind you that I keep sending a newsletter out every now and then (one in a month or so...). I send links about stuff that might interest you and maybe there's some inspo for your sewing proyects too. You can read the last one I sent out this morning below and if you like it you can subscribe here.

And I promise a sewing proyect post soon too <3

Hola // Hey

Scroll down for the English version!

Qué tal estás? Casi se acaba el primer mes del año!!! Estoy con mucho trabajo estas semanas y aunque quería que este newsletter te llegue también notificando que he escrito un post en el blog, pues al final va a ser que no. 
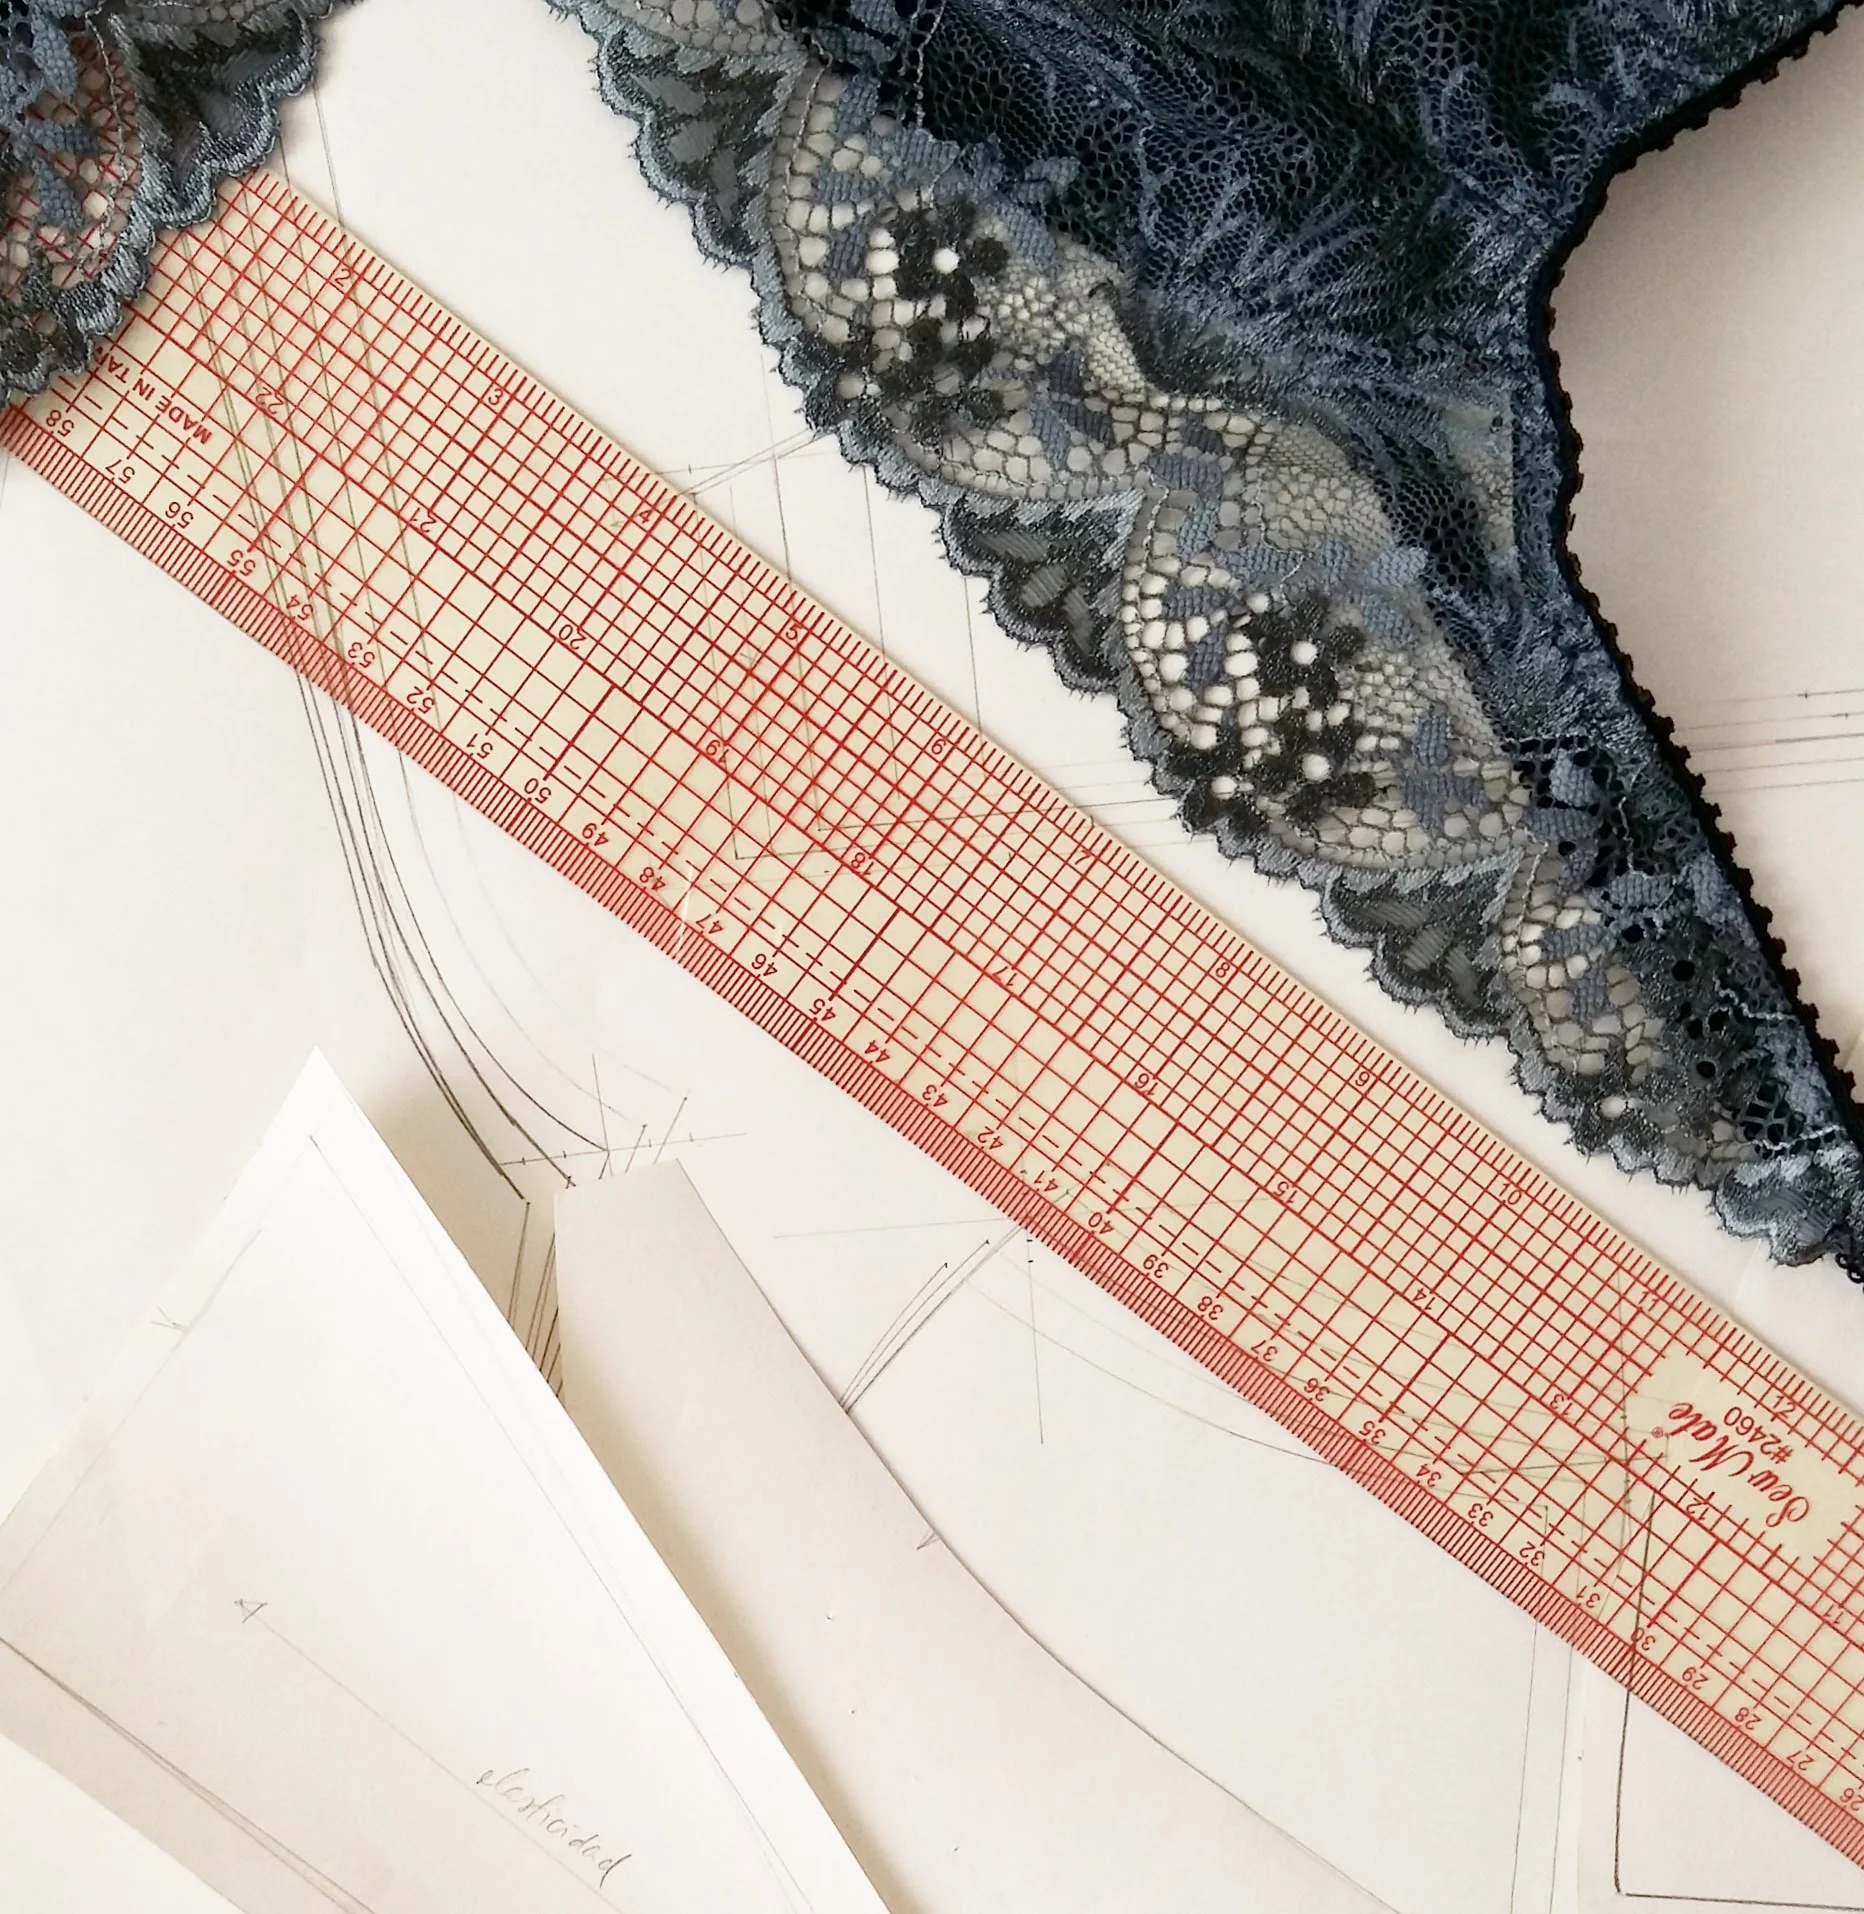
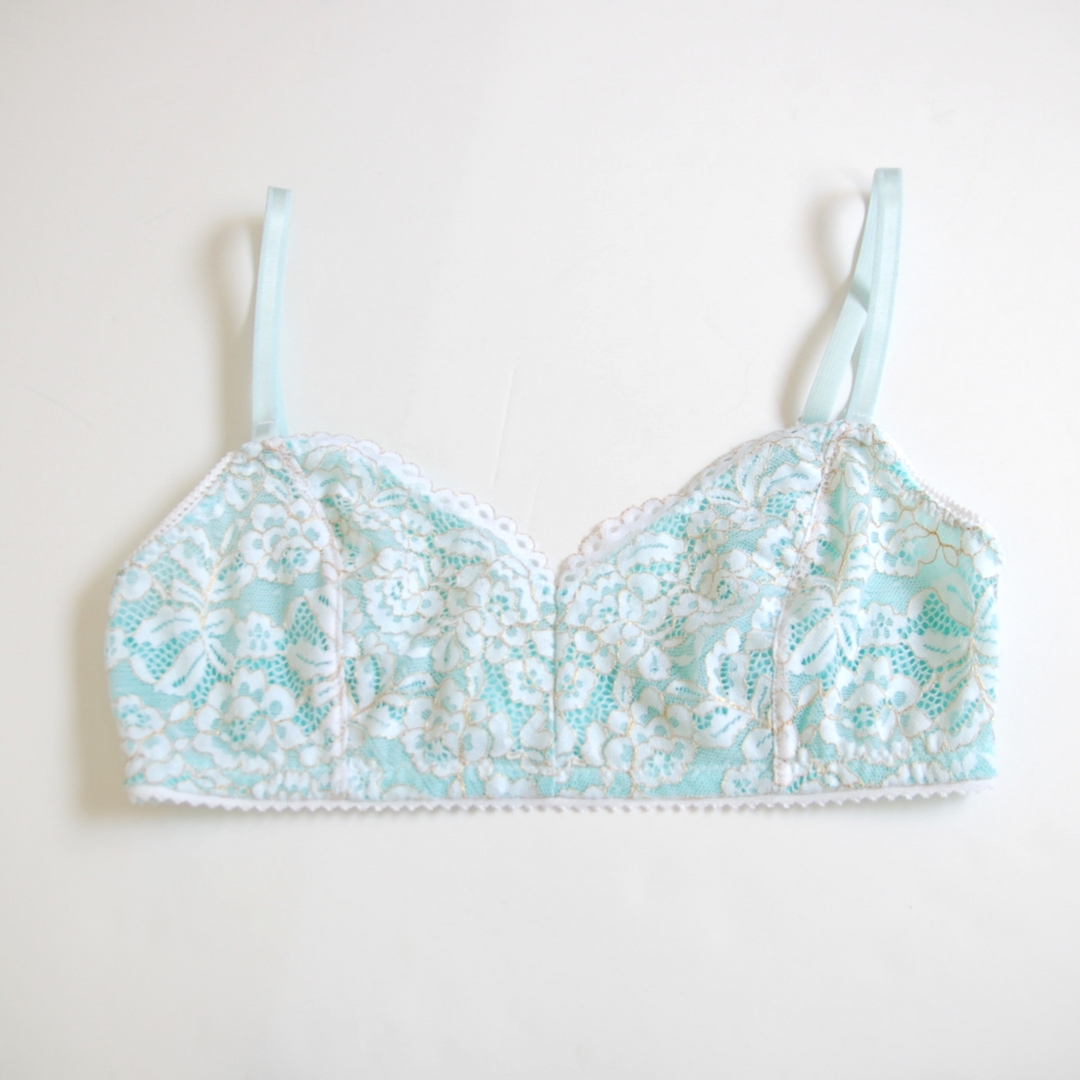
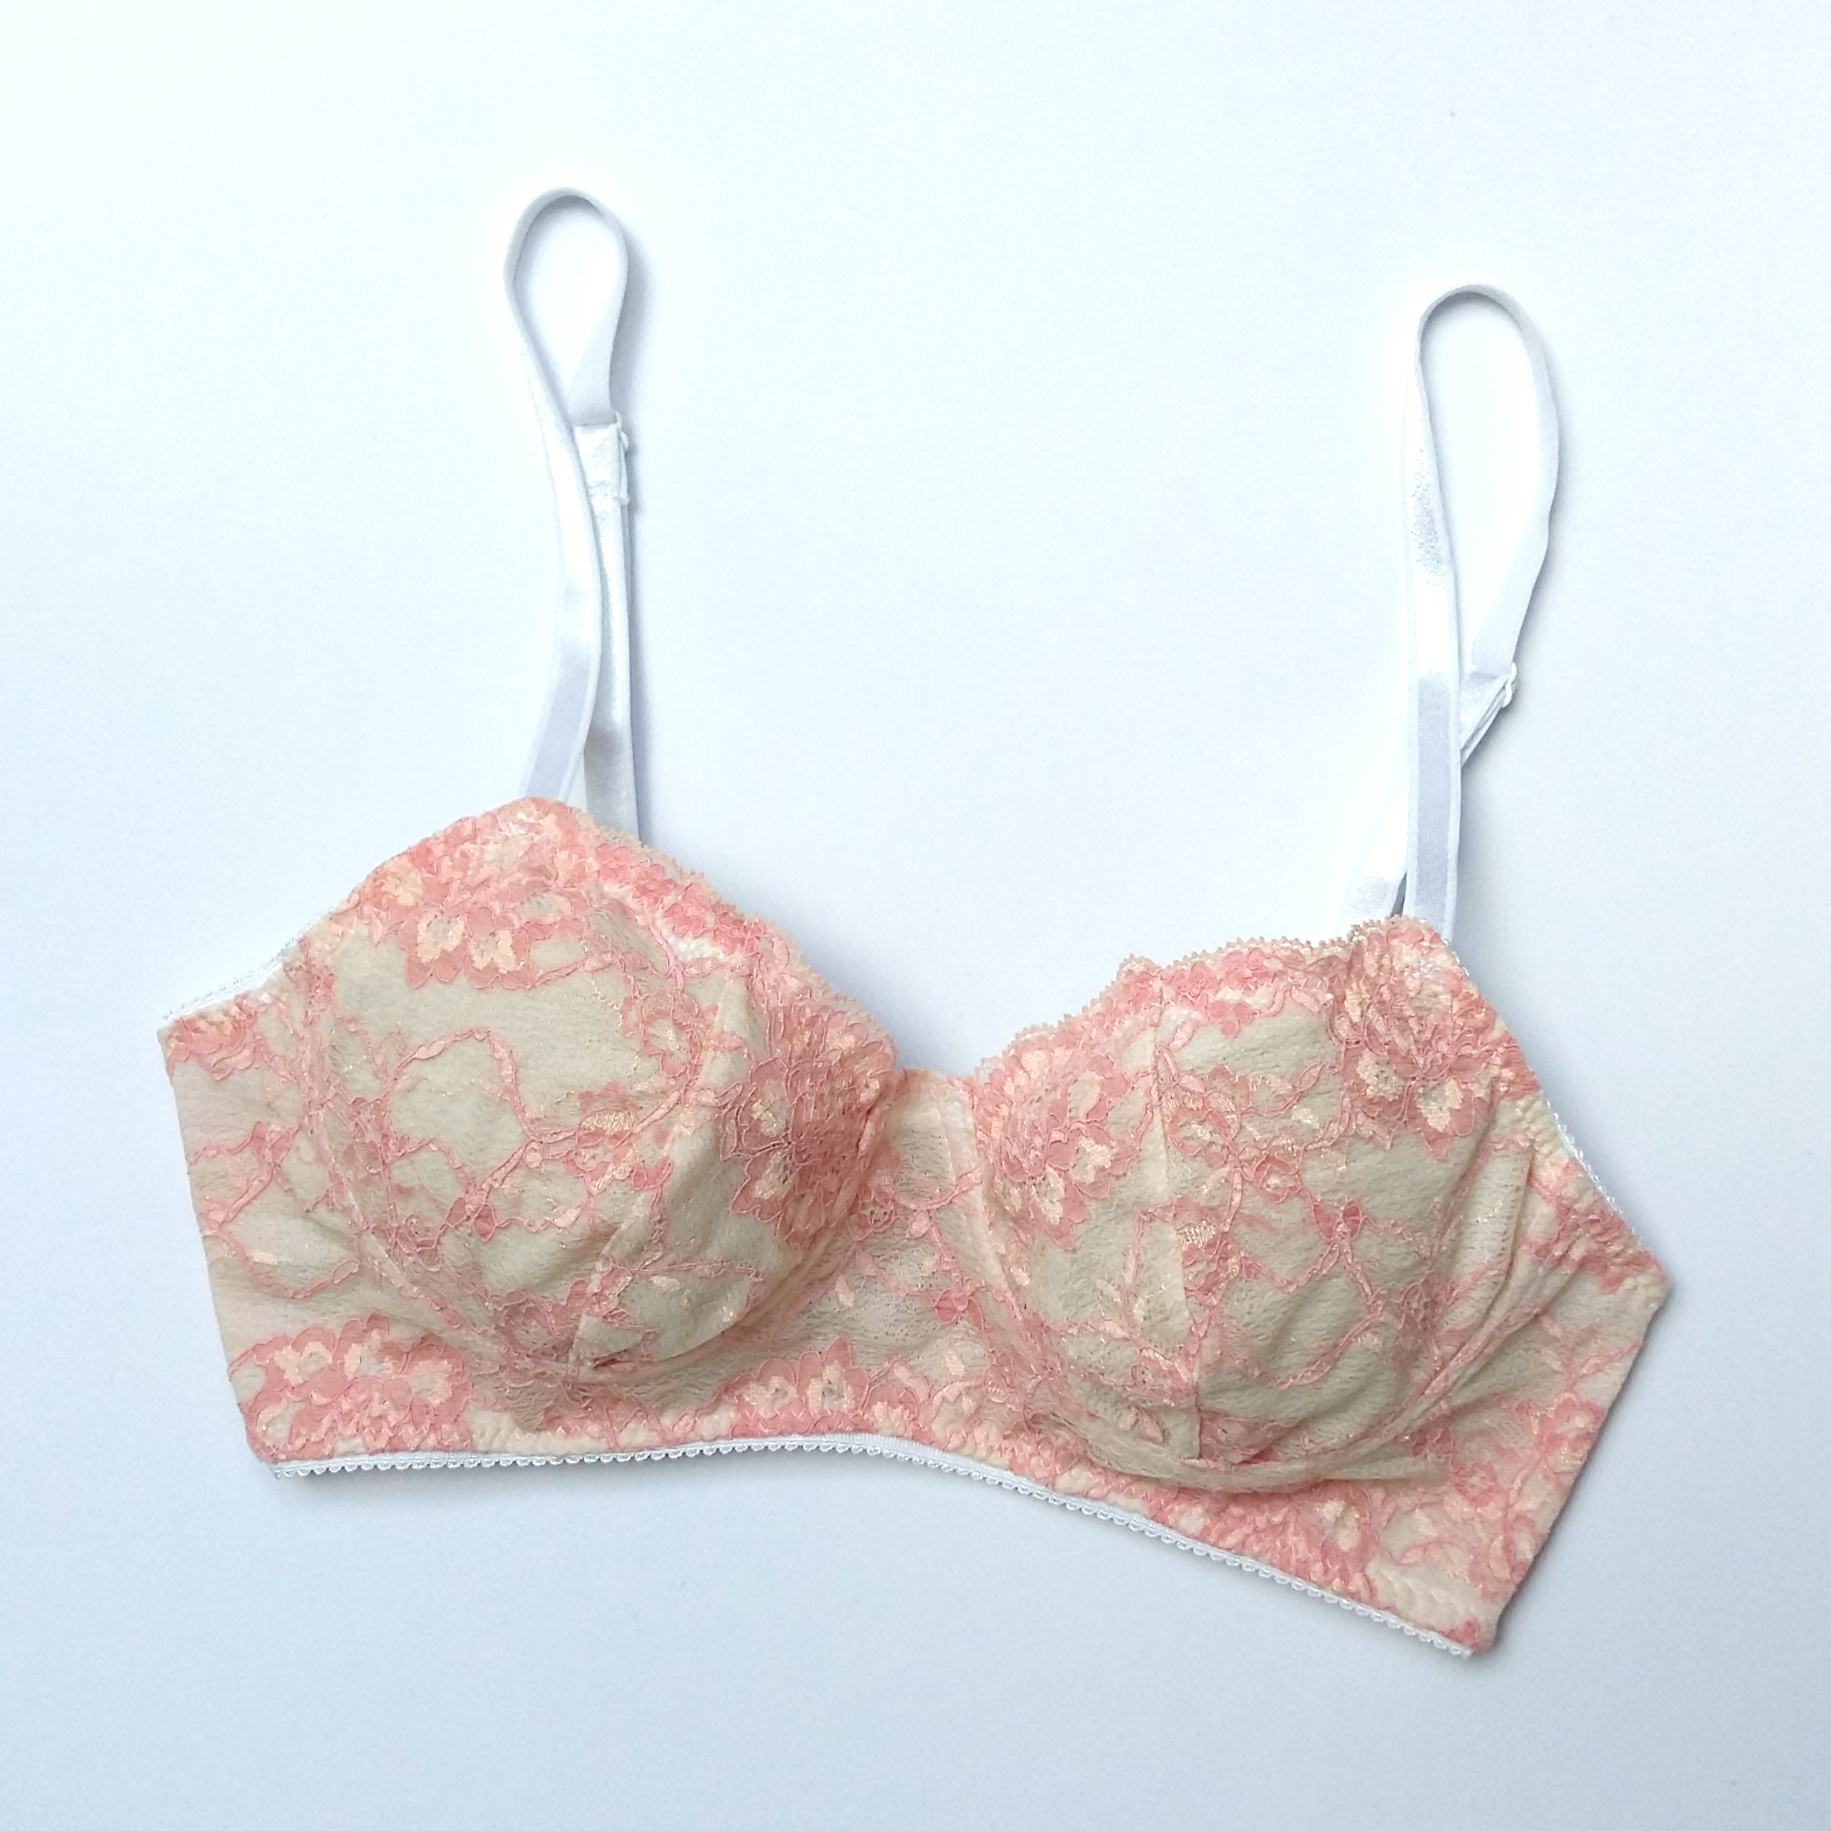
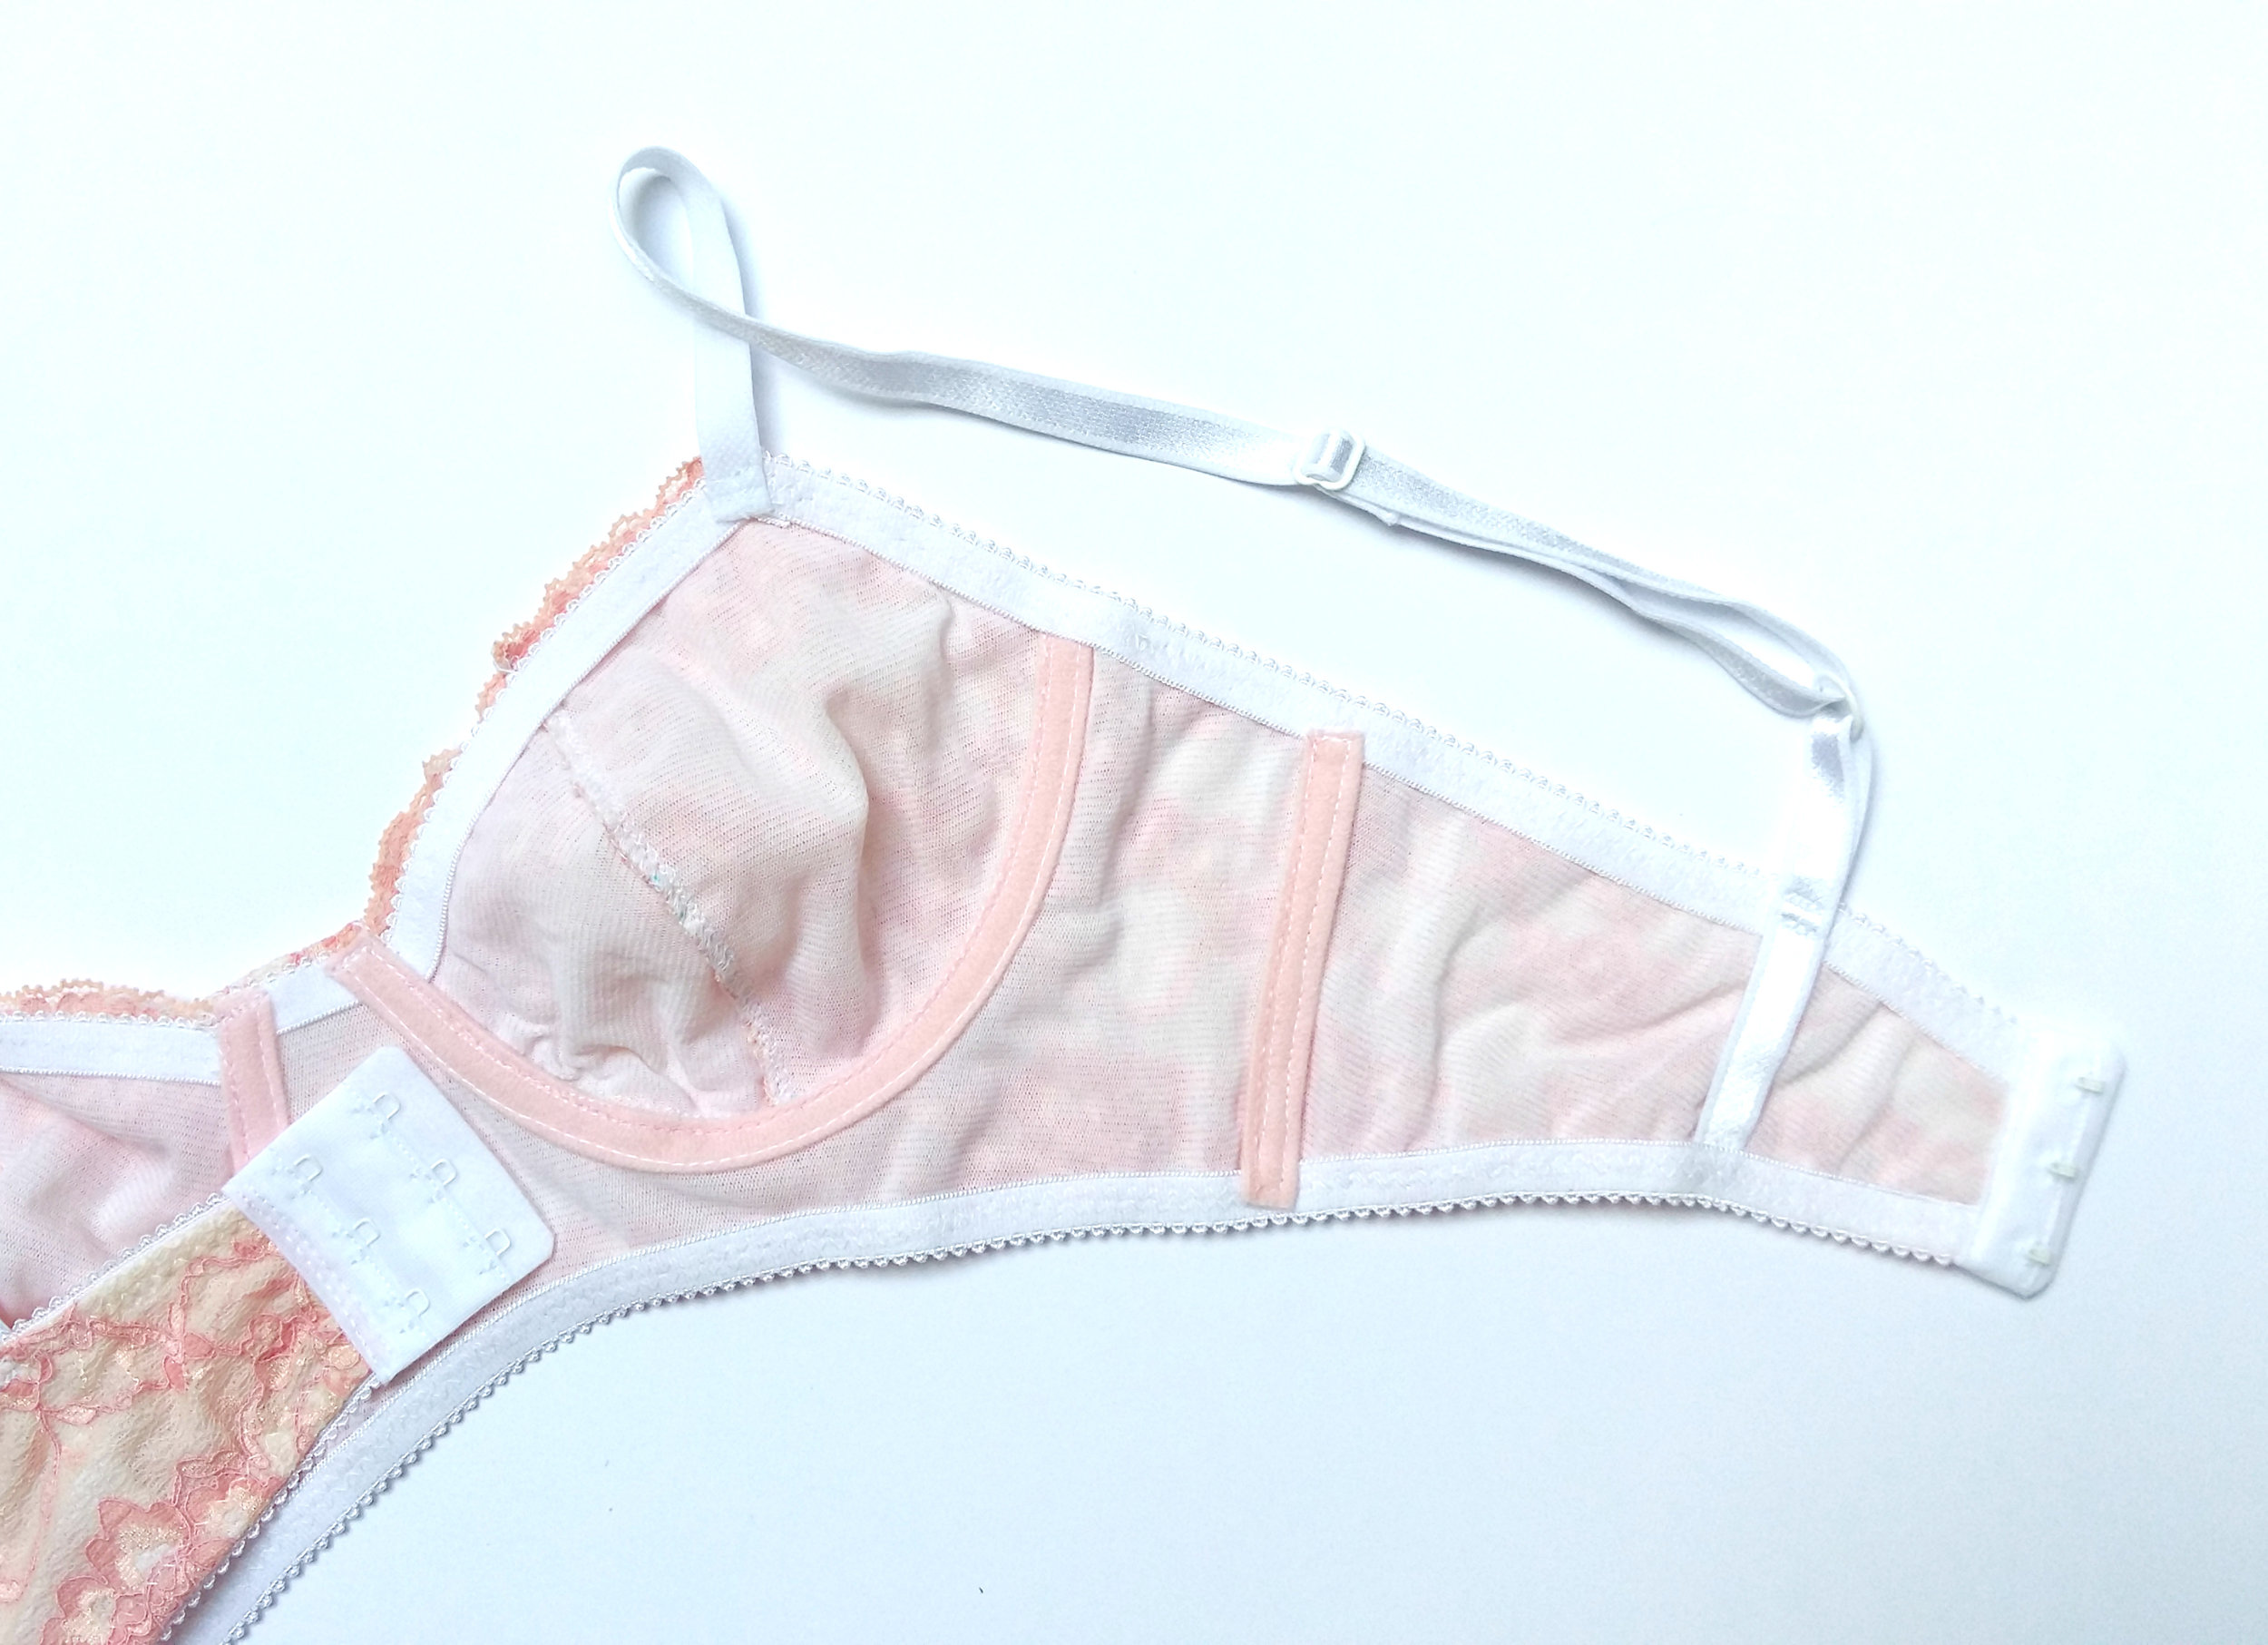
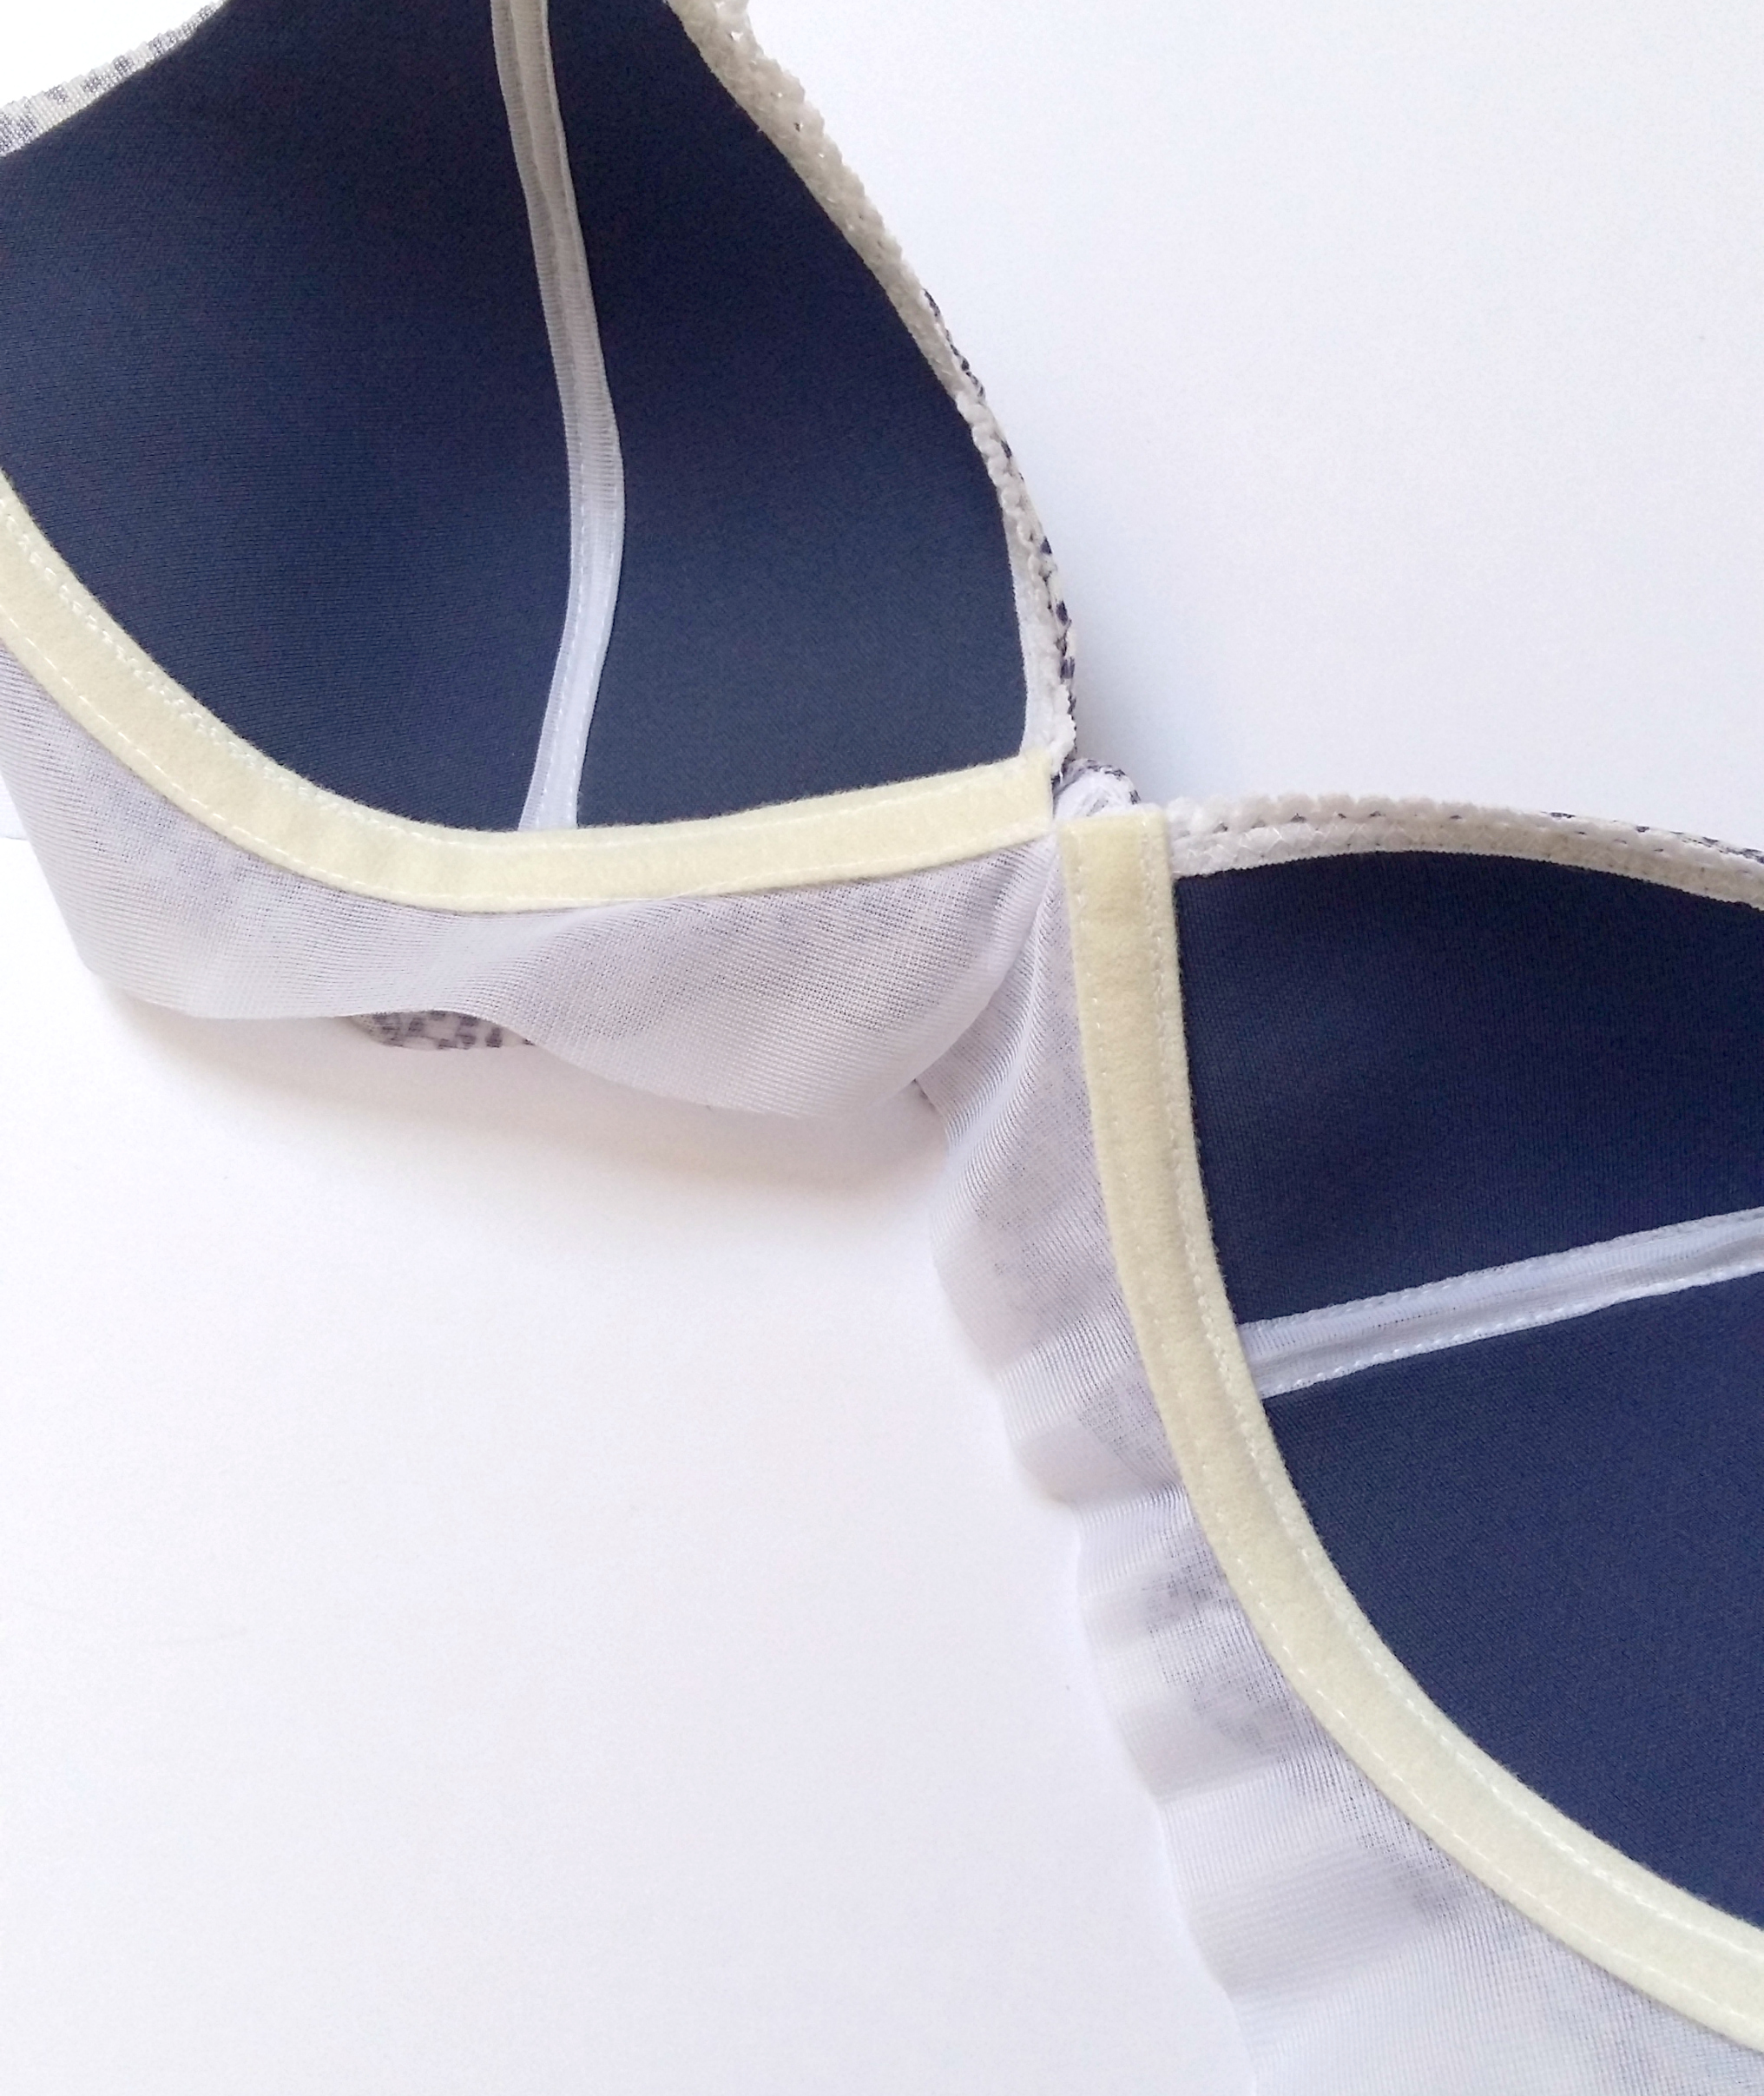
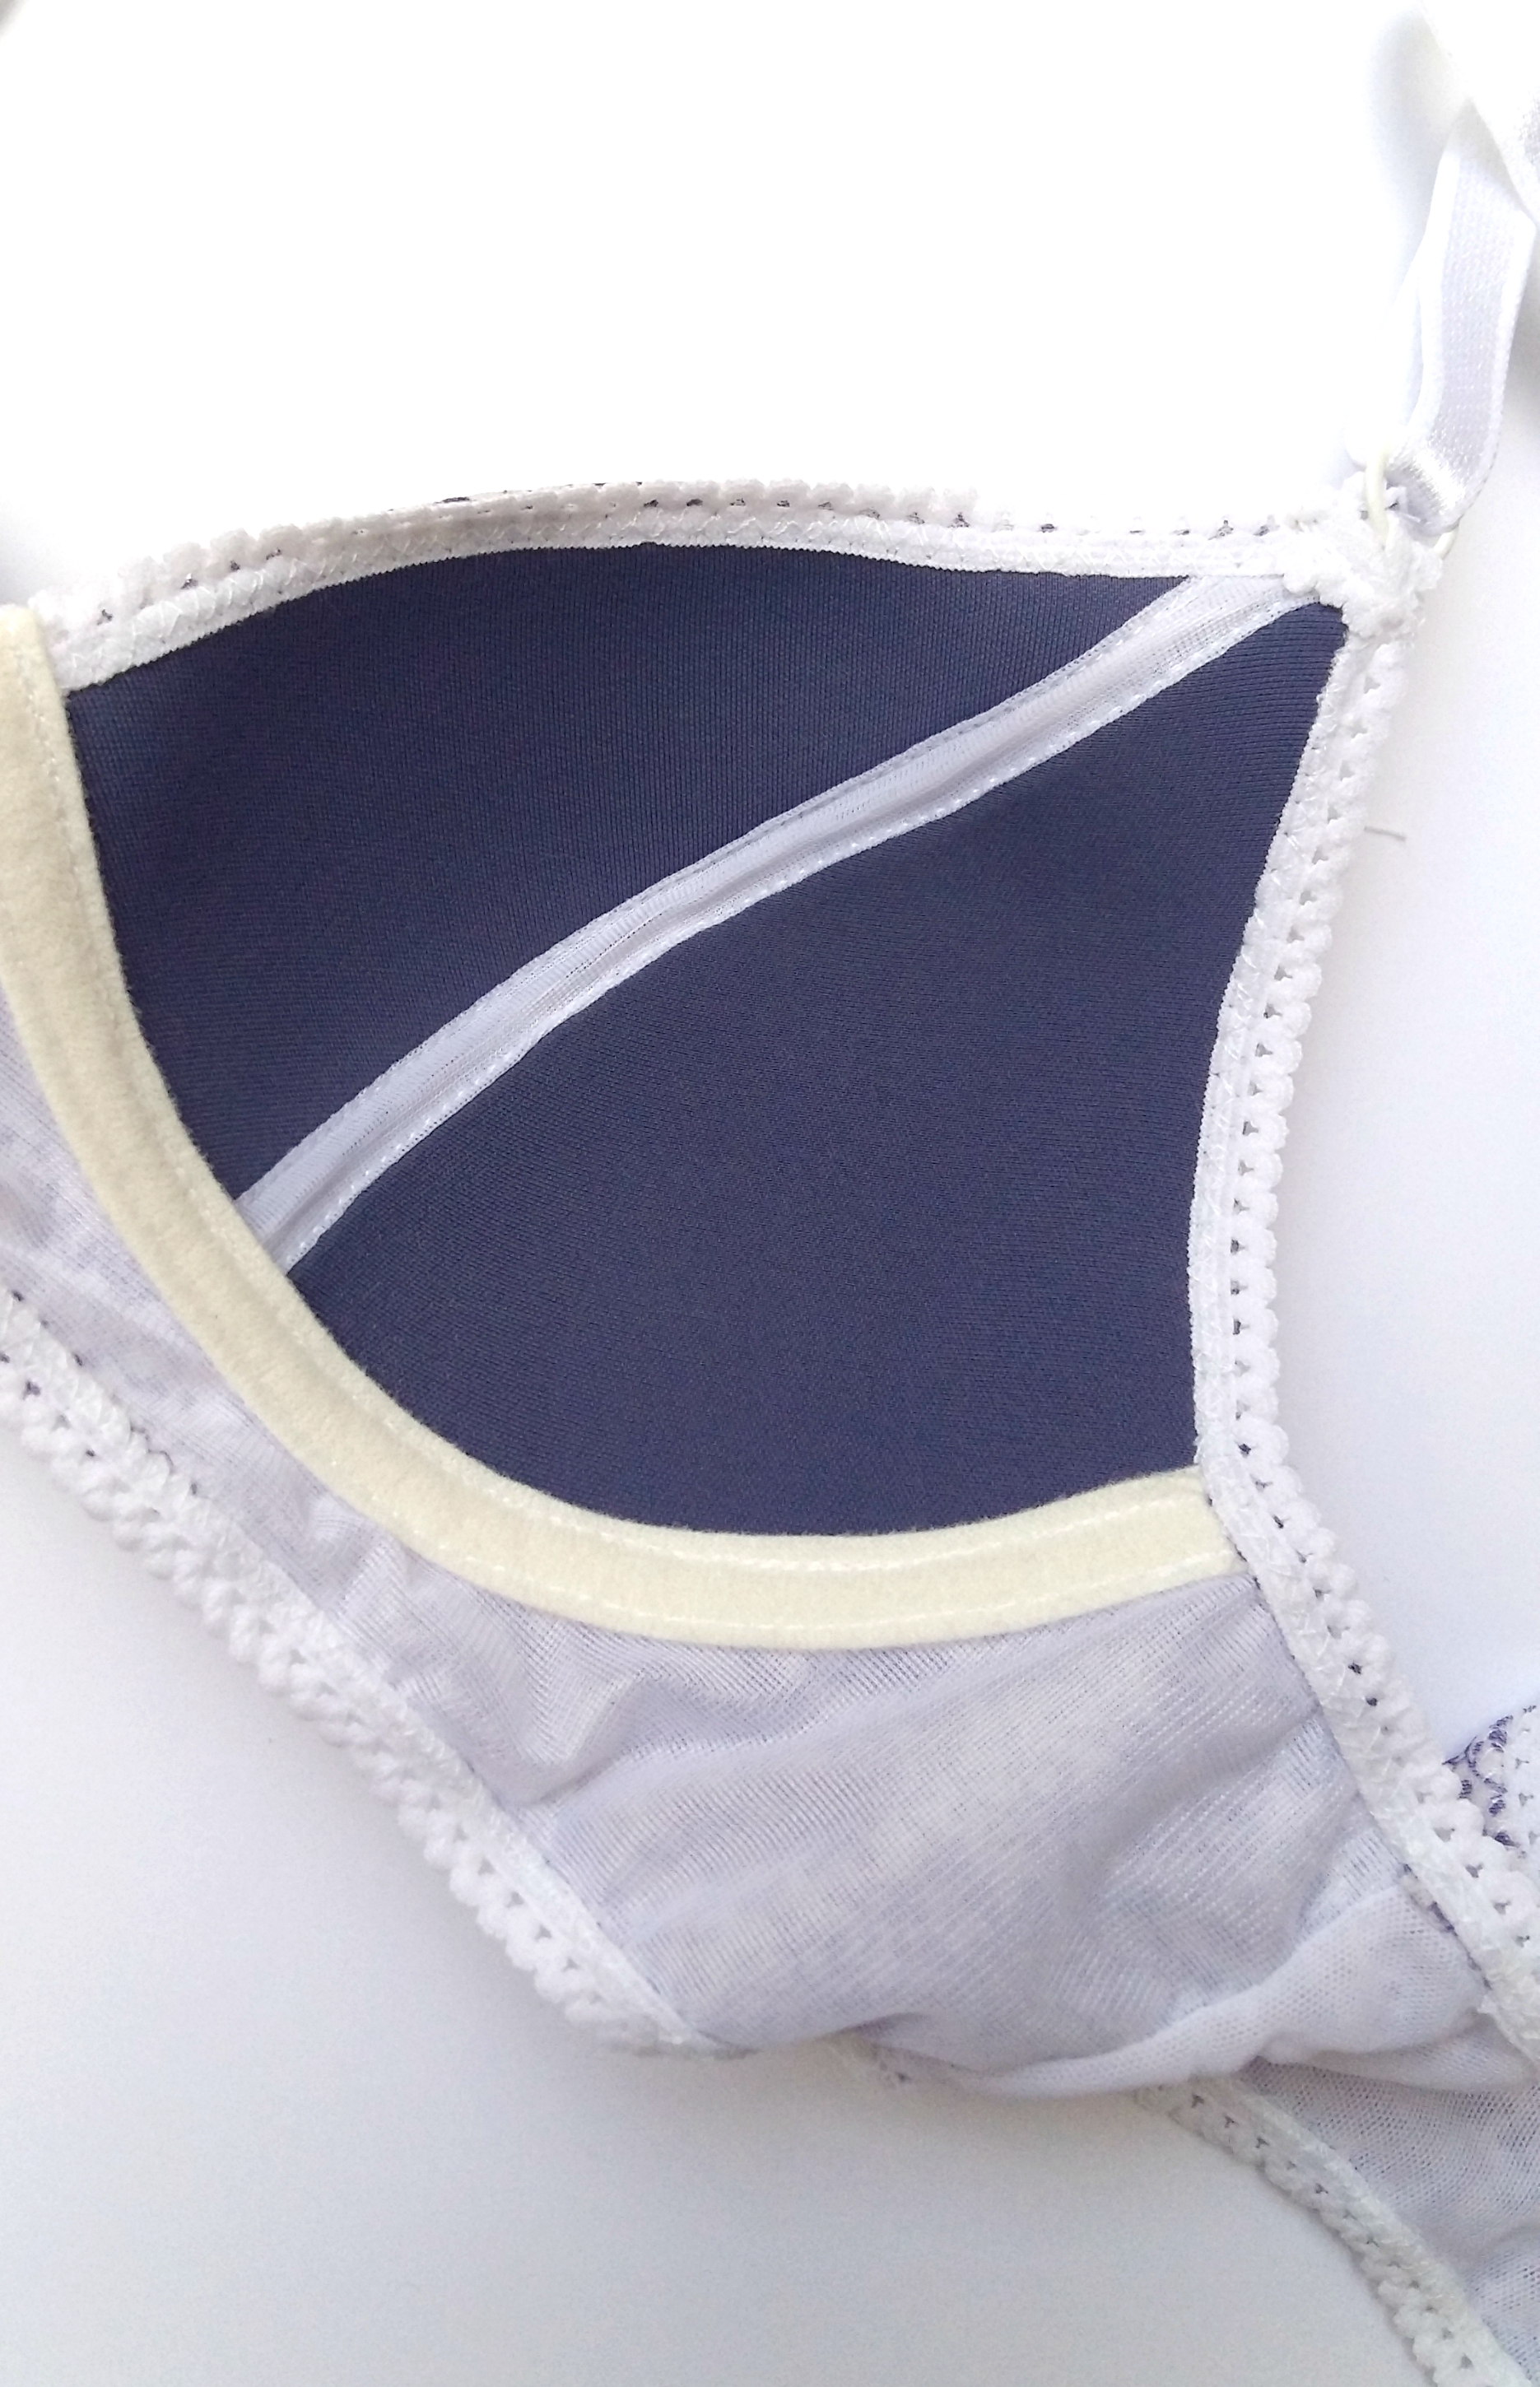
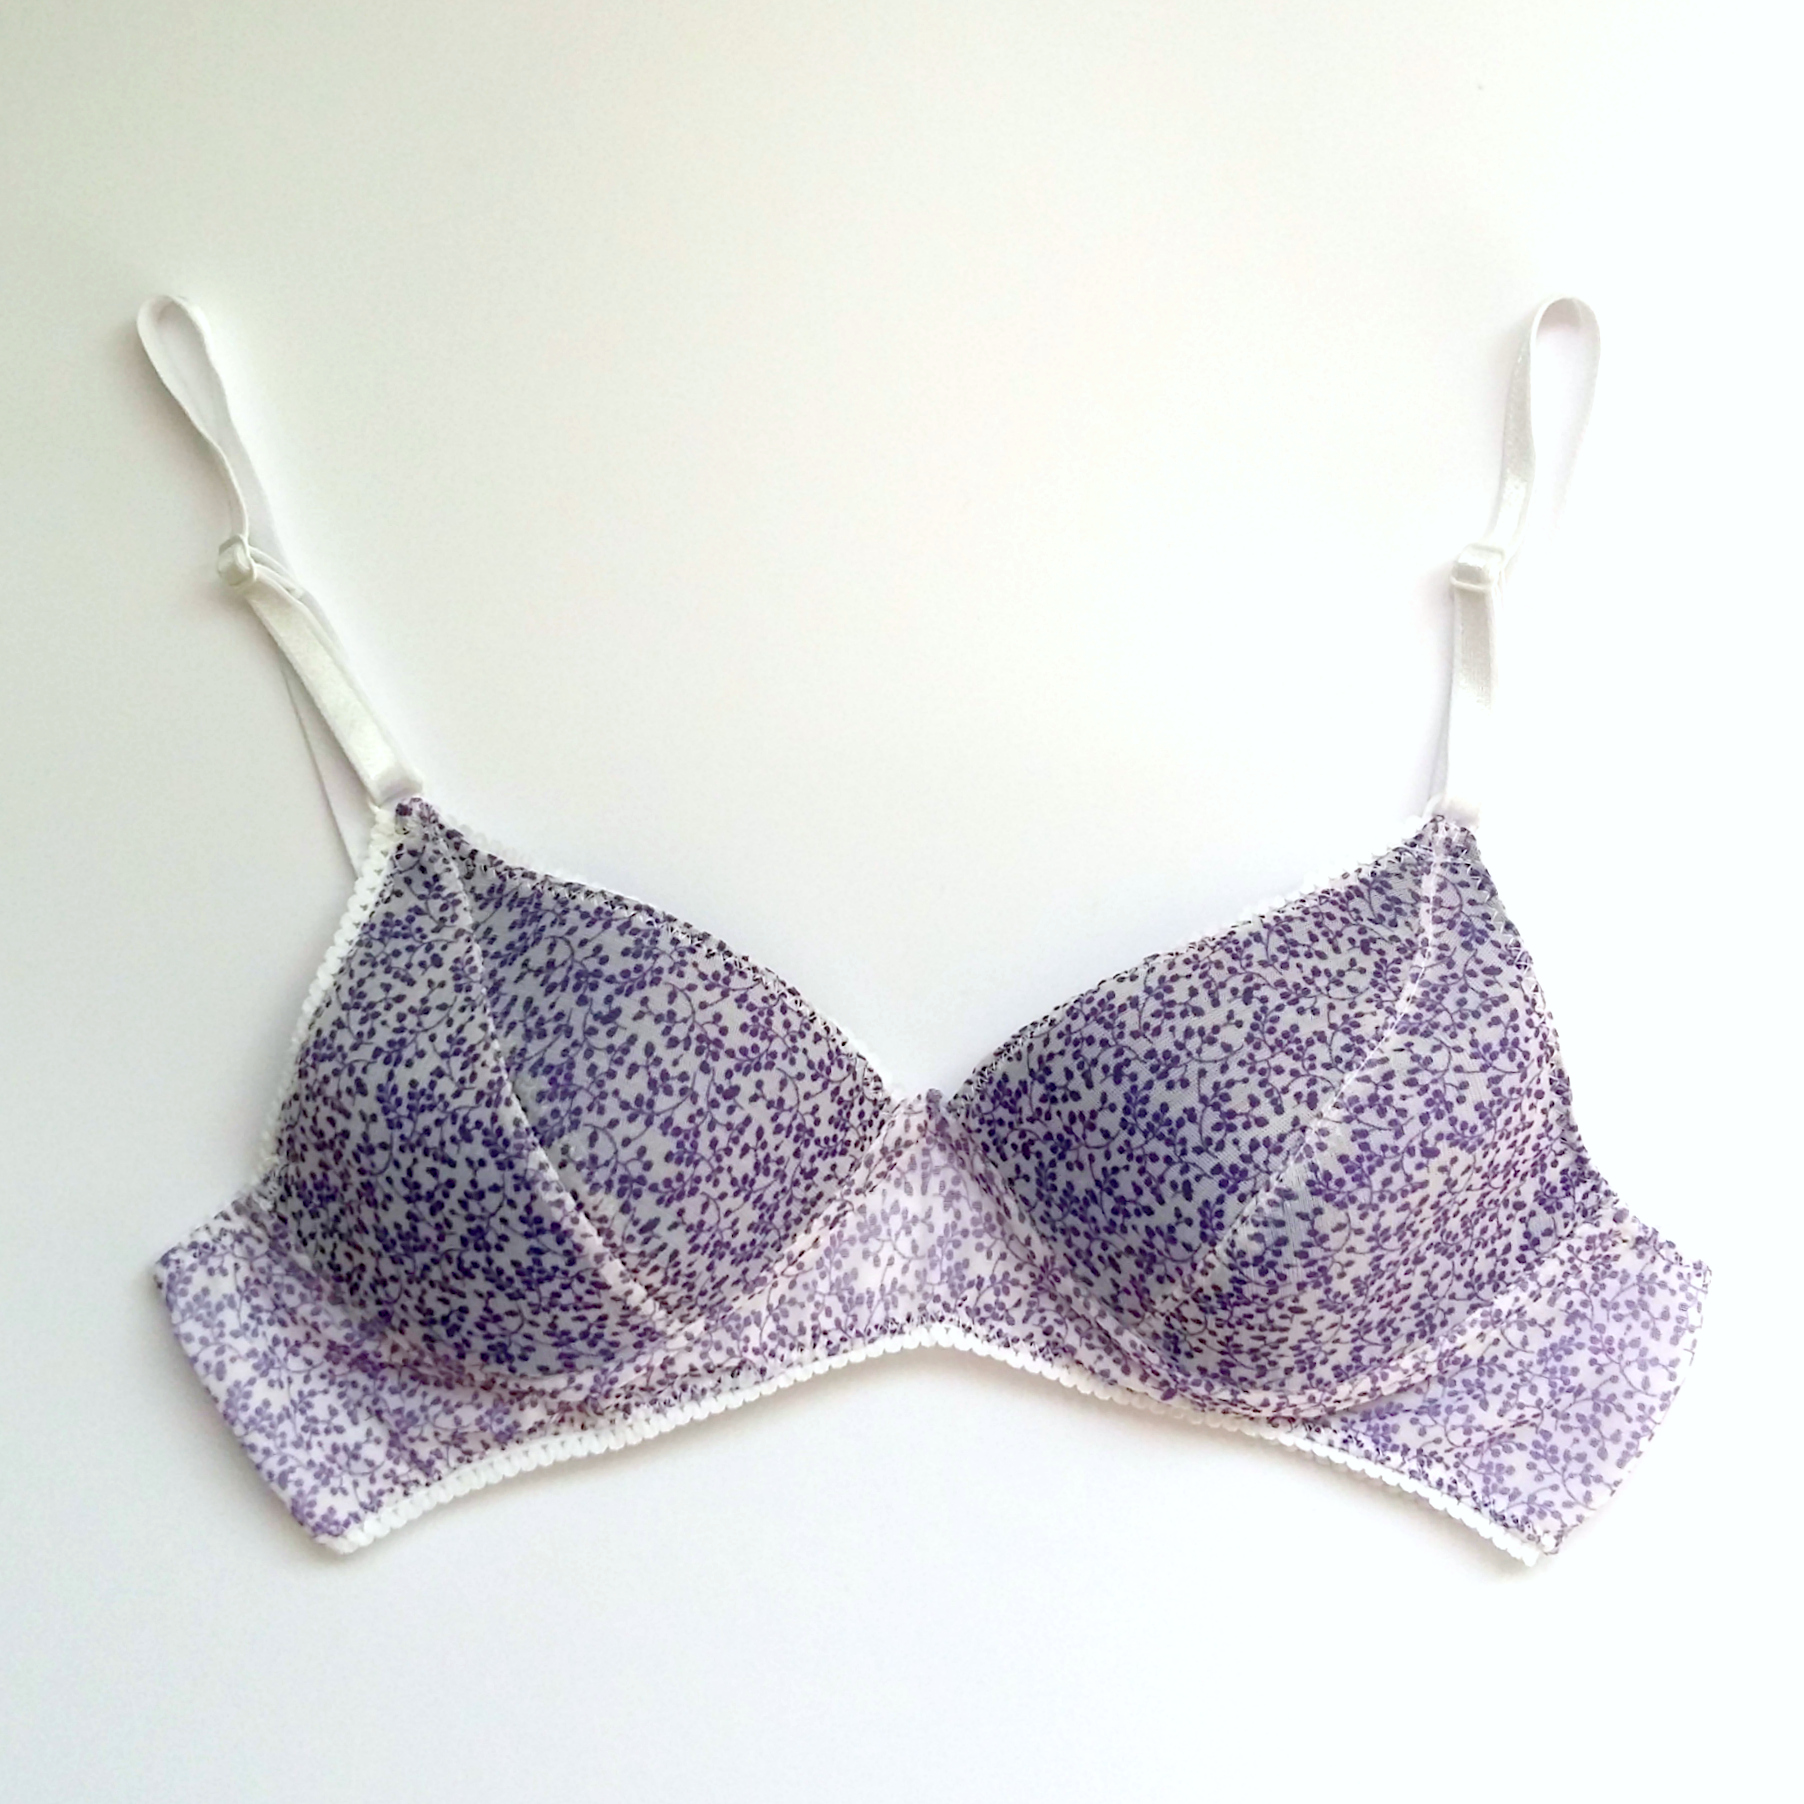
He pasado casi todo el tiempo de lo que llevamos de este año nuevo trabajando en el taller de Le Bratelier y también dando clases allí. Poco a poco en los ratos libres estoy trabajando con el patrón de bralette que saldrá en breve, espero. No he cosido mucho fuera del trabajo pero el otro día en la clase en mi casa me dio tiempo de hacer este estuche con piel y me ha gustado mucho como ha quedado.
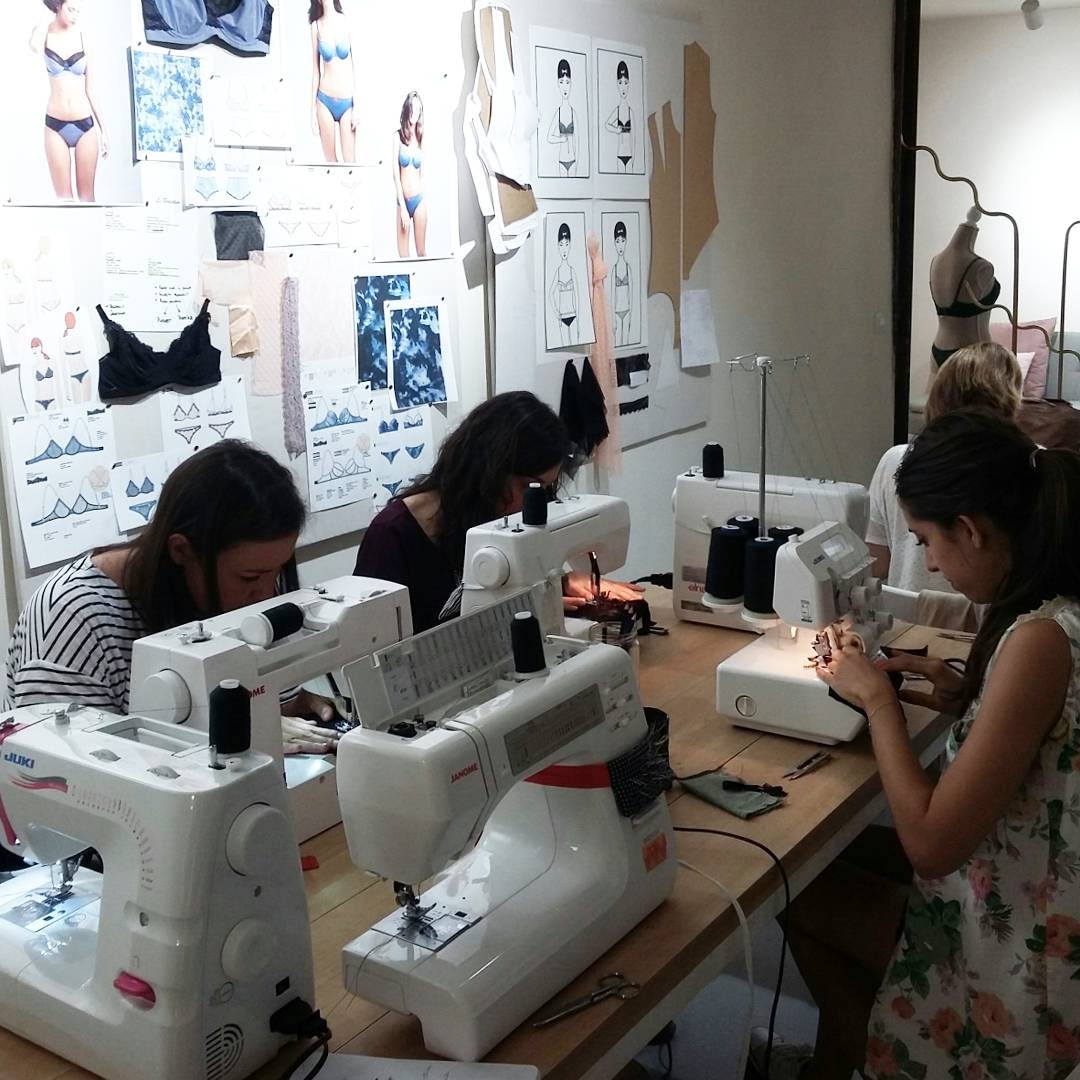
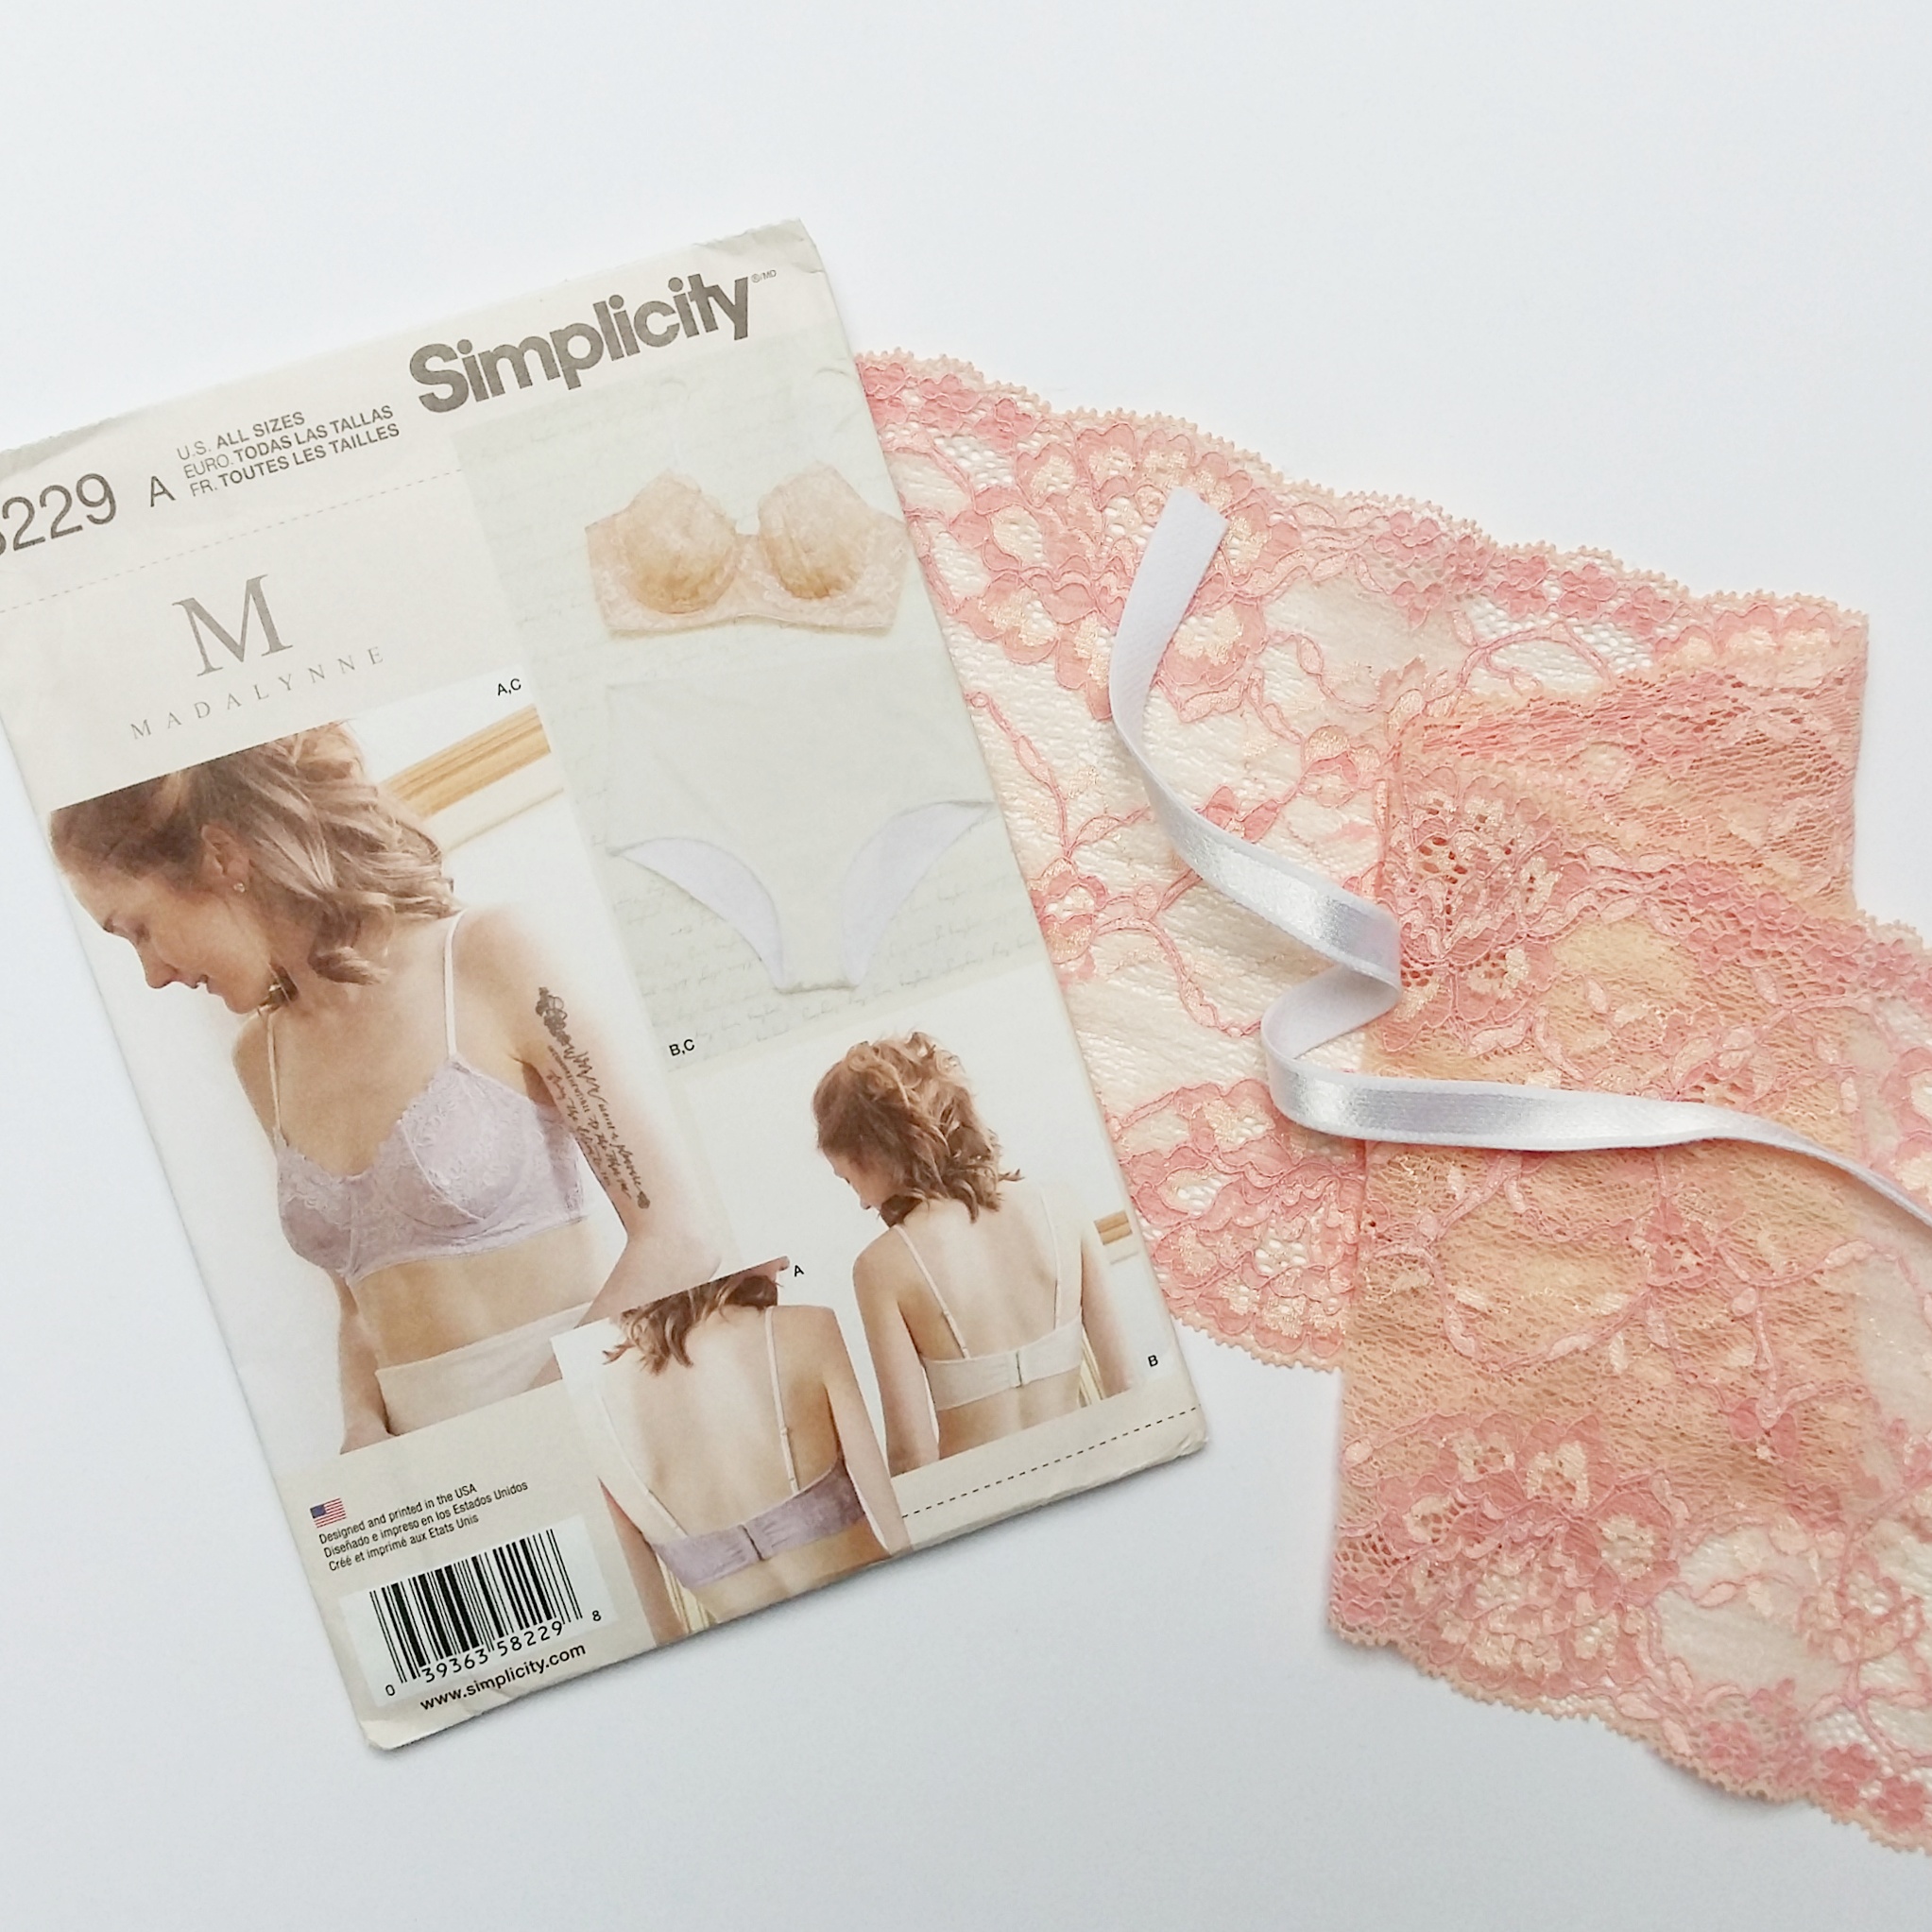
Por cierto, si estás en Madrid y estás pensando en aprender algo nuevo de costura puedes escribirme para ver la disponibilidad de clases en mi taller. También hago cursos específicos de lencería así que igual te animas para algo diferente? Pues eso, que todo es hablarlo y ver si coincidimos.

Y ahora como siempre en mis newsletters te dejo algunos enlaces con cosas que me han parecido bonitos/útiles durante las últimas semanas:

- me encantan los podcasts de costura y me da mucha pena cuando empiezan con fuerza y luego desaparecen como ha ocurrido con muchos...pero Love To Sew parece que va muy en serio y me encanta! El otro día en el curro escuché el episodio sobre la imagen de cuerpo y cómo coser ha cambiado la historia para muchas y fue muy emocionante

Grainline tiene un nuevo patrón de abrigo recién salido del horno! Tiene un estilo muy suyo y me encanta el detalle de los bolsillos

- he descubierto esta marca textil madrileña y me tiene enamorada con sus kimonos y accesorios para el hogar

- he estado escuchando los videos de The Craft Academy mientras coso en el trabajo y la verdad es que tienen muy buena información: este mini curso sobre las ferias para artesanos mola y luego tienen bastantes entrevistas guays con gente de pequeñas empresas creativas también

- necesito un Kelly anorak como este en mi vida y aunque antes no me llamaba mucho la atención el patrón de abrigo Clare de Closet Case Patterns pues después de ver esta versión me encanta también!

- necesito hacer una sudadera así para mi pequeña...y una para mí ya que estamos :)

esta falda! esta tela! la caída! la forma! <3 y el verano, traedme el verano!!!

Valee...ya está para hoy. Espero que te haya gustado y te escribo de nuevo el mes que viene!

xoxo
Karu


How are you? The first month of this year is almost over!!! I've been working a lot over the last weeks and altough I wanted this newsletter to be sent out saying that there was a new post over at the blog, in the end it hasn't been possible :(
Most of the time this month I've been working over at the atelier of Le Brateliersewing and teaching classes. Little by little when having a free moment I´m working on the bralette pattern that will be launched soon I hope. I haven't been sewing much outside of the work hours but I did make this zip pouch with leather and I really like how it turned out.
By the way, if you are in Madrid you can contact me about sewing classes at my atelier, I also teach specific lingerie making courses so you can try something a little different!

And now  to the links about stuff I've found interesting/beautiful over the last weeks:

- I love sewing podcasts and I'm really sad when they start with a lot of entusiasm and then fade away as it has happened to many of them...but Love To Sew looks like the one to stay and I love it. The other day at work I listened to the episode about body image and how sewing has changed that for people and it was really inspiring

Grainline has a new coat pattern! It has their unique style and I love the pocket detail

- I discovered this textile brand from Madrid and I love their kimonos and home accesories

- I've been listening to the videos from The Craft Academy while I sew at work and they really do have good information: this mini course about handmade markets for example is a good one and they also have many inspiring interviews with makers

- I need a Kelly anorak like that one in my life and altough I wasn´t too into Closet Case Patterns Clare coat pattern before, this version really got me! 

- need to make a sweater like that for my little one...and one for myself too :)

this skirt! this fabric! the drape! the shape! <3 and the summer, bring me the summer!!!

Oook, that's it for this time. I hope you liked it and I'll write you again next month!

xoxo
Karu


2017 en costuras // 2017 in my sewing life

 
2107

Hola - hola. Ha llegado el tiempo de resumir este año 2017. Y bueno, escribir un post por aquí de vez en cuando tampoco viene mal, verdad? El último es de 16 de octubre y el anterior de 26 de agosto...no he estado activa por aquí en mucho tiempo la verdad. De hecho descubrí ayer que tenía la pagina desactivado y todo, jaja. Todo eso porque el otoño ha sido un poco de locura con trabajo y la vida en general.

2017...por donde empezar, ha sido un año de muchas cosas nuevas. De trabajo, oportunidades, aprendizaje, nuevos contactos, el fin de ciertas cosas y el comienzo de otras. 

Durante la primera parte del año trabajé en casa y daba clases en mi taller. En la primavera conocí a María, la mujer detrás la marca de lencería Le Bratelier. En su momento ella me contactó para que colabore con su línea de lencería hecha a medida para novias. De ese encuentro surgió luego la idea de que trabaje con ella en su tienda. A mí me vino muy bien porque sabía que iba a cambiar de casa y necesitaba otro sitio para dar clases.

Desde septiembre trabajo en su tienda en el barrio madrileño Chueca y estoy muy contenta con este cambio. Empecé con las clases continuas donde cada alumno hace los proyectos según su nivel y preferencias y también imparto talleres específicos de lencería: braguitas, bralettes y sujetadores con aros. He tenido suerte a conocer mucha gente muy divertida y ayudarles con sus proyectos costuriles.


Hey-hey. It's time to recap that 2017. And well, writing a post over here from time to time doesn't hurt too bad either, right? The last one is from 16th of October and the one before from 26th of August...I really haven't been active around here at all. I actually discovered that my site had expired since one week, haha. This autumn has been kind of crazy both on work and personal front so that's the main reason I haven't been showing up here.

2017...where should I even start, it has been a year of many new things. Work, oportunities, learning, new contacts, the end for some things and the new beginning for others.

During the first half of this year I was teaching classes at my atelier at my home. In the spring I met María, a woman behind the lingerie brand Le Bratelier. At the time she reached out to me to see if I could work with her for her custom lingerie orders for brides. Later on came the idea that I could work with her in her new shop. It was a perfect timing because I knew back then that I had to move and I didn't have a new place to teach classes.

Since September I work in the shop in the center of Madrid and I'm really happy with that change of plans. I started out with regular sewing classes where the students work on the proyects according to their likes and level of knowledge and I also teach specific lingerie workshops: panties, bralettes and bras with underwires. I've been very lucky to meet a lot of amazing people in those classes.

2017

También estoy en la tienda cosiendo las pequeñas colecciones que van sacando, estas navidades hicimos una con bodys y conjuntos de sujetadores con braguitas y quedaron realmente bonitos. Esta parte de mi trabajo me gusta mucho y aunque también es un continuo proceso que muchas veces incluye muuucho descoser y rehacer para llegar a la mejor manera de confeccionar las prendas, también es un gran aprendizaje en el campo de lencería para mí. Estoy aprendiendo mucho y cada vez me apasiona más este mundo de piezas pequeñas.

Otra cosa es que estoy ahora mismo trabajando con un patrón de bralette que quiero sacar en el formato pdf. Es un camino largo, empecé al principios de este año pero pasaron tantas cosas que lo iba dejando por meses. En el verano retomé el proyecto pero es realmente ahora que estoy haciendo un progreso y viendo los resultados. Espero que pronto os puedo enseñar el patrón definitivo y convenceros a las que todavía tenéis miedo a empezar a probar coser lencería que no es tan difícil y con un poco de ayuda y unas buenas instrucciones todo es posible. Estoy muy ilusionada con ese proyecto y espero que sea un comienzo de algo nuevo para largo plazo.


I also work on the production/sewing side of the small collections that the brand is releasing, this Christmas we made a little capsule collection with bodysuits and lingerie sets that turned out really pretty. I really like that part of my work and altough it's a big learning curve that includes looots of unpicking and redoing things in order to achive the best way to sew a garment, it's also a perfect way to dig very deep into the lingerie construction and how things are made. I'm learning a lot and I'm really enjoying this world of little pieces of fabric. 

The other proyect I'm currently working on is a bralette pattern I want to release in pdf format. It's a long process, I actually started out with the idea in the beginning of this year but as there have been so many things going on I've been postponing it for months. In the summer I started again but it's only now when I actually see some real results. I hope that I can show you the pattern soon and convince the ones who are still afraid of sewing something like lingerie that with a little helping hand and good instructions everything is possible. I'm really excited about that proyect and I hope it's a beginning of something for a long run too.

2107

También quiero retomar este blog y volver a mi ritmo de posts que mantenía antes, me da mucha pena que se ha quedado en el segundo plano por tanto tiempo. También ha sido así porque apenas he cosido cosas para mí, casi todo ha sido para el trabajo. No sabéis cuánto echo de menos poder tener ratos libres para hacer proyectos personales, pero supongo que hay épocas cuando no se puede tener de todo. También tengo que reconocer que ahora no estoy tannn obsesionada con costura como hace unos años, ya no me quedo todas las noches hasta altas horas cosiendo. Eso no significa que no siga siendo mi gran pasión obviamente, quiero pensar que como en todas buenas relaciones con el tiempo cambias un poco la cantidad por calidad y aprecias más lo que haces y realmente disfrutas al máximo una vez que tienes la posibilidad de tener ese rato haciendo algo que te gusta mucho.

Aunque en mi vida personal este año ha sido muy difícil estoy contenta de que puedo trabajar de algo que realmente me apasiona y llena. Aún así son muchas horas, llegar a casa tarde, trabajar cuando el resto del mundo está descansando y como en casi todo trabajo creativo (desgraciadamente) nunca tienes la certeza de qué va a pasar o qué tal te va a ir económicamente. Pero espero seguir este camino y este proyecto, espero que mucho trabajo "invisible" hecho durante el 2017 tendrá sus frutos en el año que viene.

Espero que mi 2018 llegue con muchos proyectos nuevos, más tiempo para crecer (y descansar) y que pueda aprender mucho más. A vosotros os deseo que tengáis tiempo para coser todo lo que tengáis en mente y conquistar proyectos que todavía os parecen difíciles. Prometo más contenido en este espacio y un patrón muy bonito en breve. Gracias por leer esto y feliz fin de año!


I really hope to get back to posting more often over here at the blog too, it's really sad that this part has been on hold for so long. The reason is also that I have been doing very little selfish sewing lately, it has been almost all work related. You can't imagine how much I miss those moments of sewing time in my life but I guess there are times you just can't have it all. I also have to confess that I'm not sooo obsessed with sewing like I was some years ago, I don't do late night sewing every day anymore. It doesn't mean that it's not my big passion anymore, I'd like to think that as in all the great relationships you change the quantity for quality a bit and actually cherish the momenths you have when you can do that something you really love.

Altough in my personal life this year there have been many difficult things I'm grateful that I can work doing something I really love and feel pasionate about. Unfortuantely it includes long hours, arriving home late, working when other people have the time for themselves and almost never knowing what's next or how your economic situation will be. But still I hope to continue this path I've chosen and that this creative proyect will continue too, I hope that a lot of this "invisible" work that I've done during this year will bring great things next year.

I hope my 2018 will bring new proyects, more time to grow (and rest) and that I can learn a lot more. To you I wish you'll have time to sew all the things you have in your sewing list and that you can tackle the proyects you still think are difficult for you. I promise more content over here and a very pretty pattern soon. Thank you for reading this and happy holidays!


Rosie bralette by Evie La Luve DIY

 
rosie bralette www.studiocostura.com

Hola! Wow, cuánto tiempo desde la última entrada...me da cosa y todo, parece como si me hubiera olvidado que tengo un blog. Bueno, han sido semanas (vale, meses...) de mucho trabajo y aunque quería subir algo nuevo por aquí, tampoco encontré el rato libre para hacerlo. Además, de proyectos personales no he cosido prácticamente nada, menos este finde que algo ya he hecho y espero gracias a eso retomar lo de escribir aquí también.

Pero aparte de no coser mucho para mí, sí que he estado preparando a tope las clases de costura y de lencería así que he cosido varios bralettes y sujetadores. Todos estos bralettes que os voy a mostrar son muestras del curso que estoy dando en Le Bratelier, ya hemos tenido dos y va a haber uno en noviembre también.


Hey! Wow, it's been a while since the last post...it's such a pity, feels like I kind of forgot that I have a blog after all. Well I've had a lot of work these past weeks (well, months...) and I really didn't find a spare moment to write something new over here. Also I've had zero time for personal sewing only until the last weekend so now I atually have some stuff to post about so I'll be back soon I hope.

But apart from no selfish sewing I've been preparing the sewing classes and lingerie courses so I've been sewing many bralettes and bras. All those bralettes are samples for the course I'm teaching over at Le Bratelier, we've already had two of them and there will be another one in November.

rosie bralette www.studiocostura.com

Para empezar, éste era el primero que hice ya en el verano. Estaba pensando en varias opciones de patrones para usar en la clase, algo que sea cómodo pero no demasiado complicado. La clase dura 4 horas y hay gente de distintos niveles así que tenía que buscar algo que se puede hacer en un tiempo no muy largo pero que al mismo tiempo tenga todos los componentes para que las alumnas aprendan las bases de cómo coser este tipo de prendas.

Al final decidí por el Rosie bralette de Evie La Luve DIY porque además ella tiene el mismo patrón en formato papel y así las alumnas lo pueden llevar a casa después del curso. Es un modelo sencillo con la parte del escote con encaje que le da un toque muy bonito pero que luego se puede modificar de muchas formas y por eso me parece un buen patrón básico. 

En la primera versión usé encaje elástico para el centro y una tela de punto tipo nylon con el estampado tropical para los lados. La tela es de Julián López y el resto de los materiales de coser lencería son de mi tienda (igual que en todos los bralettes mencionados en este post).


To start with, this is the first version I made back in summer. I was thinking about various options for the pattern to use in that course, something comfortable but not too difficult either. The class lasts 4 hours and there are people with different sewing skills so I had to look for something you can make in a not very long time but at the same time something that would teach all the basics so the students would learn the principles of sewing this type of (under)garments.

Finally I decided for the Rosie bralette pattern from Evie la Luve DIY as she also offers a printed pattern version for that one and the students can take it home after the class. It has a simple cut with a scalloped edge lace in the front that gives the bralette a very beautiful appearance but you can easily modify the pattern which makes it a good basic pattern to use over and over again.

For the first version I used a stretch lace for the center part and a knit fabric made of nylon with a tropical print for the rest of the bralette. The fabric is from Julián López and all the rest of the lingerie sewing materials are from my shop (the same source for all the bralettes mentioned in this post).

rosie bralette www.studiocostura.com

Después de hacer la primera prueba vi que me gustaba todo menos la colocación del tirante en la parte detrás. En los bralettes y sujetadores que no son de talla muy grande prefiero personalmente usar más la forma que el tirante esté enganchado en el elástico de la parte de la banda y que no salga desde el cierre, en el borde superior de la banda. Igual es un poco complicado de explicar pero en la foro de abajo se ve cómo lo hago yo. Es un cambio de patrón muy sencillo y me parece que queda visualmente mejor.

El bralette está hecho con tejidos elásticos así que queda bien al no tener partes "estables", o sea va bien para todo tipo de curvas. Eso sí, este patrón está pensado para las copas A-C, más que nada porque no tiene soporte de aros. De todas maneras pienso que el nivel de soporte que quieres/necesitas es una cosa muy personal y experimentando con diferentes grosores y elasticidades en tejidos puedes conseguir resultados distintos.


After sewing up the first sample I saw that I liked everything apart from the strap part. I personally prefer to use the "T - shape" method of attatching the straps on bralettes and bras that are small sized. It's a bit complicated to explain with words but instead of attatching the strap elastic starting from the hook & eye and sewing it on the upper edge of the back band, I prefer to attatch it inside the band elastic and secure it in the back band upper elastic. It's an easy modification on the back piece and I find it better looking in general.

The bralette is made with elastic knit fabrics so it fits well as it doesn't have any "stable" parts, it suits well with all the curves. That said, this pattern is intended for the cups in size range A-C, mostly because there are no wires for greater support. Anyway I think that the support you want/need is a very personal thing so you can always experiment with different fabric weights and stretch to come up with different results.

rosie bralette www.studiocostura.com

Así que cambiando el tema del tirante hice esta muestra que es prácticamente lo mismo que el anterior, lo único que usé esta vez una tela de neopreno con el encaje. Igual eso suena raro porque pensando en neopreno parece como una tela muy gruesa para prendas tan delicadas pero yo creo que le queda muy bien, le da buen cuerpo al bralette. No haría braguitas con esa tela ya que allí sí que me parece algo grueso, aunque para poder combinarlo para tener un conjunto se podría hacer por ejemplo la parte central delantera con una tela así y el resto con tul etc. 

So once I changed the strap elastic attatchment method I made this sample which is basically the same as the previous one, just that this time I used a scuba fabric for the body part. Maybe using scuba sounds a bit odd as it looks too bulky for a delicate project like lingerie but I actually think it suits very well as it gives more stability and form. I wouldn't use it for panties but to be able to combine it for a set you could for example make a central front part of the panties with a scuba fabric and the rest with stretch mesh etc.

rosie bralette www.studiocostura.com

Todo menos el encaje en este patrón va forrado con tela de punto o con tul elástico. En esta siguiente versión quería forrar también la parte central del escote y lo hice usando un tul elástico en color azul turquesa combinado con el encaje blanco y dorado.

Everything exept the lace part in this pattern is lined with a knit fabric or stretch mesh. In this next verison I wanted to line also the central part so I used this aqua blue mesh combining it with a white lace with golden details.

rosie bralette www.studiocostura.com

De esta forma el bralette tiene menos transparencias pero sigue teniendo ese aspecto delicado, me parece muy bonito que se ve el otro color de abajo y así también se resalta más el encaje.

That way the bralette is less transparent but still has this delicate aspect which I find really pretty as the contrast color mesh lets the lace be even more visible.

rosie bralette www.studiocostura.com

Para hacerlo corté la parte central que normalmente sólo se corta de encaje también de tul. Le añadí aprox 1 cm para el margen en la parte de la puntilla del encaje (en el escote) para poder hacer un doblez y que ese margen quede limpio al unirlo con el encaje. Es prácticamente el mismo método que en este tutorial que hice sobre cómo cortar encaje. El resto de las costuras se quedan rematadas entre las capas del exterior y del forro, la única donde se ve la remalladora es la del medio. En principio también se puede apañar para que quede oculta pero no me parece tan grave que se vea (por dentro).

También en esa foto se puede ver el tirante desde dentro. El método que uso es engancharlo en la segunda pasade de zigzag en la parte de la goma que va bajo el pecho y después rematarlo sobre el otro elástico de arriba de la banda. Así está rematado doble y me gusta más que las versiones cuando sólo se remata en el elástico de arriba. El tul que he usado es de Ribes y Casals.

To change things up I cut the central part that you usually only cut from lace also from mesh. I added aprox 1 cm for the scalloped edge part of the pattern to be able to fold it down to have a neat finish where the scallops are. It's basically the same method I shared in this tutorial about sewing lace cups. The rest of the seams are lined so they stay between the two layers and are not visible, the only visible serger seam is in the center front. You could sew it invisible too but I don't find it very disturbing to see (on the inside) so I didn't do it this time.

You can also see the strap elastic attatchment on this photo. I attatch the elastic strip on the second pass of zigzag of the band elastic and then later attatch it again in the inside of the narrow elastic that goes on the upper part of the band piece. This way it's double secure and I like it more than in the versions where it's only attatched on the upper part. The stretch mesh I used is from Ribes y Casals.

BLOG (3).jpg

La siguiente prueba la hice usando telas de punto tanto para el exterior como para el interior. Tanto por fuera como por dentro usé un punto de viscosa con elastán. El cambio en el patrón sería añadir margen de costura para la parte donde normalmente está el borde de la puntilla porque allí puse también elástico y es importante tener ese extra margen para no perder espacio allí. Al usar dos telas de punto este bralette tiene más cuerpo que uno con sólo encaje y tul por ejemplo. En este sentido tienes todas las posibilidades de variar según el soporte que necesitas porque al hacerlo con tejidos más firmes desde luego es más "sólido" que por ejemplo usando sólo una capa de encaje (que es opción también ya para algo muy ligero y delicado).

La tela de punto de fuera es de un retal que tenía por casa y el forro negro es de Ribes y Casals.

The next sample is made with knit fabrics both on the outside and on the inside. Both fabrics are viscose knits with elastan. You need to add an extra seam allowance in the upper part of the cup where the scalloped edge of the lace originally is as there needs to be elastic attatched now. Using two layers of knits makes the bralette more stable than using for example only lace and mesh. In that sense you have all the possibilities to vary the aspect of support you need as you can use "firmer" fabrics to have a more stable effect (or the other way around: using only one layer of lace for something very light and delicate).

The outer fabric is a scrap from my stash and the lining is a viscose knit from Ribes y Casals.

rosie bralette www.studiocostura.com

Para último, este es el modelo que hicimos en el primer taller. Me parece muy bonita la combinación de este encaje en dos colores con la tela de punto en negro (es una mezcla de polyester, polyamida y nylon o algo así, muy cómodo y suave). Quería usar materiales negros en los cursos de bralette porque los errores se ven menos, jaja. No es yo no crea que mis alumnas sean más que buenas costureras pero al coser la primera vez algo nuevo como lencería pues lo más normal del mundo es que haya que descoser o los remates no son del todo bonitos. Al usar materiales oscuros se nota mucho menos y así no se desanima la gente con su primera prueba. Que hay mucha perfeccionista por allí, os digo, jaja. "Hecho es mejor que perfecto" es mi opinión en estos casos, que luego siempre hay tiempo para mejorar.

The last sample is made with the same materials we used in the first class. I really like that two color lace combined with the black knit fabric (it's a polyester, polyamide, nylon something mix, very soft and comfortable). I wanted to use black materials in that course as you can barely see the mistakes, hehe. Not that I don't belive my students are great seamstresses but the first time sewing something new like lingerie well the most common and normal thing is that you have to unpick and some stitches won't be the most beautiful ones. You can see it less when using dark colors and that way people won't be dissappointed with their first experience. There are a lot of perfectionsts out there, I can assure you that, hehe. "Done is better than perfect" I'd say in these cases, you'll always have time to improve later on.

rosie bralette www.studiocostura.com

Aquí va también una foto del primer taller de los bralettes, mirad lo concentradas que están todas. A la derecha por cierto está Laura del blog de costura "Mi primera máquina de coser", tuve el placer de conocerla en persona allí en el curso y es majísima!

Aparte de eso se ve la parte del taller en la tienda que se está quedando súper bonito...si estás por Chueca deberías pasar a ver la tienda con toda su lencería bonita, y si es un martes, miércoles o jueves por la tarde, lo más probable es que yo también esté allí dando clases. Aah, y bueno, ya lo dije por Instagram pero lo vuelvo a repetir porque es una gran noticia: han sacado la tienda en un artículo de Vogue España y no puedo estar más orgullosa del proyecto de que tengo la suerte de formar parte <3

Here's also a picture from that first class, can you see how concentrated they all are?! On the right there's Laura from the sewing blog "Mi primera máquina de coser", I finally met her in person there! 

Apart from that the atelier part of the shop is really turning into a beautiful workspace...so if you are in Madrid you should really stop by to see all the pretty lingerie they sell and if you come on Tuesday, Wednesday or Thursay evening I'm there too teaching classes. Oh, and well I already celebrated over at Instagram but I'll repeat myself as it's such a great news: the shop has been featured in Spanish Vogue and I can't be more proud of this project I'm part of <3

rosie bralette www.studiocostura.com

Y para terminar una foto también de todas las alumnas después del curso, era un lujo de conoceros a todas (y reencontrar a alumnas que ya he tenido en otros cursos) y lo habéis hecho genial. Que por cierto, en la foto llevo mi blusa Donna que es una de las prendas que más he usado desde que lo hice y tengo que hacer un post porque ya tengo tres de ellas y creo que es la hora de hablar del tema, jaja.

Vamos a tener más cursos de lencería estos meses así que si lo has pensado y repensado...no hay nada que esperar porque de verdad, todas me dicen lo mismo: "pensaba que yo nunca podría coser algo así y mira cómo mola!". 

To wrap it up here are all the lovely students after the class, it was a real pleasure to meet you all (and to meet again some of my previous students), you did it really well. By the way on that photo I'm wearing my Donna blouse which is one of my most worn me mades and I really have to write a post about that pattern as I've sewn up three of them by now so I guess it really is about time now, hehe.

We'll be having more lingerie courses during next moths so if you've been thinking about it...no more doubts as everyone tells me the same thing: "I thought I'd never be able to sew something like that but actually it's really fun!".


Cursos de costura, otoño 2017

 
clases de costura www.studiocostura.com

Hola! Qué tal este verano?? Espero que bien, que habéis descansado y puede que algunas ya están pensando en el mes de septiembre? Pues a mí me gusta mucho esa época de comenzar otra vez el “curso escolar”, todos los años pienso que ojalá pueda volver a sentir esas emociones de empezar a estudiar algo nuevo. Ya sé que todo el mundo está con su bajón de después de las vacaciones y la vuelta a la rutina pero tengo que reconocer que yo ya estoy esperando de poder empezar de nuevo, con más cosas y mejor (y no me mires con esa cara de "qué demonios te pasa?", jajaa, que soy así de fan de septiembre).

Así que hablando de eso, por fin os cuento más de las clases y cursos de costura que he preparado para este año escolar. Y como el septiembre es de los cambios y de las cosas nuevas, pues aquí van unas cuantas.

Para empezar, voy a cambiar el sitio donde voy a dar clases. Mi mini taller se me ha hecho pequeño y aunque me lo he pasado super bien allí con mis alumnos, he pensado que es el momento de cambio. Y justo conocí a María quien lleva la marca de lencería Le Bratelier (tenéis que ir a ver la bonita lencería que hacen!!!) y acaba de abrir su primera tienda en Madrid. Ella quería que en ese espacio también haya taller para los cursos y pues qué mejor que juntar las fuerzas, verdad? Así que a partir de ahora os espero en pleno centro de Madrid, en la calle Pelayo 48 (Metro Chueca/Tribunal/Alonso Martinez) para compartir la costura, las charlas y un ambiente relajado para aprender. Me hace mucha ilusión esta nueva etapa, ya os cuento más sobre el espacio cuando esté allí en septiembre!

Las clases continuas

Las clases continuas siguen y va a haber dos horarios de sólo tardes, los martes y los jueves (lo siento, pero por lo menos al principio no habrá clases por las mañanas). Hacemos lo mismo que siempre que es aprender a coser, desde cero si vienes sin saber nada o desde el nivel que te encuentras. Cada alumno hace sus proyectos y va avanzando según sus conocimientos. Las clases están pensados para gente que quiere aprender en el nivel inicial-medio y quiere pasarlo bien creando algo con sus manos en un ambiente relajado y fuera del estrés de día a día.

curso de lencería www.studiocostura.com

Los cursos de lencería

Por fin voy a dar cursos de lencería también: he preparado dos, uno más fácil de bralettes y otro más avanzado de sujetador con aros. Allí vas a aprender un montón de cosas sobre cómo coser prendas íntimas, desde cómo elegir los materiales hasta cómo hacer los acabados bonitos. Va a ser muy divertido, seguro!


Curso de iniciación

Otro curso que he preparado es de iniciación desde cero. Es para gente que quiere ver qué es eso de coser con la máquina y saber bien cómo empezar, sin miedo y con muchas ganas. Es un curso de cuatro horas donde voy a explicar como funciona la máquina y vamos a coser un bolso para que practiques todo lo que has aprendido. No hace falta saber nada de nada para venir a este curso así que anímate a probar algo nuevo y verás que mola!


Os dejo toda la información en el apartado de las clases en mi página. No olvidéis de leer todas las condiciones y descripciones y si tenéis cualquier duda me podéis escribir y preguntar sin problema a mi correo costurastudio@gmail.com.

Así que os espero con mucha ilusión para empezar este nuevo curso y coser juntos muchas cosas bonitas!


Simplicity 8229 by Madalynne

 
simplicity 8229 www.studiocostura.com

Hola! Hoy os muestro un nuevo sujetador con un nuevo patrón que no había usado antes. Es Simplicity 8229, patrón de sujetador y braguitas diseñado por Madalynne. Me imagino que todo el mundo quien tiene un mínimo interés en coser lencería ha oído hablar de ella...y no es ninguna sorpresa porque lleva mucho tiempo cosiendo lencería realmente bonita y en su blog hay un montón de trucos, inspiración, tutoriales etc. Ahora se puede realmente considerar que es una famosa en el mundo de costura ya que para que te fiche una marca como Simplicity me parece un súper éxito total.

Hey! Today I'm bringing you a new bra with a pattern I haven't used before. It's the Simplicity 8229, an underwire bra and panties pattern designed by Madalynne. I guess that anyone who is slightly interested in bramaking has heard of her...and it's no surprise as she's been sewing beautiful lingerie for a while now and on her blog there's so much inspiration, tips, tutorials etc. You can really consider her as a celebrity in the sewing community now as working with a company like Simplicity really is a major success in my oppinion.

simplicity 8229 www.studiocostura.com

El modelo que hice yo es uno de sus dos primeros patrones que sacaron, ahora también tiene un body y dos nuevos sujetadores. Entonces, a ver qué cosas me llamaron la atención a la hora de coserlo. Si alguna vez has usado los patrones de marcas como Simplicity, Vogue etc sabes que vienen en un sobre donde tienes las instrucciones y luego en papel tipo papel de seda los patrones. Como quería ver cómo está explicado cada paso leí bien las intsrucciones, como si fuera la primera vez...tengo esa tendencia de intentar valorar las instrucciones siempre desde el punto de vista de novata total, así luego cuando enseño en mis clases, sé donde tengo que dar explicaciones extra según mi opinión. 

Para empezar, la manera de calcular la talla como está explicado allí puede ser un poco confuso si trabajas en cm en vez de pulgadas. Así que saqué mi talla habitual, 36A y me funcionó bien. Sobre los materiales: usé el encaje en color melocotón y rosa con el forro y los elásticos blancos (igual que en este kit de mi tienda). A diferencia de los otros patrones de sujetadores con aros (y Watson también) que he usado, en este modelo la parte central abajo de las copas no lleva el forro de lencería (sheer lining) para hacerlo estable y sin movimiento. En vez de eso todo está forrado con tul elástico (stretch mesh). Eso en mi caso da un poco igual porque con talla tan pequeña de copa no necesito mucho soporte. No sé si en copas más grandes eso puede cambiar el asunto. Sin embargo el túnel de los aros sí que mantiene allí la estabilidad de esas costuras.

The pattern I used is one of the first ones they released, now there's also a bodysuit and two new bras too. So, let's see what are the things that got my attention when sewing this bra. If you have used the paper patterns from Simplicity, Vogue or other companies like that you know that the patterns come in an envelope where there are instructions and patterns on a tissue paper. As I wanted to see exactly how the instructions were made I read everything as it was my first time...I tend to do it because I try to put myself in a beginner role to see if everything makes sense to "new" eyes, that's how I can then give better and extra information when I teach.

To start with, the way they explain the sizing and how to measure yourself can be a bit difficult to understand when you work in cm and not in inches. So I just got my usual 36A and it worked out well. About the materials: I used a peach and pink color lace with white notions (as in this bramaking kit in my shop). The difference with other underwire bra patterns (and Watson too) that I've used is that the bridge part of the bra is not stabilized with sheer lining. Instead everything is lined with stretch mesh. In my case it's not so different as I don't need much support . I'm not sure if that might be different in bigger cup sizes. Anyhow there is the channeling that keeps the seams stable.

simplicity 8229 www.studiocostura.com

Así que dicho eso, como todo el encaje está forrado por tul elástico, en las intrucciones te recomiendan usar el pegamiento en spray para temporalmente unir encaje con el tul y así cortar las dos capas a la vez para facilitar el trabajo luego. Ya sabía de antes que mucha gente lo hace pero mis experiencias no han sido tan buenas. De todas maneras quería seguir las intrucciones bien y lo hice. Eso significa que tienes que cortar una pieza de encaje con un tamaño aproximado para que quepan las piezas y unirlo con otro trozo igual de tul, poniendo este al borde de la parte inferior de la puntilla en un lado de encaje. De esa manera no sobresale el forro del encaje ya que en la parte de las copas se ve el lado bonito de encaje. 

Pues sigo pensando que me gusta más cortar las piezas por separado y eso por dos razones. Primero porque así puedo coser el forro a las copas dejando todas las costuras ocultas (finales del post ves una vista del interior donde se ve el remallado en la copa, eso normalmente no lo coso así), poniendo las capas en un orden concreto. Al estar pegadas, no se puede hacer. Y por segundo, así puedo aprovechar mejor el encaje. Al no estar pegado al tul, puedo usar luego incluso las piezas más pequeñas de encaje que me qedan del corte y usarlo por ejemplo para braguitas etc. Entiendo que para empezar, tener las piezas pegadas puede resultar más fácil para manejar...pero quizás yo sólo pegaría la parte central y el resto no.

So as I said, all the lace is lined with stretch mesh, in the instructions they recommend using the temporary adhesive spray glue to put both layers together and that way make the working process easier later on. I knew before that many people do it that way but my own experiences haven't been so positive. But as I wanted to do it according to the instructions I did glue the alyers together. This means you need to cut an estimated size of lace where your pattern pieces will fit and glue it to the same size stretch mesh layer leaving one side of the mesh leveled with the lowest scallops of one side of teh lace. That way you can't see the mesh in the part where the pretty scalloped edge will be visible on the cups.

I still think that I prefer cutting the pieces separately for two reasons. First, that way makes it possible to sew the cup pieces together in a way that you can't see any seams (later in the post you can see the interior view with the serged seams on the cups that I usually don't sew this way), sandwitching them between other layers. And second because when cutting the lace alone it leaves me small scraps of lace that I can later use for panties for example. I understand that for the first time sewing that prepared double layer might be easier to work with...but I think that if I'd do it, I'd use it only for the bridge part.

simplicity 8229 www.studiocostura.com

Ok, seguimos. Una cosa que me hizo dudar mucho era que en las instrucciones generales te decían que el margen de costura es de 1.5 cm y luego el otro lado te decían que cosas las costuras a 6 mm y las dobles a un lado. Normalmente casi siempre en sujetadores el margen es de 6 mm, así que lo de 1.5 cm me extrañó mucho cuando lo leí. Entiendo que estas instrucciones de marcas tan grandes siempre tienen una parte general que es lo mismo para cualquier patrón y luego se añaden las instrucciones particulares de cada diseño. Todo eso tiene lógica, pero desde luego puede ser muy confuso para las novatas...

Sobre el método de costura. Todo era más o menos como siempre lo había hecho menos unas cosas. El centro entre las copas se remata también con elástico, no simplemente uniendo el forro con el exterior. Y la parte del borde de la puntilla en las copas también se remata con un elástico abajo. 

Ok, let's continue. I was vey confused because the general instructions said that the seam allowance was 1.5 cm and then on the other side it said "stitch in 6 mm seams and press all seams..." In general there are 6 mm seams in lingerie so I was very confused by the 1.5 cm when I read it. I understand that these companies use the general instructions for every single pattern and then add the specific instructions for the particular pattern. This makes sense and all but I think that the beginners can be confused by this...

About sewing process. Everything was more or less as always exept some details. The cradle seam was finished with a elastic not just joining the lining with an exterior layer. The scalloped edge of the cups were also finished with the elastic on the inside. 

simplicity 8229 www.studiocostura.com

Aunque en las instrucciones te indican que pongas antes el elástico en la parte de la sisa y después cierres el túnel de los aros encima, yo lo hice como de costumbre dejando el túnel abajo y así me parece que queda más bonito. Ahora, también se remata la costura lateral con el túnel y allí seguí las instrucciones y lo dejé allí encima y me parece que de nuevo yo lo cosería antes y pondría elástico encima, quedaría mucho más limpio. Lo que pasa es que no lo preveía y ya no iba a descoser el elástico. 

Los tirantes también los cambié un poco porque aunque efectivamente me gusta más la espalda así, que los tirantes salgan directos y no con la curva como en otros patrones (de nuevo, eso se hace muchas veces por el tema de soporte y yo no lo necesito), prefiero que se enganchen ya en el elástico de abajo y tengan otra costura arriba, en vez de engancharse sólo arriba como en las instrucciones. Así es más seguro en mi opinión, para eso hay que alargar la pieza y ya está.

Although the instructions tell you to first sew on the underarm elastic and then apply the channeling, I did it the other way leaving the channeling end under the elastic as I think it looks neater that way. The side seam is also covered by channeling and again they indicate that you sew it after attaching the elastics. I did it that way but I'd prefer to sew it before and finish the edges covering them with elastic...this time I didn't as the elastic was already sewn and I wasn't going to unpick anymore. 

I changed the straps a bit too. I like this kind of T-back more than the U-shape I've used on the other patterns (again, many time it's used for the support that I don't really need), but I prefer to atatch them on the band elastic and then secure them on the upper elastic too, not just only on the upper elastic as the instructions say to do. I find it more durable that way and it's quite easy to do, just make the piece longer and that's it.

simplicity 8229 www.studiocostura.com

Y para último un poco sobre la forma. Al estar hecho completamente de telas elásticas me parece que es muy cómodo! De hecho, para empezar a coser sujetadores con aros, está muy bien que tenga esas copas con algo de elasticidad, así hay más espacio de prueba y error digamos, mucho más que en las copas rígidas. Por cierto, no le puse aros a este en concreto porque no tenía en el momento en casa y como quedaba muy bien así, lo dejé tal cual.

Una cosa que me gusta mucho es que tiene suficiente espacio entre las copas. Yo con mi copa A lo necesito y muchas veces no tengo suficiente cuando he usado otros patrones o he comprado en las tiendas. Ahora, curiosamente el patrón está hecho con el mismo espacio entre las copas en todas las tallas de copa. Eso ya no sé si funciona igualmente bien porque al crecer el tamaño del pecho y con eso la copa, lo normal es que se disminuye el espacio entre los pechos. Como en todo, hay que hacer una prueba para verlo. Lo bueno es que el cambio de esta parte del patrón es bastante fácil y se puede adaptar bien para que sea cómodo para ti. Y de eso se trata al fin y al cabo.

Para último y muy último también os quería contar que voy a dar cursos este otoño en Madrid para aprender a coser este mismo sujetador con el patrón de Madalynne! Vamos a hacerlo paso a paso para que te lleves el sujetador puesto (o en el bolso, como quieras, jaja) y sepas hacer mil más en casa. Voy a anunciar los detalles, horarios, plazas etc muy pronto (creo que la semana que viene...) aquí en el blog y pondré la información también en el apartado de clases en mi web. Si quieres recibir una notificacion, puedes rellenar el formulario y te lo mando directo a tu bandeja de entrada (si ya has rellenado el formulario para las clases/cursos también te lo mandaré porque ya estás en la lista). Os voy contando!

To finish it off, a little about the fit. As it's made only with stretch materials I find it very comfortable! Actually I find it very positive when you start out sewing underwire bras as this stretch factor makes fitting the cups way easier than in the rigid fabric cups. By the way, I didn't put underwires in that bra as I didn't have them at home and as it was really comfortable as is I left it that way.

I really like that there is enough room between the cups, the bridge is wide. My A cups need that and it hasn't been easy to find before when sewing with other patterns or buying ready to wear. Now the thing is that there is the same width as the cups grow bigger. I'm not sure how that works out with bigger cups as the space between the breasts tends to get smaller when the cup volume grows.  As always you need to make a toile to see the fit. The good thing is that this pattern alteration is fairly easy to do and what matters is that it would be comfortable to your body.

For the last thing I wanted to tell you that I'll be teaching how to sew this Madalynne bra this autumn and the dates will be anounced later this month. I'll tell you all the details soon!


La tienda está abierta de nuevo // The shop is open again


Hola! Espero que estés de vacaciones y disfrutando del verano! Yo sigo en el norte un mes más pero mi tienda de materiales de lencería Studio Costura Shop se ha abierto de nuevo para que puedas comprar los materiales. Después de un mes de trabajo (que las vacaciones no significan realmente vacaciones por aquí...) os traigo bastantes novedades y para empezar os quiero contar que cambiamos de país!

Realmente no es tan radical...ya que la tienda es online y Etsy es un mercado mundial, así que no cambia gran cosa. Si me sigues desde hace tiempo sabrás que ya en enero cuando también estuve aquí en Estonia, tenía la tienda abierta y mandé los paquetes de aquí y no de Madrid. También si conoces más de la historia detrás de mi tienda (igual has escuchado el podcast de Maker Style donde conté más sobre eso) sabrás que hay dos partes en el proyecto: una soy yo y otra es mi madre. El proceso hasta ahora era que yo me ocupaba de todo el tema de organizar la tienda y mandar los paquetes desde Madrid y mi madre desde aquí hacía la parte de la contabilidad etc. 

Pues ahora lo que cambia es que también vamos a mandar todo desde Estonia, ya no voy a tener materiales en Madrid. En el primer lugar porque es más barato, tanto para nosotras como para vosotras. Al quitar los costes de llevar todo el material a España podemos tener mejores precios para los clientes. Y aparte de eso, el envío es más barato desde aquí también, así que todos ganan. Vale...todos todos no. Para las que estáis en España cambian las cosas un poco. El tiempo de envío es más largo (7-10 días normalmente) y el coste puede estar un poco más caro también. Pero os he hecho unas condiciones especiales comparado con otros países así que pienso que los precios no son desorbitados y tiene sentido seguir comprando en esta tienda :) Yo seguiré contestando a vuestros correos, llevando la cuenta de Instagram y escribiendo posts que espero que te inspiran para probar coser lencería, mi madre os va a preparar los paquetes y manetener los números en orden.

Ahora quería enseñaros algunas novedades que tenemos!

Hey! Hope you are on vacations and enjoying the summer. I'm in North one more month but my lingerie supplies shop Studio Costura Shop is open again so you can buy all the bramaking materials. After a month of work (because here the vacations really aren't so much vacations...) I'm bringing you quite a lot of news and to start with I'd like to tell you guys that we are moving!

Actually it's not so radical as the shop is online and Etsy is a worldwide marketplace, so there will be not so many changes after all. If you've been following along you know that when I was here in Estonia earlier this year I kept the shop open and sent your orders from here and not from Madrid. Also if you know more about this project (if you've for example listened to the Maker Style podcast where I talked a bit more about our story) you remember that there are two parts in it: me and my mother. Until now I was responsible for organizing the shop and shipping your orders in Madrid and she was doing the book keeping etc here.

The news is that now we'll ship everything from Estonia and I won't have more materials to sell in Madrid anymore. First of all, it's cheaper for us and for you too. When there's no extra cost for us to bring out stock to Spain, there will be better prices for our clients. Apart from that, the international shipping rates are slightly cheaper from here so everyone will win. The shipping time will be the same, so nothing changes for our customers out of Spain. I'll continue answering your mails, updating the Instagram account and writing lingerie posts over here that will hopefully inspire you to start bramaking too, and my mother will ship your orders and keep the numbers balanced.

Now let me show you the new stuff I hve for you!

Primero hay un montón de encajes elásticos que son ideales para usar en las braguitas. Por ejemplo braguitas Frankie de Evie la Luve y Celeste de Ohhh Lulu son bonitas muestras de cómo usar este tipo de elástico. Aparte de eso pueden ser un detalle bonito también para blusas lenceras, un camisón etc.

First there are a lot of new narrow elastic lace trims that are perfect for sewing panties. For example Frankie panties from Evie la Luve or Celeste from Ohhh Lulu are pretty samples of ways you could use these laces. They can also be a beautiful detail for tops, nightwear etc.

Los kits para hacerte tu propio sujetador y braguitas siguen estando disponibles en muchos colores, hay varios nuevos también, cómo por ejemplo éste con el encaje beige tan bello o éste con el encaje melocotón, un color realmente bonito.

Si antes los kits llevaban la tela para las braguitas que era de nylon o de poliamida, ahora he cambiado de tela y vienen con punto de viscosa con un poco de elastán. Prefiero personalmente esta tela más natural pero igualmente suave e ideal para las braguitas.

Otro cambio es que ahora viene en los kits el cierre de 2 filas o de 3 filas y no la cinta que puedes cortar tú, así que tienes que elegir eso antes de comprar (el patrón te dice cual necesitas pero sino es muy fácil adaptarlo al tamaño del cierre). También puedes comprar los cierres aparte, que hay varios distintos.

The bramaking kits to make your own bra and panties are available in many colors, there are new ones too, like for example this one in beige with the pretty lace and that peach one with a beautiful color combination.

The kits included a nylon or polyamide fabrics for the panties before but now I've changed that and they now have a viscose jersey knit with a bit of spandex in it. I personally prefer this more natural fiber that is equally soft and perfect for panties.

Another new thing with kits is that they now come with pretreated closures not the bra hook and eye tape like before. You have to choose the size, either 2 or 3 rows when you buy the product (you can see which one you need in your pattern instructions but it's also a very easy adjustment to make if you don't know which size you need). There are also several new closures available now.

Hay un montón de bies elástico nuevo también en la tienda, me gustan mucho estos de dibujitos...tendré que pensar un buen proyecto para ellos :)

Aparte de eso tenemos el forro de lencería (sheer lining, la tela que va a la parte central del sujetador y en las copas) en tres colores con un precio mejor que antes. También he encontrado un tul elástico (stretch mesh) que es super suave y va genial para hacer braguitas. 

Y eso, espero que te gusten las novedades y que eches un ojo a la tienda. Para la gente de Madrid: sí que tengo algunos materiales todavía allí así que si te interesa algo en particular, puedes escribirme y podemos concretar algo en septiembre. Hay encajes, telas etc, me puedes preguntar!

There are a lot of new fold over elastics too, I really like the one with small flowers on it...I should think about a project to use this one :)

Apart from that there's sheer lining in three colors with a better price than before. I also found a really nice and soft stretch mesh that would be perfect for sewing panties.

And that's it, hope you liked the new stuff and you'll see everything yourself over at Etsy. 

Por lo último, hoy empieza en Instagram el evento que se llama #BRAugust2017 organizado por Ying de Tailor Made Shop. Se trata de subir fotos con un tema diario durante el mes de agosto y todo está relacionado con coser lencería. Os animo a participar aunque sea algún día, además va a haber un montón de sorteos! Studio Costura Shop también va a patrocinar el día 8 y voy a sortear un kit de lencería. Aparte de eso creo que va a haber un montón de inspiración costuril!! Yo voy a participar con la cuenta de Studio Costura Shop si quieres seguirlo :) 

Last but not least, today starts an Instagram photo a day challenge called #BRAugust 2017 organized by Ying from Tailor Made Shop. During the month of August there will be daily photo themes to play along, everything is bramaking related. I incourage you to participate, even when you only do it some of the days, tehre will be a lot of give aways too! Studio Costura Shop is sponsoring too and I'll be giving away a bramaking kit on 8th. Apart from  that I think there will be so much sewing inspiration!!! I'll participate on the shops account if you'd like to follow along :)


Kelly anorak con forro // Kelly Anorak with Lining

 
Kelly anorak with lining www.studiocostura.com

Hola! Por fin he tenido un rato para poder escribir sobre el abrigo Kelly que terminé la semana pasada. Más que nada tenía también prisa porque sabía que lo iba a olvidar todo si no me ponía ya, jaja.

Así que para empezar, ya hice una vez el mismo abrigo con el patrón de Kelly de Closet Case Patterns, lo puedes ver en este post. Más tarde en la primavera sacaron también el extra patrón de forro para el mismo abrigo y tenía ganas de probarlo porque así esta prenda tan bonita puede convertirse en algo aún mejor y más práctico.

Mi idea realmente es hacer dos abrigos, uno para mi hermana y otro para mí. Al principio pensaba hacerlos a la vez pero entonces vi este patrón de Ottobre Design también de anorak y estaba pensando que quizás me haga el mío con el otro patrón. En busca de muestras vi este muy bonito en el blog de Ana. Después cambié de opinión simplemente porque me da tanta pereza calcar el otro patrón después de imprimir-pegar-cortar-modificar el Kelly y como tampoco el resultado final tiene tantísimas diferencias pues me quedo con este.

Hey! I finally have time to write about my latest Kelly anorak I made last week. I wanted to record the process here quickly as otherwise I'm sure I'd forget it, hehe.

So to start with, I already made an anorak with the same Kelly pattern from Closet Case Patterns, you can check it out in that post. Later this year they also put out the expansion pack for the lining which I really wanted to try out as this would make this beautiful garment even better and more practical for me.

My original idea was to make two jackets, one for my sister and the other one for myself. First I thought about making them at the same time but then I saw this Ottobre Design pattern for an anorak too and thought about using that one for my version. I was looking around to see some samples and this one from Ana's blog is looking really good. Some time after I still changed my mind basically because I'm too lazy to trace another pattern after printing-assembling-cutting-modifying the Kelly and as the end result is not so different I'm just staying with Kelly.

Kelly anorak with lining www.studiocostura.com

La tela que usé para esta versión es una micropana en color mostaza, es de algodón con un poco de elastán. Lo elegimos no porque sea pana pero por el color y la verdad es que ha quedado guay. Hay que tener en cuenta que con pana hay que recordar que no se puede voltear las piezas de los patrones al cortarlos para aprovechar mejor el tejido porque al cambiar la dirección se cambia el brillo...así que por si acaso hay que comprar un pelín más de tela. El forro es raso de viscosa en color gris claro que tenía por casa.

En mi primer Kelly usé el patrón en talla 8 y me hubiera gustado que las mangas estuvieran un pelín más anchas. Mi hermana usa talla más grande y para ella corté el patrón en pecho de 10, en la cintura de 12 y de cadera en 14, gradualmente uniendo las tallas. Los cambios los hice sólo en el delantero y en la espalda, el largo del cuerpo lo dejé como en la talla 10. Las mangas las hice en talla 10 y 2 cm más largas. La tapeta delantera donde van los snaps la hice 1 cm más ancha (en doblez) porque la última vez me pareció que los snaps se quedaron demasiado al borde.

Como no tenía aquí el patrón que usé la última vez me tocó imprimirlo todo otra vez. Si me preguntáis qué prefiero, que si imprimir y pegar o calcar del patrón impreso pues la respuesta es que siendo un patrón de tantas piezas (25 creo) es igualmente coñazo de las dos formas...o sea, un rollo, jaja. Cuando haces el Kelly con forro tienes que mirar bien qué piezas usar, en las instrucciones viene la lista de piezas que necesitas del patrón original y luego la lista con las piezas del forro. La manga se ha cambiado y ya no tiene puño, así que son nuevas tanto las piezas del forro como del exterior. Había un error que vi después de cortar: la vista de forro de la capucha (R2) lo han puesto como si se cortase de la tela de forro pero realmente es de la tela exterior.

I used a mustard colored thin striped corduroy for this version, it's a cotton fabric with a bit of elastan in it. We decided on that fabric not because of it would be corduroy but just because of the color and it turned out great. Using a fabric like corduroy means that you can't flip the pattern pieces to save up on fabric as there's the directional sheen on the fabric that shouldn't be mixed up on pattern pieces...so I bought a bit more fabric than required just in case. The lining is a rayon satin fabric I had at home.

On my first Kelly I made a size 8 and I later would have liked the sleeves to be a bit wider. My sister uses a bigger size so I cut this one in size 10 in bust, 12 in waist and 14 in hips, gradually joining the sizes on the pattern pieces. I only made these changes on the body pattern pieces and left the length like in size 10. I made the sleeves in size 10 and made them 2 cm longer. The placket where the snaps go seemed a bit too narrow for me on my first Kelly so I widened it by 1 cm (on the fold) to make more room for them.

As I didn't have my old pattern here I had to reprint everything. If you ask which method I like more, printing and assembling or tracing from a printed pattern, well my answer is  that if you're working with a pattern that big (I think it's 25 pattern pieces) it's a pain in the ass both ways, haha. When you make a lined version of Kelly you need to read well the instructions to see which pattern pieces you need from the original version and which ones from the lining extension, there's a list there. The sleeve has been changed and now comes without the cuff so both the sleeves exterior and lining pieces are new. I saw an error after cutting too: the hood lining facing (R2) is on the lining fabric list but you need to cut it from the exterior fabric.

Kelly anorak with lining www.studiocostura.com

Sobre la construcción. Hay partes que son similares a la versión sin forro pero luego hay bastante más de curro por delante. Esta vez cosí las costuras de unión de piezas sin rematarlos por dentro (por fuera se ven iguales) ya que la prenda lleva forro, eso sí que fue más rápido que la primera vez. Las instrucciones que me confundían la primera vez se habían mejorado mucho. La primera vez corté mal el tema del delantero (que son dos iguales y luego tienes que quitarle una parte a uno de ellos) y esta vez lo vi mejor explicado, especialmente eso de que cuando se refieren al lado derecho de la prenda, eso significa que el lado derecho cuando tú tienes la prenda puesta. No tenía mucho sentido pero si está hecho así, pues así lo hacemos. Mientras no me confundo en el camino…

No había grandes problemas a la hora de coser el abrigo. Las piezas encajan y todo va bastante bien. A la hora de coser la cremallera y las vistas hay que leer las instrucciones paso a paso y seguir cumpliendolos, luego se ve el porqué de los pasos...o sea, parece complicado al principio pero luego la cosa se soluciona. Donde me quedé con la duda es en la parte de abajo donde se une el forro con el exterior, ese cachito donde la vista de la cremallera, se quedó medio raro, es difícil de explicar si no tienes la prenda adelante. Pero de alguna manera doblé la vista para que no se quede con el borde sin rematar allí fuera y luego lo cosí a mano para unir al forro como en las instrucciones. No sé si lo hice bien, pero cerrado está.

Cómo dije, hice la tapeta 1 cm más ancha y me gusta el resultado así, me parece que hay más espacio para los snaps. Ahora, ya en la parte de unir la capucha, no sé cómo lo hice que me cuadró, pero pensé que realmente si la tapeta es más ancha, me faltaría también 1 cm de la capucha...así sería lógico, no? Pero igual por mi tela ligeramente elástica o vete tú a saber por qué...pues me cuadró esta vez.

Realmente la parte donde más descosí era la última: para fijar el túnel de cordón al abrigo, tanto a la capa exterior como al forro a la vez. Primero se engancha el túnel sólo al exterior y luego se cose a través de las dos capas pero el forro se me movía y me quedé sin espacio y mil movidas más hasta que lo hilvané todo a través de las dos capas de nuevo y sólo entonces conseguí que quede medio bien. Además lo malo de esta tela es que al tener un poco de elasticidad se me cambiaba de largo de vez en cuando y las cosas no siempre encajaban a la primera.

About the construction process. There are similar parts as in the non lining version of the pattern but there's also lots of work ahead after that. I didn't sew the proper flat fell seams this way, I just left the insides of those seams raw as there's lining there anyway (they look the same from the outside) and this made the process faster. The instructions that confused me the first time were better written this time. On my first Kelly I cut out the front piece wrong (they are both cut out the same and later you cut away one part) and this time I saw that this part is explained better, especially the part where they refer to the right side of the garment which means the right side when you are wearing the jacket. It didn't make too much sense to me but as it's how the instructions are written well I'll follow them as they are as long as I don't get something wrong...

There were no big problems when sewing the jacket. The pieces go well together and the process is smooth. When sewing the zipper and it's facings you need to really do it step by step and carefully read the instructions, it makes sense when everything is set finally...it might seem complicated at first but you'll see how it comes together in the end. The part I didn't understand was the part where the lining and exterior facing meet where the zipper is, inside the jacket. I did fold the facing so it wouldn't be there on the way with its raw edge and then later sewed it by hand as the instructions said but I'm not sure if it's the correct way. Also it's kind of hard to explain that part when you don't have the garment in your hands...

As I said I made the placket 1 cm wider and I like the result that way. When I was attatching the hood I realized that when I made the placket wider I should have made the hood piece wider too to fit them both. the funny thing is that everything still fit without changes this time, it might have been also because of the slight stretch in my fabric, not sure about that happy coincidence there. 

The place I unpicked the most was actually in one of the last steps: when attactching the drawstring casing on both the exterior and lining pieces. First you only attatch it to the exterior and then in the end when the lining is in place you topstitch it through both layers. Well the lining shifted like crazy and I was left with no fabric until I basted everything in place through both layers and only then I could sew it well. The bad thing about my stretchy fabric was that it cahnged it's lenght sometimes so it made things a bit unpredictable.

Kelly anorak with lining www.studiocostura.com

Así que los cambios entre la primera versión sin forro y ésta con forro son de fuera que las mangas no llevan puños y el túnel de cordón está cosido por fuera y no por dentro. Y por dentro obviamente el forro. No sé decirlo con 100% de exactitud pero me parece que ahora las mangas son más anchas que en otra versión (que sería lógico para dar espacio para el forro también…), porque la talla 8 antes me pareció de manga un poco estrecha como comenté antes pero la talla 10 con forro es bastante amplio, o sea, creo que para mi abrigo con forro voy a volver a la talla 8 después de todo.

Los snaps que he usado son de tipo Anorak de Prim y la verdad es que me gustan más los que pude poner con la prensa industrial porque son más “suaves”, estos de Prim son fuertes y aunque funcionan y todo, me parecen un poco demasiado “cerrados”, no sé si me explico. Al principio pensaba ponerle un cordón amarillo pero la verdad es que este gris que encontré por casualidad en casa le queda muy bien junto con los snaps y el forro, me parece un detalle de color bonito para romper toda la mostaza un poco.

So the main differences between the non lining and the lining versions are that the sleeves don't have cuffs and the drawstring casing is on the outside now. And the lining itself of course. I'm not 100% sure but I think that the sleeves are wider now than in the first version (I guess it's logical as the lining needs more space...), because as I mentioned before I found the size 8 sleeve a bit tight but the size 10 with lining is quite roomy, so I probably return to the size 8 with my lined jacket.

I used Anorak type snaps from Prim and to be honest I like the industrial snaps I could put on my first version a lot more. They are way "softer" than the Prim ones. I mean these ones work well but I find them a bit too "strong" and "closed" if you know what I mean. At first I wanted to add a mustard color drawstring but then found this grey one at home and I really like the combination that all the grey/silver elements bring to the overall mustard look.

Kelly anorak with lining www.studiocostura.com

Qué más? Que aunque quería hacer los dos abrigos a la vez y luego pensé terminar uno y entonces directamente otro, pues ahora necesito un descanso. A veces me olvido que este tipo de proyectos llevan mucho tiempo y energía, jaja. Ahora necesito algo más ligero...una blusa, algo de lencería quizás, así me animo seguir ya que además la parte de preparar el patrón está hecho, lo único que lo voy a cortar a mi talla y ya está.

Espero que te animes a coser este abrigo porque a mí sí que me gusta mucho y el primero lo he usado un montón y el que haré seguro que también. Es un proyecto largo y necesita paciencia en mayúsculas pero merece la pena y mucho! Para el siguiente he pensado un par de cambios que ya os contaré más en detalle una vez que lo haya terminado. Gracias por leerme como siempre!

So what else? I thought about making both jackets at the same time or at least one after another but now I need a break. Sometimes I forget how time and energy consuming these projects could be, hehe. Now I need something easy as a top or lingerie or something like that, that way I'll be more motivated to continue with the second one as the pattern is already prepared, I will only reduce it to my size and that's it.

I hope you'll try out sewing that jacket because I really like it and I've used my first version a lot and hopefully will do the same with the second one too. It's a long project that needs lots of patience but it's really worth the effort! I thought about some changes for the second one and I'll tell you all about it when it's ready. As always, thanks for reading this!


Cómo coser copas de foam para el sujetador Watson // How to sew foam cups for Watson bra

 
tutorial: foam cups for Watson bra www.studiocostura.com

Hola! La semana pasada compartí en Instagram este sujetador Watson que hice con la tela tropical y sus tirantes amarillos...ha quedado muy guay. Esta vez usé en las copas también foam, ya quise probar qué tal sale eso desde hace tiempo y ahora por fin lo hice y estoy muy contenta...me parece muy muy práctico. Algunas me preguntábais sobre cómo coser las copas de foam con este patrón y pensé que lo mejor era hacer un tutorial, así que aquí lo tenéis. 

Un par de cosas antes. El patrón es el Watson de Cloth Habit que he hecho mil veces, está en varias entradas en este blog. Este patrón está hecho para telas de punto con elasticidad en las copas: las copas tienen que ser de material elástica para que vaya bien la talla. Cuando le pones foam, cosa que no es elástica, el sujetador ya no queda igual. Yo tengo una copa AA y en mi caso no hay problema, no necesito esa elasticidad en las copas (por fin algo bueno, jaja), así que añadir foam no es problema. Si tu copa es más grande, puede que el experimento no te sirve, pero yo haría la prueba, quizás subiendo una talla o dos en las copas, te queda bien.

Hice el sujetador tropical y lo llevé para saber si todo va bien a pesar de los cambios. Efectivamente, en mi caso todo bien. El único fallo que vi es que ahora que las copas son más rígidas, me siento que están demasiado juntos en el medio. Cómo véis, este patrón no tiene la parte central (bridge) en distintos tamaños como otros patrones como por ejemplo Boylston, eso se compensa precisamente con que las copas son elásticas. Así que ahora que iba a hacer un nuevo suejetador para este tutorial, hice también el experimento de aumentar el ancho de la parte central para ver si así consigo la perfección. Te cuanto el resultado en el final!

Y antes de empezar también quería añadir que no he puesto todos los pasos de cómo coser el Watson porque ya existe todo un coseconmigo sobre eso en el blog de Cloth Habit, sólo estoy enseñando los detalles que conlleva el tema del foam. El foam que uso se llama en ingés cut-and-sew foam y es básicamente el material para poder coser copas según tu talla.


Hey! Last week I shared on Instagram this Watson bra I made with tropical print fabric and those lemon straps...it turned out really cool. This time I also used foam in the cups as it was a thing I had wanted to try out for a while now and I'm very happy with the result...I find it very practical. Some of you asked me about the construction process for the foam cups with this pattern so I thought it would be good to make a tutorial and here it is.

But first some things to consider. The pattern is the Watson bra from Cloth Habit, I've made tons of them and they're all here in the blog too. This pattern is drafted for elastic knit fabrics for the cups: the cups need the stretch factor to fit well. When you add foam to these cups, a material that has no stretch, the fit is not the same anymore. I'm an AA cup so for me the stretch factor is not a problem, I don't really need it in the cups (finally, something good, haha), so adding foam is no problem. If you have bigger cups that experiment might not work, but I'd still give it a try, maybe going up one or two sizes can work out for you.

I made the tropical bra and wore it to see if everything was good even with these changes, and it was. The only downside I saw was that as the cups are now rigid, they were too close together in the center for me. As you can see, this pattern does not have different bridge widths for different bra sizes like other bra patterns do (like Boylston for example), it is compensated by the stretch in the cup fabric. So as I needed to make another bra for this tutorial I decided to alter the bridge width to see if I can get closer to the bra fit perfection. I'll tell you about the result in the end!

And for the last thing to mention: I didn't write out all the steps because there already is a good sewalong about making a Watson bra on Cloth Habits blog, I've only described the parts that are changed by the foam factor. And the material I'm using is a cut-and-sew foam which is basically a material to construct your own bra and swimwear cups.

tutorial: foam cups for Watson bra www.studiocostura.com

Para poder coser las copas de foam hay que primero modificar el patrón de las copas. Es necesario por dos razones:

1. en la copa de foam las dos partes de la copa se unen lado con lado con un zigzag, no necesitan margen de costura

2. al aplicar el elástico en las copas, hay que reducir el margen de costura en la parte del foam porque si lo coses con foam y la doble pasada de zigzag como es lo normal, eso quedaría demasiado gordo (si nunca has cosido los elásticos de lencería, puedes mirar este post)

Para más información sobre modificaciones para las copas de foam también puedes leer este tutorial muy útil de Cloth Habit.


In order to sew foam cups you first need to alter the original cup pieces. It's necesary for two reasons:

1. the foam cup pieces are sewn together side by side using a zigzag stitch, they don't need a seam allowance there

2. when you sew the elastic on the cups you need to reduce the seam allowance on the foam cup part because if you'd sew the elastic like it's normally done with two zigzag rows you'd need to fold the foam and it would be too bulky (if you've never sewn lingerie elastics before you can read this post about it)

For more information on altering patterns for foam you can read this very useful tutorial from Cloth Habit.

tutorial: foam cups for Watson bra www.studiocostura.com

Así que por eso hay que quitar el margen de costura de 0,5 cm que lleva el patrón tanto en la costura central de la copa (donde está el piquete) y en los dos "costados", tanto en la parte exterior como en el interior de la copa. La parte de abajo se queda lo mismo porque necesitamos ese margen de costura para poder juntar luego la copa con la banda del sujetador.

No te olvides marcar los piquetes y recorta el patrón para las copas de foam.


So that's the reason the seam allowance of 0,5 cm has to be removed from both the central seam of the cup (where the notches are) and also from the "side" seams, on the exterior and interior sides of the cup pieces.The bottom part stays the same as we need that foam seam allowance to be able to attach the cups to the bridge later.

Don't forget to mark the notches on your new pattern pieces and then cut out the new foam patterns.

tutorial: foam cups for Watson bra www.studiocostura.com

Ahora la otra parte de mi experimento que ya conté antes, eso no tiene que ver con foam pero quería hacer la parte central (bridge) más ancho. Me medí y vi que unos 1,5 cm de ancho estaría bien entre las copas, así que añadí 0,75 cm para el centro deoblez (0,75 cm porque luego se dobla) y quité la misma cantidad en el otro borde porque la banda en sí me iba bien, sino hubiera quedado demasiado ancha. Una cosa que me olvidé y lo vi después al coser es que donde añadí estos 0,75 cm hay que añadir también 0,5 cm para arriba (el largo de la parte que hice más ancha). Eso es para poder unir por esa costura la capa exterior y la capa de forro de lencería (sheer lining) y no perder allí margen. Así que eso no está dibujado pero hay que añadirlo.


Now the other part of my experiment, as I told you before it's not directly related to the foam part of this tutorial. I wanted to make the bridge wider and I measured that it should be 1,5 cm wide, so I added 0,75 cm to the center fold (0,75 cm because it will be double when cut) and I took away the same quantity on the side of the pattern piece as the diameter whole band was OK and I didn't want it to be too big for me. I forgot one thing and saw it later when sewing: you need to add 0,5 cm above the bridge (the part that I extended). This makes it possible to sew together the outer fabric layer of the bridge and the inner sheer lining layer, otherwise you'd lose margin there. So this part is not drawn on the photo but needs to be added.

tutorial: foam cups for Watson bra www.studiocostura.com

Ahora hay que cortar las piezas: las de tela según las piezas originales y las del foam según los nuevos patrones.


You now cut the fabric cup pieces according to the original pattern pieces and the foam according to the new pattern pieces.

tutorial: foam cups for Watson bra www.studiocostura.com

Las partes de las copas de foam se unen entre sí con zigzag. En esa foto el zigzag es pequeño porque la máquina que uso aquí es antigua y no tiene la función de poder regular tanto el ancho como el large de zigzag. Así que primero cosí con ese zigzag y después hice otra vuelta con el zigzag de tres puntos para asegurar que esté todo pillado. Si puedes regular el zigzag, elige una puntada ancha y corta, así es más seguro. 

Tienes que juntar las piezas y sujetarlos juntos mientras coses con el zigzag por el medio, pillando las dos capas. Mientras coses, la copa se va tomando forma y al terminar tienes una pieza 3D...es pura mágia, jaja.


The foam cup pieces are sewn together with zigzag. In this photo you see a small zigzag because I'm using an old machine that doesn't have a possibility to change zigzag stitch width and length. So first I used this small zigzag and then later did another round with a three-step zigzag to be sure that everything was under control. If you can change your zigzag stitch, choose a wide and short one.

You need to put the pieces side by side and keep them aligned while you sew both of them together with the zigzag. While you sew the central seam the cup starts to turn into a new shape and when you finish you'll have a 3D piece...pure magic, hehe.

tutorial: foam cups for Watson bra www.studiocostura.com

Puedes usar el mimso color de hilo que tu foam y sólo unirlo todo con zigzag y dearlo así o también puedes hacer una tira para cubrir el zigzag. Yo prefiero la segunda opción ya que me parece que todo queda más limpio por dentro del sujetador. Para la tira puedes usar el forro de lencería (sheer lining) cortado en dirección de bies, yo usé un ancho de 2,5 cm y el largo lo medí por el largo de mi costura que quería tapar.


You can use the same color thread as your foam, sew the zigzag and leave it that way or you can also cover the seam with a fabric strip. I prefer the second option as it's all nice and clean both on the inside and on the outside. You can use a strip of sheer lining cut on bias for that, mine was 2,5 cm wide and the length is according to the seam you're covering.

tutorial: foam cups for Watson bra www.studiocostura.com

Dobla la tira en tres partes y coselo encíma del zigzag por los dos bordes con la puntada recta y ya está. Además de más limpio también es más fuerte.


Fold the strap in three parts and sew it on your seam with a straight stitch on both sides. Apart from a clean finish it's also a strong one.

tutorial: foam cups for Watson bra www.studiocostura.com

Con las copas de foam y las de tela preparadas, puedes empezar a unirlas. Puse la copa de tela encíma de la copa de foam (el revés con el revés) y primero puse alfileres para que esté bien la costura central, luego unos alfileres más para repartir la tela bien.


When you have your foam cups and fabric cups ready you can start sewing them together. I put the fabric cup on the foam cup (with wrong sides together) and first pinned it in place making sure the central seams were aligned, later I pinned the rest of the fabric evenly.

tutorial: foam cups for Watson bra www.studiocostura.com

En el otro lado se ve así, lo importante es comprobar que tienes ese margen de costura que te sobra en la tela, allí es donde vamos a coser el elástico con la primera pasada de zigzag.


This is the inside view, it's important to see if you have the extra seam allowances on the fabric cups, we'll sew the elastic there with the first row of zigzag.

tutorial: foam cups for Watson bra www.studiocostura.com

En mi caso yo ahora quité la copa de tela para poner el elástico para que sea más fácil pero también lo puedes coser con el foam abajo para no tener que volver a poner los alfileres. Cosemos el elástico sólo en la parte "central" de la copa (lo que se queda en el escote). Cose el elástico en derecho de la copa sin estirar porque el foam de todas maneras no es elástica así que no tienes que tirar.


In my case I unpinned what I just did to sew on the elastic separately on the fabric cup. You don't need to do that when you don't want to repeat the pinning process, you can attach the elastic anyway, I just find it easier when it's fabric alone at this point. Sew the elastic on the inner cup piece on the right side of the cup. You don't need to stretch the elastic here as the foam doesn't stretch anyway.

tutorial: foam cups for Watson bra www.studiocostura.com

Vuelve a poner las dos copas juntas y ahora sí que puedes doblar ya el elástico encíma del foam y coser la segunda pasada de zigzag para fijarlo. Por eso dije antes que sería incomodo poner el elástico si tuvieras que doblar el foam. Primero se cose sólo en la capa de tela y después de dobla encima del foam, así no hay el bulto extra. Ahora puedes unir también la parte de abajo para trabajarlo como una misma capa. 


Put the two layers back together and now you can fold the elastic over to the foam side and sew the second row of zigzag. That's why I said before that it would be uncomfortable to fold the foam to sew on the elastic. First the elastic is sewn to the fabric only and then it's folded on the foam, so there's no extra bulk that way. Now you can also sew together the bottom part to treat it as one layer.

tutorial: foam cups for Watson bra www.studiocostura.com

Para preparar la parte central tuve que hacer un paso extra ya que había aumentado la distancia entre las copas. Sería poner derecho con derecho la capa exterior de tela y la capa de forro de lencería (sheer lining) y coser a 0,5 cm (eso era lo que había que añadir y se me olvidó antes....hice un apaño más o menos) sólo en la parte central de la banda. Después darle la vuelta y así esa parte entre las copas (que no existe en el patrón original) se queda rematada.


To prepare the bridge area I needed to make the extra step as I made the bridge area wider. You need to put the fabric layer and the sheer lining layer right sides together and sew the bridge width seam with 0,5 cm wide seam allowance (that was the thing I forgot before..I somehow managed to do it anyway). Now you can turn the pieces around again and the bridge central part is now finished (this part doens't exist on the original pattern so that's why you don't need to do anything normally).

tutorial: foam cups for Watson bra www.studiocostura.com

Igual que en la versión original, ahora hay que unir las copas a la banda. Es importante que en el lateral el foam termina antes y queda allí todavía margen de costura en la tela para poder poner el elástico de nuevo sin doblar el foam.


Like in the original version you now need to sew the cups to the bridge. Make sure that the foam cup piece ends just before the fabric one to leave the seam allowance there to be able to fold down the elastic like we did on the cup before.

tutorial: foam cups for Watson bra www.studiocostura.com

Otro paso opcional pero que me parece práctico aquí es que en vez de remallar es costura de la unión de copas, le puse el túnel de aros (sin aros, claro) que tapa bien esa costura y lo deja todo más limpio y plano. No he hecho fotos de paso a paso de este proceso (sí que lo podéis ver en el tutorial de Cloth Habit) porque son varias costuras pero básicamente es tapar la costura con esa cinta. Si queréis puedo hacer un tutorial aparte de eso (me decís en los comentarios).


Another step that's optional but I prefer to do is to cover the cup and bridge union seams with underwire channeling (without underwires, of course), it makes everything cleaner and flatter too. I didn't make step by step photos of the process (you can check out this tutorial by Cloth Habit for that) because you need to do various stitching lines there but basically it's the process of covering the seam with the channeling. I can make a separate tutorial about that if you'd like (mention it in the comments then).

tutorial: foam cups for Watson bra www.studiocostura.com

Después de terminar de poner todos los elásticos se queda así, bastante bien y limpio por dentro y por fuera.

After attaching all the elastics the result is pretty neat on the inside too.

tutorial faom www.studiocostura.com

Mi conclusión sobre el experimento de aumentar la parte central del sujetador es que es maravilloso! Creo que he encontrado por fin el modelo de sujetador que mejor me funciona...ahora tengo que hacer mil!!!!! Jajaa...bueno, un par de ellos igual sí. Para mí es ideal porque es lígero pero da soporte y como necesito poco pues funciona muy bien. Estoy pensando ahora adaptar eso para coser las copas de encaje...creo que podría estar muy bonito! Ya me decís si queréis ver lo de encaje al detalle también. Espero que os ha dado una idea más o menos cómo hacer las copas de foam. Cualquier duda me preguntáis! Esto ha sido larguísimo, jaja, gracias por leerlo!


My conclusion about the bridge width experiment is that it's a success! I think I've finally found the best bra fit for me...now I need a ton of those!!!! Hehe...well, a pair or so at least. It's perfect for me as it's lightweight but gives support and as I need quite a little it works out really well. I'm now thinking about adapting the pattern for lace too...I think it could be very pretty! Let me know if you'd like to see the lace pattern in detail too. Hope it was useful for you and you learned how to adapt this pattern once more. If you have any doubts just ask! This has been a long one, hehe, thanks for reading!