How to choose fabric for your project: composition // Cómo elegir tela para tu proyecto: composición

 
www.studiocostura.com

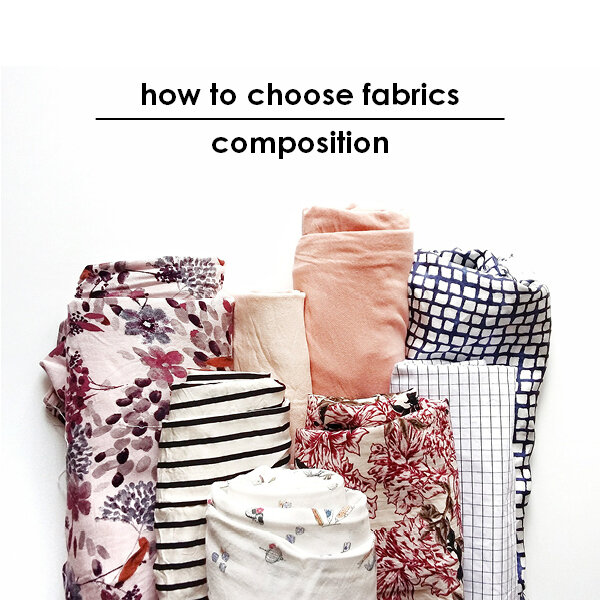
Today I’m going to talk a bit about how to choose fabrics for your sewing project. I think that many people struggle with this as it’s a skill that is learned over time and there are no right or wrong answers. Basically you just have to go and try things out and see what really works for you and your life. But there are some guidelines I’d like to share which I think will help you to narrow things down when you are thinking about your next garment project. This is not a super extensive post about fabric types, my aim here is to guide you through the process of choosing the right material for your sewing project with some important things to consider. You can of course go way deeper on this subject but I’d like you to start with basic concepts so you won’t get overwhelmed right away :)

Yes, the world of fabrics is very big and yes, it can be difficult to orientate in the sea of fabric names, especially when you are a beginner sewer. But there’s light, I promise. When I think about how to choose fabric for a specific project I like to take two things into consideration: the composition and the drape of the specific fabric, both are important in order to get the result you imagine in your head. In this first post I’m going to talk about the composition.


Hoy os hablaré sobre cómo elegir telas para tu proyecto de costura. Creo que a mucha gente les cuesta ese tema ya que es una habilidad que creo que viene con tiempo y no hay maneras correctas e incorrectas de hacerlo. Básicamente lo que tienes que hacer es ir probando y viendo qué es lo que mejor funciona para ti y para tu vida. Pero hay unas pautas generales que me gustaría compartir porque creo que ayudan aclarar un poco los conceptos a la hora de decidir qué tela usar para tu próxima prenda. Éste no es un post super extenso sobre tipos de telas, mi intención aquí es guiarte dando algunas pistas importantes para que pienses antes de elegir. Por supuesto puedes investigar más al fondo sobre el tema pero pensaba que molaría más empezar con algo más general para no marearte enseguida :)

Sí, el mundo de las telas es muy grande y sí, puede ser complicado navegar en el mar de nombres diferentes, especialmente si acabas de empezar a coser. Pero hay luz al final del túnel, te lo prometo. Cuando pienso qué tela usar para un proyecto concreto me gsuta concentrarme en dos cosas: la composición y la caída de la tela. Las dos cosas son importantes para poder conseguir el resultado que tienes en mente. En este primer post hablaré sobre composición.

www.studiocostura.com

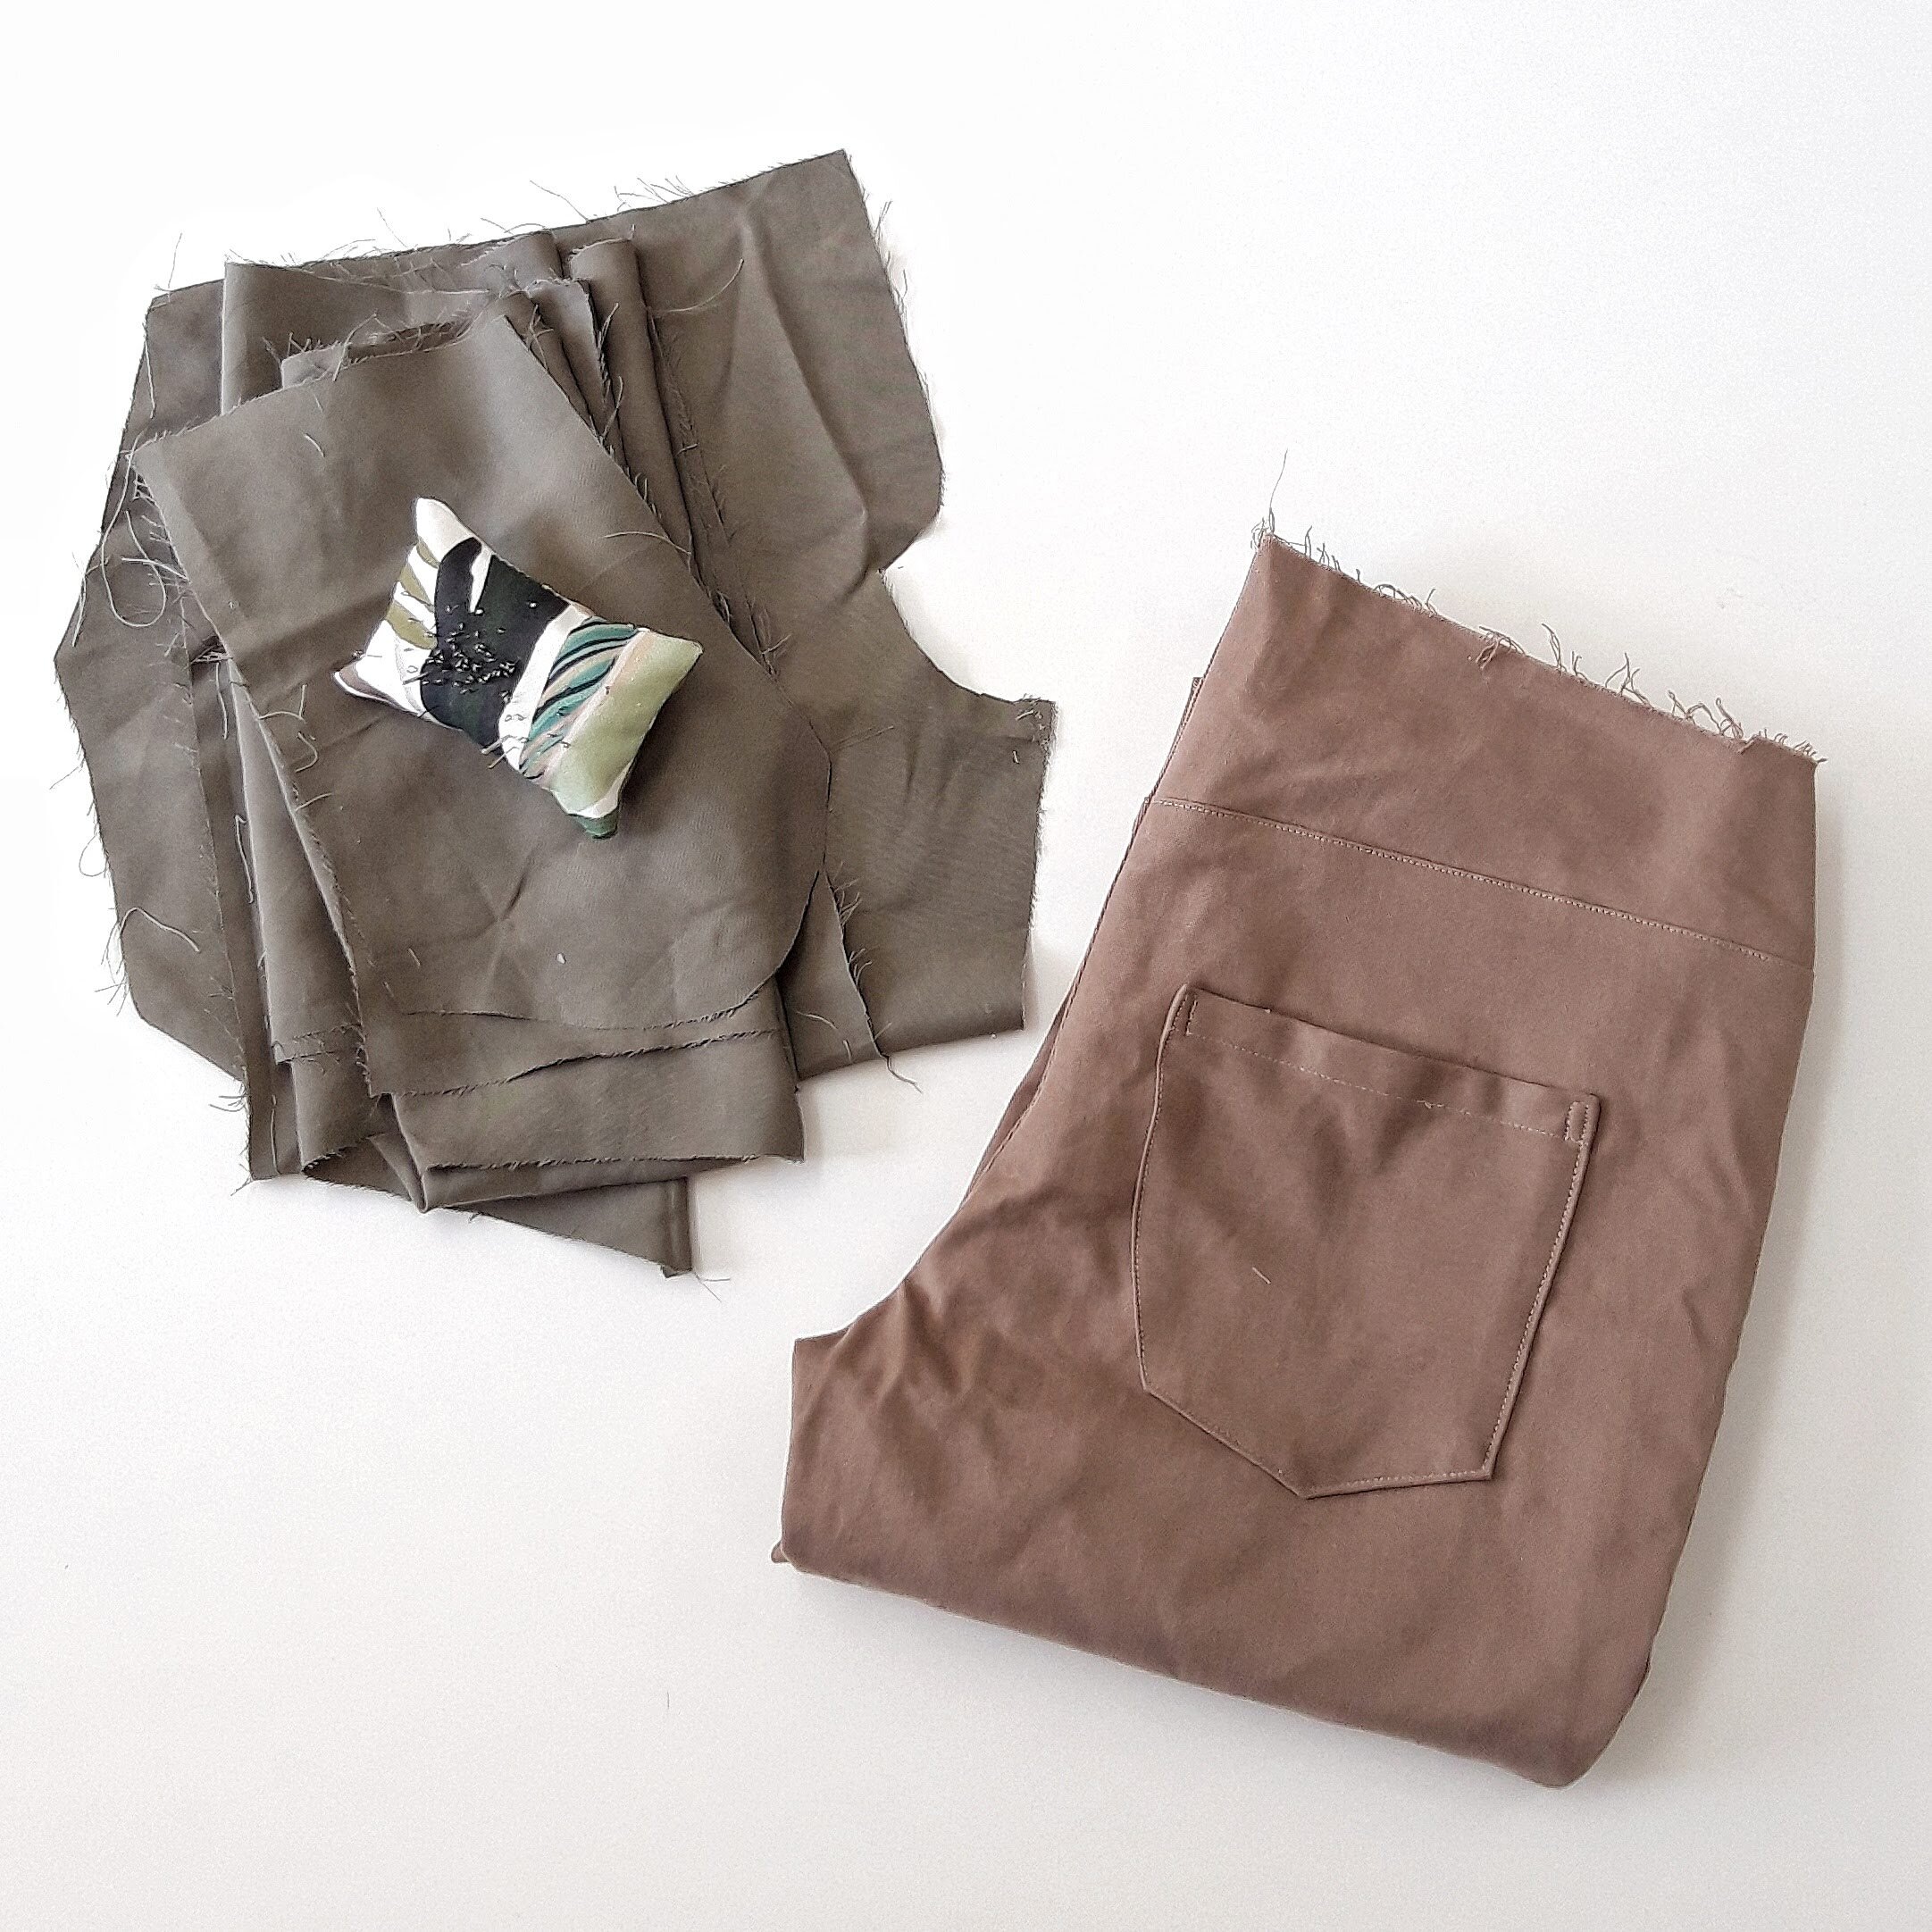
The composition tells you what type of fibers are used in the fabric. You can divide the fibers into two main groups: natural fibers and synthetic fibers.

Natural fibers come from plants or animals, most common ones are cotton, linen, silk, wool and hemp. The best thing about natural fibers is that they are breathable and adapt to the temperature of your body. Cotton, linen and silk keep you cool in the summer, wool will keep you warm in the winter (and many types of wool are also comfortable to wear in the summer). A great thing about these fibers is that they let your body adapt to the weather and the exterior temperature and they are biodegradable.

The “bad” thing about natural fibers is that they wrinkle quite a lot. This can be worked out by ironing your clothes of course but there might be times when you really can’t deal with wrinkles all over the place a second after sitting down and seeing all the wrinkles forming on your pants or a skirt.

I’d also put semi natural fibers into this category (I prefer to call them semi natural instead of semi synthetic, you’ll see why just in a bit). Semi natural fibers like rayon are made out of cellulose following complex procedures. Specific types of rayon include viscose, modal and lyocell (most commonly known as a brand name Tencel). Fabrics made out of rayon fibers have similar characteristics like natural fibers, they are breathable and wrinkle quite a lot.


La composición de la tela te dice de qué fibras está compuesta una tela. Las fibras se dividen generalmente en dos categorías grandes: las fibras naturales y las fibras sintéticas.

Las fibras naturales vienen de plantas o animales, las más conocidas son algodón, lino, seda, lana y cáñamo. Lo mejor de las fibras naturales es que son transpirables y se adaptan a la temperatura de tu cuerpo. Algodón, lino y seda mantienen el frescor en el verano y lana te da calor del bueno en el invierno (y algunos tejidos de lana también son cómodos para llevar en el verano). Lo guay de estas fibras es que ayudan a tu cuerpo para que se adapte al mundo exterior y el tiempo que haga, además son fibras biodegradables.

Lo ”malo” de fibras naturales es que se arrugan bastante. Esto se puede por supuesto arreglar con la plancha pero puede haber momentos cuando realmente no puedes permitirte tener arrugas en tus prendas nada más sentarte llevando unos pantalones o una falda hechos con tejido natural.

Yo pondría en esta categoría también las fibras seminaturales (prefiero llamarlos seminaturales en vez de semisintéticas, ahora ves por qué). Las fibras seminaturales como rayón se producen usando celulosa  que se pasa por complejos procesos para fabricar la fibra. Los tipos de rayón tienen diferentes nombres como viscosa, modal o lyocell (más conocido por su nombre de marca Tencel). Las telas producidas con las fibras de rayón tienen características similares como fibras naturales, son transpirables y se arrugan bastante.

www.studiocostura.com

On the other hand there are the synthetic fibers, these are man made using chemicals. Most common synthetic fibers you probably know are polyester and nylon. Compared to the natural fibers, many synthetic fibers are more water and stain resistant and they don’t wrinkle. Synthetic fibers are more durable than most natural fibers and will readily pick-up different dyes, that’s why they are quite a popular choice in the garment industry.

The bad things about synthetic fibers are that they are usually not breathable and make your body sweat, this can be especially uncomfortable during the summer. You have to take good care when you iron the fabrics made out of synthetic fibers as they can melt easily when using hot temperatures. Also there’s the electrostatic charge problem: for example skirts made of fabrics made out of synthetic fibers can end up pulling against your legs if you don’t line them with another fabric. 

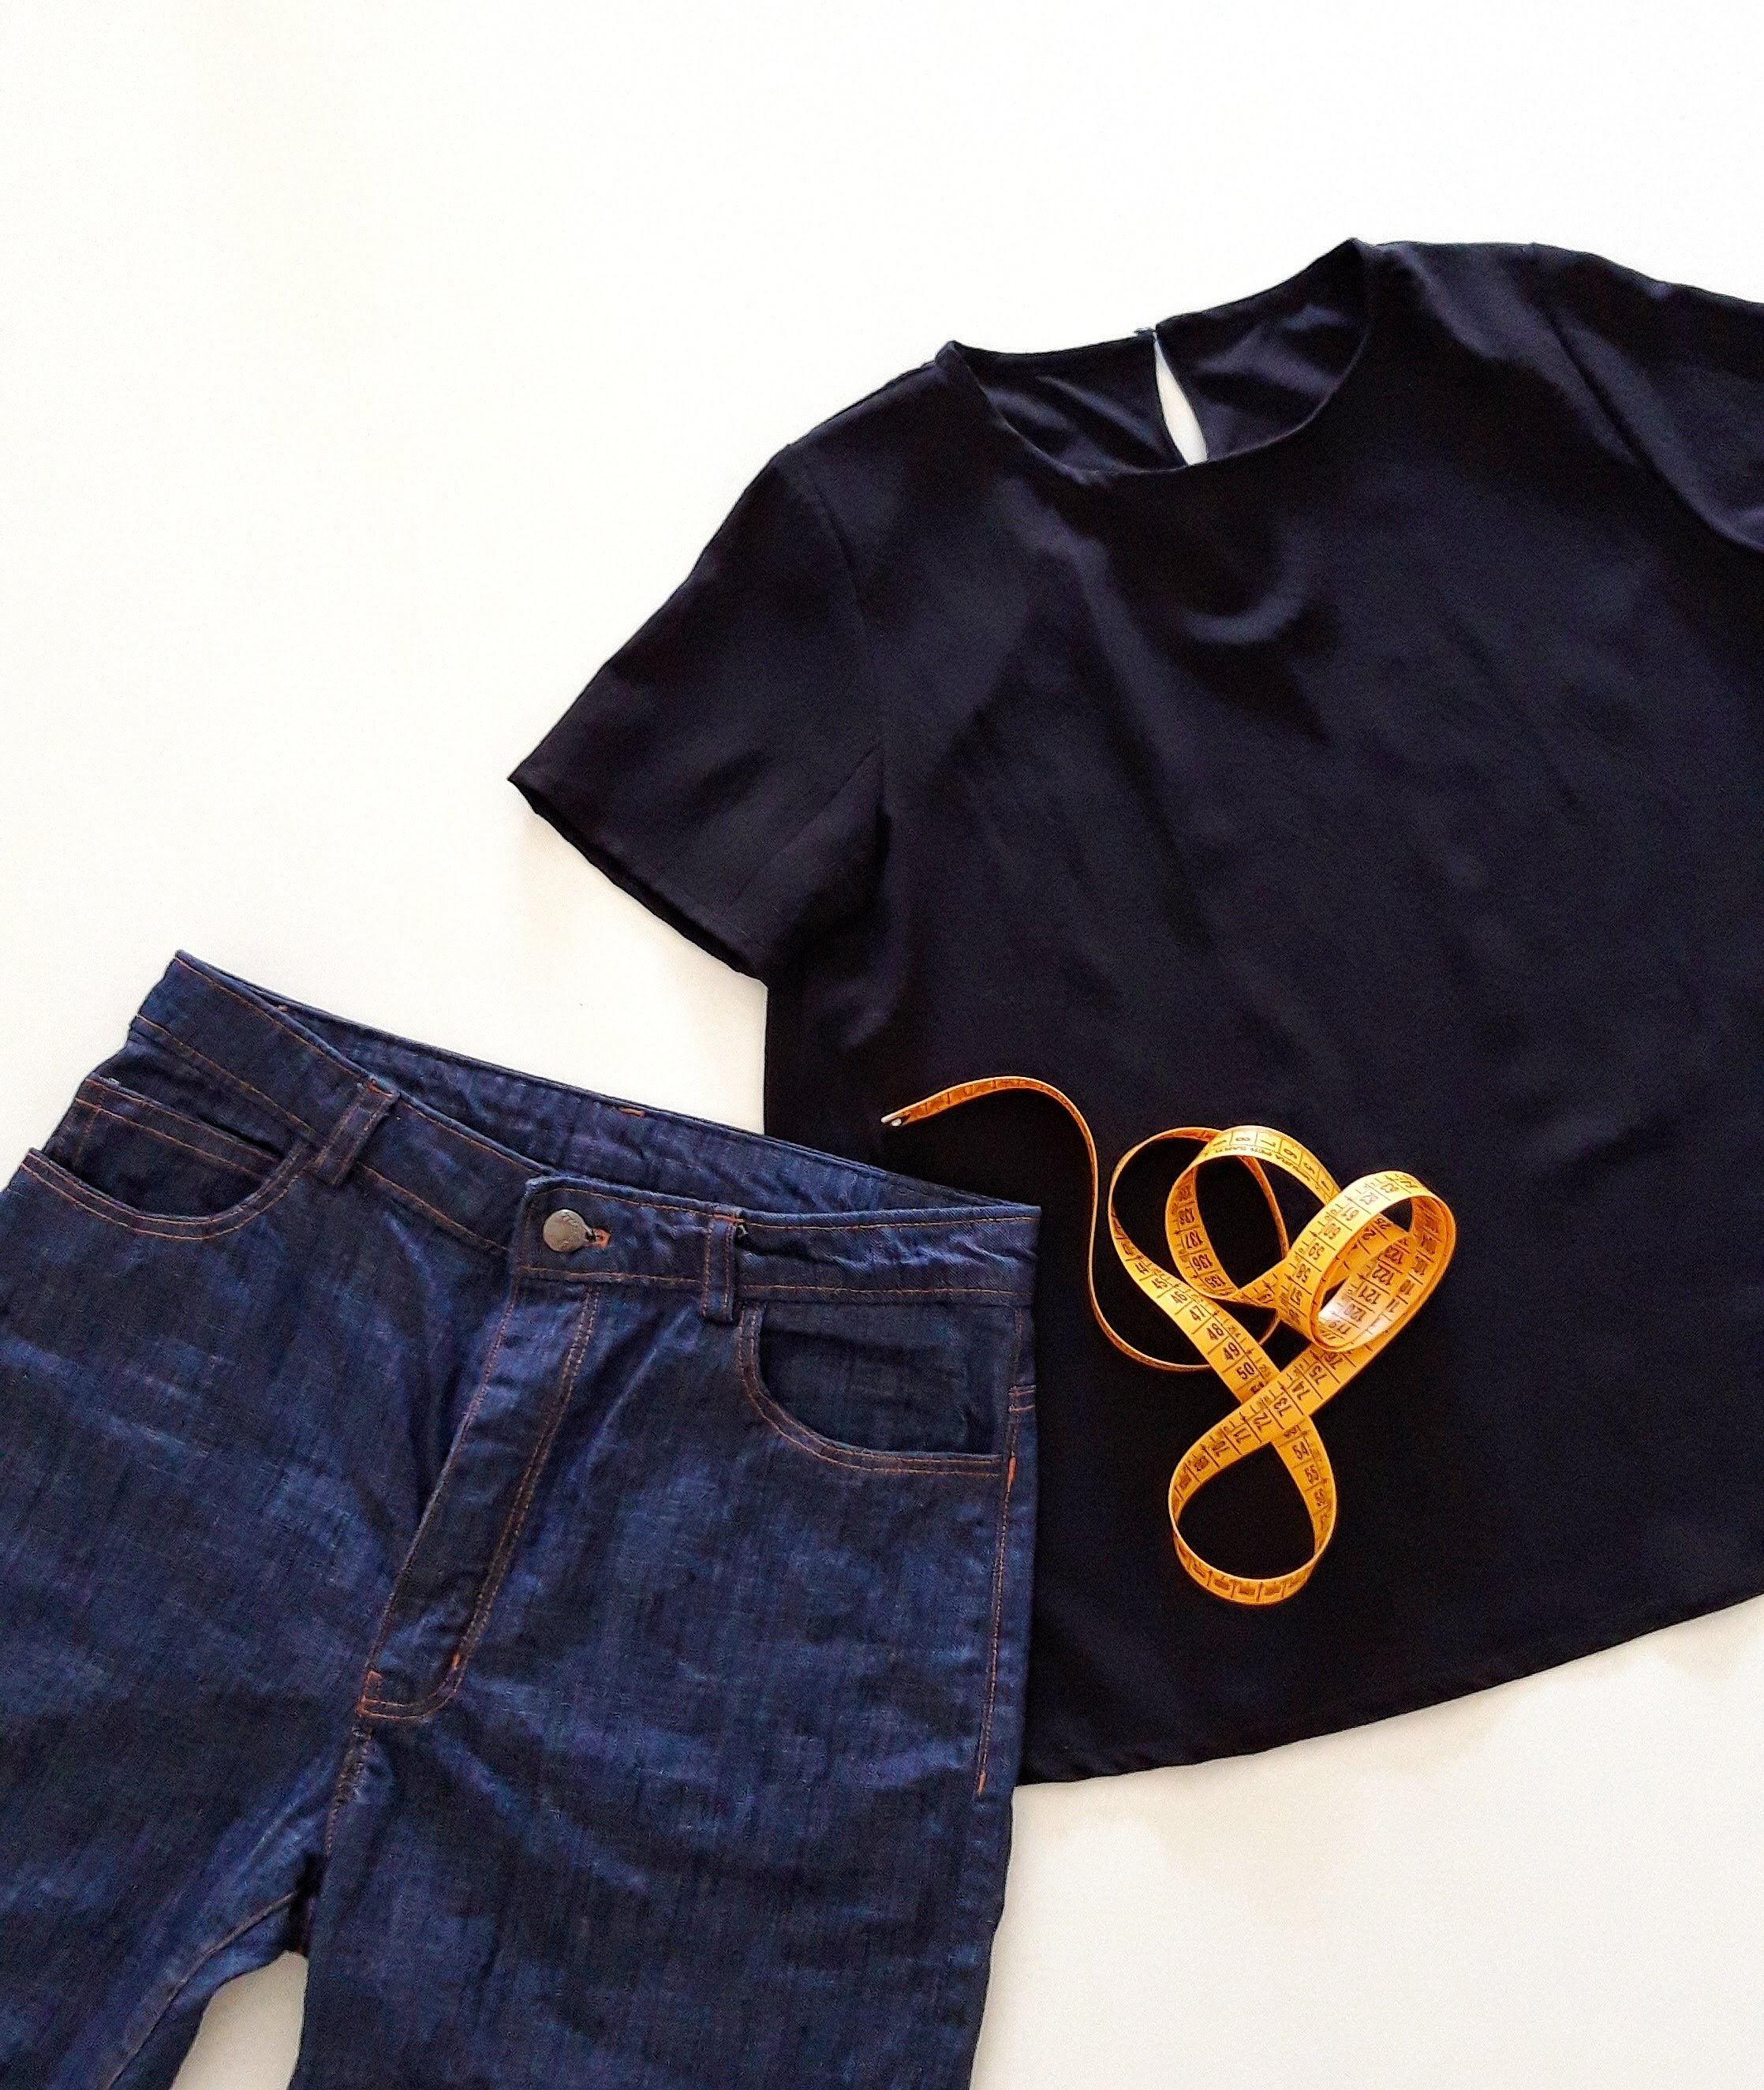
There’s one more synthetic fiber that is well known and you can find it in the composition of many fabrics these days, it’s called spandex (also called elastane or lycra). Mixing spandex with other fibers produces elastic fabrics that stretch (the stretch percentage is determined according to the percentage of spandex used in the particular fabric). Adding spandex to woven fabrics make them a bit stretchy and this way many close fitting garments are more comfortable to wear (if you are wearing jeans, unless they are made out of 100% cotton I’m sure there’s at least 1-3% of spandex in them and that’s why they are comfortable to wear). Adding spandex to knit fabrics makes them stretch in four ways and the result is a nice stretchy fabric (usually 5% of spandex is enough for a nice stretch).

Natural and synthetic fibers can be combined to bring out the best from both of them but the bad thing about blending synthetic fibers with natural fibers is that these fabrics can’t be recycled as well as fabrics made out of exclusively natural fibers. That’s why it’s especially important to take care of your garments in order to wear them for a long time.


El otro grupo grande de fibras son las fibras sintéticos, se hacen usando químicos. Las fibras sintéticas que quizás más conozcas son poliéster y nylon. Comparado con las fibras naturales, muchas fibras sintéticas resisten más al agua y las machas y además no se arrugan fácilmente. Las fibras sintéticas son muchas veces más fuertes que las fibras naturales y se tiñen bien, por eso son bastante populares en la industria de confección.

Lo malo de las fibras sintéticas es que normalmente no son transpirables y hacen que tu cuerpo sude, esto puede ser especialmente incómodo durante el verano. Tienes que vigilar mucho la temperatura cuando planchas tejidos sintéticos ya que aguantan menos calor y se pueden quemar. También está el problema de electricidad estática: por ejemplo las faldas hechas con tejidos sintéticos pueden pegarse en tus piernas si no usas un forro de otro tejido debajo.

Existe una fibra sintética que es muy conocida también y puedes encontrarla en la composición de muchas telas hoy en día, se llama elastano (o spandex, o lycra). Mezclar elastano con otras fibras produce telas que teinen elasticidad (el procentaje de elasticidad o cuánto dan de sí, depende del procetaje de elastano que lleva la tela). Cuando se añade elastano a telas planas se consigue tejidos más cómodos para coser prendas ajustadas (si estás llevando vaqueros, al no ser que sean rígidos de 100% algodón, estoy segura que tienen por lo menos 1-3% de elastano que es lo que hace que sean cómodos). Añadir elastano a telas de punto hace que se pueden estirar en dos direcciones y el resultado es un punto elástico ideal para coser prendas ajustadas (normalmente 5% de elastano es suficiente para una elasticidad buena).

Las fibras naturales y sintéticas se pueden también combinar entre sí para sacar lo bueno de los dos tipos pero lo malo de combinar en la composición de un tejido las fibras naturales y sintéticas es que estos tejidos no se pueden reciclar fácilmente comparado con tejidos hechos solo de fibras naturales. Por eso es muy importante cuidar de las prendas para que duren mucho tiempo.

www.studiocostura.com

So basically you can choose between these two types of fabrics (natural vs synthetic) and both have their positive and negative aspects. How to know the composition of the fabric? When you buy online it’s usually easy to get the information about the composition. When you buy in local fabric stores it can be a bit more difficult, at least here in Spain. The correct thing would be to look for the tag on the fabric roll, you should see the composition there. Unfortunately according to my experience when buying fabric in Madrid the information on these tags is not always accurate. Often the rolls are changed up and have incorrect information on the tags (this shouldn’t be like this, we consumers should always have the correct information). Asking a person working in a fabric shop should be another good option but unfortunately again you might not get the right information (at least I’ve had too many disappointing experiences locally…). And there are also many local shops who don’t use any tags at all or they sell remnant fabrics with no information on the rolls at all. 

When you are shopping in a place like that you can still get some information by touching the fabrics. It’s probably more complicated for beginners but natural fibers usually have a “more natural feel” and synthetic fibers have a bit more “plastic” feel. Then again fabrics are made in so many different ways these days and it can be very difficult to know what you are dealing with. One of my tried and true tricks is to wrinkle a bit of fabric to see how it behaves, if the wrinkles persist once you let go the fabric there’s a good chance that there are natural fibers involved. When the fabric maintains a crisp look with no wrinkles I’m pretty sure that it’s made out of synthetic fibers. Your work as a fabric detective determining the fiber content probably gets better in time, so don’t worry if it can be confusing in the beginning.

Another trick (that I personally don’t use directly at the fabric store, hehe) is to burn a bit of threads of the fabric and the smell and look should indicate if it’s natural or synthetic fibre (I found this burn chart resource if you want to experiment with this method).


Así que básicamente tienes que elegir entre estas dos categorías de telas (de fibras naturales vs sintéticas) y las dos tienen sus cosas “buenas” y “malas”. Cómo saber la composición de una tela? Cuando compras online suele ser fácil tener esta información, cuando compras en tiendas físicas, puede ser algo más complicado, por lo menos aquí en España. Lo correcto sería buscar la etiqueta que viene en el rollo de tela , deberías ver allí la composición. Preguntar a la persona que vende las telas sería buena opción también aunque de nuevo puede que no te aclare mucho (lo digo por mi experiencia en las tiendas de Madrid, ojalá hubiera más sitios donde te atiendan bien…). También hay muchas tiendas locales que no usan ni siquiera etiquetas o solo venden retales sin información ninguna.

Cuando compras tela en algún sitio así puedes obtener algo de información cuando tocas las telas. Es más complicado para las principiantes pero las fibras naturales suelen tener un tacto “más natural” y las sintéticas más de “plástico”. Pero al mismo tiempo digo que hoy en día hay acabados en las telas tan diferentes que puede ser muy complicado detectar la fibra. Uno de mis trucos es arrugar la tela en la mano si puedo, cuando suelto la tela y las arrugas siguen allí, lo más probable es que lleve fibras naturales. Si la tela sigue como si nada hubiera pasado, lo más seguro que sea sintética. Tu capacidad de trabajo de detective a la hora de averiguar qué telas estás viendo probablemente se mejora en el tiempo así que no te preocupes si te confundes más al principio.

Otro truco (que yo personalmente no uso directamente en las tiendas, jeje) es quemar hilos de la tela para observar el olor y el aspecto del material para saber si son de fibras naturales o sintéticas (encontré esta página en inglés sobre el experimento por si lo queréis probar).

www.studiocostura.com

So as I mentioned in the beginning of this post, I’d like to concentrate on two things when choosing fabric: the composition and the drape. These two things are equally important and they influence the final result in different ways. First let’s first just concentrate on the composition and what it actually means in terms of everyday use for you. 

There’s normally two scenarios when you buy the fabric: you either already know what you’ll be working on and you are looking for a specific fabric or you just fall in love with a fabric and you are going to buy it and later figure out what you are going to use it for (no judgement here, hehe). 

When you know what the project will be you should think about these things: 

  • When will you wear this garment, in hot or cold weather?

  • Are you someone who sweats a lot or do you always prefer wearing various layers because you’re always cold?

  • What’s the occasion when you’ll be wearing the garment, is it to hang around the house, go to work or attend a fancy event?

  • Do you have time to iron/do you like ironing...or you prefer something that needs little care?

Thinking about these things and how you really wear garments in your life makes it easier to choose the fiber content you want to work with….because personally I want my clothes to work for my life and not the other way around.


Así que como mencioné en el principio de este post, me gustaría concentrarme en dos cosas sobre las telas: la composición y la caída. Las dos cosas son igual de importantes e influyen el resultado final de maneras diferentes. Primero vamos a concentrarnos en  la composición y qué significa eso realmente en tu uso diario de las prendas que coses.

Normalmente hay dos escenarios cuando compras telas: o ya sabes lo que quieres coser y estás buscando una tela concreta para este proyecto o lo que pasa es que te enamoras de una tela y lo vas a comprar y después ya vemos lo que haces con él (no juzgo a nadie aquí eh, jaja).

Cuando sabes qué prenda quieres coser deberías pensar en:

  • Cuándo vas a llevar esta prenda, cuando hace calor o cuando hace frío?

  • Eres alguien quien suda mucho o prefieres llevar siempre varias capas porque eres muy friolera?

  • En qué ocasión vas a ponerte la prenda, es para estar por casa, en el trabajo o para un evento especial?

  • Te gusta / tienes tiempo para planchar? ...o prefieres algo que sea de muy fácil cuidado?

Pensar en estas cosas y cómo llevas tú tu ropa en el día a día de tu particular vida hace que sea más fácil elegir la composición de tela que quieres usar para tu proyecto...porque personalmente yo prefiero que mi ropa se adapte a mi vida y no al revés.

www.studiocostura.com

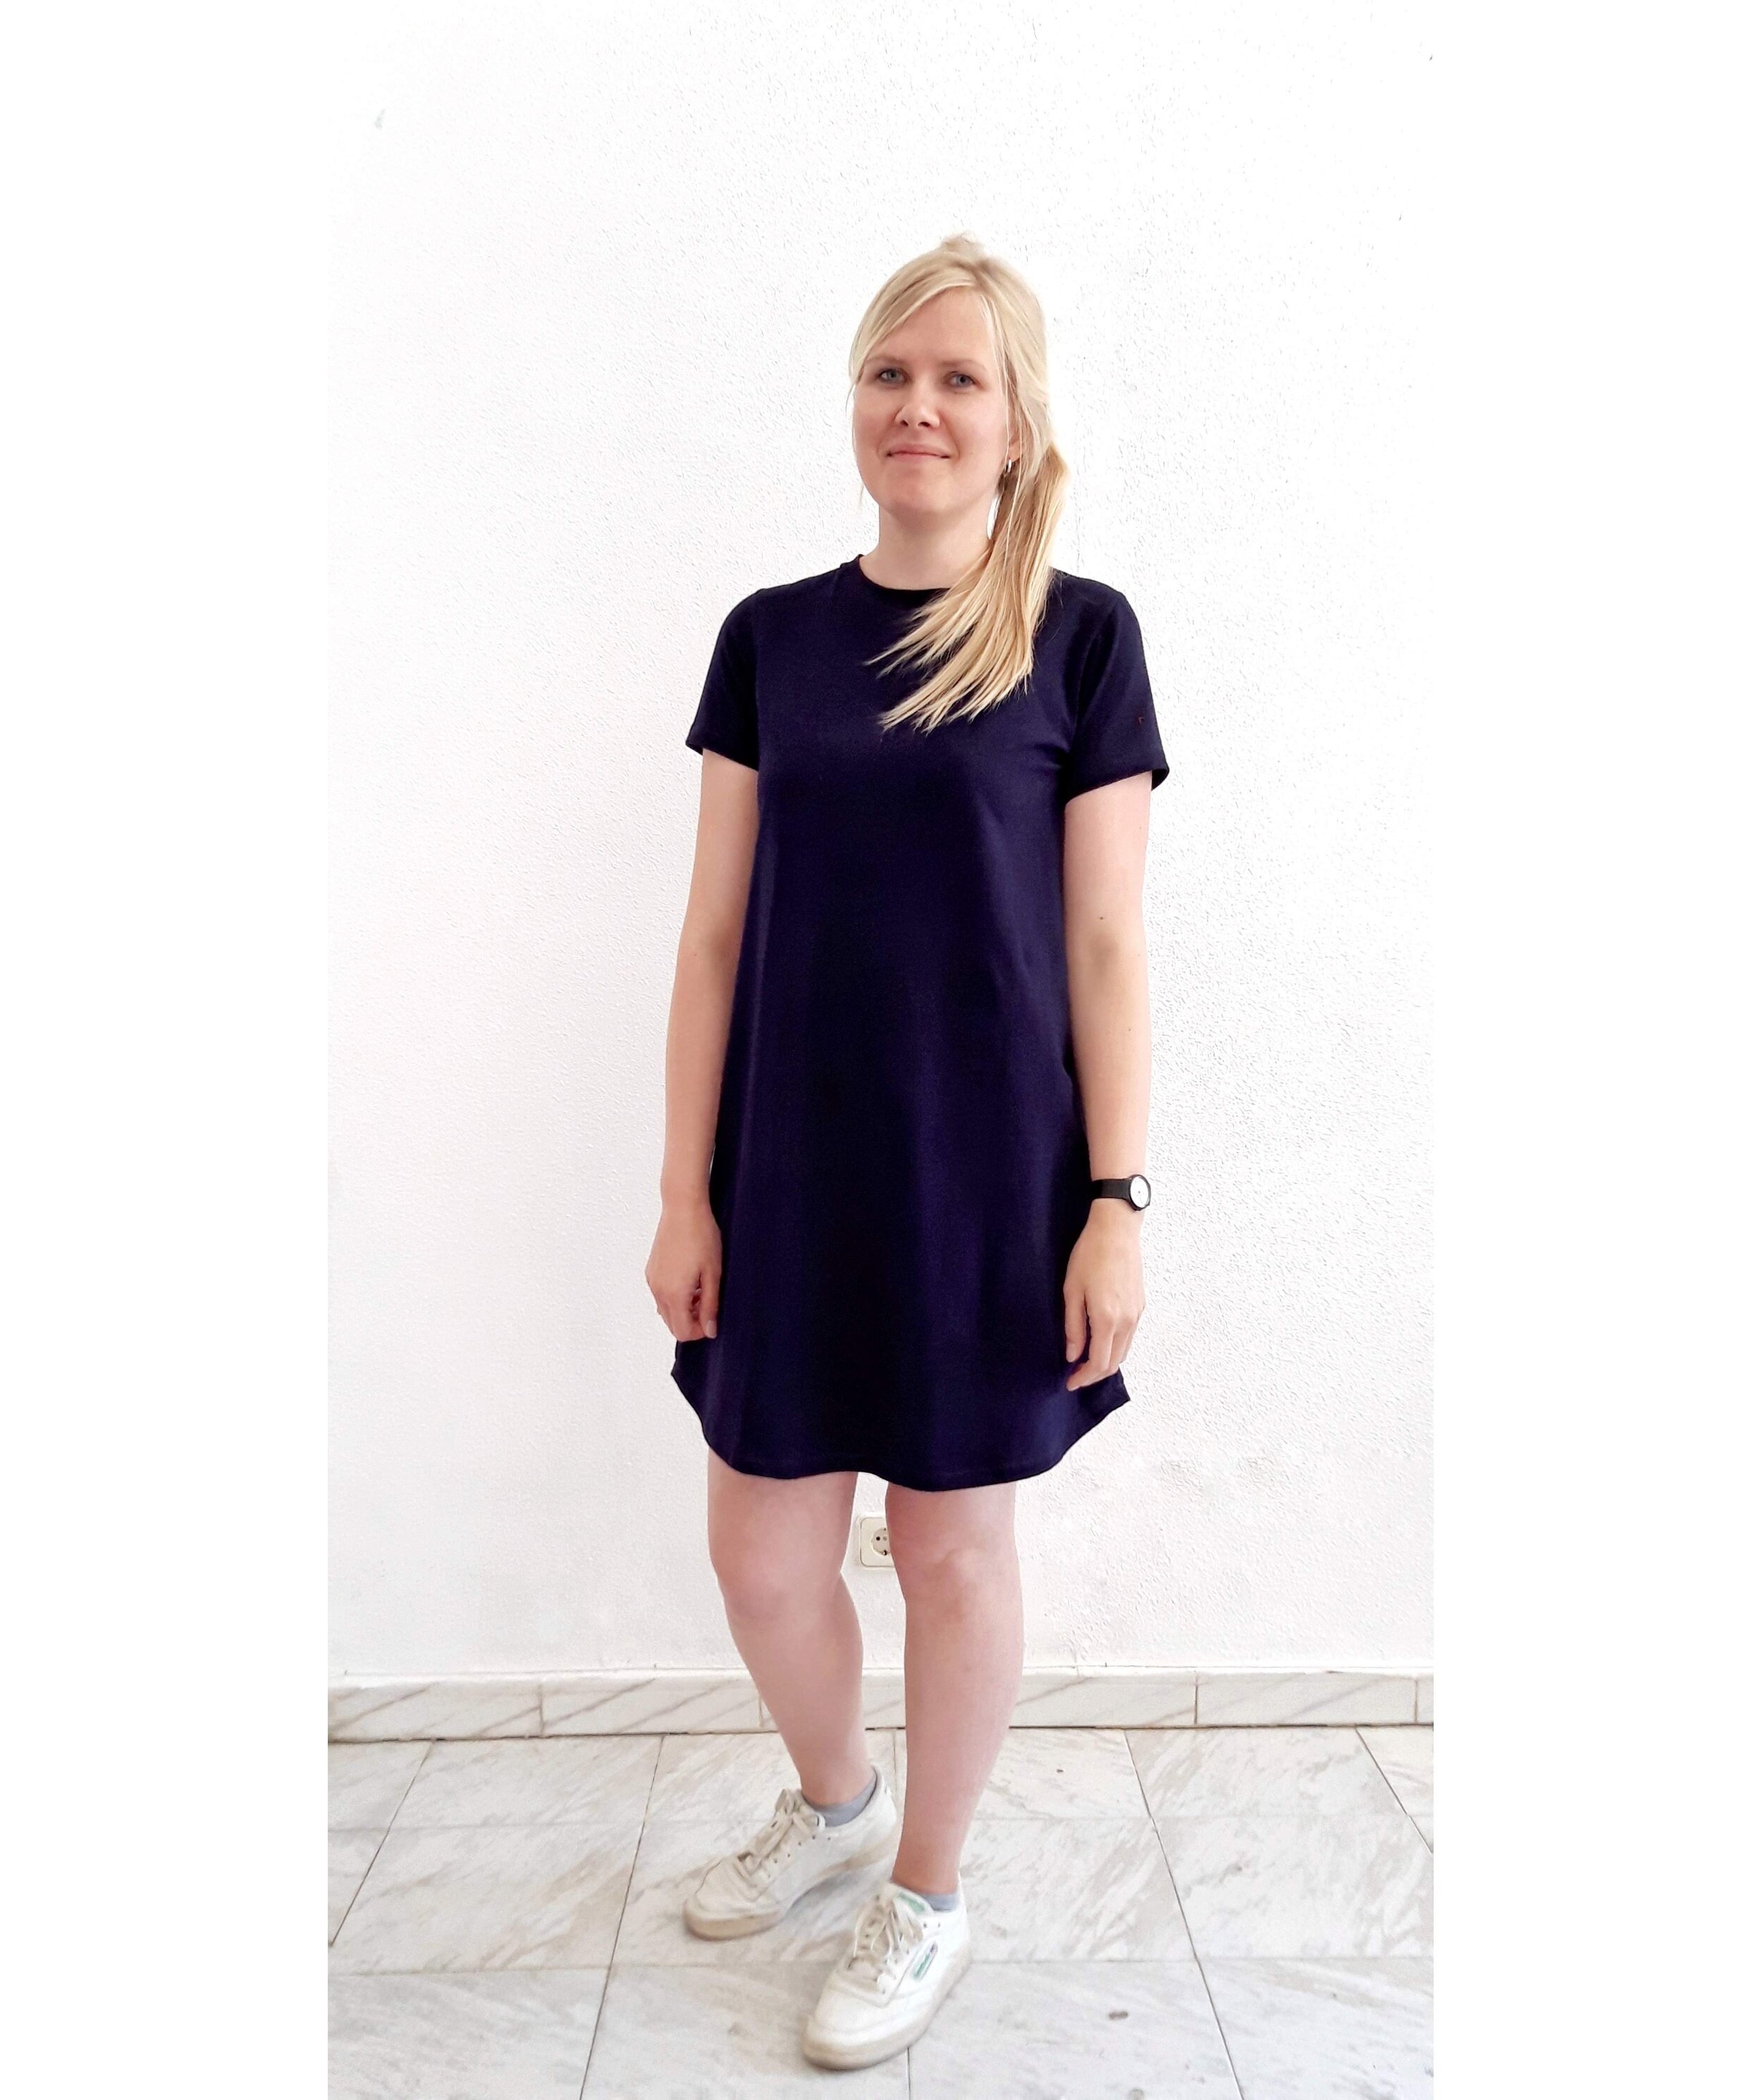
I’m going to put you some examples, maybe it can clear out some cases. So if you want to make a summer blouse and you are someone who sweats a lot or you live in a very hot climate, I’d say that natural fibers are a good choice for you, they will let your skin breathe and even when you sweat you won’t smell bad after a second. Then again if you will be wearing your blouse in a hot climate and you are going to an event where you just can’t have your sweaty armpits to be seen (happens to me quite a lot here in Spain…) I’d make a sleeveless top out of a fabric made of synthetic fibers, this way your armpits can have their “air”, hehe, but there won’t be visible sweat stains. Synthetic fibers are also great when you travel, you can pack a light suitcase as you can wash and dry this type of blouses in no time.

When you want to sew a winter coat and you live in a cold climate or you are very cold all the time (me!) I’d suggest using wool fabrics, they are very warm and help to regulate the temperature so you won’t sweat much even when you have to be outside and then use the transport where it’s hot etc. Also wool can be pressed amazingly well and when you sew a coat it’s so much easier to get neat finishings when you work with wool. But of course there are synthetic fibers that can help with keeping warm too, you can probably use an interlining made out of special synthetic fibers that will give you the extra warmth you need.

By the way, here’s one more thing that I really like about wool both in fabric and in knitted garments. Many people are afraid of wool because they think it needs a lot of special care, you can’t throw garments made of wool into the washing machine etc (although there are already superwash yarns available). But for me it’s the opposite, wool is an amazing material that can be left out of the closet to “breathe” (I usually leave my wool sweaters and coats out on the terrace for a day after wearing them) and all the bad odours will disappear. If you get stains on your garment you can also just spot clean and you don’t need to wash the entire garment. So as wool lets your skin breathe and you won’t sweat + caring for it is not so complicated, for me it’s just a fiber of dreams!

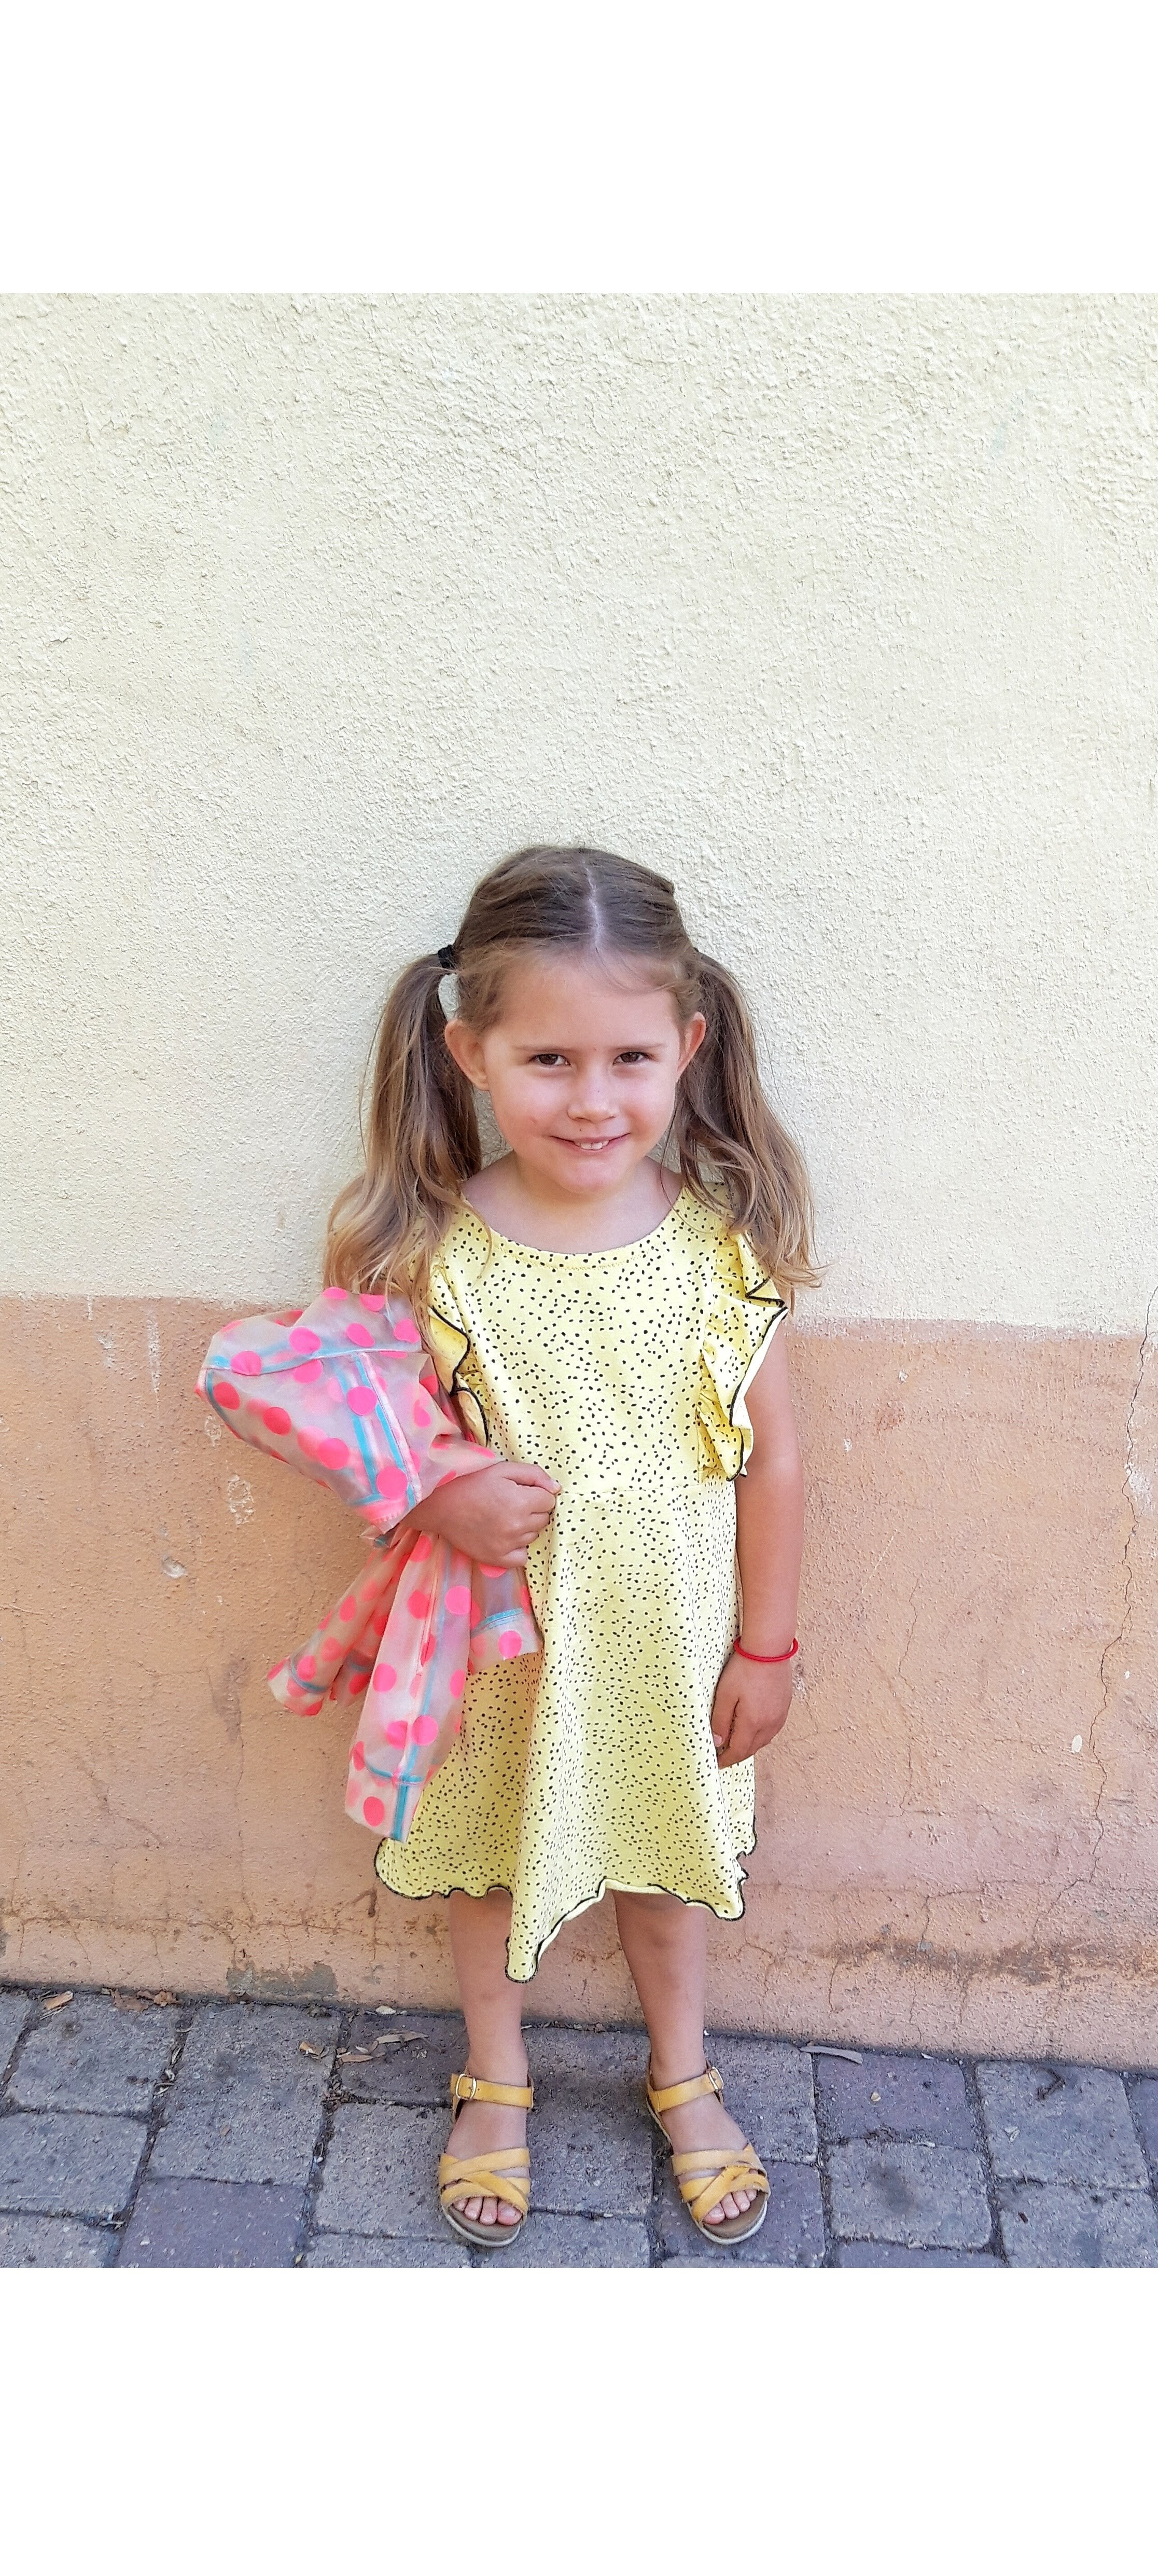
Back to examples, also think about how and exactly when you will wear the garment. My mom made my sister a silk dress for her graduation, it was a special event and silk truly is a special fabric. The thing is that she had to sit on the stage and everyone was called individually to get their diplomas...and what happens to natural fibers when you sit down for a while? Yes, there are these wrinkles that are formed and they will be very visible especially on plain fabrics (prints can really help with hiding the wrinkles!). So maybe it would have been a better idea to use a fabric that didn’t wrinkle for that special event. Well, it’s a lesson learned at least!


Voy a usar algunos ejemplos, quizás eso ayuda aclarar cosas. Imaginamos que quieres coser una blusa de verano y sabes que sudas bastante o que vives en un clima muy cálido. Yo diría que las fibras naturales son una buena elección para ti porque dejan que tu piel transpire e incluso si sudas no vas a oler mal después de dos segundos. Sin embargo si vives en un clima muy cálido y sabes que quieres ponerte tu blusa para ir a algún evento especial donde obviamente no quieres que se vean marcas de sudor (me pasa mucho eso aquí en España…), lo que puedes hacer es coser la blusa con un patrón sin mangas usando tejidos sintéticos. De esa manera tus axilas estarán “al aire” y la tela no va dejar que se vean las marcas de sudor. Las fibras sintéticas también son muy cómodas cuando viajas, puedes hacer una maleta pequeña porque tejidos así se secan muy rápido al lavarlos.

Si quieres coser un abrigo de invierno y vives en un sitio frío o eres muy friolera (yo!) recomendaría usar tejidos de lana, son muy cálidos y ayudan a tu cuerpo para poder regular la temperatura así que no sudas incluso si tienes que estar en la calle con el frío y luego usar transporte donde ponen mucho más calefacción. Además lana se plancha increíblemente bien y cuando coses un abrigo es mucho más fácil conseguir acabados bonitos. Por supuesto hay también tejidos sintéticos que ayudan con dar calor, probablemente puedes usarlas para forrar tus prendas de invierno. 

Por cierto, hay una cosa más sobre lana que me encanta y va tanto sobre las telas de lana como para los jerseys tejidos a mano/comprados. Muchas veces la gente tiene miedo a la lana porque tiene fama de difícil cuidado, no se puede lavar a máquina etc (aunque ya existen lanas superwash para eso también). Pues nada más lejos, la lana me parece un material increíble porque si dejas la prenda a airear (yo mis jerseys y abrigos los dejo en la terraza al aire libre un día después de ponermelos) se queda como nuevo, no hay olores ni nada similar. Si manchas la prenda de algo puedes limpiar el sitio concreto, no hace falta lavarlo todo. Así que entre que lana deja que tu piel transpire y no te hace sudar y también su cuidado es más fácil de lo que parece...a mí me parece un material super agradecido!

De vuelta a los ejemplos, también piensa exactamente cómo y cuándo vas a ponerte esa prenda. Mi madre hizo a mi hermana un vestido de seda para su graduación, fue un vestido especial y la seda desde luego es un tejido especial. Lo que pasa es que en este evento los alumnos tenían que sentarse en el escenario mientras les llamaban para recoger su título...y qué pasa a los tejidos naturales cuando te sientas un rato? Sí, salen arrugas y especialmente en telas lisas se notan un montón (estampados por cierto ayudan bastante en camuflar arrugas!). Así que quizás hubiera sido mejor para este tipo de evento usar para la falda una tela sintética para evitar un problema así...en fin, algo nuevo aprendimos!

www.studiocostura.com

When you see a fabric you love and you absolutely “need” to buy it even when you are not sure what to do with it yet, I’d think about the same things in order to know how much fabric you should buy. Think about how you would use this fabric and for what...is it just the pretty print that is catching your eye, can you imagine making something that will fit in your life? 

So I guess you get the point, the fabric content plays an important role because everyone lives different lives and we all use our clothes in different situations. What can be comfortable at home might not be suitable for long office hours (maybe at work you are cold all the time so you need to think about warm layers...or maybe it’s the opposite and you have to choose breathable fibers as it’s really hot in your office all the time). I personally use more fabrics made out of natural fibers. When I shop for fabric I no longer go crazy about a print if I know it’s a polyester blend that I won’t wear anyway. I prefer cotton and rayon fibers for summer/spring and I love wool for winter and autumn. I’ve also had bad experiences with pilling on synthetic fabrics and I really don’t want to spend time on sewing something when it will look bad afterwards. But as I explained there are no right or wrong answers, there probably is an occasion for every fabric, you just need to think about what you are making and how you will wear it.

So this was the first part of the blog post concentrating on the fabric composition and the second will be about the drape. I like to separate these two concepts because I think that they both play an important role and these roles are very different. I’ll see you around next week for the second part of this post. Hope you found this interesting!

Cuando ves una tela que te encanta y necesitas comprarlo sí o sí aunque no sabes muy bien qué hacer con él yo pensaría sobre las mismas cosas para poder saber cuánta tela necesitas. Piensa para qué usarías la tela y cómo sería la prenda...es solo el estampado bonito que te está llamando o realmente puedes coser algo que va bien con tu estilo de vida?

Así que me imagino que lo entiendes, la composición de la tela es importante porque todas vivimos vidas diferentes y usamos nuestra ropa en situaciones distintas. Lo que puede resultar cómodo en casa puede que no sea adecuado para el trabajo (igual pasas frío en tu trabajo y tienes que pensar en capas para poder estar bien o quizás es al revés y ponen mucha calefacción y te toca pensar cómo vestirte para no morir de calor). Yo personalmente uso más telas de fibras naturales. Cuando compro telas ya no me pongo como una loca viendo estampados si son de poliéster que no me voy a poner. Me gustan fibras de algodón y rayón para primavera/verano y me encanta lana para otoño/invierno. También he tenido malas experiencias con pilling en tejidos sintéticos así que no quiero arriesgarme con gastar mi tiempo en coser algo que no va a quedar bien. Pero como expliqué antes, no hay respuestas correctas e incorrectas, probablemente existe el momento para cada tela, simplemente piensa qué vas a coser y en qué momento te lo vas a poner.

Así que ésta ha sido la primera parte del post donde he concentrado en la composición y en la segunda parte os hablaré sobre la caída. Me gusta separar estos dos conceptos porque creo que hay que verlos por separado para entender cómo trabajan juntos a la hora de crear una prenda. Os veo la semana que viene para la segunda parte de este post. Espero que esto ha sido interesante!


Tutorial: how to sew period panties // Tutorial: cómo coser braguitas de menstruación

 
pin.jpg

It’s tutorial time and today I’m showing you how to sew period panties! You’ve probably heard about period panties before: they are a special kind of panties that have an absorbent layer + waterproof layer in the crotch area to prevent any leaking. This type of underwear is meant to be used as an extra protection when using tampons or cups during your period and you can even use them on their own on the first/last days of your period ! I first saw this type of panties when I discovered Thinx, a well known brand that sells period panties in many different styles. And you know what’s the best news? Sewing your own period underwear is super easy and you can make ANY style you want! And the second best news? That I just added some super nice kits to the shop so you can start with eeeeverything you need in one place :)

I had been seeing people making their own period panties over at Instagram for a while now and I finally made myself a pair to check out how it works. I don’t know what the hell was I waiting for for so long!!! Seriously, it’s such a genius idea in the first place and as we seamstresses can actually do it ourselves it’s also a money saver (I’m planning to make like…7 pairs, haha). I used my two test pairs during my period and I was so happy with the result, they really absorb very nicely and I especially love the idea of wearing them on their own (without the cup/tampon) during the days when I have less and less spotting but I can still have a bad surprise whenever I least expect it. I was especially happy to see that they work so nicely for the nighttime, as the “protected” crotch area is longer (and you can make it as long as you want to, according to your needs, more about that when I show you how to alter the pattern), they really are life savers you guys!!


Es la hora de un nuevo tutorial y hoy os enseño cómo coser bragas para la menstruación o “period friendly” bragas como las llamo yo, jeje. Me imagino que habrás oído hablar de bragas de este tipo: llevan en la parte de la entrepierna capas de tela absorbente e impermeable para evitar que salgan los líquidos. Este tipo de ropa interior está pensado para usar junto a tampones o copas menstruales durante la regla y también sirven para llevarlas sin más por ejemplo durante los primeros o los últimos días de la regla. La primera vez que conocí a este tipo de bragas era cuando descubrí la ahora conocida marca Thinx, esta empresa vende las bragas especiales de menstruación y tienen un montón de modelos para elegir. Pero sabéis qué es la buena noticia? Que es super fácil coser tus propias bragas y puedes elegir el estilo que más te guste a ti! Y la segunda buena noticia? Que acabo de subir unos kits muy guays a la tienda por si quieres empezar con toooodo lo necesario en un mismo sitio :)

Hace tiempo ya que había visto por Instagram chicas que cosían este tipo de bragas y por fin me hice un par para ver qué tal. No sé por qué tardé tanto en hacerlo!!! En serio, es un invento genial para empezar y además nosotras las costureras las podemos hacer en casa así que puedes ahorrar dinero (que yo me quiero hacer 7 pares o así, jaja). Usé mis dos pares de prueba durante mi última regla y estoy encantada de la vida, absorben muy bien y además me gusta mucho la idea de que las puedo usar así sin más en los días que ya solo mancho pero aún así puedo tener “malas sorpresas” cuando menos me lo espero. También me encantó que se pueden usar super bien por la noche ya que la zona protectora es más larga incluso al estar tumbada (y lo puedes hacer con el largo que tú quieras, más sobre eso cuando so digo cómo cambiar el patrón) y realmente son super cómodas!

supplies

period panties sewing kit

So first of all let’s talk about what you need to sew your own period panties:

  • a panties pattern that you like (most of the patterns will work, I used my Vera panties pattern for my period panties)

  • knit fabric for your panties

    whatever you like really: I’m a fan of viscose and bamboo knits, you can also use cotton or polyamide knits, whatever makes you feel good

  • crotch lining fabric

    the fabric that is closest to your skin: I always recommend it to be a breathable (natural) knit fabric, for example cotton knit or viscose/bamboo knit

  • absorbent layer fabric

    the fabric that will absorb all the liquid: there are many options available, for example cotton, bamboo or hemp fleece knits and my favorite Zorb, it’s a speficfic absorbent layer designed for this kind of garments

  • waterproof layer

    the fabric that won’t let the liquid come through the panties: the best option is to use PUL fabrics (PUL stands for Polyurethane Laminate and it’s a waterproof but at the same time breathable fabric)

  • fold over elastic for the leg and waist opening of the panties, wider FOEs are easier to sew with


To make it easier for you I’ve also made kits that are available at my shop! I’ve sourced some really nice high quality materials and the full kits include:


(edited: please read the product listing information, there might be changes with which fabrics and elastics are currenly included in the kits!)


  • super soft bamboo knit for the panties

    the SOFTEST knit I’ve got my hands on, seriously way comfier than my regular go-to viscose knit, you will love it!

  • absorbent Zorb Original interlining infused with Silvadur especially made for reusable period pads and diapers

    this high quality super absorber is a blend of bamboo viscose, cotton, organic cotton and polyester fibres and it absorbs 10x its weight in moisture in half a second – that’s 20x faster than cotton, bamboo or hemp knits (each layer will replace 2-3 layers of conventional knit material like cotton, bamboo or hemp fleece/french terry). This fabric is infused with SILVADUR™ antimicrobial silver ions to inhibit bacterial growth, control bad odours and create long lasting freshness without toxic chemicals

  • waterproof and breathable food safe PUL fabric

    unique heavy duty waterproof PUL with a 2 mil waterproof film for additional strength & long lasting durability, it’s super soft, breathable and flexible and tested for food safety. Tested to withstand 300 washings and 100% eco-friendly

  • soft picot edge FOE to finish the leg and waist openings, way easier to sew than other elastics

And if you already have the rest of the supplies and you only need the absorbent layer + the waterproof layer I’ve also prepared these kits so you can get only those two fabrics and start sewing! And now you have both the Zorb and the Food Safe PUL at my shop sold by the meter too.


Así que primero vemos qué necesitas para coserte unas bragas así:

  • un patrón de bragas que te guste (casi todos valen, yo usé mi patrón Vera para las mías)

  • tela de punto para tus bragas

    lo que más te guste la verdad: soy fan de punto de viscosa y de bambú pero puedes también usar punto de algodón o puntos de poliamida, lo que sea que te haga feliz

  • forro de la entrepierna

es la tela que va a estar en contacto con tu piel, siempre recomiendo que sea una tela natural como algodón o viscosa/bambú

  • tela absorbente

    la tela que absorbe los líquidos: hay bastantes opciones, por ejemplo rizo de bambú (tipo toalla), muletón de cañamo, telas de punto gorditas que absorben líquido (cotton, bamboo, hemp fleece en inglés). Mi favorito es el Zorb, una tela absorbente que absorbe mucho más rápido y más cantidad, está diseñado justo para este tipo de proyectos!

  • tela impermeable pero transpirable

    para esta capa lo mejor es PUL (Polyurethane Laminate en inglés) que es una tela impermeable pero transpirable

  • bies elástico (FOE) para las aberturas (los bieses más anchos de 20 mm son mejores y más fáciles de coser)

Para hacerlo más fácil he preparado también kits que tienes disponibles en mi tienda online! He conseguido unas telas de alta calidad que te van a encantar, los kits incluyen:

(editado: lee con atención la descripción del producto cuando lo compres en mi tienda, puede haber cambios en las telas o elásticos según el momento que estés comprando)

  • punto de bambú super suave para las braguitas

    es la tela de punto MÁS SUAVE que he probado, de verdad, es mucho más suave que el punto de viscosa que solía usar para mis braguitas, te va a encantar!

  • Zorb Original absorbente que contiene Silvadur, especialmente creado para compresas y pañales reusables

    esta tela especial de alta calidad es una mezcla de bambú, algodón, algodón orgánico y poliester y absorbe 10 veces su peso en líquido en medio segundo: es 20 veces más rápido que la absorción en puntos de algodón, bambú o cañamo (cada capa de esta tela super absorbente es equivalente a 2-3 capas de un punto normalmente usado para estos casos). La tela está además combinado con SILVADUR™, iones de plata antimicrobianos para evitar el crecimiento bacteriano, controlar malos olores y crear un frescor duradero sin usar químicos tóxicos

  • impermeable y respirable tela de PUL Food Safe

    tela especial con gran resistencia, impermeable con una capa muy duradera y fuerte y al mismo tiempo muy suave y transpirable. Esta tela está además aprobada por la seguridad alimentaria. Dura por lo menos 300 lavados y es 100% amable con el medio ambiente

  • Bies elástico muy suave con puntilla para los acabados en las aberturas de piernas y cintura

Pattern alteration

www.studiocostura.com

So, first things first, you need to alter your favourite underwear pattern. As I’ve mentioned I used the Vera panties for this pair (I’d also suggest that Stella panties are great too). As you will be making the crotch lenght longer you need to put your pattern pieces together in a way like they would be already sewn together: this pattern has 6 mm seam allowances so when you overlap the pieces by 12 mm you have eliminated the seam allowance (you can fold your crotch pattern piece to have everything lined up). Draw this into a separate paper.

Primero necesitas hacer unos cambios a tu patrón favorito de braguitas. Como dije antes, yo he usado mi patrón Vera para hacer este par (la barguita Stella también es un buen modelo para este tipo de braguitas). Como tenemos que aumentar el largo de la pieza de entrepierna, tienes que primero colocar las piezas de la manera como si ya estuvieran cosidos: este patrón tiene margenes de costura de 6 mm así que si superpones las piezas por 12 mm has eliminado los margenes de costura (puedes doblar tu pieza de entrepierna para tener todo bien colocado). Dibuja esta silueta a un nuevo papel.

www.studiocostura.com

Next step: make the front and the back of the crotch piece longer so the absrbent area will be bigger than your regular crotch pattern piece. I added 3 cm both for the front and the back piece (counting from where my original crotch piece ends, without the seam allowance). So this is my personal preference, I tested it out and I liked it so this is what I will probably use for all of my period panties. But you can of course alter your patter in a diffrent way, adding more or less, maybe more on the back, less on the front…I’d try out a pair and make adjustments if needed.

Also just a side note: I did some research on period panties that are sold in the ready to wear industry and many of them have a separate back piece that extends from crotch all the way until the waist, I guess then you can use a longer absorbent layer. If this is something you are interested in trying out just hack away! (The only thing I’d be careful with is that if your absorbent piece is very large you are “taking away” the elasticity of the panties and you might need to play around with that a bit)

Segundo paso: hay que aumentar el largo de la pieza de entrepierna para poder tener un espacio más amplio donde se absorbe el líquido. Yo añadí 3 cm tanto para la parte delantera como para la parte trasera de mi entrepierna (contado desde donde se acaba la pieza original de la entrepierna sin márgenes de costura), lo probé y me gustó, creo que esta medida es lo que voy a usar para todas mis braguitas de este tipo. Pero tú puedes cambiar tu patrón como quieras, puedes añadir más o menos centímetros, quizás más en la parte trasera, menos en la delantera…yo probaría hacer un par y después de llevarlas sabes qué es lo que más te gusta.

También un comentario: hice un poco de investigación sobre las barguitas de menstruación que se venden en las tiendas y muchas de ellas llevan una parte separada del trasero que empieza con la entrepierna y llega hasta la cintura, supongo que es para poder tener la capa absorbente más larga. Si es algo que te puede interesar simplemente adapta tu patrón todo lo que quieras! (Lo que sí haría es estar pendiente de le elasticidad: si hacer la parte absorbente muy larga estás quitando la elasticidad a la braguita en general y quizás tienes que hacer pruebas con el alrgo y ancho del patrón en general)

3.jpg

Then mark your new seam allowance for the crotch piece on both of the sides.

Después marca los nuevos márgenes de costura de la pieza de entrepierna.

www.studiocostura.com

This is the new crotch piece, you can cut it out.

Esta es la nueva pieza de entrepierna, puedes recortarlo ya.

www.studiocostura.com

The back and front pieces need their new seam allowance as well, add to both pieces. Note that my new crotch piece is only the half of the crotch actually. I’d recommend to cut this peiece on folded paper to have the full crotch piece, it’s easier to cut fabric that way.

One thing I didn’t alter was the rest of the seam allowances included in the pattern for the elastic. For my panties patterns I use 7 mm seam allowance that is included in the pieces, you use it for sewing lingerie elastics on the leg and waist openings and it is folded under once the elastic is sewn on. So if you want to have the same width of the crotch as you usually have in my patterns (once the lingerie elastic is sewn under) when using FOE that doen’t need any extra seam allowance you should take away this seam allowance on all the openings. I didn’t do it as I prefer my period panties to be a bit wider in the crotch area, I just feel more comfortable this way. Also the soft FOE I’m using is very comfortable so it’s not something that “digs in” while I wear my panties. But if you feel that this might be something you don’t like just go ahead and reduce all the pieces in the leg and waist opening areas.

So this is it with the pattern alteration, now let’s cut out the pieces.

La parte trasera y delantera necesitan sus nuevos márgenes de costura también, añade los 6 mm a las dos. Mi nueva pieza de entrepierna es solo la mitad y hay que cortarlo al doblez. Yo recomeiendo que lo cortes en doble de papel directamente para tener el patrón completo, así que más fácil cortar las piezas de tela.

Una cosa que no hice era cambiar márgenes de costura en el resto de la braguita. En mis patrones uso el márgen de costura de 7 mm que está incluido en las piezas para coser los elásticos de lencería en las aberturas de las piernas y la cinturilla, este márgen se dobla hacia abajo una vez cosidos los elásticos. Así que si quieres tener el mismo ancho de la entrepierna que sale normalmente en mis patrones (una vez cosidos los elásticos) si usas el bies elástico, deberías quitar este márgen de costura en las aberturas. Yo no quité nada en mis barguitas ya que prefiero que la entrepierna esté un poco más ancho en este caso, me siento más cómoda así. Además el bies elástico que uso es muy suave y no molesta nada al llevar las braguitas. Pero si crees que es algo que puede no gustarte puedes quitar los márgenes en todas las aberturas.

Así que ya estamos con los cambios de patrón, ahora vamos a cortar las piezas.

www.studiocostura.com

You need to cut out the front, back and the crotch piece from your main fabric. You then need to cut out the crotch piece again one time from the absorbent layer, one time from the waterproof PUL layer and one time from you inner crotch lining fabric (I use the same bamboo knit if you are using the kit from my shop).

To make the crotch seams invisibe we’ll be sewing all the layers together. This means you’ll want to avoid bulk and the absorbent layer needs to be trimmed down before working on all the layers at once. I didn’t make a separate pattern for that layer as I find it easier to work this way but if you want to make a separate pattern just go ahead.

Tienes que cortar el delantero, espalda y la entrepierna de tu tela exterior. Después tienes que cortar la entrepierna una vez de la capa absorbente, una vez de PUL y una vez de la tela que usas para el forro de entrepierna (en mis kits uso el mismo punto de bambú para eso).

Para poder tener las costuras de la unión de las piezas de entrepierna ocultas hay que coser todas las piezas juntas. Eso significa que para que estas costuras no se abulten tanto hay que recortar la pieza de la capa absorbente un poco antes de unir todo. Yo no hice un patrón por separado para esta capa ya que me parece más fácil trabajar así pero si quieres directamente hacerlo más peqeuño puedes hacerlo.

sewing the panties

www.studiocostura.com

First put the absorbent crotch piece on top of the waterproof fabric (with the shiny side up) and sew about 1 cm (3/8 in) from the edge to join the two layers. You can use a straight stitch as these fabrics are not stretchy.

Primero pon la capa absorbente encima de la capa impermeable (con el lado brillante hacia arriba) y cose aprox 1 cm desde el borde para unir las dos capas. Puedes usar la puntada recta ya que estasa telas no son elásticas.

www.studiocostura.com

Now cut away the seam allowance on the absorbent layer, this way when you’ll sew the crotch pieces together you won’t be sewing on top of the buly absorbent layer.

Ahora recorta el márgen sobrante de la capa absorbente, así no hay que coser encima de esta capa una vez que unimos todas las capas entre sí.

www.studiocostura.com

To make it easier to sew together various layers of fabric I first sew together the exterior fabrics and then sew the crotch pieces together with everything on a second pass, this way the pieces won’t shift so much.

Sew the front piece together right sides facing with the exterior crotch piece and do the same with the back piece.

Para que sea más fácil unir todas las capas vamos a coser primero juntas las piezas de la tela exterior y después lo unimos con las otras capas en la segunda costura, así las piezas no se mueven tanto.

Cose el delantero con la entrepierna derecho con derecho y haz lo mismo con el trasero.

www.studiocostura.com

Roll both the front and the back piece on top of the crotch piece until you see the seams you have just sewn together.

Enrolla el delantero y el trasero hacia la entrepierna hasta que ves las costuras que acabas de hacer.

www.studiocostura.com

Put the crotch lining piece with the right side facing down on top of that.

Coloca el forro de la entrepierna encima de eso con el derecho hacia abajo.

www.studiocostura.com

Now put the absorbent layer together with the waterproof layer on top of that (the absorbent layer is facing down and the waterproof layer is facing up).

Ahora coloca la capa absorbente junto a la capa impermeable encima de eso (la capa absorbente está hacia abajo y la capa impermeable está hacia arriba).

www.studiocostura.com

Sew a zig-zag stitch or overlock the seams.

Cose con zig-zag o remalla las dos costuras.

www.studiocostura.com

Turn your pieces right sides out and this is the enclosed crotch right there.

Da la vuelta a las piezas y ya tienes la entrepierna cosida sin que se vean las costuras.

www.studiocostura.com

You are now ready to sew on the elastics and finish up the panties. I prefer sewing the fold over elastic first on the leg openings before sewing the side seams. For me it’s always complicated to get a neat finish when working with FOE when sewing in the round. That’s why I sew it on flat pieces and then sew the side seams.

Ahora puedes coser los elásticos y terminar las braguitas. Yo prefiero coser el bies elástico a las aberturas de las piernas antes de juntar los laterales. Me cuesta conseguir un resultado limpio y bonito cuando coso bies elástico en círculo, por eso lo coso en plano y después uno los laterales.

www.studiocostura.com

You can use your regular fold over elastic, the wider the better. I’m going to use this nice FOE available at my shop, it’s already prefolded so it’s very easy to sew in one pass. If you’re using the regular FOE you can follow this tutorial.

Puedes usar el bies elástico normal, míentras más ancho mejor. Yo voy a usar este FOE de mi tienda que es muy fácil de coser en una misma pasada. Si usas un FOE normal puedes seguir a este tutorial.

www.studiocostura.com

Just wrap the FOE around the raw edge of the leg opening and sew on top of that with a zig-zag stitch (2.5 lenght, 2.5 width) pulling slightly when sewing to get an even tension. I prefer a normal zig-zag stitch but there are people who use a three step zig-zag, use whatever you like the best.

Simplemente coloca el borde de la abertura de la pierna entre las dos capas de FOE y cose con un zig-zag (2.5 de largo, 2.5 de ancho), mientras estiras ligeramente para tener una buena tensión. Yo prefiero usar un zig-zag normal pero hay gente que usa el zig-zag de tres pasos, usa lo que más te guste.

www.studiocostura.com

Once you are done with the leg openings you’ll go and sew one of the side seams. This way you can sew the elastic on the waist opening in the same way while it’s flat.

Una vez cosido el elástico a las dos piernas cose uno de los laterales. Así puedes después coser la cinturilla en plano también.

www.studiocostura.com

When using an overlock hide the threads inside the seam with a yarn needle.

Si usas le remalladora esconde los hilos dentro de la costura con una aguja lanera.

www.studiocostura.com

To reduce bulk and to make the seam allowance stay flat sew a small bartack on top of the right side of the panties, pushing the seam allowance towards the back of the panties.

Now go on and attatch the waist elastic, then join the remaining side seam and you are done!

Para reducir bulto y hacer que el márgen de costura se quede más plano puedes echar el márgen hacia el trasero y en el derecho de las braguitas hacer un remate encima de esta zona.

Ahora cose el elástico de la cinturilla y une el otro lateral y ya está!

www.studiocostura.jpg

And that’s it! It actually is very easy, you’ll have a nice pair of period friendly panties in no time and I’m sure you’ll want to make more when you try them out. Experiment with the crotch lenght and make your own personalized pair exactly as you want to.

About washing your period panties: I usually just rinse them in cold water right after wearing them and then wash them with my regular clothes in the washing machine. No more plastics and all the comfort!!!

I hope this tutorial was useful and that you’ll try out sewing your own pair. As I mentioned, we have kits available if you want to have all your supplies in one place :)

Y nada más! Ya ves que es muy sencillo hacer unas braguitas aptas para usar con la regla y estoy segura de que quieras hacer muchos pares una vez que las pruebas. Experimenta con el largo de entrepierna y haz un par totalmente personalizado y a tu gusto.

Sobre cómo lavar tus braguitas: yo normalmente justo después de usarlas las aclaro con agua fría y luego a la lavadora. Se acaban los plásticos y tienes toda la comodidad!!!

Espero que te haya gustado el tutorial y que pruebes coser tu propio par. Tenemos los kits con todo lo necesario si quieres tener todas las cosas de un mismo sitio :)


Cuatro años de Studio Costura // Four years of Studio Costura

 
www.studiocostura.com

Hola, otro San Valentin, otro aniversario de Studio Costura! Hoy ya celebro cuatro años desde que escribí el primer post aquí en este blog. Este último año ha pasado super rápido con tantas cosas!!! Este día coincide casi con el aniversario de la academia y estos días recordando los comienzos he estado viendo las fotos del año pasado y recordando con Laura todo lo que hemos hecho.

Releí hoy el post del tercer aniversario cuando todavía no pude contar nada, estábamos a punto de pillar el local y con los nervios de ver qué tal iba a salir todo eso. No nos imaginábamos lo guay que iba a ser, cuánta gente maravillosa íbamos a conocer, qué duro íbamos a trabajar y cuántas horas iba a llevar este proyecto de la academia.

www.studiocostura.com
IMG_20200112_192414_205.jpg

El cuarto año de Studio Costura como mi proyecto está muy ligado al primer año de Historias Hiladas Madrid. De trabajar en casa y salir más bien poco he pasado a currar en la academia y pasar aquí más horas del día que en mi casa. Aparte de dar clases continuas y los monográficos estoy aquí currando con todas las otras cosas de patrones, preparación de cursos etc una media de 6 días a la semana desde las 9h hasta las 16h en la semana que mi hija está conmigo y hasta las 21h cuando ella no está. A veces voy de aquí por la noche y la mañana siguiente vuelvo tan temprano que no ha salido el sol, jaja. Muchas veces termino la semana tan agotada que el domingo lo único que quiero hacer es estar sola y no hablar con nadie…pero durante la semana este sitio es lo más para mí. Aunque todo eso lleva muchas horas y todavía no da “para vivir”, trabajar junto a gente tan maja como Laura, Alex y todas las alumnas que pasan por aquí, pues esto la verdad es que no tiene precio.

www.studiocostura.com

Durante este año de academia he creado bastantes monográficos, he estudiado un montón de cosas para llegar a ser mejor profesora, he planificado horas y horas con Laura cómo hacer que la gente venga a clases. Hemos hecho que esto funcione echando horas y horas y horas, hemos contenido la respiración al ver cómo iba a desarrollar el proyecto sin tener nada seguro, hemos apostado por hacer las cosas de la manera de cómo creemos que está bien hacerlo. He conocido mucha gente muy maja y he podido realizar todo tipo de ideas locas de costura en formato de cursos, eventos, propuestas etc (gracias Laura por siempre dar luz verde a estas ideas, jaja). Estoy increíblemente feliz de poder trabajar de esto que es lo que me llena el corazón a tope, suena cursi, pero es así.

www.studiocostura.com

El cuarto año hablando de Studio Costura Shop, mi proyecto de patrones y materiales para coser lencería, ha sido muy bueno también. He publicado tres nuevos patrones y junto a mi madre tenemos una tienda en Etsy que crece cada día, intento tener muchas cosas bonitas para vuestros proyectos y me alegro mucho de ver que a la gente le gusta lo que vendemos. Este año mucha gente nueva ha probado mis patrones y ha sido super bonito ver todo lo que habéis hecho con ellas. Lo mismo en los monográficos de lencería: cómo mola poder ver el aprendizaje y el orgullo al terminar algo tan bonito como lencería. De corazón os digo: muchísimas gracias por confiar en mis patrones!

www.studiocostura.com

Últimamente no paro porque hay muchas cosas nuevas al llegar: cursos que preparar, eventos que organizar, patrones e instrucciones que escribir… Ha sido un año lleno de trabajo y el que viene va a ser igual, ahora más que nunca siento la enorme felicidad de poder dedicarme a esto. Tengo muchas ganas de seguir aprendiendo, experimentando y enseñando. Gracias por acompañarme!

www.studiocostura.com

Para terminar va un descuento también, así a modo de celebrar :) De hoy hasta el domingo 16 de febrero tenéis todos los patrones pdf a -25% en mi tienda usando el código descuento FOURYEARS. Gracias!


2019 en costuras // 2019 in sewing

 
2019.jpg

Hoy, en el último día de 2019 quería hacer una recopilación de mi año costuril y poner aquí los proyectos que he cosido durante el año. Como de costumbre lo he dejado para el último momento así que no voy poder escribir mucho sobre los proyectos sino termino el año detrás del ordenador. Y si me conocéis este no va a ser el sitio donde quiero estar esta noche….mucho mejor si puede ser en el sofá haciendo punto, jaja. Así que vamos con los proyectos:

Today, on the last day of 2019 I’d like to recap here all my sewing this year. As always I’ve left it for the last minute so I’ll just name the patterns and get over with it, haha, otherways I’ll be here in front of the computer until the end of the year. And if you know me you should know that this is NOT a place I’d like to be tonight…instead I want to be on the sofa knitting, haha. So let’s go with the projects:

Para mí // for me

IMG_20190218_165849_991.jpg

Tamarack jacket, pattern by Grainline Studio

DSC_0282.jpg

Burda Style coat in boiled wool, blogged here.

IMG_20190212_204134_794.jpg

Viscose button up shirt, pattern from Ottobre Design.

IMG_20190317_193839_872.jpg

Viscose French terry knit t-shirt, pattern from Ottobre Design.

IMG_20190430_164736_635.jpg

Odgen cami, pattern by True Bias.

IMG_20190411_194742_849.jpg

Tencel chino pants, pattern from Ottobre Design, cotton twill pants, pattern Ginger Jeans by Closet Case Patterns.

20190612_161138-01-01.jpeg

Cotton knit dress, pattern by Le Maison Victor, blogged here.

IMG_20190617_161318_173.jpg

Dawn jeans by Megan Nielsen Patterns and viscose blouse by La Maison Victor, blogged here.

IMG_20190708_181915_336.jpg

Ogden cami dress, pattern by True Bias (there’s another one, basically lived the whole summe rin these two!).

DSCF7479-01.jpeg

Cottesloe swimsuit by Megan Nielsen Patterns.

www.studiocostura.com

Viscose knit t-shirt, pattern from Ottobre Design.

www.studiocostura.com

Self drafted rib knit wrap top.

IMG_20190909_194117_555.jpg

Softshell Serra jacket, pattern by Pauline Alice Patterns, blogged here.

www.studiocostura.com

Viscose knit dress, self drafted.

IMG_20190928_175851_711.jpg

Linen Claudia dress, pattern by Tessuti Fabrics.

www.studiocostura.com

(Still needs buttons) self drafted work jacket in cotton canvas.

www.studiocostura.com

Boiled wool Berlin jacket, pattern by Tessuti Fabrics (I did take this one apart later on and I’m almost done putting the lining in for it).

www.studiocostura.com

Indigo dress in viscose twill, pattern by Tilly and the Buttons.

Para Lia // for lia

www.studiocostura.com

All patterns from Ottobre Design (and there are matching PJ pants for me too with the same fabric).

www.studiocostura.com

Cutom printed fabric + waterproof lining, self drafted snack bags.

www.studiocostura.com

A gym bag for judo, self drafted.

www.studiocostura.com

Some fabric bins for the academy, craft bag in colaboration with Donna Telas.

IMG_20190319_201118_795.jpg

Pincushion for the academy, pattern by Noodlehead.

www.studiocostura.com

Backpack for my sister, self drafted pattern.

www.studiocostura.com

Backpack for a little friend, self drafted pattern.

Acolchados // Quilting

Este año por fin probé quilting y me ha encantado. Espero poder seguir con más proyectos en el 2020. Hasta ahora hice un par de colchas para bebés, todas iban para regalos, pero tengo planeado una grande para mi cama!

This year I finally started to learn quilting and I’m loving it. I hope I will continue making more quilted projects during 2020. Until now it has been mostly baby quilts, all gifted, but a big bed quilt for me is definitely in my plans!

www.studiocostura.com

Pillow inspired by Modular Bocks Quilt by Purl Soho.

www.studiocostura.com

Baby blanket, pattern Little Peaks Quilt by Purl Soho.

www.studiocostura.com

Craft pouch, my own pattern (you can use the free zipper pouch pattern available here).

www.studiocostura.com

Baby quilt, pattern Modular Blocks Quilt by Purl Soho.

www.studiocostura.com

Wall hanging for Lia, my own pattern.

www.studiocostura.com

Yuba Crib Quilt, pattern by Vacilando Quilting.

muestras de lencería // Lingerie samples

Este año he publicado tres patrones de lencería: el bralette Mara y las braguitas tipo bikini Vera y tipo tanga Lili. Aquí se ven algunas muestras y ejemplares cosidos para los coseconmigos. También han sido un par de encargos, muestras de los materiales de la tienda y muestras para las actualizaciones de los patrones.

This year I’ve published three lingerie sewing patterns: Mara bralette, Vera bikini cut panties and Lili thong cut panties. Here you can see some samples of the patterns and other pairs made for sewalong posts. There have been some custom orders and shop samples + renewing the existing patterns so I’ve been making new samples.

tejer // knitting

Algo que empecé en el final del año pasado y nunca llegué a publicar por aquí: todo el punto que ha conquistado mi vida, jaja. Desde que empecé no he parado y ya llevo bastantes cositas hechas. Para los detalles puedes ver mi página de Raverly. Aquí están las cosas que he tejido desde el noviembre 2018, algunas los he vuelto a tejer, algunos me los pongo todos los días y algunos están todavía a medias :)

Soemthing I started in teh end of 2018 but I never published here: how knitting has taken over my free time, hehe. Since I started I haven’t really stopped so there are quite many things I’ve finished during the past year :). To read about the details you can visit my Raverly page. Here are the things I’ve finished since November 2018: some I’ve unraveled to knit them again, some of them are worn on repeat and soma are still works in progress!

Así ha sido mi año en “labores”. La verdad es que estaba posponiendo este post un poco ya que en las últimas semanas no me he sentido muy motivada, aparte de que si hay que hacer algo con alguna fecha concreta siempre consigo dejarlo al último momento. Quizás ha sido el fin de un año intenso y ya necesitaba desconectarme de mi día a día para poder recuperar la energía necesaria para seguir.

Este año ha tenido de todo para mí…muchas cosas muy grandes de los cuales lo más grande seguramente ha sido poder trabajar con un proyecto tan inspirador como es la academia Historias Hiladas Madrid. Este año 2019 ha sido cuando más he trabajado en mi vida, cuando más horas he estado enseñado y cuando más me he reído en compañía de nuestras alumnas. Me paso más horas en este sitio que en mi propia casa y estoy feliz de poder trabajar en algo que me llena profundamente.

Mi propia marca de patrones ha crecido y las nuevas publicaciones de patrones han gustado, tengo más ideas para el año que viene y he podido compartir mi trabajo con muchas personas tanto en mis clases como viendo lo que hacéis en vuestras casas a través de redes como Instagram. Cada vez que veo que alguien ha cosido algo con algún patrón de Studio Costura Patterns me da una alegría muy grande.

Pero no todo en la vida es como lo que vemos en Instagram (bueno, y menos mal también!), hay muchas cosas que nos pasan, cosas que compartimos entre gente cercana…no soy muy de compartirlo todo en redes sociales, jaja. Empezar el proyecto de academia ha sido muy duro económicamente y me ha hecho cuestionar toda mi trayectoria laboral porque llevo ya varios años viviendo de costura, poco a poco haciendo crecer mi proyecto, y este año 2019 es el que más me ha costado con diferencia. Piensas que ya has llegado a una cierta estabilidad, aunque sea muy poca, y entonces tomas unas decisiones y le das la vuelta a todo, vuelves a empezar y apuestas por una oportunidad que puede salir bien o puede superarte, todavía no lo sabes pero mientras tanto hay que vivir y hay que comer. Hubo momentos durante este año cuando tenía muy muy claro que no cambiaría todo esto por nada en el mundo…también hubo momentos cuando lo único que quería hacer era coger mis cuatro cosas e huir o inventar una máquina de tiempo para volver a aquel entonces cuando tenía 18 años y hacer otro tipo de elecciones para no estar en una situación de incertidumbre como lo de ahora.

En fin…cuando me puse hacer este post hoy, sin muchas ganas la verdad, me di cuenta al pasar por todas las fotos del 2019 que he hecho muchas cosas. Aunque las últimas semanas me han hecho sentir un poco de bajón y por eso tampoco he visto mucho progreso en mi trabajo (cosa que automáticamente me hace sentir que no hay progreso NUNCA, lógico, no??), hoy he vuelto a ver lo importante que es mirar el plano grande y no quedarte todo el rato en los detalles de día a día. Porque hay días mejores y luego hay días no tan buenos…pero creo que en general vamos bien si hacemos balance, supongo que la palabra que resume este año ha sido “extremos”. Así que aquí lo dejo y espero que 2020 traiga más costura, más punto y no me importaría un poco más de estabilidad, jaja. Gracias por estar aquí! Espero que vuestro año también ha sido lleno de cosas buenas que recordar (y que por lo menos las cosas buenas han superado las cosas no tan buenas!), nos vemos en el 2020!!!


So this has been my “craft year”. I was postponing this post as I haven’t been very motivated during the past weeks…and of course I’m an expert in doing things once there’s literally no more time left. Maybe it has been the end of a very intense year and I needed a break to recharge in order to continue.

This year has had lots of big things for me and certainly the biggest has been the opportunity to work in the sewing academy Historias Hiladas Madrid. 2019 has been the year when I’ve worked the most in my whole life, I’ve never been teaching more hours and I’ve never laughed so much as I did in these classes. I litearlly spend more time there than in my own house, I feel very lucky to be able to work on something that really fills up my soul.

My own pattern line has been growing and people have been liking the new patterns. I have lots of plans for the coming year and I’ve been able to share my work with many students and it hs been wonderful to see people sewing with my patterns through social media like Instagram. Every time I see someone who has chosen Studio Costura Patterns I feel very proud!

But not everything in life is like we see it on Instagram (and that really is a good thing!), there are many things we only share with the closest to us. I don’t really feel comfortable with sharing all of those moments on social media, hehe. This year with starting the academy project has been financially so difficult. I’ve been questioning my whole professional career (this sounds more professional than it is actually, haha)…I’ve been working full time with sewing for the past years, little by little growing my project, and this 2019 has been the most difficult year so far to be honest. You think you’ve made it into some kind of stability, even if it’s just a little bit, you then make some decisions and turn things over, start again and you don’t know if it will be OK or it will be too hard…and you still have to live and you still have to eat while you figure all that out. There were moments during this year when I knew I wouldn’t change my life for anything…and there were moments where I really wanted to run away or invent a time machine to go back to when I was 18 so I would have made other decisions and I wouldn’t be in this unstable postion right now.

So…when I started to pass through all the photos from 2019 to write this post today I saw that I actually have made quite some stuff happen. Altough I’ve been feeling a bit low during these past weeks and I have felt that I haven’t progressed on my work (which obviously means that I feel that I NEVER make any progress, haha), writing this post has made me remember to look at the big picture again. Because it’s so easy to get stuck in a day and forget that it’s all way bigger than today and it’s all way bigger than todays feelings. Because when I see the balance I see that we’re pretty good…it’s just that the word for this 2019 has been “extremes” for me. So for the 2020 I hope there will be more sewing, more knitting and let’s just say I hope there will be more stability :) Thanks for reading! I hope your year has been full of nice things to remember (or at least I hope that these nice things will be more memorable than those not so nice things)! See you over here in 2020!

www.studiocostura.com
 

Bralette Mara con banda de encaje // Mara bralette with lace band

 
www.studiocostura.com

Ha llegado el turno de presentaros el tutorial sobre cómo modificar el bralette Mara para coserlo con puntilla ancha en la banda. Para muestras de este tipo de bralettes puedes ver este post sobre la inspiración de Mara donde recopilé un montón de ideas que son super bonitas. Cuando diseñé este patrón dejé la parte de la banda a propósito recta para que se pueda fácilmente modificar.

Os voy a enseñar la manera cómo hacerlo pero este solo es un metódo entre muchos que se pueden usar para conseguir este efecto. Yo he usado una banda bastante ancha para que se vea el bonito encaje (uno que me mandó Ying de Tailor Made Shop cuando hicimos el intercambio de encajes) pero también podéis usar el mismo método para bandas más estrechas pero con puntilla visible igual.

It’s time to show you the tutorial about how to hack the Mara bralette sewing pattern so you can use wide scalloped edge lace for the band part of the bralette. You can check out different inspiration ideas about this hack in this Mara inspiration post where I gathered a lot of cute photos. When I designed this pattern I left the hemline straight so it can be easily modified to make an asjustment like that.

I’ll show you the method I use altough there are of course others that you can try out. I lengthened the band quite a lot so this beautiful lace really shows off (this one is from Tailor Made Shop, Ying and I had a lace swap and she sent me this lace…I had this lace in my stash for a long time now and I was waiting for a special project to use it up). You can also use the same method for narrower bands when you want the scalloped edge to be seen.

instructions.jpg

En esta versión lo que he hecho es dejar el encaje y el forro de la banda en capas separadas, el forro tiene el ancho normal para luego poder poner el cierre de un tamaño “normal” que sino habría que usar un cierre más ancho si se prefiere (usando por ejemplo este tipo de cierres que se pueden cortar a medida). Las dos capas se cosen por separado y el encaje forma una capa superior que es ligeramente más ancha para que tenga buena caída . Te cuento las modificaciones que he hecho, las partes que modifico son las piezas de la banda delantera (C) y la banda trasera (D), el resto de las piezas, o sea las copas, se quedan como su forma original.

1) el largo del patrón depende del ancho de tu encaje y el largo que tú quieras que tenga la banda. La mía mide aprox 10 cm, he añadido este espacio debajo de las dos piezas.

2) para que la capa de encaje sea “flotante”comparado con el forro he añadido 5 mm de margen extra en los bordes que luego se cosen como el lateral (la parte izquierda de la banda frontal C y la parte derecha de la banda trasera D)

3) en la parte del cierre (en la parte izquierda de la banda trasera D) en el nuevo bajo le doy 10 mm de margen hacia la izquierda porque una vez que el encaje y el forro están unidas en la parte de arriba (punto 8 de este tutorial) y tienes el bralette puesto, el encaje al ser suelto tiene la tendencia de “caer” hacia los lados. Para que el encaje se quede en “recto” le doy estos 10 mm para compensar ese giro natural. Este paso puede quedar confuso ahora mismo pero lo verás bien después.

In this version I left the lace and the lining pieces as separate layers, the lining has the same size as the original pattern in order to use a regular width bra closure (but you could use a wider closure, for example this closure tape). The layers are sewn separately and the lace layer is a bit wider so it will be comfortably “hanging” on top of the lining. I’ll show you the modifications I’ve made, the pattern pieces I’m changing are the front band (C) and the back band (D), the rest of the pieces, the inner and outer cups, will be cut as in the original version of the pattern.

1) the new lenght of the pattern pieces will depend on how long you want the band to be. Mine measures aprox 10 cm, I’ve added this amount to my original pattern pieces.

2) to make the exterior “floating” lace layer I’ve added 5 mm to the side seams on both pieces (the left side of the front band C and the right side of the back band D)

3) on the closure part (on the left side of the back band D) I’m adding 10 mm on the new hemline on the left because once the lace and the lining are sewn together on the upper part (step 8 of this tutorial) and you are wearing the bralette, the lace layers will be “falling” towards the sides. In order to have the lace “fall” straight I’m compensating the pattern with these 10 mm of extra space. This part can be a bit confusing right now but you’ll it see once we get there.

www.studiocostura.com

Con los nuevos patrones vamos a cortar las piezas de encaje, primero la banda delantera. Coloca el encaje doblado con la puntilla hacia abajo, normalmente si la puntilla tiene ondas muy pronunciadas como este encaje, lo que hago es que lo doblo justo en la mitad de una onda para que se quede a la mitad y la pieza se simétrica.

Marca un piquete en tu patrón en la parte derecha a 6 mm del borde de costado para saber dónde va la costura de unión. Este paso nos ayuda a colocar el encaje de la manera que luego al cortar las piezas de la banda trasera los largos del costado sean iguales. Por eso en vez de colocar mi nuevo patrón al ras de la parte baja de la puntilla como siempre cuando corto encaje, esta vez para no equivocarme lo coloco donde se acaba la puntilla, asegurándome de que mi piquete del costado también esté en la parte donde se acaba la puntilla (y no en al parte más baja de la puntilla). Corta la banda en doblez.

With the new pattern pieces we’re going to cut out the lace pieces, first the front band. Put your lace on fold with the scalloped edge facing you. If the lace has big scallopes, like this one, I usually fold it just in the middle of one of the scallops, this way the piece will be symmetrical.

Make a mark on your pattern piece on the right side 6 mm in on the side seam so you know where you will sew. This helps us to put the pattern piece correctly on top of the lace and the side seams will be the same length on the front and back sides. I usually cut the lace with the pattern piece laying on top of the lower (inner) part of the scallops but this time I’m putting the piece on the border of the scallops to know that my pieces match up exactly. The notch has to be on the border of one of the scallops (and not somewhere on the inner part of the scallops). Cut the piece on fold.

www.studiocostura.com

Para colocar la banda trasera también ponlo con en lado recto donde se acaba la puntilla. Esta vez coloca primero el piquete del costado a la derecha (que de nuevo tienes que marcar antes) donde acaba la puntilla, así los dos costados, el trasero y delantero, son iguales. Por otra parte en la parte de la izquierda haz otro piquete en tu patrón a 5 mm, es donde se hará el dobladillo de acabado. El punto donde cae el piquete debería también estar en el borde de la puntilla porque al doblar el margen hacia dentro para rematarlo no quieres que ese margen sea más largo que el punto donde se dobla (punto 5 de este tutorial).

To cut out the back band put it again on the border of the scallops. This time first put the side seam notch (that you have to mark again on your pattern piece) on the border of the lace that’s how the side seams will align well. Then mark a notch on the left side of the pattern, 5 mm in from the edge. This is where we’ll fold the lace edge in (the closure part). This point should be also on the lace border as you don’t want the folded edge to be longer than the point where the fold itself is (step 5 of this tutorial).

www.studiocostura.com

Después de cortar las piezas modificadas de encaje, corta las piezas de copas de encaje de la manera normal. Corta las piezas como en la versión original del forro también, allí no tienes que cambiar nada.

Cose como siempre hasta el paso 18 cuando terminas de poner la cinta recubrearos debajo de las copas.

After cutting out modified lace pieces cut the cup pieces as usual. Cut the lining pieces as usual, you don’t have to change anything there.

Sew as always until the step 18 where you’ve attatched the underwire channeling under the cups.

www.studiocostura.com
  1. Cose las piezas de forro de la banda delantera y la banda trasera juntos dejando la costura de unión hacia el interior del bralette.

    Cose las piezas de encaje entre sí con los derechos juntos.

  1. Sew the lining band pieces together leaving the seam allowances towards the inside of the bralette.

    Sew the lace pieces together with right sides together.

www.studiocostura.com

2. En la capa de encaje (solo en el encaje) haz un pespunte a 2 mm desde la costura que acabas de hacer para sujetar el margen de costura hacia la banda trasera.

2. (Only) on the lace layer topstitch the seam allowance 2 mm away from the seamline pushing it towards the back band.

www.studiocostura.com

3. Solo en la capa de forro cose la cinta recubrearos como en paso 21.

3. Only on the lining sew the underwire channeling on this seam as explained on step 21.

www.studiocostura.com

4. Cose el elástico de bajo como en los pasos 22-28 pero hazlo solo con la capa de forro. Coloca el forro como si fuera ya el bralette terminado, primero coses el elástico en el otro lado del forro (el lado que se queda entre las dos capas) y luego lo doblas hacia dentro como siempre. Es normal ver que el forro parece más pequeño que encaje, eso pasa porque al estirar el elástico como hay que hacerlo la pieza “se encoje”.

4. Sew the band elastic as explained on steps 22-28 but only on the lining layer. Use the lining as it was the whole bralette, first sew the elastic on the other side of the lining (the one that is between the two layers) and then fold it on the inside as always. It’s normal to see that the lining now looks smaller than lace as once the elastics are sewn in the pieces “get smaller”.

DSC_0664.jpg

5. Dobla el margen de 6 mm del final del encaje hacia dentro y coselo con la puntada recta. (Yo no veo mucho sentido en remallar/hacer el zig-zag antes en ese borde ya que el encaje en general no se deshilacha)

5. Fold the 6 mm seam allowance on the lace piece under and sew it with a straight stitch. (I don’t think that previously using a serger/zig-zag stitch would be very important at this point as the lace edge in general won’t fray)

www.studiocostura.com

6. Igual que en el punto 29 comprueba que tu pieza de la banda de forro tenga el ancho correcto según el ancho de tu cierre.

6. As on step 29 check if your closure fits well with the lining band ending.

www.studiocostura.com

7. Coloca tu borde de encaje a 6 mm desde donde acaba tu forro y sujétalo con un alfiler. Esto lo hacemos para que el encaje “empiece” después del cierre, estos 6 mm van a estar allí para colocar el cierre.

7. Pin your lace edge in place 6 mm from the end of the lace piece. We’re doing this so the lace layer “starts” after the closure, the remaining 6 mm of the lining will be inside the closure.

www.studiocostura.com

8. Estirando el forro para que esté en el mismo sitio que el encaje trabaja las piezas como si fueran una y cose el elástico de sisa como en el paso 30. Repite con el otro lado.

8. Stertching the lining so it will match with the lace and treat them as one layer. Sew the underarm elastic as on step 30. Repeat on the other side.

www.studiocostura.com

9. Termina el resto del tirante y coloca el cierre como en los pasos 35-37 uniéndolo solo en el forro. Así tendrás el encaje como una capa separada pero está bien rematado y sujeto con el elástico de sisa. Si quieres puedes ahora unir las dos capas donde se acaba el cierre cosiendo a través de las dos telas también.

9. Finish the straps and sew the clousre on as on steps 35-37 using the lining seam allowance. This way the lace is like a separate layer but it will still be well attatched with the underarm elastic. You can also sew a line of stitching to unite these two layers just where the closure ends if you want to.

www.studiocostura.com

Y ya está! Por dentro aún así tenemos el acabado limpio y por fuera la bonita banda ancha de encaje.

That’s it! On the inside there’s a pretty and neat finishing and on the outside there’s a beautiful lace layer.

www.studiocostura.com

Yo usé esta vez también foam para las copas (el tutorial sobre foam lo tenéis en la página de Coseconmigo de bralette Mara) y me gusta mucho el resultado. Para el conjunto también hice un par de braguitas Vera en la versión 2 de encaje.

I used foam for the cups (there’s a foam tutorial on the Mara bralette sewalong page) and I really like the result. I also made a matching pair of lace panties using version 2 of Vera panties.

www.studiocostura.com

La verdad es que se me ocurren un montón de maneras bonitas cómo usar el encaje ancho para este bralette: puedes dejarlo más ancho, más corto o incluso dejar el forro más largo que el encaje que queda muy bonito también. Espero que os haya servido este tutorial :)

I think that there are so many cute ways to use this hack for making more bralettes like this: you can leave a longer lace edge or a shorter one or you can even make the lining longer and let the lace sit on top of the lining for more contrast. I hope you liked this tutorial :)


Chaquetas de softshell // Softshell jackets

 
www.studiocostura.com

Justo para cuando ha llegado el otoño…o bueno, de hecho para hoy ya parece que ha llegado el invierno, jaja…he terminado la chaqueta de softshell para mi niña. Además no he publicado aquí las fotos de mi chaqueta, también de softshell, que hice este verano así que aprovecho ya ya escribo sobre los dos.

Just in time for fall…or well, today it seems like for the winter, hehe…I finished the softshell jacket for my daughter. I also haven’t posted the photos of my own softshell jacket I made in August so here goes a post about both.

www.studiocostura.com

Para empezar: el primero que hice, mi chaqueta de softshell. Por una parte hace tiempo que quería hacerme una chaqueta con este tejido ya que no tenía en mi armario un modelo así más deportivo pero al mismo tiempo calentito para el entretiempo (después de hacer esta chaqueta para Lia que me encantó!). Por otra parte cuando Pauline Alice publicó su patrón Serra Jacket sabía que quería hacerlo sí o sí. Pauline fue tan generosa y nos mandó varios patrones en formato papel a la academia cuando tuvimos la inauguración y me mandó también a mí este patrón, así que estaba de suerte para completar el proyecto. Al principio pensaba usar otro tipo de tela para este patrón, algo más como tipo "plástico” en el sentido que fuera como cortavientos ligero…o quizás algodón encerado para un poco más de forma. Pero este verano en Estonia encontré este softshell que tiene un estampado muy bonito…un poco con aires africanos pero aún así geométrico, de colores pero los colores justos, demasiado llamativo para mi estilo pero aún así lo elegí, jaja.

First off: the first one I finished, my softshell jacket. I wanted to make myself a jacket with softshell fabric for some time already, a sporty style with warm lining like this was missing from my closet (and after making this jacket for Lia I knew I wanted to make one for myself!). So when Pauline Alice published the Serra jacket pattern I knew I wanted to make one for sure. Pauline was so generous when she sent us paper copies of her patterns for the sewing academy opening event, she even specifically sent me the Serra pattern so I was prepared to make this project happen. At first I was thinking about using another type of fabric for this jacket, something more like a “plastic” for a windbreaker look…or maybe a waxed canvas for a sturdier look. But this summer in Estonia I found this pretty softshell print…it has a bit of African vibes while still being geometric, it’s slightly colorful but just enough for me, probably it’s too “wild” for my neutral closet but I bought it anyway, haha.

www.studiocostura.com

Este patrón en la versión 3 realmente está hecho con forro y pensado más para telas algo más ligeras que softshell diría yo, o por lo menos si esperas el resultado como en las fotos del patrón. Pero se puede hacer con softshell perfectamente y yo estoy muy contenta con el resultado. De los cambios que hice voy a intentar recordar qué eran exactamente porque lo cosí en agosto y como no apunté nada…así vamos, jeje. Lo primero que no corté el forro porque softshell ya es una tela con dos capas (está como directamente forrada con un polar finito). El bajo lo hice un poco con forma aunque se ve muy poco, lo dejé un pelín más largo en la espalda. Las mangas creo que las hice algo más largas porque eso lo hago siempre y usé el puño de punto para rematarlas de la forma que no entre frío allí.

Version 3 of this pattern is drafted with a lining in mind and I’d say that you should use drapier fabrics in order to make a jacket like the one shown on the photos that illustrate the pattern. But you can use softshell and I’m very happy with how this jacket came out. I will try to remember the modifications I made to the pattern but as I sewed it back in August I won’t remember everyting, hehe. I didn’t cut the lining pieces as softshell is lined (there’s the interior light fleece lining directly attatched to the fabric). I left the hemline slightly longer on the back, you can barely see it actually. I probably lenghtened the sleeves as this is what I always do and I used knit ribbing for the cuffs to make the sleeves extra warm.

www.studiocostura.com

En la capucha en vez de la vista le puse bies que me sirvió también de “tunel” para poner el cordón elástico. No tenía las partes metálicas que suelen llevar este tipo de prendas para los cordones así que hice ojales a máquina, dos en un lado de la capucha y dos en el otro lado.

Instead of using facings for the hood I used a bias tape which also worked well for the “tunnel” I needed to create in order to instert the elastic cord. I didn’t have the metallic parts that these type of jackets usually have to insert the cords so I just made buttonholes instead, two on one side of the hood and two on the other side.

www.studiocostura.com

Lo mismo con el bajo, en el dobladillo del bajo puse el cordón elástico para poder ajustar el bajo en el caso de querer hacerlo e hice ojales también en la parte de los costados para sacar el cordón. Por una coincidencia encontré la cremallera del color que quería, de marca Barbour (será resto de stock), así que confiamos que sea de una calidad muy alta, jaja. También está el pequeño detalle de etiqueta esta vez, el patrón de Pauline venía con esta etiqueta que cosí en la parte del cuello.

Estoy muy contenta con esta chaqueta porque soy muy friolera así que con la chaqueta + un jersey fino abajo he estado muy a gusto en estos días de “entretiempo”…que ya sé, que son dos días en Madrid. Para mí no es algo que me voy a poner en el invierno pero quizás para la gente que tiene menos frío vale incluso para el invierno con un jersey bueno debajo.

The same thing with the hemline: I made buttonholes close to the side seams to insert the elastic cord, this way I can adjust the fit of the hem. By a coincidence I found a matching color Barbour zipper (probably dead stock from manufacturing), hopefully it has the best quality, hehe. There’s also this little label detail, Pauline had sent this label with her sewing pattern.

I’m very happy with the jacket as I feel cold all the time so I’ve been using it with a light pullover underneith and it has been perfect for this fall…which unfortunately lasts only a couple of days here in Madrid, haha. I wouldn’t use this jacket in the winter but someone who isn’t that afraid of cold could get away with using it with a good pullover underneith.

www.studiocostura.com

De talla elegí la S según mi medida de pecho, yo normalmente soy más bien un M o un 40 de talla. Y el modelo a mí me va muy bien, tiene el ancho exacto que quería en este tipo de chaqueta. La única cosa que no me convence 100% en la capucha…es muy grande y me tapa los ojos cuando me lo pongo! Y mira que yo soy muy pro capuchas grandes y lo veía genial cuando lo corté…pero me resulta un poco grande, tengo que ajustar bien los cordones y apretarlo contra la cabeza para ver algo, jaja.

Más sobre chaquetas: ahora estoy terminando la chaqueta de “lona” tipo work jacket, me faltan los botones (se ve en la foto de abajo) y también voy a hacer el Berlin jacket con lana hervida…este otoño es de chaquetas para mí, a ver si termino todas para tenerlo ya hecho para el año que viene, jeje. Aunque hay que decir que las chaquetas tienen algo para mí que siempre me llaman, por ejemplo me encantaría hacer este cortavientos en algodón encerado y este nuevo patrón reversible de Pauline Alice me está llamando también muchísimo!

I chose the size S according to my bust measurement, I’m normally an M or 40. The sizing is perfect for me, it’s exactly as loose as I need it to be and as I’ve used the elastic cords on the hem I can also asjust the fit. The only thing I’m not so happy about is the hood…it’s very big and when I wear it, it covers my eyes! And I’m definitely team big hoods and I really liked the idea when I was cutting out the pieces…but it’s definitely too big for me, I have to adjust the elastics to get it to “sit” on my head in order to see where I walk, haha.

More about jackets: at the moment I’m finishing a canvas jacket, only the buttons left, and I’ll also sew a Berlin jacket with a boiled wool I have in my stash…this fall is defintely about jackets for me, hopefully I’ll finish all of them and this way I’ll have everything ready for the next year, hehe. But I have to admit that there’s something about jackets that always makes me want to sew them, for example I’d like to make this windbreaker in waxed canvas and this new reversible jacket pattern from Pauline Alice looks just beautiful!

www.studiocostura.com

Por otra parte entonces la chaqueta de Lia. En la primavera pasada se puso las últimas veces esta chaqueta de softshell que era monísimo pero ya le quedó pequeño! Así que yo ya tenía una tela comprada para hacerle la siguiente talla pero resulta que una de mis alumnas, Elena, había cortado una para su hijo y no le valía de talla así que me dio el cuerpo unido y la tela para que lo termine…medio trabajo hecho! Ella había usado el patrón de sudadera del Ottobre Design 4/2018 pero al no darle suficiente margen extra no le valía a su hijo. Yo normalmente prefiero usar patrones específicos de chaquetas para hacerlos con softshell pero podéis usar también patrones de sudaderas…lo que pasa es que estos patrones son para telas de punto (normalmente elásticas) y no tienen tanto desahogo así que puede que el resultado es una prenda demasiada pequeña para usarlo como chaqueta (donde normalmente quieres poner algo de manga larga debajo también), me pasó con esta primera chaqueta de softshell que le quedó pequeño muy rápido. Así que nada, esta chaqueta lo rescaté yo para Lia. La tela es de Cal Joan y me gusta mucho el estampado…para hacerlo un pelín más alegre le añadí los detalles en amarillo mostaza ya que tenía puño de este color.

And about Lias jacket. She wore her other softshell jacket for the last time this past spring, it was so cute but she grew out of it! So I already had another fabric prepared for this project when one of my students, Elena, made a jacket for her son and when trying the bodice pieces on she saw that it was too small for him. So she gave me the sewn body and sleeves + the fabric to finish the jacket. She used the hoodie pattern from Ottobre Design 4/2018 but she didn’t add enough ease and it was too small for her son. I usually try to use speficic jacket patterns when working with softshell but you can also use hoodie patterns…the thing is that these patterns are made for knit fabrics (usually with spandex) and you need to add ease or go up at least 1-2 sizes, otherwise the result is a garment that will be too close fitted to wear it over other long sleeved garments (like a jacket), it happened to me with this first softshell jacket I made, she grew out of it so fast!

So I rescued this jacket for Lia. The fabric is from Cal Joan and I really like the print…to make it a bit brighter I used the details in mustard yellow as I had a rib knit for the cuffs in this color.

www.studiocostura.com

Esta chaqueta está terminado de la manera muy similar como la mía. No le puse el cordón elástico en el bajo ya que no creo que lo use y en la capucha usé un cordón normal porque en Pontejos no había uno elástico en este color. Debajo de la cremallera igual que en mi chaqueta lleva una tapeta extra que es simplemente tela doble a la medida de la cremallera, con los dos extremos cortos previamente cosidos entre sí. Todas las costuras están abiertas y les hice pespunte encima en los dos lados desde el derecho para que se queden más planos y la única costura tapada es la de unión de cuello con la capucha donde usé cinta de bies y de paso también hice una tira para poder colgar la chaqueta. Esta vez no usé bies en la parte de la capucha donde puse el cordón porque no tenía suficiente bies así que corté vistas del mismo softshell y allí es donde metí el cordón.

This jacket is made in a way that is very similar to my other jacket. I didn’t use the elastic cord on the hem as I thought I won’t use it anyway. The hood is adjusted with a normal cord, not an elastic cord as there wasn’t a suitable color available here. Like on my jacket, the zipper has a placket sewn under using a double layer of the fabric (with the short ends prviously sewn together). All the seams are openend up and topstitched on both sides from the right side of the garment. The only seam that is covered with bias tape is the union of the neck and the hood, I also used a strip of bias to make a loop for easy hanging.. This time I didn’t use bias tape for the hood “tunnel” as I didn’t have enough tape, I instead cut the facings according to the hood pattern pieces and put the cord inside there.

www.studiocostura.com

Ha quedado super mono y de talla perfecta, espero que puede ponerlo por lo menos durante este año escolar y con suerte tiramos hasta el otoño que viene, jeje.

The result si super cute and the size is perfect, I hope she can wear it at least during this school year and hopefull also next fall if I’m lucky, hehe.

www.studiocostura.com

Esta niña se me está haciendo super grande ya…esta semana cumple 5 años!!!

This girl is getting so big already…it’s her 5th birthday this week!!!

www.studiocostura.com

Quería aprovechar que las dos llevamos nuestras chaquetas para hacer una foto las dos juntas pero entre todas las fotos no hay ni una donde las dos salimos con una sonrisa y ojos abiertos a la vez, jaja. Así que aquí va una con Lia muy bonita y yo con cara de “ pero qué estás haciendo loca?”.

I wanted to get some photos of both of us wearing our jackets together this weekend but there were none that would feature both of us either smiling or with eyes open at the same time, haha. So here goes one with Lias pretty face and my “what are you doing you crazy kid?”expression.

www.studiocostura.com

Ah y para terminar ya el post voy a aprovechar y subo esta foto del jersey que también terminé este finde para Lia…hecho con alpaca y mucho amor, los detalles están en mi página de Raverly :)

Oh and to wrap this post up I’ll also show you this sweater I made for Lia and finsihed this weekend…made with alpaca and lots of love, you can find the details on my Raverly page :)


Bralette Mara con foam // Mara bralette with foam

 
20191010_163636-01.jpeg

Hola, aquí va un tutorial en la serie de posts de coseconmigo que prometí desde que saqué el patrón de bralette Mara: cómo hacerlo con foam. Realmente si habéis visto el tutorial de bralette Hanna sobre lo mismo, deberíais ya saber cómo hacerlo…la idea es la misma. Pero hay algunos cambios que voy a repasar aquí específicamente para este patrón.

Me puse a hacer este tutorial, ya edité las fotos y todo, pero cuando me puse ver el tutorial de Hanna sobre foam me di cuenta que estaba mucho mejor hecho y ya con casi todo explicado al detalle, jaja. Así que para hacerlo más fácil (para mí, jaja) voy a explicar la parte específica de Mara aquí y en la parte que es igual con el otro bralette os voy a indicar los pasos que van en el otro tutorial.

Sobre dónde consigo el foam, cuándo lo puedes usar y cuándo no etc lo puedes leer en el principio del otro tutorial. Igual que Hanna, este patrón está patronado para tejidos elásticos en las copas y a la hora de usar foam, esa elasticidad se reduce bastante (dependiendo del foam que uses) así que es mejor opción para personas con poca talla de copa. Pero tenéis que probar y quizás queréis subir de talla en la copa etc. En general el foam en mi opinión funciona mejor para este patrón que para Hanna ya que la forma de la copa se adapta mejor al foam y a mí en mi talla me resulta cómodo (soy 80A).

Hello, here’s the next post on Mara bralette sewalong series, something I promised to publish when I released the Mara pattern last summer: how to sew it with foam. Actually if you’ve seen the Hanna bralette foam tutorial you should have a quite clear idea about how to do it…but there are some changes which I will point out in this specific post.

I started to write this tutorial, I even edited the photos and when I started to work on the text I wanted to see how I wrote the other Hanna tutorial and I saw that it was so clear and well photographed (haha) that I decided that I’d use it as a reference for this post instead of writing it all over again…it will be way easier (for me at least, haha!).

You can read about where to buy foam, when you can use it in bralette projects and when you can’t etc in the beginning of the Hanna post. This pattern, like Hanna is drafted for stretch fabrics so using foam can reduce the amount of stretch quite a lot (depending on the specific foam you use), the fit will definitely be different compared to the original version. As always I recommend using foam for stretch patterns when you don’t have large bust but I won’t say you can’t use it for bigger bust too…just try out and see if you like it, you can always go up a cup size to compensate the lack of stretch, this might be one way to deal with it. In general in my opinion this pattern is better suited for foam than Hanna, the breast shape is rounder and it looks and feels nice with foam in my size (80A).

www.studiocostura.com

Para poder usar foam en las copas tenemos que modificar las piezas A y B que forman la copa. El foam se cose de otra forma, sin margenes de costura, y por eso las piezas de encaje/de tela las tienes que cortar como siempre pero estas dos piezas para foam hay que modificarlas.

  1. Para empezar quita en las partes curvadas (que se unen luego por el centro para formar la copa) 6 mm de margen de costura, mantén los piquetes.

  2. Haz lo mismo con la costura central que está entre las dos piezas interiores de la copa (la parte derecha de la pieza A).

  3. En la pieza B en el lado izquierdo tienes que quitar 10 mm ya que es el margen de elástico de la sisa (una vez se cose el elástico, primero solo se cose con el margen de encaje para después doblarlo encima del foam y para que no tengas que doblar el foam encima de sí mismo)

  4. En la pieza A tenemos que reducir también la línea de escote, donde va la puntilla. Por una parte hay que reducir 10 mm en la parte superior donde las dos piezas, A y B, se casan ya que en el B ya hemos quitado los 10 mm. Yo prefiero también quitar unos 3 mm en la costura central para estar segura de que el foam no sea visible una vez que está unido con el encaje. Por eso he quitado en la parte de arriba 10 mm y abajo 3 mm y he unido los dos puntos.

Corta las piezas A y B de foam (no te olvides de volver a marcar los piquetes en las curvas para poder casar las piezas correctamente) dos veces y usando tus patrones originales corta A y B de encaje también dos veces. El resto de las piezas, C y D, se cortan igual que antes, tanto de encaje como de forro.


Pattern pieces A and B that form the cup need to be altered in order to use foam. Foam is sewn without seam allowances and that’s why you need to cut the lace/fabric pieces as always but the foam will be cut differently.

  1. First take off the seam allowance of the curved parts in the middle (the seams that will be sewn together to form the cup), 6 mm on each. Mark the notches again

  2. Do the same with the central seam on the right side of piece A, take off 6 mm

  3. On the left side of the piece B you need to take off 10 mm as this is the underarm elastic seam allowance on this pattern (once the elastic is sewn on the lace part only, you’ll fold it under to then cover the foam, this way you don’t have to fold the foam and create bulk)

  4. On puece A you also need to trim off the neckline a bit. First from the upper part you need to take off 10 mm as this is what you’ve taken off on the piece B and those two pieces have to align now. I also prefer taking off 3 mm on the center of the neckline, just in case so the foam won’t be seen once it’s sewn together with lace. That’s why I’ve marked 10 mm on the left side and 3 mm on the right side and then I joined the two points with a straight line

Cut pieces A and B twice from foam (don’t forget to mark the new notches so you can sew the foam pieces together) and cut pieces A and B twice form lace using the original pattern pieces. The rest of the pieces, C and D, will be cut as usual from lace and lining.

www.studiocostura.com
DSC_0489.jpg

Como en el paso 1 del otro tutorial une las copas de foam.

As in step 1 of the other tutorial, sew the foam cups together.

www.studiocostura.com

Como en el paso 2 del otro tutorial tapa las costuras con cinta de forro de lencería o de tul (opcional).

As in step 2 of the other tutorial cover the seams with lining strips (optional).

www.studiocostura.com

Remata la parte superior de las copas como en los pasos 3-4 del otro tutorial (opcional, también podrías solo remallar el borde si lo prefieres).

Cover the upper part of the cups with lining strips as in steps 3-4 of the other tutorial (optional, you can also just serge the edges).

www.studiocostura.com

Como en el otro tutorial en pasos 5-6, une las dos copas y haz el remate. Junta las piezas de encaje A y B con los derecho juntos y cose/remalla, haz un pespunte en el lado derecho en al costura de la unión. Junta las dos capas, haz el pespunte de refuerzo.

As in the other tutorial on steps 5-6 sew the cups together and cover the central seam with lining strips. Sew the lace pieces A and B together with right sides together, topstich on the right side of the cup seams. Then sew the cup pieces right sides together and sew the topstitching on the right side.

www.studiocostura.com

Ya puedes poner el encaje encima del foam (los revéses juntos) y verás que la puntilla sobresale en la parte del escote y en la sisa sobran los 10 mm de margen de elástico que quitamos al foam previamente.

Juntando bien las costuras centrales y de las copas, cose con la puntada larga para unir las dos capas en la parte de abajo, así será más fácil unirlo todo con la banda central en el siguiente paso.

Ahora puedes también unir el encaje al foam en la parte del escote cosiendo con zig-zag o con la puntada recta a través de las dos capas. Yo usé esta vez la puntada recta y cosí a la altura de foam a través de las dos capas, fijando bien dónde quedaba el centro.

Now you can put the lace layer on top of the foam layer (with wrong sides together) and you’ll see that the scalloped edge of the lace overlaps the neckline and that you have 10 mm of extra seam allowance on lace pieces on the underarm seams.

Align both layers well using the cup and central seam as reference points, machine baste the two layers together on the lower part (following the curve of the cups), this way it’s easier to sew this part together with front band on the next step.

Now you can also join both layers on the cup part, sew a zig-zag or straigh stitch through the two layers. I used straight stitch this time and I sewed them together on top of the upper border of the foam cups, making sure the centers match.

www.studiocostura.com

Como en el paso 11 de las instrucciones del patrón, une tus copas con la banda central siguiendo los piquetes y empezando a coser en el mismo borde de encaje y ya después cosiendo encima del foam. Sigue con los pasos igual que en las instrucciones (aplicar el recubrearos encima de la costura que acabas de hacer, coser el elástico de bajo etc) hasta llegar al paso 30 cuando tienes que coser el elástico de sisa.

As in step 11 of the pattern instructions, sew the cups and the front band together following the notches, start sewing on the border to catch both lace layers, then continue sewing with foam. Keep following the instructions (sewing underwire channeling and band elastic) until sewing the underarm elastic on step 30.

www.studiocostura.com

Lo único diferente a la hora de coser el elástico de sisa es que en la primera pasada vas a coserlo solo en la capa de encaje en la parte de la copa (el resto sigue igual como siempre). Después cuando haces la segunda pasada, doblas el encaje en la parte de la copa justo encima del foam y así todo queda bien sin bulto en las costuras. Después sigue como siempre hasta terminar el bralette.

The only difference when sewing the underarm elastic is that you sew you first pass of zig-zag only on top of the lace layer and not the foam (the rest of the underarm is sewn as usual). When you sew the second zig-zag pass you’ll fold the elastic under on top of the foam and this way there won’t be any extra bulk. After that continue as always until you finish your bralette.

www.studiocostura.com

Así es como queda el bralette con foam por dentro.

This is how the foam cup looks once ecerything is finished.

www.studiocostura.com

Aprovechando que tenía que hacer este tutorial, hice el bralette en mi talla y en conjunto también cosí un par de braguitas con el nuevo patrón Vera. Para las braguitas usé un punto de viscosa con brillo que tenía hace tiempo en mi colección y añadí trozos del mismo encaje en color marfil. Aunque los colores “nuetros” (las que no se transparentan debajo de camisetas/blusas blancas) no se ven como algo espectacular en las fotos de lencería, estoy super contenta con mi conjunto porque es super practico y cómodo. De hecho es justo lo que quería, tanto en bralette (con foam) y en braguitas (cómodo corte bikini, elásticos suaves, un poco de encaje para que sean monos)…y no os miento cuando digo que es el primer conjunto que me he hecho para mí (y no para muestra de patrón/regalo para otra persona) en mucho tiempo…quizás en un año?! Así que nada, espero que os guste este post y podéis ver todos los posts del coseconmigo de Mara bralette en este apartado del blog! Los siguientes tutoriales serán para el bajo de encaje más largo y para telas de punto…nos vemos por aquí!

Knowing I needed to photograph this tutorial, I made a bralette in my size and completed it with a matching pantie using the new Vera panties pattern to create a pretty lingerie set. I used this special shiny viscose knit for the panties (had it in my stash for forever) and I also added some leftover lace pieces. Altough the “neutral” colors (the ones that won’t be see through under white tops/t-shirts) don’t look like something extra fancy on photos, I’m very happy with this set as it’s so parctical and pretty. Actually it’s just what I wanted, a bralette with foam cups and panties with this comfortable bikini cut style, using a nice stretchy knit and pretty lace details…I’m not lying when I say that I haven’t made myself a set of lingerie for at least for a year or so (it has been all sample sewing or gifts). I hope you’ve liked this post and you can see all the posts on this Mara sewalong series over at this page. The next tutorials will be about using knits and a wider lace hem!


Nuevo patrón: la braguita Vera // New pattern: Vera panties

 
www.studiocostura.com

Hola, os presento mi nuevo patrón braguita Vera! Es un patrón con el corte bikini y viene en tres versiones, uno para punto y dos para encajes.

Hey, here’s my newest pantie pattern: meet the Vera panties! It’s a bikini/brief cut pattern that comes in three versions, one for stretch knit fabrics and two for stretch lace.

www.studiocostura.com

Hace tiempo que quería publicar un patrón con este corte ya que era lo que faltaba entre los patrones de braguitas que tengo disponibles. Aparte de así tener una variedad de cortes para todos los gustos para gente que cose en casa, también puedo ofrecer a las que asisten a mis cursos de lencería la mayor variedad.

It was about time to publish this style as it was missing from my pantie pattern collection. Apart from making patterns for people who sew at home I also teach lingerie sewing classes so now there’s one more style they can choose when they attend the classes.

www.studiocostura.com

La versión 1 es la más básica: se hace con telas de punto con elastano y la cinturilla y las aberturas de piernas están rematadas con elásticos de lencería. Puedes usar cualquier tela de punto que sea elástica y no muy gruesa, mis favoritos son puntos de viscosa ya que son de grosor fino y el tejido es respirable. Es también buena oportunidad de aprovechar los típicos cortes pequeños que quedan de los proyectos de camisetas etc. Si quieres probar coser braguitas por primera vez, esta versión es lo mejor para empezar y así aprendes lo básico (ya sabes que como de costumbre mis patrones vienen con instrucciones muy detalladas, tienen fotos con texto explicativo sobre cada paso que tienes que hacer). Si necesitas elástico de lencería puedes mirar en esta sección de mi tienda que hay varios colores y tipos.

Version1 is the very basic pantie: it’s sewn with knit fabrics (with spandex for more comfort) and the waist and the leg openings are finished with lingerie elastic. You can use whatever light weight knit fabrics with stretch in them, my favourites are viscose knits as they are light weight and breathable. Sewing panties is also the perfect occasion to use up scraps of fabric from t-shirt projects etc. If you’re new to sewing lingerie, this version is perfect for starting out and learning the very basics (as always my patterns come with step by step instructions full of photos and text about each step you have to follow in order to finish a pretty pair of panties). If you need narrow lingerie elastics for panties you can check out this section of my shop for various colors and types.

www.studiocostura.com

La versión 2 se cose con encaje elástico y queda muy bonito con el borde de la puntilla en las aberturas de las piernas. Las piezas de encaje se juntan en el centro delantero creando un diseño diferente! Este diseño es similar a la versión de encaje de las braguitas Stella pero el corte es diferente ya que está adaptado al corte bikini, cubriendo menos en la parte de la pierna.

Version 2 is made with stretch lace and the scalloped lace edge looks very pretty on the leg openings. The front lace pieces are joined on the center front in a special way that creates as a result a unique design element! This design is similar to the Stella panties pattern in the lace version but this time the same style is drafted for a bikini style with a higher leg opeing.

www.studiocostura.com

La versión 3 es algo distinto, también se cose con encajes elásticos pero tiene un bonito detalle de elástico de tirante en la parte de los costados. Era un diseño que quería añadir a los dos previos ya que me parece muy fácil de hacer y el resultado es diferente aunque el corte en sí es lo mismo que la base. Además este estilo lleva bastante poco material así que es ideal para hacer conjuntos con los bralettes y sujetadores. Aparte de los materiales que normalmente necesitas para coser un par de braguitas, tienes que tener 4 arandelas y 2 reguladores y 0,4m de elástico de tirante. Si los quieres comprar aparte tienes diferentes variedades en mi tienda en las secciones de tirantes y de arandelas y reguladores.

Version 3 is different, it’s also made with stretch lace but it has a beautiful strap elastic detail on the sides. I really wanted to add this style as one of the versions as it’s easy to make and the result is completely different altough it’s based on the same pattern block. Also this version can be made with a little amount of supplies so it will be a great scrap buster to sew up panties that match with your handmade bras and bralettes. Apart from the usual supplies you need for sewing panties this version also uses 0,4 m of stap elastic and 2 sliders + 4 rings. If you want to get them from my shop you can check out this section for strap elastics and this one for rings and sliders.

www.studiocostura.com

Como siempre tienes en la tienda los kits específicos para coser braguitas, vienen con material suficiente para coserte un par de braguitas de punto y otro de encaje. En el caso de querer coser la versión 3 de este patrón Vera puedes escribirme en los comentarios de la compra y te añado los materiales que necesitas: el tirante y las arandelas y los reguladores.

También tienes la opción de comprar directamente el patrón Vera + kit de braguitas, es la versión más económica! En este caso como siempre, cuando lo compras me dices allí qué kit quieres y yo te mando el patrón a tu correo.

As always there are specific pantie making kits in the shop that include enough supplies to make one pair of knit and one pair of lace panties. In case you want to sew the 3rd version of Vera panties you can leave me a comment so I will add the strap elastic and rings + sliders you need.

You have also the option to buy the Vera panties pattern directly with a pantie kit, it’s also the cheapest option! In this case as always just leave me a comment about which kit you’d like to get and I will send you the pattern to your e-mail address.

www.studiocostura.com

También aprovecho para recordaros que aquí en los archivos del blog tenéis varios tutoriales y posts de inspiración para hacer tooodas las variaciones de braguitas que querías. Primero podéis ver los posts de inspiración para las braguitas Stella y Mia que os sirven perfectamente también para este patrón.

I't’s also a good time to remind you that there are several inspiration posts and tutorials about pantie sewing here at the blog archives so you can make allll the variations you want. First you can check out the inspiration posts about Stella and Mia pantie patterns, both of these are great for this pattern too.

www.studiocostura.com

Y luego tenéis tutoriales para:

And tehre are tutorials about:

www.studiocostura.com

Espero que os guste el nuevo patrón! Ya sabéis que en mi cuenta de IG @studiocosturashop pongo un montón de fotos de lencería para que os animéis a probar a coserlo!!!

I hope you like the new pattern! As you know you can follow along on my IG account @studiocosturashop where I share customer makes, inspirational photos about lingerie and my own lingerie sewing process pics!