

Hola, hoy os traigo otro post de lencería (sorpresa-sorpresa). La parte de arriba otro sujetador Boylston de Orange Lingerie y abajo dos nuevos patrones de EvielaLuveDIY. Esta vez en negro con esa tela de estampado geométrico que me gusta tanto. Pero antes voy a contar un poco de mis andanzas de coser sujetadores con otro proyecto más.
Hey, today I have another lingerie post for you (surprise-surprise). The upper part is another Boylston bra from Orange Lingerie and the bottom part are two new patterns from EvielaLuveDIY. This time in black with this geometric print that I'm really in love with. But before I'll write a little about my lingerie sewing path this far with another project.
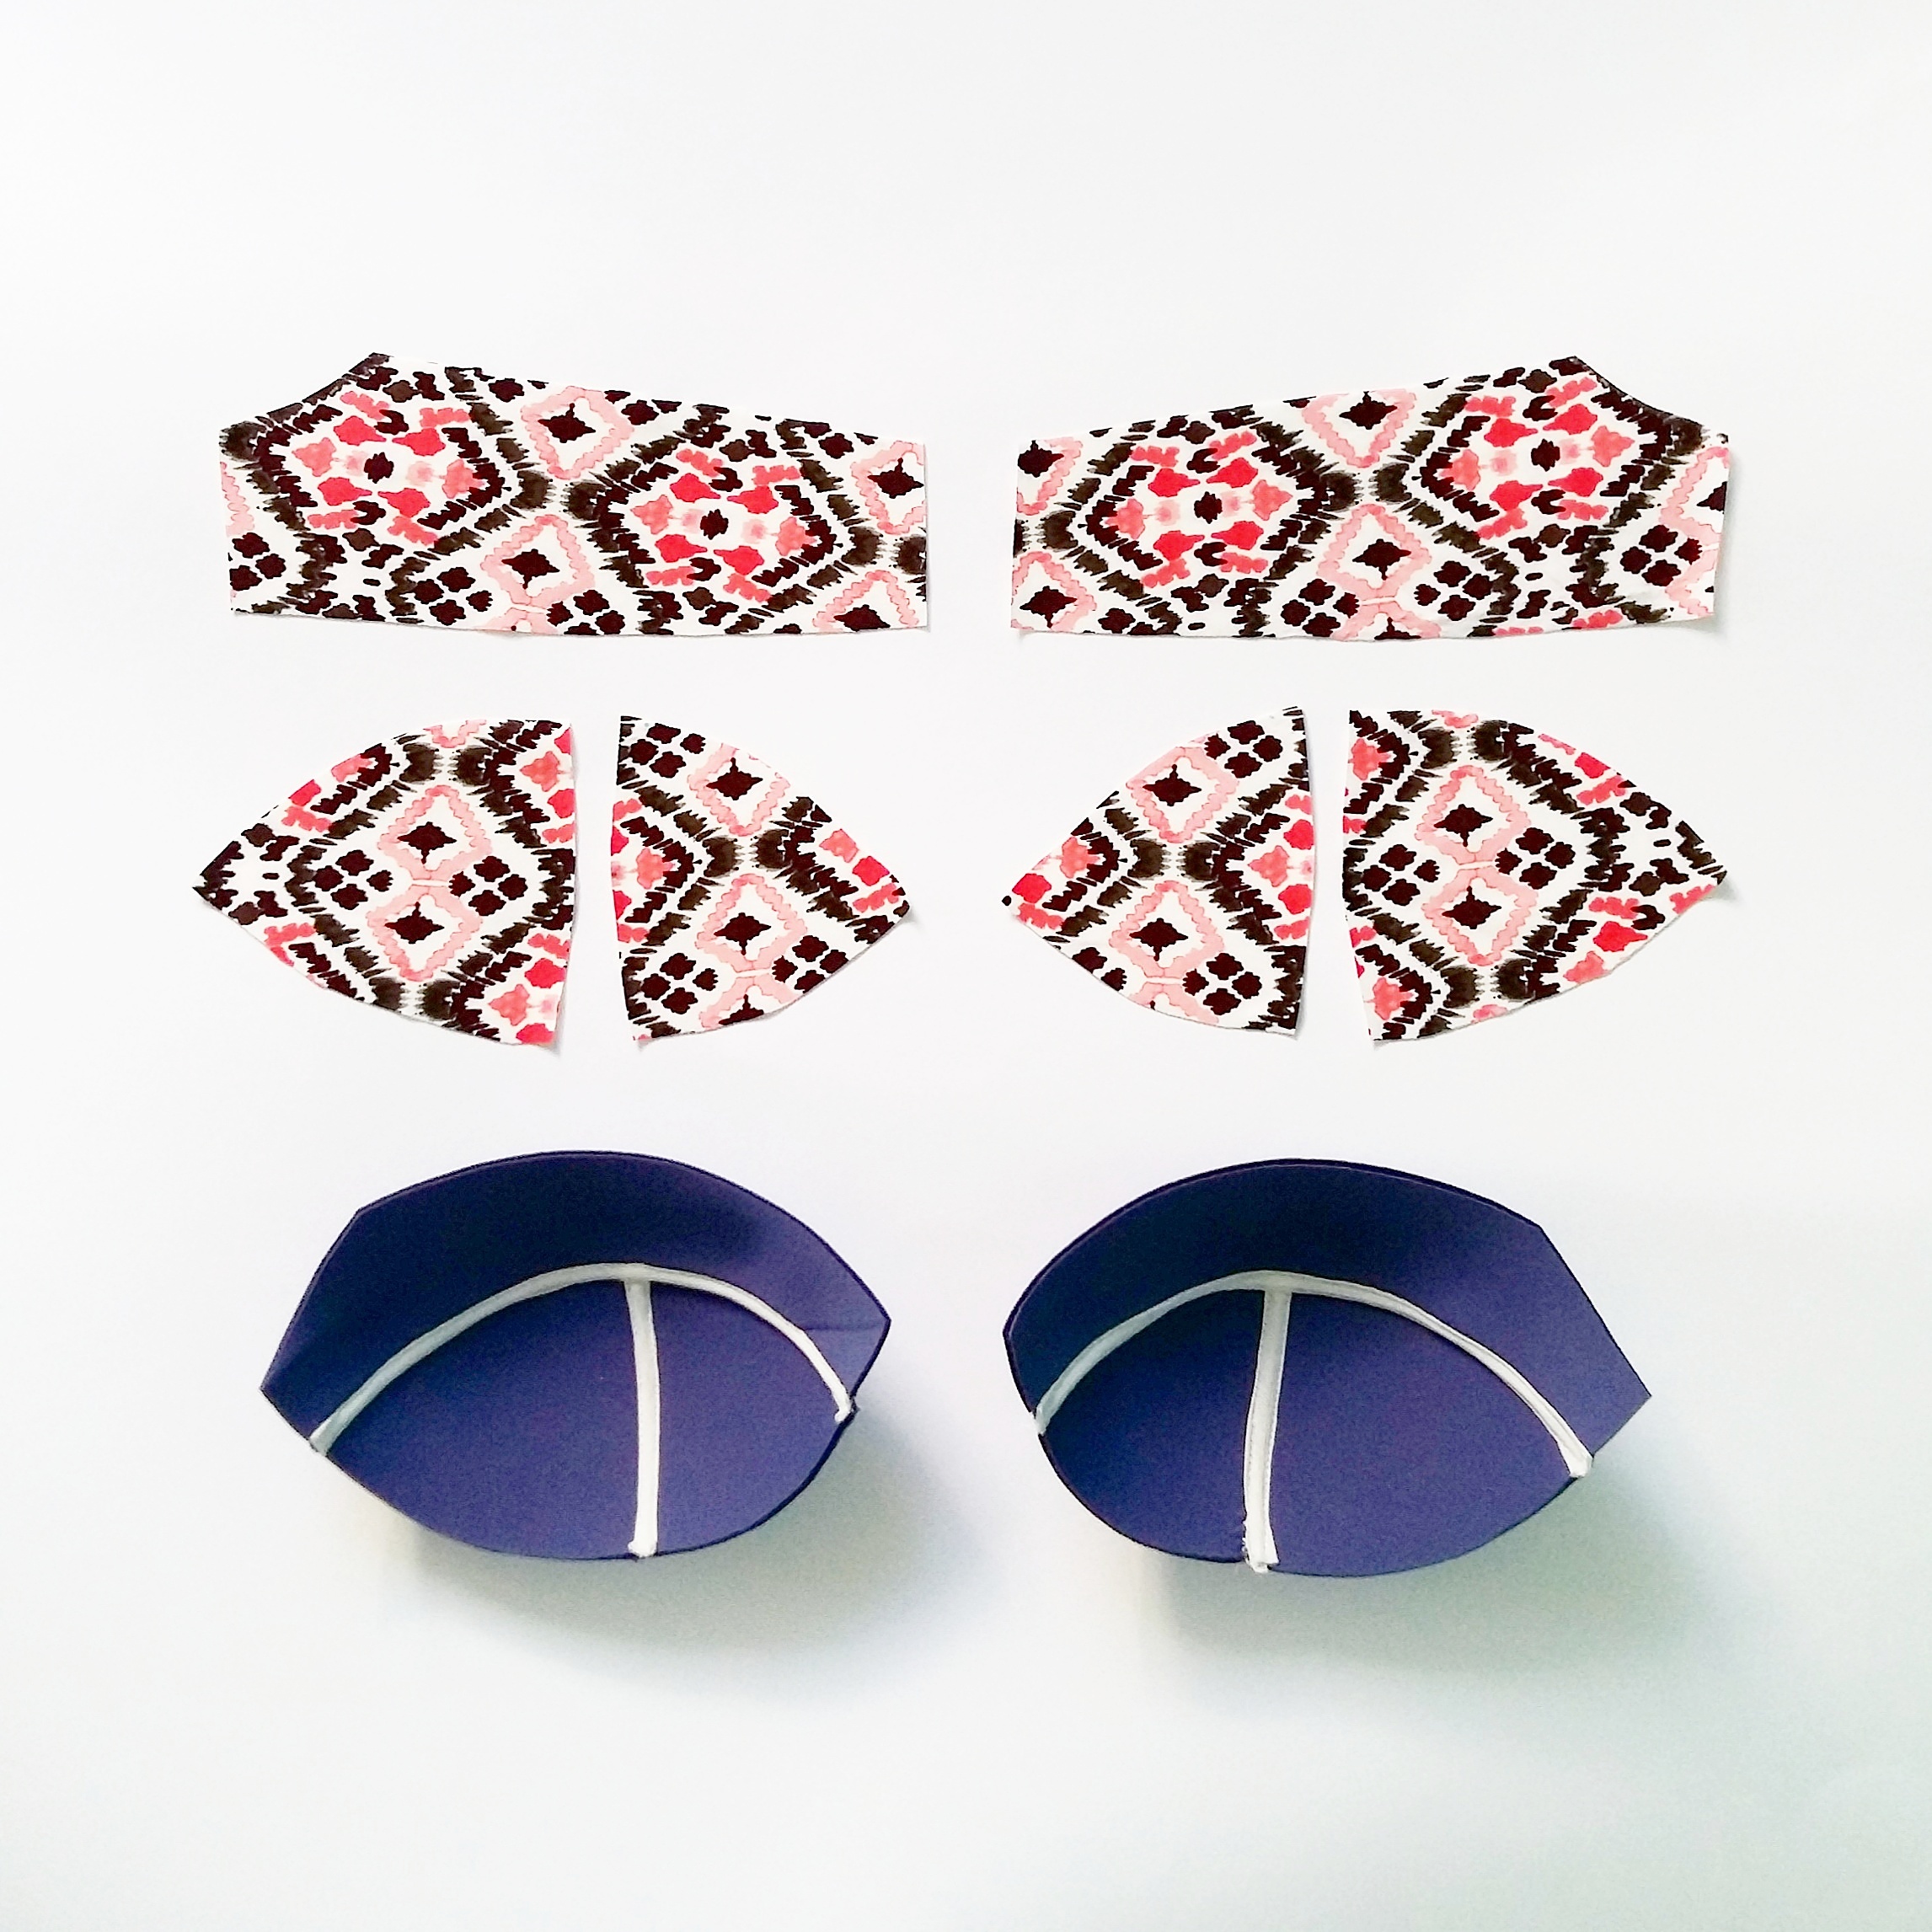
Antes del geométrico hice otro Boylston usando la misma tela que ya os suena del último post de Watson. Encontré este foam morado y probé la técnica de rematar las uniones de la copa de foam con tiras de tela de forro de punto para que quede más limpio. En realidad no es un paso obligatorio porque sólo con el zigzag no queda mal para nada, pero me gustó lo que vi en el blog de MissMake y decidí probarlo también. Me encanta cómo queda el morado con blanco.
Before the geometric Boylston I made another one using the same fabric that you've seen before in my Watson post. I found this purple foam and tried out the technique of covering the foam cup seams with a little tape from knit lining to get a neat finish. Actually this step is not obligatory as it's ok with only the zigzag stitch too but I saw this post on MissMake's blog and decided to try it out myself. I love how purple and white work together.
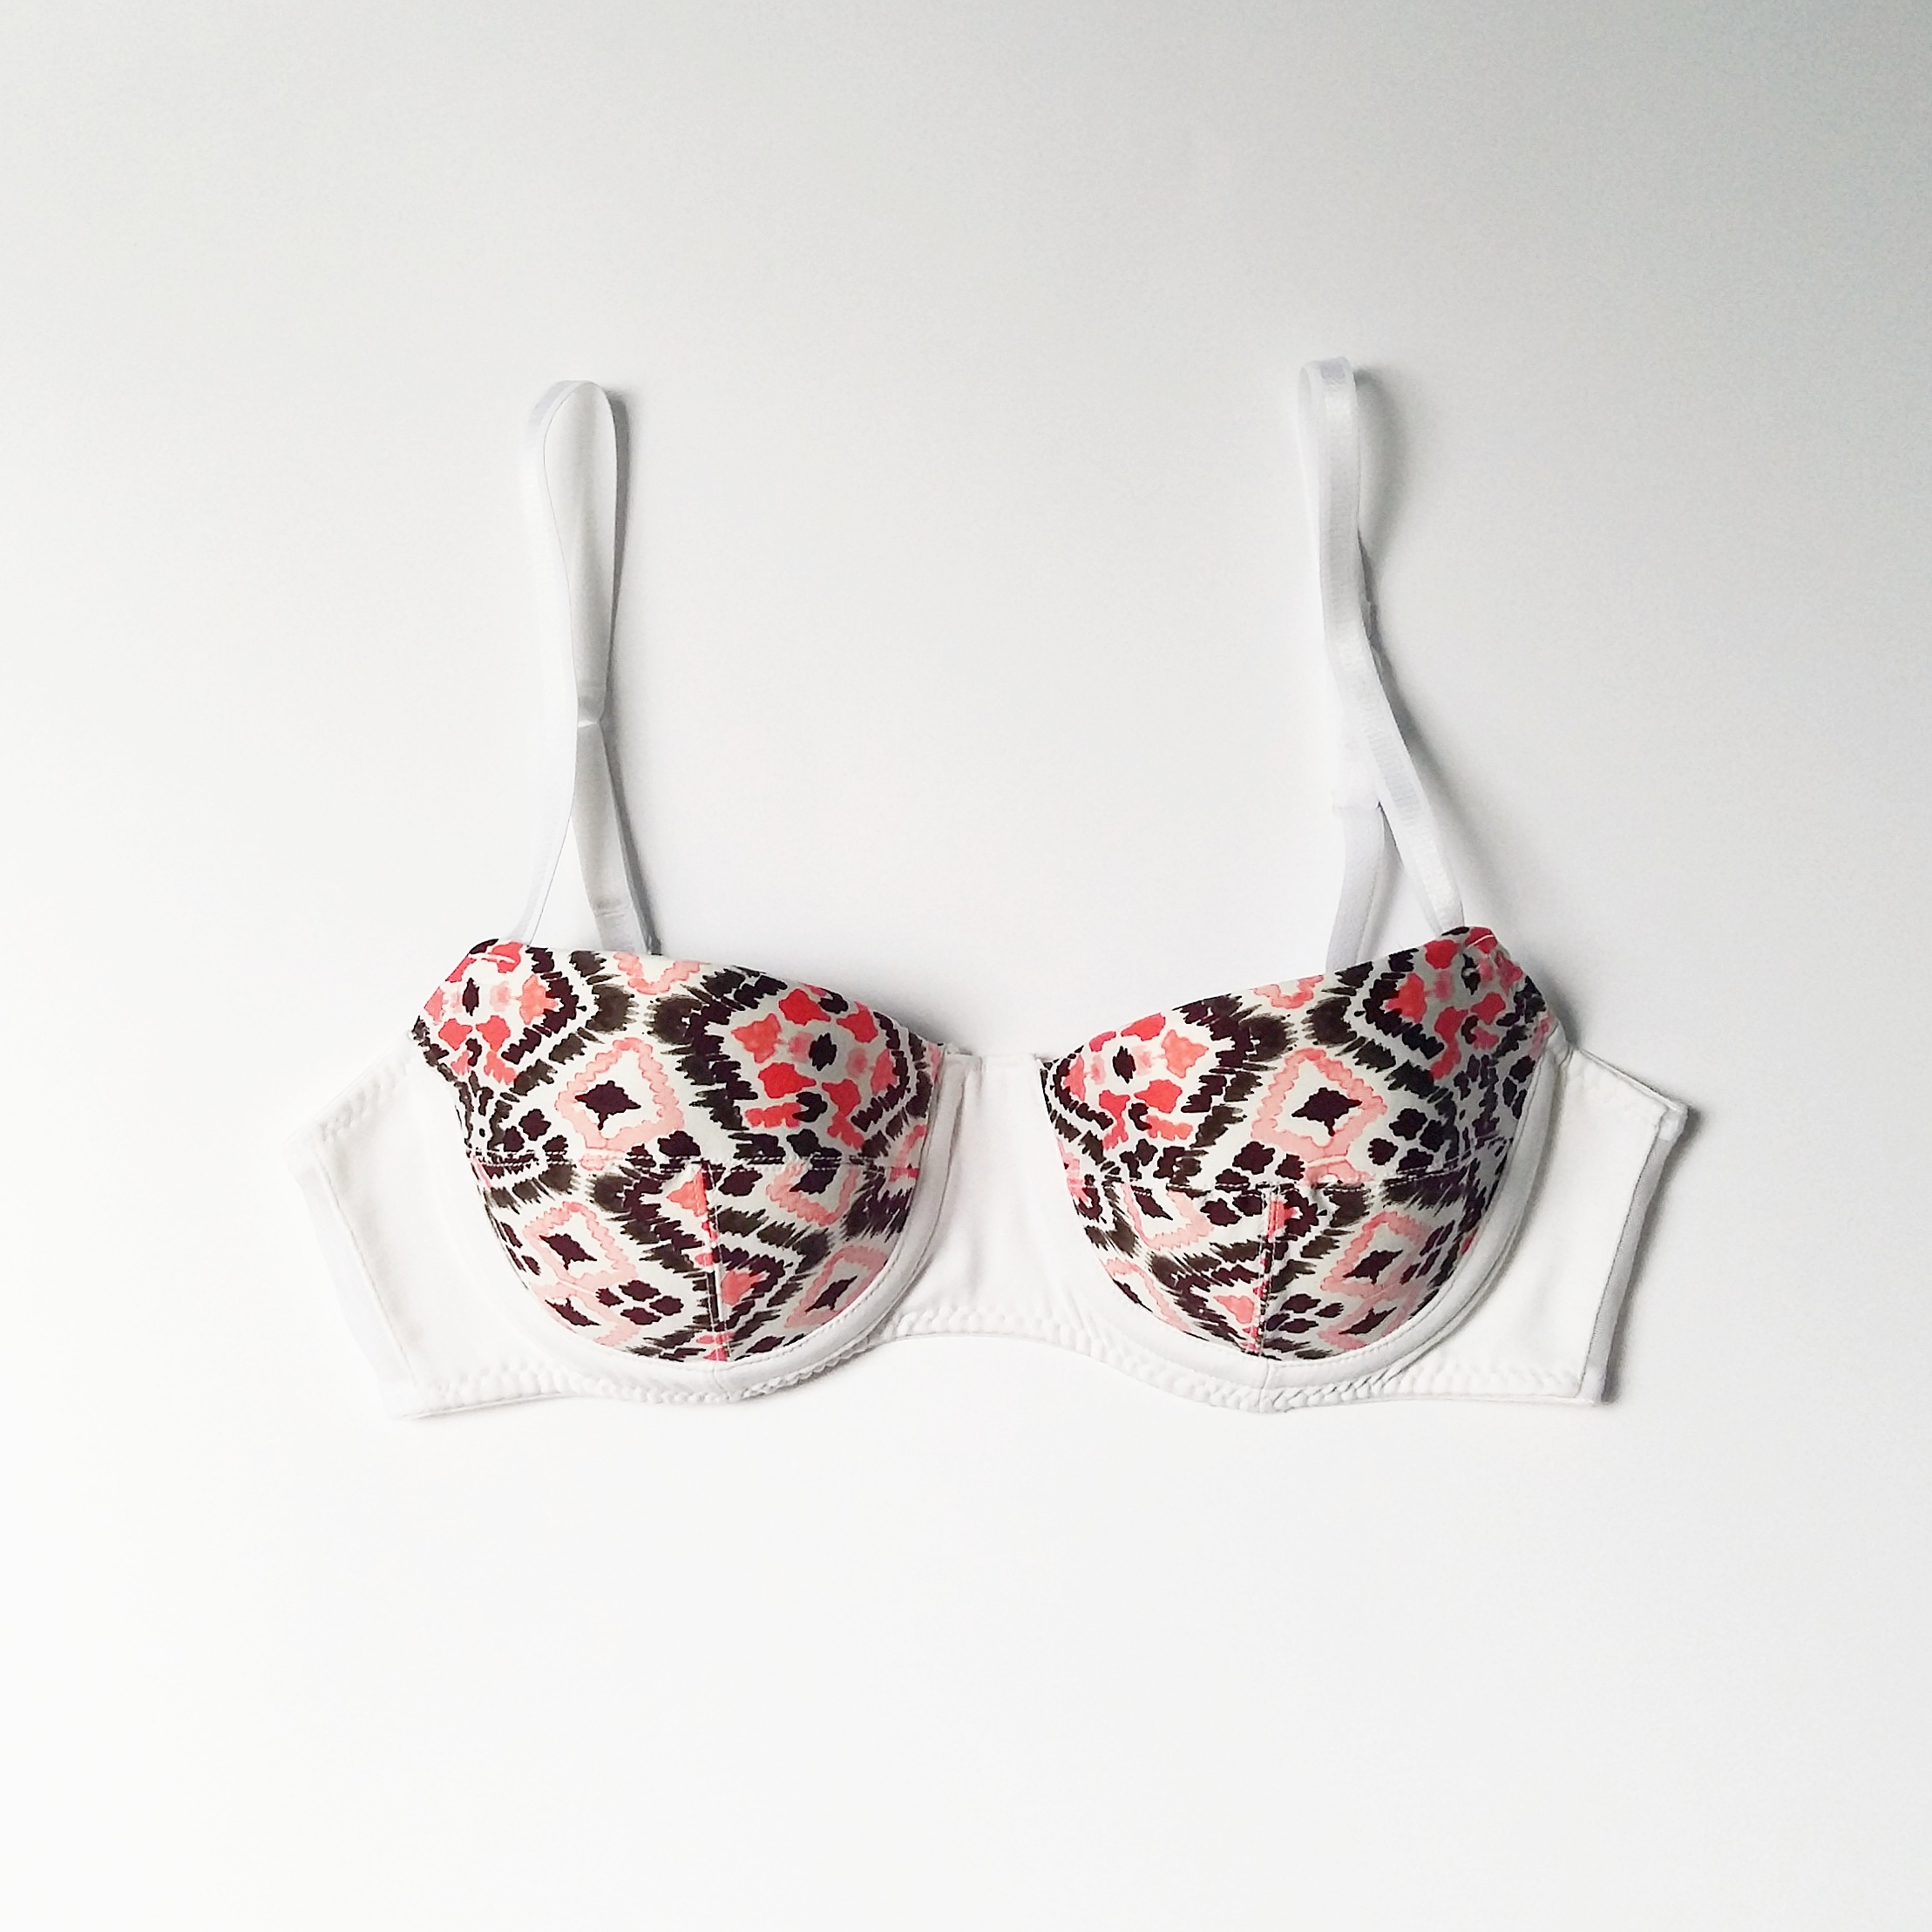
Lo hice con blanco en los lados usando una tela de punto blanco y stretch mesh en los lados, más o menos los mismos materiales que en mi primer Boylston. Esta vez no sé qué hice al cambiar el patrón para hacerlo con la copa de foam pero algún error tenía porque los tirantes se quedaron demasiado en los lados. Ahora después de hacer el siguiente ya me di cuenta que no había modificado bien una parte del patrón. Aparte de eso todo más o menos bien. Apliqué mis nuevos conocimientos después de clase de Craftsy pero algo otra vez hice mal al tirar el elástico y me quedó una pequeña arruga en los lados de las copas, cosa que no tenía en el primer sujetador. Pero creo que ya sé también cómo arreglarlo ahora.
I used white knit fabric on the bridge and on the sides and white stretch mesh on the band pieces, more or less the same materials as on my first Boylston bra. I don't know what error I made when drafting the pattern for foam cups but somehow the straps got too far away on the side. Now after making the next one I saw the mistake and I managed to get it right. Apart from that everything was good. I used my new knowledge from a Craftsy bramaking class but I did something wrong when pulling the elastic a bit too tight and I ended up with a little wrinkle next to the cups, this didn't happen on my first bra. But I think I more or less know how to avoid it now.

Y aquí está el tercero en negro. No me di cuenta pero parece que tengo tendencia a hacer el sujetador en un color liso y las copas en todo color jaja. No mucho más que contar aquí. Esta vez las copas bien, también hice un cambio en la parte central abriéndolo un poquíto para que quede mejor. Ahora sí que lo tengo bien ajustado al cuerpo. No sé porqué no hice los tirantes como en Watson: continuando la goma que viene del lado para que haga un gancho para la arandela y así se engancha allí el tirante y listo. Yo en este sujetador lo que hice era coser los tirantes sin más y queda un pelín feo...para el próximo ya sé, jaja. Más que nada porque esa tela tiene varios colores y algo se ve, al ser liso y al hacerlo con el mismo hilo no molestaría tanto, seguro.
And here is the third bra in black. I didn't see it before but looks like I tend to make one color bras with print cups a lot, hehe. Not so much more to tell here. The cups are good this time, I also changed the cradle a bit to make it wider on the lower part and now the fit is way better. I don't know why I didn't sew the bra straps like on Watson, using the underarm elastic as a little hoop to put a ring on it and then just put the strap elastic through the ring. I just sewed the straps on the cups andI actually I don't like the bartack there too much. It's also because the fabric has different colors and whatever the color is that you use, there will be something visible anyway.
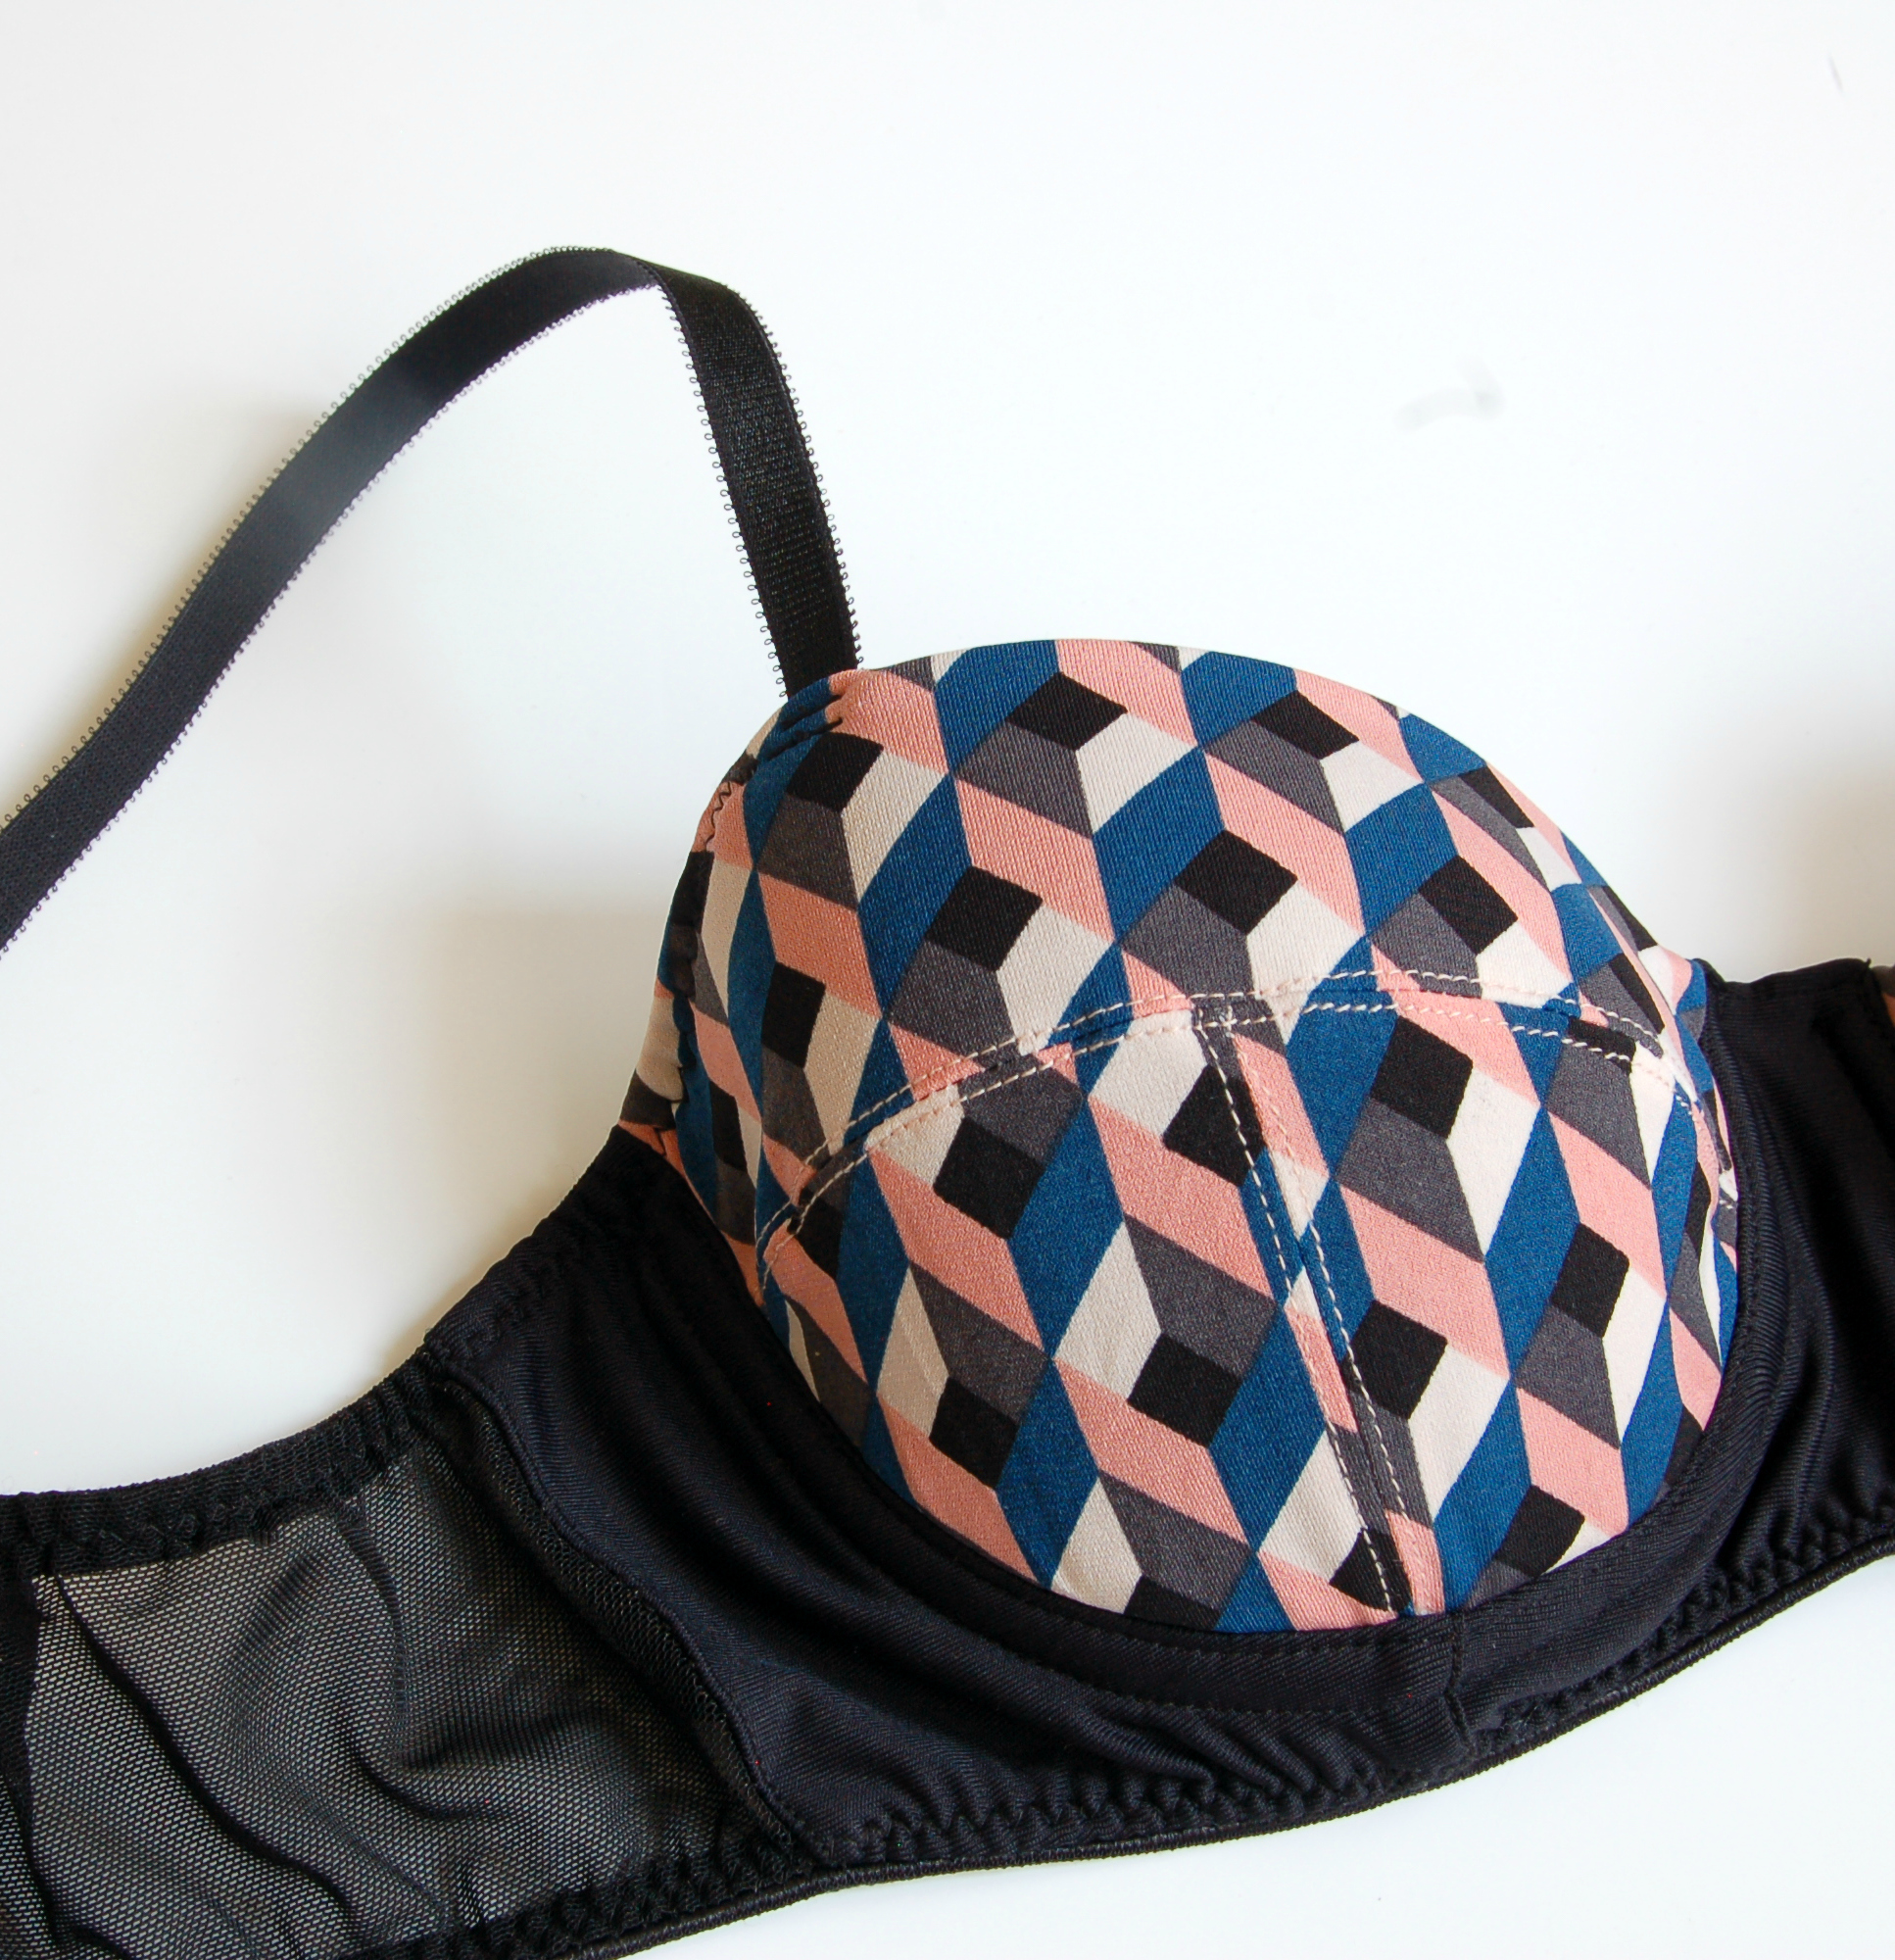
Aquí se ve la transparencia de stretch mesh y el pespunte en la copa.
You can see the transparency of the stretch mesh here and the topstiching on the cups.

Ahora con las braguitas. Los dos patrones son de EvielaLuveDIY y los cosí para probar patrones para ella. La braguita Lottie y la tanga Lyla van a salir a la venta ahora en septiembre. Tiene también un montón de otros patrones bonitos de lencería en su tienda de Etsy.
Now the panties. Both patterns are from EvielaLuveDIY and I sewed them while pattern testing for her. The Lottie panties and the Lyla thong are coming out this month, but she has also many more beautiful lingerie sewing patterns on her Etsy shop.

Lottie tiene un corte bikini que realmente quedaría súper bien como bikini para el verano si se usa la tela de bañador. Está unido en los laterales por arandelas de 15mm de ancho y rematado con el FOE.
Lottie panties have a bikini cut that would actually be perfect for swimwear bikini if you use swimwear fabric. They have a nice 15 mm ring detail on the sides and all the edges are finished with fold over elastic.

Me gusta mucho cómo queda el elástico, hay tantas posibilidades de customizar aquí. Es un patrón fácil de coser y queda mono. En la foto se ve que las arandelas están como un poco para atrás y es así porque al probarla la braguita me quedó un pelín grande y lo retifiqué con volver a coser la arandela un poco más adentro en la parte trasera (porque soy una vaga y no iba a descoser los dos lados para centrar la arandela...total, al llevarlo no se nota jaja).
I really love the look of the FOE on these, there are so many possiblities to customize here. It's an easy pattern and looks nice. You can see on the photo that the rings are kind of towards back and it's like this because when I tried them on they were a bit too big for me so I took away some excess from the back part (because I'm very lazy and didn't unpick both of the sides to make it even, anyway you can't really see the difference when wearing them hehe).


La tanga Lyla es un patrón muy básico también y se puede variar mucho. En el patrón original también lleva un poco de encaje en la unión de las piezas delanteras pero yo esta vez no lo usé. Pero está la posibilidad de darle un toque especial con encaje o incluso hacerlo todo de un color y usar por ejemplo elástico de otro color. En Instagram hay un montón de inspiración para eso. Por cierto, me gusta mucho esta goma que he usado, es discreta pero tiene su punto de brillo, lo voy a subir en breve a la tienda también.
The Lyla thong is a staple pattern too and it could be made into many variations. On the original version it has a little lace detail between the main panel and the side panels but this time I didn't use it. But there's the option to add this lace detail or even a variation when sewing it with the same fabric but different color elastic. There's a lot of inspiration in Instagram for this. By the way, I really like this elastic I used because it's simple but has it's shiny detail, I'm going to put it up on my Etsy shop soon.

Y aquí está la parte trasera. He cosido todo con un zigzag normal en vez del zigzag de tres pasos porque me gusta más el zigzag más corto. Este par también me quedó un poco grande pero aquí era más fácil de arreglarlo, simplemente antes de poner las gomas lo probé y metí un poco en los lados.
Ya está por hoy, espero que os animáis a coser braguitas porque es un proyecto súper rápido y muy útil!
And here's the back part. I used normal one step zigzag on all the seams attaching elastics instead of the three step one recommended on the pattern, but it's only because I like it more. This pattern was again a bit too big in the beginning but it was easy to fix as I tried it on before attaching the elastics and then just took away a bit on the sides.
That's it for today, hope you are up for sewing some panties because it's so fast and also so practical!