Hey! Today I’m showing you a super cute Hanna bikini hack! I saw many pretty images of bikinis with front flounce over at Pinterest and thought that I’d share this simple hack so you can make your own. I’m not into really girly stuff as you might have noticed but I actually love how this version turned out.
Hola, hoy os traigo una modificación muy mona del bikini Hanna! Vi muchas imagenes bonitas de volantes en el delantero de los bikinis por Pinterest y pensé que estaría guay compartir esta sencilla modificación para que podáis coserlo en casa. No soy muy de detalles así de “ñoñas” pero me ha encantado cómo ha quedado.


Here you can see some of the examples. As you can see you can really make a ton of variations as you can cut the flounces either wider or narrower etc. All the images above are from my Hanna bikini Pinterest board which you can check out for more inspiration to sew your own bikinis.
Aquí van unos ejemplos. Realmente puedes hacer un montón de versiones diferentes porque el volante lo puedes cortar más estrecho o más ancho etc. Todas las imágenes arriba son de mi carpeta de Hanna bikini en Pinterest donde tienes mucha más inspiración para coser tus bikinis.

So first off there are basically two different ways to make a flounce. First you can cut a flounce like you would cut a full circle skirt, just that instead of using your waist measurement to know the length of the smaller circle, you’d use the length of the area you’ll be sewing the flounce (just Google full circle skirt pattern and there are many tutorials online).
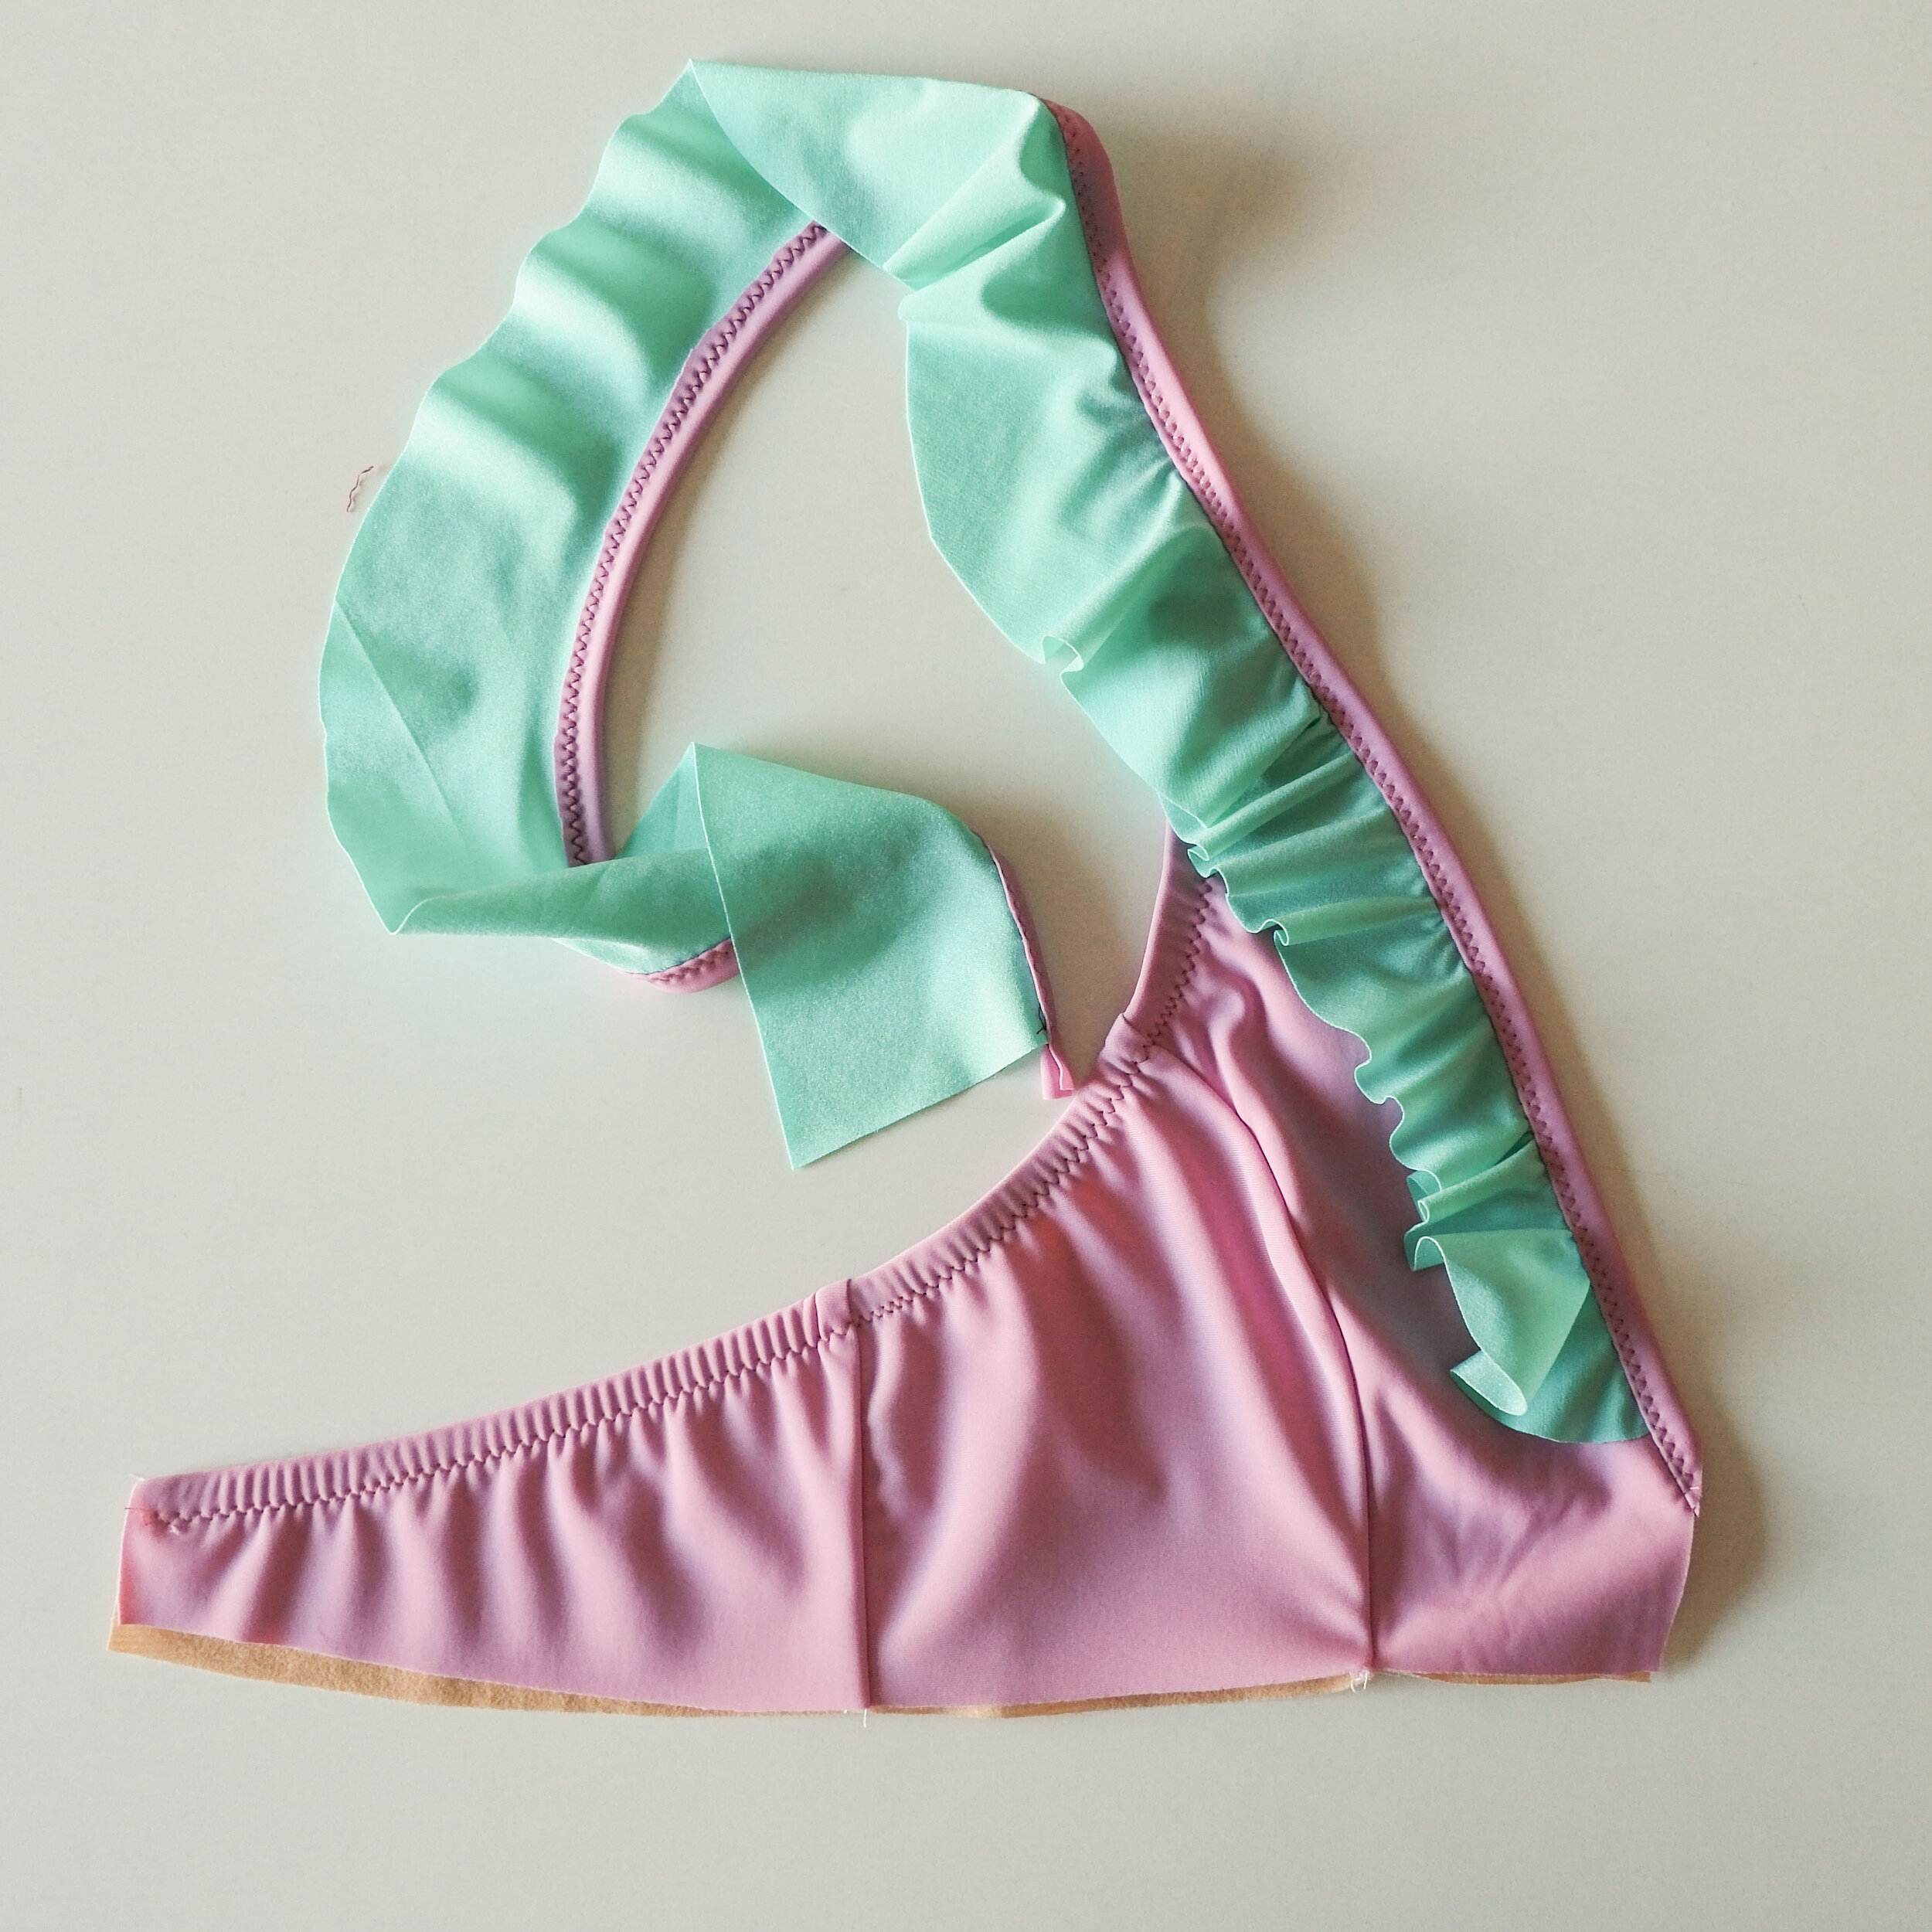
I’m using another method because I wanted to have a flounce that would be narrower in the beginning and wider in the end. To do this you have to draw something like a snail form, hehe (see this image for reference for example). Cutting your fabric this way will always give you an uneven amount of flounce, as the curve is smaller in the beginning, there will be more flounce, as the curve grows there will be less flounce. So I kind of freehanded my flounce and drew it on the fabric with a fabric marker. You can use really any width you want, mine measures 4 cm in the beginning, 5 cm in the middle and 6 cm in the end. The length of the strip you cut should be as long as your bikini front + strap. I just cut a generous amount without measuring or math, just in case, hehe.
Hay dos diferentes maneras de hacer volantes. Primero lo que puedes hacer es cortar un volante igual como cortarías una falda de capa entera, simplemente en vez de usar la medida de cintura para el círculo pequeño, usarías el largo donde vayas a poner el volante (haz una búsqueda de Google de falda de capa entera o full circle skirt pattern, hay muchos tutoriales online).
Yo uso otro método porque quería tener un volante que sea más estrecho en el comienzo y más ancho en el final. Para hacer esto tienes que dibujar un patrón en forma de caracol, jeje (mira esta imagen para que te hagas una idea). Cortar tu volante de esta manera hace que el volante siempre sea desigual, tendrá más volumen en el comienzo y menos volumen en el final ya que la curva crece. Yo hice mi volante bastante a ojo y lo dibujé en la tela con un rotulador de tela. Puedes usar el ancho que te apetezca, el mío mide 4 cm en el comienzo, 5 cm en el medio y 6 cm en el final. El largo de la tira que cortas debería ser igual que el largo del escote de tu bikini + el tirante. Yo corté el mío generosamente por si acaso porque lo hice sin medir mucho ni hacer matemáticas, jeje.


As for the bikini you need two equal strips of fabric, I just placed the first flounce on top of the fabric and cut out the second one. It’s definitely easier to cut this form with a rotary cutter, trying to lift the blade as little as possible to get even edges.
Como para el bikini necesitas dos tiras iguales puse el primer caracol encima de la tela y corté así el segundo. Es más fácil cortar esta forma con el cutter rotatorio, intentando no subir la cuchilla para conseguir un borde uniforme.

You also need binding for this hack. Just cut long strips of swim fabric, I cut mine 5 cm wide but 4 cm is fine as I cut away quite a lot in the end.
También necesitas tiras de bies para esta modificación. Lo llamo bies pero realmente en lycra con que cortes unas tiras en cualquier dirección te vale porque hay elasticidad en dos direcciones normalmente. Simplemente corta dos tiras largas de tu tela, yo corté los míos con el ancho de 5 cm, pero 4 cm es suficiente porque luego recorté bastante tela que me sobró.

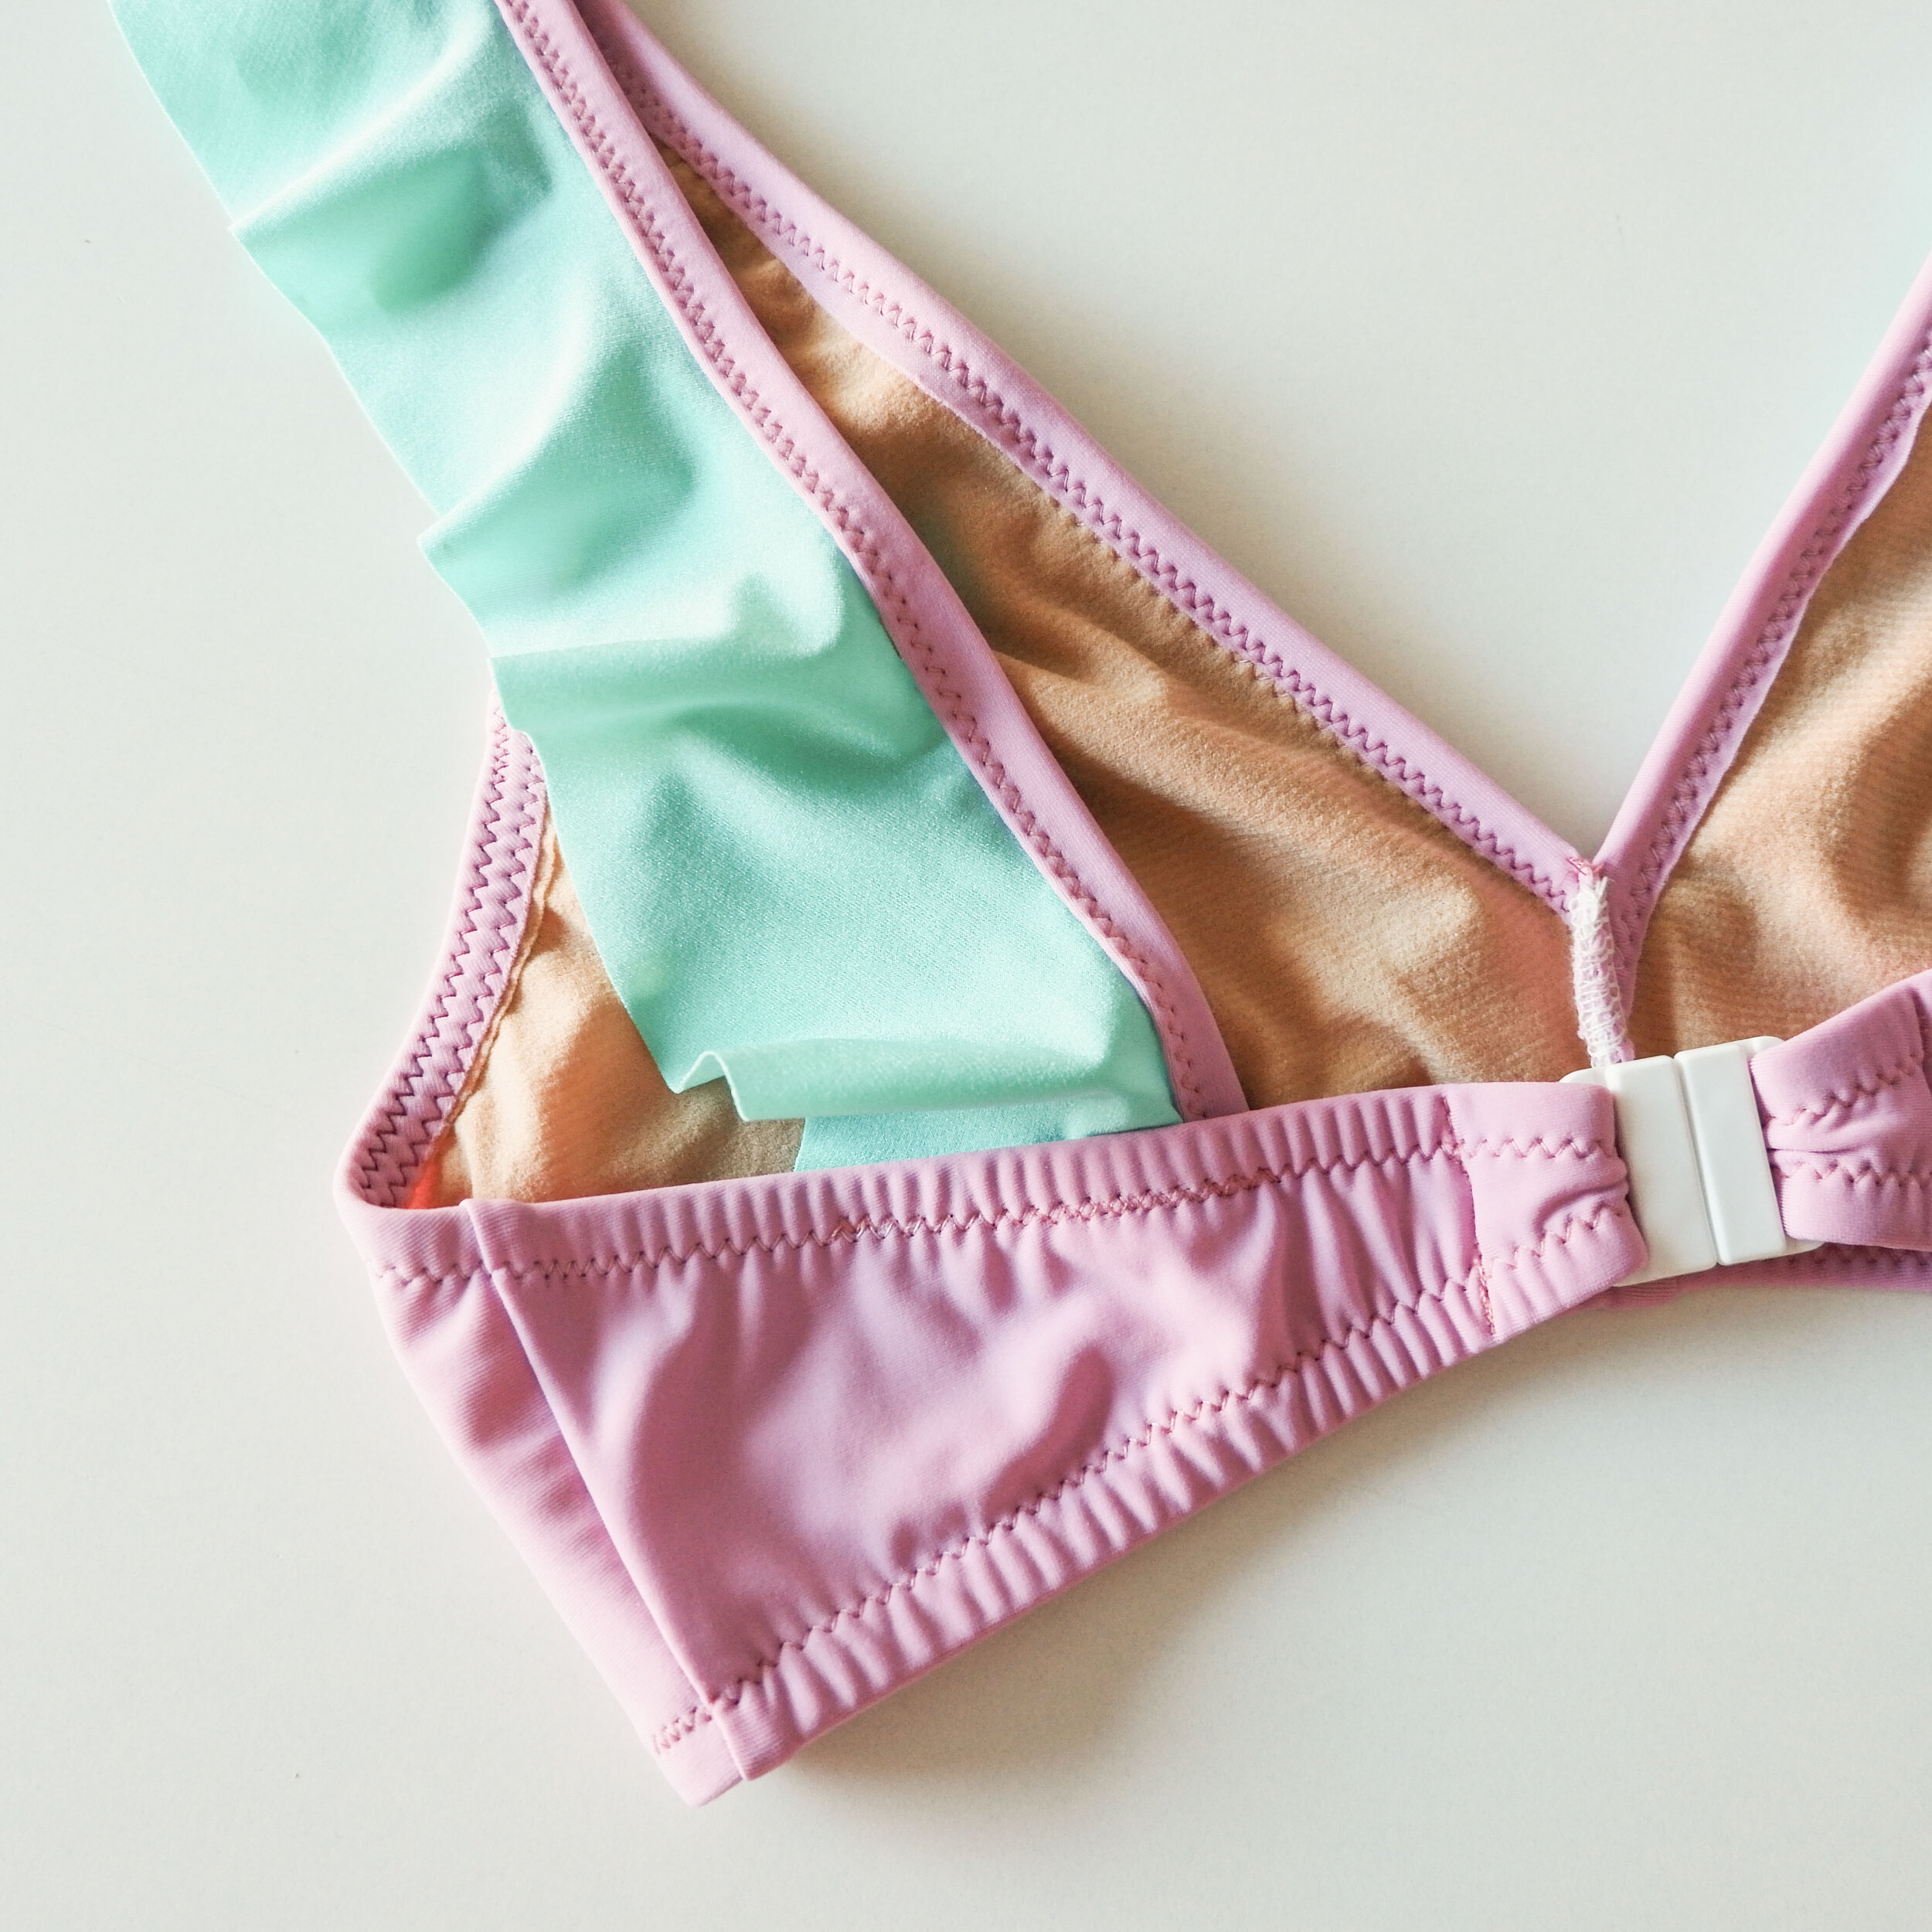
The only thing you need to modify on your pattern is the neckline seam allowance. As I’ll use binding I just cut away the elastic seam allowance on the neckline.
Lo único que tienes que modificar en el patrón es el margen de elástico en el escote. Como vas a usar bies que no requiere extra margen, se lo recortas en el escote.

You’ll also need to change the construction order a bit. First sew together the inner cup, the outer cup and the band and apply the elastic as usual for the underarm.
También tienes que cambiar el orden de construcción un poco. Primero une la copa interior con el exterior y la banda y cose el elástico a la parte de la sisa.

Then pin the flounce in place, starting with the narrower part of it. I left 6 mm of seam allowance for the center front seam and started to pin my flounce from there.
Ahora sujeta el volante en su sitio con alfileres, empezando con el lado más estrecho. Dejé 6 mm de margen de costura para coser el centro delantero así que empecé a coser el frunce desde allí.

Sew the flounce in place with a small zig-zag on the neckline edge.
Cose el frunce en el escote con un zig-zag pequeño.

Now put the binding and the flounce with right sides together and sew the binding in place, I used 6 mm seam allowance. As there’s no elastic attached to the neckline I did pull the binding to give this part of the bikini more tension, otherwise you can end up with a loose neckline.
Ahora pon el bies y el volante derecho con derecho y cose el bies en su sitio, yo usé un margen de 6 mm. Como en el escote no estoy usando elástico, lo que hago es estirar el bies para crear más tensión, sino el escote puede quedar demasiado suelto.

Once you have the first pass sewn, flip the binding to the wrong side of the neckline and sew another row of zig-zag again on the right side of the bikini, making sure you fold the binding down evenly.
Cuando tengas la primera pasada cosida, dobla el bies hacia el revés del bikini y cose otro zig-zag de nuevo en el derecho del bikini, asegurando que el bies esté doblado bien y que quede un ancho igual en todo el recorrido.

Once you’ve done that you can just cut away the extra binding on the wrong side and you’re done! Cut carefully as it’s very easy to cut a whole in your flounce if you’re not going slowly.
Cuando has hecho eso, recorta lo que sobra del bies en el revés del bikini y ya está! Corta con cuidado porque es muy fácil cortar el volante si no vas con paciencia.
I didn’t add elastic for the neckline to avoid bulk. You can add elastic if you wish, just sew it on top of the binding after the first pass and then wrap it inside the binding once you fold the binding under. Adding elastic makes the neckline firmer, a good thing to consider especially in bigger sizes!
Yo no usé elástico para el escote para evitar bulto. Puedes añadir elástico si lo prefieres, simplemente coselo después de la primera pasada de zig-zag y dobla el bies encima, se queda dentro del bies. Si añades elástico el escote se queda más firme, es una cosa para considerar especialmente en tallas más grandes!

Then just go on and finish your bikini as usual! I really like this candy color combination, hehe, it’s a good way to combine solids.
Ahora termina tu bikini como siempre! Me gusta mucho esta combinación de colores tipo chuche, jaja, es una buena manera de combinar colores lisos.
I measured the straps and just sewed another line of zig-zag on top of the band to fix them in place. In this version I used a flounce that goes all the way until the end of the strap but you can also make the flounce shorter if you wish.
Yo medí los tirantes una vez puesto el cierre de espalda y cosí un zig-zag encima de la banda en la parte superior para fijarlos en su sitio. En esta versión puse el volante hasta abajo en todo el largo del tirante pero puedes hacer que la parte del tirante con frunce sea más corto también.

This week I also made a swimsuit for my daughter and used a similar technique for the straps. For her swimsuit I used ruffles instead of flounce. To make ruffles you just need a fabric strip approx 2x length of the strap. First gather the fabric strip to make a ruffle and then sew it in the same way as I explained with the binding. For her straps I did insert the elastic too as the fabric wasn’t so stretchy.
También le hice a mi hija el bañador esta semana y usé la misma técnica para los tirantes. Esta vez usé frunce en vez del volante. Para crear frunce solo necesitas la tira de tela que sea aprox 2 veces de largo que tu tirante. Primero frunce la tira con la máquina y después coselo usando el bies igual como expliqué con el bikini. Para sus tirantes sí que usé elástico también porque esa tela no tenía mucha elasticidad.


The pattern is from Ottobre Design 3/2016, and I have used it for three previous swimsuits for her already, hehe.
El patrón es de Ottobre Design 3/2016 y lo he usado ya antes para coser tres bañadores, jeje.

I hope you liked these two ideas to customize your swimwear! The Hanna bikini can be a really versatile piece and I really hope you’ll sew one for yourself this summer :)
Espero que os hayan gustado estas dos ideas para dar un toque diferente a las prendas de baño! Puedes coser el bikini Hanna de muchas formas, espero que te animes a coserte uno este verano :)