

Hola! Hoy os traigo un post donde os cuento uno de mis trucos favoritos para dar un toque diferente a vuestros proyectos de braguitas. Ese mismo truco también sirve muy bien para aprovechar al máximo los materiales como encaje porque se pueden aprovechar trocitos muy pequeños y el resultado mola mucho.
Yo personalmente soy una persona que valora muucho la comodidad y las muestras que he hecho para la braguita Stella y que he llevado directamente a mi cajón de ropa interior no han sido las de encaje sino las del punto, jaja. Eso sí, me encanta que usando trocitos de encaje encima de la tela de punto puedes tener un par de braguitas super cómodas pero no por eso menos bonitas, así que hoy os enseño cómo hacerlo: es muy sencillo!
Hey! Today I'm bringing you a post about my favourite trick to give a different look to your pantie sewing projects. The same method works great for using up your lace leftovers as you can use very small pieces and the result is very cute.
I'm personally a very comfort loving person so when I made all the samples for Stella panties I kept all the knit versions for my own underwear drawer leaving the lace ones for educational purpose, haha. I do like to use small scraps of lace over the knit fabrics to have a beautiful and comfortable pair of undies so today I'll show you how to do it: it's very easy!

Para empezar corta las piezas de la versión 1 de la braguita Stella en tela de punto. Después donde tú quieras poner los detalles de encaje y dependiendo del tamaño de trozos que tengas, coloca el encaje encima de la pieza (en mi caso delantero) y busca la manera como quieres ponerlo.
Start with cutting out the version 1 pieces of Stella panties from knit fabric. After that put the lace piece on top of the pattern piece (in my case the front) and depending on the size of your lace scrap decide how you'd like to put it.

Recorta la pieza de encaje dejando la puntilla hacia dentro y el resto que tenga la misma forma que la pieza de punto (suelo cortar directamente el encaje encima de la pieza de punto siguiendo los bordes ya que es medio transparente). Corta otra pieza de encaje simétrica para ponerlo en el otro lateral de la braguita.
Cut the lace piece leaving the scalloped edge towards the center of the panties in a way it has the same shape as the base layer (I usually cut the lace directly over the knit piece following the edges as the lace layer is half transparent). Cut the other lace piece for the other edge using the mirroring method.

Sujeta el encaje encima de la pieza de punto con alfileres para que no se mueva.
Pin the lace in place over the knit fabric so it won't move around.

Y aquí viene la parte importante: para que al coser estas dos capas de tela bastante finitas la máquina no quiera "comer" tu tela puedes usar un buen truco. Coloca abajo de la tela un trozo de papel de seda (o papel de horno también vale) y cose encima de él. Eso hace que hay una "capa protectora" entre los dientes de arrastre de tu máquina y la tela finita. Cose con un zig-zag pequeño (2 de ancho, 2 de largo) a lo largo de la puntilla de la pieza de encaje siguiendo sus bordes. (Yo no suelo hacerlo pero también puedes coser luego en los laterales dentro del margen de costura para que no se muevan las capas.)
Here's the important part: in order to avoid your machine wanting to "eat" those two fairly light weight fabrics when sewing on top of them there's a trick to use. Put a scrap of tracing paper (baking paper works well too) under the fabric and sew on top of it. The tracing papers forms a "protective layer" between your machines feed dogs and your fabric. Using a small zig-zag stitch (2 width, 2 length) sew the lace in place following the edge of the scallops. (I usually don't do it but if you wish you can also sew together the side seam so the layers won't move.)

Después de coser quita el papel de seda tirando de él.
After sewing tear away the tracing paper.

Así queda el pequeño zig-zag que sujeta el encaje en el revés de la braguita.
This is how the small zig-zag will be on the wrong side of the panties.

Después sigue todo como siempre poniendo los elásticos y listo! El encaje estará sujeto por la parte de la puntilla con el zig-zag que acabas de hacer y en las otras partes por el elástico y la costura lateral.
After that follow the steps in the original version and it's done! The lace will be sewn to the fabric with the zig-zag you just made and it will also be sewn to the elastic and the side seams.

La siguiente variación del mismo método es unir dos piezas de encaje simétricas para hacer un bonito detalle en el medio. Coloca tu pieza de encaje en el centro delantero tal como quieres que quede.
The second version of the same method is to sew together two mirrored lace pieces in order to create a beautiful detail in the center of the panties. Put your lace scrap in the center front in a way you want it to be.

Corta esta pieza teniendo en cuenta que debería tener también 6 mm de margen de costura en el centro delantero para poder unirlo con su pieza simétrica: la pieza de emcaje debería llegar hasta la mitad del delantero + 6 mm de margen.
Cut this piece remembering that it needs to have the extra 6 mm in the center front so you can sew the two pieces together: the lace piece should cover half of the center front and extend 6 mm for the seam allowance.

Corta otra pieza de encaje en simetría y cose las dos piezas juntas derecho con derecho usando la remalladora o zig-zag.
Cut the mirrored lace piece and sew the pieces together with right sides facing using a zig-zag stitch or an overlocker.

En el caso de usar la remalladora esconde los hilos en la parte de la puntilla dentro de la costura.
In case you are using an overlocker hide the thread taails inside the seam you just made.
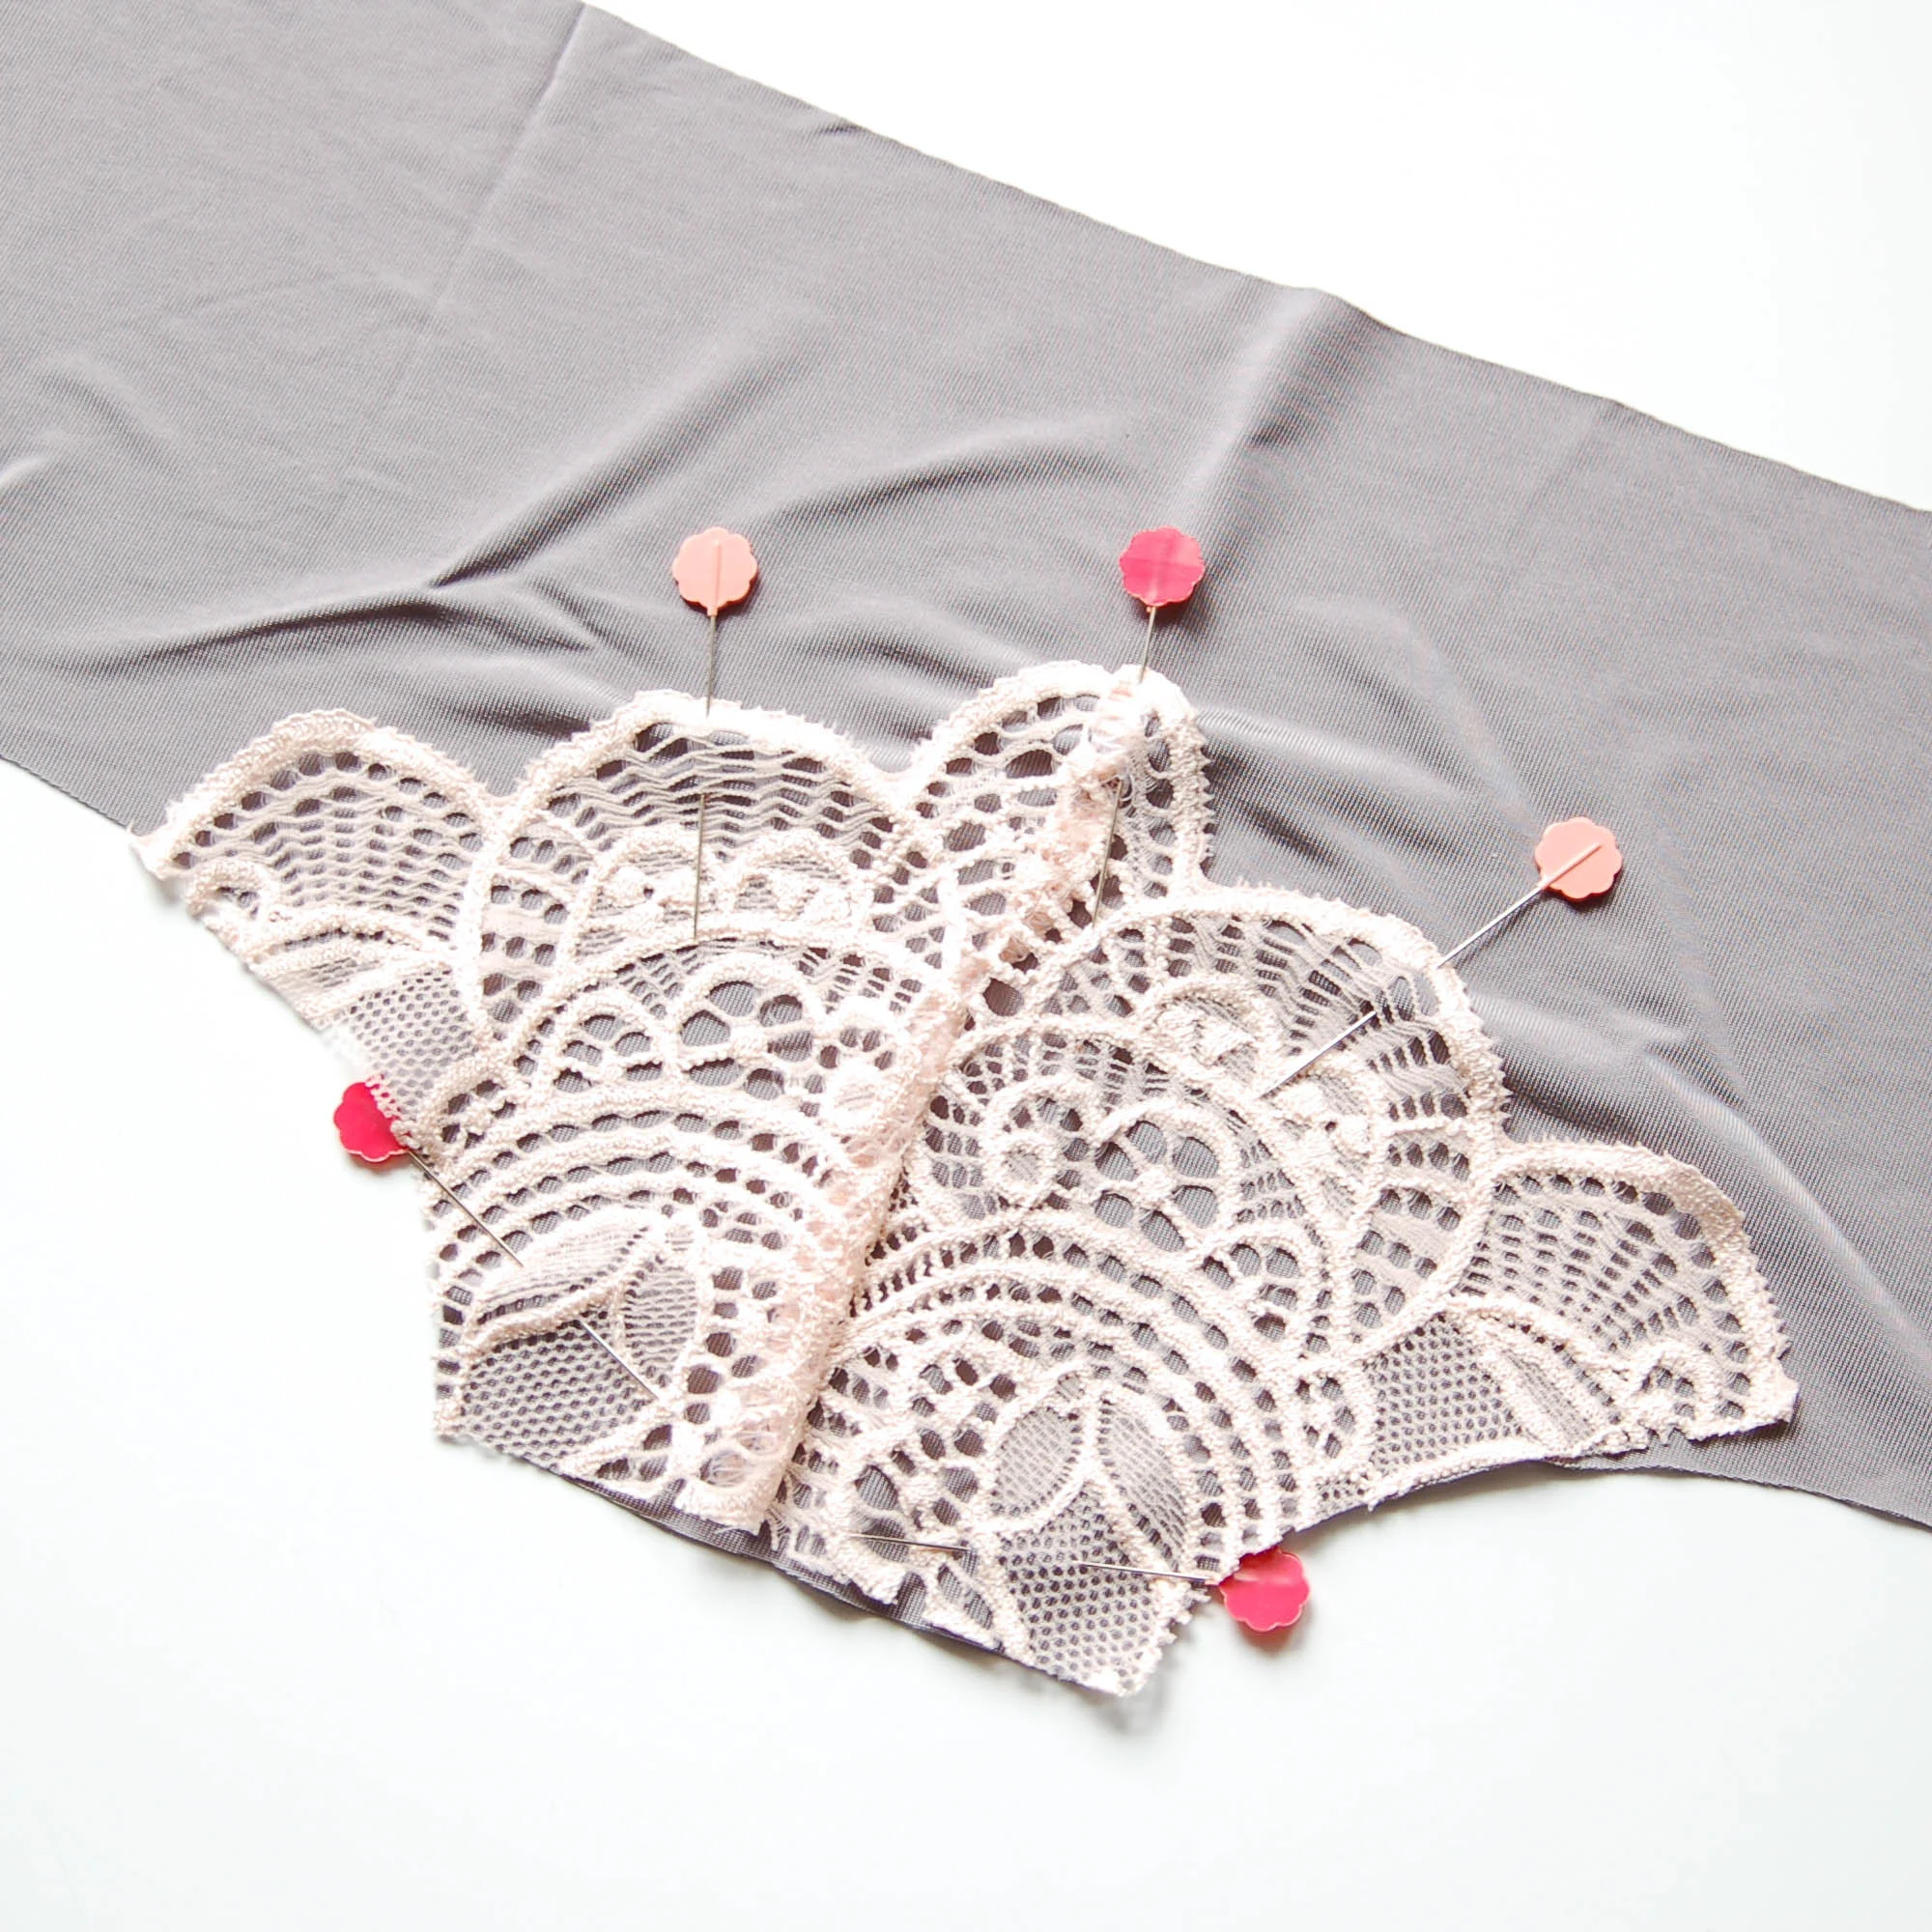
Coloca la pieza en su sitio y de nuevo sujétala con alfileres. Cose un zig-zag alrededor de la puntilla.
Put the lace piece in its place and pin it in place. Sew a zig-zag around the scalloped lace edges.
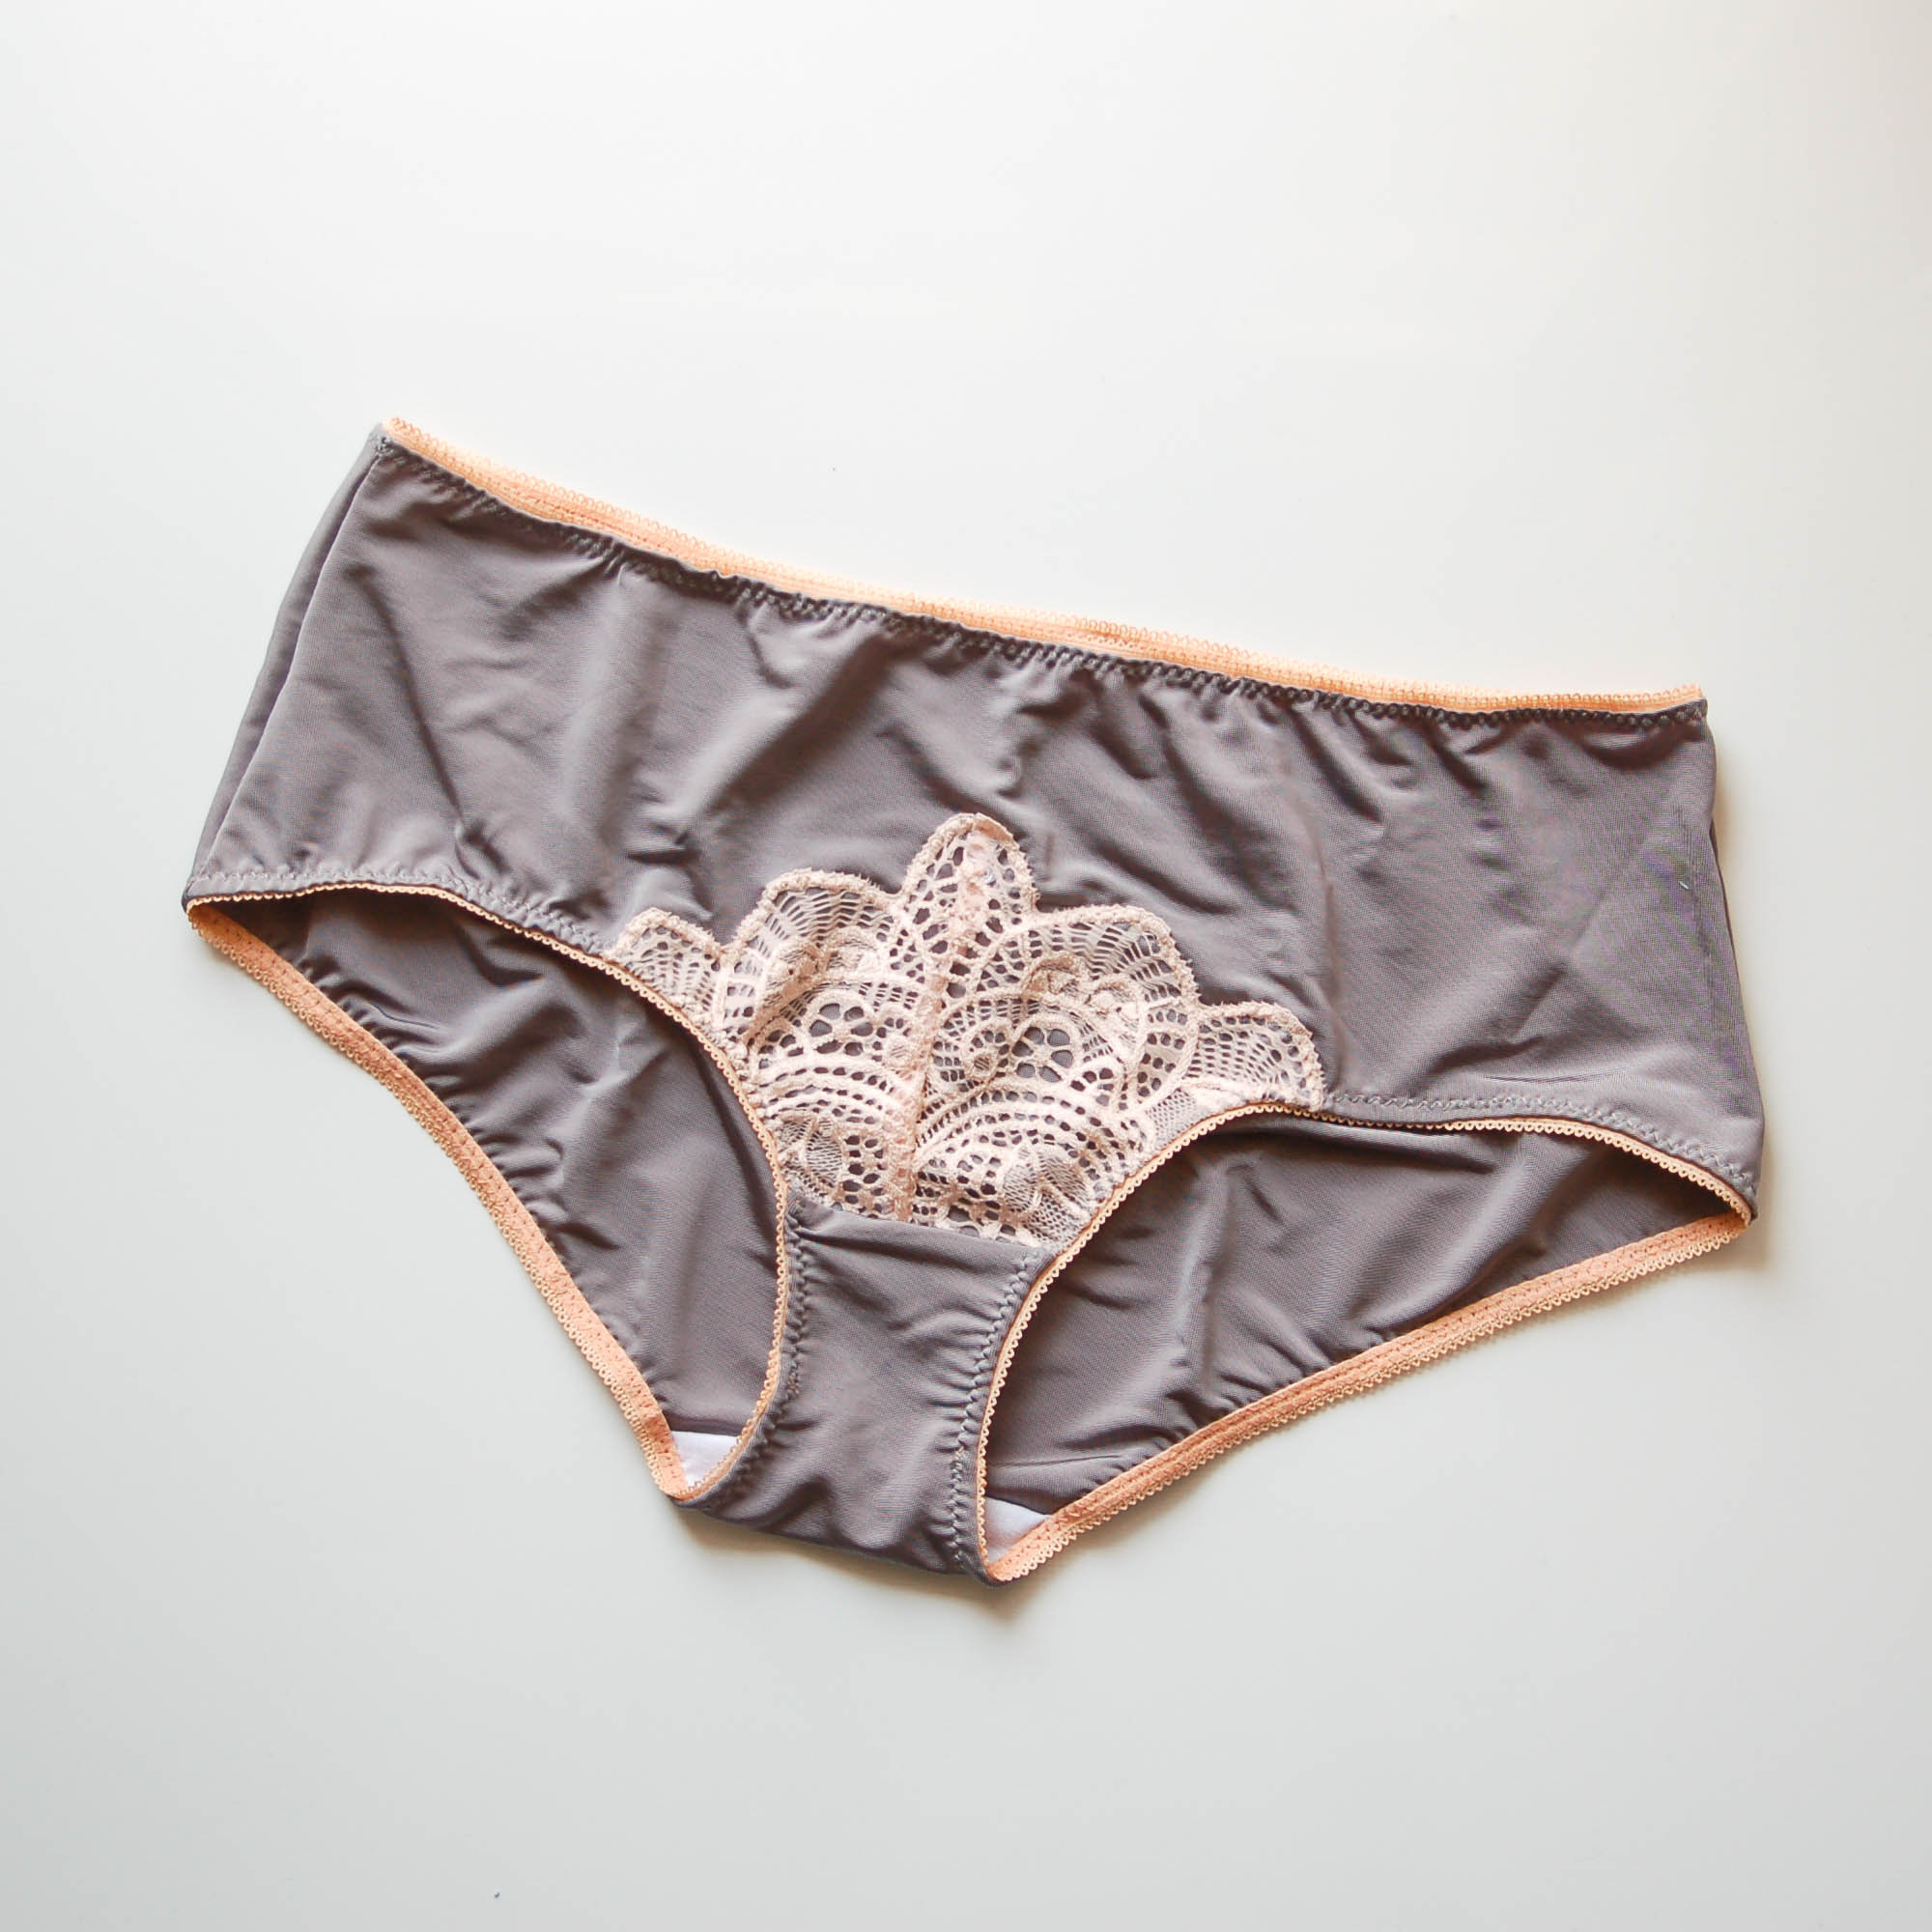
Así queda esta variación: lo puedes hacer más pequeño o más grande, todo depende de ti!
This is how the final result looks like: you can make it smaller or bigger, it all depends on how you prefer it!

Otra posibilidad es cubrir una parte más grande con encaje. Yo he elegido hacerlo con el delantero y por eso he doblado el encaje para cortar una pieza en doblez, igual que la pieza de punto. Decide la altura que quieres que tenga el encaje y cortalo según el patrón original.
Another possibility is to cover a bigger area with lace. I decided to do it with the front piece so I folded the lace in order to be able to cut it on fold, the same as using the knit fabric. Decide where you want your lace to end and cut it according to the original pattern.

De nuevo une el encaje a la pieza de punto con un zig-zag.
Again, use a zig-zag stitch to sew the lace together with the knit fabric.

En la parte de la espalda (pero se puede hacer donde tú quieras) hice otra variación igual que la segunda que os enseñé pero esta vez en la parte de arriba y luego le recorté la tela de abajo (dejando 5 mm de margen desde el zig-zag).
I made another version like I showed you before but this time on the back piece (but you can do it anywhere you'd like) and I cut away the fabric underneith (leaving 5 mm of seam allowance from the zig-zag).

Así queda un efecto transparente y muy bonito. Además necesitas super poco encaje para esto y el resultado merece la pena!
That way it has a transparent look and the effect is very beautiful. Also you need only so little lace to do this and the result really is worth the effort!

También puedes usar tul, lycras y todo tipo de otros tejidos de punto como base, así que tienes un montón de posibilidades! Espero que os haya gustado este post y en el siguiente os enseñaré más trucos y cómo modificar el patrón para tener aún más variaciones.
You can also use stretch mesh, lycras and all other knit fabrics for the base so you have so many possiblities! I hope you liked this post and in the next one I'll show you more hacks for even more variations.