
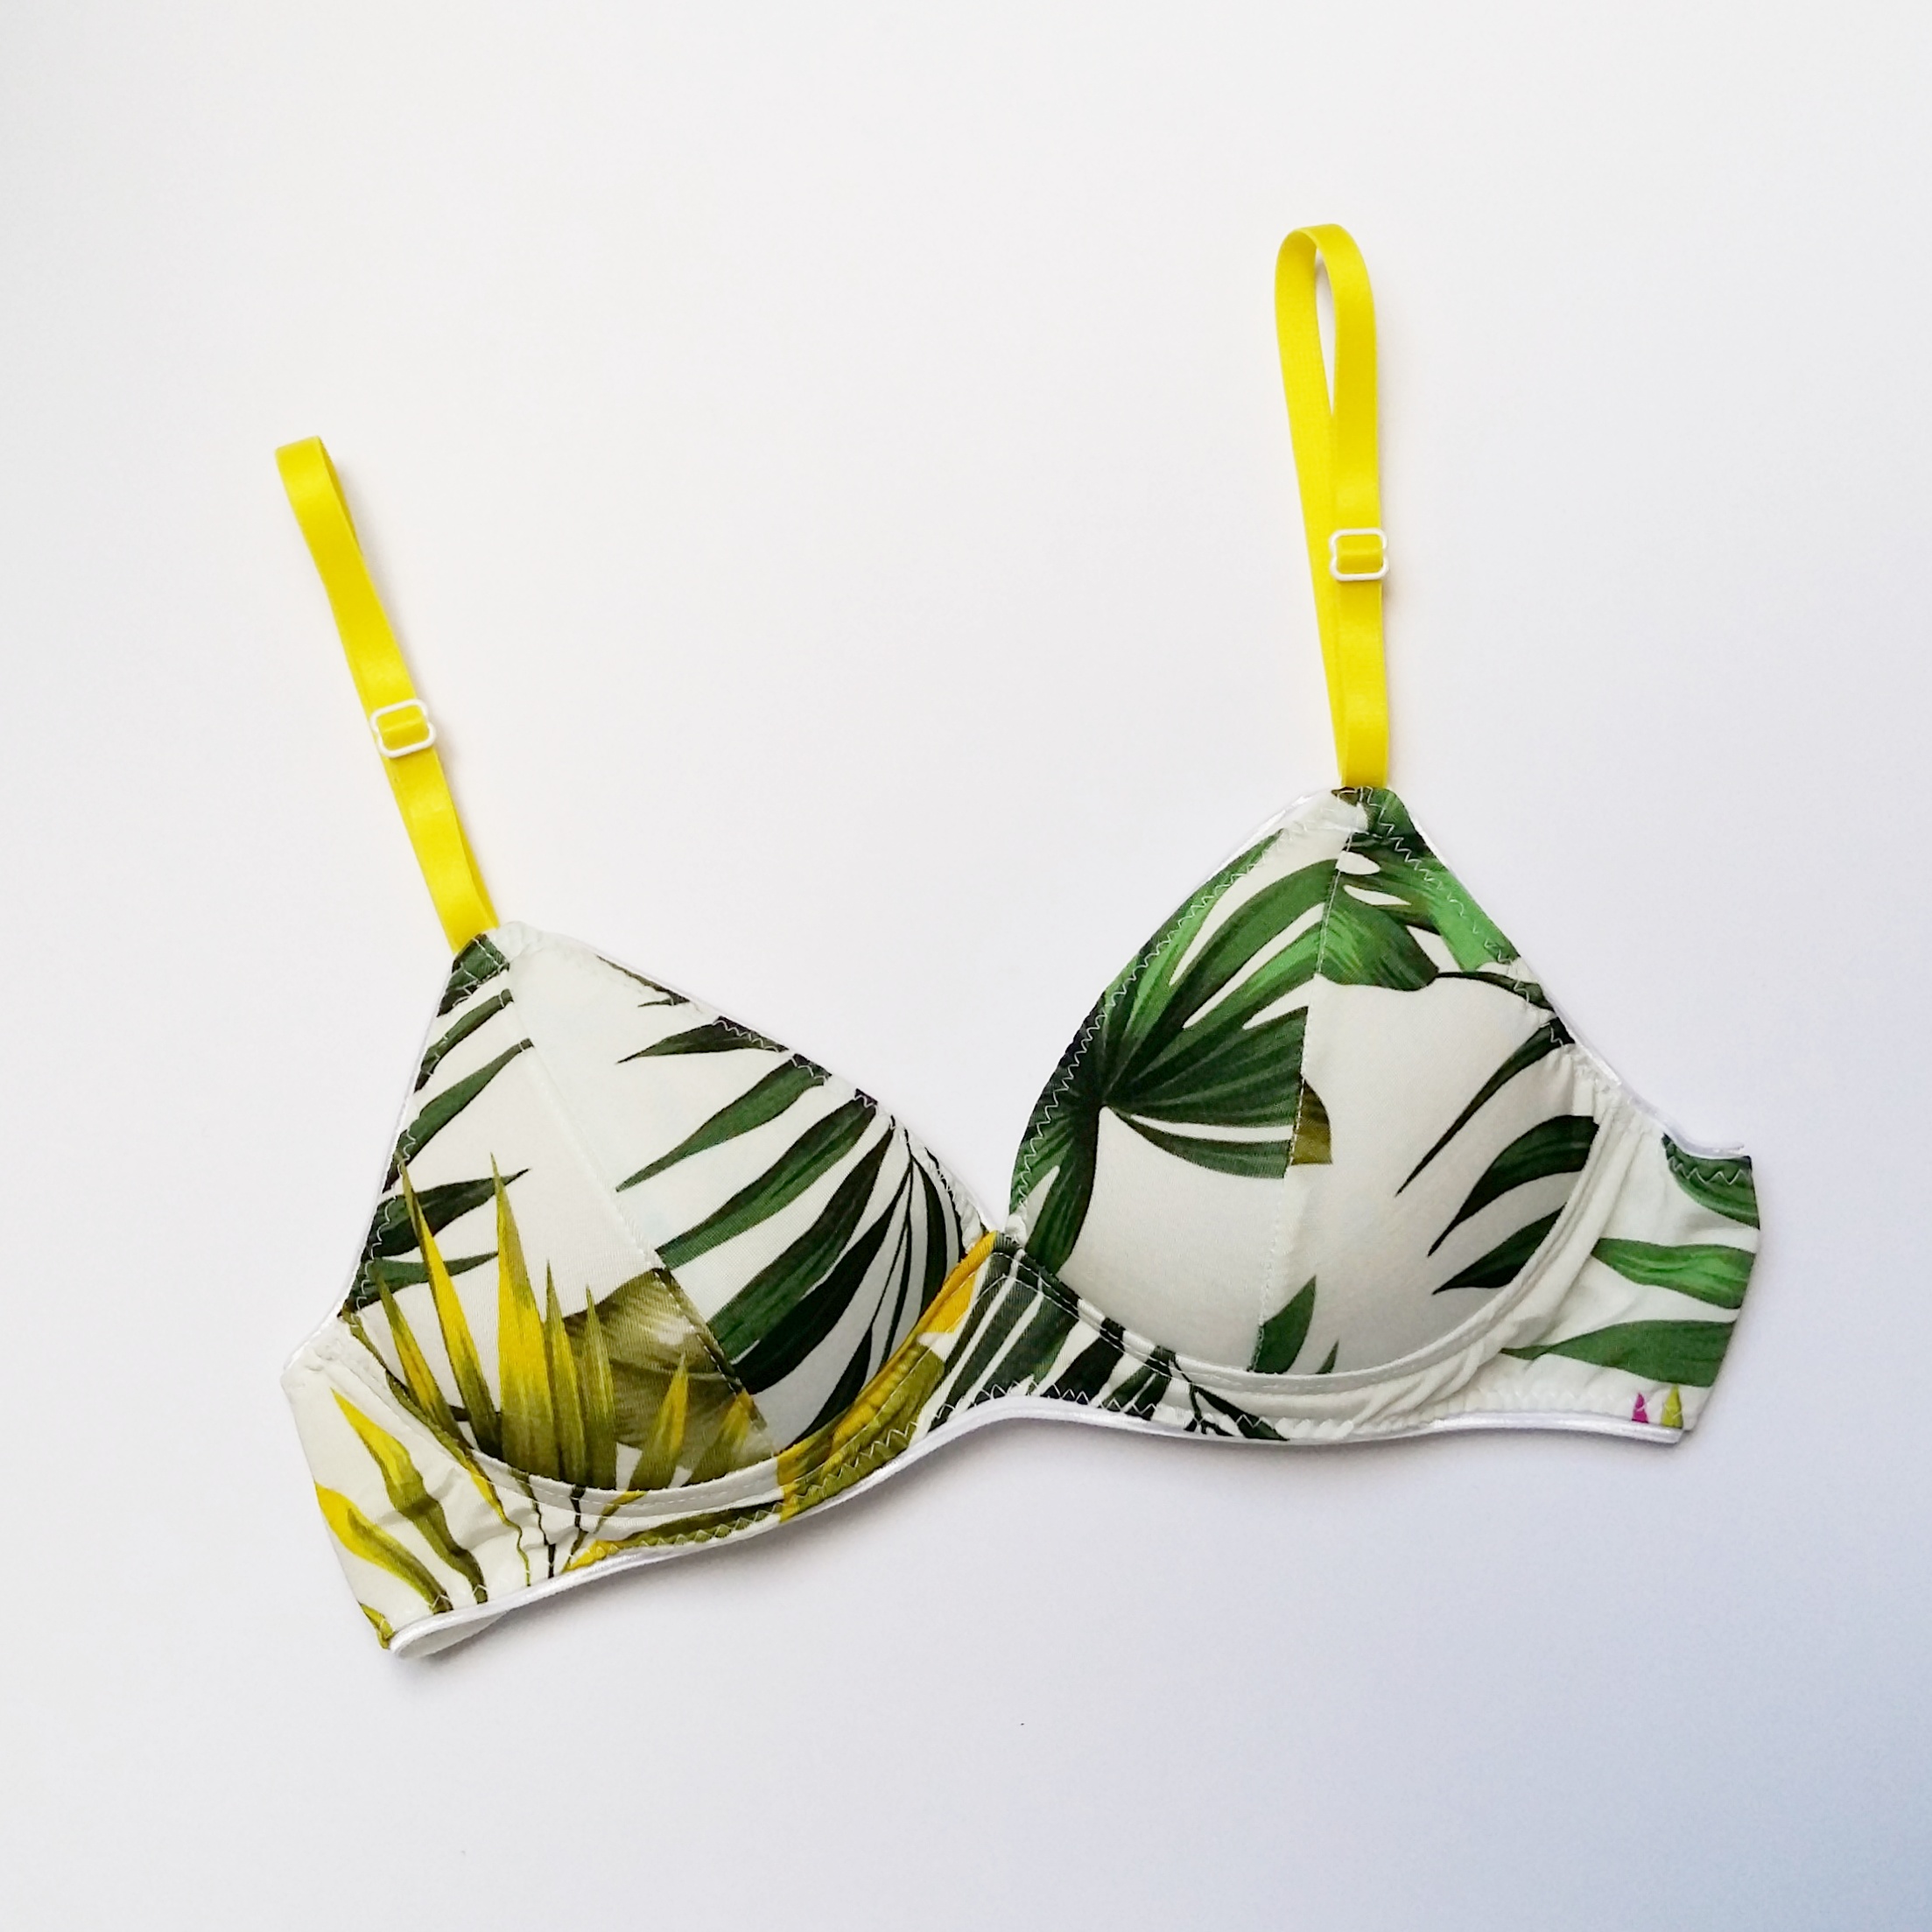
Hola! La semana pasada compartí en Instagram este sujetador Watson que hice con la tela tropical y sus tirantes amarillos...ha quedado muy guay. Esta vez usé en las copas también foam, ya quise probar qué tal sale eso desde hace tiempo y ahora por fin lo hice y estoy muy contenta...me parece muy muy práctico. Algunas me preguntábais sobre cómo coser las copas de foam con este patrón y pensé que lo mejor era hacer un tutorial, así que aquí lo tenéis.
Un par de cosas antes. El patrón es el Watson de Cloth Habit que he hecho mil veces, está en varias entradas en este blog. Este patrón está hecho para telas de punto con elasticidad en las copas: las copas tienen que ser de material elástica para que vaya bien la talla. Cuando le pones foam, cosa que no es elástica, el sujetador ya no queda igual. Yo tengo una copa AA y en mi caso no hay problema, no necesito esa elasticidad en las copas (por fin algo bueno, jaja), así que añadir foam no es problema. Si tu copa es más grande, puede que el experimento no te sirve, pero yo haría la prueba, quizás subiendo una talla o dos en las copas, te queda bien.
Hice el sujetador tropical y lo llevé para saber si todo va bien a pesar de los cambios. Efectivamente, en mi caso todo bien. El único fallo que vi es que ahora que las copas son más rígidas, me siento que están demasiado juntos en el medio. Cómo véis, este patrón no tiene la parte central (bridge) en distintos tamaños como otros patrones como por ejemplo Boylston, eso se compensa precisamente con que las copas son elásticas. Así que ahora que iba a hacer un nuevo suejetador para este tutorial, hice también el experimento de aumentar el ancho de la parte central para ver si así consigo la perfección. Te cuanto el resultado en el final!
Y antes de empezar también quería añadir que no he puesto todos los pasos de cómo coser el Watson porque ya existe todo un coseconmigo sobre eso en el blog de Cloth Habit, sólo estoy enseñando los detalles que conlleva el tema del foam. El foam que uso se llama en ingés cut-and-sew foam y es básicamente el material para poder coser copas según tu talla.
Hey! Last week I shared on Instagram this Watson bra I made with tropical print fabric and those lemon straps...it turned out really cool. This time I also used foam in the cups as it was a thing I had wanted to try out for a while now and I'm very happy with the result...I find it very practical. Some of you asked me about the construction process for the foam cups with this pattern so I thought it would be good to make a tutorial and here it is.
But first some things to consider. The pattern is the Watson bra from Cloth Habit, I've made tons of them and they're all here in the blog too. This pattern is drafted for elastic knit fabrics for the cups: the cups need the stretch factor to fit well. When you add foam to these cups, a material that has no stretch, the fit is not the same anymore. I'm an AA cup so for me the stretch factor is not a problem, I don't really need it in the cups (finally, something good, haha), so adding foam is no problem. If you have bigger cups that experiment might not work, but I'd still give it a try, maybe going up one or two sizes can work out for you.
I made the tropical bra and wore it to see if everything was good even with these changes, and it was. The only downside I saw was that as the cups are now rigid, they were too close together in the center for me. As you can see, this pattern does not have different bridge widths for different bra sizes like other bra patterns do (like Boylston for example), it is compensated by the stretch in the cup fabric. So as I needed to make another bra for this tutorial I decided to alter the bridge width to see if I can get closer to the bra fit perfection. I'll tell you about the result in the end!
And for the last thing to mention: I didn't write out all the steps because there already is a good sewalong about making a Watson bra on Cloth Habits blog, I've only described the parts that are changed by the foam factor. And the material I'm using is a cut-and-sew foam which is basically a material to construct your own bra and swimwear cups.
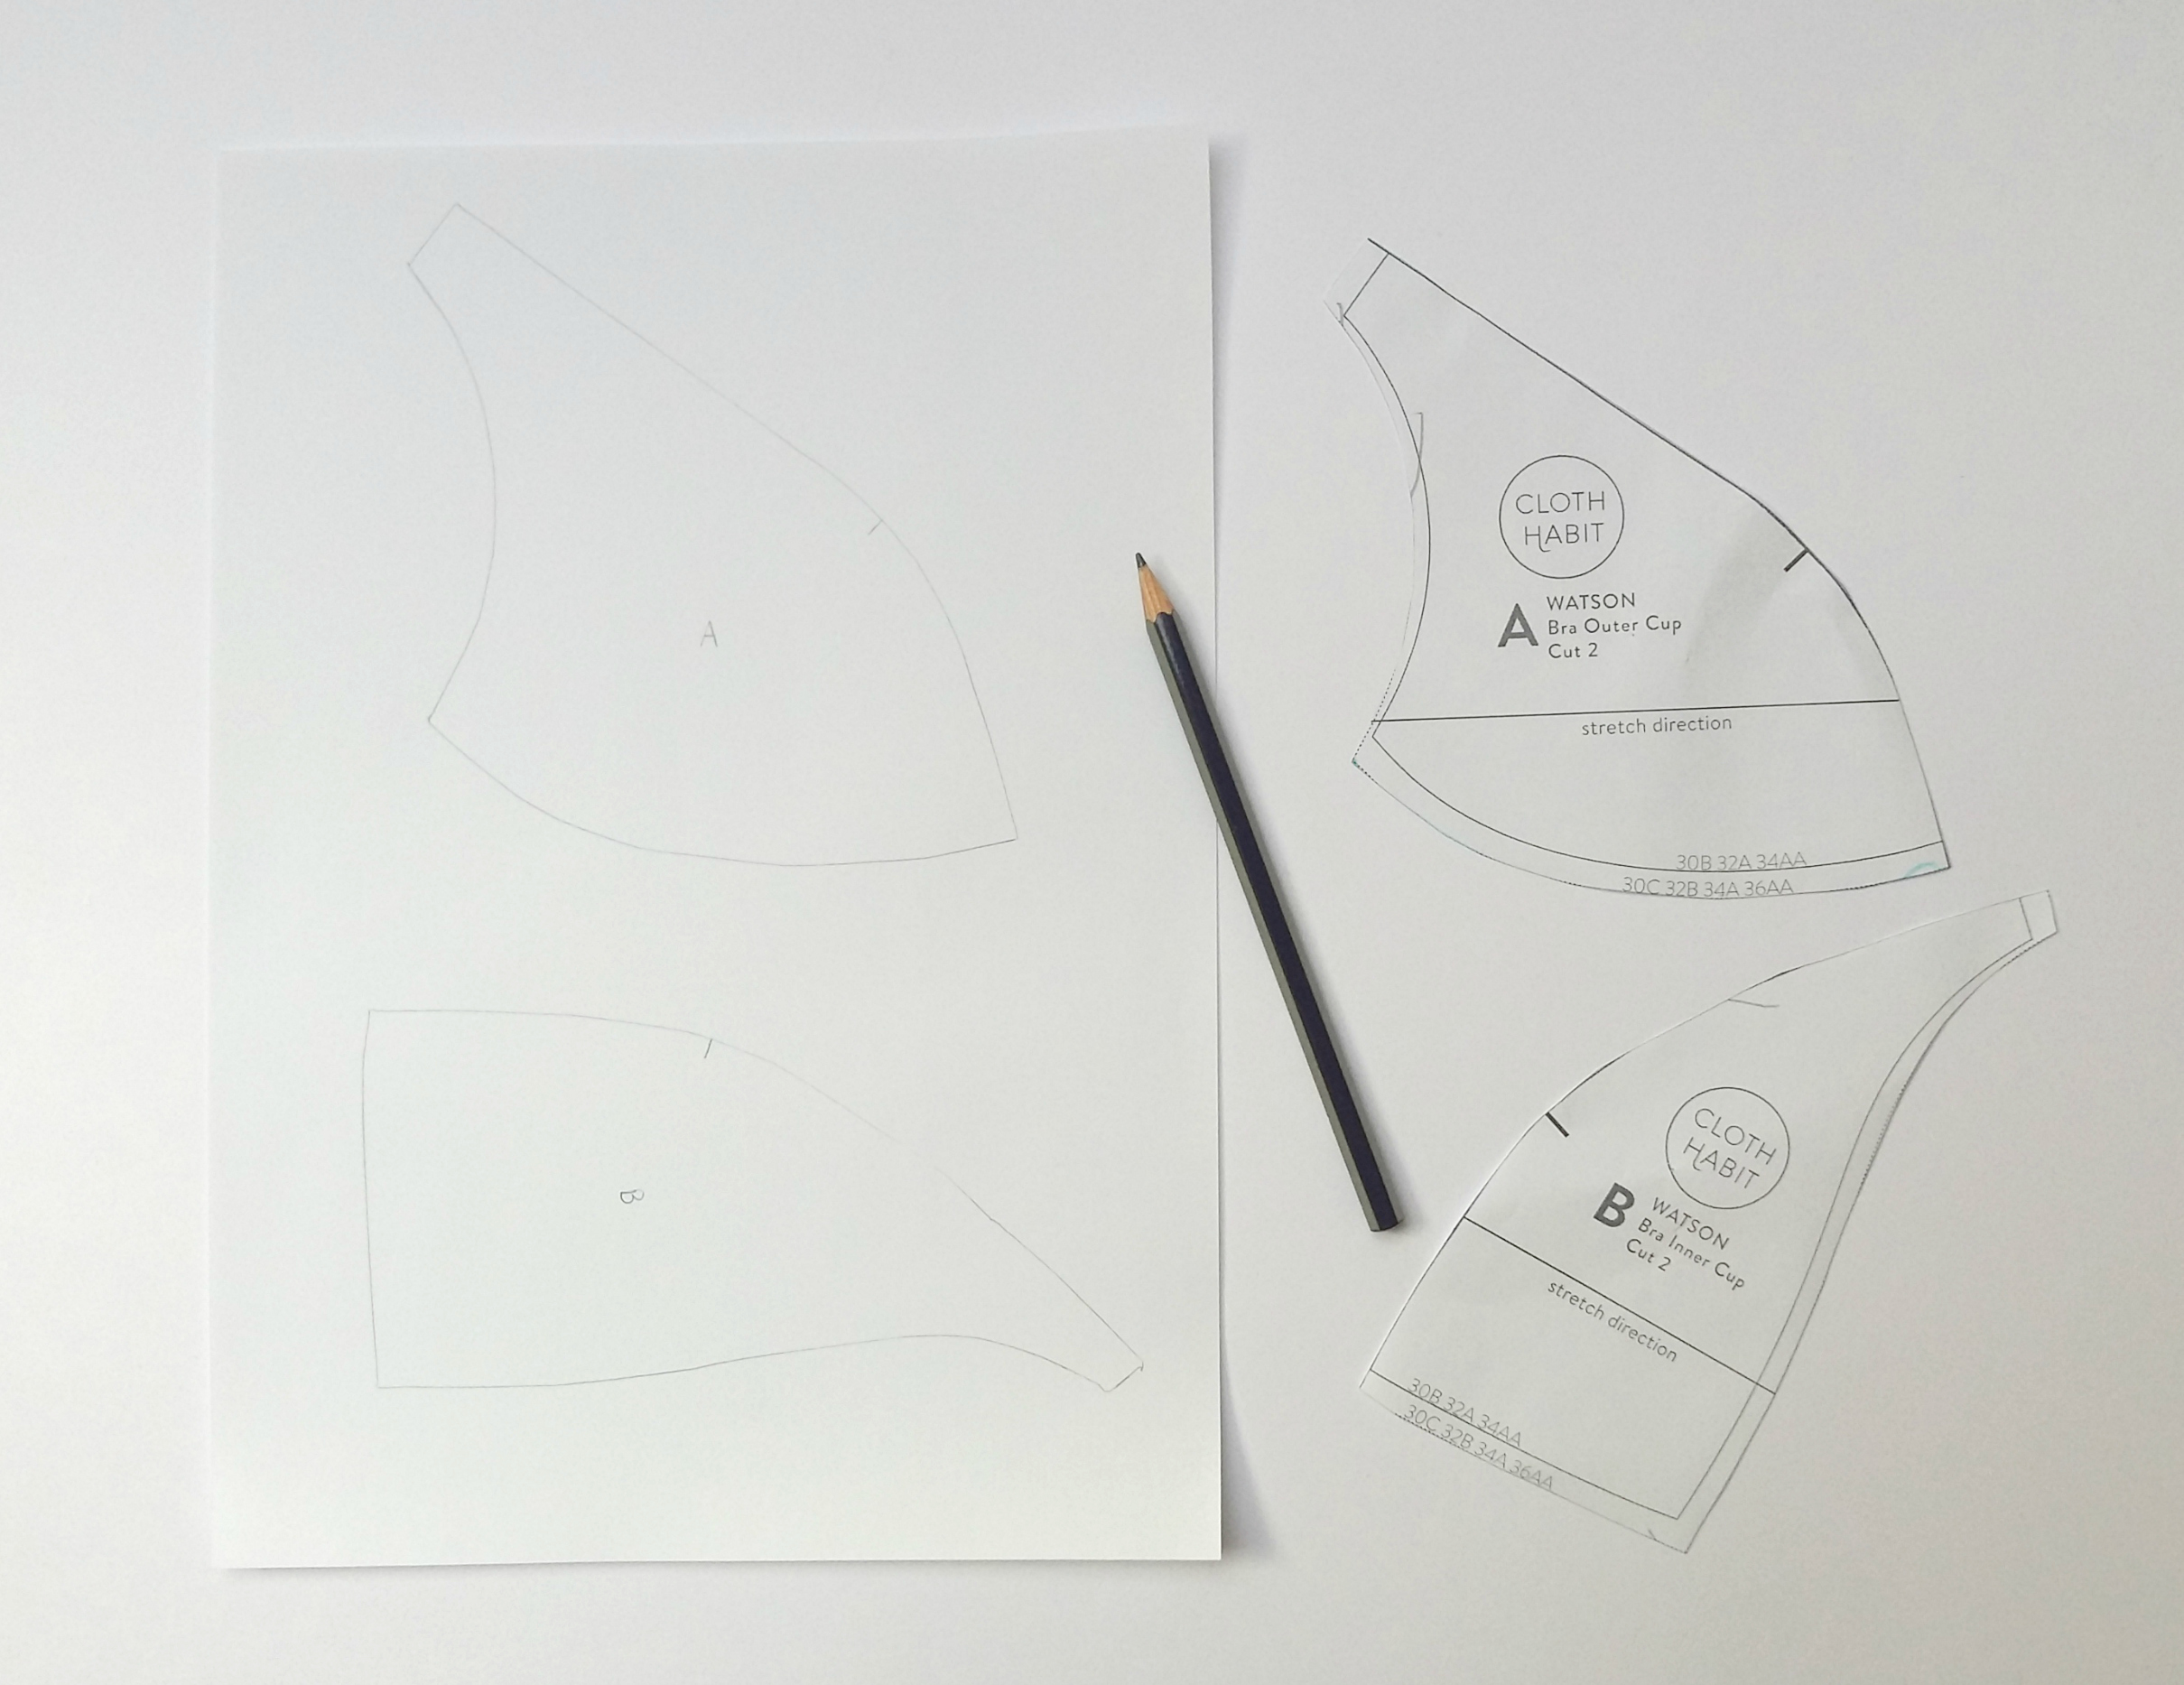
Para poder coser las copas de foam hay que primero modificar el patrón de las copas. Es necesario por dos razones:
1. en la copa de foam las dos partes de la copa se unen lado con lado con un zigzag, no necesitan margen de costura
2. al aplicar el elástico en las copas, hay que reducir el margen de costura en la parte del foam porque si lo coses con foam y la doble pasada de zigzag como es lo normal, eso quedaría demasiado gordo (si nunca has cosido los elásticos de lencería, puedes mirar este post)
Para más información sobre modificaciones para las copas de foam también puedes leer este tutorial muy útil de Cloth Habit.
In order to sew foam cups you first need to alter the original cup pieces. It's necesary for two reasons:
1. the foam cup pieces are sewn together side by side using a zigzag stitch, they don't need a seam allowance there
2. when you sew the elastic on the cups you need to reduce the seam allowance on the foam cup part because if you'd sew the elastic like it's normally done with two zigzag rows you'd need to fold the foam and it would be too bulky (if you've never sewn lingerie elastics before you can read this post about it)
For more information on altering patterns for foam you can read this very useful tutorial from Cloth Habit.
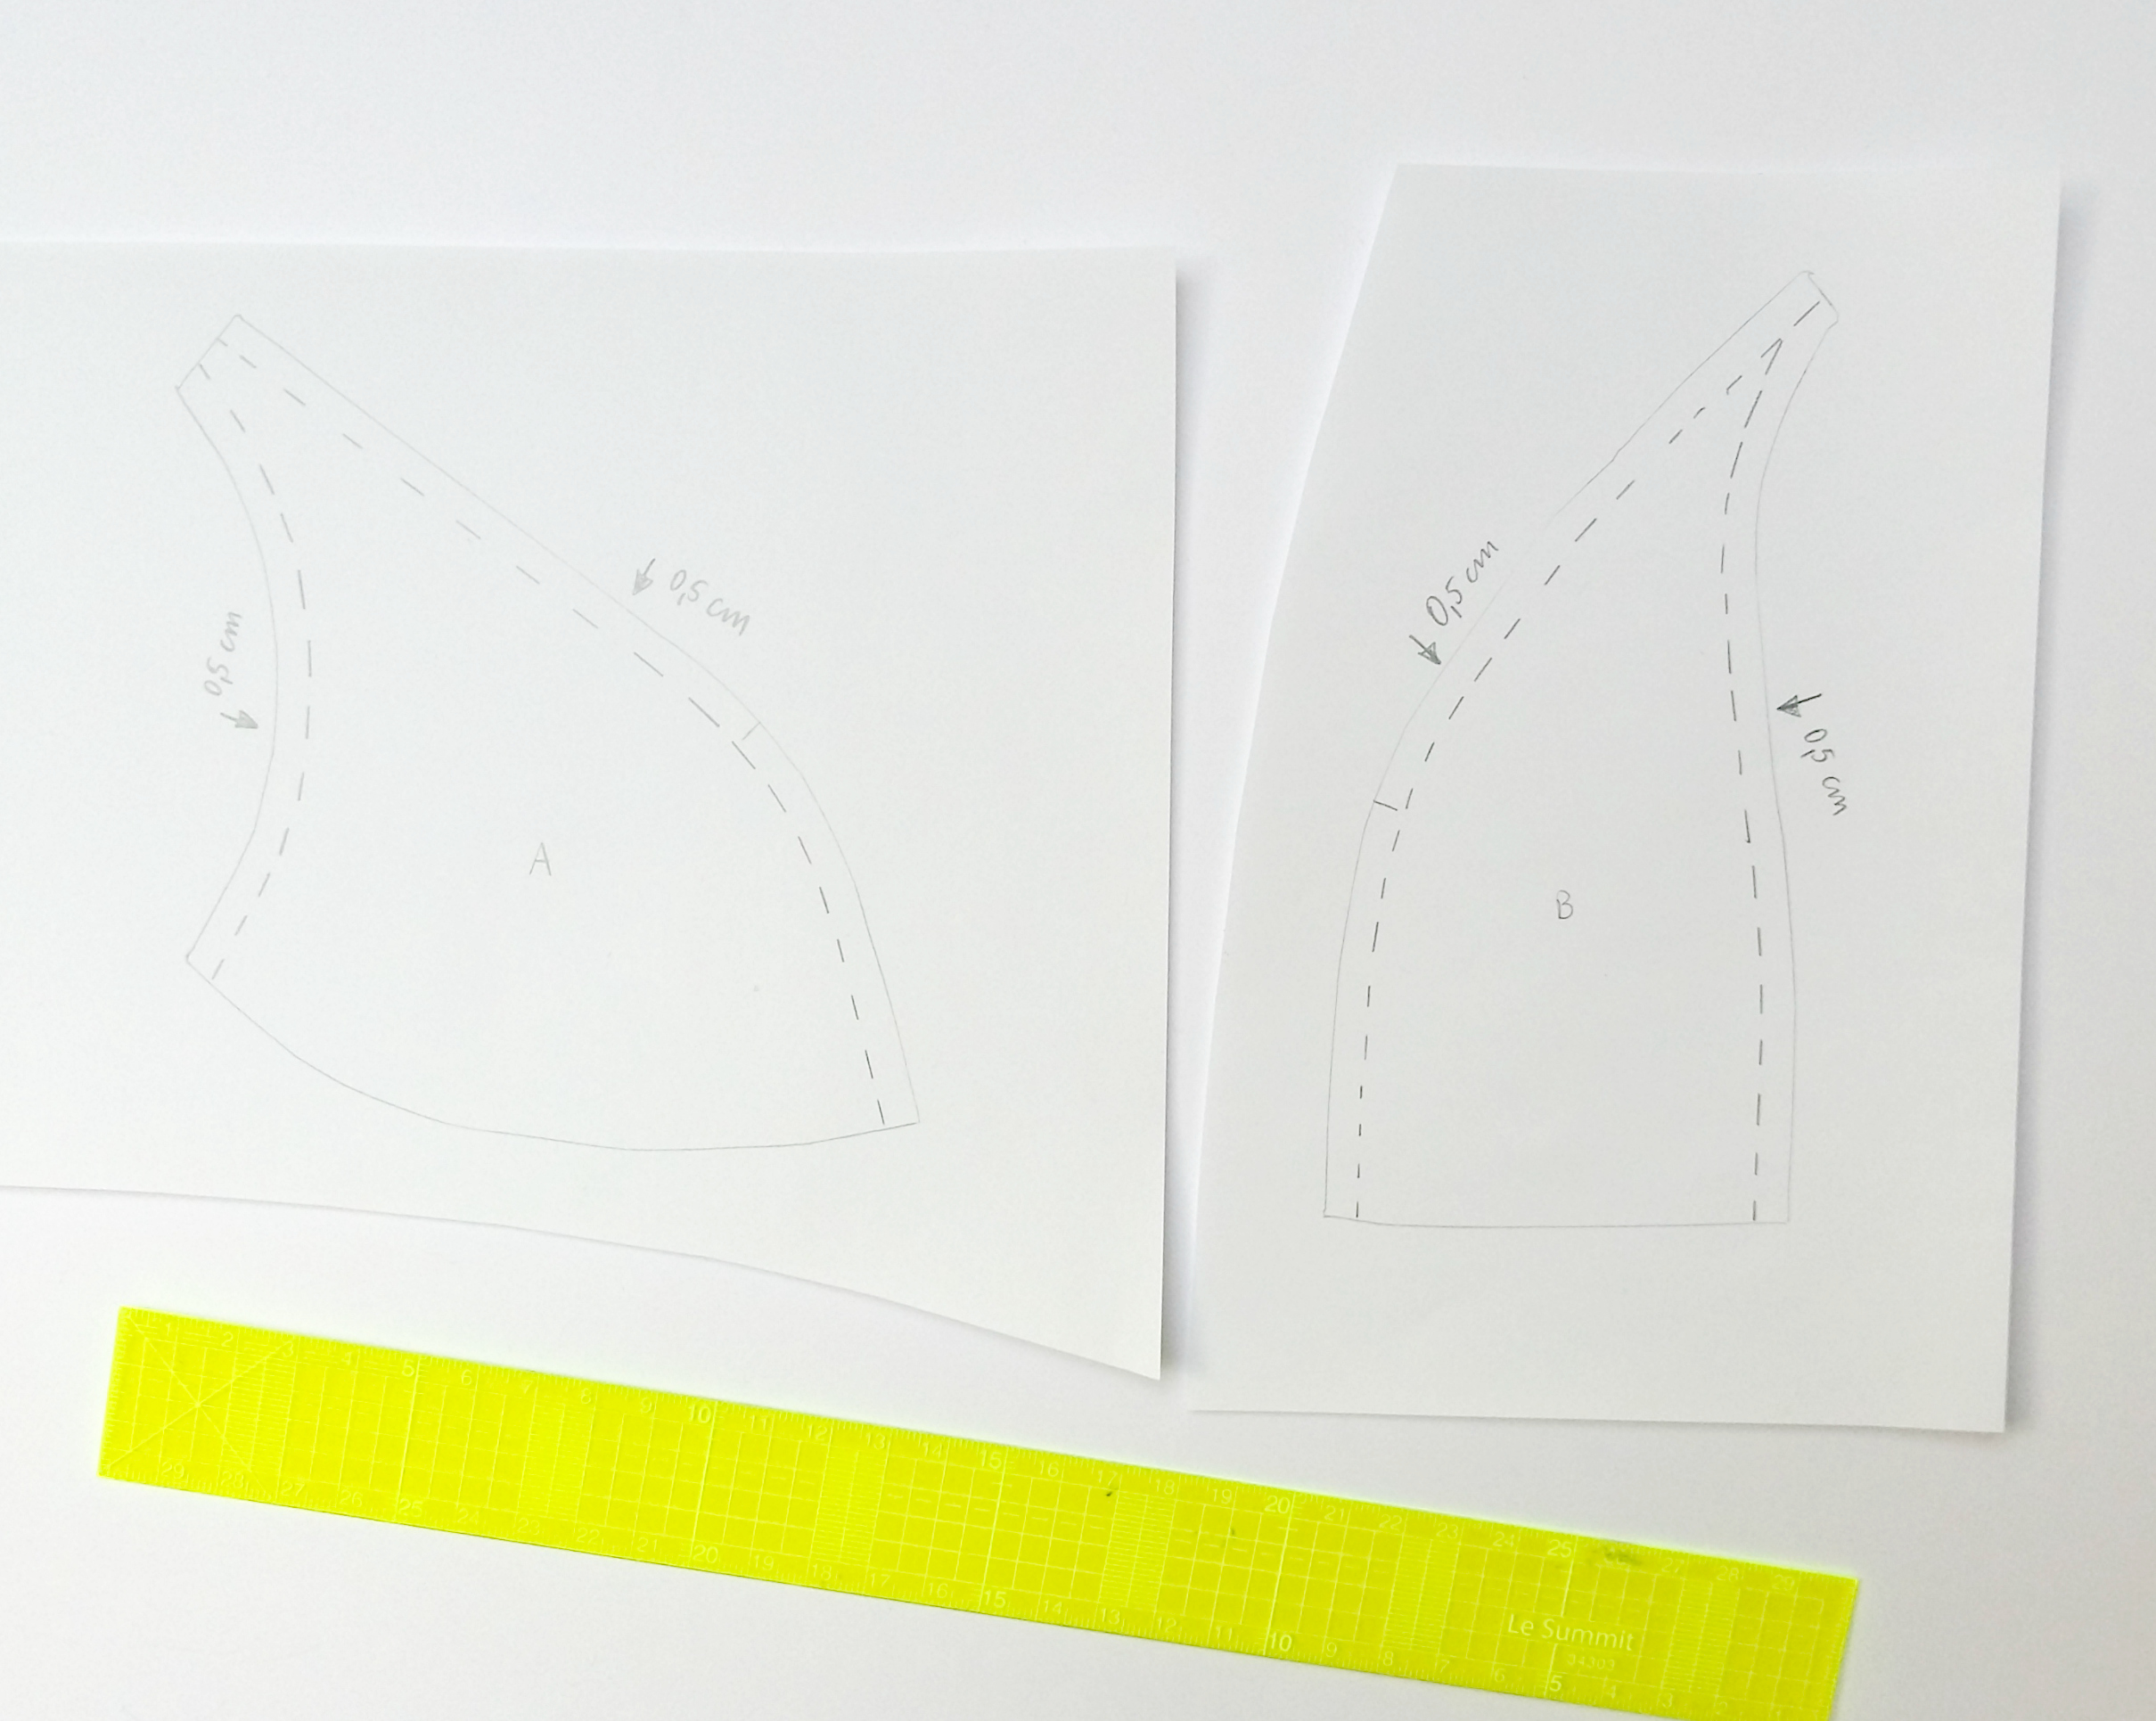
Así que por eso hay que quitar el margen de costura de 0,5 cm que lleva el patrón tanto en la costura central de la copa (donde está el piquete) y en los dos "costados", tanto en la parte exterior como en el interior de la copa. La parte de abajo se queda lo mismo porque necesitamos ese margen de costura para poder juntar luego la copa con la banda del sujetador.
No te olvides marcar los piquetes y recorta el patrón para las copas de foam.
So that's the reason the seam allowance of 0,5 cm has to be removed from both the central seam of the cup (where the notches are) and also from the "side" seams, on the exterior and interior sides of the cup pieces.The bottom part stays the same as we need that foam seam allowance to be able to attach the cups to the bridge later.
Don't forget to mark the notches on your new pattern pieces and then cut out the new foam patterns.

Ahora la otra parte de mi experimento que ya conté antes, eso no tiene que ver con foam pero quería hacer la parte central (bridge) más ancho. Me medí y vi que unos 1,5 cm de ancho estaría bien entre las copas, así que añadí 0,75 cm para el centro deoblez (0,75 cm porque luego se dobla) y quité la misma cantidad en el otro borde porque la banda en sí me iba bien, sino hubiera quedado demasiado ancha. Una cosa que me olvidé y lo vi después al coser es que donde añadí estos 0,75 cm hay que añadir también 0,5 cm para arriba (el largo de la parte que hice más ancha). Eso es para poder unir por esa costura la capa exterior y la capa de forro de lencería (sheer lining) y no perder allí margen. Así que eso no está dibujado pero hay que añadirlo.
Now the other part of my experiment, as I told you before it's not directly related to the foam part of this tutorial. I wanted to make the bridge wider and I measured that it should be 1,5 cm wide, so I added 0,75 cm to the center fold (0,75 cm because it will be double when cut) and I took away the same quantity on the side of the pattern piece as the diameter whole band was OK and I didn't want it to be too big for me. I forgot one thing and saw it later when sewing: you need to add 0,5 cm above the bridge (the part that I extended). This makes it possible to sew together the outer fabric layer of the bridge and the inner sheer lining layer, otherwise you'd lose margin there. So this part is not drawn on the photo but needs to be added.
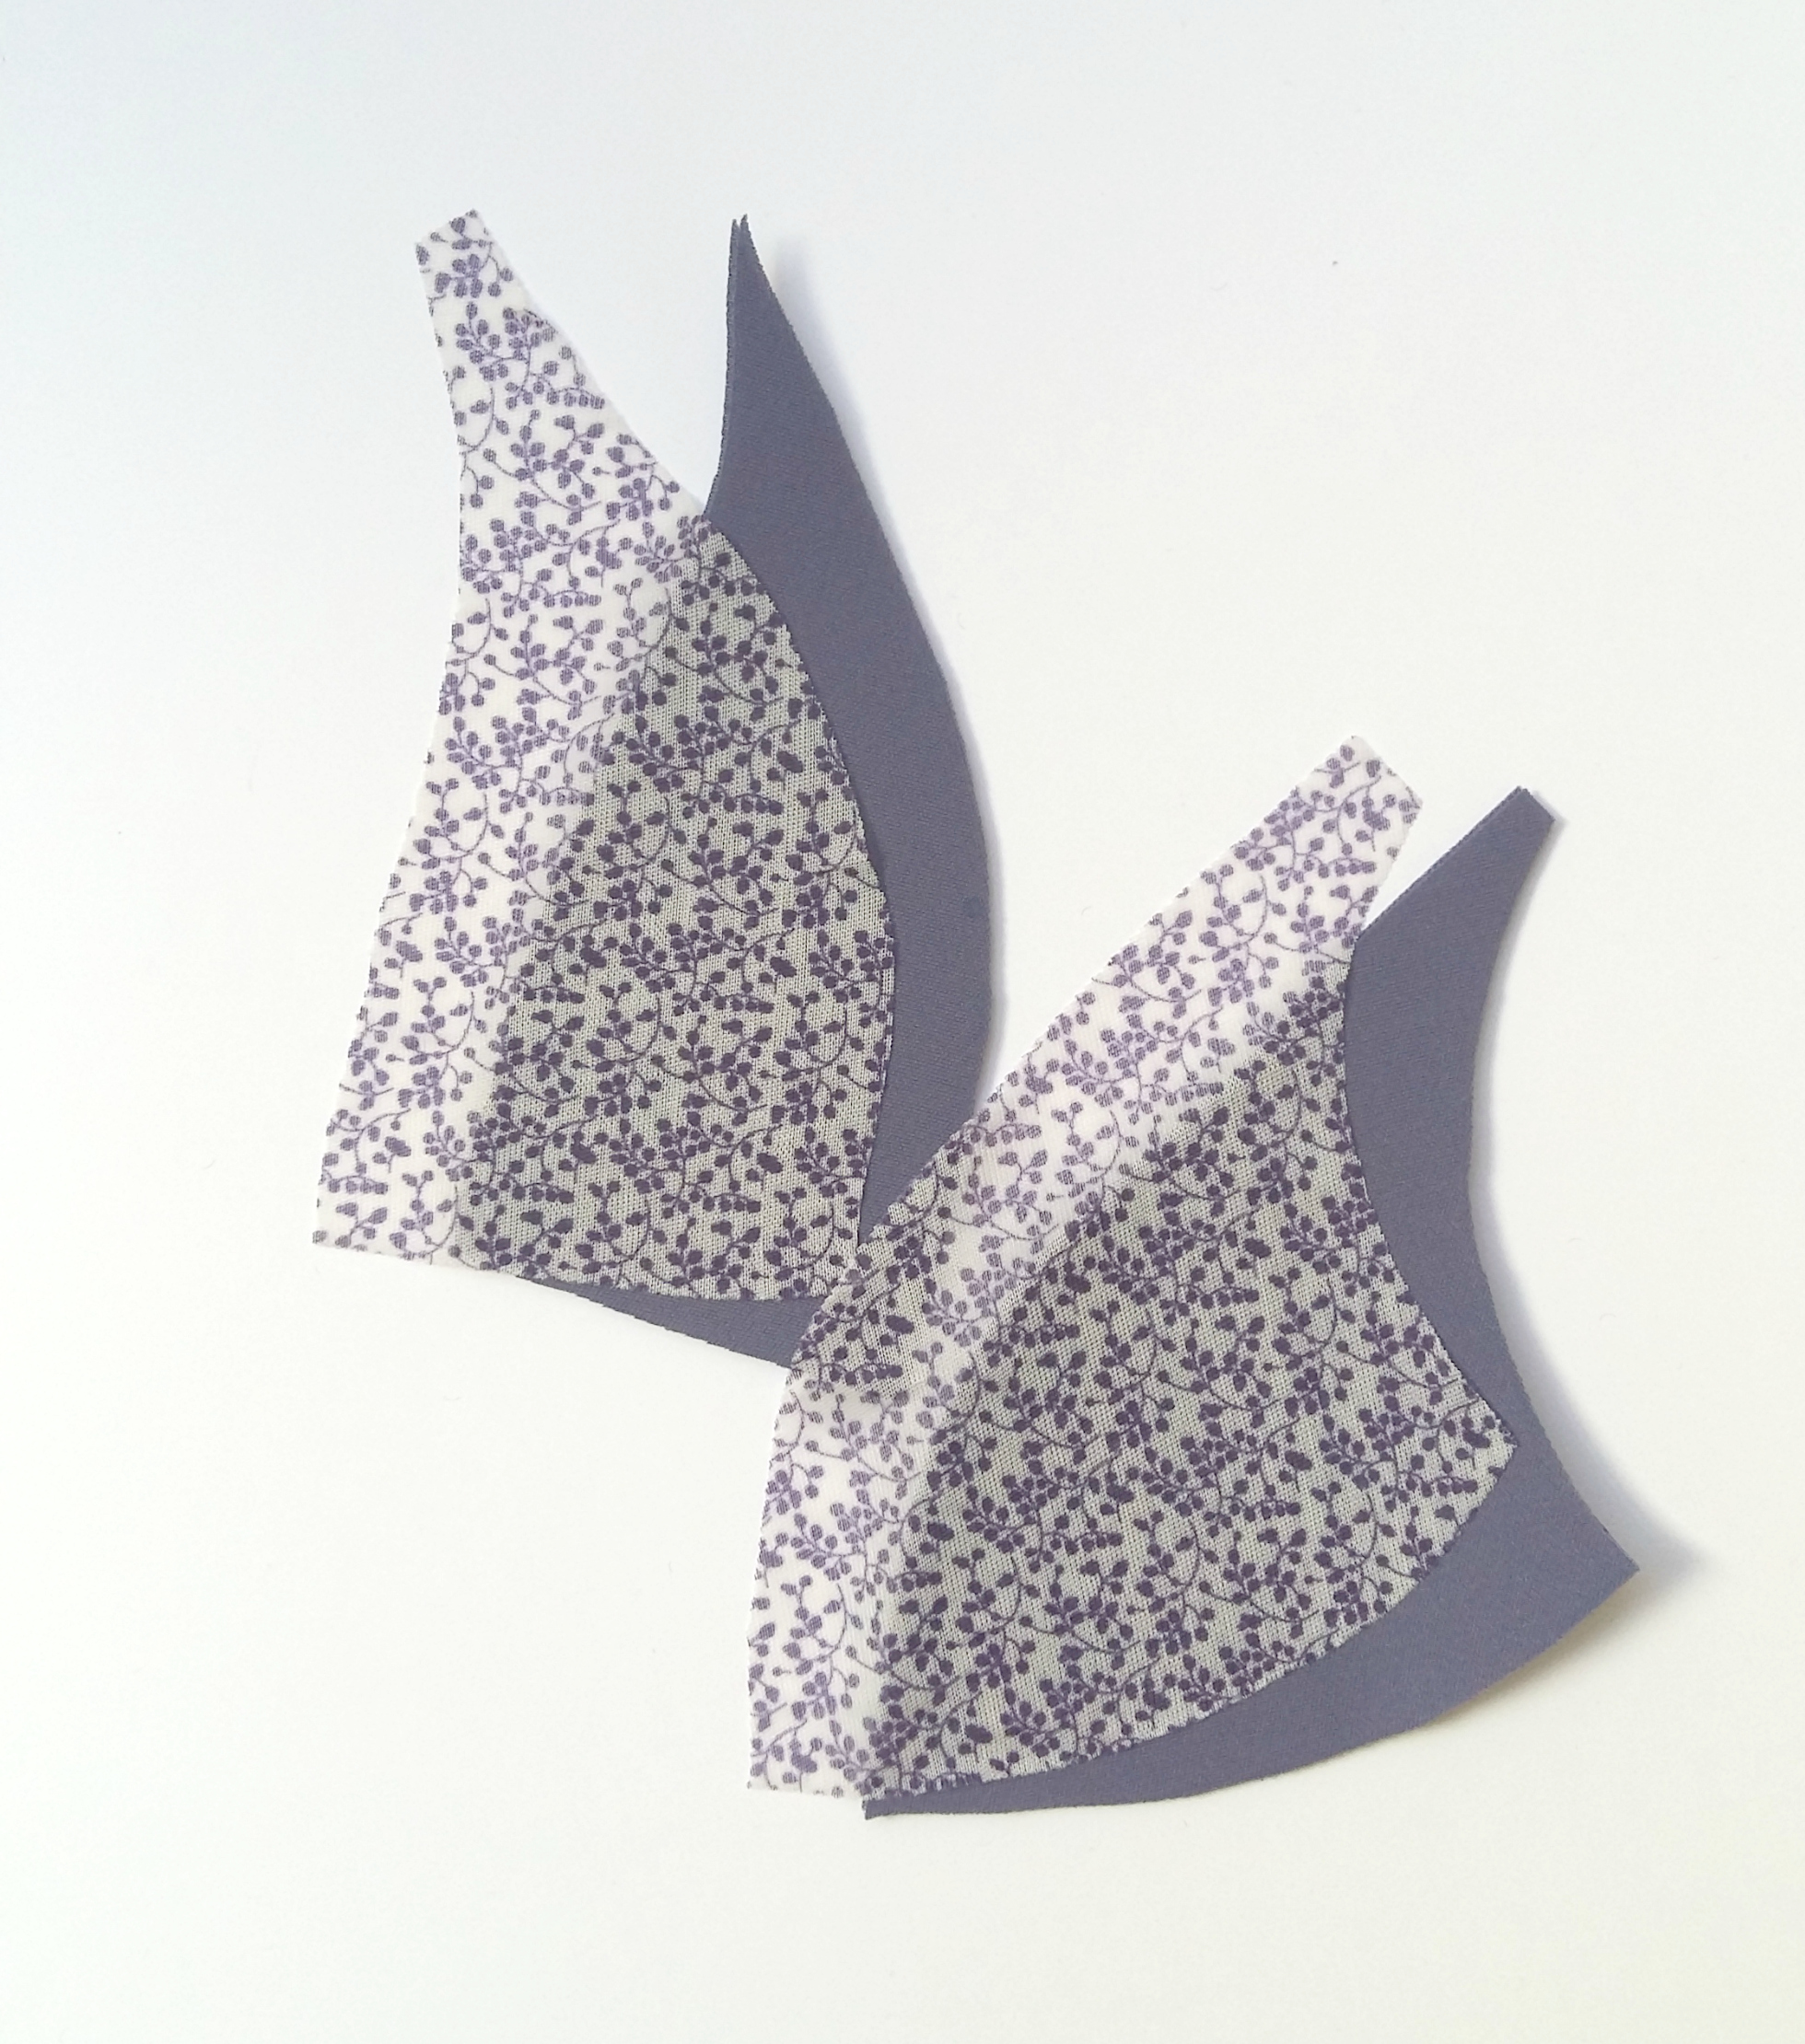
Ahora hay que cortar las piezas: las de tela según las piezas originales y las del foam según los nuevos patrones.
You now cut the fabric cup pieces according to the original pattern pieces and the foam according to the new pattern pieces.
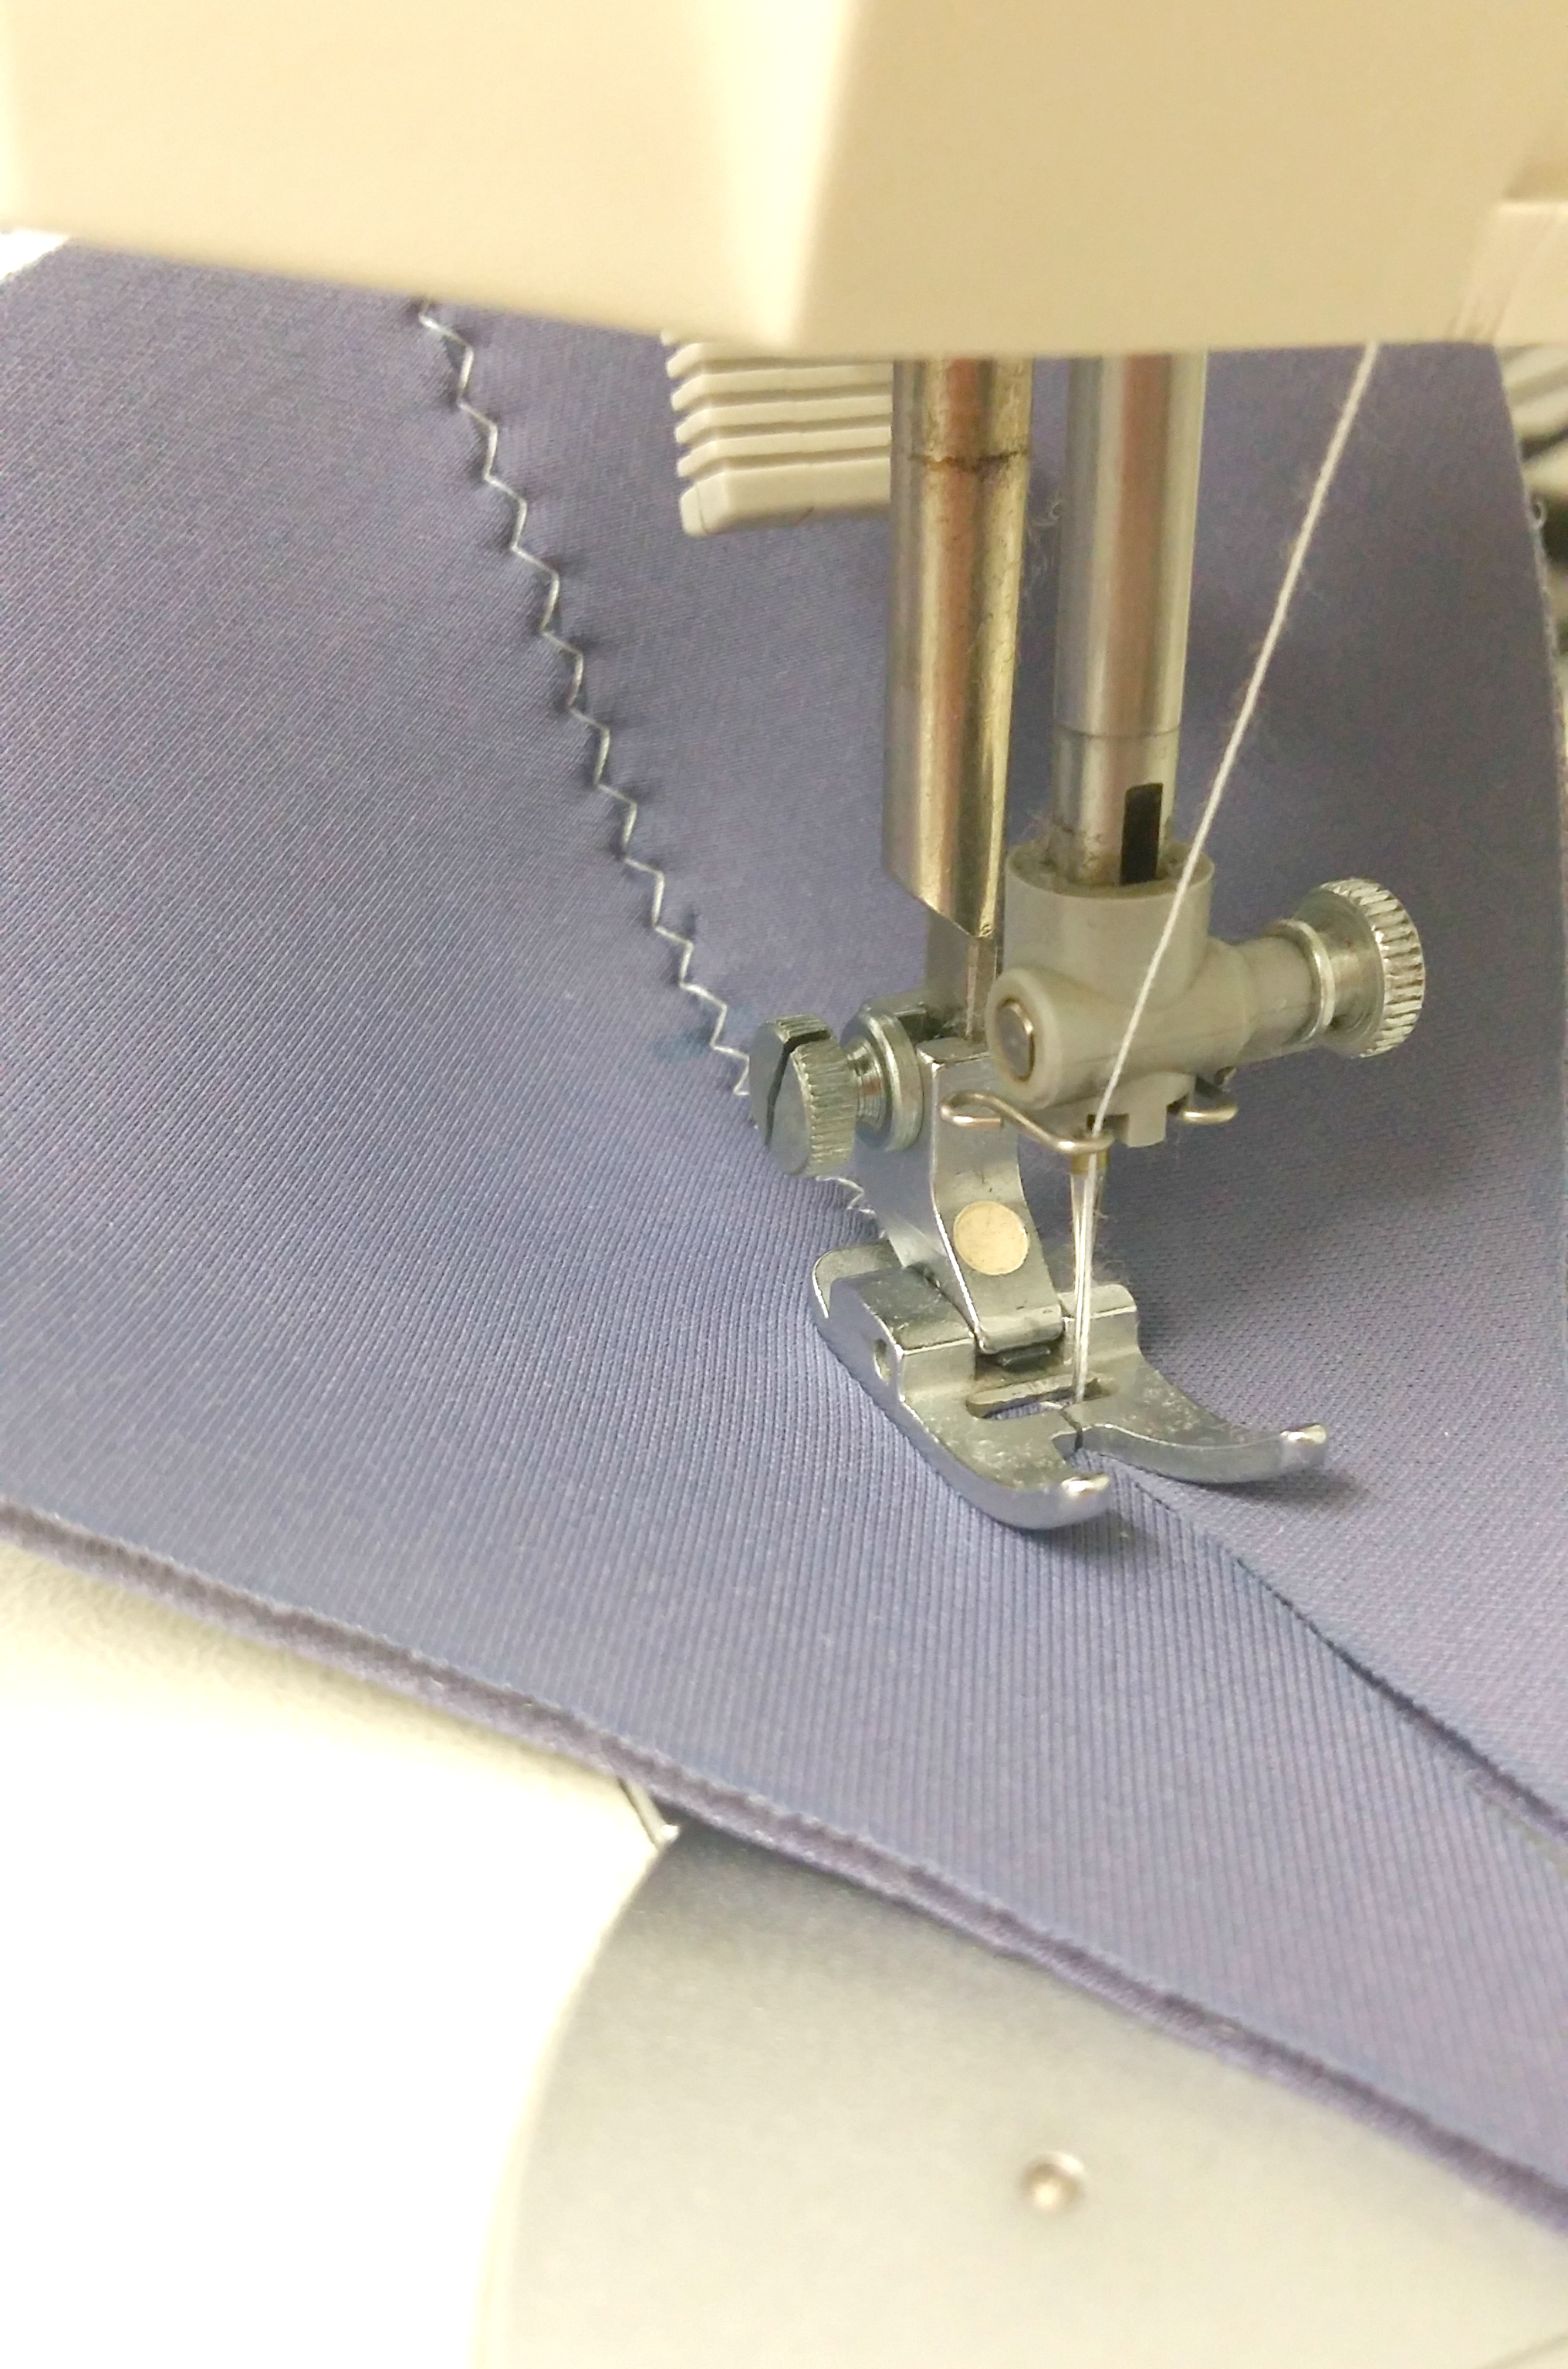
Las partes de las copas de foam se unen entre sí con zigzag. En esa foto el zigzag es pequeño porque la máquina que uso aquí es antigua y no tiene la función de poder regular tanto el ancho como el large de zigzag. Así que primero cosí con ese zigzag y después hice otra vuelta con el zigzag de tres puntos para asegurar que esté todo pillado. Si puedes regular el zigzag, elige una puntada ancha y corta, así es más seguro.
Tienes que juntar las piezas y sujetarlos juntos mientras coses con el zigzag por el medio, pillando las dos capas. Mientras coses, la copa se va tomando forma y al terminar tienes una pieza 3D...es pura mágia, jaja.
The foam cup pieces are sewn together with zigzag. In this photo you see a small zigzag because I'm using an old machine that doesn't have a possibility to change zigzag stitch width and length. So first I used this small zigzag and then later did another round with a three-step zigzag to be sure that everything was under control. If you can change your zigzag stitch, choose a wide and short one.
You need to put the pieces side by side and keep them aligned while you sew both of them together with the zigzag. While you sew the central seam the cup starts to turn into a new shape and when you finish you'll have a 3D piece...pure magic, hehe.

Puedes usar el mimso color de hilo que tu foam y sólo unirlo todo con zigzag y dearlo así o también puedes hacer una tira para cubrir el zigzag. Yo prefiero la segunda opción ya que me parece que todo queda más limpio por dentro del sujetador. Para la tira puedes usar el forro de lencería (sheer lining) cortado en dirección de bies, yo usé un ancho de 2,5 cm y el largo lo medí por el largo de mi costura que quería tapar.
You can use the same color thread as your foam, sew the zigzag and leave it that way or you can also cover the seam with a fabric strip. I prefer the second option as it's all nice and clean both on the inside and on the outside. You can use a strip of sheer lining cut on bias for that, mine was 2,5 cm wide and the length is according to the seam you're covering.
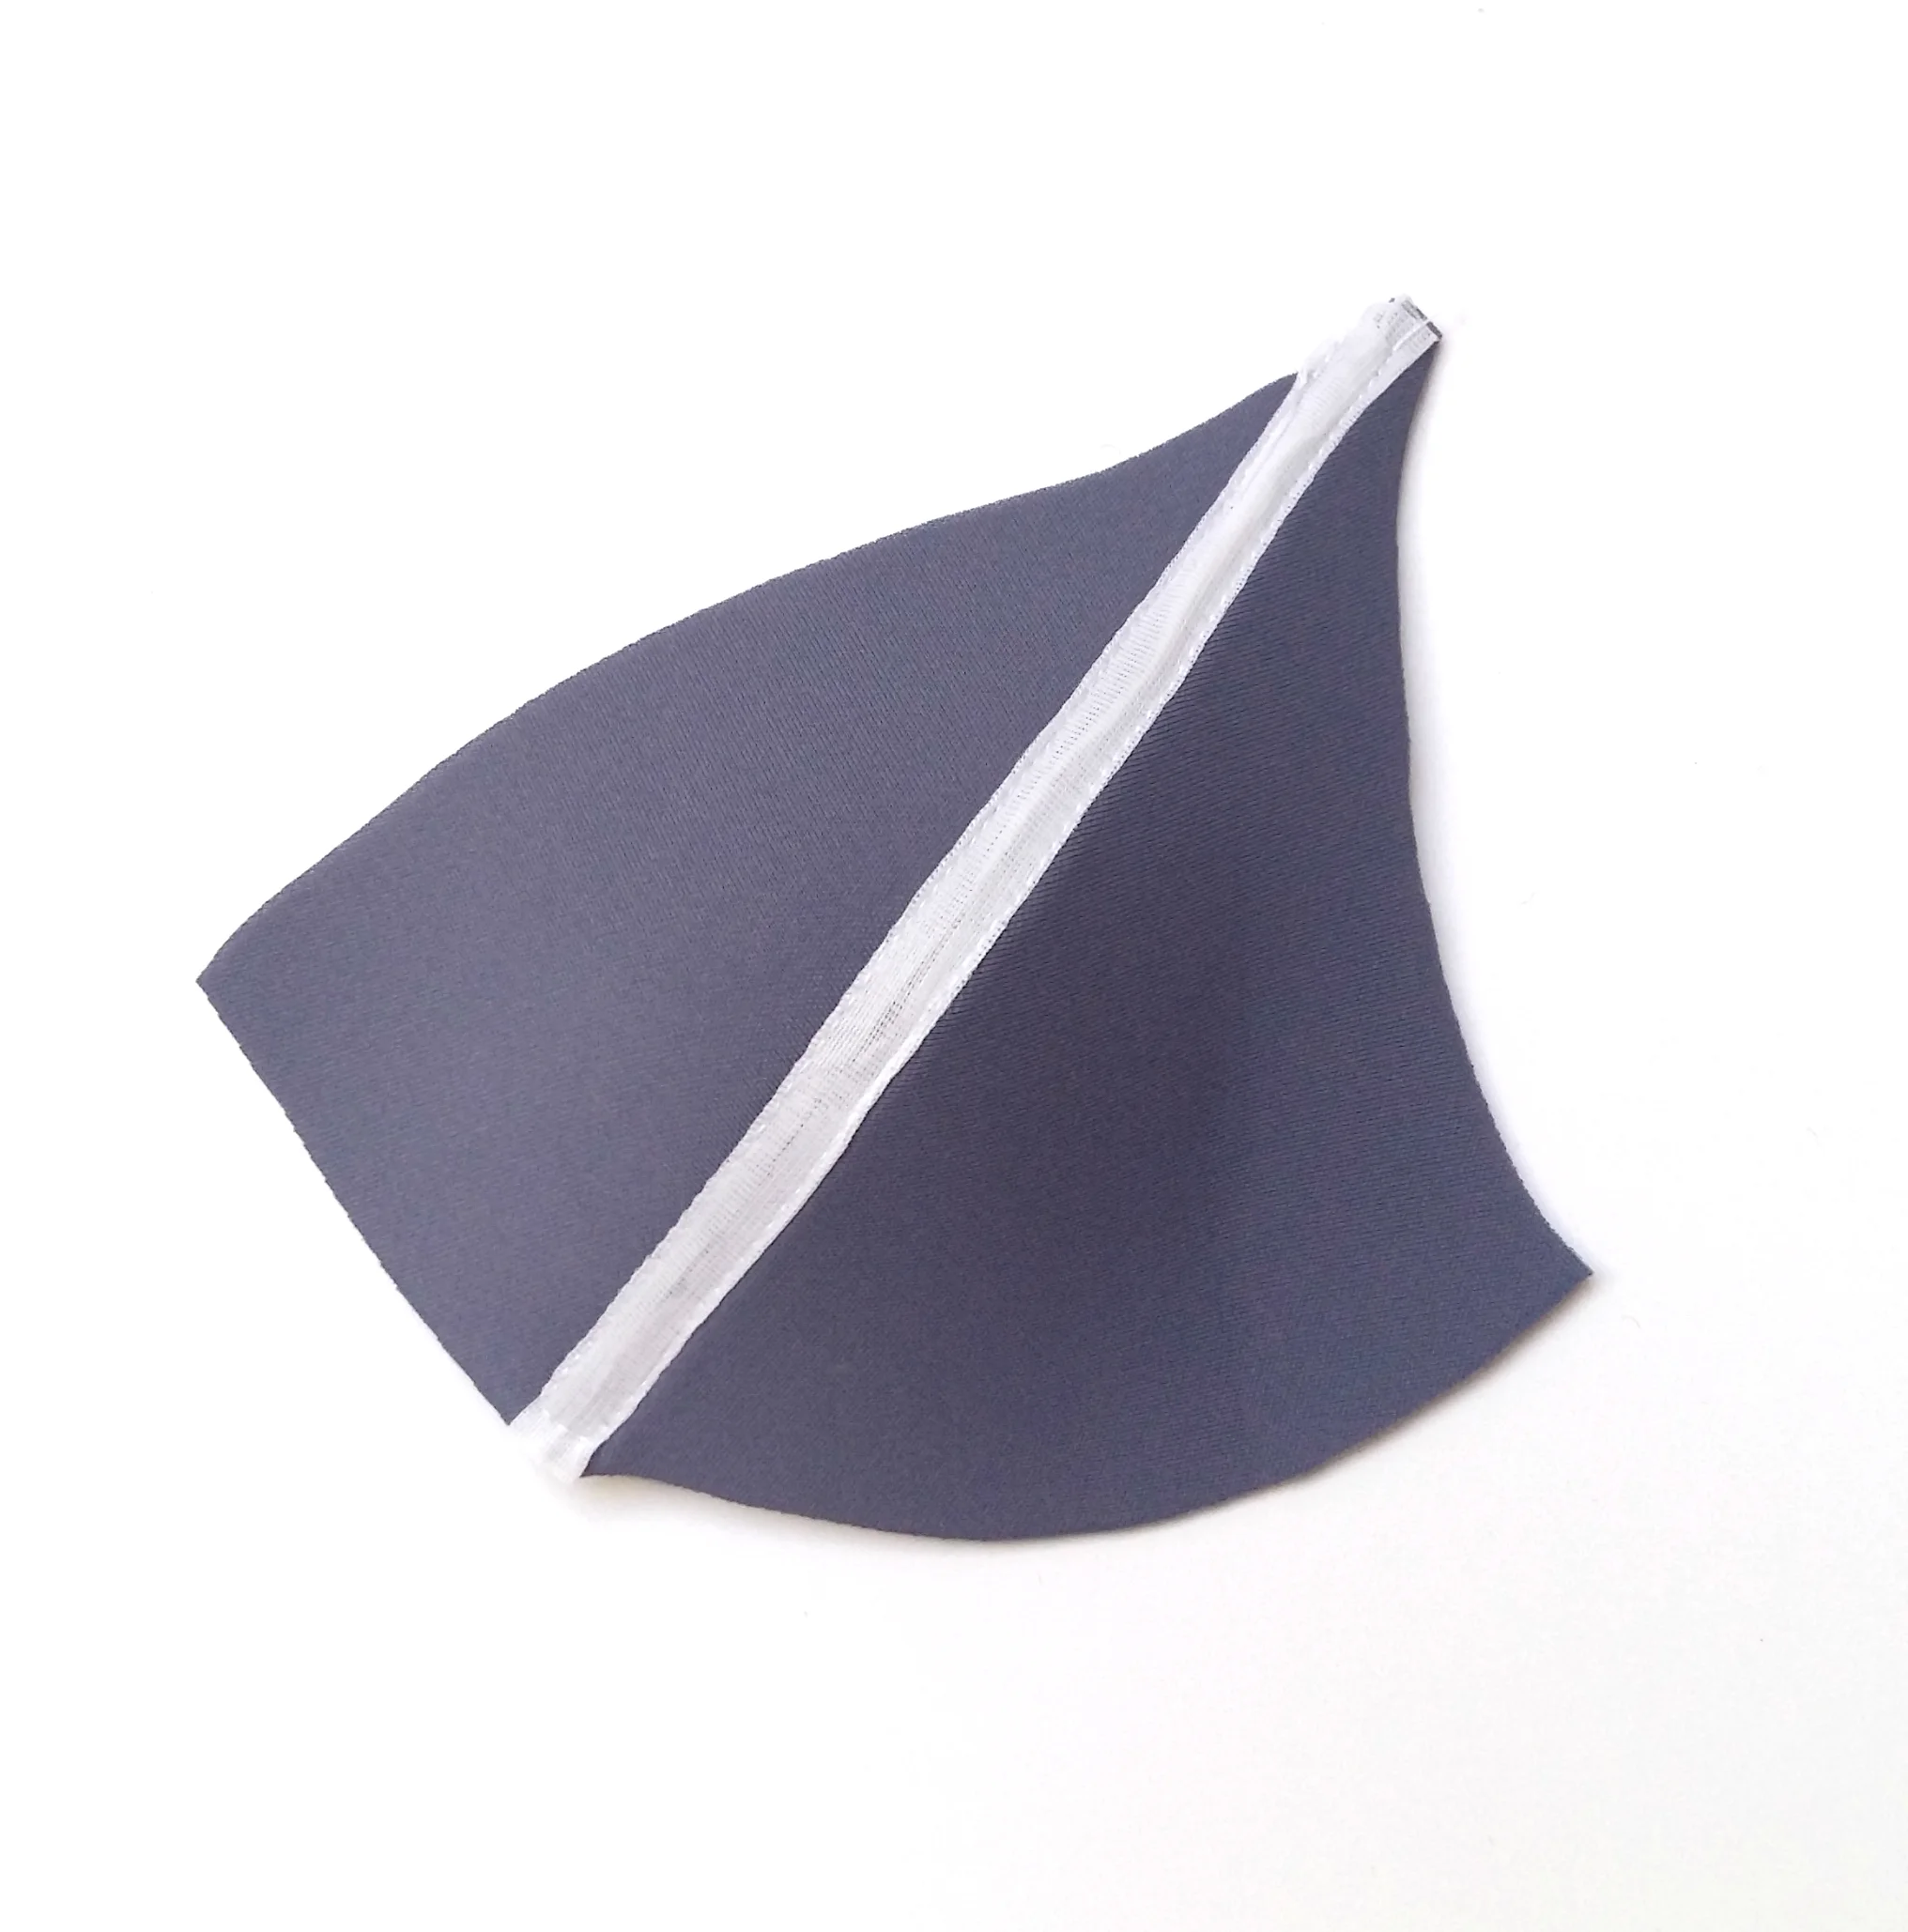
Dobla la tira en tres partes y coselo encíma del zigzag por los dos bordes con la puntada recta y ya está. Además de más limpio también es más fuerte.
Fold the strap in three parts and sew it on your seam with a straight stitch on both sides. Apart from a clean finish it's also a strong one.
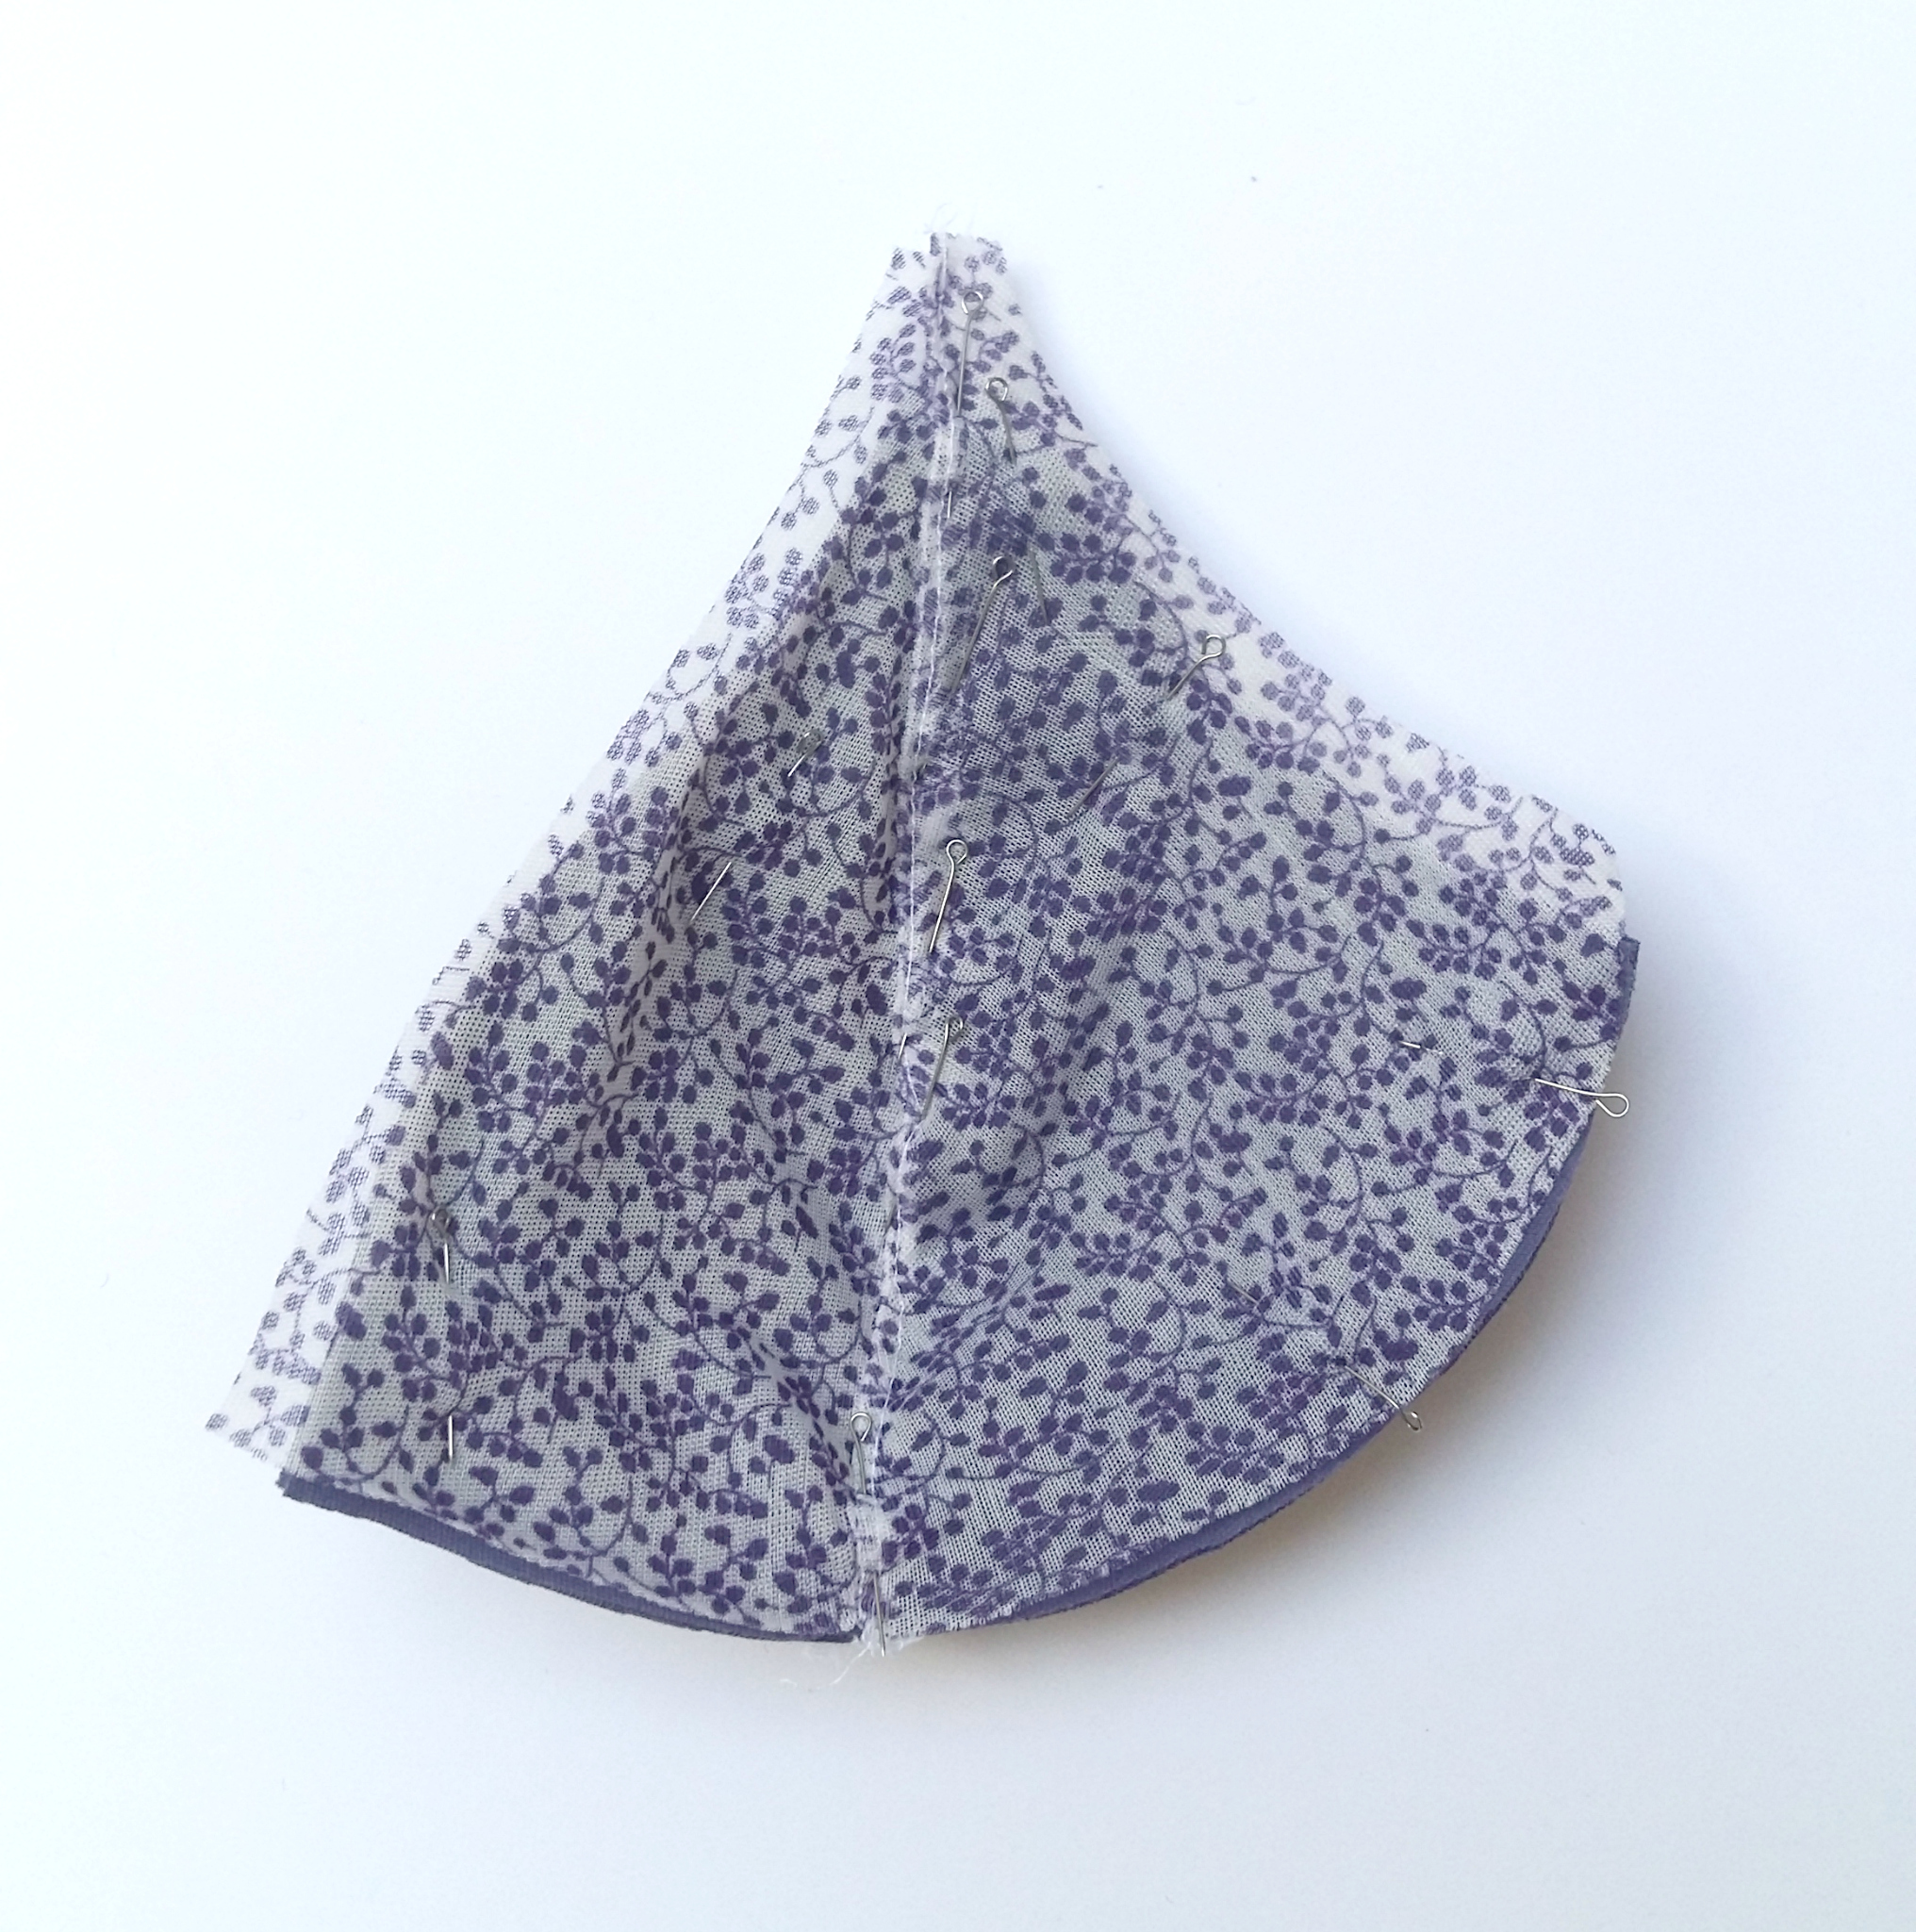
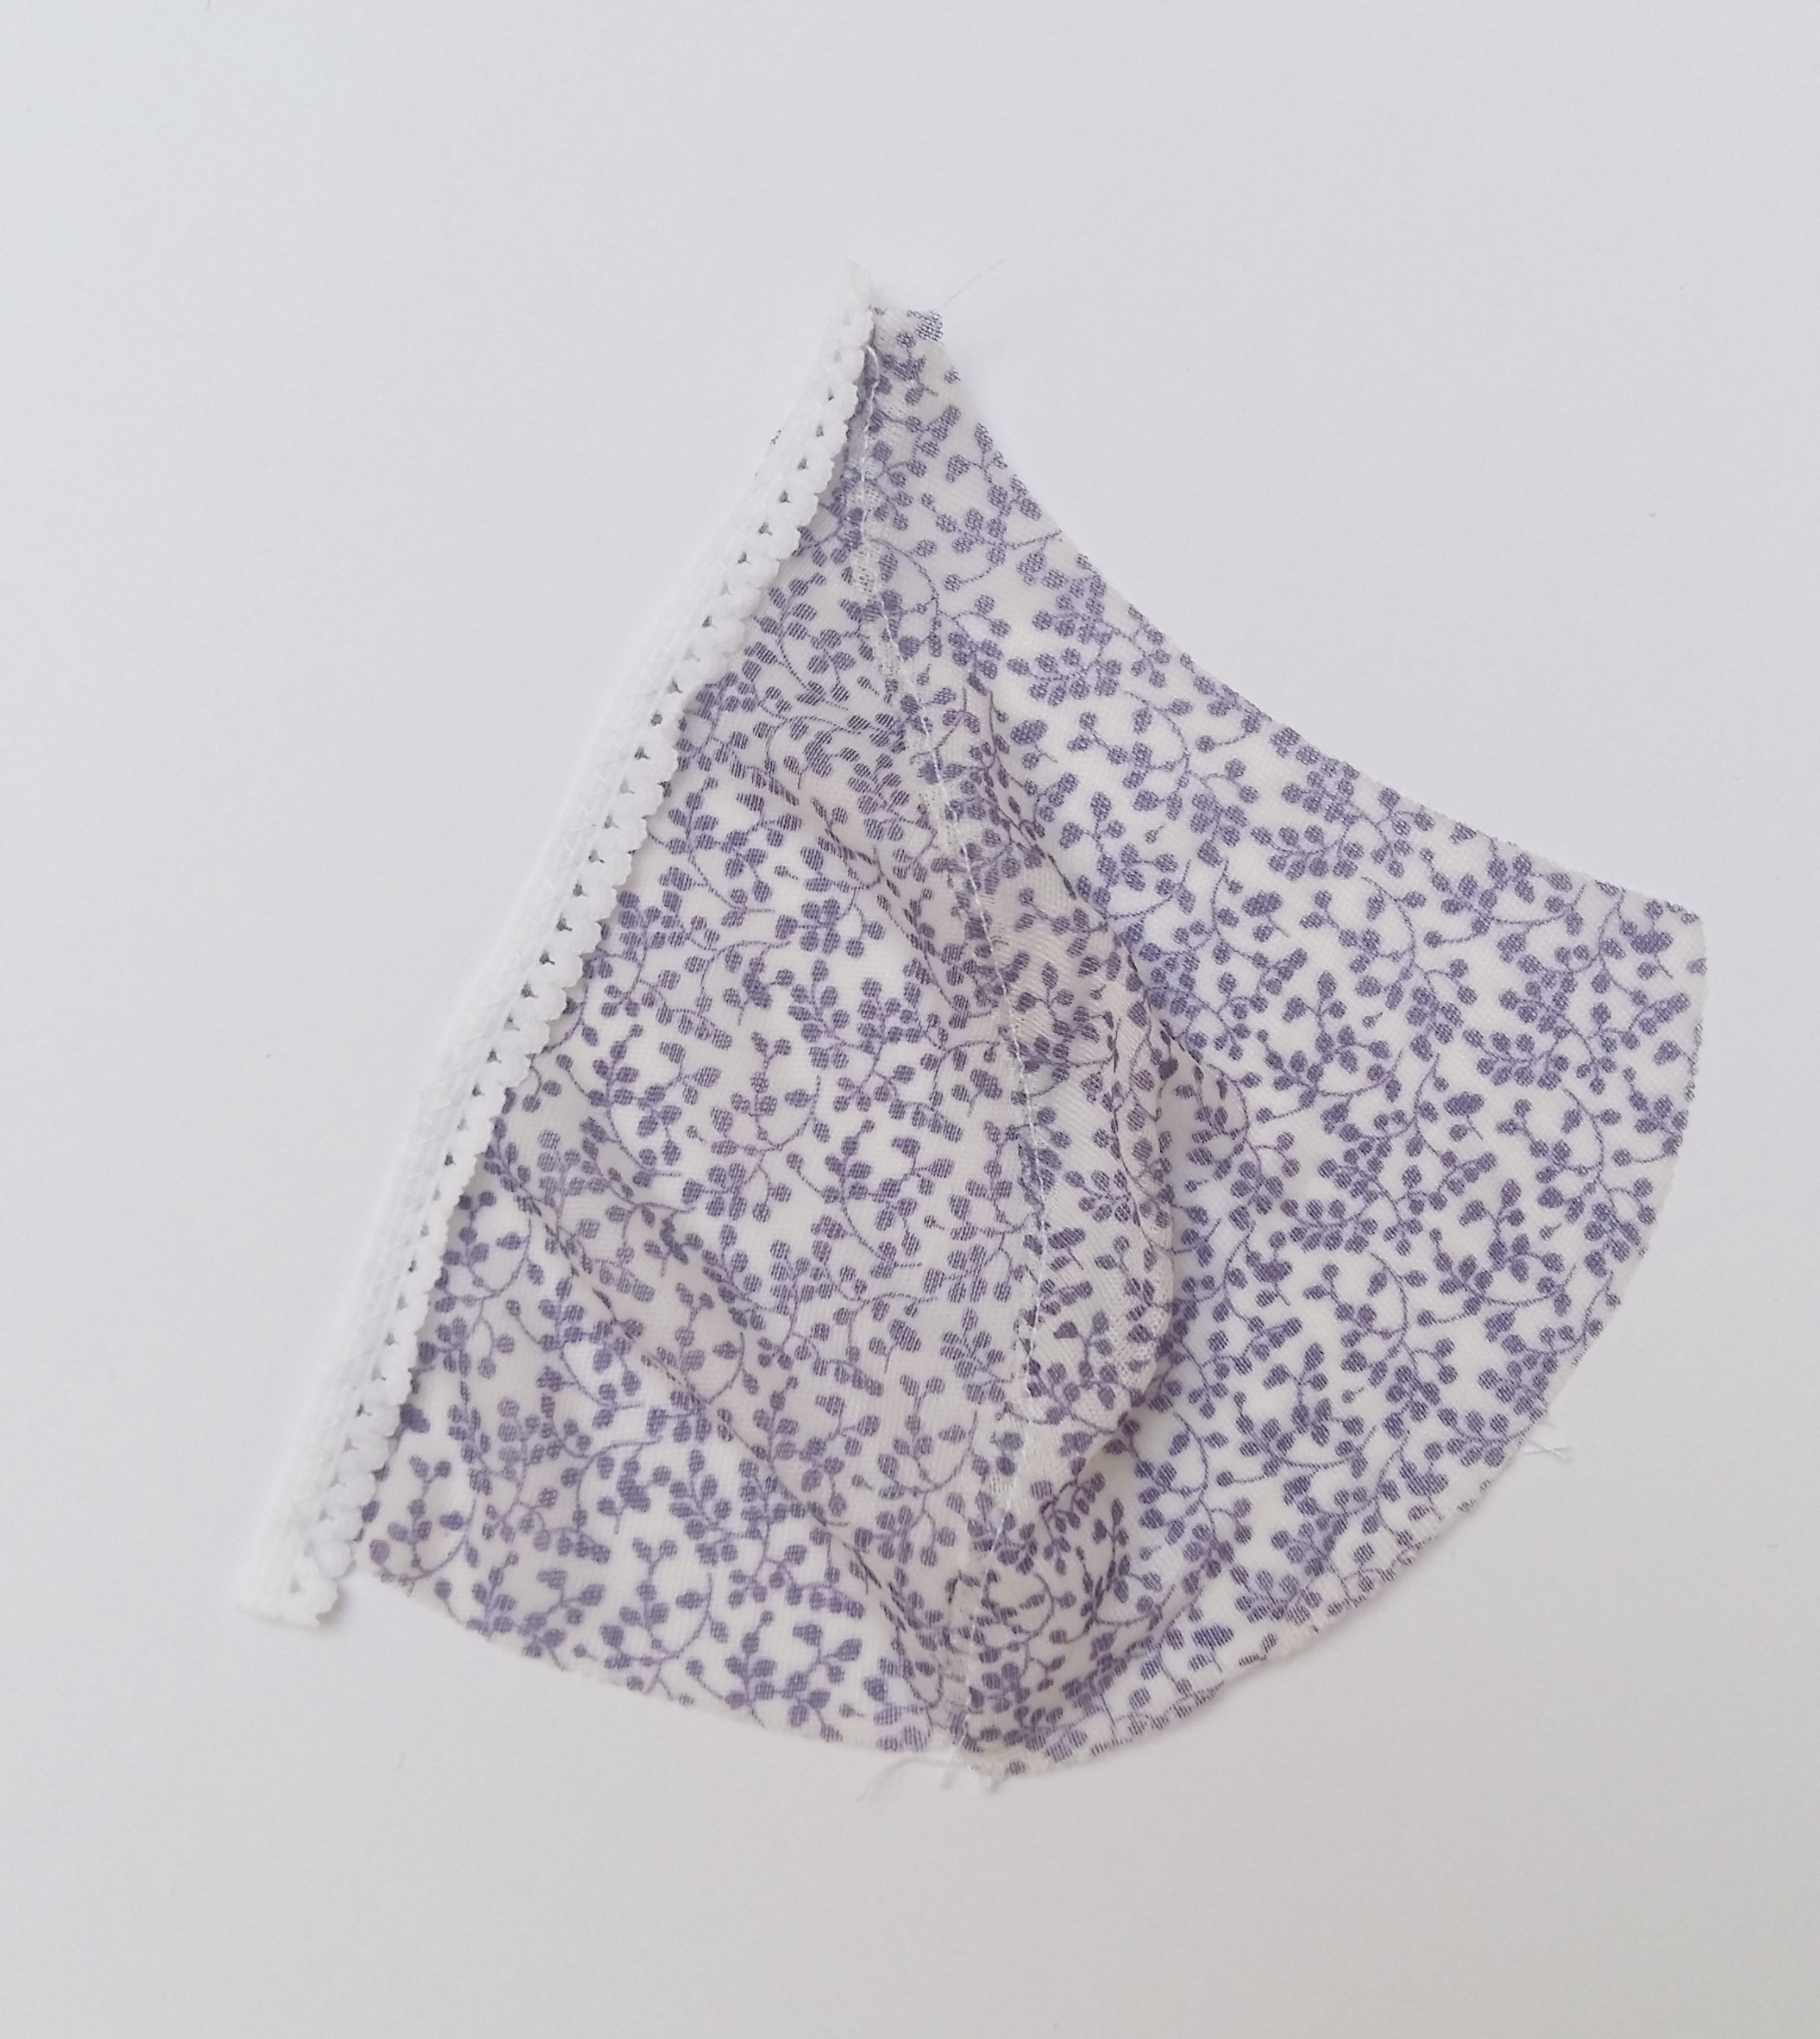
Con las copas de foam y las de tela preparadas, puedes empezar a unirlas. Puse la copa de tela encíma de la copa de foam (el revés con el revés) y primero puse alfileres para que esté bien la costura central, luego unos alfileres más para repartir la tela bien.
When you have your foam cups and fabric cups ready you can start sewing them together. I put the fabric cup on the foam cup (with wrong sides together) and first pinned it in place making sure the central seams were aligned, later I pinned the rest of the fabric evenly.
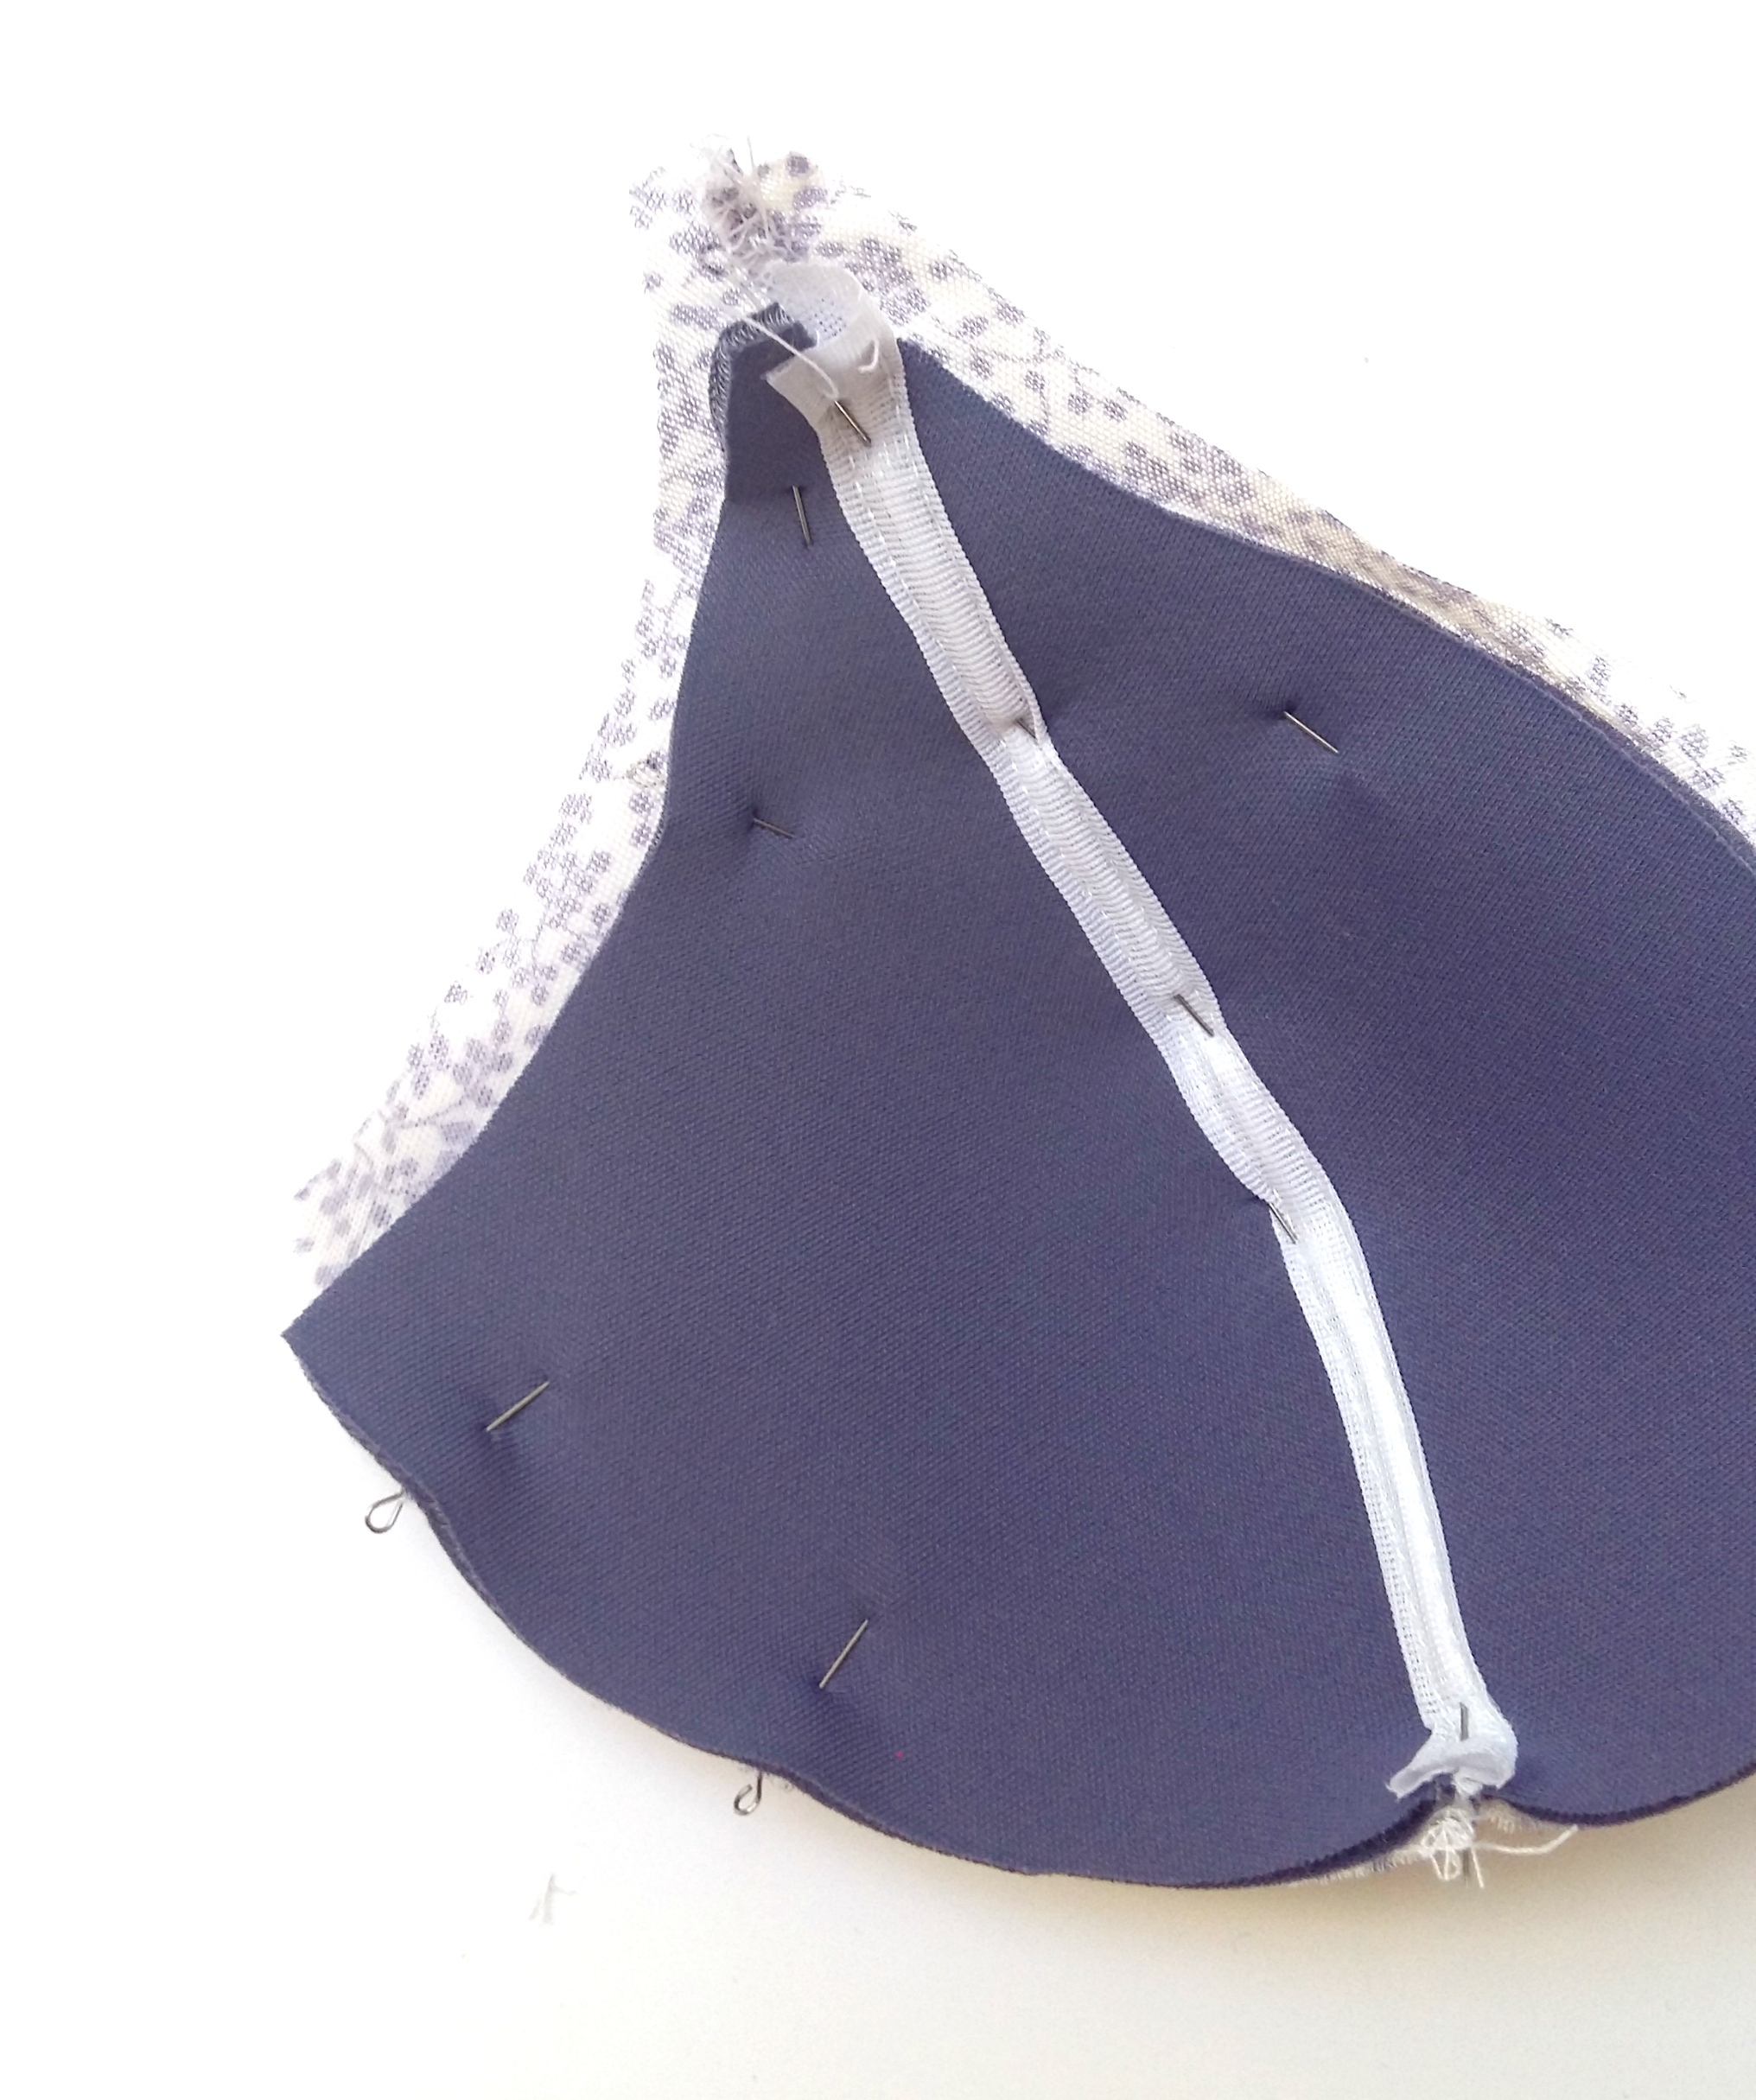
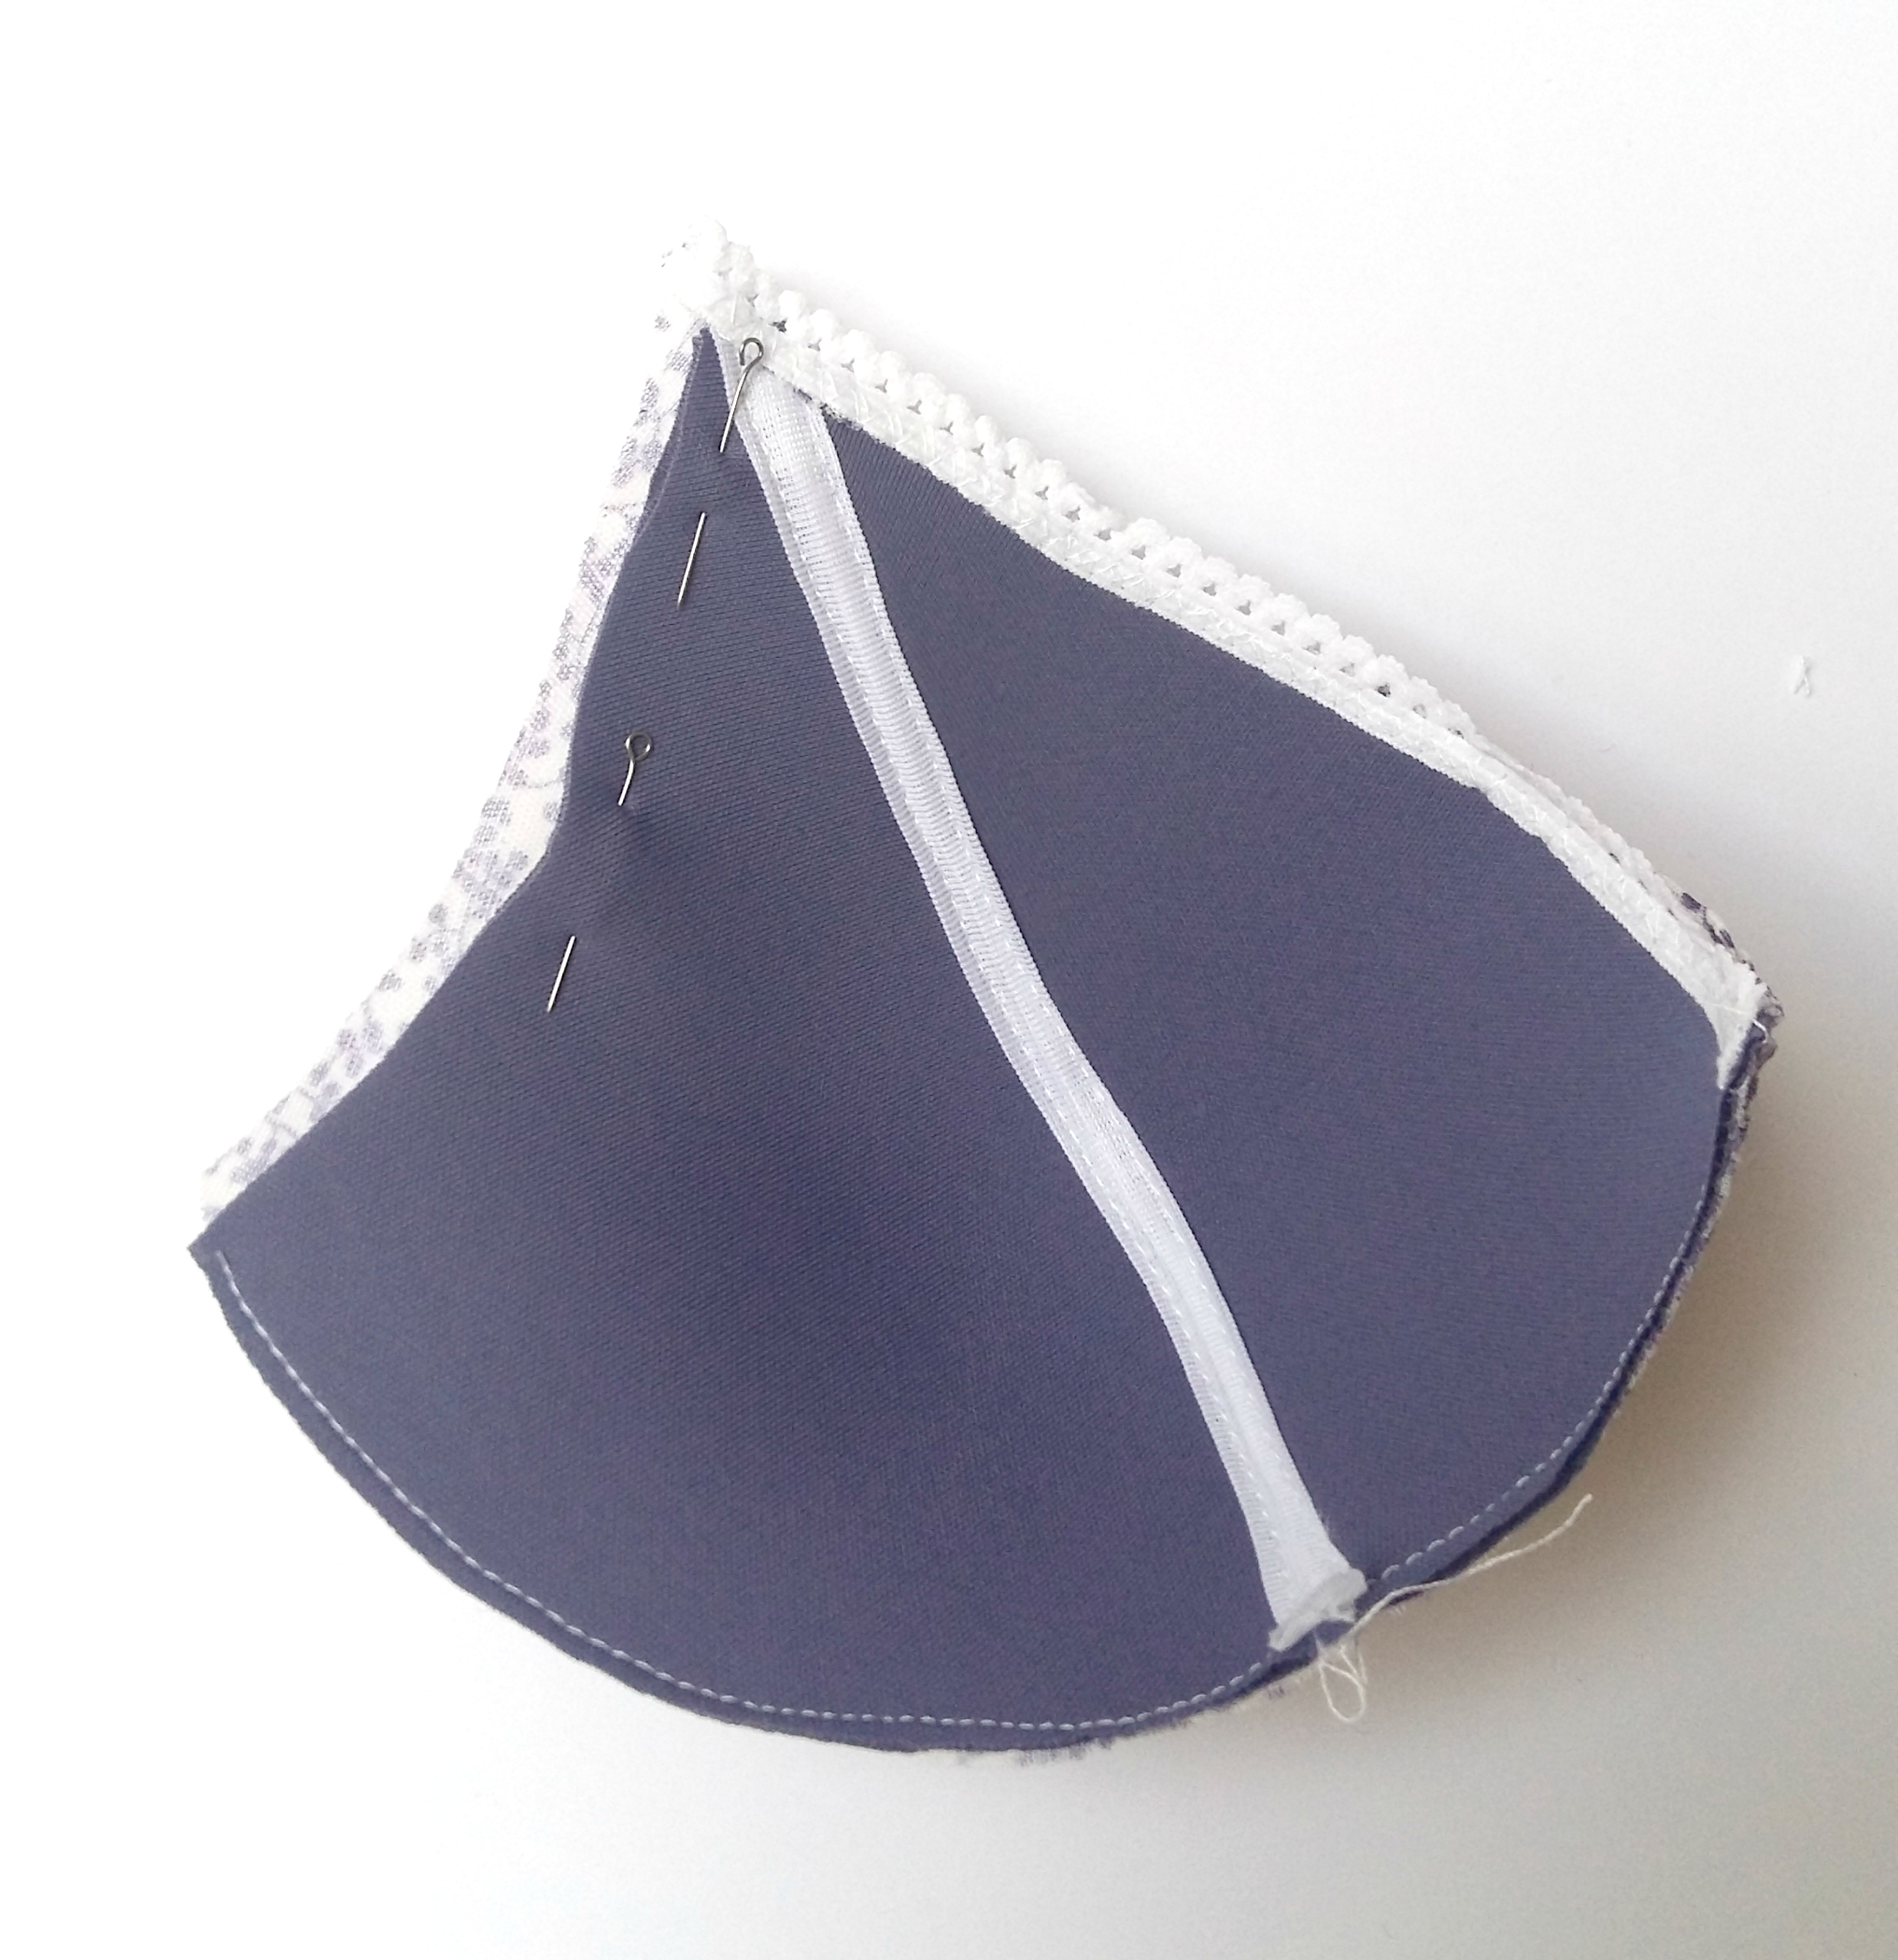
En el otro lado se ve así, lo importante es comprobar que tienes ese margen de costura que te sobra en la tela, allí es donde vamos a coser el elástico con la primera pasada de zigzag.
This is the inside view, it's important to see if you have the extra seam allowances on the fabric cups, we'll sew the elastic there with the first row of zigzag.
En mi caso yo ahora quité la copa de tela para poner el elástico para que sea más fácil pero también lo puedes coser con el foam abajo para no tener que volver a poner los alfileres. Cosemos el elástico sólo en la parte "central" de la copa (lo que se queda en el escote). Cose el elástico en derecho de la copa sin estirar porque el foam de todas maneras no es elástica así que no tienes que tirar.
In my case I unpinned what I just did to sew on the elastic separately on the fabric cup. You don't need to do that when you don't want to repeat the pinning process, you can attach the elastic anyway, I just find it easier when it's fabric alone at this point. Sew the elastic on the inner cup piece on the right side of the cup. You don't need to stretch the elastic here as the foam doesn't stretch anyway.
Vuelve a poner las dos copas juntas y ahora sí que puedes doblar ya el elástico encíma del foam y coser la segunda pasada de zigzag para fijarlo. Por eso dije antes que sería incomodo poner el elástico si tuvieras que doblar el foam. Primero se cose sólo en la capa de tela y después de dobla encima del foam, así no hay el bulto extra. Ahora puedes unir también la parte de abajo para trabajarlo como una misma capa.
Put the two layers back together and now you can fold the elastic over to the foam side and sew the second row of zigzag. That's why I said before that it would be uncomfortable to fold the foam to sew on the elastic. First the elastic is sewn to the fabric only and then it's folded on the foam, so there's no extra bulk that way. Now you can also sew together the bottom part to treat it as one layer.
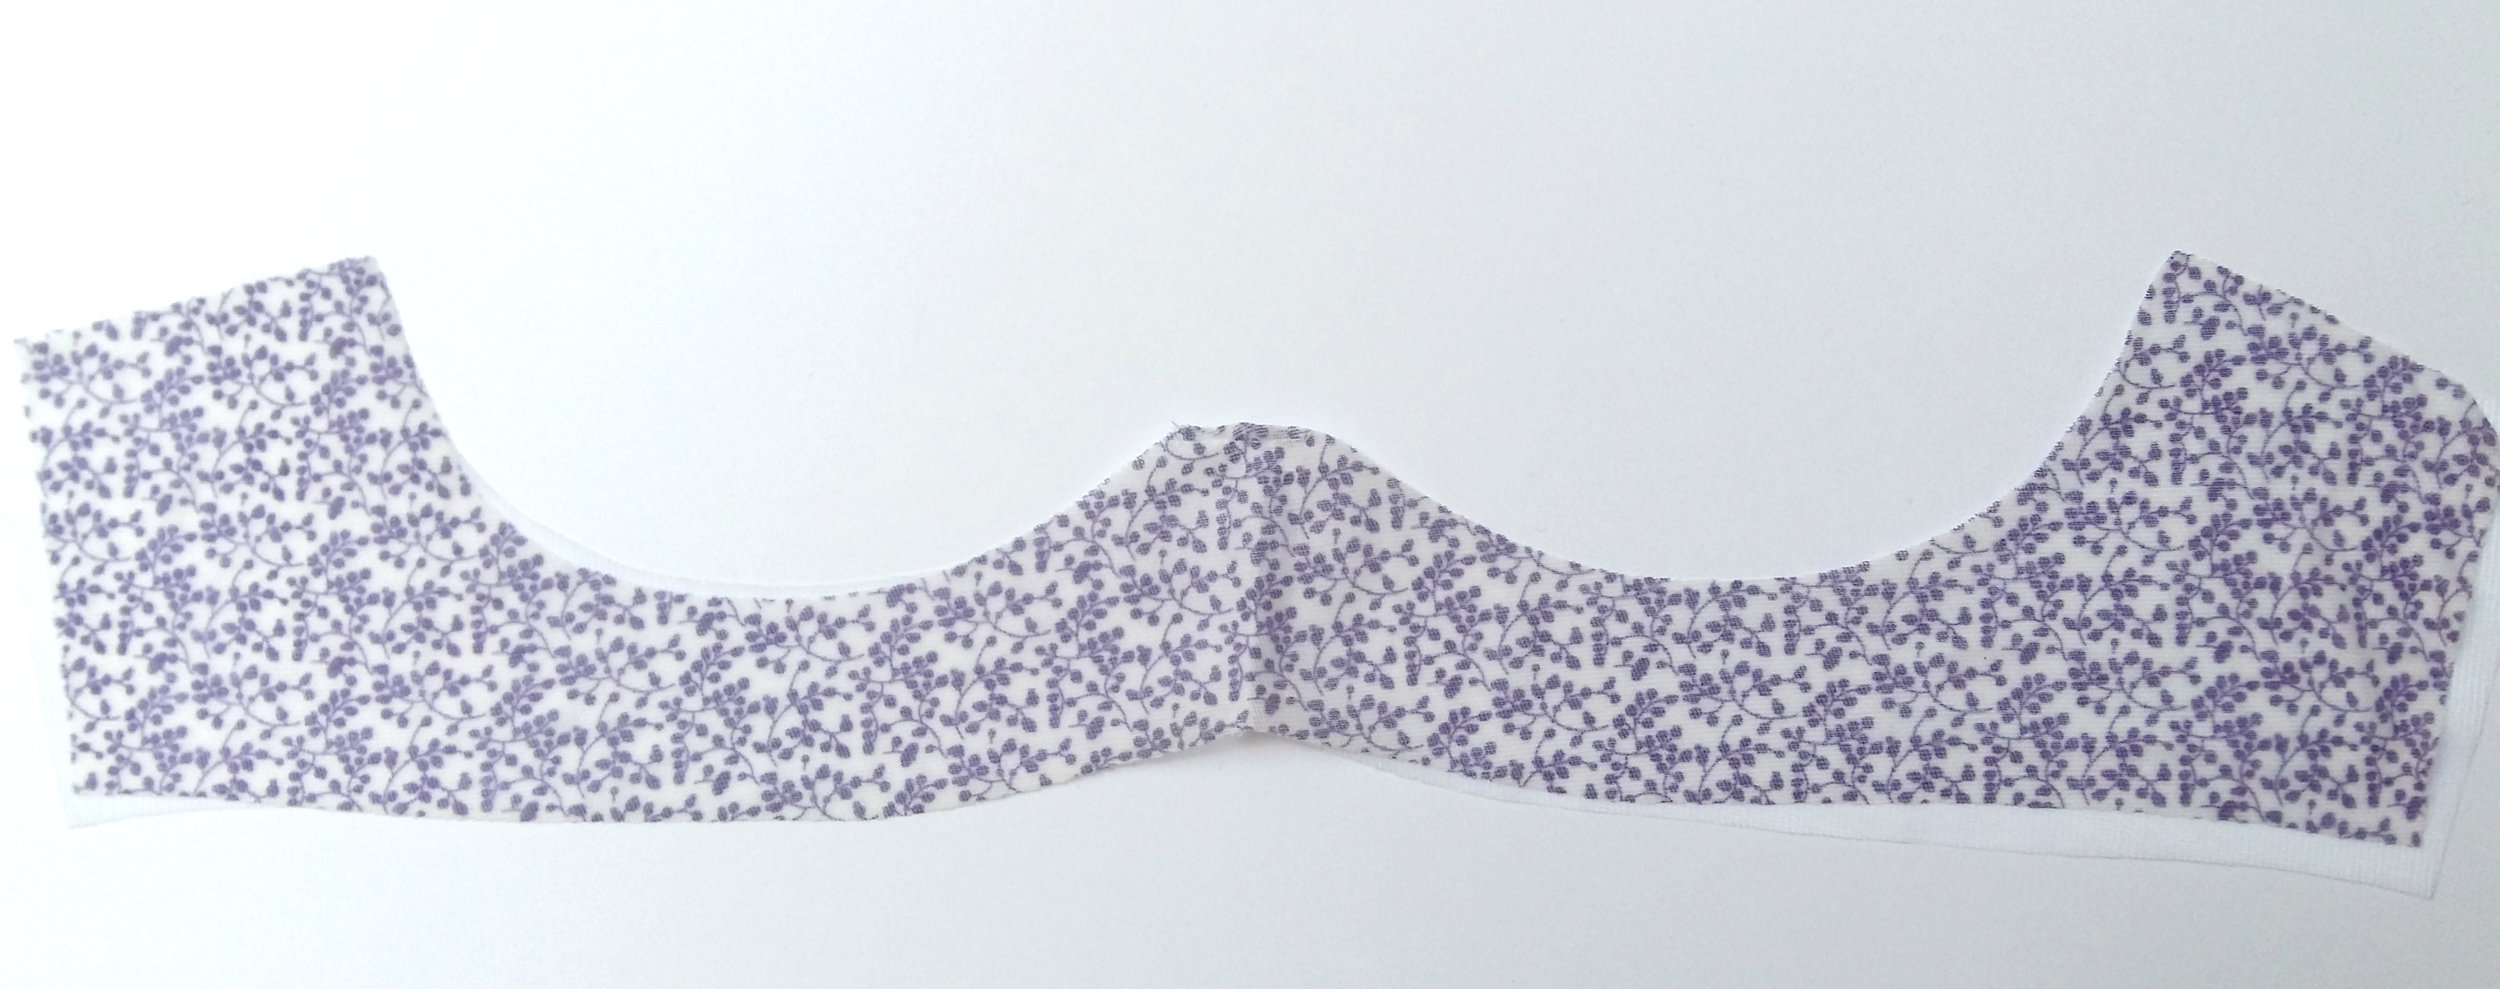
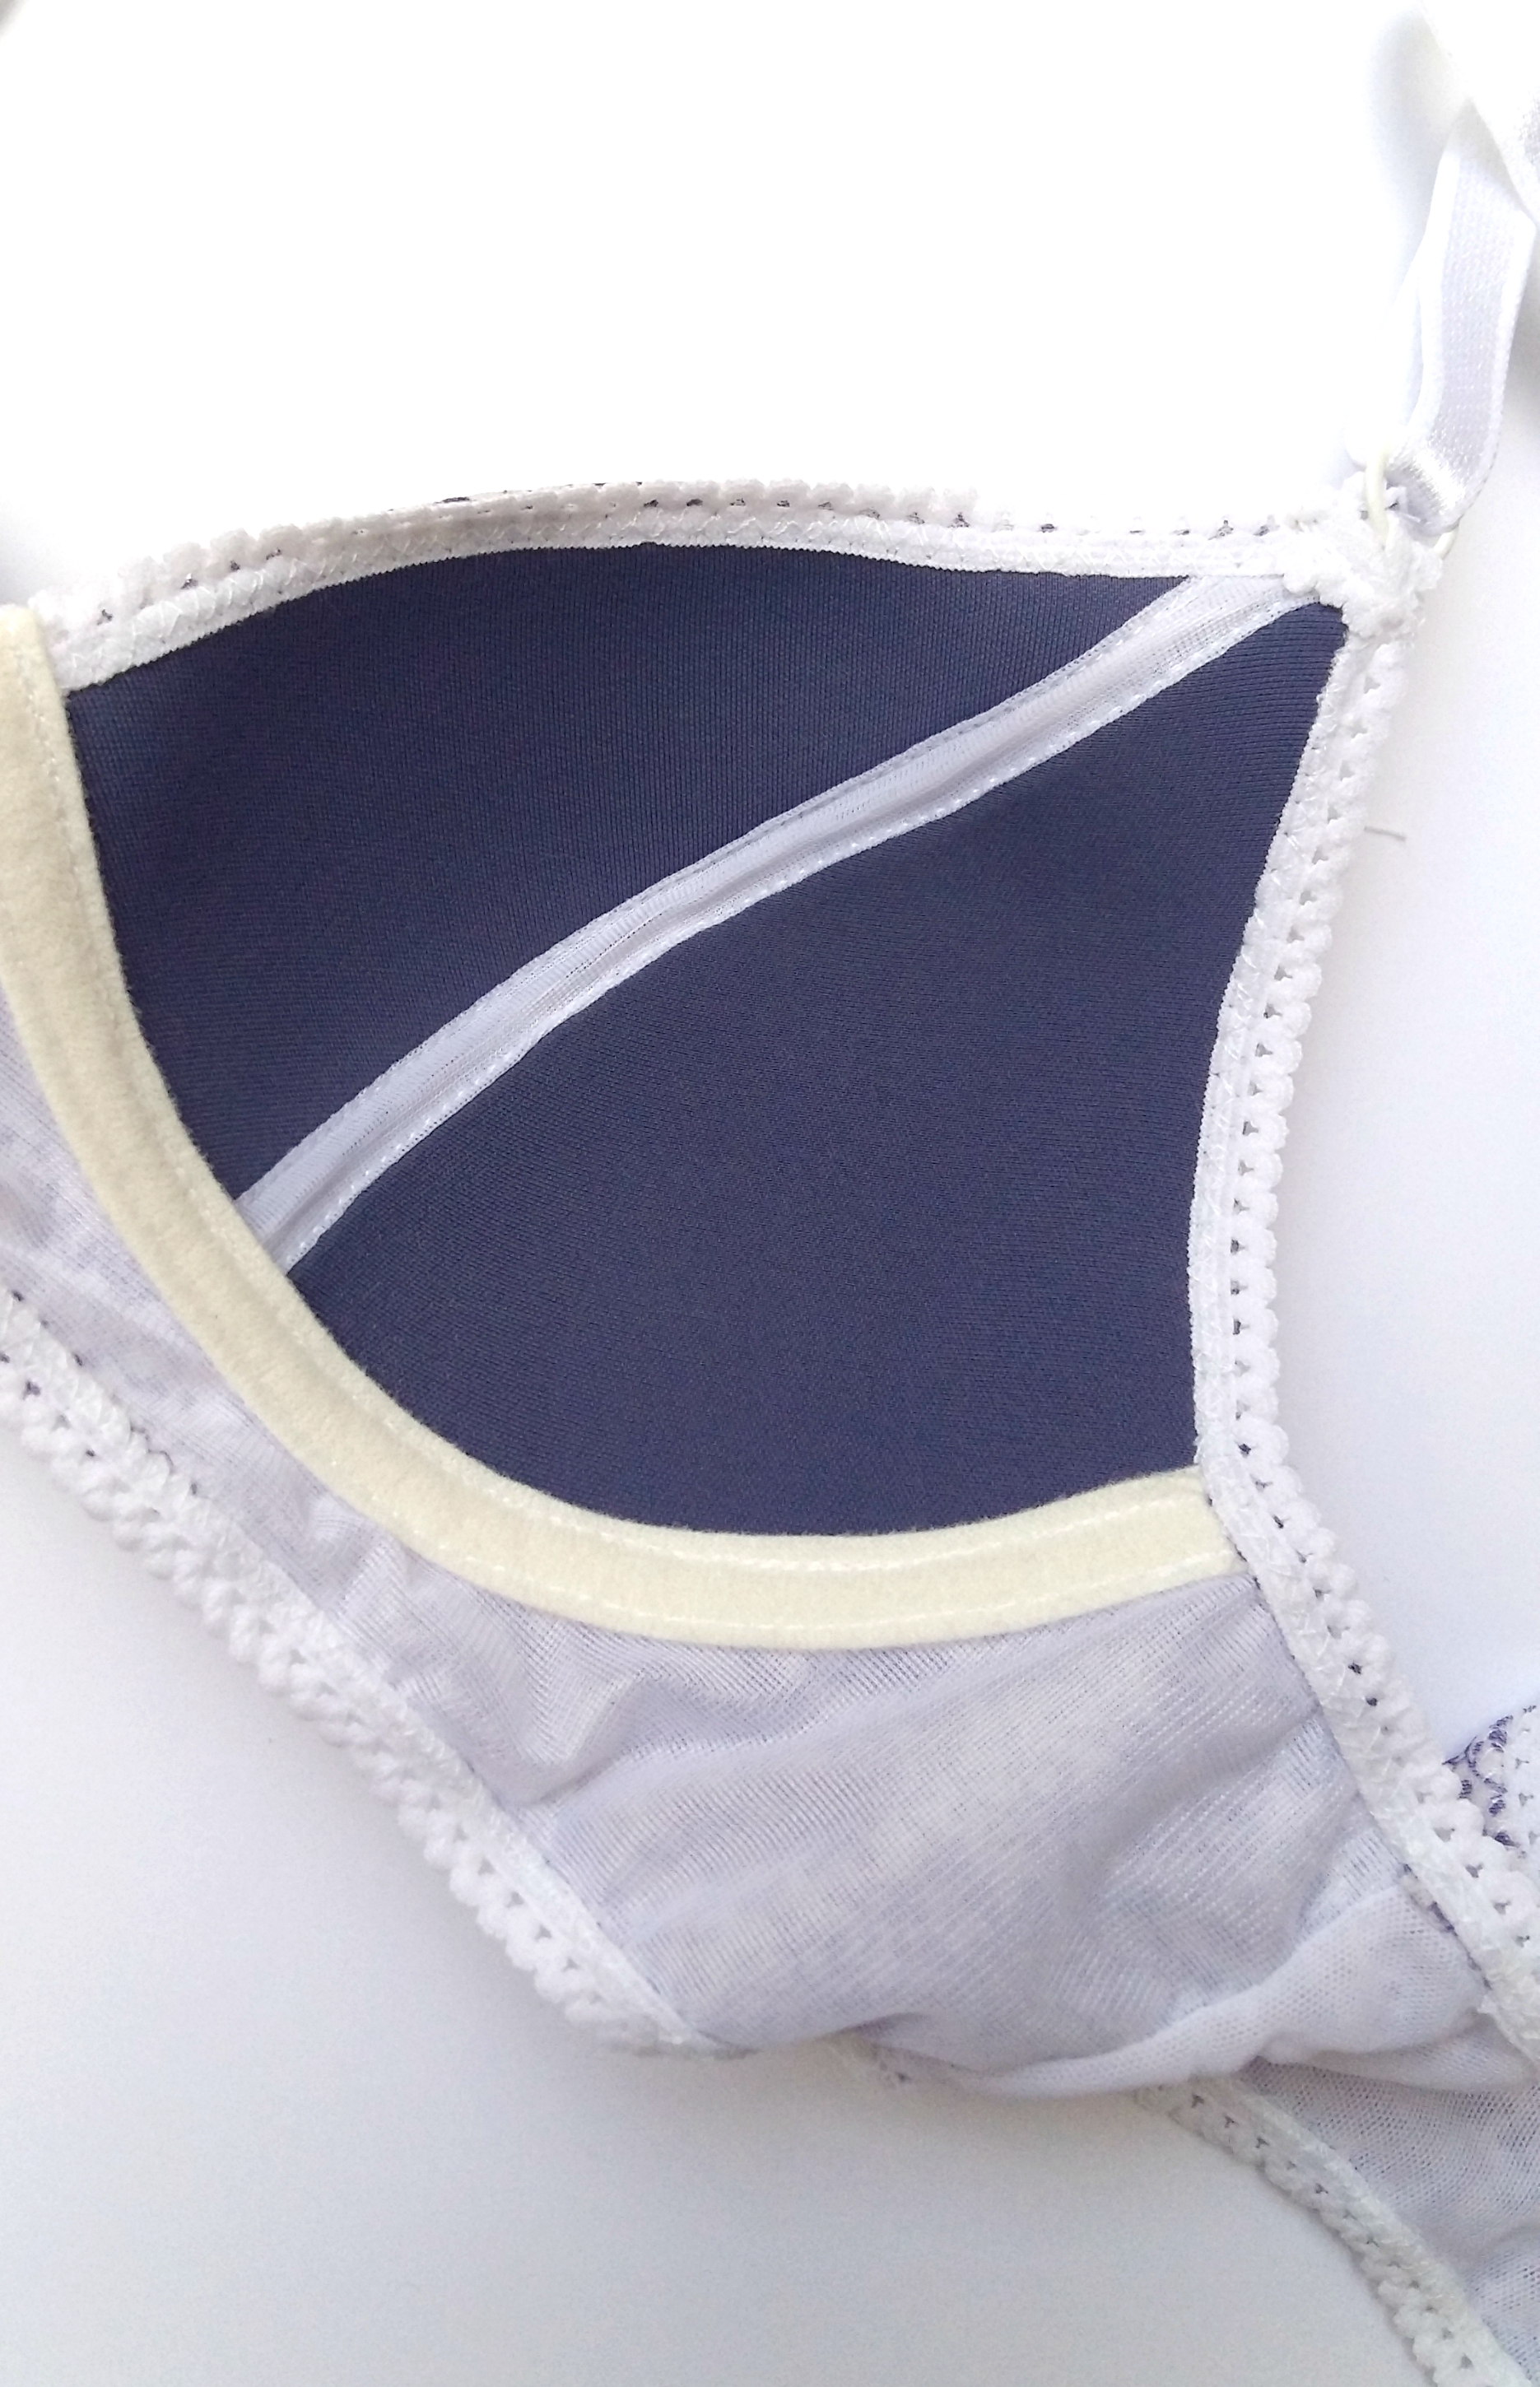
Para preparar la parte central tuve que hacer un paso extra ya que había aumentado la distancia entre las copas. Sería poner derecho con derecho la capa exterior de tela y la capa de forro de lencería (sheer lining) y coser a 0,5 cm (eso era lo que había que añadir y se me olvidó antes....hice un apaño más o menos) sólo en la parte central de la banda. Después darle la vuelta y así esa parte entre las copas (que no existe en el patrón original) se queda rematada.
To prepare the bridge area I needed to make the extra step as I made the bridge area wider. You need to put the fabric layer and the sheer lining layer right sides together and sew the bridge width seam with 0,5 cm wide seam allowance (that was the thing I forgot before..I somehow managed to do it anyway). Now you can turn the pieces around again and the bridge central part is now finished (this part doens't exist on the original pattern so that's why you don't need to do anything normally).
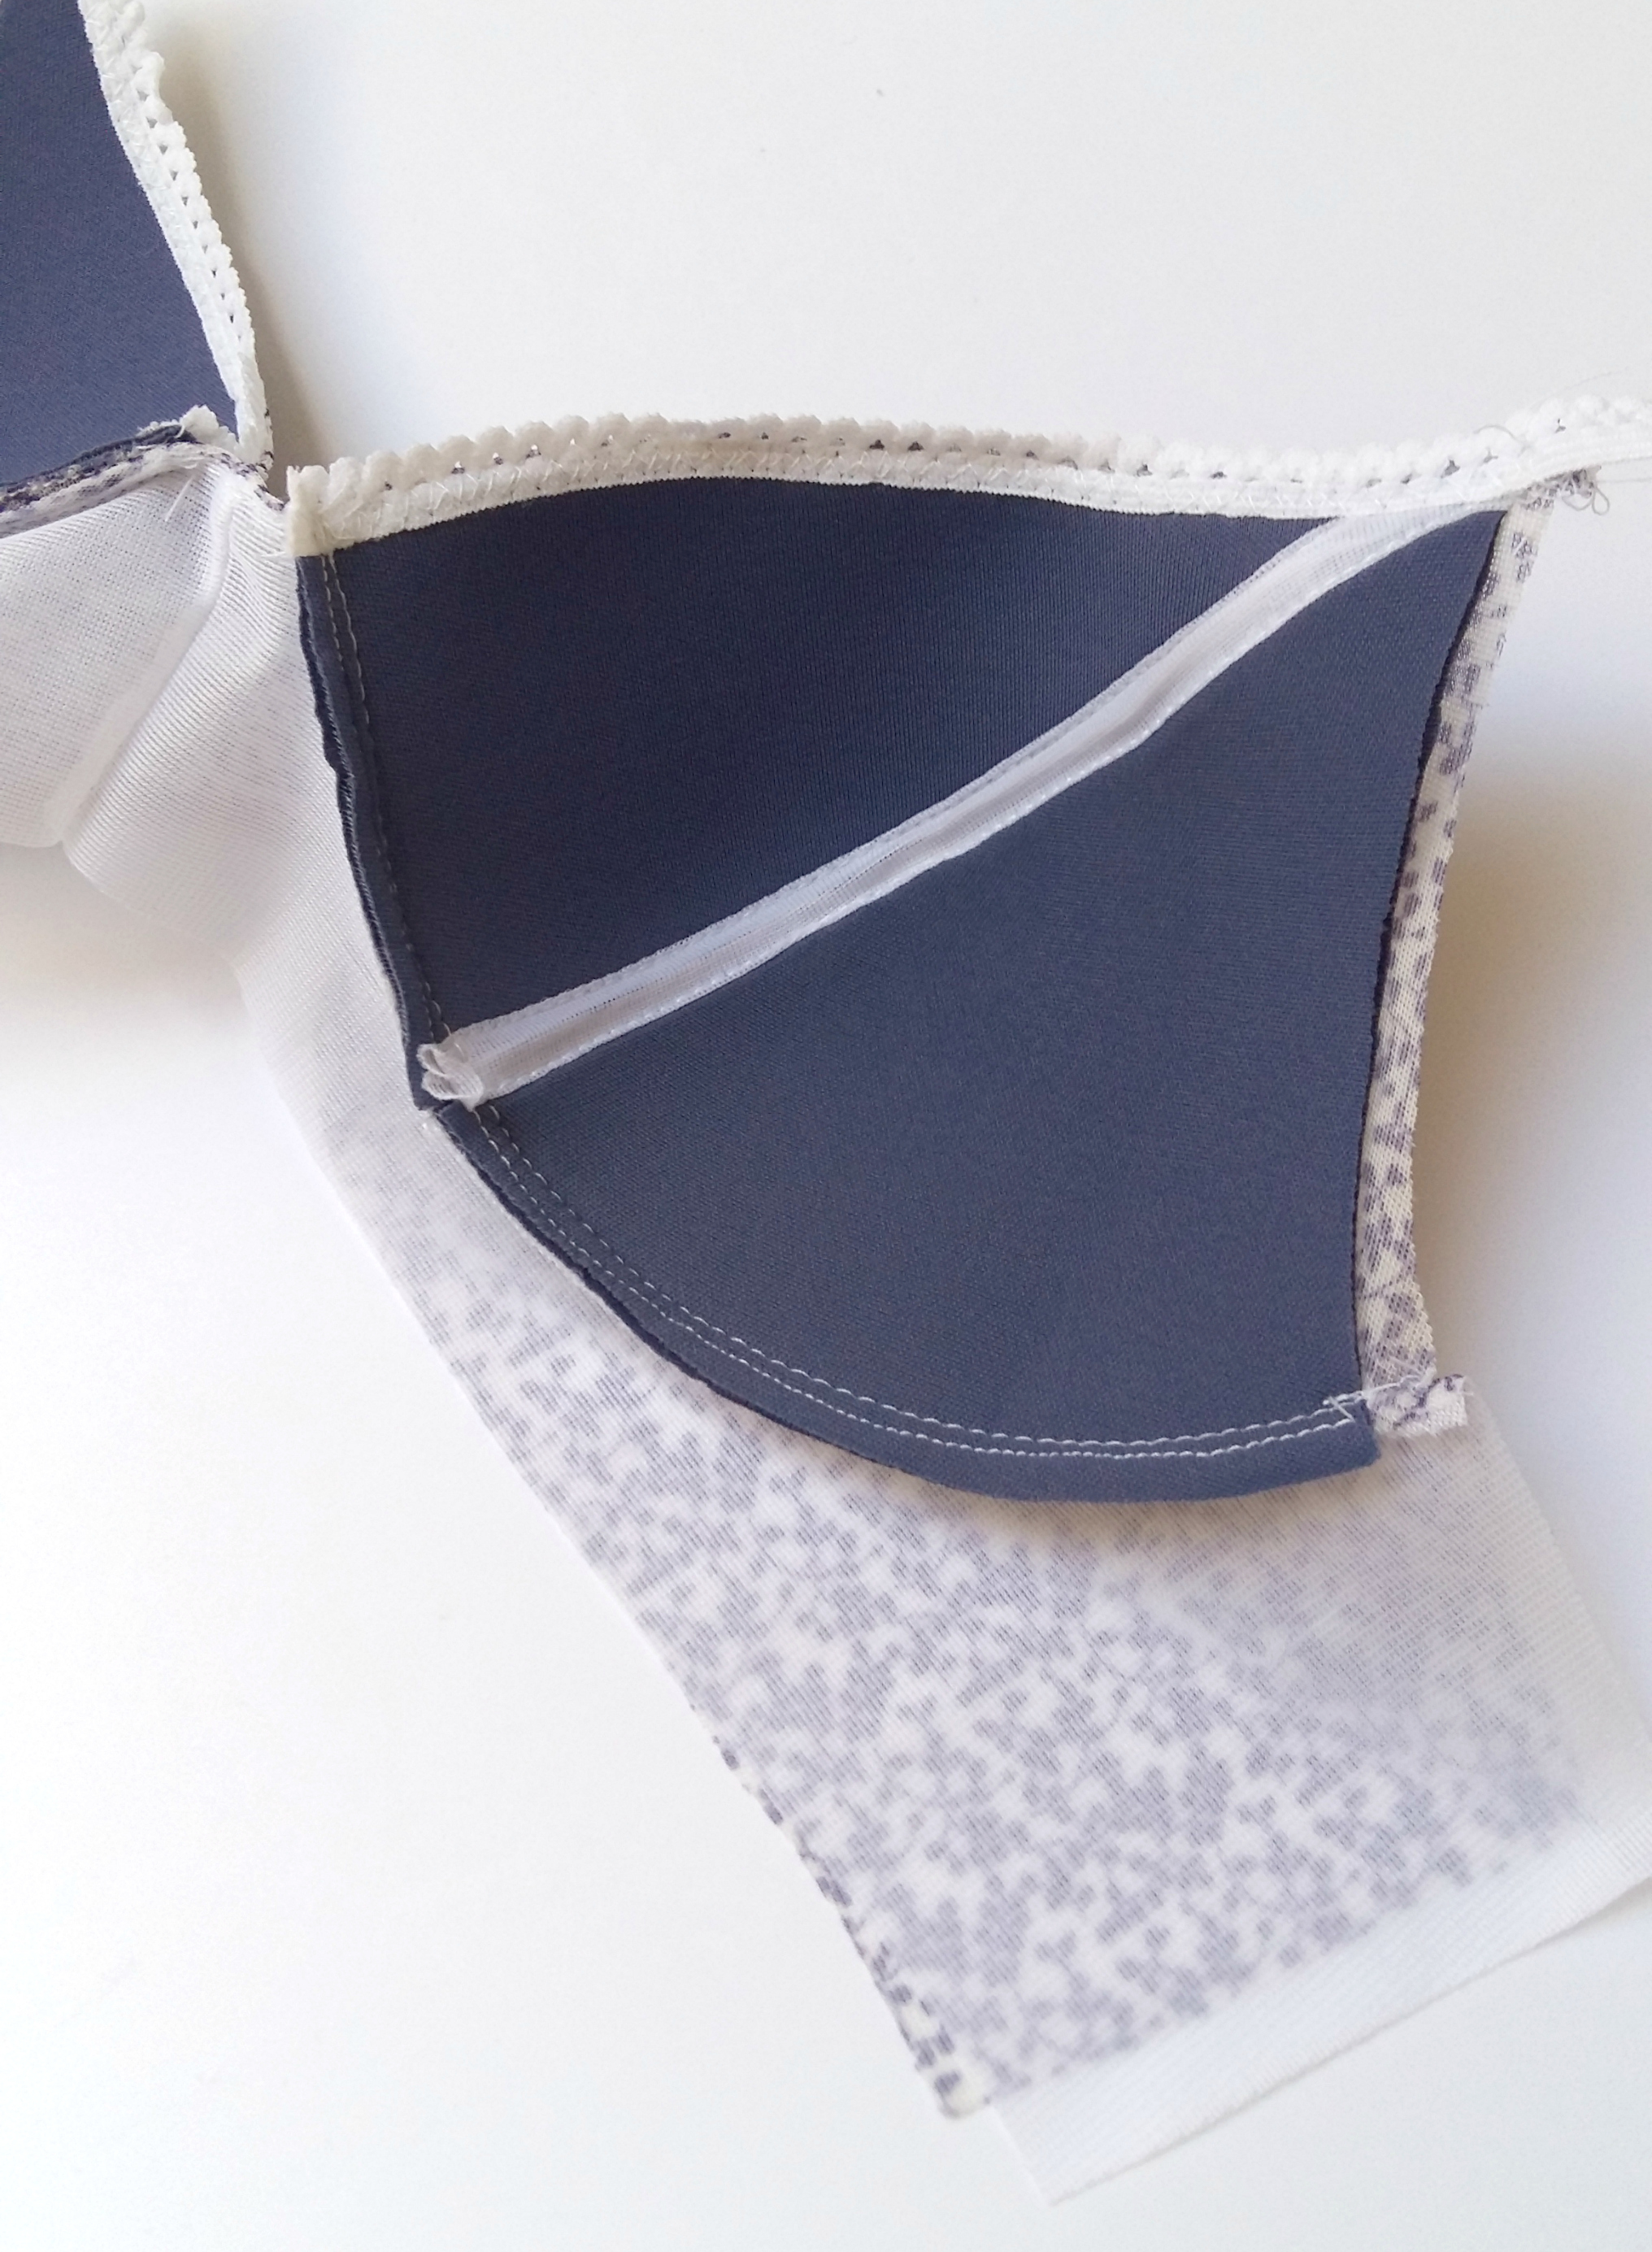
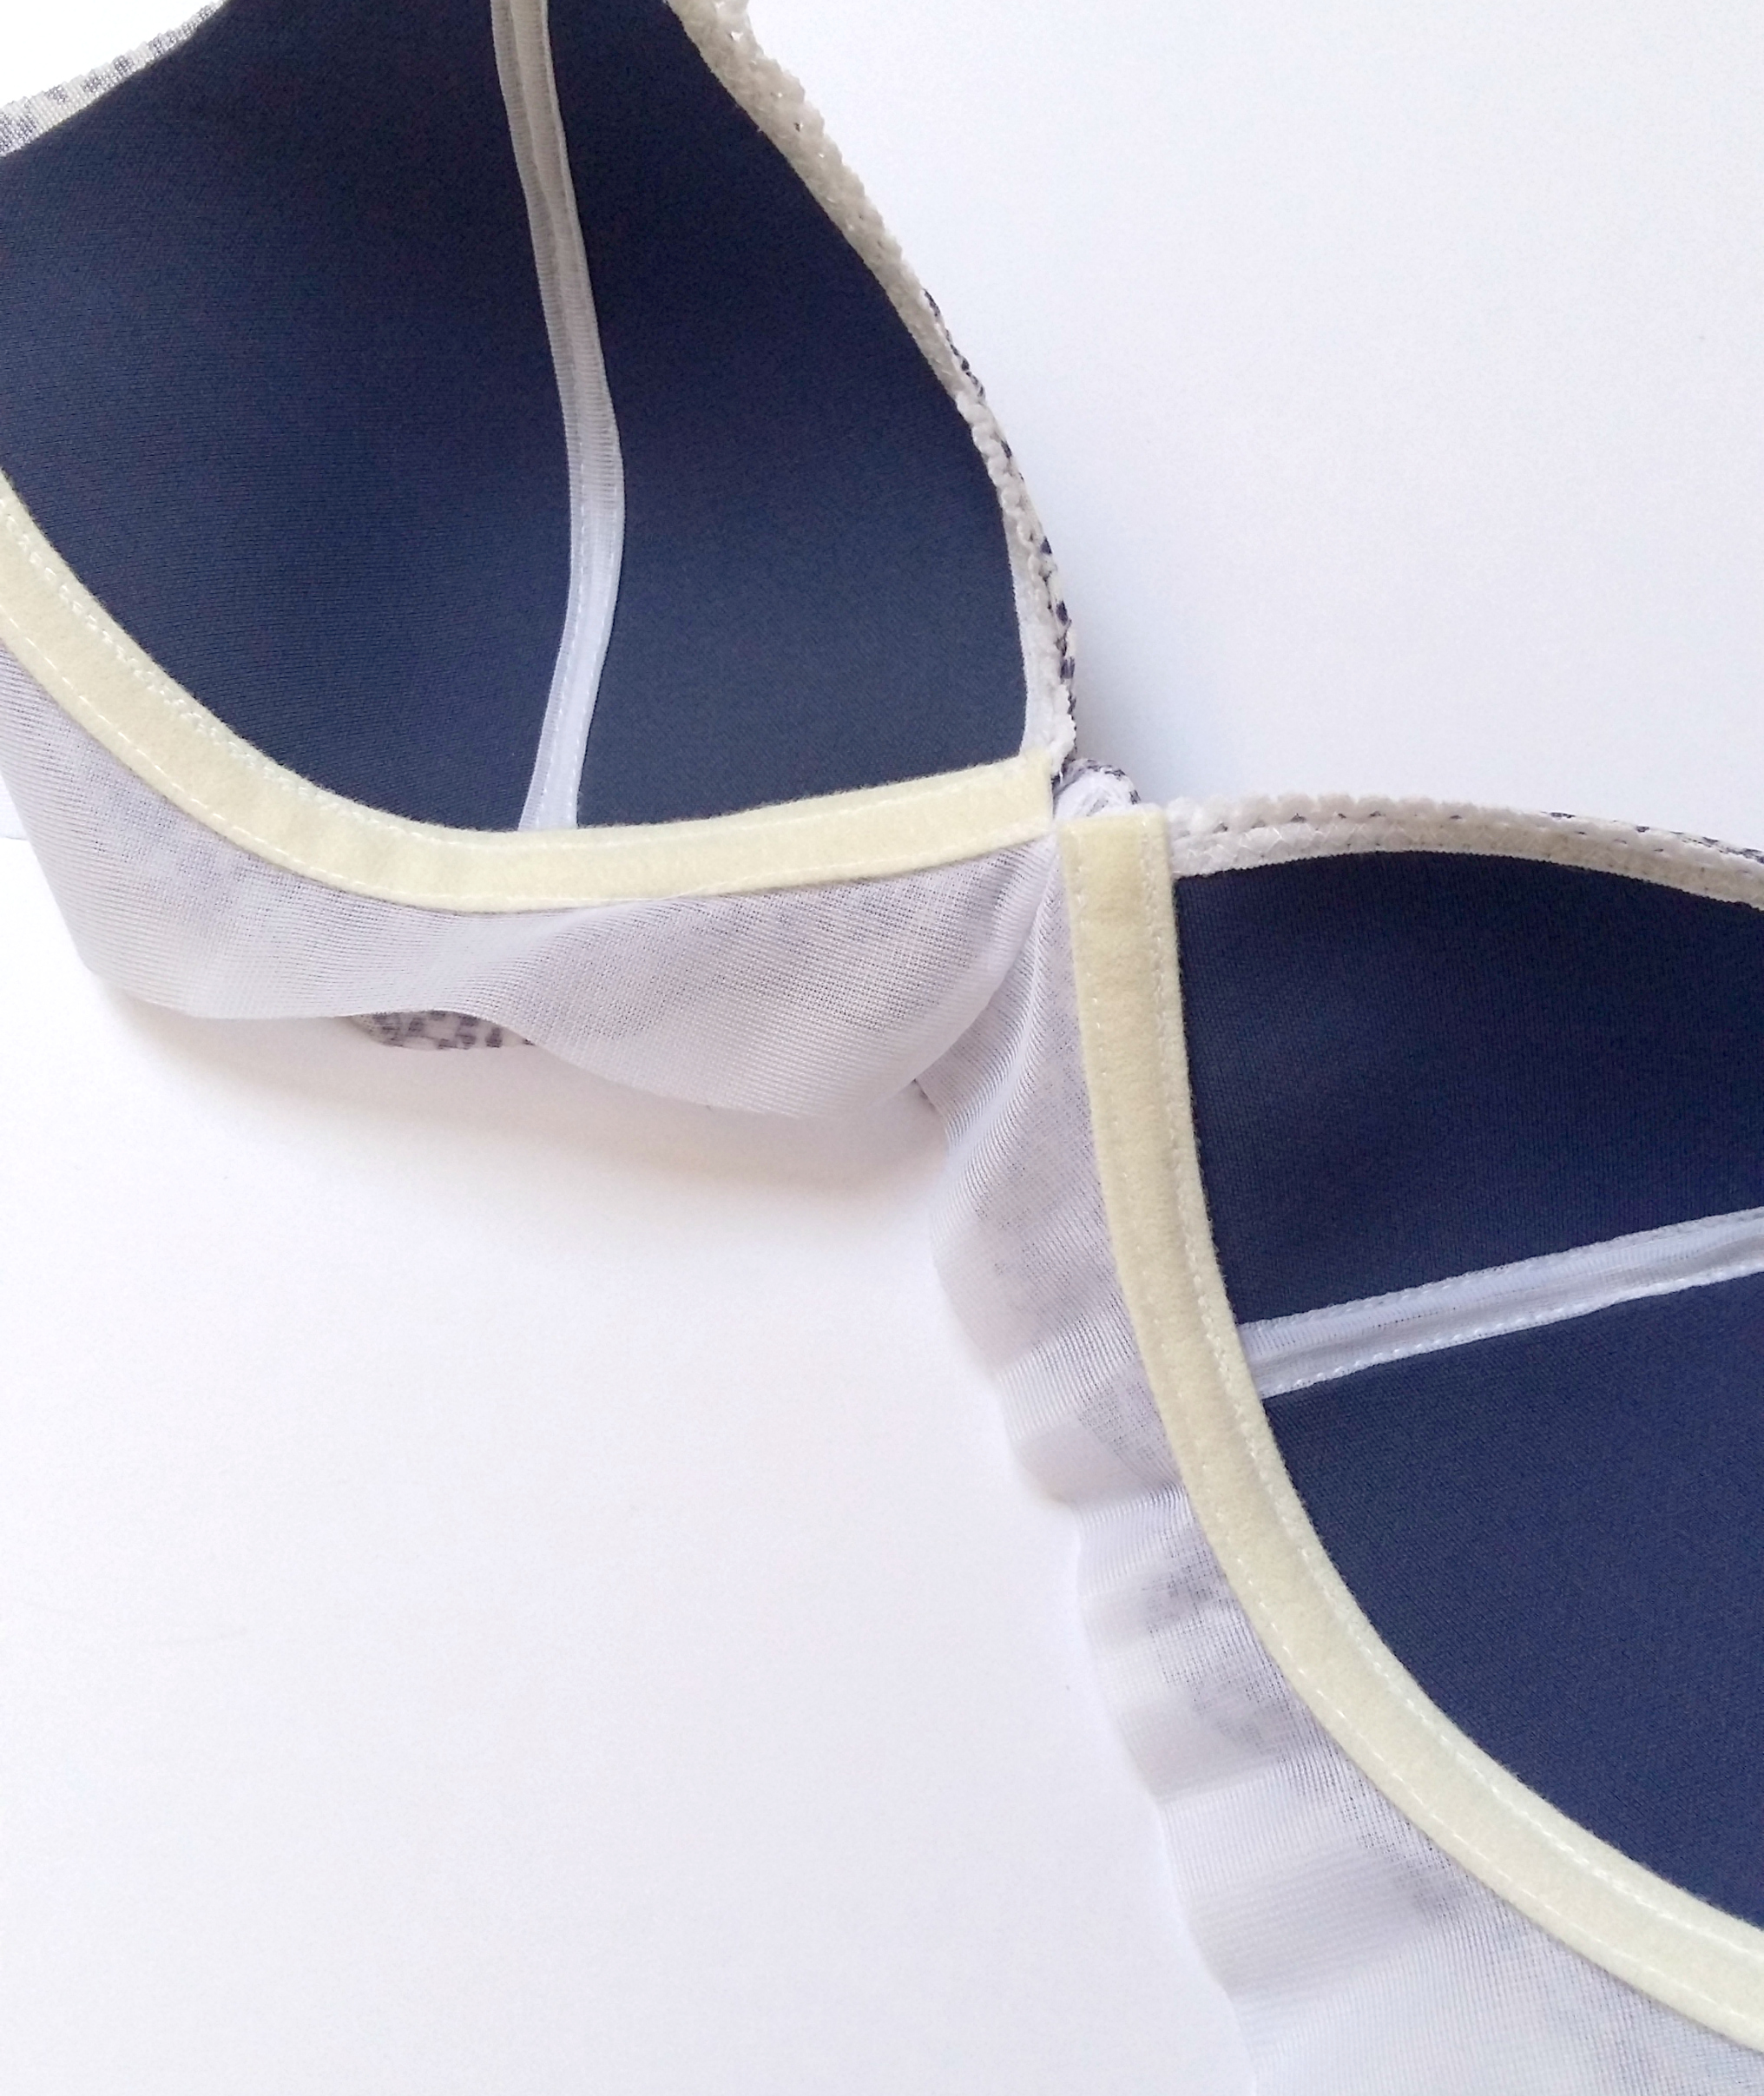
Igual que en la versión original, ahora hay que unir las copas a la banda. Es importante que en el lateral el foam termina antes y queda allí todavía margen de costura en la tela para poder poner el elástico de nuevo sin doblar el foam.
Like in the original version you now need to sew the cups to the bridge. Make sure that the foam cup piece ends just before the fabric one to leave the seam allowance there to be able to fold down the elastic like we did on the cup before.
Otro paso opcional pero que me parece práctico aquí es que en vez de remallar es costura de la unión de copas, le puse el túnel de aros (sin aros, claro) que tapa bien esa costura y lo deja todo más limpio y plano. No he hecho fotos de paso a paso de este proceso (sí que lo podéis ver en el tutorial de Cloth Habit) porque son varias costuras pero básicamente es tapar la costura con esa cinta. Si queréis puedo hacer un tutorial aparte de eso (me decís en los comentarios).
Another step that's optional but I prefer to do is to cover the cup and bridge union seams with underwire channeling (without underwires, of course), it makes everything cleaner and flatter too. I didn't make step by step photos of the process (you can check out this tutorial by Cloth Habit for that) because you need to do various stitching lines there but basically it's the process of covering the seam with the channeling. I can make a separate tutorial about that if you'd like (mention it in the comments then).
Después de terminar de poner todos los elásticos se queda así, bastante bien y limpio por dentro y por fuera.
After attaching all the elastics the result is pretty neat on the inside too.
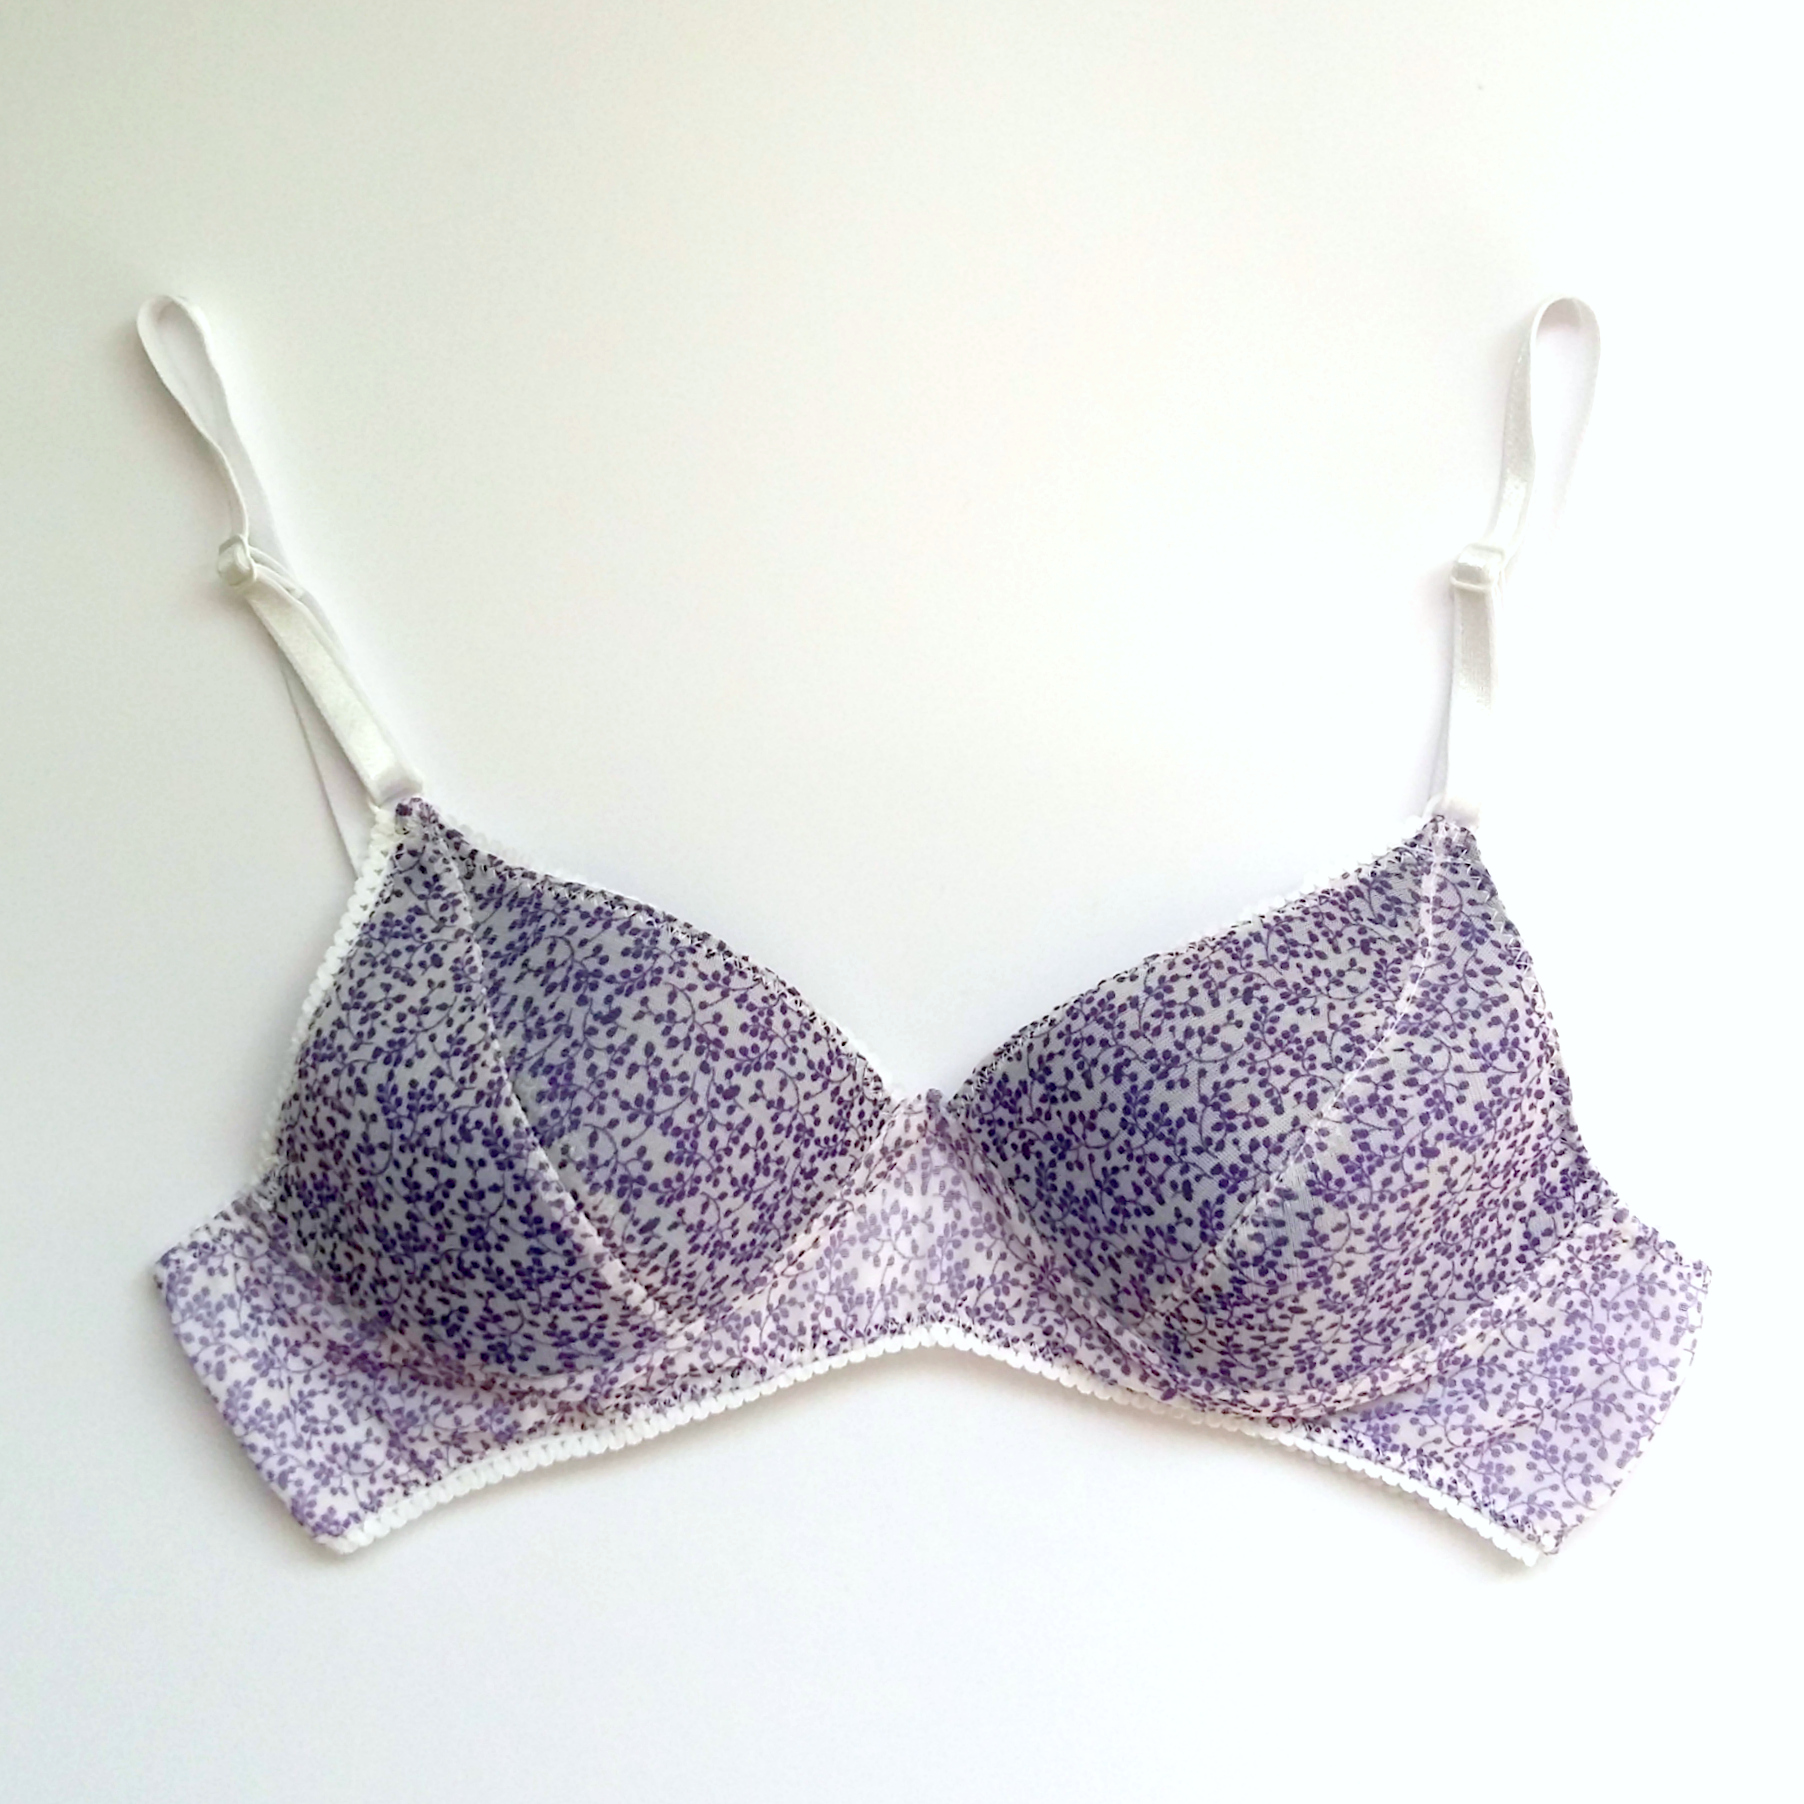
Mi conclusión sobre el experimento de aumentar la parte central del sujetador es que es maravilloso! Creo que he encontrado por fin el modelo de sujetador que mejor me funciona...ahora tengo que hacer mil!!!!! Jajaa...bueno, un par de ellos igual sí. Para mí es ideal porque es lígero pero da soporte y como necesito poco pues funciona muy bien. Estoy pensando ahora adaptar eso para coser las copas de encaje...creo que podría estar muy bonito! Ya me decís si queréis ver lo de encaje al detalle también. Espero que os ha dado una idea más o menos cómo hacer las copas de foam. Cualquier duda me preguntáis! Esto ha sido larguísimo, jaja, gracias por leerlo!
My conclusion about the bridge width experiment is that it's a success! I think I've finally found the best bra fit for me...now I need a ton of those!!!! Hehe...well, a pair or so at least. It's perfect for me as it's lightweight but gives support and as I need quite a little it works out really well. I'm now thinking about adapting the pattern for lace too...I think it could be very pretty! Let me know if you'd like to see the lace pattern in detail too. Hope it was useful for you and you learned how to adapt this pattern once more. If you have any doubts just ask! This has been a long one, hehe, thanks for reading!
