

Hola! Hoy os cuento un par de cosas sobre acabados que podéis usar para las braguitas Stella. Este patrón está pensado para elásticos de lencería de 5-10 mm para rematar la cinturilla y las piernas pero se puede usar también otro tipo de elásticos. Primero te cuento cómo hacerlo con el bies elástico (el FOE en inglés).
Hey! Today I'm writing a bit about finishings you can use for Stella panties. This pattern is designed for 5-10 mm wide lingerie elastics for the wast and legs but you can use other types of elastics too. First I'll tell you how to use FOE (fold over elastic).

Tengo que decir que yo no soy muy fan de coser el bies elástico pero me gusta mucho como queda. A ver, no es que sea muy complicado de coser pero muchas veces los acabados no me terminan de gustar y me parece más fácil y bonito como queda el elástico de lencería normal. Eso sí, el bies elástico es muy fácil de encontrar en la mayoría de las mercerías así que es una buena opción por si no quieres pedir en internet. También es cuestión de tiempo y práctica, los resultados pueden ser muy bonitos!
La primera cosa con el bies elástico es que igual que el bies normal, no necesita márgenes de costura, así que quita el margen de costura donde lo vayas a poner. En el caso de estas braguitas sería quitar 5 mm del borde. Luego, a mí me gusta más coser el bies antes de que la braguita esté todavía cerrada porque lo que me parece que siempre queda un poco mal es la unión en círculo de bies. Ahora, eso es preferencia personal y puedes coserlo tal como cosemos el elástico de lencería normal.
En este caso voy a poner el bies a la cinturilla y ya he cosido todo menos un lateral. Si lo pondrías en la versión 1 de este patrón en las piernas también lo harías una vez que tengas las piezas de entrepierna unidas pero antes de cerrar los laterales. Luego ya unirías un lateral y lo pondrías en la cinturilla.
I have to say that I'm not a big fan of sewing with FOE but I really like how it looks. I mean it's not that it's very complicated to sew with but I find that I don't always love the finishing touches with this elastic, I think that regular lingerie elastics are easier to sew with and look more professional. The thing is that FOE is quite easy to find in normal fabric shops so it's a good idea if you don't want to order online. Also it's just the matter of practice and time, the reuslts can be very pretty!
First thing about FOE is that like a regular bias binding it doesn't need seam allowances so you can take them away in the part of the panties where you'll be using it. In the case of these panties take away 5 mm from the edge. The other thing is that I prefer to sew the FOE on when one of the side seams is not closed yet because the part I think that doesn't look too good normally is the union/overlapping point of elastic once you sew it in circle. But it's a personal thing so if you want to sew it in circle you can perfectly do it in a similar way we attach the normal lingerie elastics.
In this case I will use FOE for the waistline and I've sewn everything exept one side seam. If you would do it with the version 1 of this pattern for the leg openings you would first only join the crotch pieces with the front and the back, add the FOE in the leg openings and then sew one side seam so you can use the elastic on the waist.

Empezando en un lateral coloca el bies con el revés hacia arriba. Puedes usar tanto el lado brillante como el mate para que sea visible, así que tú decides cuál es el revés y cuál es el derecho. Encima del bies coloca la braguita con el derecho hacia arriba y pon el borde de la cinturilla al ras de la linea central de bies. Estirando igual que el elástico de lencería ligeramente cose todo el recorrido con un zig-zag (2.5 de ancho, 2.5 de largo).
Starting on one side seam put the FOE with the wrong side facing up. You can use both the shiny or matte side, so it's you who decides which side is the right and whitch side is the wrong one. On top of the FOE put the panties with the right side facing up and line the waist edge with the central line on the FOE. Pulling the elastic just slightly as you do with the normal lingerie elastic, sew a zig-zag stitch (2.5 width, 2.5 length) along all the waistline.
Si te sobra tela encima de la linea central puedes recortar un poco para evitar que abulte.
If there's extra fabric over the central line you can trim that down in order to avoid bulk.

Ahora de nuevo en el derecho de la braguita, dobla el bies por la mitad encima de sí mismo, ahora coses un zig-zag (2.5 de ancho, 2.5 de largo) encima del bies. El borde de la braguita se queda entre los dos lados del bies. Cose a lo largo del todo el recorrido.
Now again on the right side of the panties fold the FOE over on top of the panties and sew a zig-zag stitch (2.5 width, 2.5 length) on top of it. The pantie waist edge will be sandwitched between the two sides of FOE. Sew along the entire edge.

Ahora que tienes el bies cosido une el lateral. Para que no se mueva tanto prefiero coser antes con la máquina de coser y luego la remalladora (si lo tienes). Después de hacer esta costura te recomiendo sujetar el margen de costura de bies hacia el trasero de la braguita y dar un par de pespuntes en la parte superior para que se quede en su lugar y para reforzar la costura.
Now you have the FOE attatched and you can sew the side seam. In order for it to not move so much I usually sew with my sewing machine first and (if using) then overlock the seam. After sewing this seam I recommend you to push the FOE seam allowance towards the back of the panties and secure it down with some stitching. That way it will stay in it's place and the seam will be stronger too.

Ya está! Me gusta mucho usar el bies para el contraste y para un diseño más sobrio.
That's it! I love using FOE for some contrast and the results look very clean.

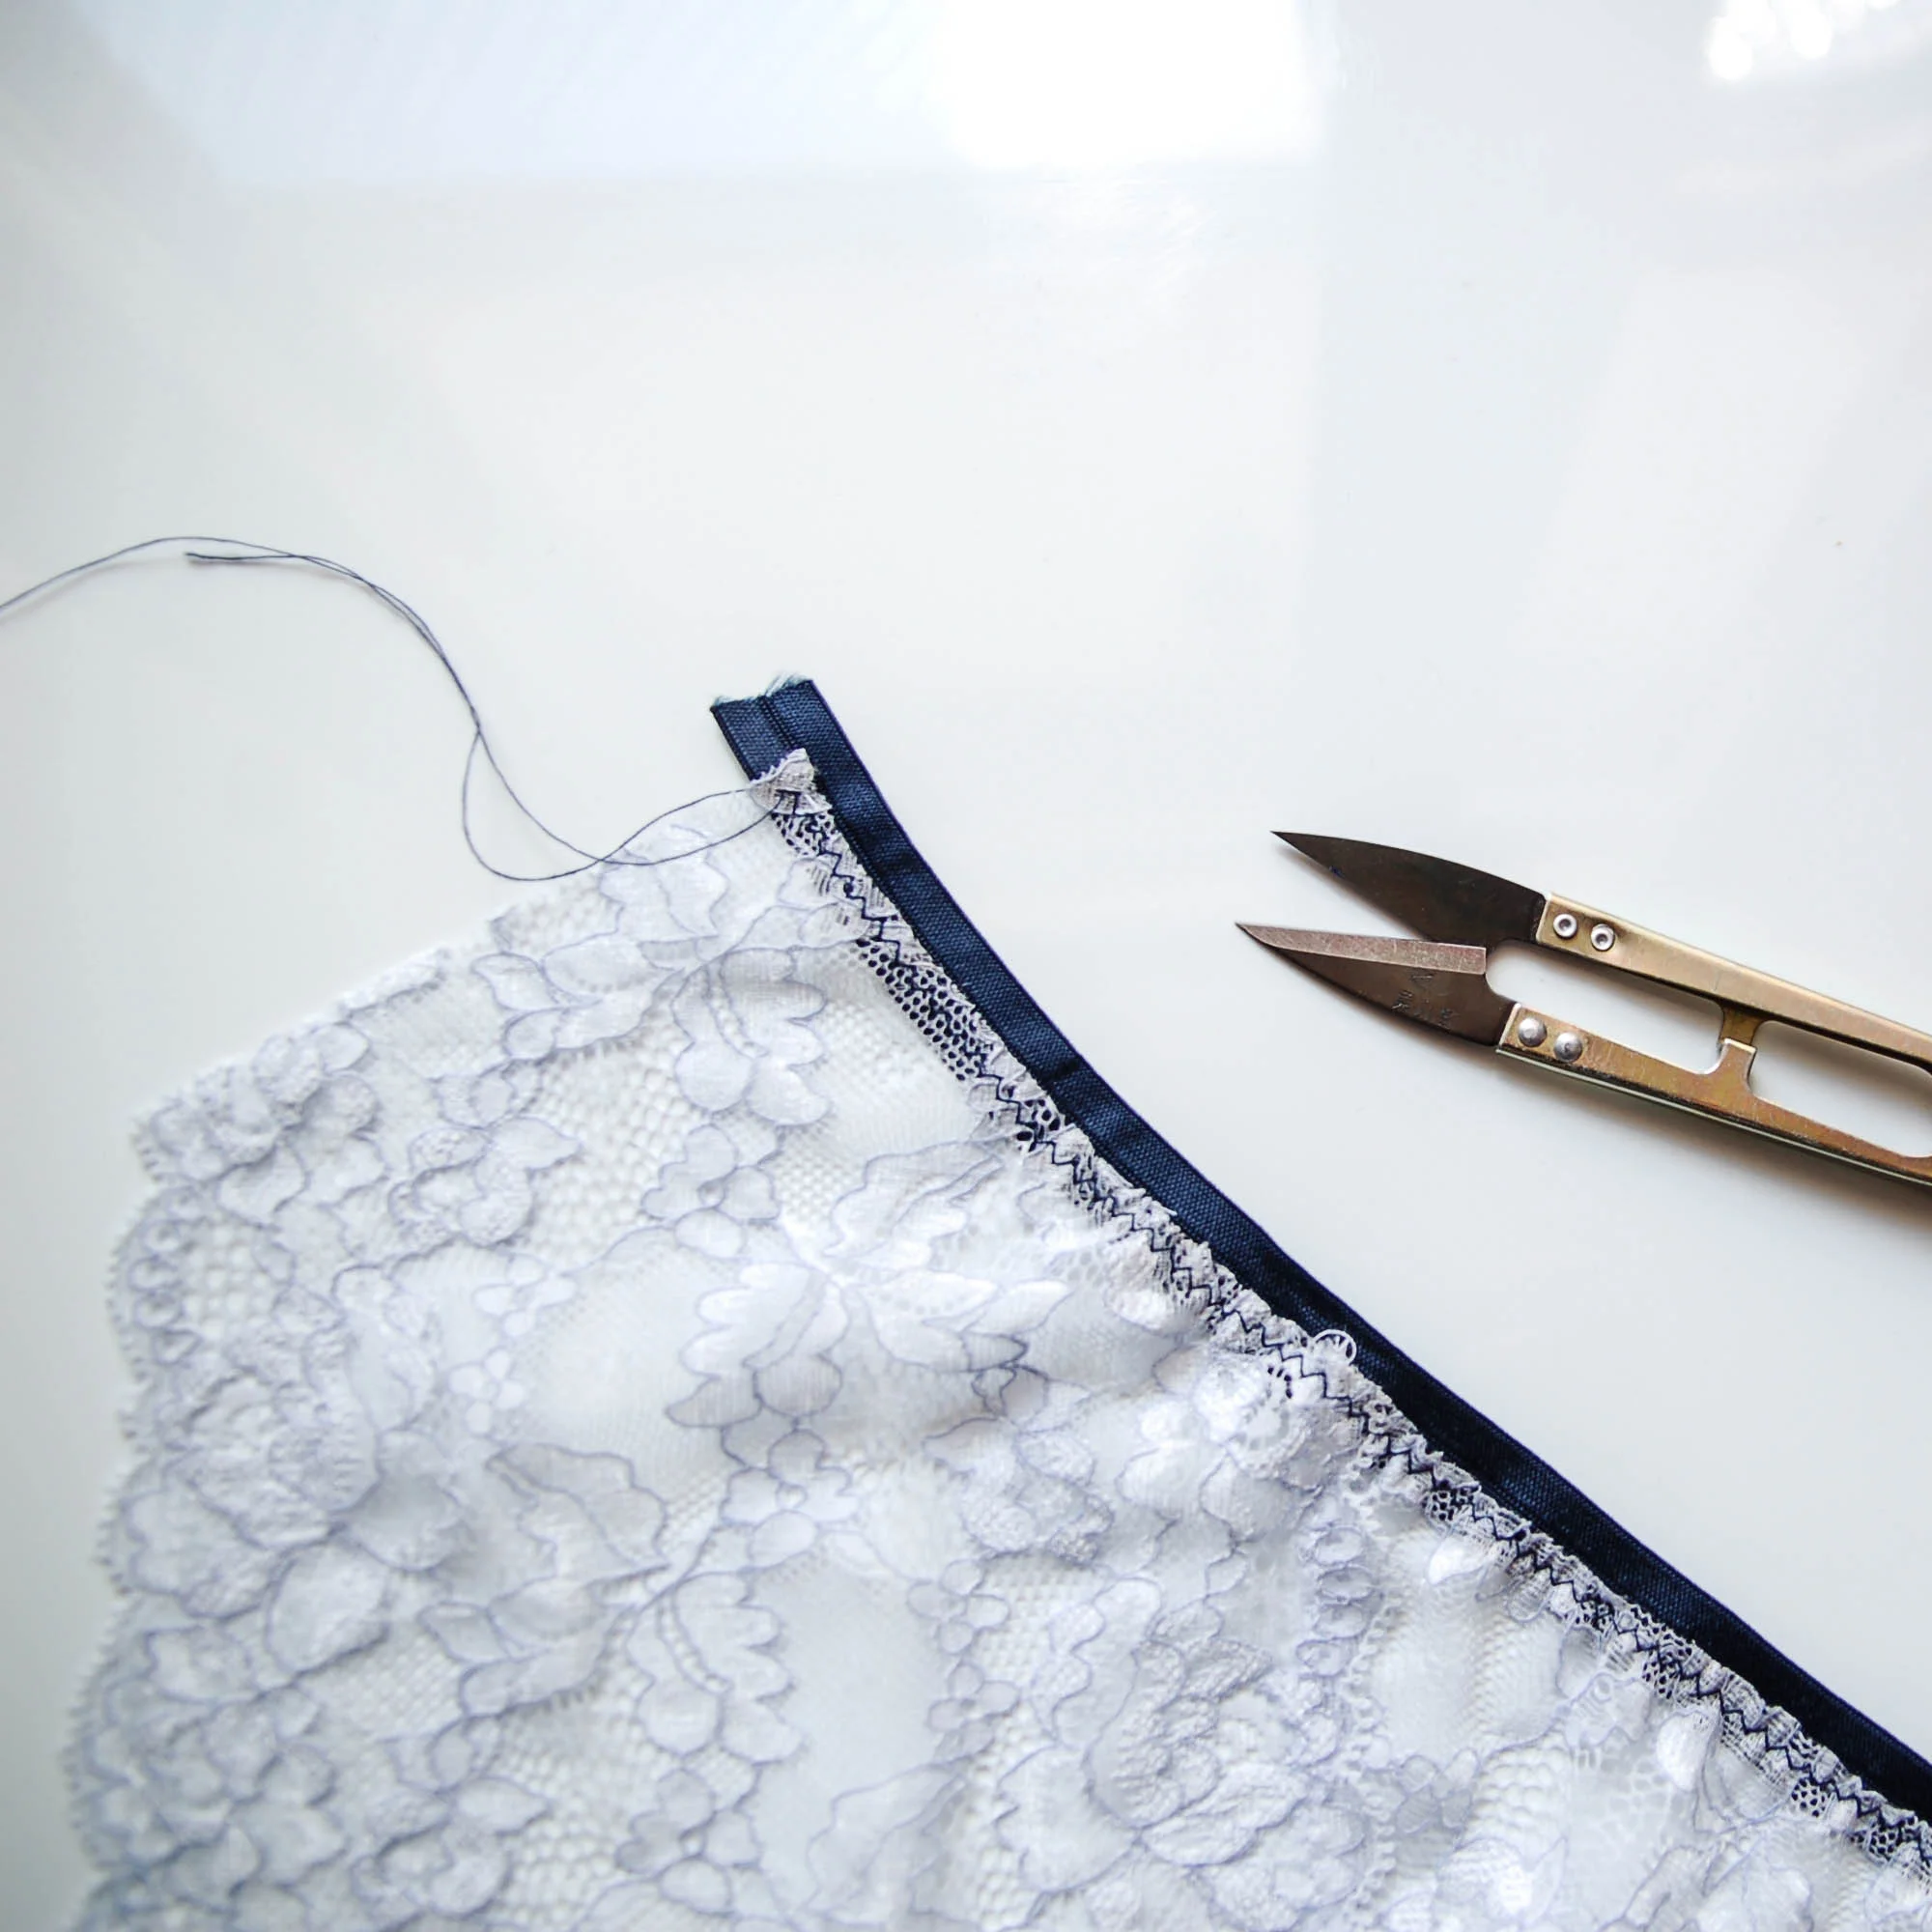
Para la otra versión te enseño cómo usar la puntilla elástica. Perdonad mi tela arrugada pero este punto de viscosa tan suave y cómodo también se arruga con mirarlo :) Las puntillas de este tipo quedan super bien para las braguitas y vienen en un montón de colores y estilos (en mi tienda tienes una selección de puntillas, para un par de barguitas suele ser suficiente con 1 m de puntilla).
Hay gente que prefiere coser la puntilla mientras la braguita todavía no está unida por los laterales para que sea más cómodo pero la verdad es que yo prefiero hacerlo en círculo porque así evito tener que usar dos hilos diferentes en la costura lateral por si uso colores distintos como en esta muestra. Así que puedes hacerlo según veas que más te gusta. Aquí no hace falta quitar márgenes de costura porque luego de todas maneras cortamos lo que sobra debajo de la puntilla.
For the other version I'll show you how to use narrow stretch lace trim. Sorry for my wrinkled fabric but this super soft and comfortable viscose knit also wrinkles like hell :) This kind of lace trims are perfect for panties and they come in a variety of styles and colors (you also have a selection at my shop, for one pair of panties it normally takes about 1 m of lace trim).
There are people who prefer to sew the lace trim while the pantie side seams are not yet sewn together, that way it stayes flat and it's easier to work with. I prefer to do it once the panties are sewn together because then I can avoid changing threads on my machine if I'm using different colors like in this example. You can really do it as you prefer. You don't need to take away the seam allowances here as we'll be anyway cutting away the extra fabric under the lace trim.

Al coserlo en círculo empieza en la parte de la entrepierna para que la unión no sea muy visible. Coloca la braguita con el lado derecho hacia arriba y pon la puntilla con el derecho hacia arriba encima de ella. El lado recto de la puntilla va donde el borde de la abertura de la pierna. Cose un zig-zag (2 de ancho, 2 de largo) siguiendo la parte de ondas de la puntilla.
When you sew the trim in circle start on the crotch area so the overlapping point won't be so visible. Put the panties with the right side facing up and the lace trim with the right side facing up on top of it. The straight side of the lace trim will be aligned with the leg opening edge. Sew a zig-zag stitch (2 width, 2 length) following the curves of the lace trim.

Yo suelo estirar muy muy ligeramente la puntilla mientras coso para que no se quede flojo. Una vez que llegas al comienzo sobrepasa la puntilla encima del principio por aprox 1 cm.
I usually pull just very slightly the trim while I sew so it won't be too loose in the end. Once you get back to the staring point overlap the beginning of the trim by aprox 1cm.

Como ves he dejado la unión abierta porque primero quiero recortar la tela que sobra y entonces después dar unas puntadas para cerrarlo. Yo solo he hecho una linea de zig-zag pero si quieres puedes hacer otra paralela para que sea más fuerte (mi experiencia es que con una linea es suficiente).
As you can see I didn't sew the lace trim ends together yet because I want to trim the excess fabric first. I only made one row of zig-zag stitching but if you want to you can do another parallel row too (in my experience you don't really need to do it).

Ahora recorta la tela debajo de la puntilla que sobra dejando un margen de 5 mm desde el zig-zag.
Now trim away the excess fabric under the lace trim leaving a 5mm margin from the zig-zag stitching line.

Coloca bien la unión de la puntilla y ahora remata esa parte con un par de puntadas de zig-zag.
Sew the lace trim overlap together using some zig-zag stitching.

Repite en el otro lado empezando en el mismo punto y colocando la puntilla con el mismo dibujo donde empezaste. Así tienes todo bonito y simétrico. Ya está, las braguitas listas!
Este tipo de acabados me gustan bastante porque une la comodidad del punto con un toque de encaje y el resultado es monísimo! La semana que viene te traigo otro tutorial sobre cómo aprovechar trocitos de encaje para pequeños detalles en las braguitas y otro post sobre cómo modificar el patrón para hacer diseños como lo que te enseñe en el post de inspiración. Que tengáis un buen fin de semana!
Repeat on the other leg opening putting the same part of the trim where you started. This way you will have a beautiful mirrored effect once everything is sewn up.
I really like this type of finishings because you'll have the comfort of knit fabrics and a beautiful detail of lace, the results look really cute! Next week I'll bring you one more tutorial about how to use up your lace scraps for panties and another post about hacking your pantie pattern to make similar styles as I showed you in the Stella inspiration post. I hope you'll have a great weekend!