

Here’s a fresh take on the Hanna bikini sewing pattern. I’ll show you how to add an extra band that is both a cute style element and it also provides more support. I also used a crossover hack for this version, so you can read about how to do that too. This tutorial is also available in a video format as part of the extra modules in the Hanna bikini online course.
Aquí tienes una nueva versión que puedes crear con el patrón de bikini Hanna. Te mostraré cómo añadir una banda extra que, además de ser un bonito detalle, también proporciona más sujeción. En esta versión también he utilizado la modificación de cruce, así que también podrás leer cómo hacerlo. Este tutorial también está disponible en formato de vídeo como parte de los módulos extra del curso online de bikini Hanna.
Pattern preparation // Preparación de patrón

The pattern modification is very simple. You need your top pieces as usual, but instead of sewing the elastic on the hem of the whole top, you replace it with a tunnel made of swim fabric with the elastic on the inside.
You can choose to use any width of elastic. I used normal elastic, not specific rubber elastic for my sample (you can read about spcific supplies you need to sew swimwear in this blog post). If you know you are going to use the bikini a lot at the pool and beach and you are unsure whether regular elastic will last, you can use rubber elastic as in the rest of the bikini. Knowing that I don't use it intensively, I know that regular elastic will be fine.
The length of the tunnel piece is the same as the length of the hem of your top once you have joined all the pieces together. The width should be double the width of the elastic you are going to use + a seam allowance on both sides.
I left a 10 mm seam allowance on both sides just in case, to make it easier to sew, and then cut it off when finishing that seam with the serger. Technically, you're fine with a 6 mm seam allowance on both sides, but I think that if you're not super tight on fabric, it's easier to leave 10 mm and then trim it afterwards.
So, in my case, I used 2.5 cm elastic and the final width of the tunnel was: 2.5 + 2.5 + 1 + 1, for a total of 7 cm.
In my size, there is a 10 mm seam allowance for the hem of the top pieces, so I didn't remove any seam allowance before joining the pieces. If you have a larger cup size and the seam allowance is 17 mm, you can first remove the 7 mm to match that seam allowance to the tunnel.
La modificación del patrón es muy sencillo. Necesitas tus piezas de top como siempre y en vez de poner el elástico en la banda, se sustituye por un túnel hecho de tela de lycra con un elástico de ancho que quieras, por dentro. Yo he usado un elástico normal, no es elástico de caucho (puedes leer sobre los materiales que necesitas en esta entrada del blog). Si sabes que vas a darle mucho uso en piscina y en la playa y estás dudando que si ese elástico normal va a perdurar en el tiempo, puedes usar un elástico de caucho como en el resto del bikini. Yo sabiendo que no le doy ese uso intensivo sé que voy a ir bien con el elástico normal.
El largo de la pieza de túnel es el mismo que largo de todo el bajo de tu top una vez que has unido todas sus piezas. El ancho sería doble de elástico que vayas a usar + margen de costura para ambos lados. Yo dejé por si acaso ese margen a 10 mm en ambos lados para que sea más fácil de coser y luego lo corté al hacer el acabado con la remalladora. Técnicamente vas bien con 6 mm de margen en ambos lados pero creo que si no vas super justa de tela, es más fácil dejar los 10mm y luego recortas.
Por lo tanto, en mi caso usé el elástico de 2,5 cm y el final de ancho de túnel fue: 2,5 + 2,5 + 1 + 1, en total 7 cm.
En el top de mi talla hay margen de 10 mm para el bajo, así que no quité nada de margen antes de unir las piezas. Si tienes la copa más grande y el margen es de 17 mm, puedes primero quitar los 7 mm para igualar ese margen al del tunel.
Crossover front modification // La modificación del cruce
I'll tell you about my muslin process first because I made another modification to make the crossover front for this tutorial, apart from the extra band. If you are using the original pieces, you can move on to the sewing part of this tutorial.
Te cuento primero mi proceso de prueba porque hice otra modificación de delantero cruzado en este tutorial, aparte de la banda extra. Si tú vas a usar las piezas original, puedes pasar a la parte de coser de este tutorial.

I wanted to see if I was going to lower the neckline. So first I assembled the top pieces with test knit fabric and added the band by folding it in half and then sewing it right sides together with the top pieces.
To test it, I inserted the elastic that I measured on my body. The elastic looks slightly gathered because in my case it is shorter than the tunnel, but it doesn't have to be that way. The elastic I used is quite soft, so I preferred to cut it shorter and stretch it more to adapt it to my body. When wearing the bikini, you can't see the gathering. If you use a firmer elastic, it can have the same measurement as the tunnel. It is best to measure the elastic with your torso to find out what size is right for you.
After my test, I saw that I could lower the neckline, so I first marked where I wanted it to be (this modification is described in the pattern adjustment part of the pattern instructions).
Quería ver si iba a bajar el escote y por eso primero monté las piezas de top en mi talla con tela de prueba y le añadí la banda doblándolo por la mitad y luego derecho con derecho con las piezas de top.
Para probar le metí ya el elástico que medí con mi cuerpo. El elástico se ve ligeramente fruncido porque en mi caso es más corto que el túnel pero no tiene por qué ser así. El elástico que he usado yo es bastante blandito, así que he preferido cortarlo más corto y estirarlo más para adaptarlo a mi cuerpo, con el bikini puesto no se nota ese frunce. Si tú usas un elástico más firme, puede que uses la misma medida que el túnel. Lo mejor es medir el elástico con tu torso para saber qué medida va bien para ti.
Según mi prueba vi que sí que puedo bajar el escote así que primero marqué dónde quería que esté (esta modificación la tienes en las instrucciones del patrón en la parte de ajustes de patrón).

To create the crossover effect, I followed the diagonal neckline line on pattern piece A all the way down and cut the cup pieces as usual. The elastic on the neckline is sewn in the same way as always, but there is no seam allowance angle where the elastic ends; everything is sewn all the way down.
Para hacer el efecto cruzado, seguí la línea diagonal de escote en la pieza de patrón A hasta abajo y corté las copas como siempre. Se cose el elástico igual que siempre pero no hay ese escalón de margen de costura donde se acaba el elástico, se cose todo hasta abajo.
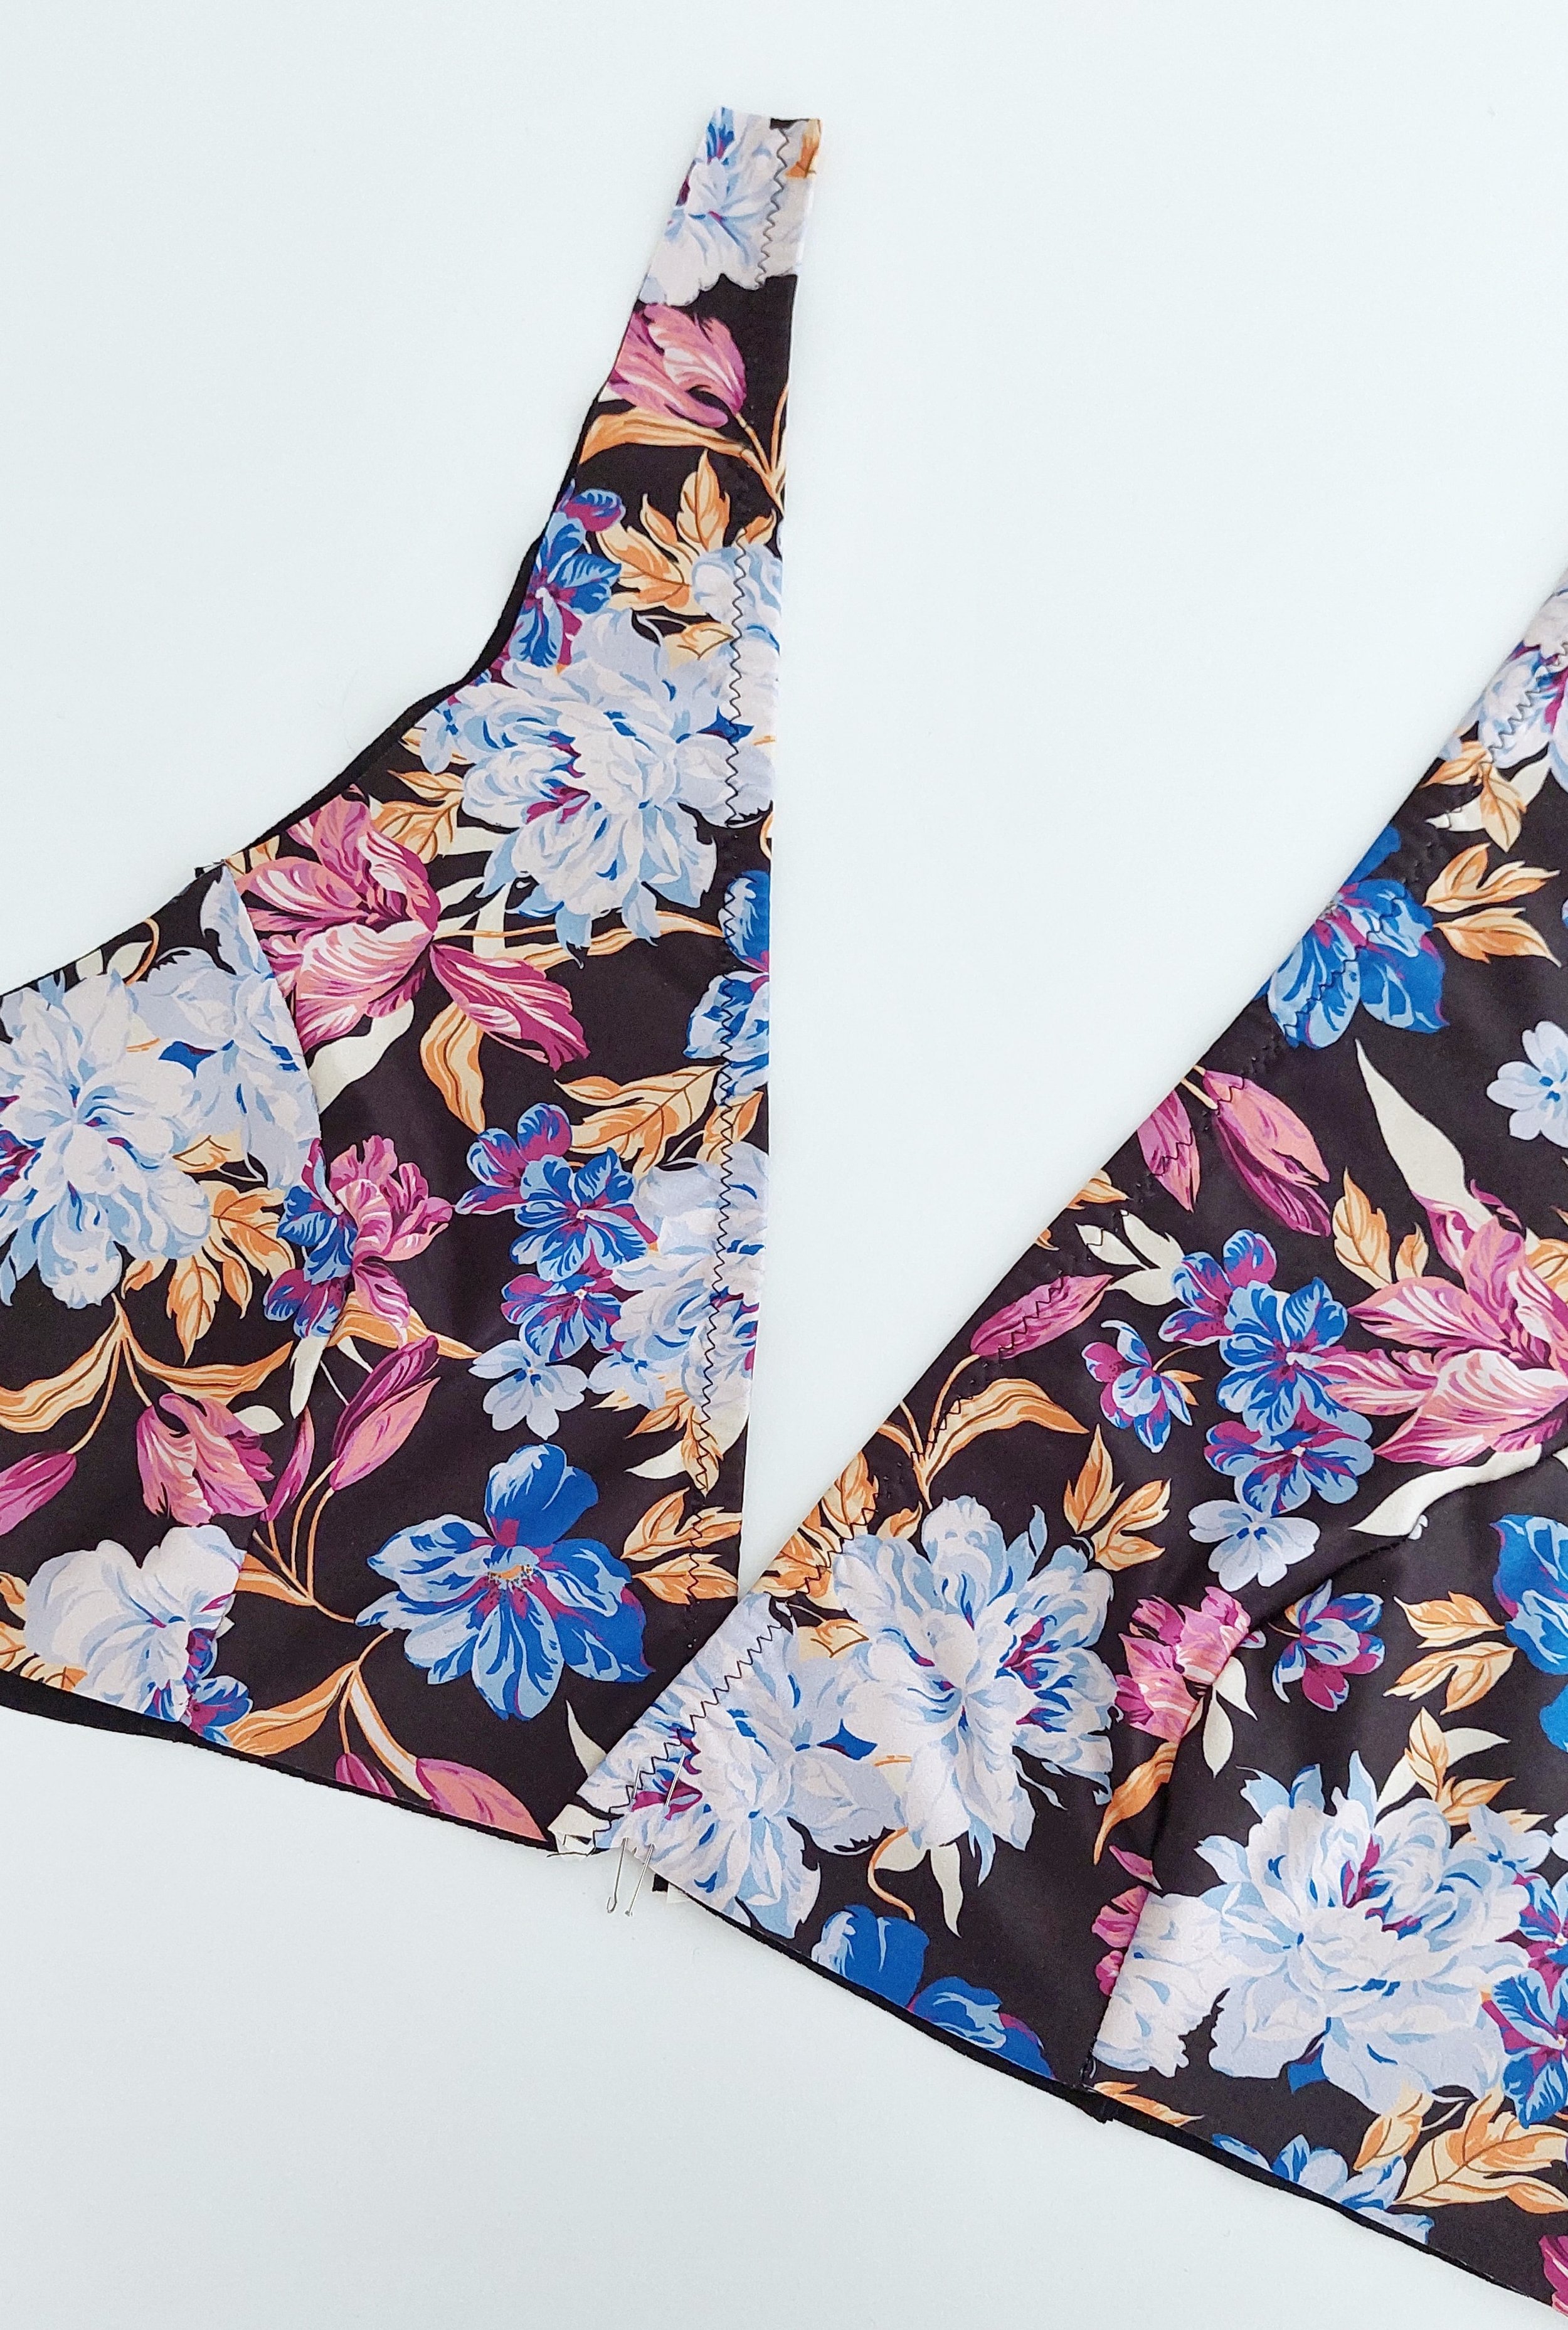
I marked where the center seam is on both cup pieces, and that's where I overlapped one piece with another. Joining the notches, I placed one piece on top of the other and sewed them together on the lower part so they wouldn't move. They will be eventually sewn together by the extra band.
You also have the option of making a little reinforcement stitching where the pieces cross, to secure the crossover a little more on the upper part. This way you can reduce the risk of the overlap opening up when you wear the bra.
Marqué dónde está la costura central y allí es donde he solapado una pieza con otra. Juntando los piquetes he puesto una pieza encima de otra y las cosí juntas en la parte inferior para que no se muevan. Luego se unirán con la banda que las sujeta juntas.
También tienes la opción de hacer una costura de remate donde las piezas se cruzan en la parte superior, para asegurar el cruce un poco más. Así evitas que se abre esa parte más de lo que te gustaría cuando llevas el top puesto.
Sewing // Costura

To begin the assembly, join the top pieces as usual, sew the neckline elastic, and join the front center seam. In my case, I use my modified pieces for the crossover neckline.
Now fold the tunnel piece in half, with the right side facing out. Pin it on top of the top pieces, right sides together, with all seam allowances facing the bottom of the top.
Para empezar con el montaje une las piezas de top igual que siempre, cose el elástico de escote y une el centro delantero. En mi caso uso mis piezas modificadas para el escote cruzado.
Ahora dobla la pieza de tunel por la mitad, con el derecho hacia fuera. Sujétala encima de las piezas de top, derecho con derecho, todos los márgenes de costura quedan hacia el bajo del top.

Sew along the seam allowance you left. I used 10 mm, so that's where I sewed. You can use a small zigzag stitch or a serger. I first joined the pieces with my domestic sewing machine and, once I saw that everything was fine, I went over it with the serger and left a 6 mm seam allowance.
Cose según el margen que has dejado, yo usé 10 mm así que he cosido allí. Puedes usar un zigzag pequeño o la remalladora. Yo uní primero las piezas con la máquina doméstica y al ver que todo bien, pasé la remalladora y dejé el margen a 6 mm.

Now you have to adjust the width of the end of the band according to the closure. The end of the band should measure the same as your clasp closure plus the 10 mm elastic seam allowance that you haven't used yet on the upper part of the band. The rest needs to be cut off.
The same applies if you are going to use the tie closure. In that case, half of the ribbon piece, minus 6 mm of its seam allowance, is the final measurement of the band you are looking for.
Normally, to provide better support, I use a wider closure so that I don't have to cut the final width of the band as much. But you can use a narrower closure as well. In that case, you may have to trim your piece above the tunnel edge. As your armhole elastic will fold over the tunnel and finish it off, you should first insert the wide elastic into the tunnel (here I’m doing it afterwards) and then do that step.
Ahora tienes que ajustar el ancho del final de la banda según el cierre. El final de la banda debería medir el mismo que tu abertura del cierre más el margen de costura de elástico de 10 mm que todavía no has usado. El resto hay que cortarlo.
Lo mismo si vas a usar las cintas. En ese caso la mitad de la pieza de la cinta, menos 6 mm de su margen de costura, es la medida final de la banda que estás buscando.
Normalmente para dar mejor soporte uso un cierre más ancho y así además no tengo que cortar tanto el ancho final de la banda. Pero puedes usar cierre más estrecho también. Puede ser que en ese caso tengas que recortar tu pieza de la banda también encima de ese túnel que has creado. Ya que en ese caso el elástico de sisa va a doblarse encima del túnel, es mejor insertar primero el elástico ancho (aquí lo he hecho después).

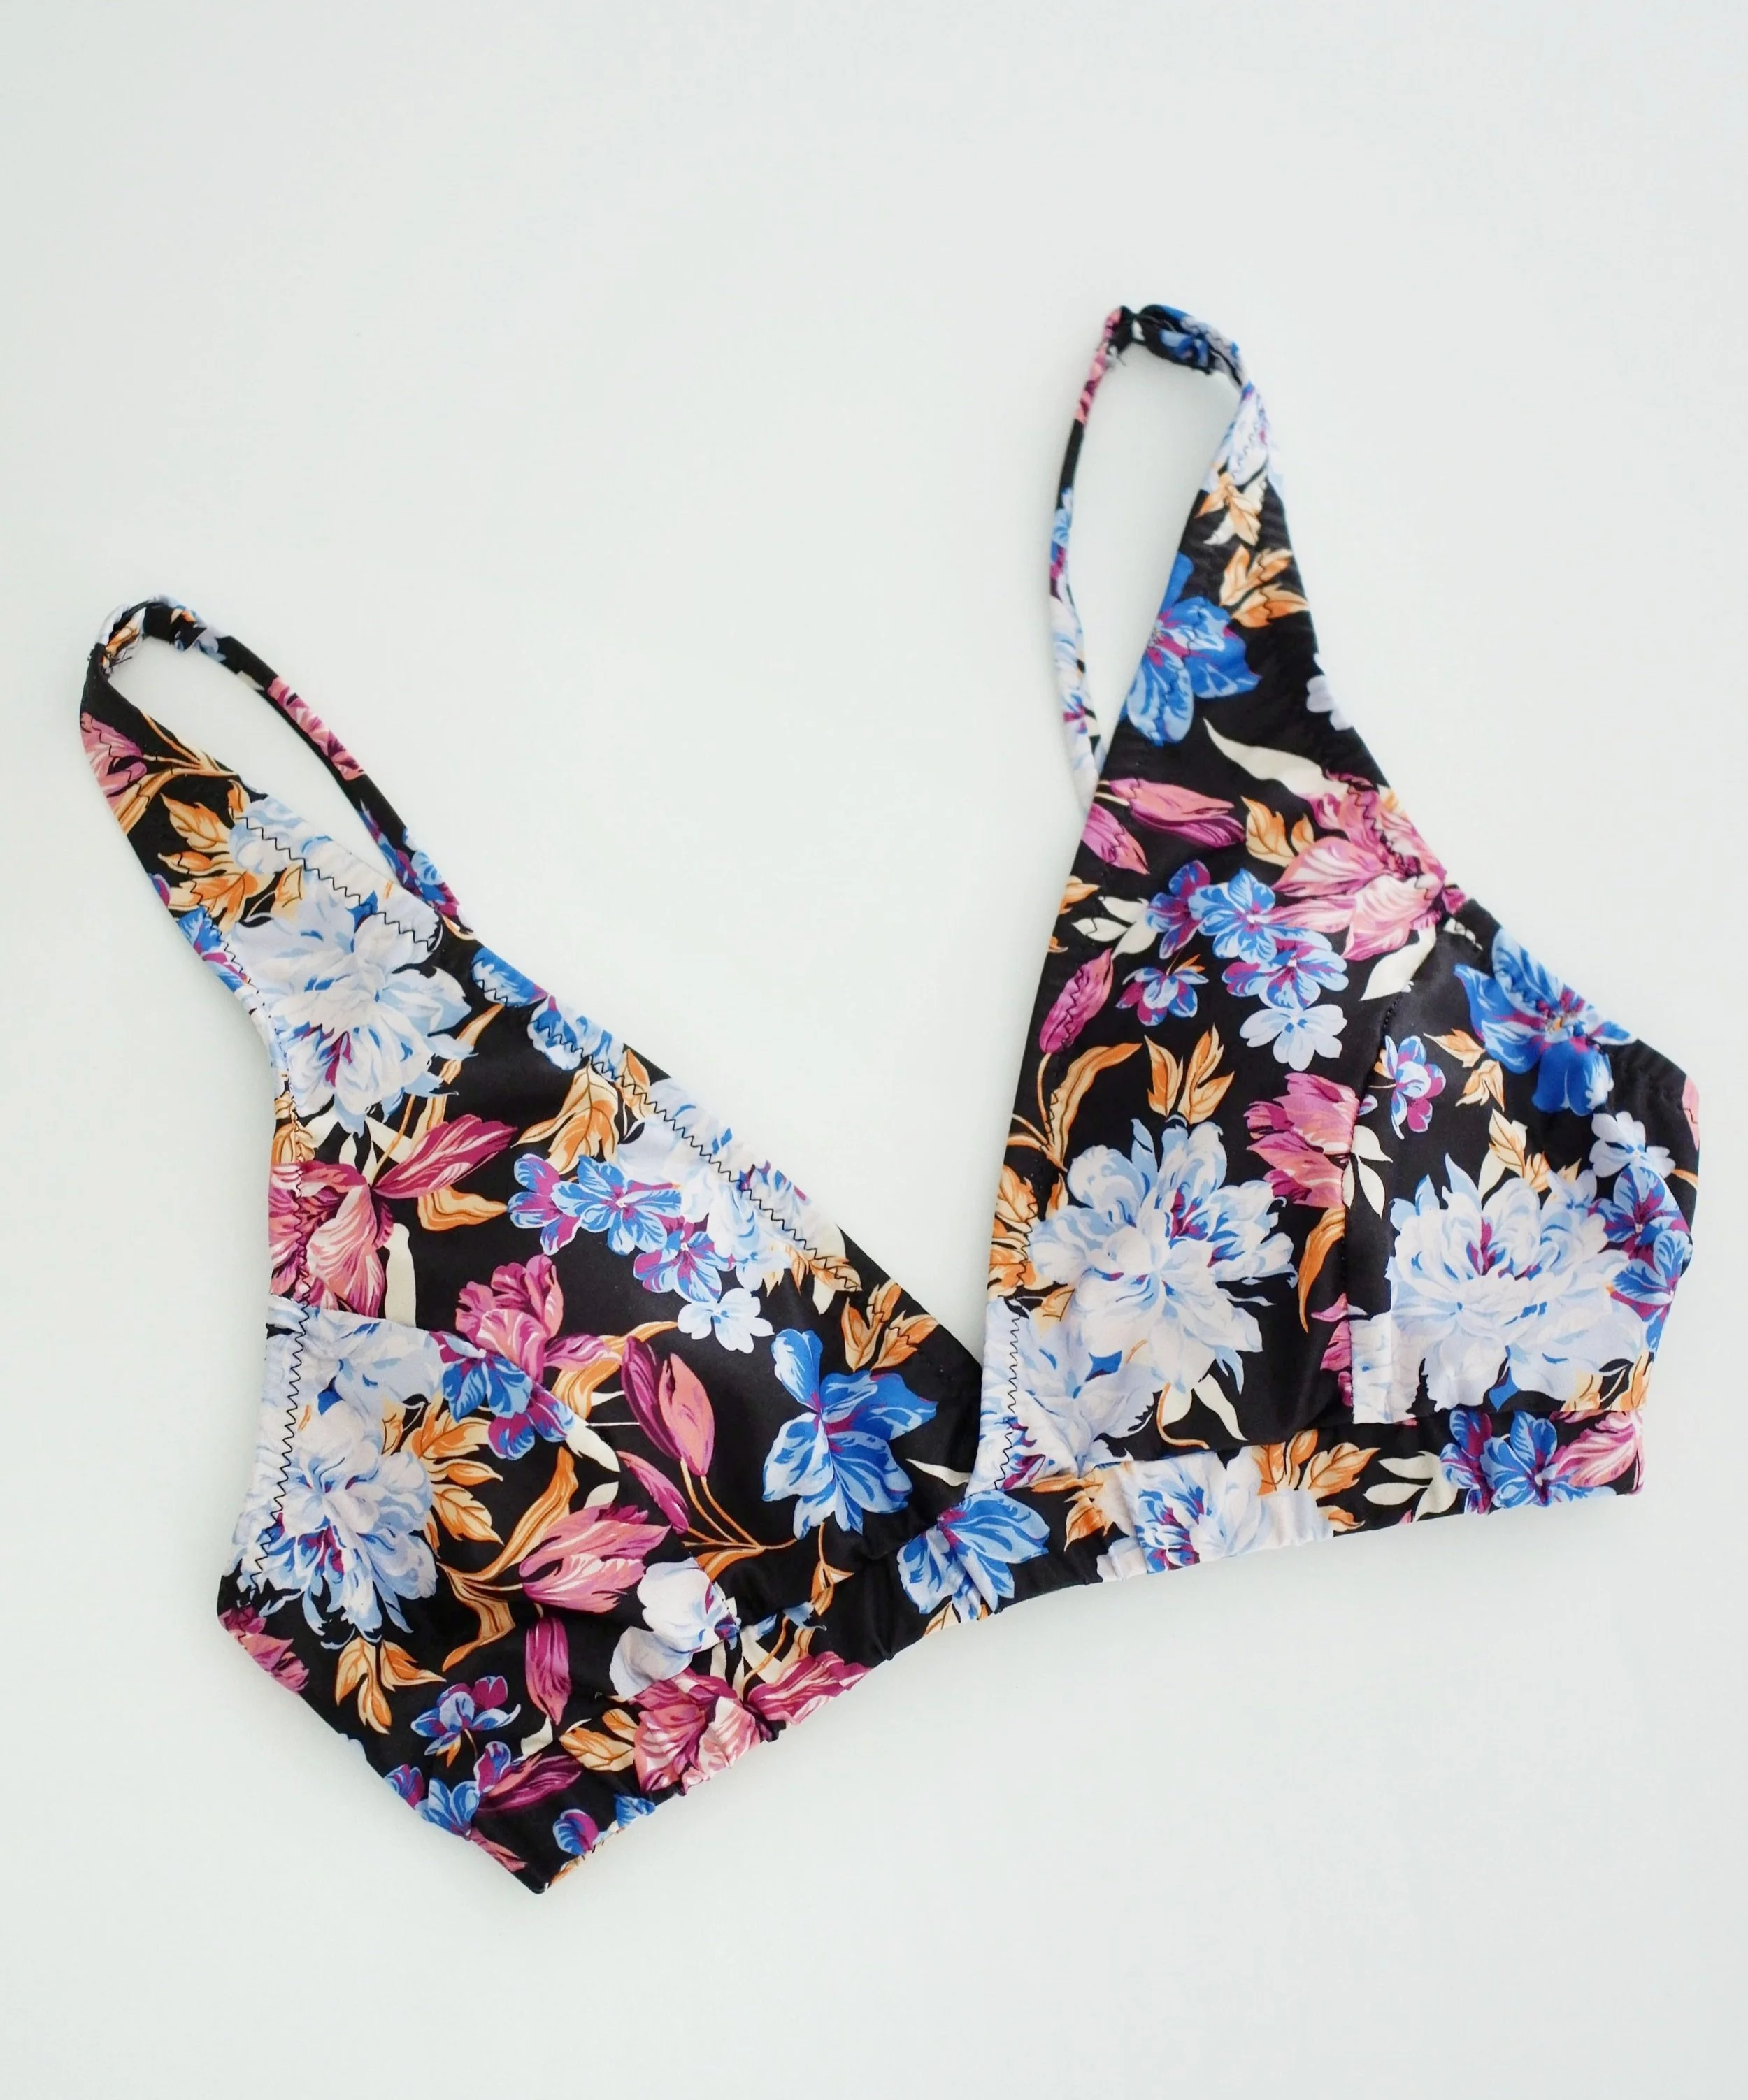
Once you have adjusted the width of the band, sew the elastic to the armhole. Then add the wide elastic to the tunnel using a safety pin and sew at both ends to the tunnel to keep them in place. Sew the closures and straps as usual and you're done!
Una vez que has corregido el ancho de la banda, cose el elástico de la sisa. Después añade el elástico ancho al túnel usando un imperdible o pasacintas y cose en ambos extremos para mantenerlo en su sitio. Cose los cierres y los tirantes como siempre y has terminado el top.
In my Pinterest folder, you can see many more examples of how to use the extra band. You can use this detail to play around with color blocking or direction of prints or stripes, and there are many possibilities for changing up the design. I hope you can experiment with this tutorial!
Above you can see a green version I made for a friend last summer.
En mi carpeta de Pinterest puedes ver bastantes más ejemplos de uso de la banda extra. Puedes usar ese detalle para hacer cambios de color o dirección de estampados o rayas y tienes muchas posibilidades de darle una vuelta al diseño. Espero que experimentes con ese tutorial!
Debajo puedes ver una versión en verde que hice el verano pasado para una amiga.

For the floral version in this tutorial I used a swimwear fabric I got from Pili Tejidos Encants in Barcelona (find my Barcelona fabric shopping post here).
If you’re interested in more swimwear related content, you can check out these resources:
blog post about which supplies you need to sew swimwear
video guide with my 5 tips about sewing swimwear (perfect for beginners)
the list of all lingerie and swimwear related posts from this blog
Hanna bikini online course is the perfect solution for learning everything you need to know about learning how to sew swimwear, I’ll be there to help you with any questions you might have!
To stay up to date with everything new around here, sign up for my newsletter. I’ll post a couple of other new things about the Hanna bikini this summer which I hope you’ll like. Thanks for reading!
Para la versión floral de este tutorial, utilicé la lycra de bañador que compré en Pili Tejidos Encants, en Barcelona (puedes encontrar mi entrada de blog sobre tiendas de telas en Barcelona aquí).
Si te interesa más contenido relacionado con prendas de baño, puedes mirar estos recursos:
la entrada del blog sobre los materiales que necesitas para coser prendas de baño
video guía con mis 5 consejos para coser prendas de baño (va super bien para principiantes)
la lista de todas las entradas relacionadas con lencería y prendas de baño de este blog
el curso online de Hanna bikini junto a su comunidad de alumnas es el sitio perfecto para aprender todo relacionado con prendas de baño, estaré allí para solucionar todas tus dudas!
Para estar al día con todas las novedades, suscríbete a mi newsletter, este verano publicaré un par de cosas más sobre el bikini Hanna que espero que os gusten. Gracias por leerme aquí!