Este post ha sido editado el día 10 de noviembre 2020. He añandido más información sobre la segunda máquina y sobre coser lencería.
Hola! Hoy un post sin prendas nuevas...de hecho sin ninguna novedad de gran escala. Pero algo útil, eso espero que sí. No sé si recordáis a este post del otoño pasado cuando escribí un poco sobre mis máquinas de coser, era cuando había comprado una nueva para mis clases. Desde entonces hemos pasado juntas todo un curso “escolar” y quería escribir sobre mi experiencia con las distintas máquinas, quizás sea de ayuda para alguien quien quiere comprar su siguiente máquina. Una pequeña advertencia: el post me ha salido larguísimo, jaja.
This post has been edited on 10th of November 2020. I’ve added more information about the second machine and about sewing lingerie.
Hey! Today’s post won’t contain any news...actually no big novelties at all. But hopefully there will be something useful at least. I’m not sure if you remember that post from last autumn when I wrote a bit about my sewing machines, I had recently bought a new one for my classes. Since then we have spent together almost a whole “school year” and I wanted to write about my experiences with different machines, maybe it will be helpful for someone who wants to buy their next machine. A little warning: this post ended up very long, hehe.
Cómo elegir tu primer máquina de coser
Me gustaría empezar un poco más lejos para ampliar este post también para dar algún consejo a gente que recién quiere comprar su primera máquina. Lo más importante sería saber qué tipo de uso le vas a dar...bueno, nunca se sabe, pero hay que adivinar, verdad? Si nunca has cosido y te interesa, pero no sabes si te va a gustar: te recomiendo probar eso de coser en alguna clase de costura o pidiendo ayuda a alguien quien sabe coser. Pienso que en un mes de clases te das cuenta si es lo tuyo o no. También es buena oportunidad de probar las máquinas y ver cómo funcionan, qué es lo que te gusta y qué no. La verdad es que al principio lo más probable es que no llegas a ver tanto las diferencias entre las máquinas, sólo acabas de aprender cómo manejarlo...todavía es difícil darte cuenta de todo lo que tiene una máquina. Pero eso viene con el tiempo y no hay que preocuparse.
Si puedes encontrar a algún familiar o amigo o quien sea quien tenga una máquina sin darle uso, aprovecha y usa esa máquina para empezar. Si no sabes si está en buena forma, llévala al mecánico y que lo revisen, total, lo más probable que eso te sale más barato que directamente comprar una nueva. Las máquinas “antiguas” suelen ser muy buenas, no dejes de aprovechar la ocasión si lo tienes! Comprar de segunda mano en un sitio que no sea una tienda lo veo algo difícil. Más que nada porque no sabes si la cosa va bien o no, ya que no tienes mucha experiencia. Y aún si lo tienes, los fallos suelen ocurrir luego al darle uso, y sin garantía no puedes hacer nada.
Si no consigues que te dejen una máquina y/o piensas en comprarte una, tienes todo el mundo por descubrir. A ver...en un mundo ideal mi consejo sería acercarte a una tienda de máquinas de coser donde puedes probar distintas máquinas, te asesoran bien, incluso te dan clases y luego puedes ir al mismo sitio si necesitas soporte técnico. Ahora...como ya os conté de mi propia experiencia, aquí en Madrid por lo menos no es tan fácil. Si tienes suerte y eliges/te toca cerca un sitio con profesionales buenos que te recomiendan lo que necesitas (no uno de 700 euros para tu primera máquina…), aprovecha y compralo allí.
How to choose your first sewing machine
I’d like to start this post a bit further away from the initial theme to also give some recommendations to these people who want to buy their first sewing machine. The most important thing to know would be the use you’ll be giving the machine...well, you don’t really know yet, but you can guess, right? If you have never sewn before and you’re not sure if you like the activity I’d take some sewing classes to start with or you can ask someone who knows how to sew to show you a bit. I think that in one month of classes you’ll know if it’s your thing or not. That’s also a good opportunity to try out the machines and to see how they work, what you like and what you don’t. The truth is that in the very beginning it will be hard to see the difference between the machines, you just started to use the thing...it’s difficult to see everything a machine has to offer. But it will come with time so no worries.
If a family member, a friend or whoever you might know, has a sewing machine they don’t use, you’re in luck, you can use this machine to try out in the beginning. If you are not sure if the machine works well, take it to the tech support, it’s most likely cheaper than buying a new machine. The “old” machines are usually good, don’t waste an opportunity when you have it! I find buying a second hand sewing machine from a place that isn’t a shop quite difficult. Mostly because as a beginner you are not aware if the machine is working well or not. And even if you are not a beginner, the problems the machine has are most likely going to show up when you’ll use it and without the guarantee you can’t reclaim anything.
If you are not able to get a machine from someone or/and you want to buy one, there’s a whole world of opportunities out there. Let’s see...in an ideal world my first recommendation would be to attend your local sewing machine retailer where you’ll be well advised, maybe even they include classes when you buy a machine and later you have your tech support there too. But as I already told you about my personal experience, here in Madrid it’s not so easy. If you are lucky enough/close to a good place with professionals who can recommend you what you need according to your preferences (not a 700 euros worth machine for an absolute beginner….), go for it and buy it there.

Pero la realidad es que lo más probable es que vas a ir a una tienda tipo supermercado o directamente vas a buscar por internet. Yo lo he hecho y lo más seguro es que te quedas alucinada con tantas marcas, variedades, precios, puntadas y mil cosas más…”que alguien me diga cual compro y ya está!” Pues cuando mis alumnas me preguntan eso, volvemos al tema de preguntarte a ti misma qué uso le vas a dar. Si es ocasional, sólo estás empezando, no quieres gastar mucho dinero...pues ve por los modelos normales y corrientes tipo 100-200 euros de las marcas más comunes (más fácil de encontrar soporte técnico luego) como Singer, Alfa, Janome, Elna, Brother etc. En mi opinión no hay tanta diferencia entre las máquinas en esa gama baja (baja pero no mala, eh!!). No merece la pena volverte loca comparando números de puntadas y las extras...vas a usar la recta y zigzag y eso lo tienen todas.
Dependiendo en cuánto puedes gastar y entre qué modelos estás, si puedes, mira esas cosas para las máquinas de la gama baja:
Ojal de un paso
Poder ajustar el ancho de la puntada (en la puntada de zigzag es mejor si puedes variar por separado el ancho y el largo de la puntada porque así tienes más variedades de puntadas)
Si estás en España te recomiendo comprar en Seoane Textil, esta tienda gallega tiene un montón de máquinas en stock y solo tienes que escribirles para preguntar modelos y precios, te asesoran según lo que necesites.
But the reality is that most probably you are going to go to a big supermarket or directly you’ll look around the internet to find a sewing machine. I’ve done that and I’m sure like me, you’ll be astonished with the variety of brands, models, prices, stitches and other things…”could someone just tell me which one to buy and I’ll get it!! When my students ask for advice I normally ask them again the same question, what do they think they’ll do with the machine. If the use will be occasional as you’re just starting out and you don’t really want to spend too much money...just go for the common machines that cost around 100-200 euros from the most known brands (it’s easier to find tech support later on) like Singer, Alfa, Janome, Elna, Brother etc. In my opinion there are not so many differences between the lower grade (hey, low but not meaning a bad ones) machines. I think it’s not very smart to go crazy comparing the number of stitches and all the extras...you’ll use the straight stitch and the zigzag and all of them have those.
Depending on your budget and the models you can choose from, in the beginner class machines I’d look for the next things if possible:
1 step buttonhole
Variable stitch width (for the zigzag stitch, it’s better if you can choose the length and the width separately, you’ll then have more variety)

Máquinas más avanazadas
Ahora acercando más al tema de este post. Cuando vas a comprar la máquina y ya sabes que te encanta coser, sabes lo que no tiene tu máquina de coser y lo que echas de menos, tienes la idea de qué tipo de cosas te gustaría coser. No pienso que es más fácil ahora, jaja. Sabes más, estás dispuesta a gastar más...y hay muchas más máquinas también, jeje. Ahora es cuando me gustaría comparar las dos máquinas domésticas de gama media que tengo y que he usado suficiente como para tener una idea de los buenos y malos de las dos. Quizás mis apuntes te vienen bien a la hora de elegir una máquina ya un poco más avanzada.
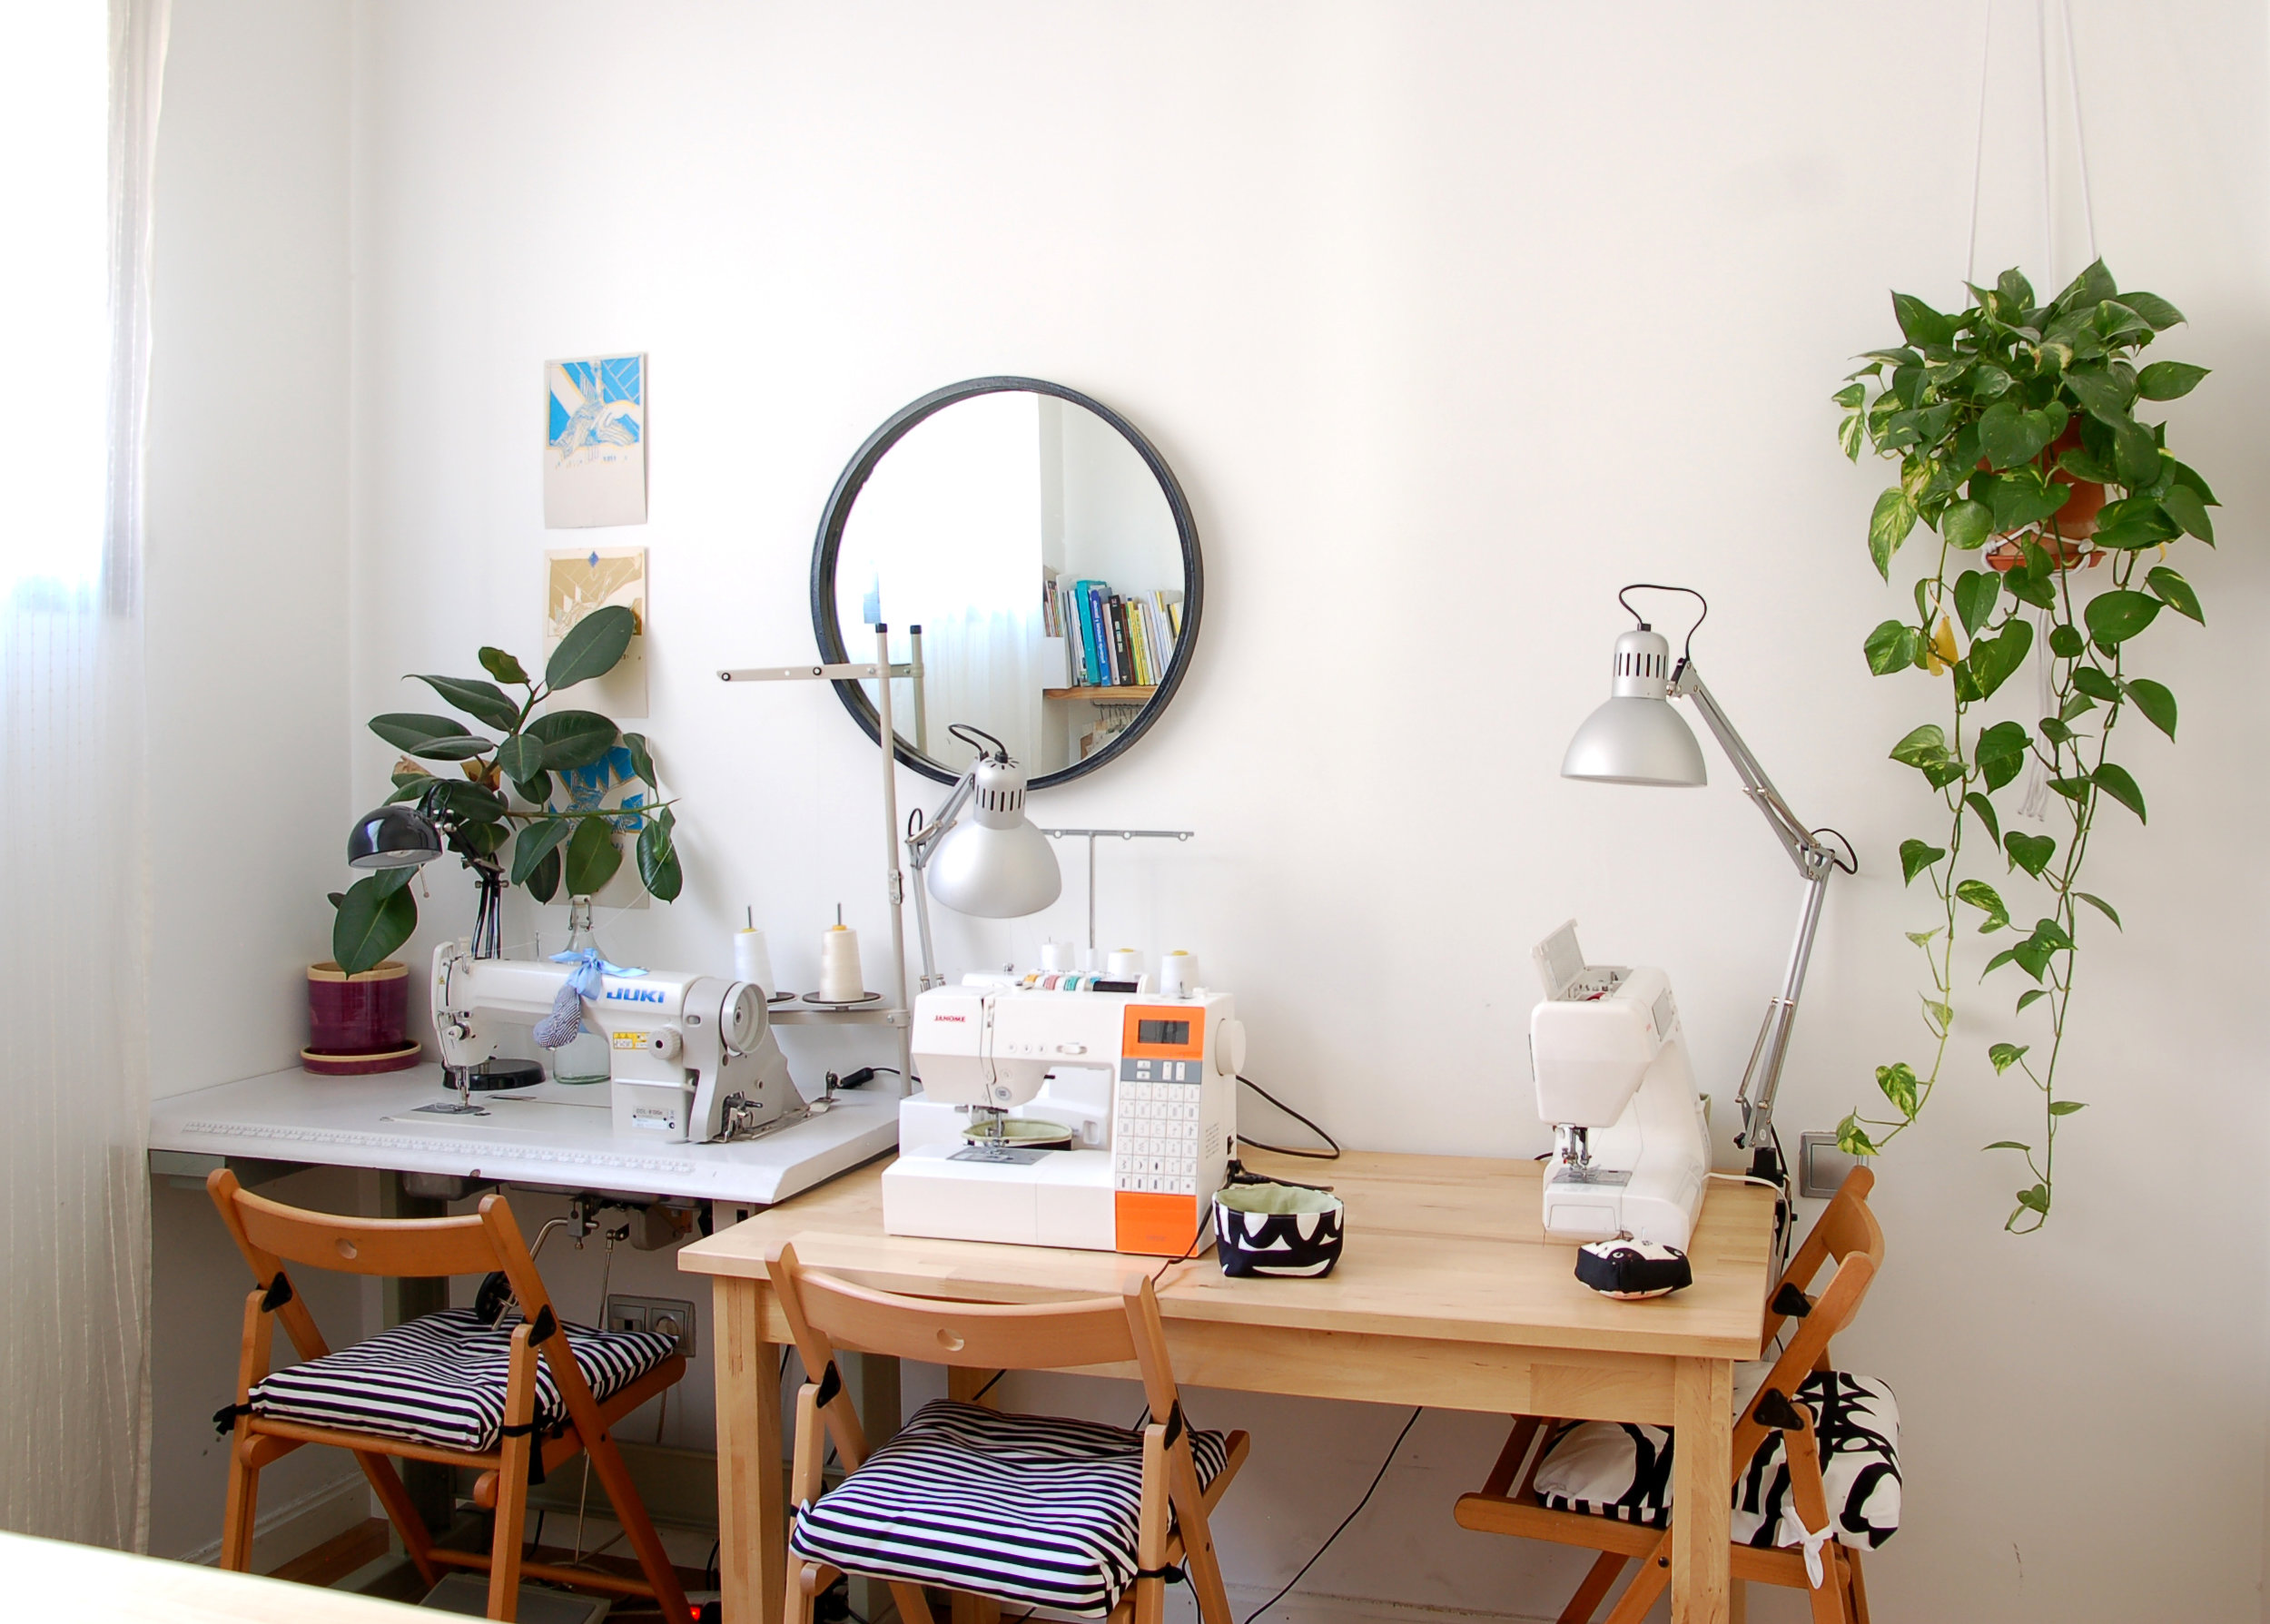
Cómo ya comenté en el otro post, mis dos máquinas son de marca Janome y las compré por esta tienda online (no tengo ningún patrocinio con esta tienda, he comprado las máquinas allí porque tienen gran variedad y el envío a España es rápido). La primera está conmigo desde hace seis y la segunda hace cuatro años. Os cuento un poco sobre las dos.
Advances sewing machines
Now we’re getting closer to the theme of that post. When you are going to buy a machine and you already know that you like to sew, you know what you’re old machine is lacking of and what you’d like to have and you know what kind of things you show. I don’t think it’s easier now, hehe. You know more, you are willing to spend more...and there are also more machines, hehe. Now I’d like to compare the two domestic machines I have, both of them are from a medium range and I’ve used them enough for now to tell you a bit of pros and cons that both of them have. Maybe my thoughts will be useful for someone looking for a bit more complex machine.
As I already told in my other post, both of my machines are from Janome and I’ve bought them from this online shop (I’m not affiliated with this shop, I bought my machines there as they have a wide variety of products and the shipping to Spain is relatively fast). The first one has been here for six years and the second one for four years. I’ll tell you a bit about the two.
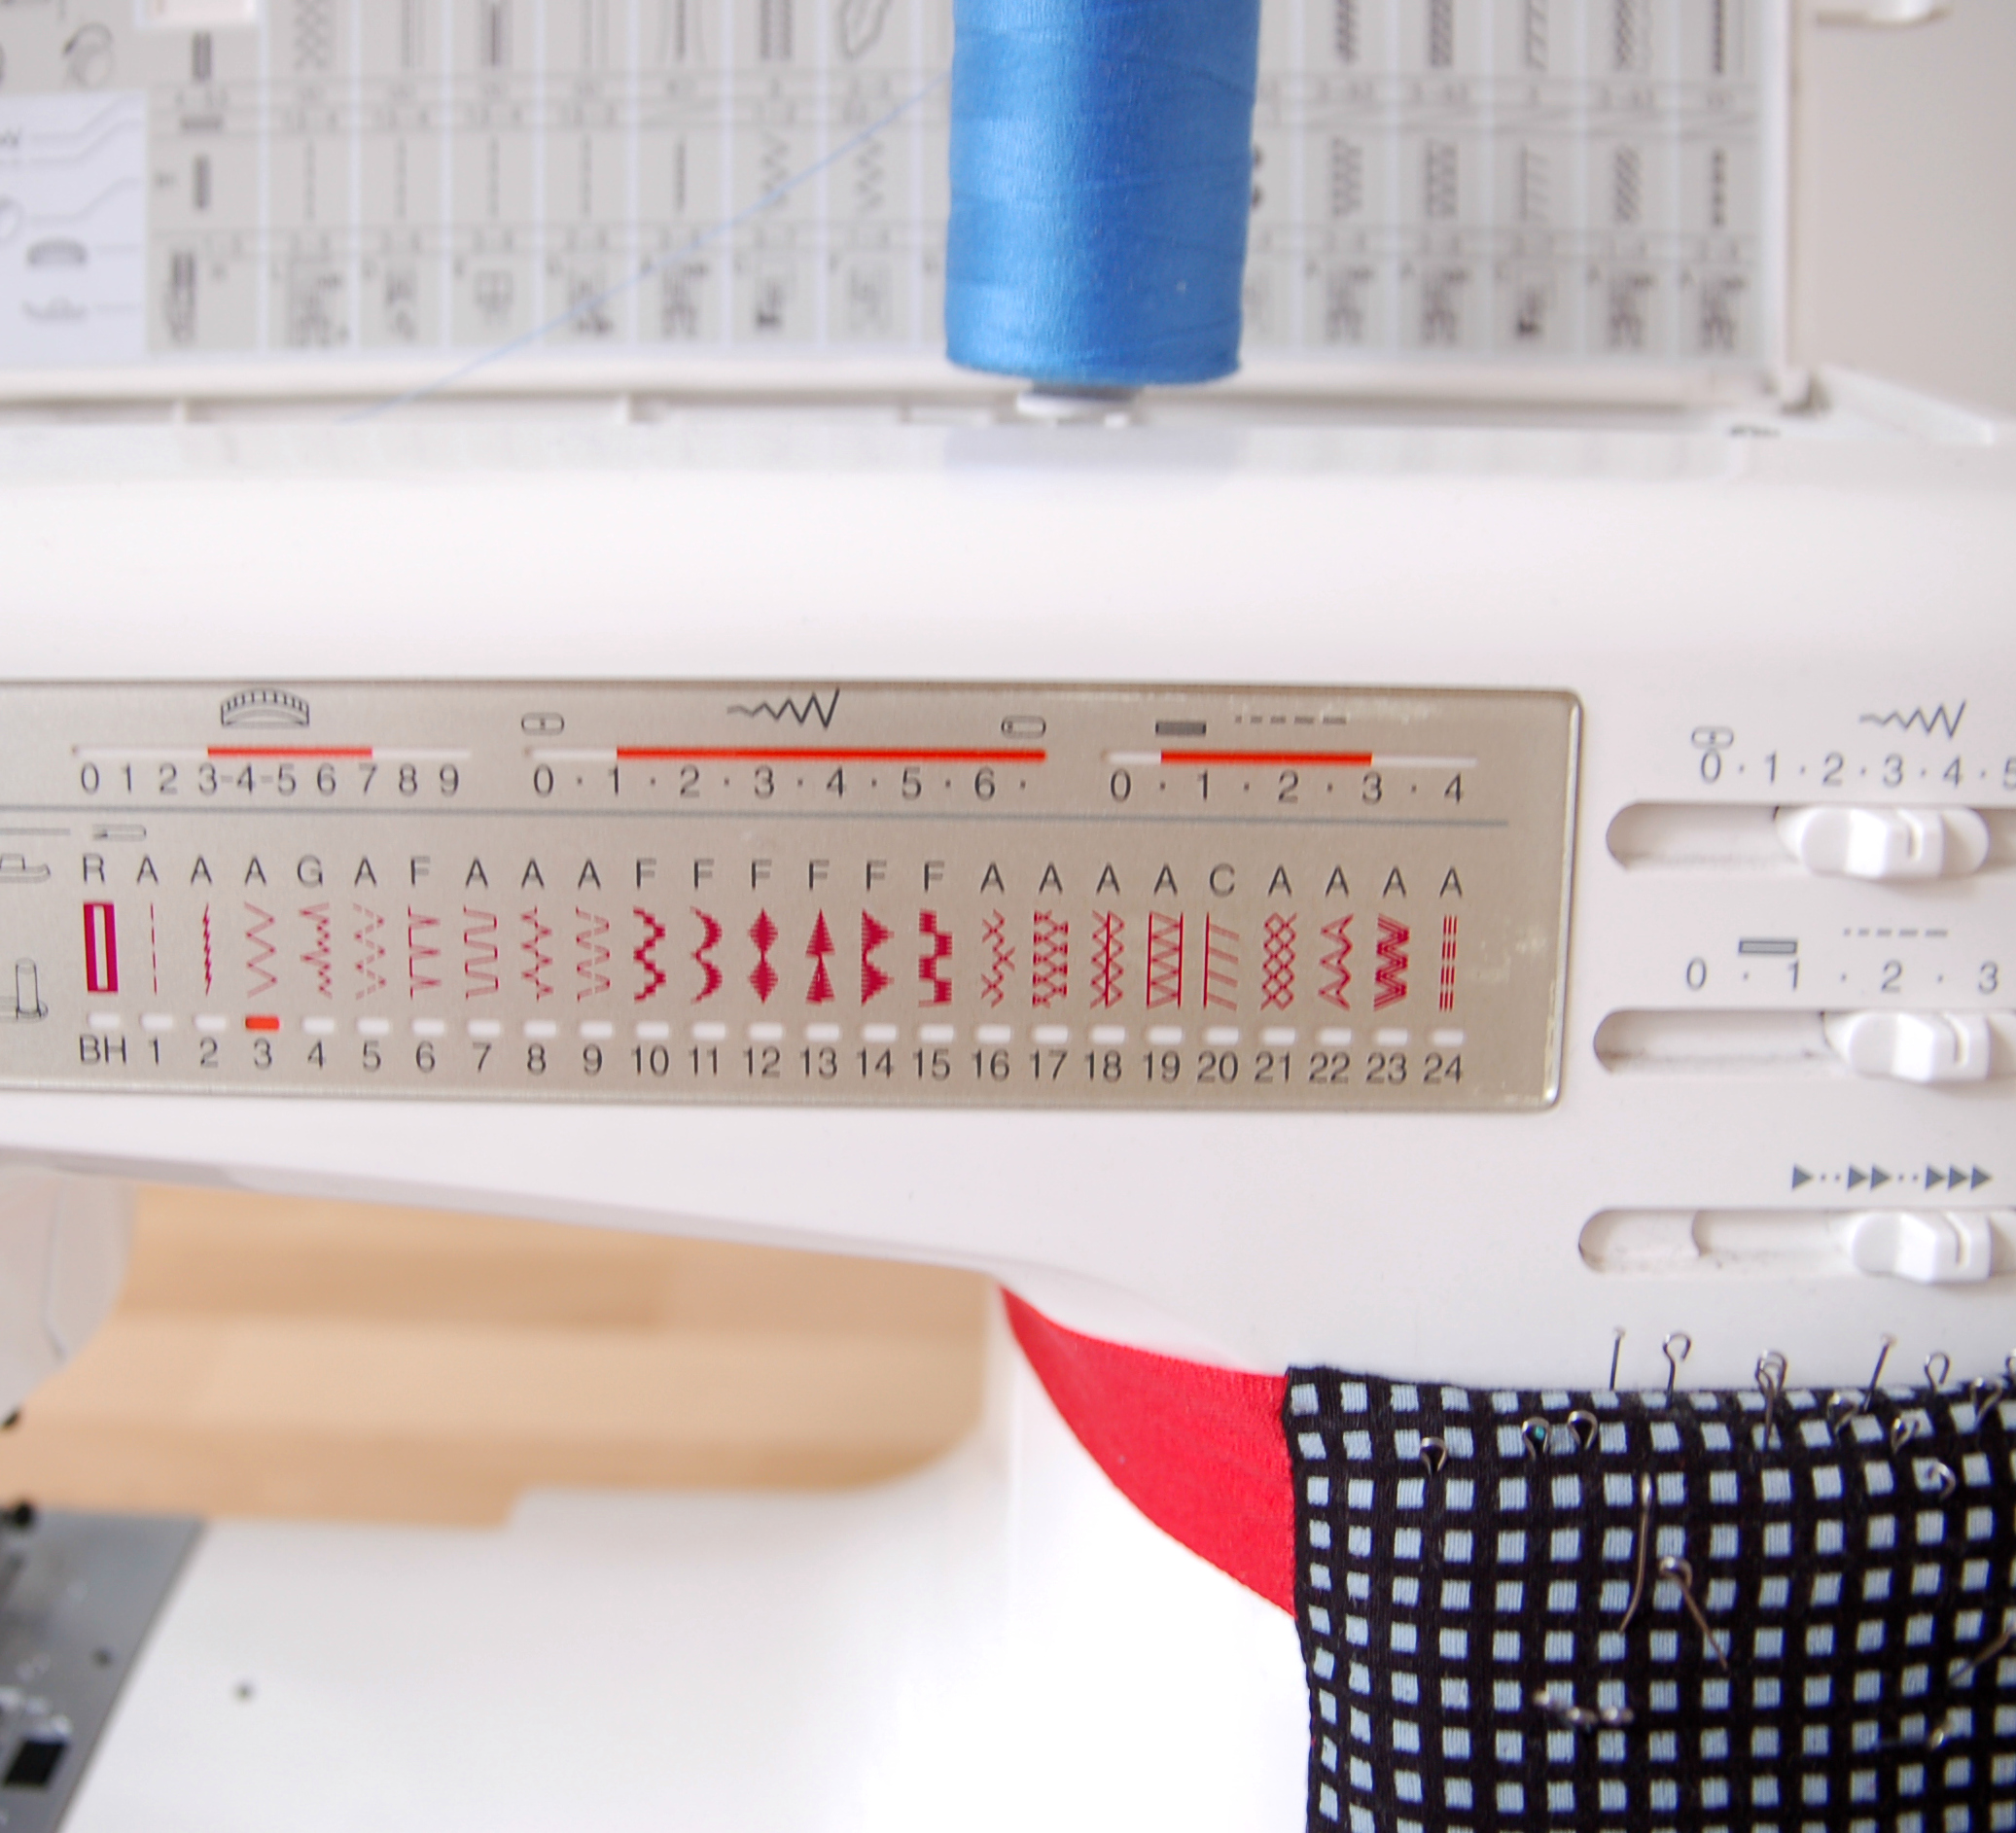
Janome SMD Exclusive SMD5018
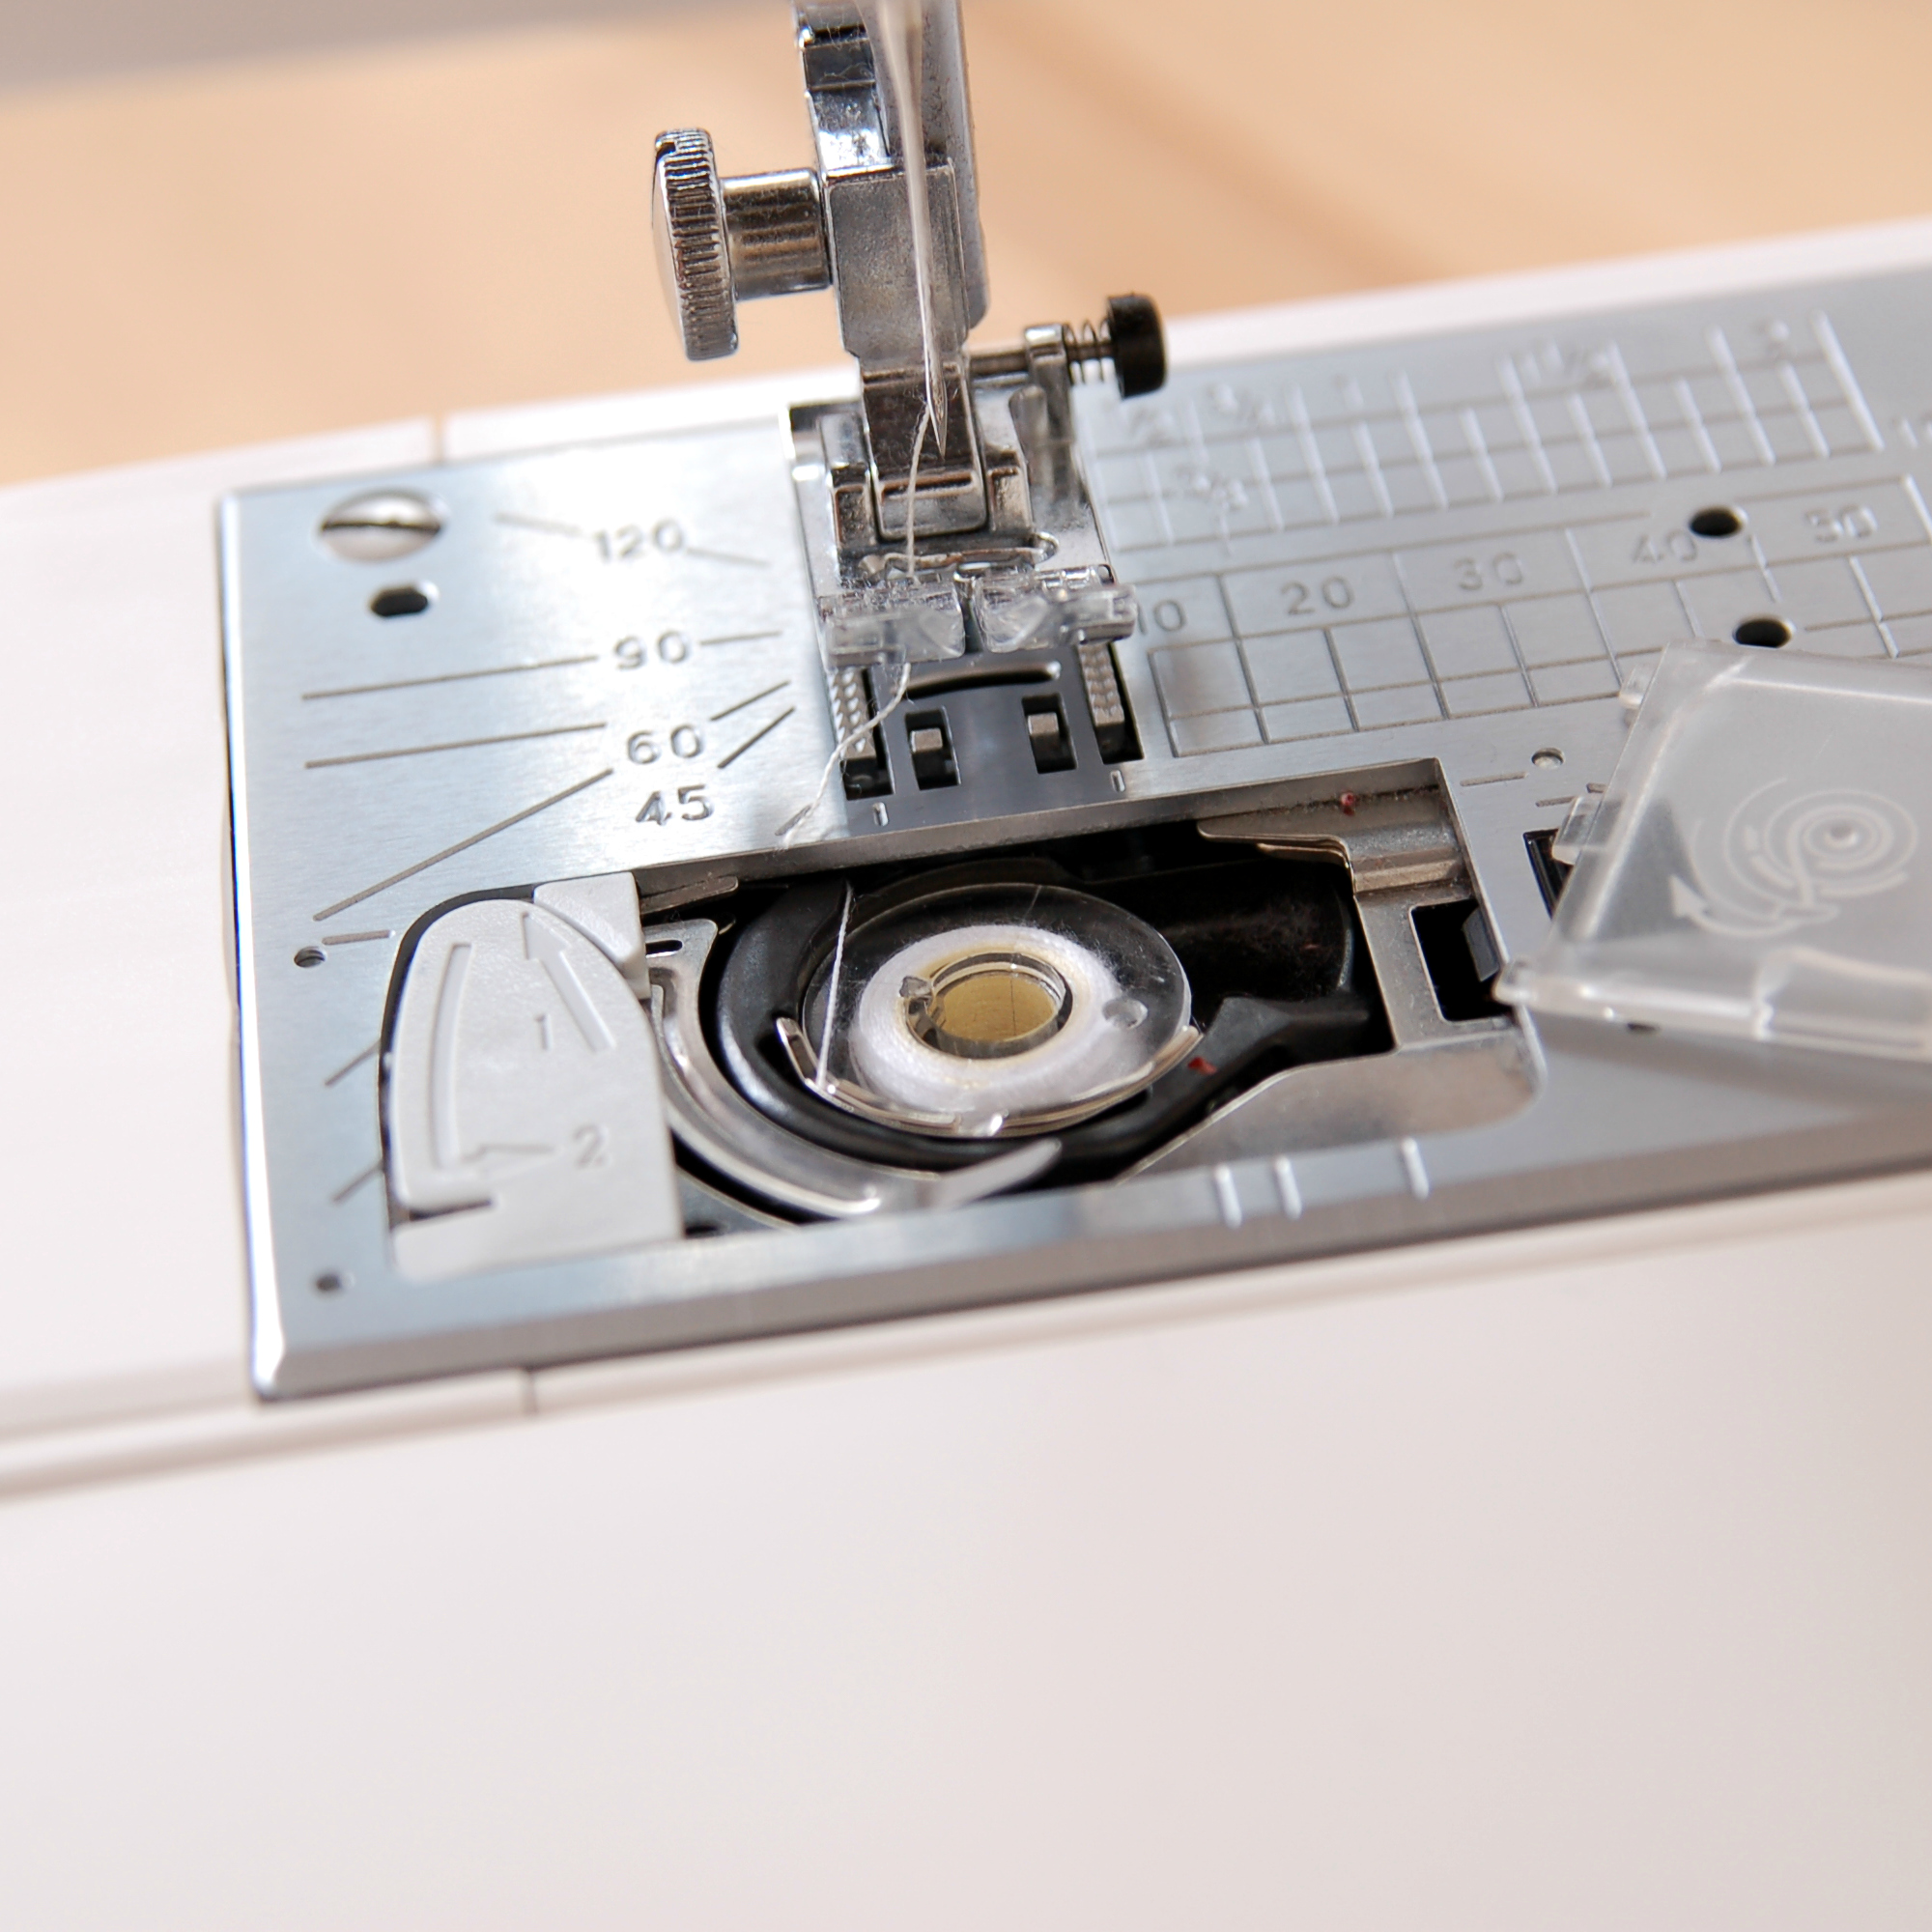
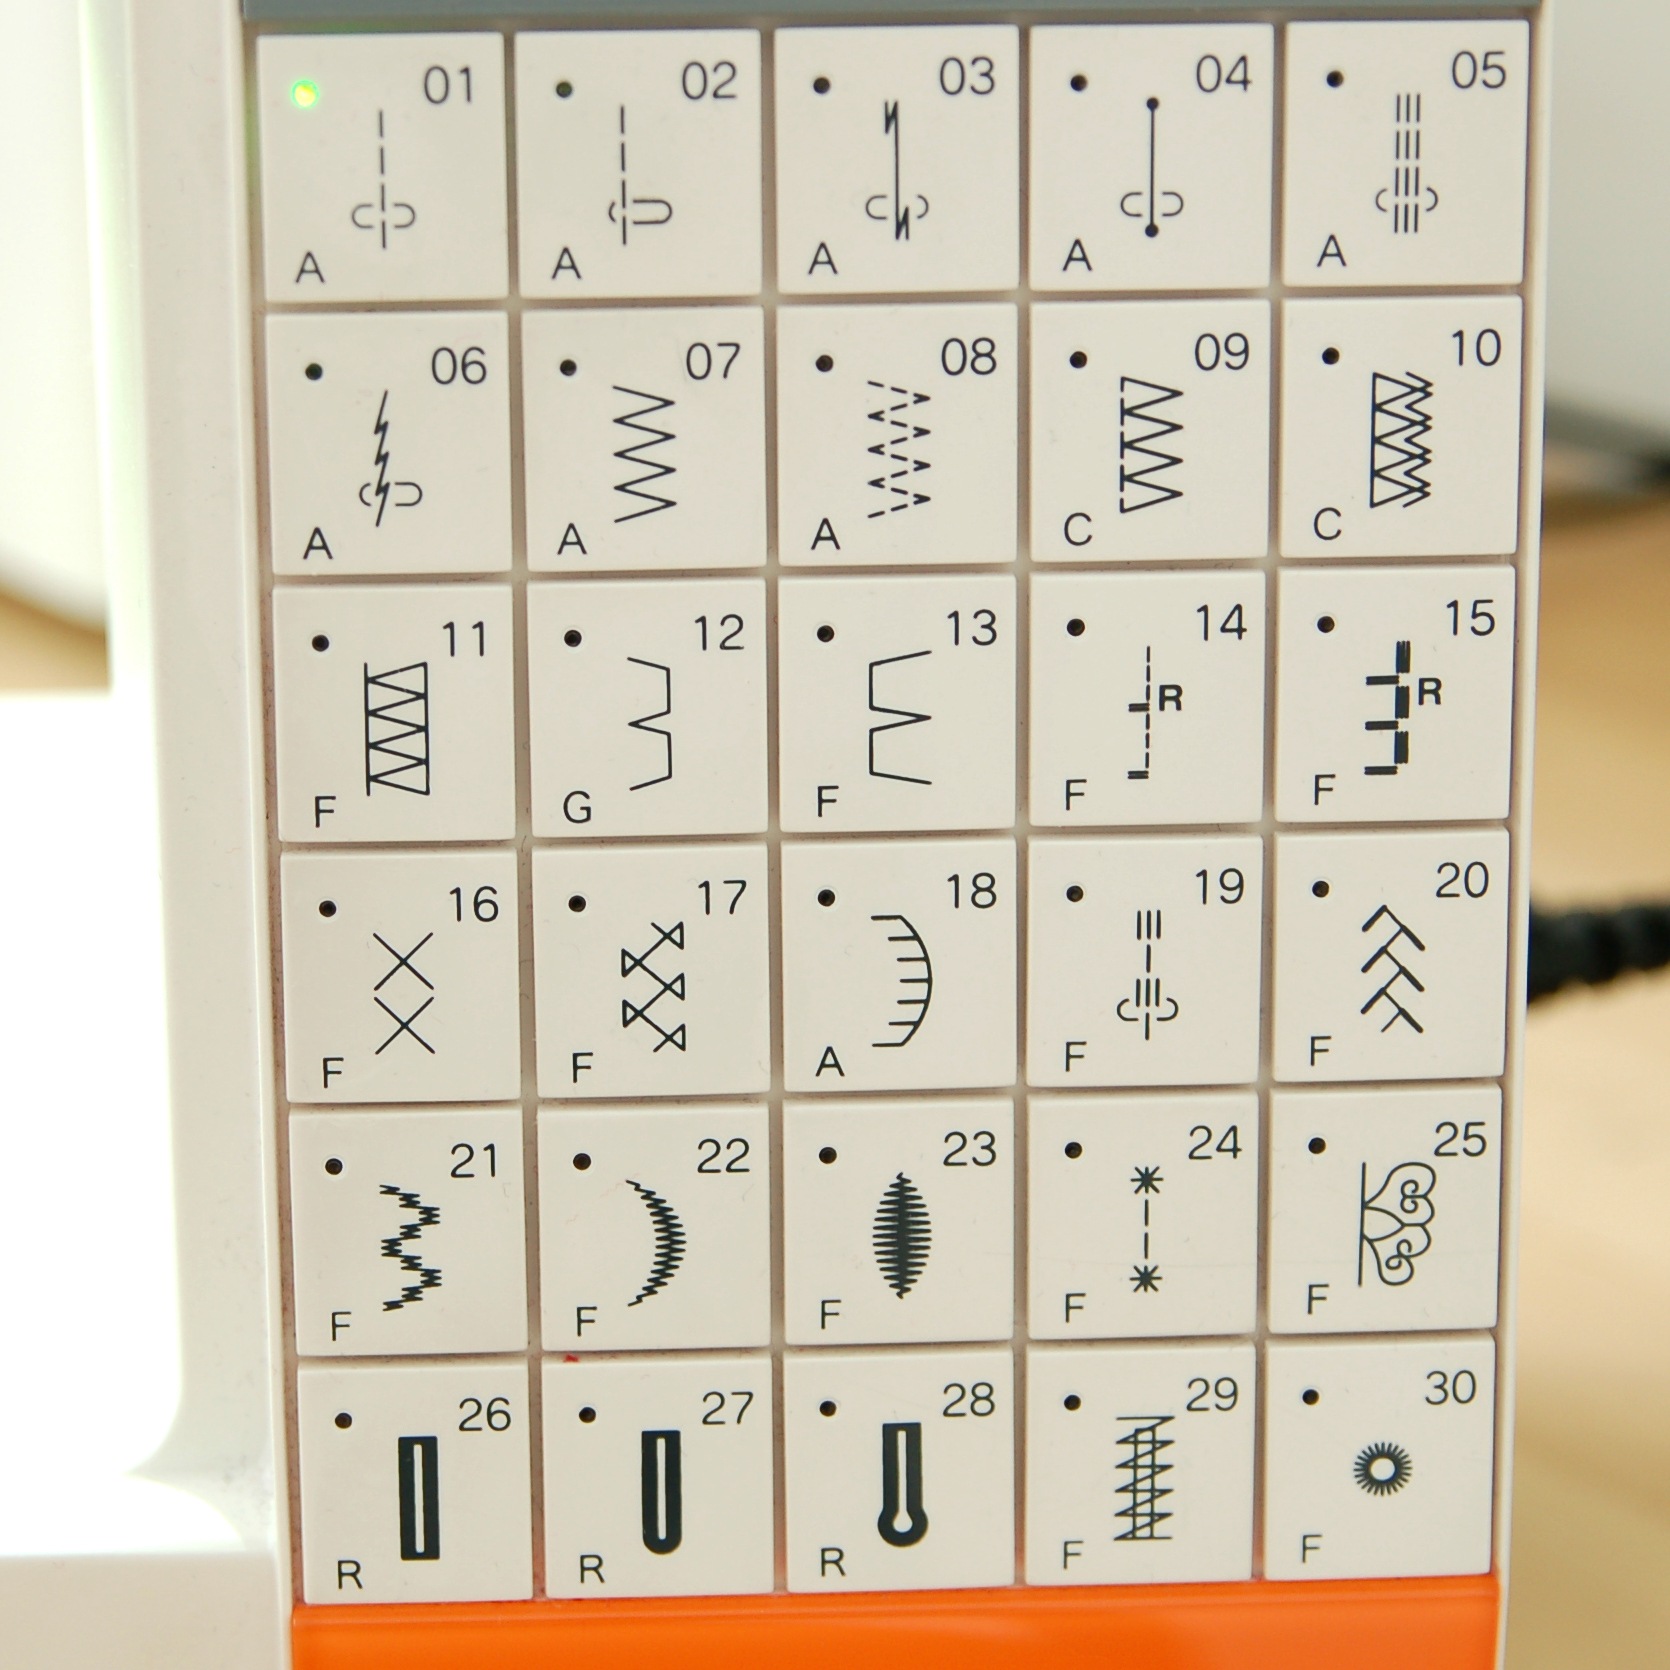
Es una máquina semicomputerizado que significa que no va todo digital pero tiene allí partes que sí (hace “bip” cuando cambias a hacer la bobina etc). Tiene 18 puntadas distintas, un tipo de ojal de un paso, puedes cambiar tanto el largo como ancho de la puntada y regular la velocidad de la máquina. El prensatelas se sube un extra más, cosa que mola mucho para los trabajos más gruesos. La canilla se pone de arriba (top loading bobbin case).
(Editado: por desgracia parace que este modelo ya no está disponible en la tienda donde lo compré pero Janome 230DC parece ser más o menos igual en cuánto a precio y prestaciones)
It’s a semi computerized model which means it’s not all digital but it has some parts that are (it makes “bip” when you change to wind the bobbin etc). It has 18 different stitches, one automatic 1 step buttonhole, you can change the stitch width and length and it has a speed control. The presser foot can be elevated more than normal which is very handy for bulkier projects. The bobbin is top-loading.
(Edited: unfortunately this machine seems to not be available at the shop where I got it from anymore, but Janome 230DC seems to be similar both in price and features).
Lo que me gusta:
Es muy fuerte...mucho más fuerte de lo que esperaba de una máquina doméstica. Cose vaqueros, varias capas de telas gruesas, telas finas, gasas...sobrevive todo
Es especialmente bueno en “arrastrar” la puntada zigzag y desde el inicio del borde. Si eso suena a chino, pues lo que me refiero es que al coser los elásticos de lencería por ejemplo, en la segunda pasada ya tienes bastante bulto y esa máquina lo cose sin ningún problema, no se queda atrapado en un sitio dando puntadas sin avanzar. Deduzco que su motor es fuerte y los dientes arrastran como si no hubiera mañana
Tiene el botón que deja la aguja automáticamente o arriba o abajo y me encanta, al trabajar con algo que se mueve mucho (elásticos!) , siempre se queda en su sitio porque baja la aguja.
Los prensatelas tienen cada uno su sitio en la parte superior de la máquina y eso está muy bien para tenerlo todo organizado
Tiene control de velocidad que va genial para los principiantes
Lo que no me gusta:
El incidente que tuve con el ojal. Al poco tiempo de tener la máquina, se le rompió el sensor que ocupa de “medir” el ojal (no soy mecanico, os voy a contar como yo lo entiendo, así que si lo lee algún experto, sorry!). Empezó a hacer bien el ojal, pero cuando tenía que volver para cerrarlo (paso dos), nunca paró y siguió en su camino. La llevé al mecanico y me lo medio arreglaron, ahora funciona, pero no del todo porque cuando termina de hacerlo, tengo que parar yo la máquina si no, sigue con el último “cuarto” paso hasta donde le da la gana. Se puede usar, pero no está del todo bien. Ahora, ni idea si es sólo mi máquina, si es la serie, si es la marca...quiero creer que es el problema de mi máquina en particular. No he vuelto a llevarla para otro arreglo porque tengo la otra maquina para ojales...así de vaga soy yo, jaja
He recomendando este modelo a muchas alumnas y un par de ellas lo han comprado y están muy contentas con la máquina!

Pros:
It’s very strong...way stronger than I imagined a domestic machine could be. It goes trough jeans, many layers of heavy weight fabrics, lightweight fabrics, tulle...it can beat anything
It’s especially good with feeding through bulkier fabrics with zigzag stitch and from the very beginning of the edge. If that sounds weird to you, what I’m trying to explain is that when you sew lingerie elastics for example, on the second pass of the zigzag it’s quite bulky and this machine sews it up without problems, it won’t get stuck in the same place repeating stitches without moving forward. I guess it’s because of a strong motor and good feed dogs that work very well
A needle up/down position button is very handy too, it makes sewing difficult and moving stretchy projects way easier (elastics!), you know that the needle will always keep you project where you want it to be
All the presser feet have their own space in the upper part of the machine which is great for keeping all the little pieces in order
It has speed control which is very useful for beginners
Cons:
The buttonhole incident I had with that machine. I had the machine since not so long when the sensor that “controls” the size of the buttonhole broke down (I’m no sewing machine expert and I’m just trying to explain how I understand the problem here, if anyone smarter is reading this, sorry!). It started the buttonhole well but in the point where it had to go back to close it (step two), it just continued to move forward without stopping. I took the machine to the tech support and they kinda fixed it and it more or less works now but still it’s not like it is supposed to be: I have to stop the machine at the end, otherwise it will continue making the forth step until infinity. You can make buttonholes but it’s not 100% OK. I’m not sure if it’s this particular machine, the series or the brand...I guess the problem is only with my machine. I haven’t got it serviced again because I have the other machine for making the buttonholes...I’m that lazy, hehe.
I’ve recommended this machine to many students and a couple of them have bought it. Everyone is very pleased with the results!

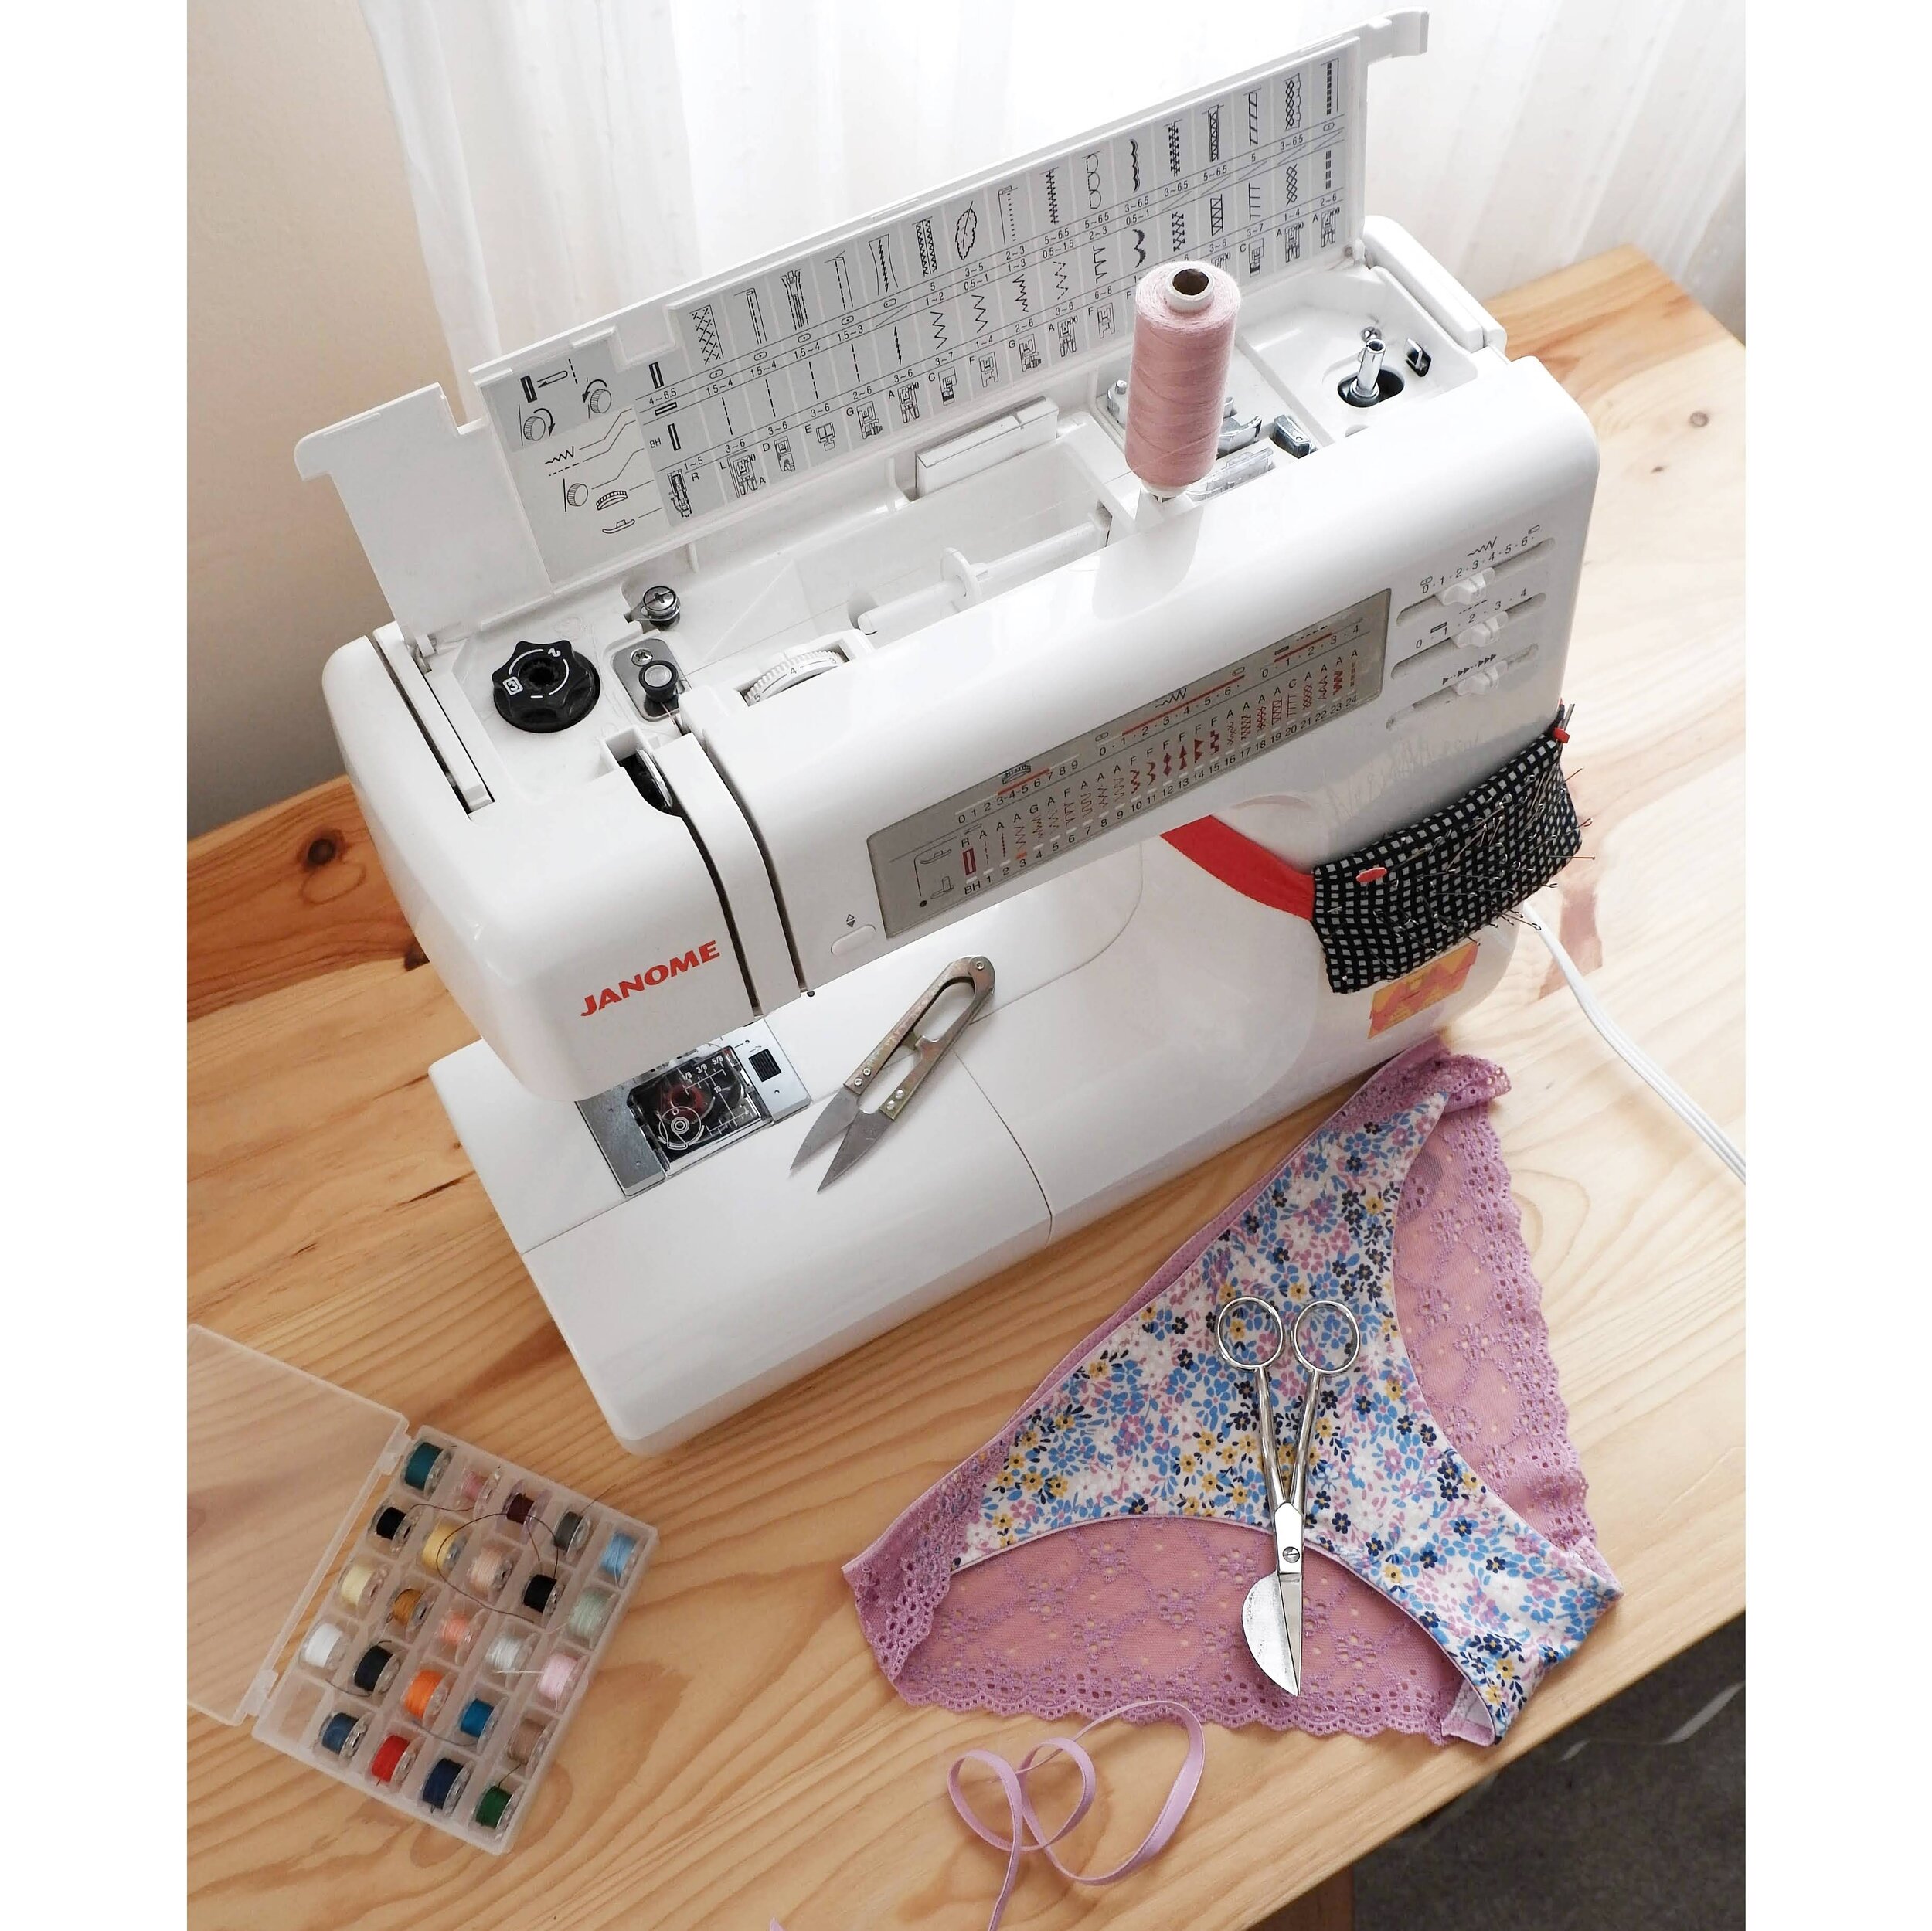
Janome DKS30
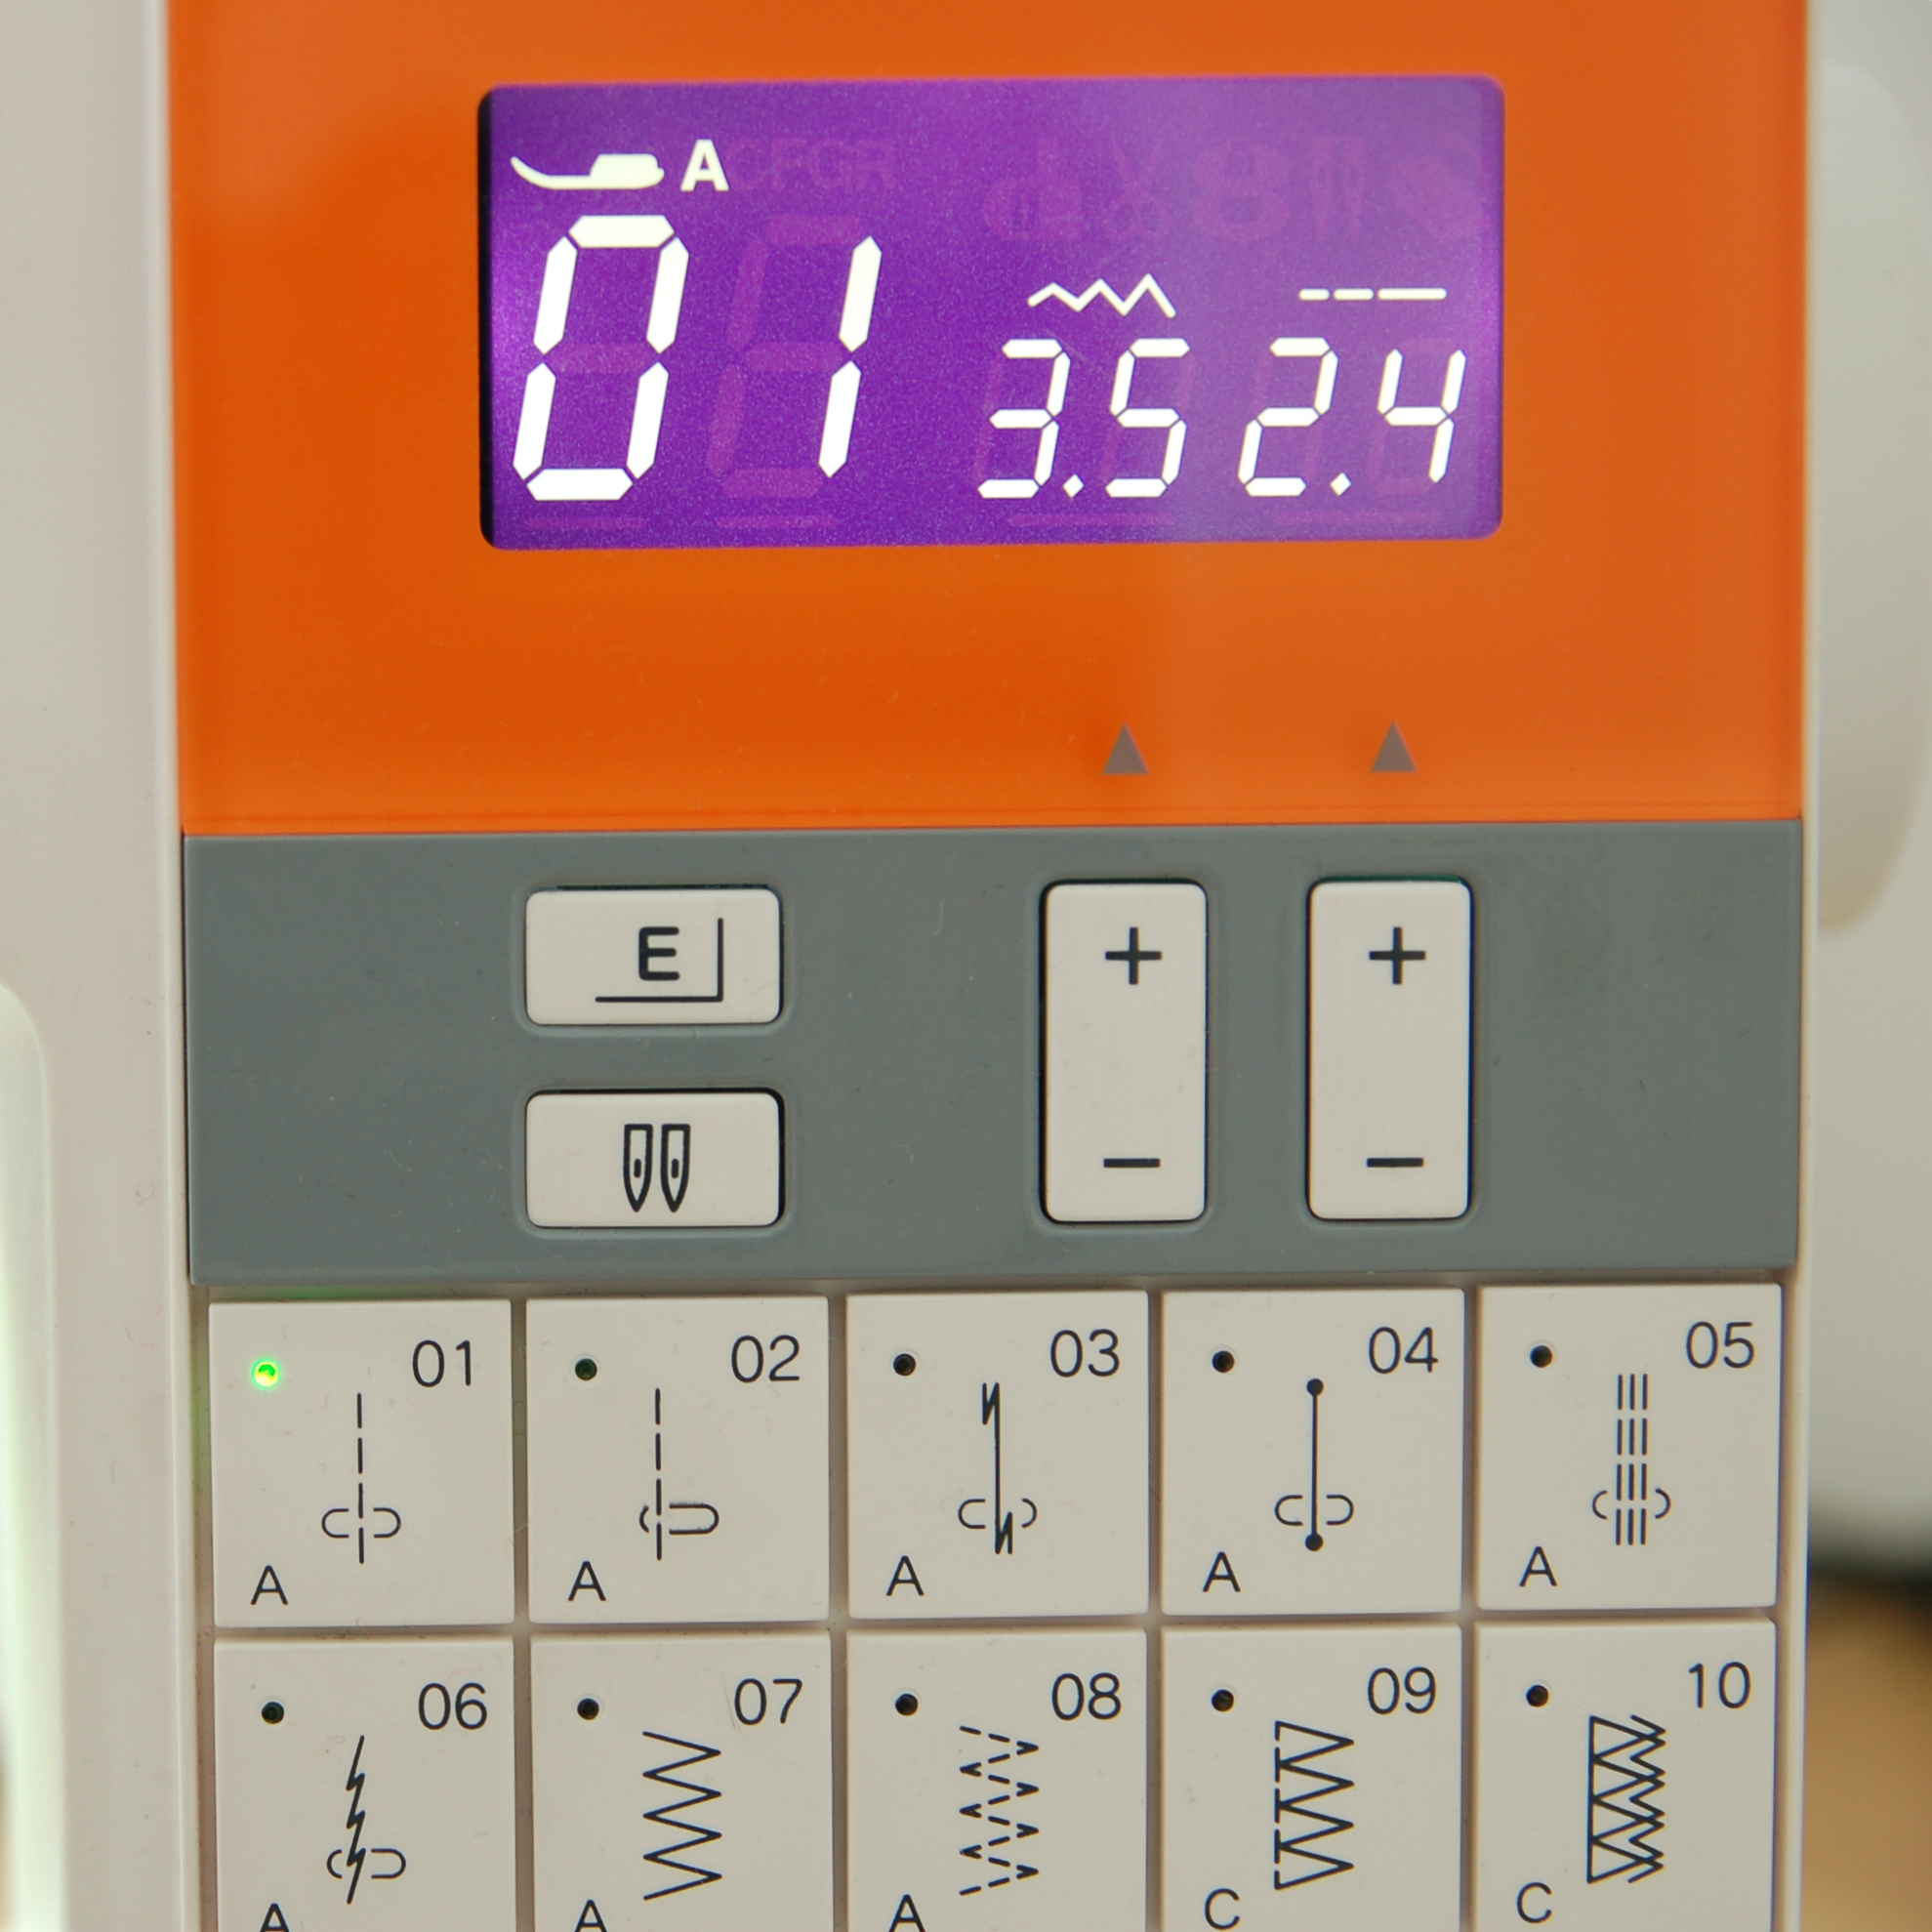
Es una máquina computarizada con 30 puntadas distintas, aparte de todo lo bueno que tiene la primera máquina también corta los hilos automáticamente. Tiene tres tipos de ojales distintas, se enhebra muy fácil (no tienes que subir el hilo de la canilla). Se puede usar sin el pedal, usando el botón de start/stop (cosa que nunca hago pero me alegro de que existe la posibilidad porque a veces me dan pesadillas que me rompo el pie y no puedo coser, jaja). Y es naranja...muy bonita! Ahora está disponible en otro color en la tienda donde lo compré.
It’s a computerised machine with 30 different stitches, apart from all the good things the first machine has, this one also automatically cuts the thread ends. It has three types of buttonholes, has a very easy threading system (you don’t need to bring up the bobbin thread yourself). You can use it without a foot control using the start/stop button (I’ve never used it but it makes me glad it exists as sometimes I imagine breaking a leg and not being able to sew, haha). And it’s orange...so pretty! Right now it’s available in another color in the store where I got it from.
Lo que me gusta:
Es una chorrada pero que corte hilos mola mucho
Se puede ir muuuy lenta, para las principiantes de la costura eso está muy bien
Es increíble con la aguja doble, si a las otras máquinas muchas veces les cuesta la tensión con aguja doble, esa lo lleva muy bien sin tocar nada (menos que su botón especial de aguja doble, ya que estamos)
Hace ojales como campeona! Bien, porque era una de las principales razones porque lo compré, jaja. Sólo he usado el ojal normal, porque soy una vaga y no he probado los otros dos, jaja
Puedes programarla para hacer muchas cosas automáticas de remates etc pero no lo hago...ya sabéis por qué, verdad?
Te avisa cuando estás haciendo algo mal. En serio, jaja. Me viene super bien como ayudante de clase. Si no bajas el prensatelas (típica cosa cuando empiezas a aprender sobre la costura con máquina) hace “biiip!!”, y ya te pillé!!
Lo que no me gusta:
Ya se sabe en mis clases que esa máquina tiene algo de mala uva de vez en cuando. Allí vamos: no es tan fuerte como la otra!! Lo de fuerte me refiero que no arrastra tan bien. Se nota especialmente en el caso de los elásticos de lencería, lo que ya escribí sobre la otra máquina. Pues al contrario que la otra, ésta sí que se atasca a veces, siempre hay que tener en cuenta de no empezar en el borde exacto porque te lo come la tela y he tenido que destornillar a veces la placa para rescatar piezas que se han quedado allí atrapadas. El zigzag en las costuras con más grosor no se arrastra tan bien y se queda demasiado juntos y a veces demasiado pequeño por el mismo tema del arrastre
Pros:
It’s just a fancy addition but the thread cutter is awesome
It can go verrry slow, the beginners really appreciate this
It’s incredibly good with twin needle, when normally I have to adjust the tensions when working with a double needle, this one goes with no special adjustments (apart from pushing the special double needle button, of course, while we’re at it)
It makes beautiful buttonholes! A very good thing, because it was the main reason I bought the thing in the first place, haha. I’ve only used the normal buttonhole because I’m lazy and the other two are still a mystery, hehe
you can program different backstitching options that are all automatic but I haven’t really done it...you now why, right?
It tells you when you are doing something wrong. Really, haha. It’s super convenient as a class helper. If you forget to lower the presser foot (a very common mistake in the beginning) it makes “beeeep!!” and here you go, busted!!!
Cons:
It’s well known already in my classes that this machine has it’s own weird personality sometimes. There we go: it’s not as strong as the other one!! By strong I refer to the fact that it doesn’t feed fabric so easily as the first one does. It’s very obvious when sewing the elastics I talked about earlier. Not like the other machine, this one gets sometimes stuck with the zigzag when it’s just a bit bulkier and when you start right off the edge it wants to “eat” the fabric. I’ve had to take apart the metal part below the presser feet various times to rescue some projects that have got stuck there. The zigzag stitch just doesn’t feed so well and the stitch is sometimes too small because of the feeding issue
Mis conclusiones
La más obvia es que me gusta más la primera de las dos máquinas...y eso que es supuestamente más básica y cuesta menos. El arrastre se diferencia claramente. No sé cómo puedes averiguar el arrastre que tiene la máquina antes de comprarlo...preguntando específicamente por eso quizás. Si podría tener el arrastre de la primera y los lujos de corte automático y ojales de la segunda...ya sería la leche (y me imagino que costaría bastante, jaja).
Así que al buscar una máquina de un nivel un poco más avanzado, yo diría que hay varias cosas que me han gustado mucho y que molaría que tenga la máquina: buenos ojales automáticos, cortahilos y la posibilidad de poder dejar la aguja siempre arriba/abajo. Para mí personalmente la cantidad y la variedad de puntadas decorativas me da un poco igual, nunca las uso y no me guiaría por el número. El control de velocidad les encanta a mis alumnas...aunque me imagino que si buscas una máquina algo más avanzada ya no tienes problemas con controlar la velocidad de tu máquina así que no lo veo como algo muy necesario.
My conclusions
The most obvious one is that I like the first machine more than the second one...even though the second one is supposed to more advanced and it is more expensive. The feed dogs make all the difference. I’m not sure how to find out about that aspect before buying a machine...I guess you have to ask directly about that feature. If I could have the feed dogs from the first machine and the thread cutter and the buttonholes from the second one, it would be very very good (and I guess expensive, hehe).
So when looking for a medium range machine I’d say there are things I like quite a lot and it could be very nice to have them on a machine if you can: good buttonholes, thread cutter and a needle up/down button. I personally don't really care about the number and variety of different decorative stitches as I hardly ever use them. The speed control is a favorite of my students...although I imagine that if someone is looking for a more advanced machine, controlling the speed shouldn’t be a problem anymore and it’s not so important.
Editado en noviembre 2020:
Ahora que llevo aún más años con las dos máquinas me gustaría añadir un par de cosas. En este tiempo he podido coser con bastantes otras máquinas y he comprobado que estas dos van super bien, no las cambiaría por otra marca. Justo el arrastre es la cosa más importante para mí. Por otra parte, este año descubrí que no le di todo el crédito a la máquina naranja (la más avanzada) y quiero añadir unas cosas.
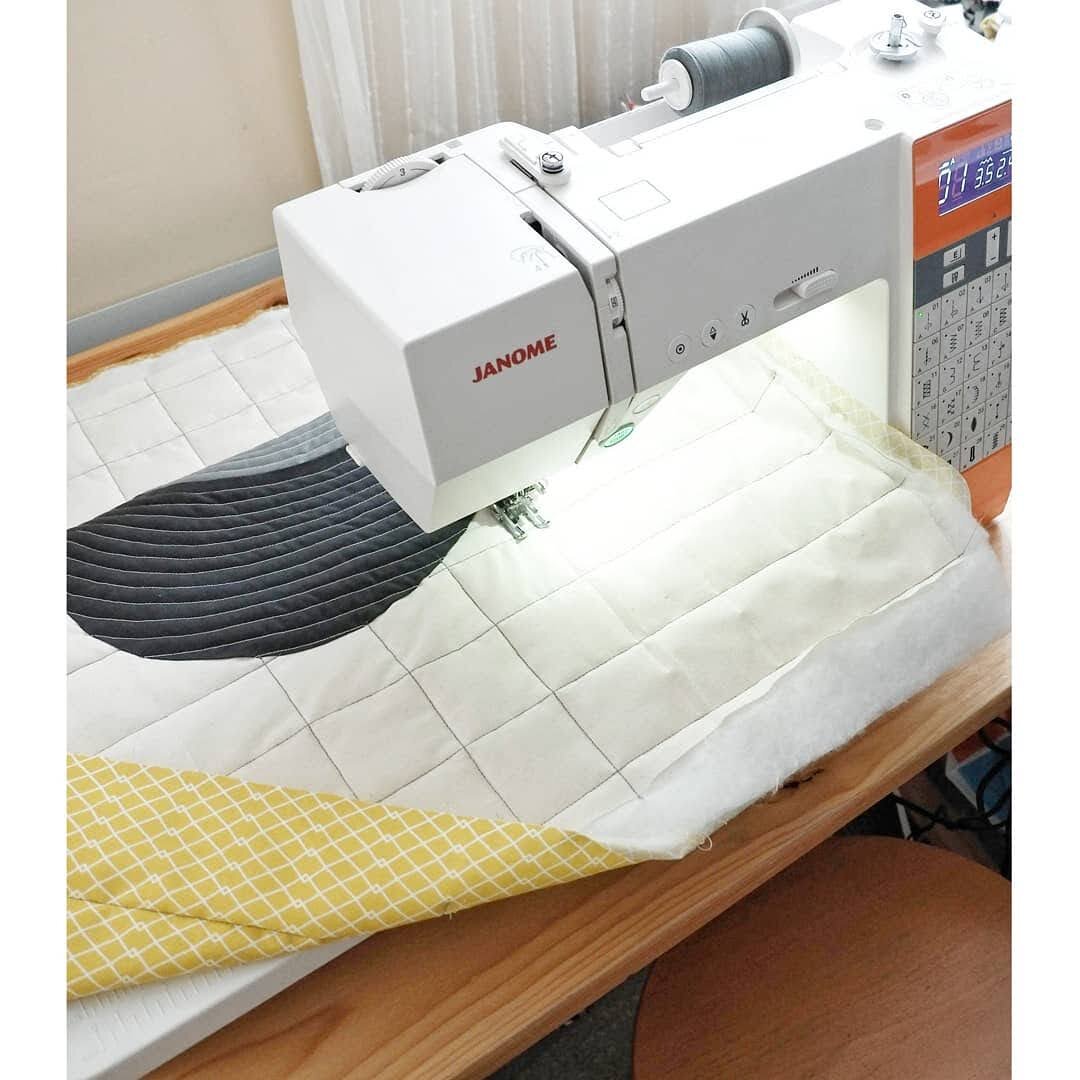
Este verano me puse por fin a acolchar con esta máquina ya que cuando lo compré vino con la mesa de extensión extraíble y así es mucho más cómodo trabajar (efecto de la mesa de la máquina industrial!). También usé en condiciones el prensatelas de doble arrastre y me quedé flipada con lo bien que acolcha! Sigo pensando que la máquina ya de por sí tiene que tener buen arrastre porque a mí personalmente no me resulta cómodo coser cosas en general con el de doble arrastre porque abulta un montón. Pero para acolchar es genial, arrastra de manera uniforme a todas las capas y todo va super bien. También al acolchar empecé a usar el remate automático de la máquina y me gusta mucho porque hace un remate pequeño de tamaño pero muy seguro y al acolchar eso queda muy bien si empiezas en el medio de la pieza (sé que no es la manera tradicional de acolchar pero me da un poco igual, jaja).
De hecho estuve un poco atascada con el tema de acolchar porque lo solía hacer con el industrial y si hacía líneas en forma de cuadros la tela se me arrugaba al hacer las segundas lineas (como esta colcha por ejemplo), se notaba que el arrastre de las capas no era uniforme. Me puse a investigar y vi que por eso las máquinas guays específicas de patchwork/quilting eran tan caras, ya tenían su doble arrastre integrado en la máquina y por eso iban tan divinas en cualquier superficie. Era como un momento de luz en mi vida costuril, menudo descubrimiento (ahora parece una tontería pero antes claro, no me explicaba su precio de a partir de 1000 euros…). Y así me quedé…pensando que tendría que invertir en una máquina de estas si quería hacer un acolchado en condiciones. Hasta que dije, venga, le doy una oportunidad a la máquina naranja con la mesa + el prensatelas de doble arrastre. Y funcionó!!! Tan bien que le pedí mentalmente disculpas a la máquina por no valorarlo tanto y por no haber probado eso antes, jaja. Así que en conclusión: si necesitas un todoterreno, esa máquina va super bien!
Edited in November 2020:
Now that I’ve sewn with both of these machines during even more years I’d like to add some things. During this time I’ve been sewing with many different machines and I’ve really seen that these two are excellent machines, I wouldn’t pick another brand. For me the feed dogs are the most important thing. I also saw that I didn’t say all the good words about the orange machine (the more advanced one) and I’d like to highlight some of its features.
This summer I started to actually quilt with this machine and I used the longer extension table that came as a gift when I got the machine (this way it’s more similar to an industrial sewing machine!). I also used the walking foot and I was so surprised with how well it quilts! I still think that a machine has to have good feed dogs because for me at least it’s important to not have to use the walking foot for general sewing as it’s not very comfortable to work with. But for quilting it’s amazing, it feeds all the layers of fabric and batting evenly and it’s a super smooth experience in general. I also used an automatic locking stitch and I like it a lot as the reinforcing stitch in the beginning is small but strong and it works very well for starting your quilting lines in the middle of the quilt for example (I know that this way of securing the threads is not by any means a traditional quilting method but I’m OK with it, hehe).
Actually I was a bit stuck with quilting as I used to use my industrial machine for that and when I did grid quilting (like in this example) the second lines created little creases as the feeding over various layers of fabric wasn’t completely even. I started to investigate a bit and that’s when I saw that all these fancy quilting machines were expensive for that reason: the walking foot is already integrated into the machine and that’s why they sew so well over everything. It was such a lightbulb moment in my sewing life, what a discovery (I know it sounds totally logical now but I couldn’t explain the high pricing before understanding this concept before…). So I was already convinced that I would need to get a fancy quilting machine to make a decent quilt. Until I said, OK, lets try once again with my orange machine with the extension table + the walking foot. And it worked!!! It worked so well that I secretly said sorry to my machine as I didn’t value it so much before and because I didn’t try this out sooner, haha. So as a conclusion: if you need a good machine that sews anything, this machine is a really good option!
Qué máquina elegir para coser lencería
Mucha gente me ha preguntado sobre qué máquina elegir para coser lencería. Las que me conocen saben que soy de recomendar cosas básicas que van bien y para mí las máquinas que tienen miles de puntadas no me interesan mucho porque sé lo poco que yo los usaría (si a ti te va el tema de puntadas decorativas es otro caso por supuesto!).
Por eso siempre he dicho que no necesitas nada especial para coser lencería, de hecho con una máquina doméstica normal y corriente vas bien. Lo importante es tener la puntada de zig-zag y mejor que puedas directamente controlar tanto el largo como el ancho de zig-zag (opción que tienen todas las máquinas que no sean super básicas). Yo personalmente no uso la puntada de zig-zag en tres pasos pero se puede usar si la máquina lo tiene. Para mí lo más importante es que la máquina tenga buen arrastre, el tema que ya mencioné antes en este post. Por eso me encanta el Janome SMD5018, su arrastre es perfecto para coser la lencería. Otra cosa que si lo puedes tener es genial (pero no es imprescindible) es la opción de dejar que la aguja siempre esté arriba y abajo porque al coser los elástico viene muy bien que la aguja baje cada vez que paras para que tu trabajo no se mueva cuando vuleves a estirar el elástico.
Esto es todo, no hay mucho más. Creo que si empiezas a coser la lencería es porque ya tienes una máquina en casa y has cosido otras cosas. Pues lo más probable es que con esa misma máquina podrás coser la lencería perfectamente también. Si vas a comprar una máquina nueva en una tienda física y puedes probarla allí, llevaté elástico y tela de punto, así verás tú misma si el arrastre va bien. Sé que hay gente que usa el prensatelas de doble arrastre para conseguir que su máquina más básica arrastre bien, personalmente pienso que al abultar ese prensatelas tanto, no es muy cómodo trabajar con piezas pequeñas de lencería donde tienes que estar pendiente de coser en los bordes etc.
Por supuesto tienes también la opción de comprarte una máquina semi industrial que cose tanto con la puntada recta y con el zig-zag. Esa opción es genial si ya sabes que coses mucho y si tienes espacio en tu casa para ponerlo. La mesa grande de una máquina industrial/ semi industrial es una cosa que te hace todo el proceso de confección mucho más cómodo y el rapidez es un punto clave también (no querrás volver a las máquinas domésticas, jaja). Por ejemplo Emerald Erin usa una máquina de estas, lo puedes ver aquí. En España se venden por semi industriales por ejemplo de marca Refrey y en las tiendas especializadas puedes conseguir una hasta de segunda mano (revisado por el técnico) a precios muy baratos.
Choosing a machine for sewing lingerie
A lot of people ask me about which sewing machine they should get to sew lingerie. People who know me in real life already know that I tend to recommend good basic machines/supplies and that the machines that have thousands of stitches just don’t interest me that much as I know I wouldn’t use them enough (if you do use decorative stitches you would be interested of course!).
That’s why I always tell you that you don’t really need anything special to sew lingerie, it’s all doable with a regular domestic machine. The important thing is to have a zig-zag stitch and it’s better if you can directly choose the zig-zag stitch width and length (this option is usually available for all machines that are not super beginner level ones). I personally don’t use the three step zig-zag stitch but you can of course use it if it’s available on your machine. For me the most important thing is that the machine has nice and even feeding, something I already talked about previously in this post. That’s why I like my Janome SMD5018, it’s feed dogs sew through lingerie really well. Another thing that is good to have (but it’s not obligatory) is the needle up/down button which makes sewing elastics really easy. I always leave the machine with the needle down option, this way when I sew the elastics, every time I stop the needle goes down and the work won’t shift once I pull the elastic again.
That’s it, there’s not much more. I suppose that when you start sewing lingerie you already have a machine at home and you’ve sewn other things. You can probably sew lingerie on that machine without problems. If you do want to buy a new machine and you can go to a sewing machine store you can try it out in person. Bring some elastic and knit fabrics with you so you can try out the feed dogs yourself. I know that some people use the walking foot to compensate for the lack of even feeding on their basic machines. I personally don’t find it very comfortable to sew on small seam allowances with this big presser foot that makes it more complicated to sew accurately.
Of course there’s also the option to get a semi industrial sewing machine that sews both straight and zig-zag stitches. This option is great if you already know that you’re sewing a lot and if you have enough space at home. The wide integrated table of industrial / semi industrial machines makes all the difference in your sewing practice and elevated sewing speed is something very enjoyable too (you won’t want to go back to domestic sewing machines, haha). For example Emerald Erin uses a machine like this, you can see it here. In Spain they sell semi industrial machines, for example Refrey is a good brand and you can find used machines (that have been serviced) for very low prices.

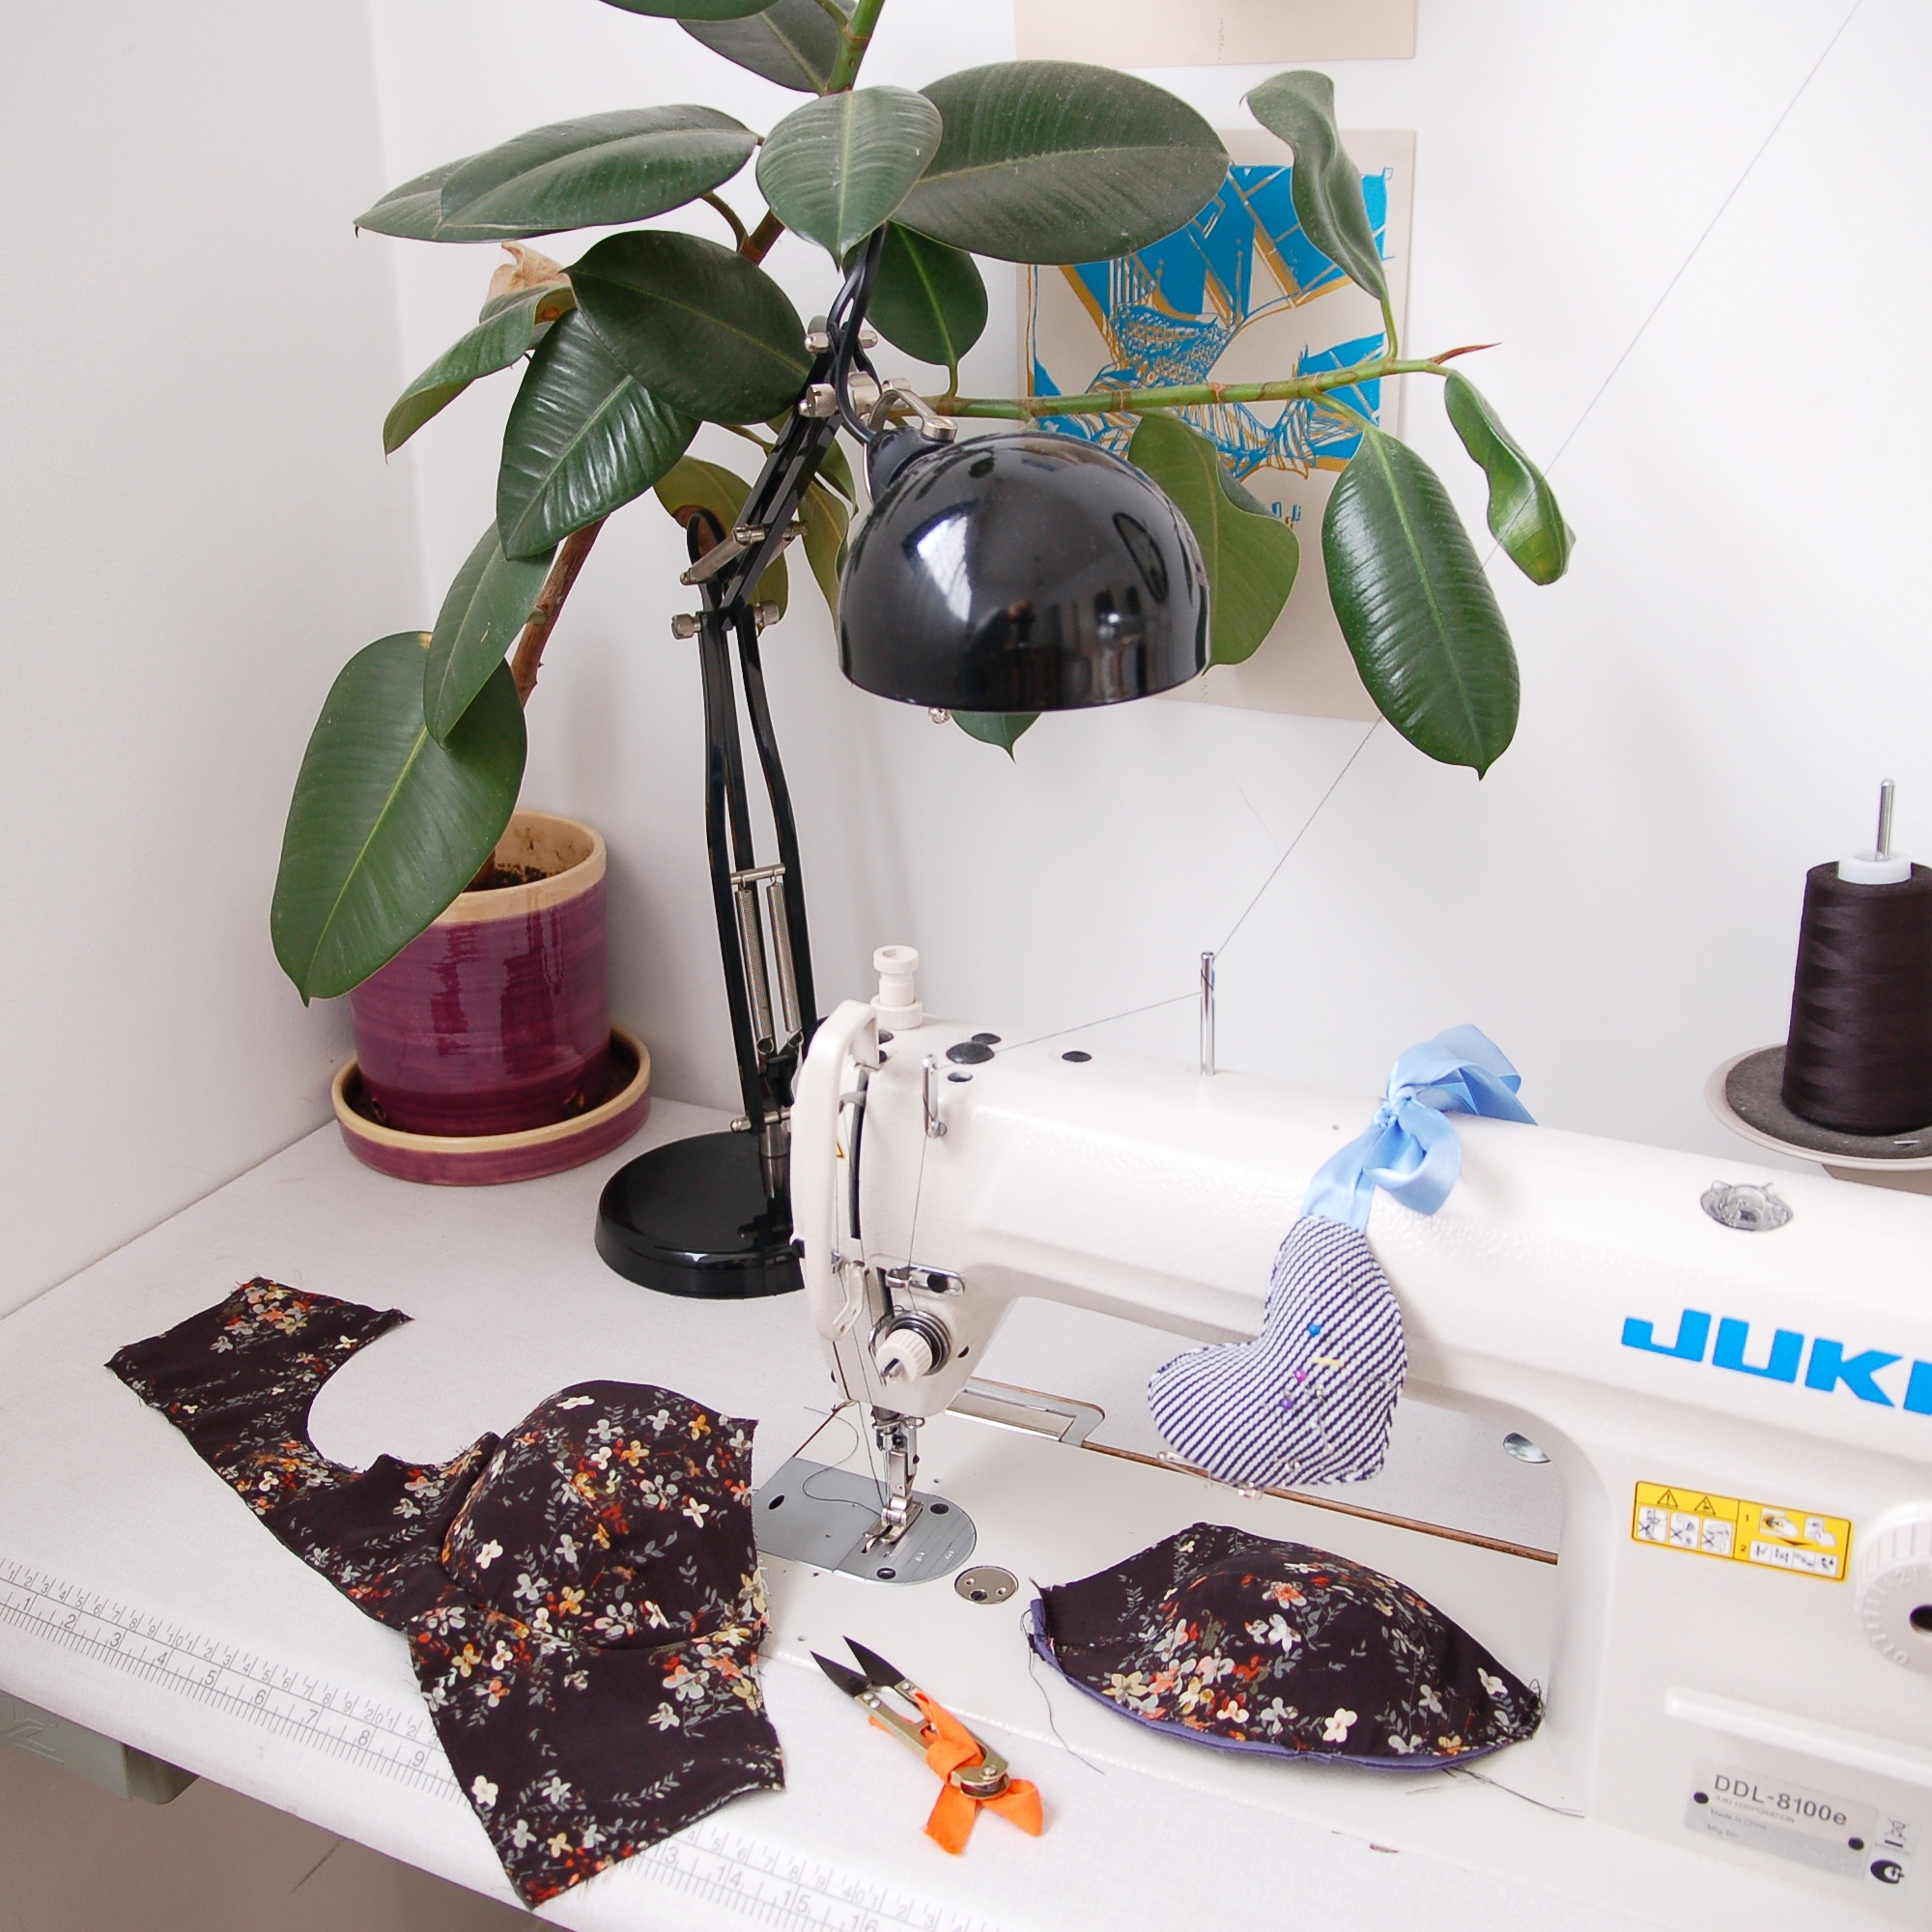
Para terminar y ya que estamos con todas las máquinas, unas palabras sobre la máquina industrial que tengo también. Lo tengo porque aprendí a coser con las industriales y lo más lógico en su momento cuando quería comprarme mi máquina personal era elegir una industrial. Es una Juki fuerte y grande, pasa todas las telas y me hace feliz coser con ella. Sólo tiene puntada recta y lo hace de maravilla. A veces la gente me pregunta que si merece la pena una industrial. Mi respuesta sería que si piensas trabajar por lo menos varias horas al día cosiendo, entonces sí. Esas máquinas sí que tienen el motor para eso, si lo haces con tu máquina doméstica lo vas a matar dentro de poco con el curro que le das. También el industrial al tener la mesa integrada es más cómodo para trabajar y el prensatelas se sube con la rodilla, cosa que ahorra mucho trabajo. Ahora hay modelos domésticos que también tienen la extensión de la mesa y el mismo sistema de subir el prensatelas, pero allí ya no tengo información si valen para trabajar horas y horas...si algo se llama doméstico, normalmente significa que el uso tiene que ser no profesional.
Bueno, aquí os dejo con ese pequeño post que se convirtió en una larga historia. Espero que sea útil para alguien y si has llegado hasta aquí te doy mis gracias por leerlo todo, jaja. Voy a hacer otro post sobre las remalladoras, que es otra cosa por lo que me preguntan mucho :).
To finish off this post and as we are already with all the machines I’d like to talk a bit about the industrial machine I have here too. I have it because I learned to sew with industrial machines so when I wanted to buy myself a machine, it was quite normal for me to go for an industrial one. It’s a Juki and it’s a strong and big machine, it sews everything and makes me happy every time I use it. It only has a straight stitch and it sews that one perfectly. Sometimes people ask me if it makes sense to buy an industrial machine. My response would be that if you are spending many hours every day working on your sewing machine, it makes sense. The industrial machines have strong motors to put up with this use, when you do the same with your domestic machine you’ll kill it sooner or later. It’s also more comfortable to work with as the working table is integrated and the presser foot is lifted with your knee, it makes it way faster to work that way. There are domestic models with the extension table and presser foot lifter features now too but I’m not sure if they are meant to be used many hours a day...if something is called domestic, it usually means you shouldn’t use it for long hours in a row.
Ok, that’s it with this little post that ended up being a long story after all. I hope it can be useful for someone and if you actually read until here I’m just saying thank you for being here, hehe. I’m going to write a post about overlockers/sergers too as it’s something many people have been asking me about :).