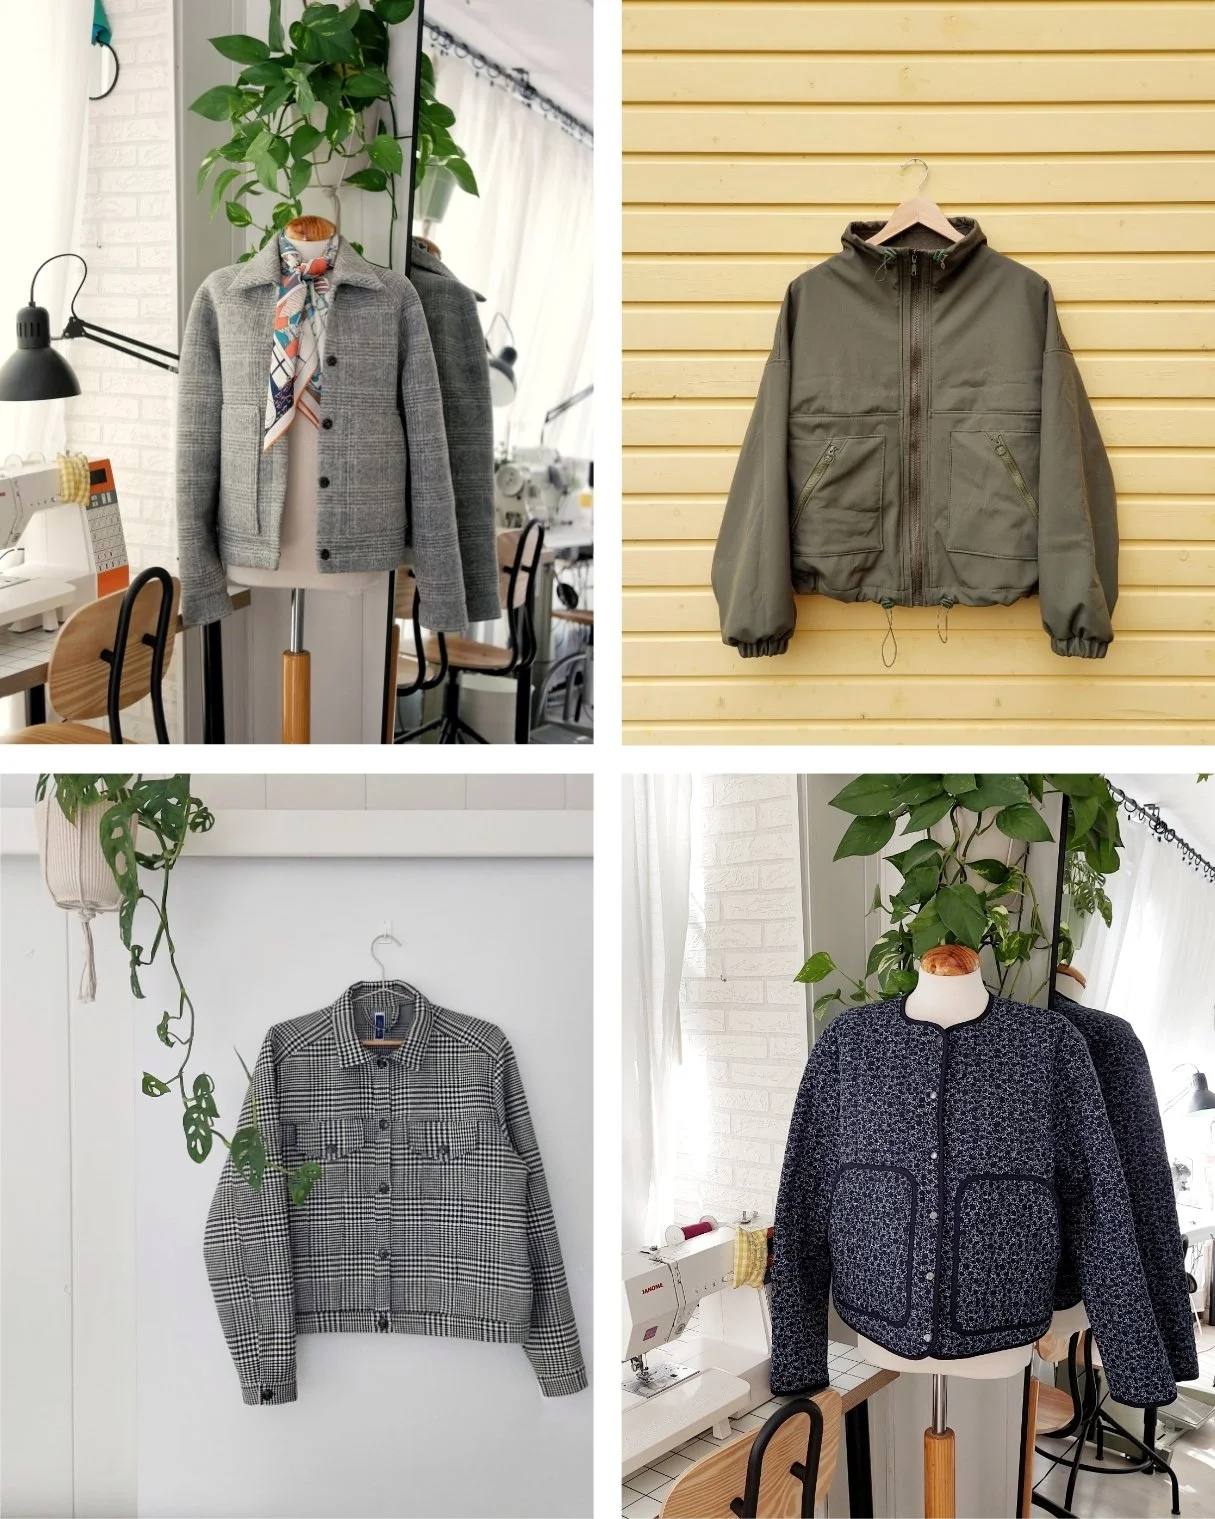
The wait has been long, but fall is finally here in Madrid. During the day, it’s still sometimes too warm to wear jackets, but the mornings are already perfect for seeking out a little warmth. And that works great for writing this post—a roundup of my recent jacket projects.
If you’ve been following me for a while, you probably already know: I’m a big fan of jackets, especially those for the in-between seasons. Here on the blog, I’ve posted quite a few entries featuring different jackets (I’ll try to find the time to update the visual directory, so they are easier to find!). That doesn’t quite match with the climate where I live, because spring and fall theme isn’t a big thing here. It’s either really cold or really hot—and then we get those two days of the so-called “in-between season.” But whatever—I’m sticking to what I like! So it’s no surprise that I’m sharing four (!) new projects from this year in this category. In my defense, to anyone who might think, “Why does she need more garments like this when she has already sewn plenty of jackets?”—it wasn’t planned. So I’ll better tell you the details and the story behind each one separately.
La espera nos ha costado muchísimo tiempo, pero el otoño está por fin en Madrid. De día seguimos llevando la chaqueta en la mano, pero las mañanas ya se prestan para buscar el calorcillo. Y eso me viene muy bien para escribir esta entrada/recopilación de mis proyectos de chaquetas de últimos tiempos.
Si me sigues desde hace rato lo sabrás ya: soy bastante fan de chaquetas y especialmente las de entretiempo. Aquí en el blog tengo bastantes entradas con chaquetas diferentes (intentaré buscar el tiempo para actualizar el archivo visual para que se puedan encontrar más fácilmente!). Eso no conjunta del todo bien con el clima donde vivo, porque esto del entretiempo no se lleva mucho aquí. O es mucho frío o mucho calor, luego tenemos los dos días del famoso entretiempo. Pero da igual, me mantengo firme en mis gustos! Así que no es de extrañar que traigo cuatro (!) proyectos nuevos de este año en esta categoría. A mi defensa ante personas que pueden pensar que “para qué necesita ella más prendas si ya ha cosido bastantes chaquetas”: no fue planeado. Así que mejor te cuento los detalles y la historia de cada una por separado.
“Denim” jacket exercise / El ejercicio de la chaqueta “vaquera”
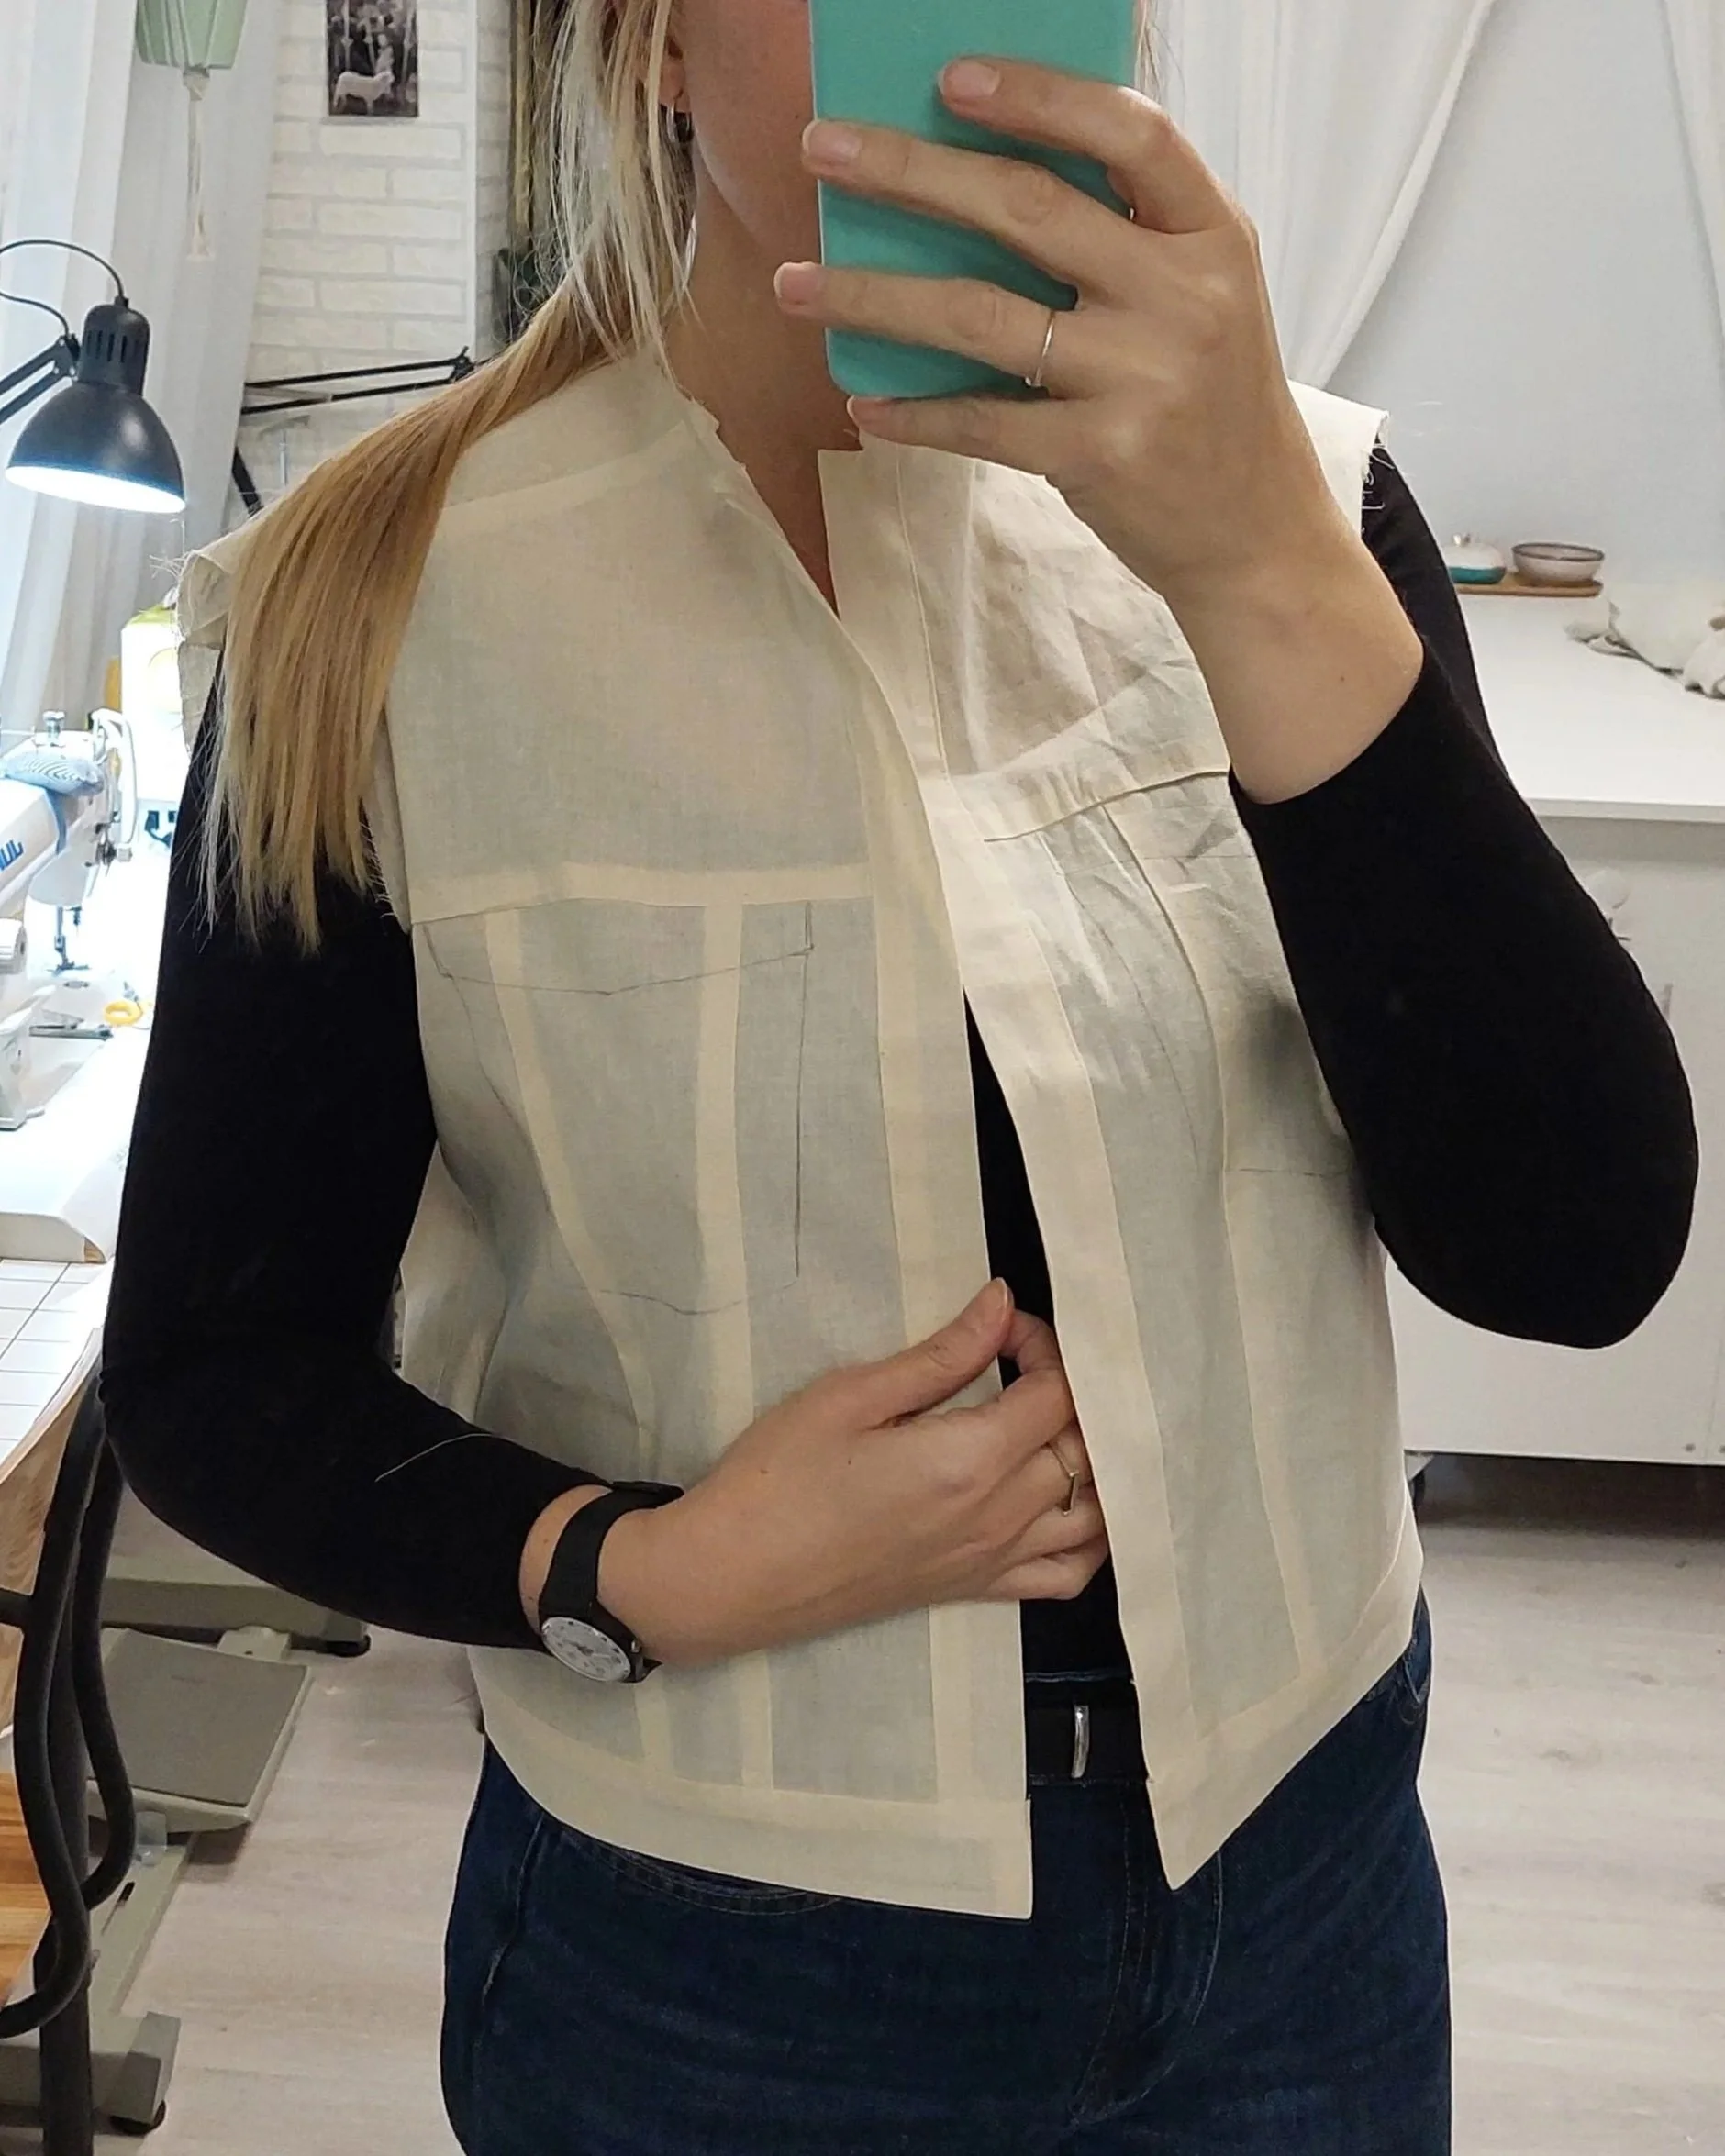
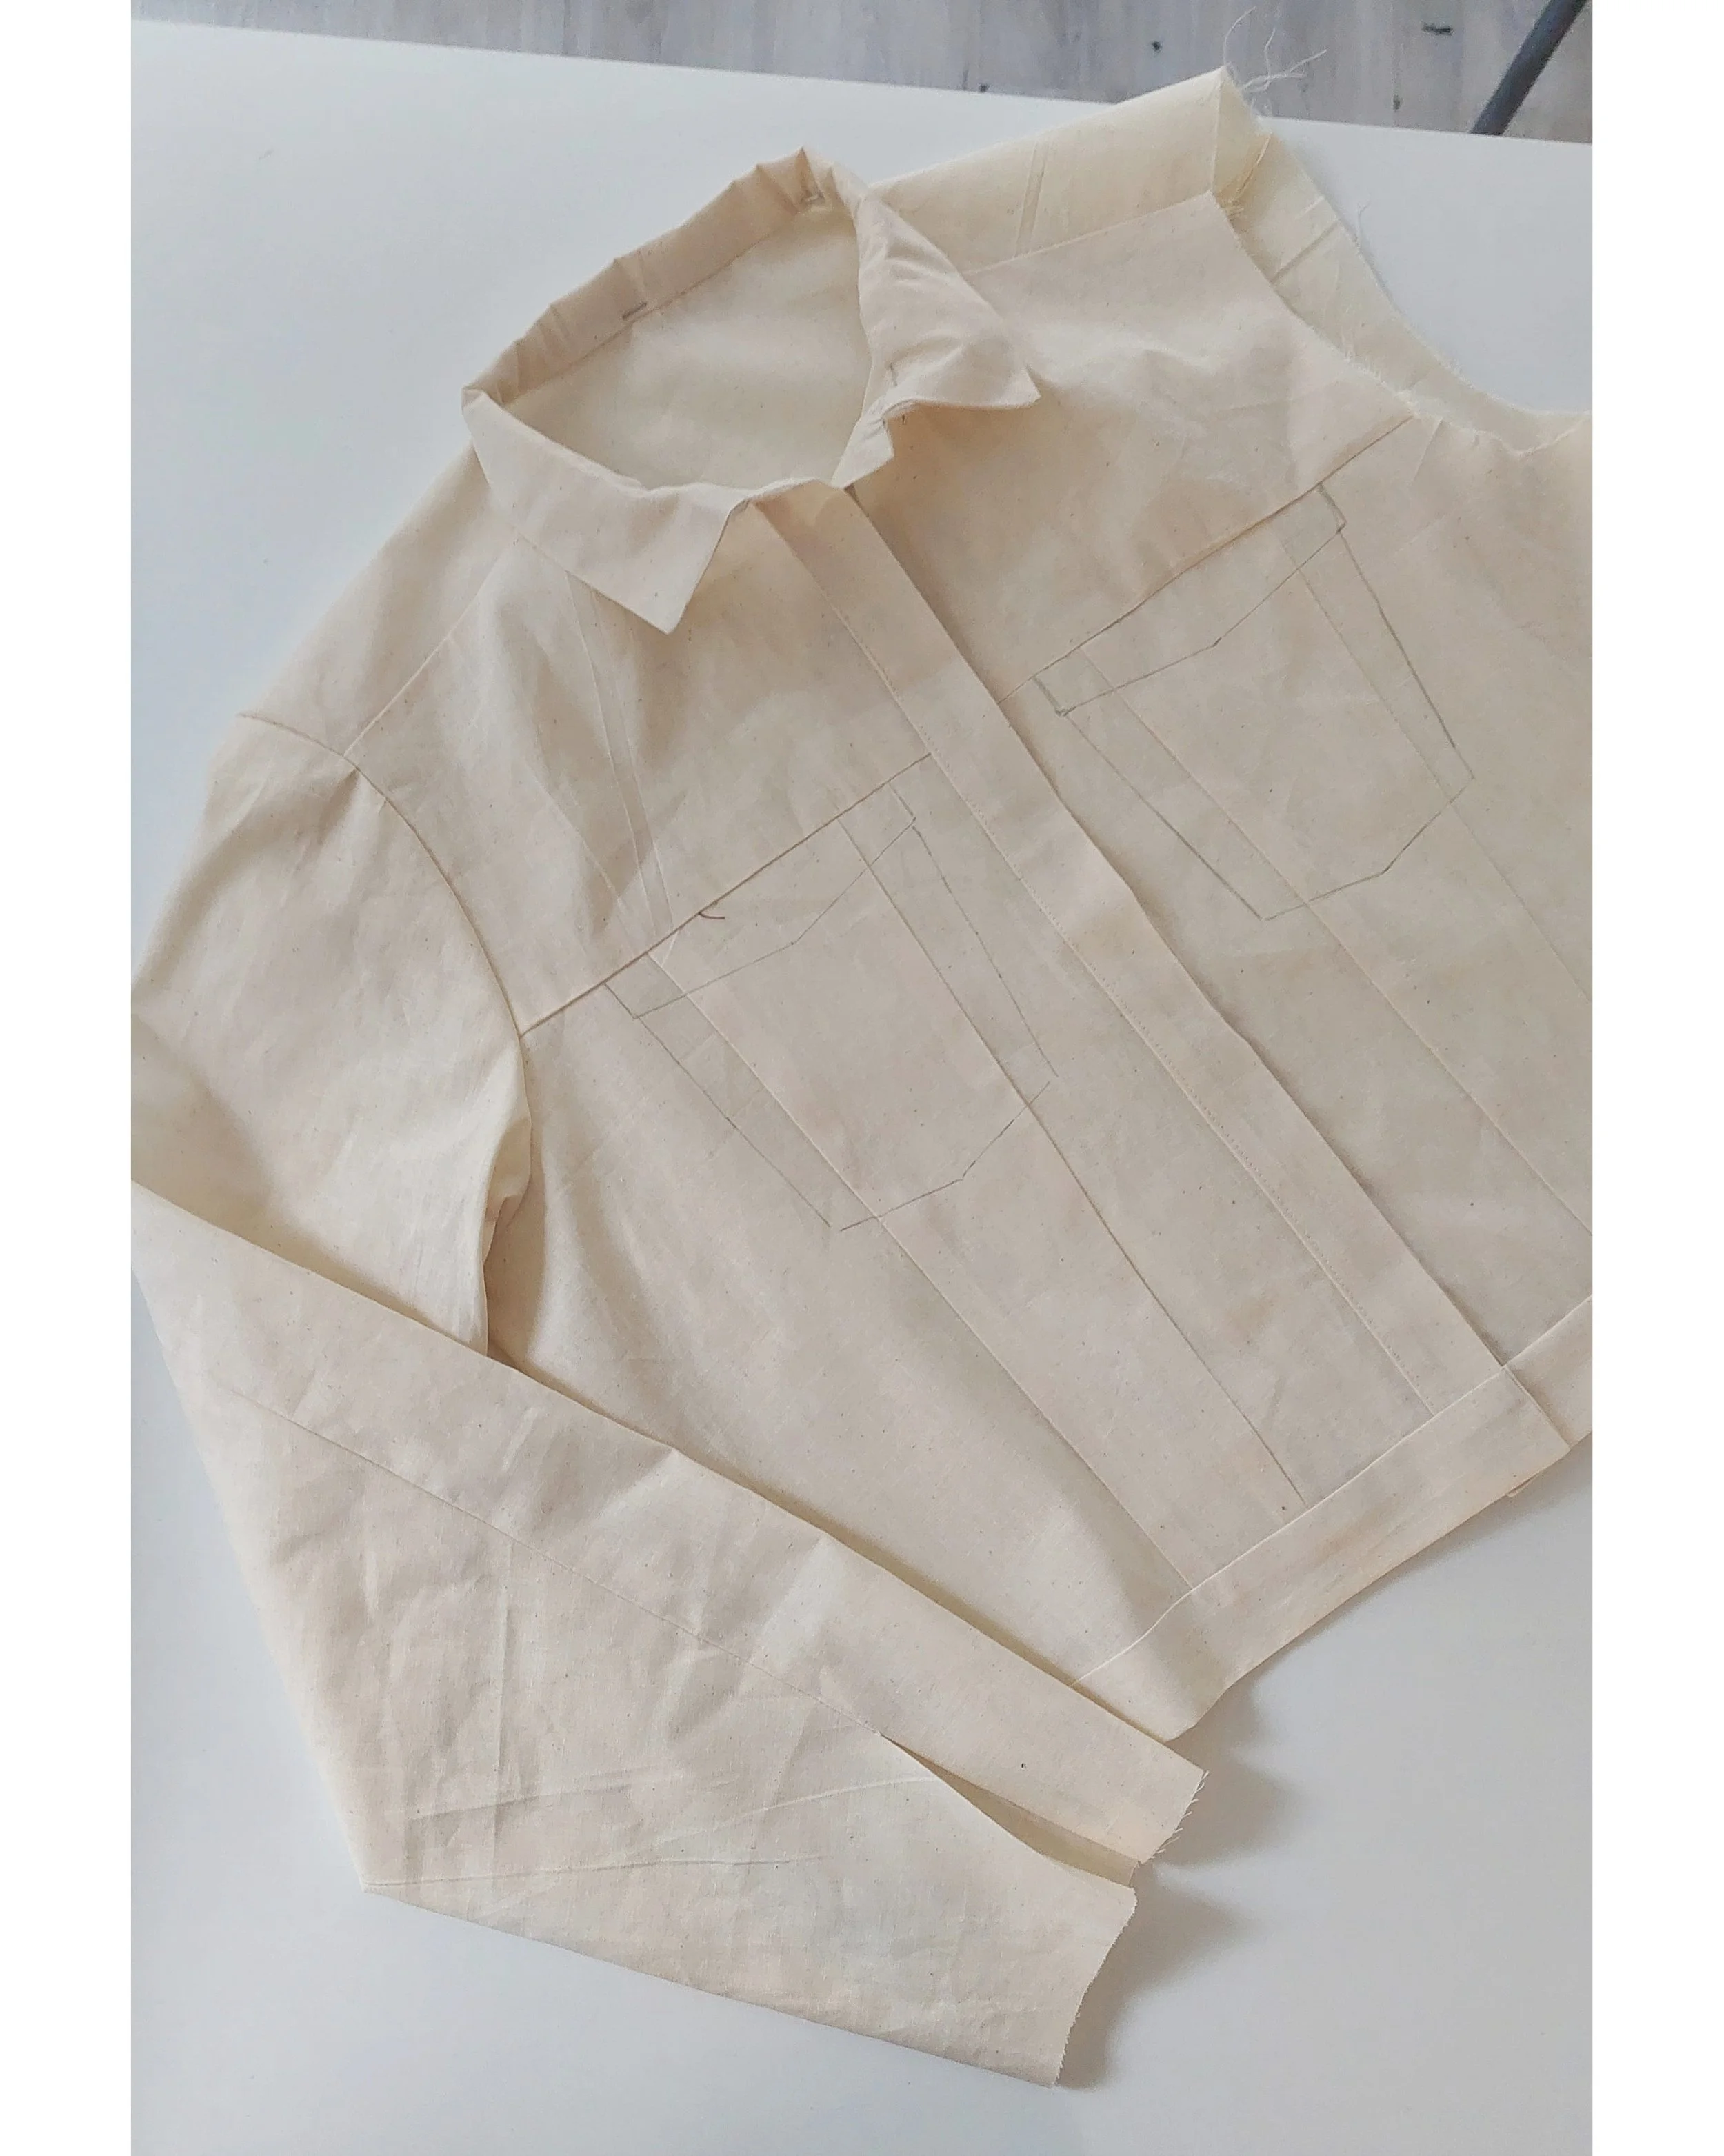
First toile of the denim jacket exercise. / Primera prueba del ejercicio de la chaqueta vaquera.
I think that it was here, when I saw it as something I’d actually wear. What came after that was a bunch of bad decisions considering the “last minute” situation, lol. / Creo que aquí fue cuando lo vi como algo que me pondría. Después de esto ya fue una secuencia de malas decisiones considerando que no me quedaba nada de tiempo para coser.
Let’s start with this black-and-white checkered pattern, which comes with a story. Technically, it’s not from this year because I started working on it in late November of last year, but I finally finished sewing it this spring. It all started towards the end of the pattern-making course I was taking , and I was almost through that crazy fall of doing two modules at once (you can read about that experience here). For my last live class, the teacher encouraged us to make a denim jacket pattern as an exercise (Asun: “Come on, girls, it’s a piece of cake!” Me: “But it’s a ton of work, haha”). Personally, I wasn’t very interested in making that pattern for myself, because I don’t usually wear jackets like these, I didn’t have any fabric ready either, and the one thing I had the least of was time. But I’m a bit of a nerd, so I couldn’t resist doing the exercise.
I first made it in calico, and it turned out pretty well. I’m still trying to remember what motivated me to decide I should go ahead with that project using real fabric, even though I only had one day to finish it in time for the class the next day. Maybe it was when I tried on that calico toile—it’s a light color I like—and thought, “Hey, it’d be cool to have a jacket like that.” Maybe it was the idea of finishing the course with one last sewn project as a grand finale. I don’t know. The only thing I know is that I made the decision on Sunday afternoon (with the class on Monday) and that the only fabric I had in the studio at that moment (and that would even remotely work for the jacket) was the remnant of this plaid fabric that I’d already used for two skirts for the skirt module I was taking at the same time.
Empezamos con este modelo de cuadros en blanco y negro, que tiene historia. Técnicamente no es de este año porque lo empecé a hacer en el final de noviembre del año pasado, pero al final lo he cosido bien esta primavera. Todo empezó en el final del curso de patronaje que estaba realizando en ese momento. Estaba casi terminando la locura de otoño haciendo dos módulos a la vez (puedes leer sobre esa experiencia aquí), y para la última tutoría que tenía, la profesora nos animó a hacer el patrón de la chaqueta vaquera como ejercicio (Asun: venga chicas, que es nada! Tú: pero si es un montón, jaja). Yo no tenía personalmente mucho interés en hacer ese patrón para mí, porque no suelo llevar chaquetas así, no tenía tela preparada tampoco y de lo que menos tenía era el tiempo. Pero soy bastante empollona así que no pude resistirme a hacer el ejercicio.
Primero lo hice en retor y bastante bien. Sigo intentando recordar cuál fue mi motivación a la hora de decidir que debería seguir con ese proyecto en tela de verdad, teniendo un solo día para poder presentarlo para la tutoría del día siguiente. Igual me probé ese retor que es un color claro que me gusta, y dije: oyes, molaría tener una chaqueta así. Igual fue la idea de terminar el curso con un último proyecto cosido como un broche final. No lo sé. Lo único que sé, es que tomé la decisión el domingo por la tarde (con la tutoría el lunes) y que la única tela que tenia en el taller en ese momento (y que mínimamente iba a funcionar para la chaqueta), fue el retal de esta tela de cuadros que ya había usado para dos faldas para módulo de faldas que estaba cursando al mismo tiempo.
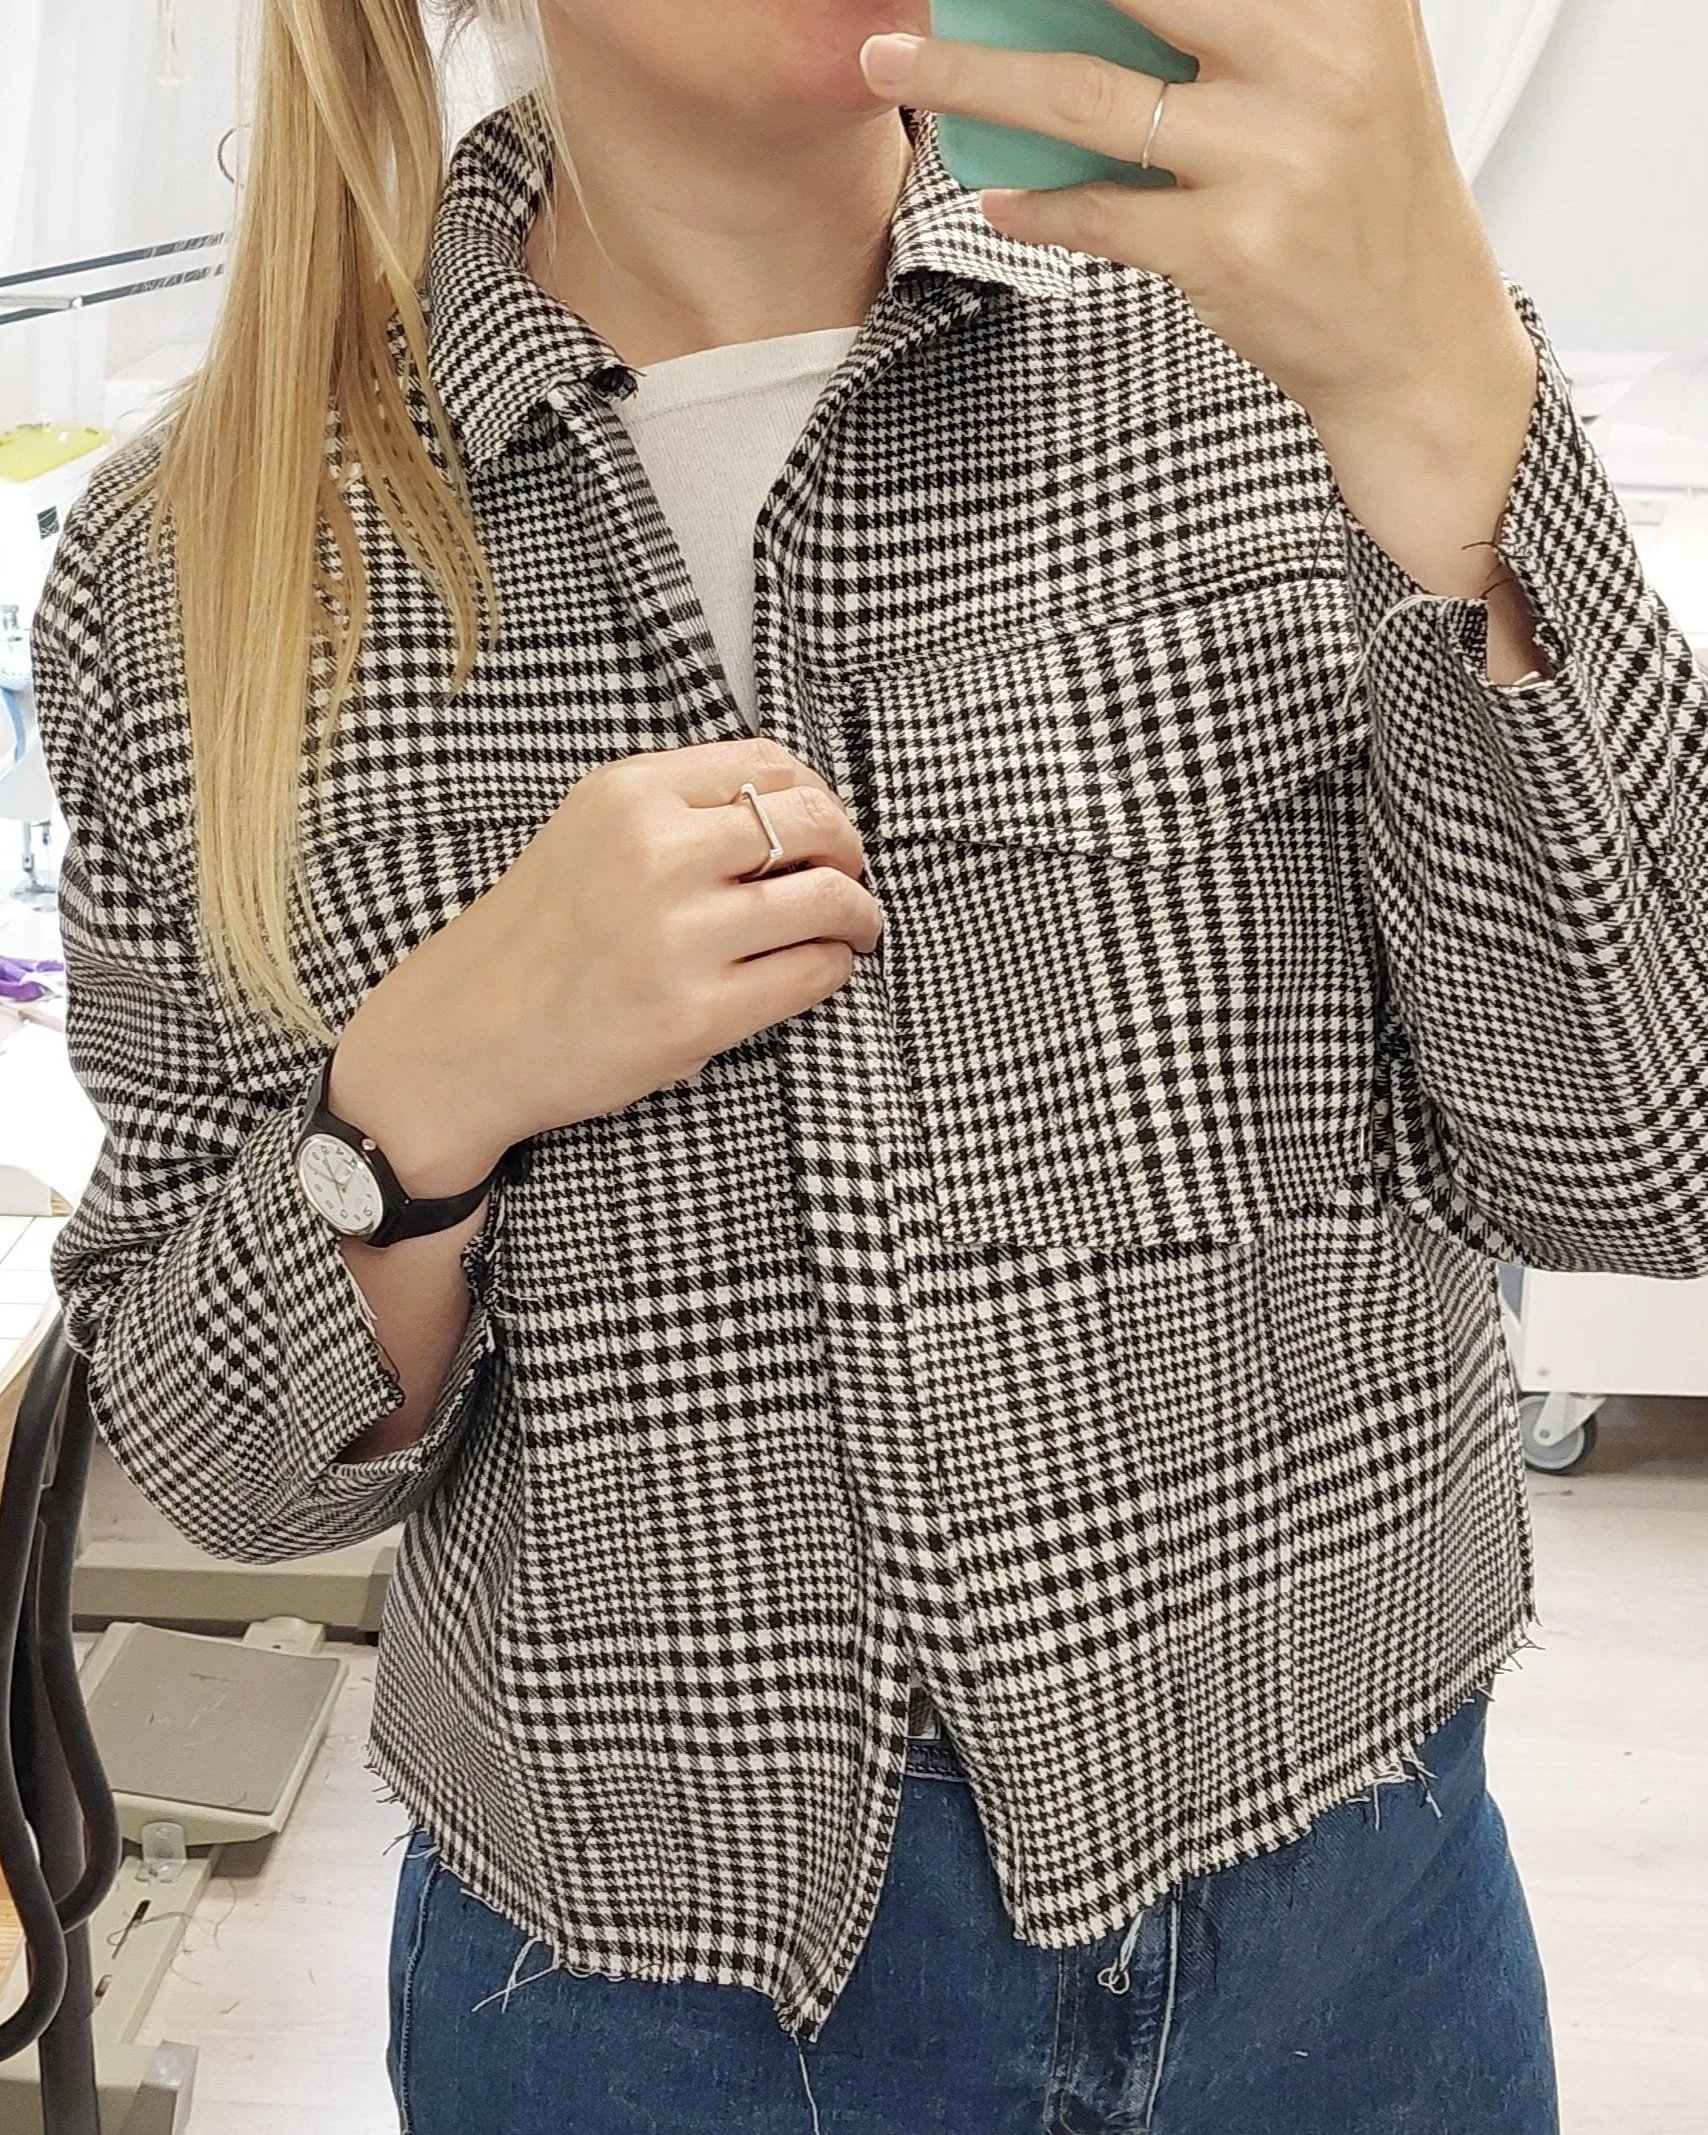
This is how the jacket sewing ended in November. / Así se quedó el proyecto de la chaqueta en noviembre.
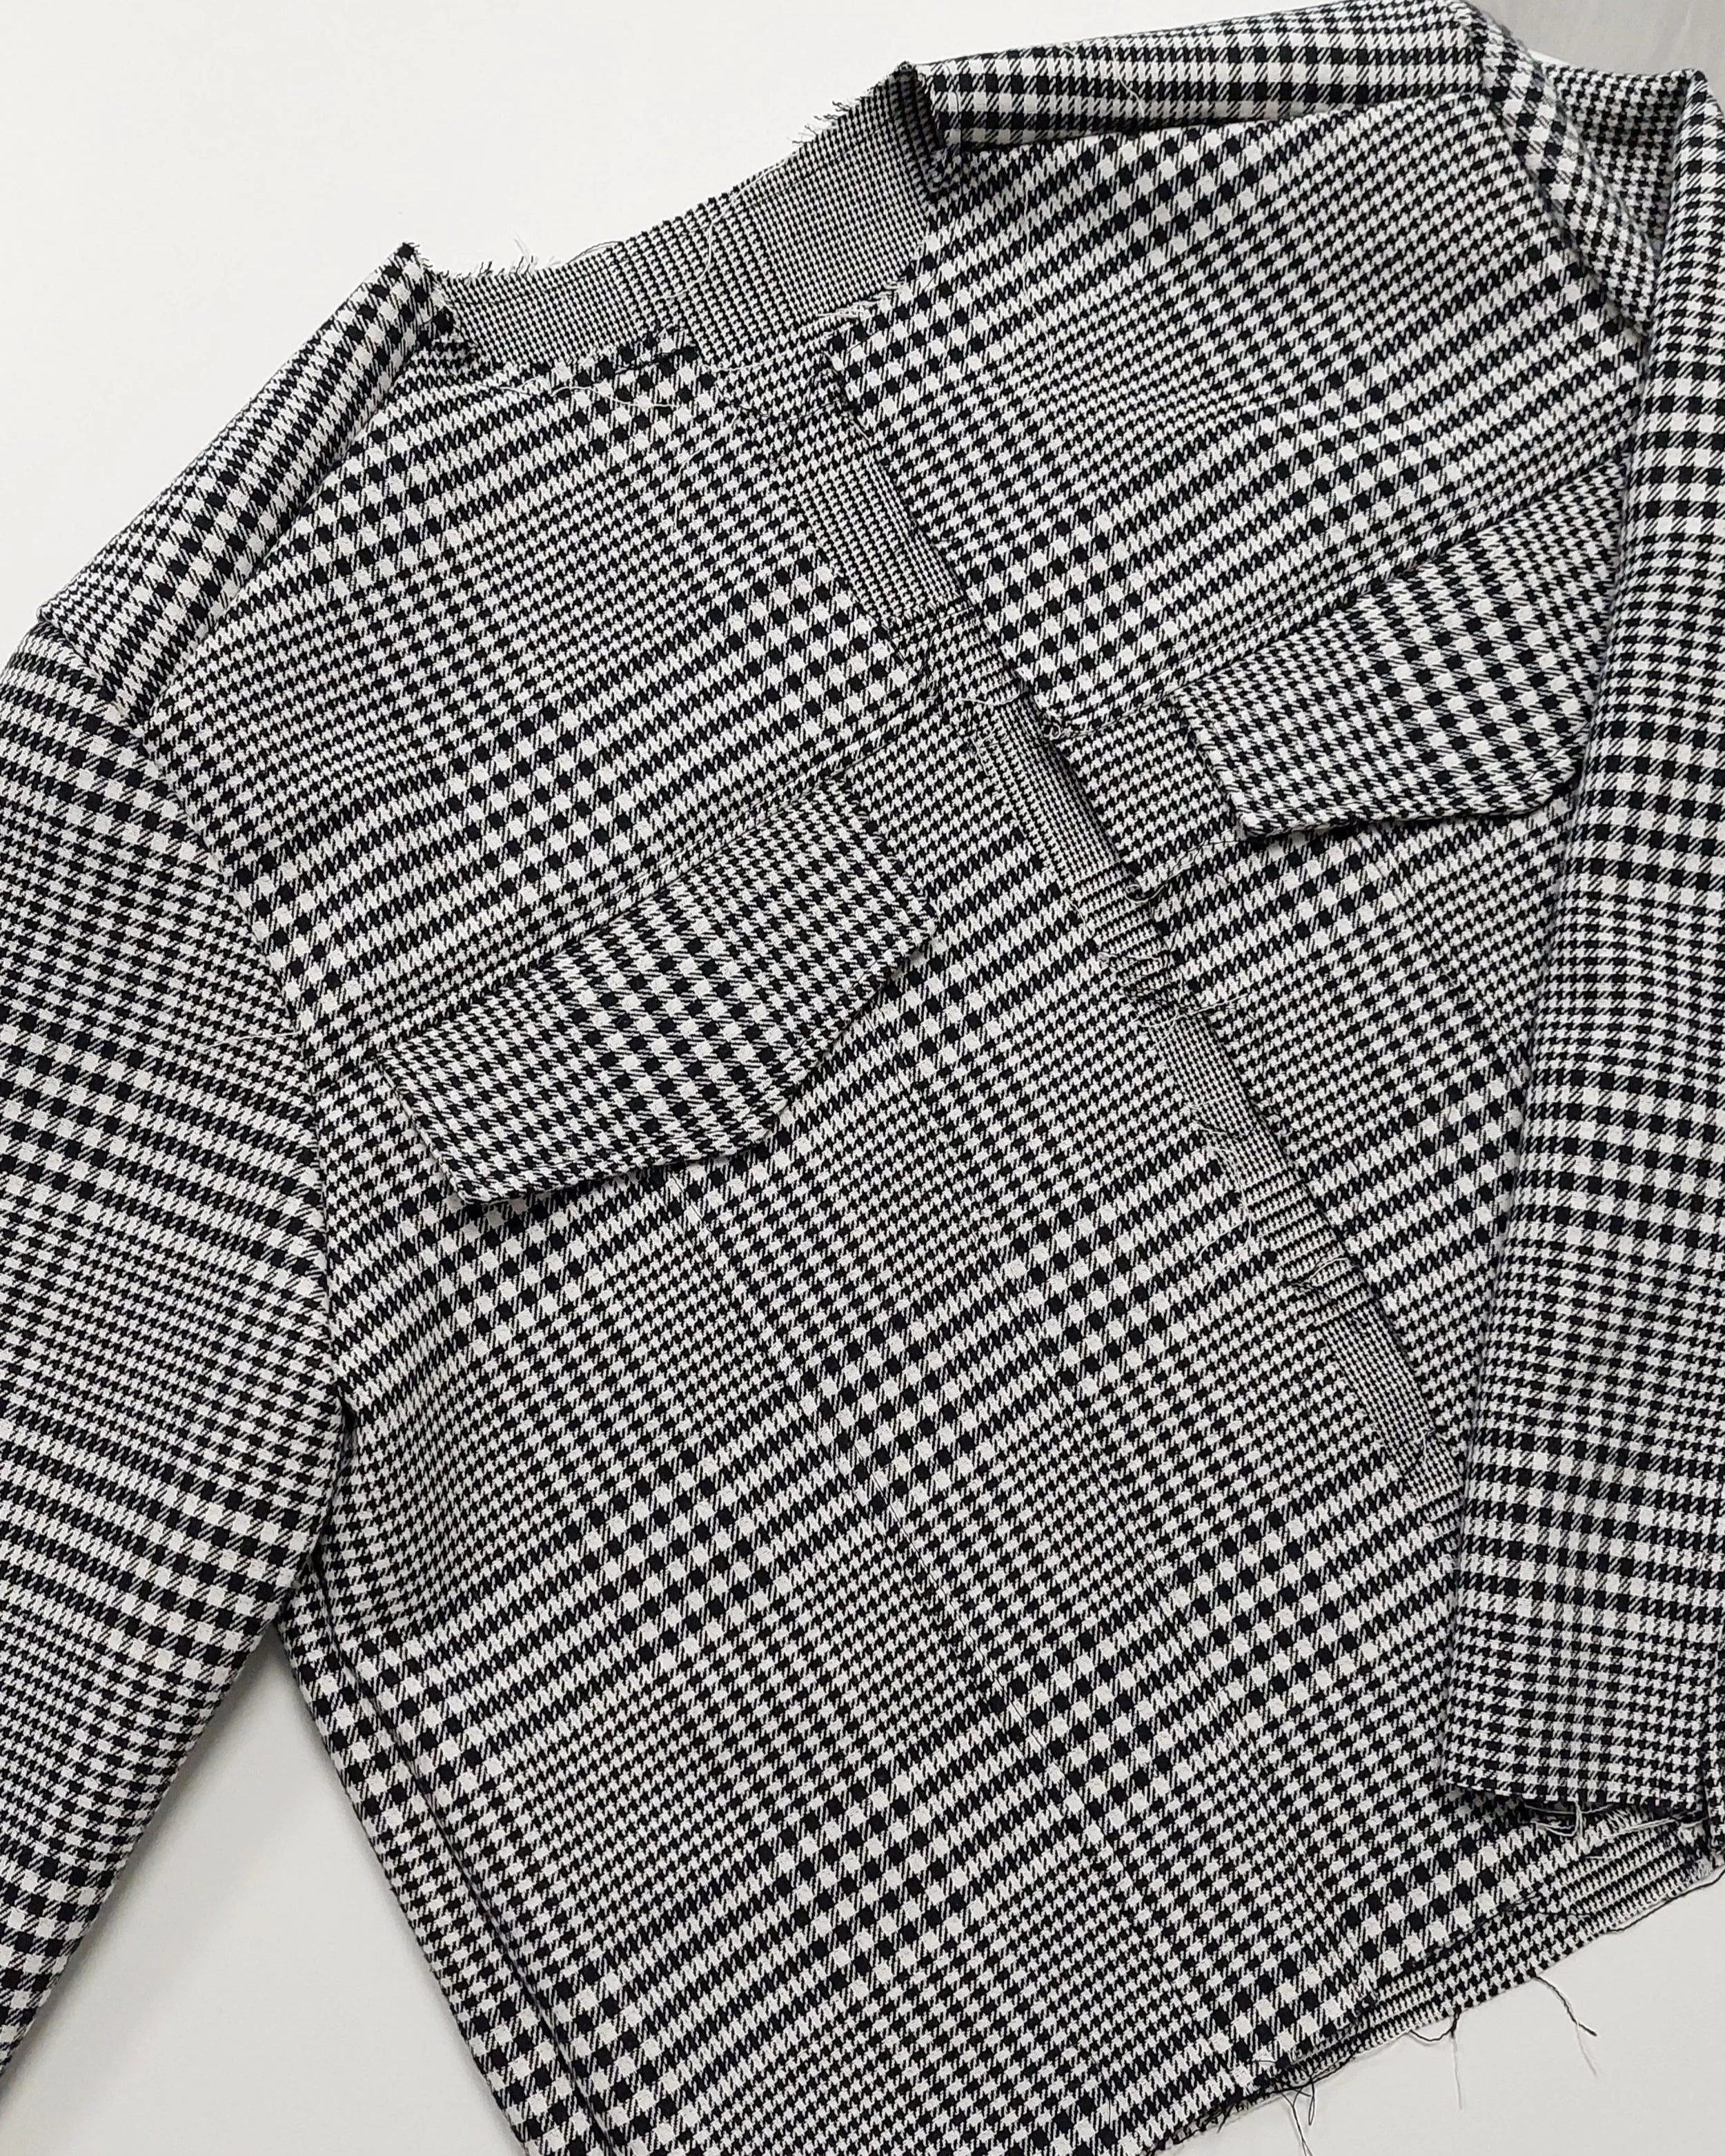
After four months of hibernation, I rescued it, unpicked the plackets that were not aligned well, and fixed the jacket. / Después de cuatro meses de hibernación lo rescaté, descosí las tapetas que no estaban bien alineadas y me puse con el arreglo de este proyecto.
So we’ve got plaid fabric, a multi-panel pattern, and very little time? A perfect recipe for cursing every thirty seconds. It was such a bad idea that I’m at a loss for words to describe it. Obviously, you have to match the plaids—otherwise, you’re headed straight to sewing hell. But then what’s the point of these panels if, when you match the plaids properly, you can’t even see those design lines? Exactly—bad idea. Very bad. Matching the plaids when cutting out the pieces was a nightmare (the fabric has different plaids on the right and wrong sides to make it more fun). And even when I did it carefully, the pieces would shift when I sewed them together. And the best part? After matching up the nine panels (I’m sobbing) for the front and back, when I started cutting out the sleeves, I was already so on autopilot (it must have been nighttime by then, and I’m not really a night person) that I cut them without paying any attention to matching the plaids whatsoever. After doing all that work, I attached sleeves that didn’t match the side seams. And I didn’t have any more fabric left to cut new sleeves. That’s when I stopped making a fool of myself, called off the “jacket finished by tomorrow” mission, and headed home.
That Monday, I presented my pattern-making assignment in class, along with a photo of the plaid jacket with the collar pinned in place (showing my failed attempt to match the plaid, obviously), and I wrapped up what had been my training for that busy fall. At first, I literally wanted to throw the jacket in the trash. The fabric had been cheap, from Floridablanca in Barcelona. And I couldn’t see myself wearing a jacket with mismatched sleeve and body plaids. Would anyone else notice that they didn’t match? Obviously not. The average person doesn’t even know what “matching checks” means (which is normal, haha). And would an ordinary person be so harsh on their own project just because the checks didn’t line up, considering that what you buy in stores rarely has matching checks anyway? Of course not—I’m the one who judges myself the most, and no one else.
Así que tenemos tela de cuadros, patrón de muchos paneles y muy poco tiempo? Un cóctel perfecto para maldecir mi existencia cada treinta segundos. Fue una idea tan mala que me faltan palabras para describirlo. Obviamente tienes que casar los cuadros, sino, vas directo al infierno de costura. Pero entonces qué sentido tienen estos paneles, si al casar bien los cuadros ni siquiera ves esas líneas de diseño? Pues eso, mal. Muy mal. Fue una pesadilla casar los cuadros en corte (la tela tiene cuadros diferentes en el derecho y el revés para hacerlo más divertido aún). Y aún al hacerlo con cuidado, las piezas se movían luego al coser. Y la mejor parte? Después de casar los nueve paneles (lloro) del delantero y espalda, cuando me puse a cortar las mangas, estuve ya tan en autopiloto (sería ya de noche, y yo no soy muy de noche), que las corte sin mirar nada de casar absolutamente nada. Después de hacer todo lo previo, le puse unas mangas que no casaban con los laterales. Y ya no me quedaba más tela para cortar mangas nuevas. Allí fue cuando dejé de hacer el ridículo, cancelé la misión “chaqueta terminada para el día siguiente” y me fui para mi casa.
Aquel lunes presenté en clase mi ejercicio en retor, también la foto de la chaqueta de cuadros con la prueba de cuello con alfileres (contando mi c**** de casar cuadros, obviamente) y terminé lo que fue mi formación de ese otoño tan movido. Al principio quería tirar la chaqueta a la basura literalmente. La tela había sido barata, de Floridablanca en Barcelona. Y no me veía yo usando una chaqueta donde las mangas no casaban con el cuerpo. Alguien más se iba a dar cuenta de que no casaban? Obvio que no. Si el ser humano medio no sabe ni lo que es casar cuadros (normal, jaja). Y una persona común sería tan radical con su proyecto, por el hecho de que no casasen unos cuadros, considerando que lo que compras en las tiendas ya rara vez está casado? Obvio que no, la que más me juzga soy yo misma, y nadie más.
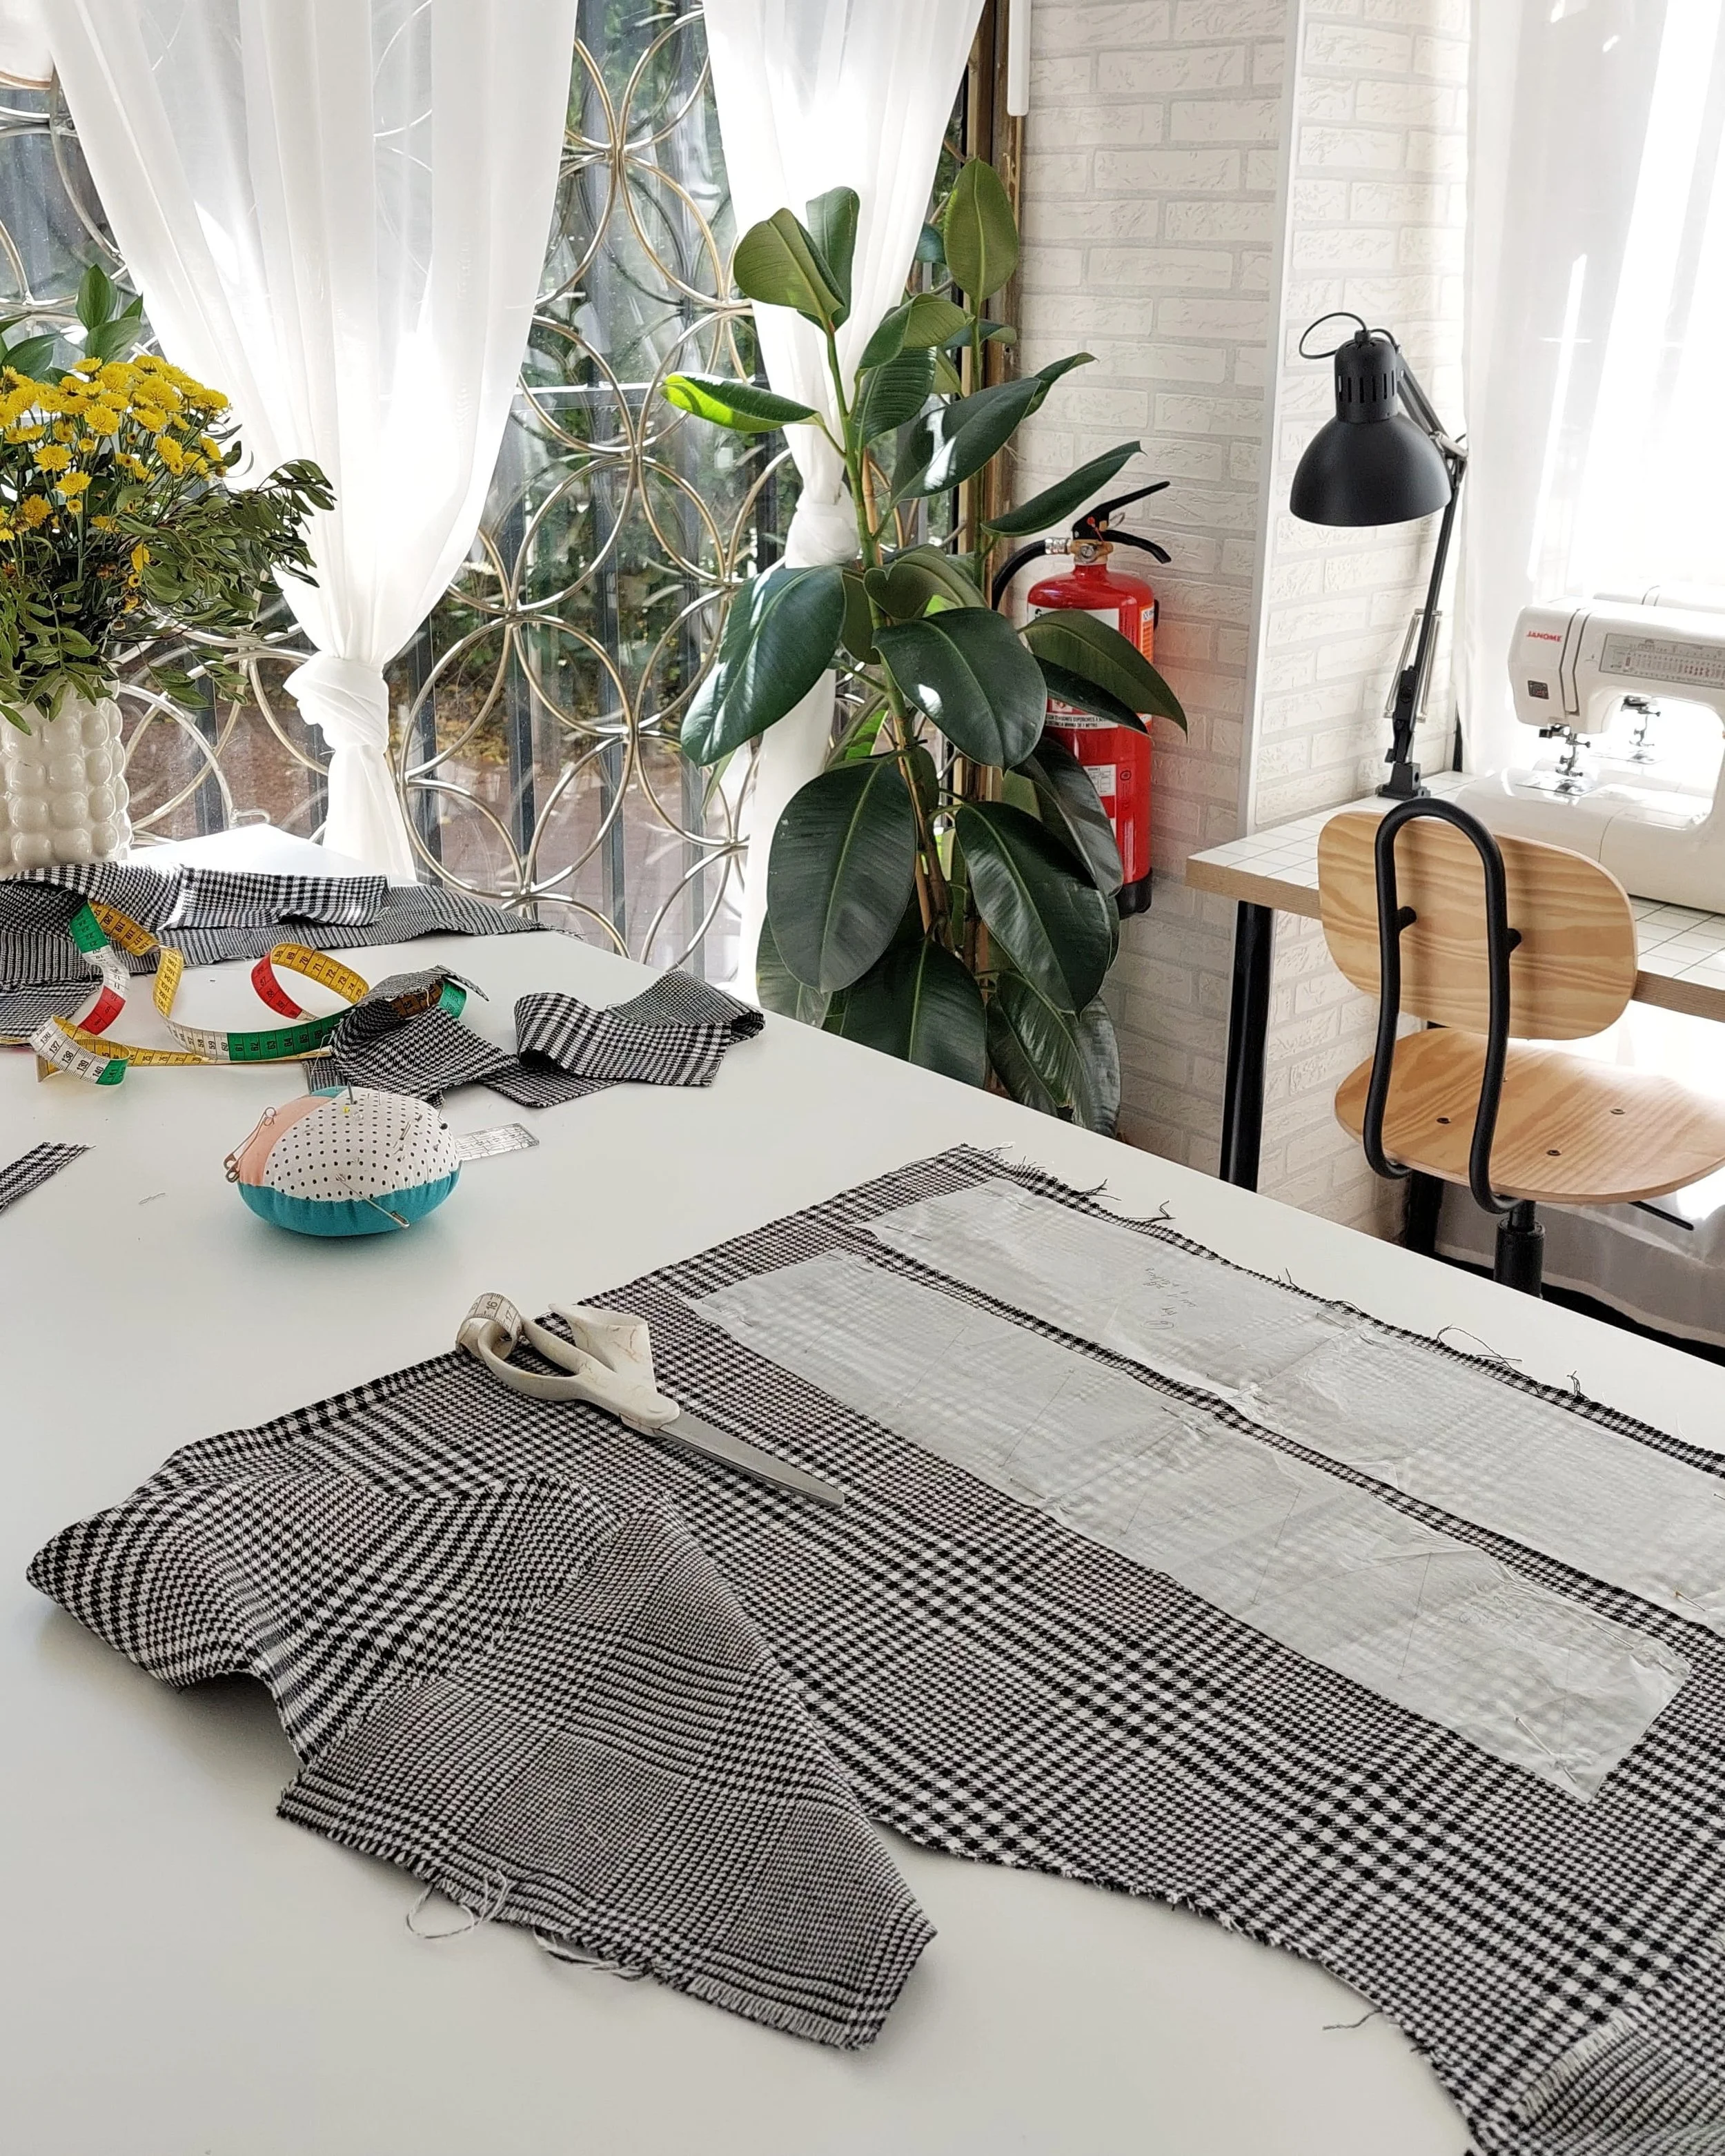
Fast forward: spring at the studio, cutting out new collar pieces. / Viaje al futuro: primavera en el taller, cortando las nuevas piezas de cuello.
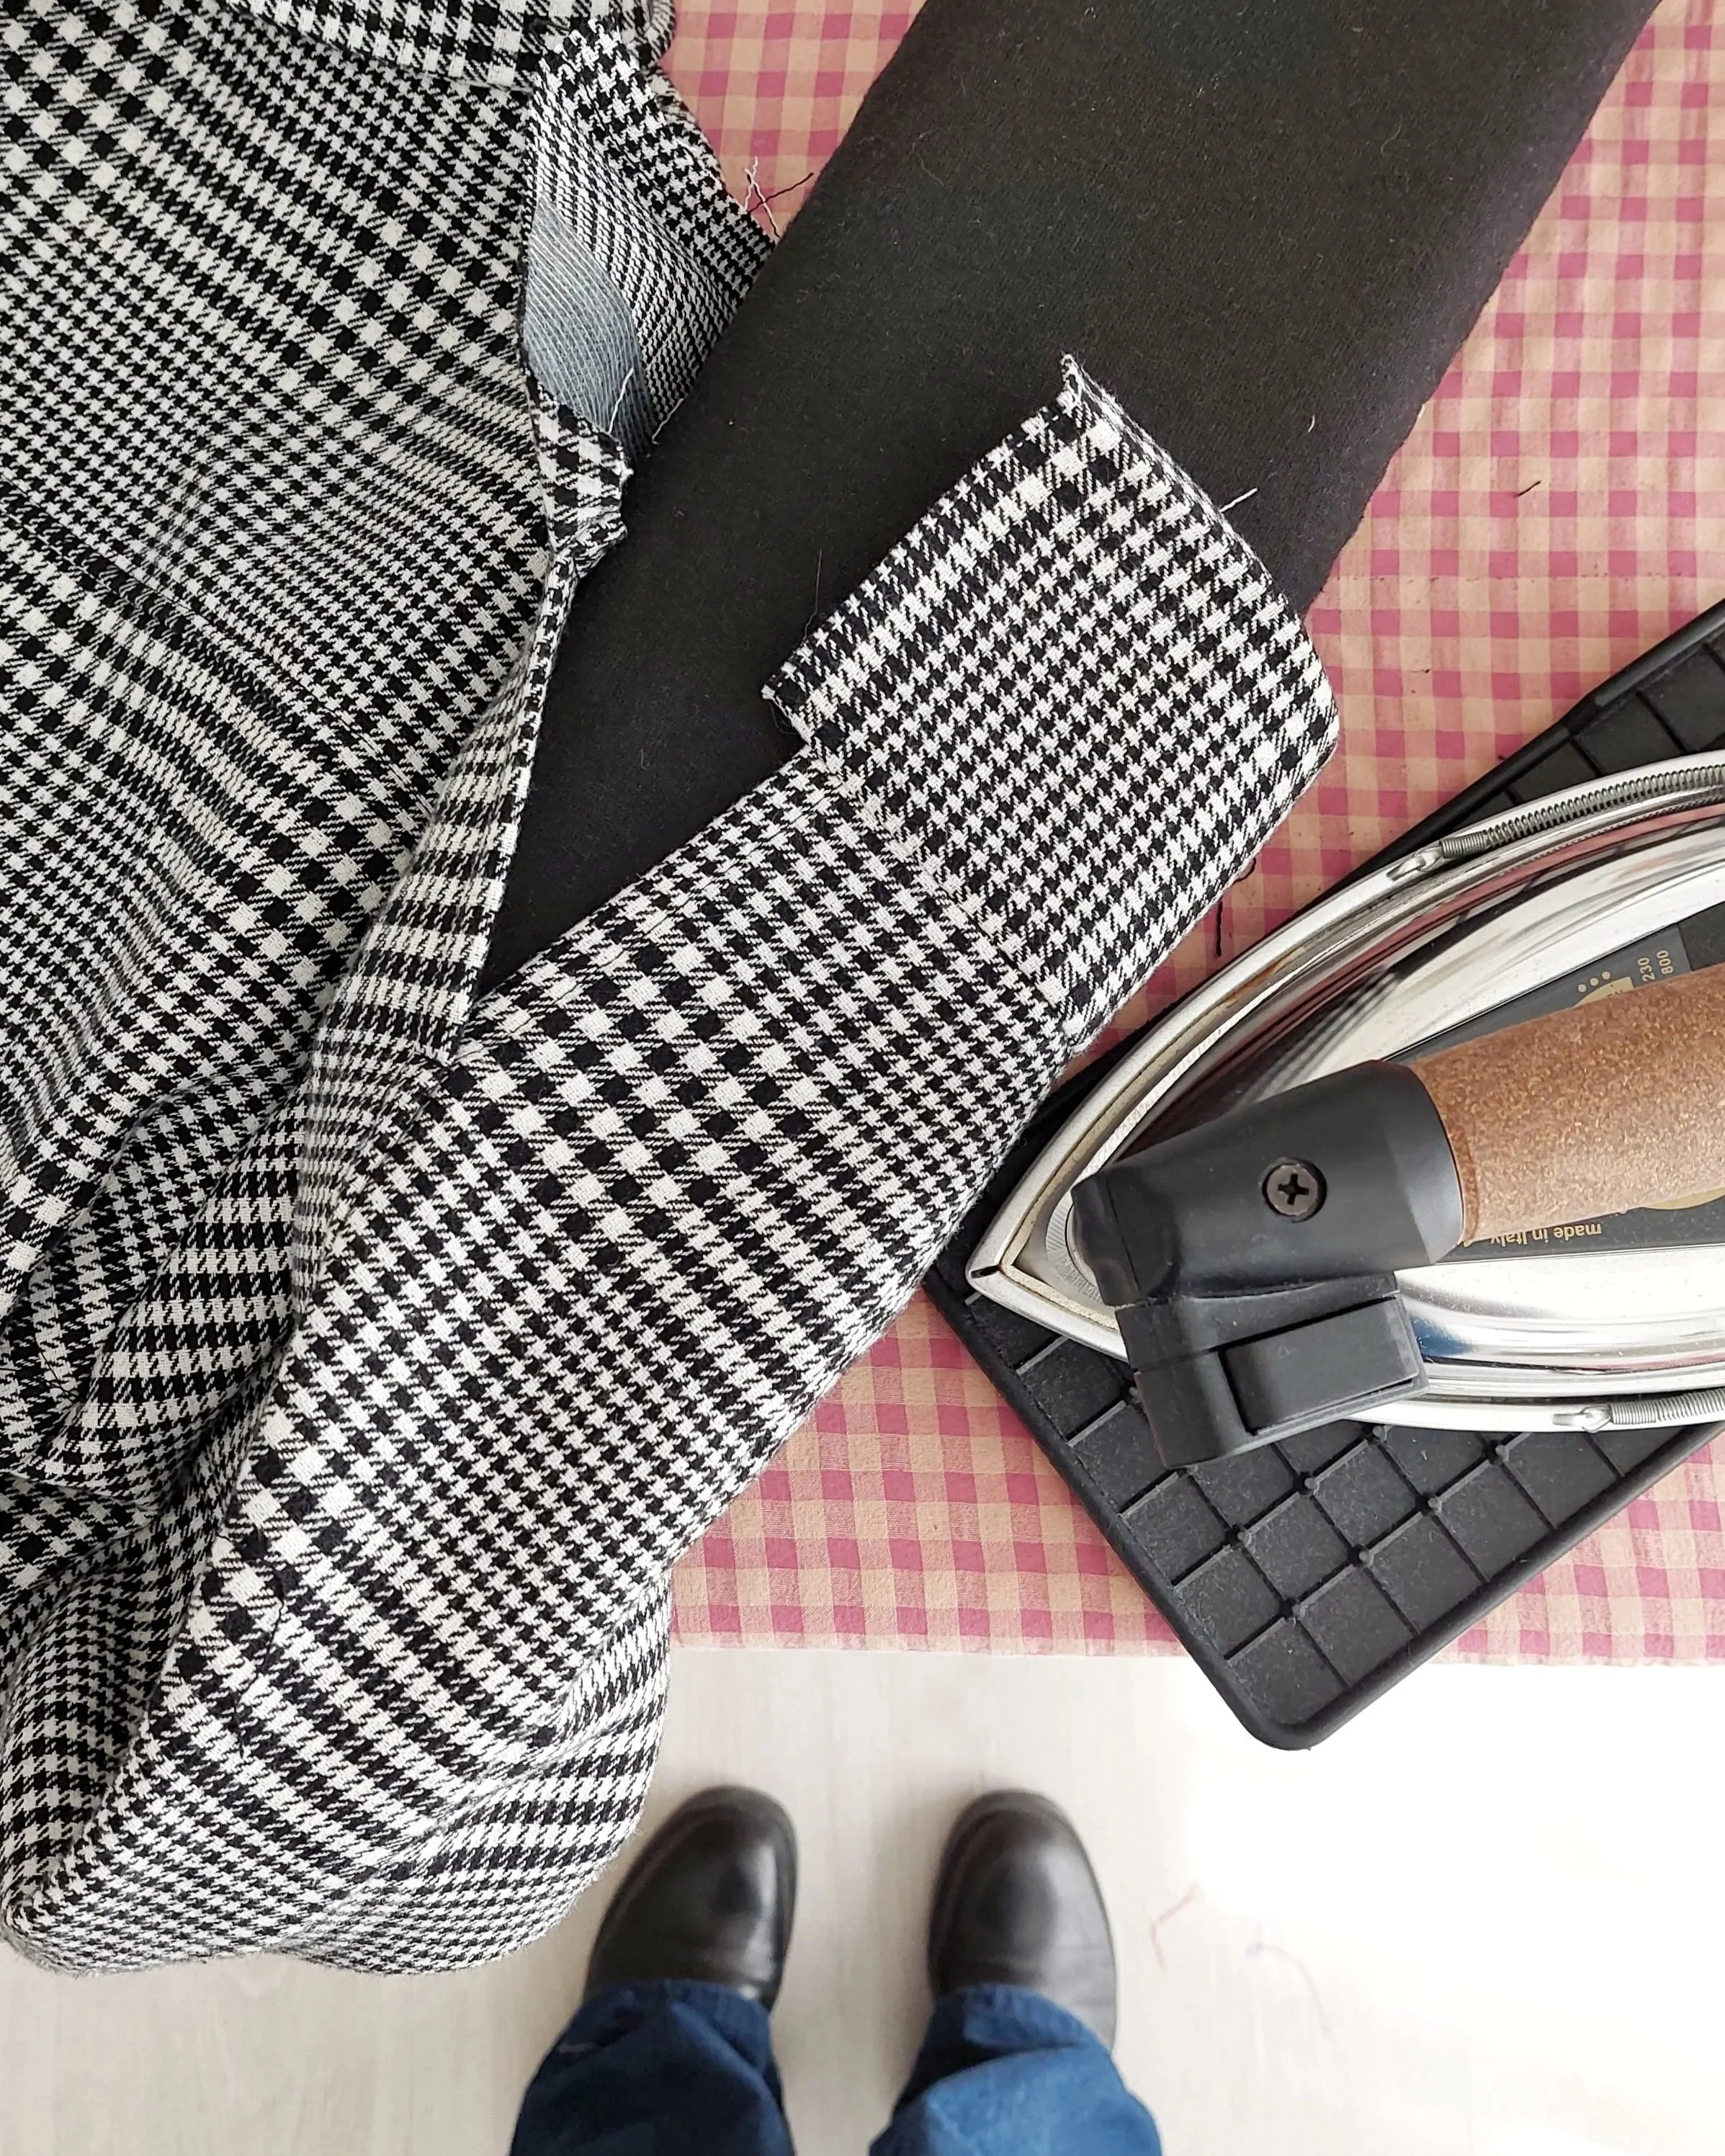
Vaporino helping out with flattening those cuffs. / Vaporino ayudando con aplanar bien estos puños.
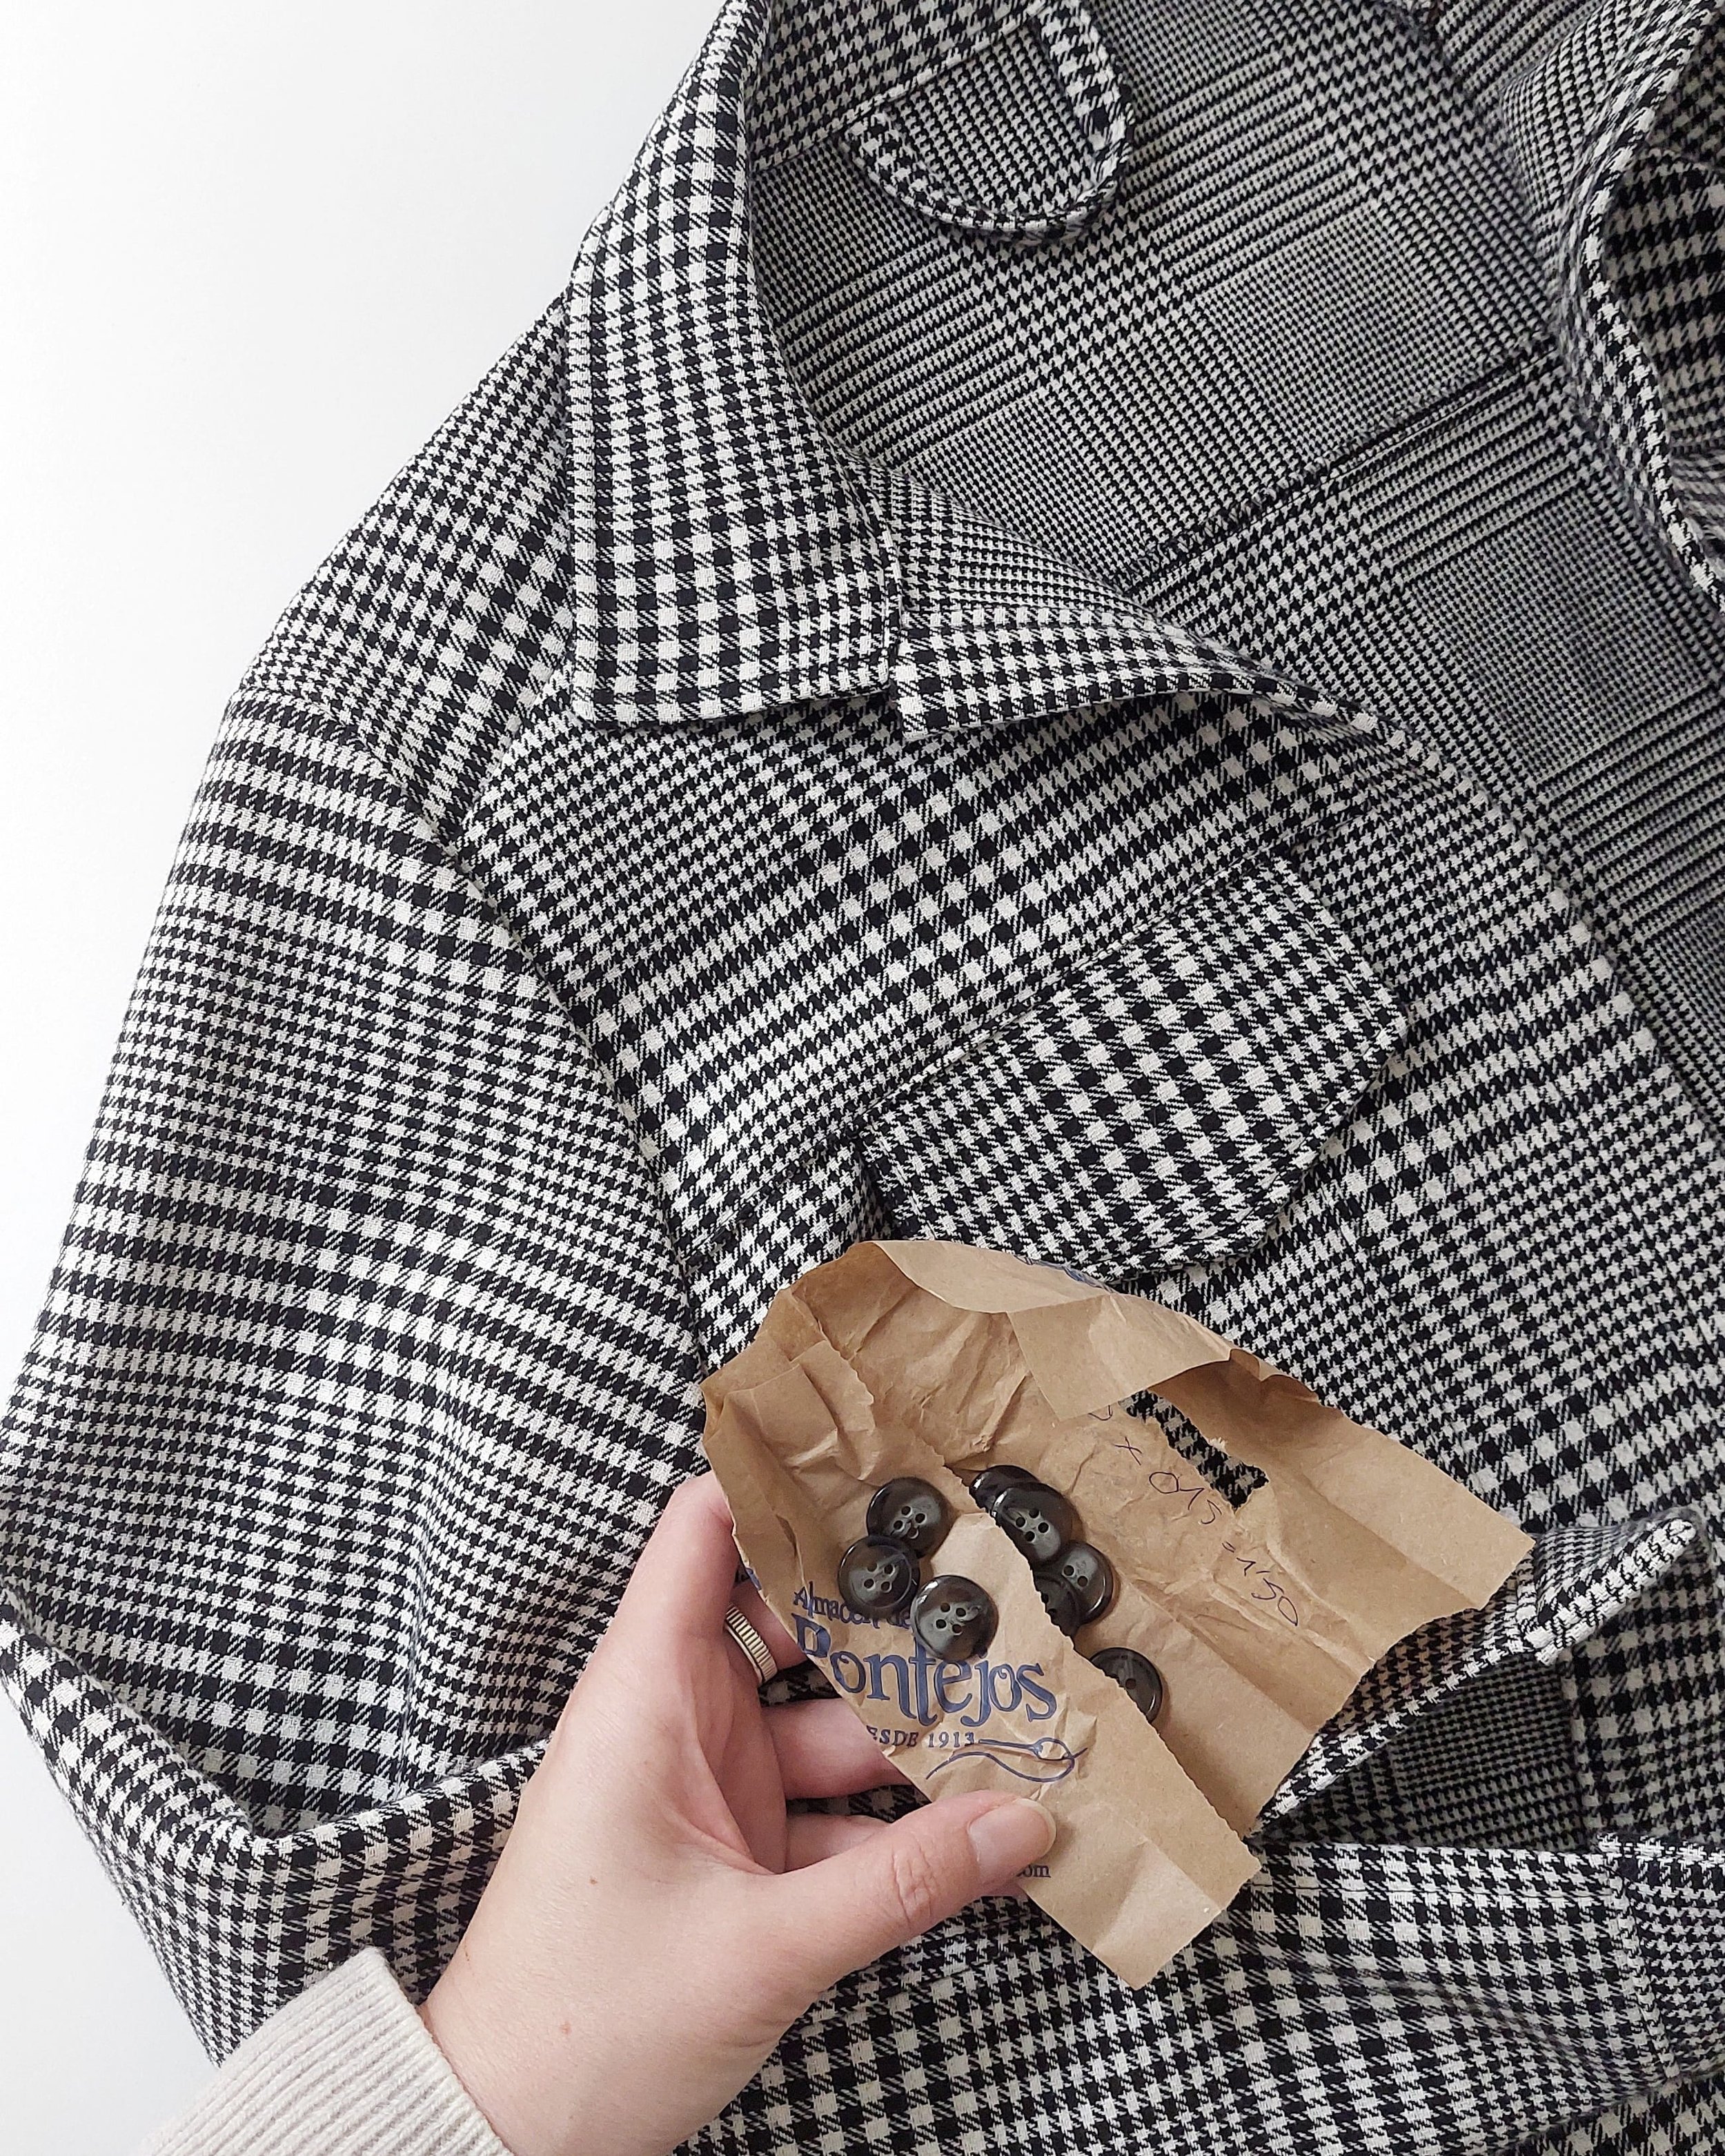
A trip to my local haberdashery Pontejos to get the matching buttons. I love how they still do the counting (most of them without a calculator) by writing on the paper they use to wrap your goods. / El viaje a mi mercería local Pontejos para comprar botones a juego. Me encanta que ellos siguen haciendo sus cuentas (la mayoría de memoria, sin usar la calculadora) a boli en ese mismo papel que usan para envolver tu compra.
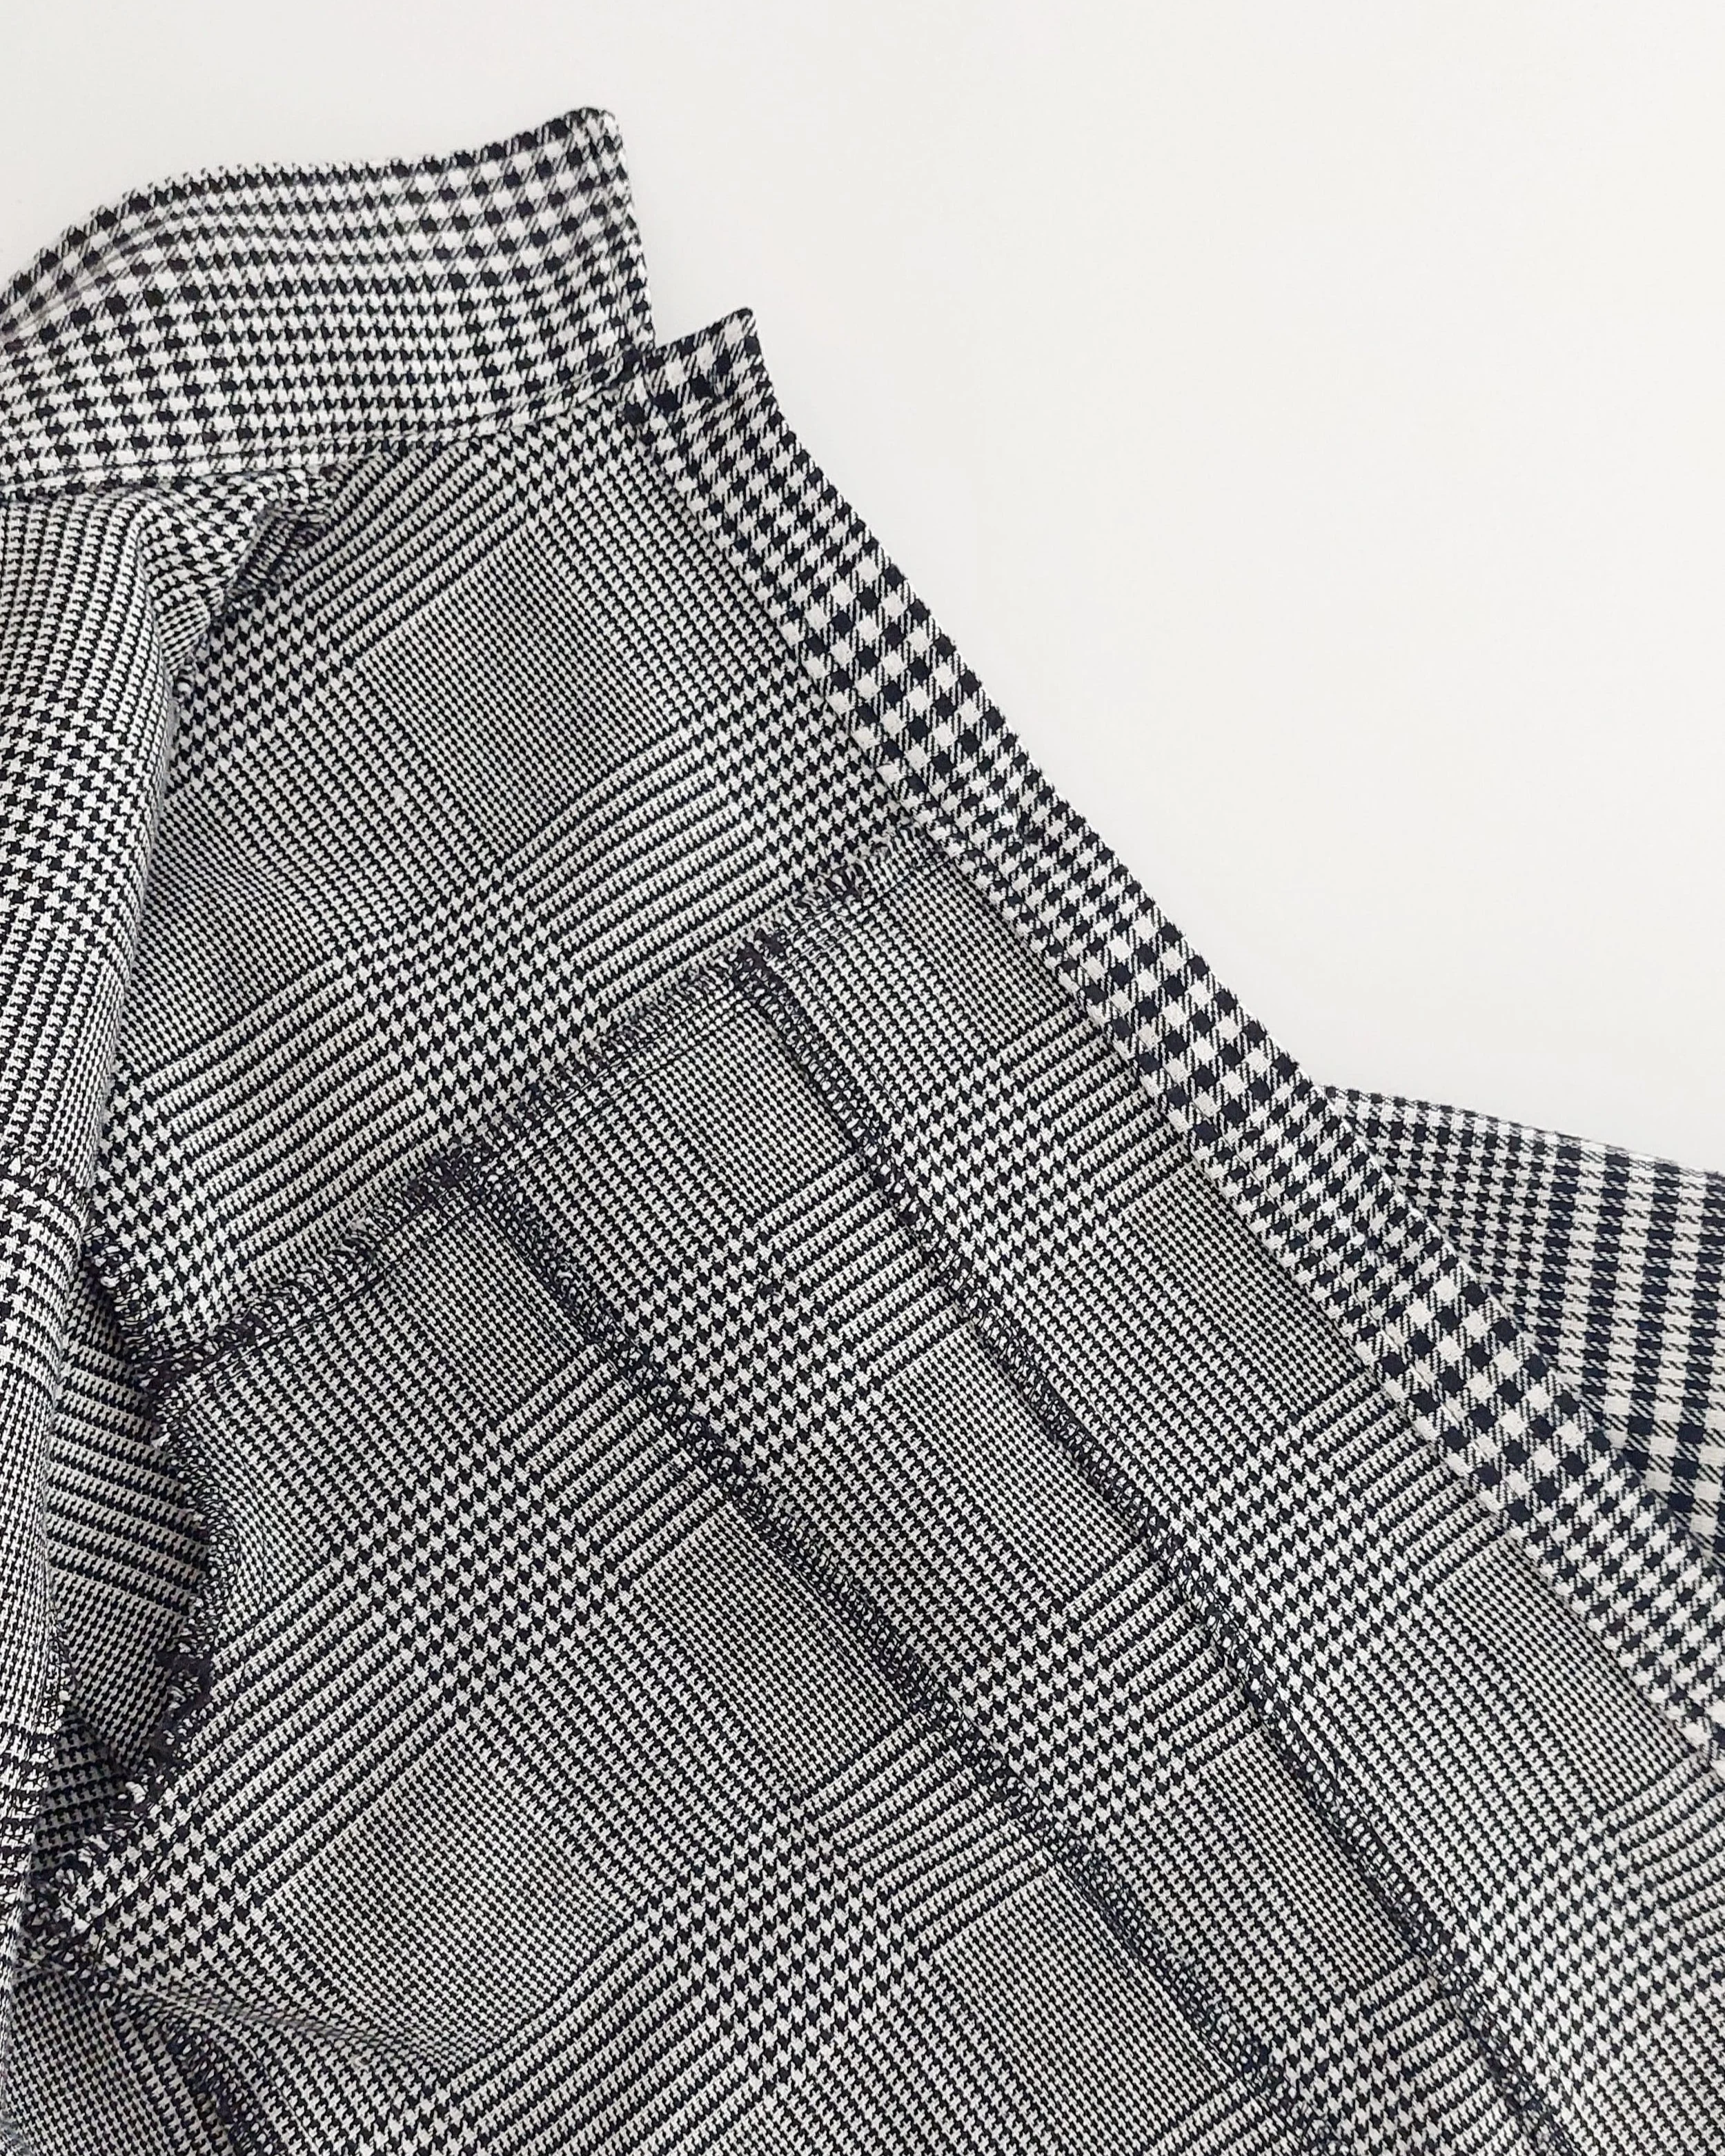
Here you can see the inside of the jacket and the camuflaged panels. It just doesn’t make sense to use plaids for something like that, as you don’t even see the design lines on the right side of the garment. But, oh well…/ Aquí se ve el interior de la chaqueta y los paneles de camuflaje. Simplemente no tiene sentido usar cuadros para un proyecto así, ya que ni siquiera se aprecian las líneas de diseño en el derecho de la prenda. Pero bueno…
But it also really saddens me when a handmade project doesn’t turn out right after all the fabric and time I’ve put into it. So, caught between my frustration and my sadness, I decided to set that jacket aside in my “unfinished projects” box, where it would hibernate until April, when I finally had my Easter sewing break. That’s when I took it out of the box to see if I should just throw it away once and for all. I still thought I couldn’t wear something like that. But I tried it on, and I liked the style and the fabric. And that’s when I decided to be the living example of the lesson I always preach to my students in class: that not everything has to be perfect all the time; that it’s better to finish, learn, and keep improving; that you don’t have to be so hard on yourself when you’re learning—all those things I say but then don’t apply to myself. You know how it goes.
And the result was that I finished sewing the jacket and I love it. I decided I wasn’t going to obsess over a few misaligned stripes. That it was more important to finish the jacket since I liked everything else about it. And honestly, now that I’ve worn it a lot, I don’t even notice it. So was all that drama about “I’m going to throw it away” really necessary? Of course not. It was a humbling moment to realize I’d messed up something that, for me, should be a piece of cake (based on my own assessment and expectations, mind you). But after giving it another calm thought (and with four months of hindsight, haha), it turns out everything’s fine. Stepping away from the conflict to take a break and come back with a clear head works in life… and in sewing, too.
Pero también me da mucha pena cuando algo hecho a mano no sale adelante después de usar la tela y el tiempo. Así que entre mi frustración y mi pena, decidí aparcar esa chaqueta en mi caja de “cosas a medias” y allí estuvo hibernando hasta abril, cuando por fin tenía mis vacaciones de costura de Semana Santa. Fue entonces cuando la saqué de la caja para ver si la tiraba ya de una vez. Seguía pensando que yo no podía llevar algo así. Pero me lo probé y me gustaba el modelo y la tela. Y allí decidí ser yo misma el ejemplo de la chapa que tanto les doy a mis alumnos en clase. Que no todo tiene que quedar perfecto siempre. Que es mejor terminar, aprender y seguir mejorando. Que uno no tiene que ser tan duro consigo mismo cuando está aprendiendo. Todo eso que yo digo y luego no me aplico a mí misma. Pues eso.
Y el resultado fue que terminé de coser la chaqueta y me encanta. Decidí que no me iba a obsesionar con unas rayas colocadas incorrectamente. Que era más importante terminar la chaqueta ya que todo lo demás de ella me gustaba. Y la verdad es que ahora que lo he llevado mucho, ni lo noto. Así que era necesario todo ese drama de “lo voy a tirar a la basura”? Pues claro que no. Fue un momento de humildad ver que lo había liado con algo que para mí debería ser algo que hago con ojos cerrados (valoración y expectativas según yo misma, ojo). Pero después de darle una pensada con calma (y cuatro meses de distancia, jaja), resulta que todo bien. Alejarte del conflicto para pausar y volver con la cabeza fría funciona en la vida… y también en la costura.
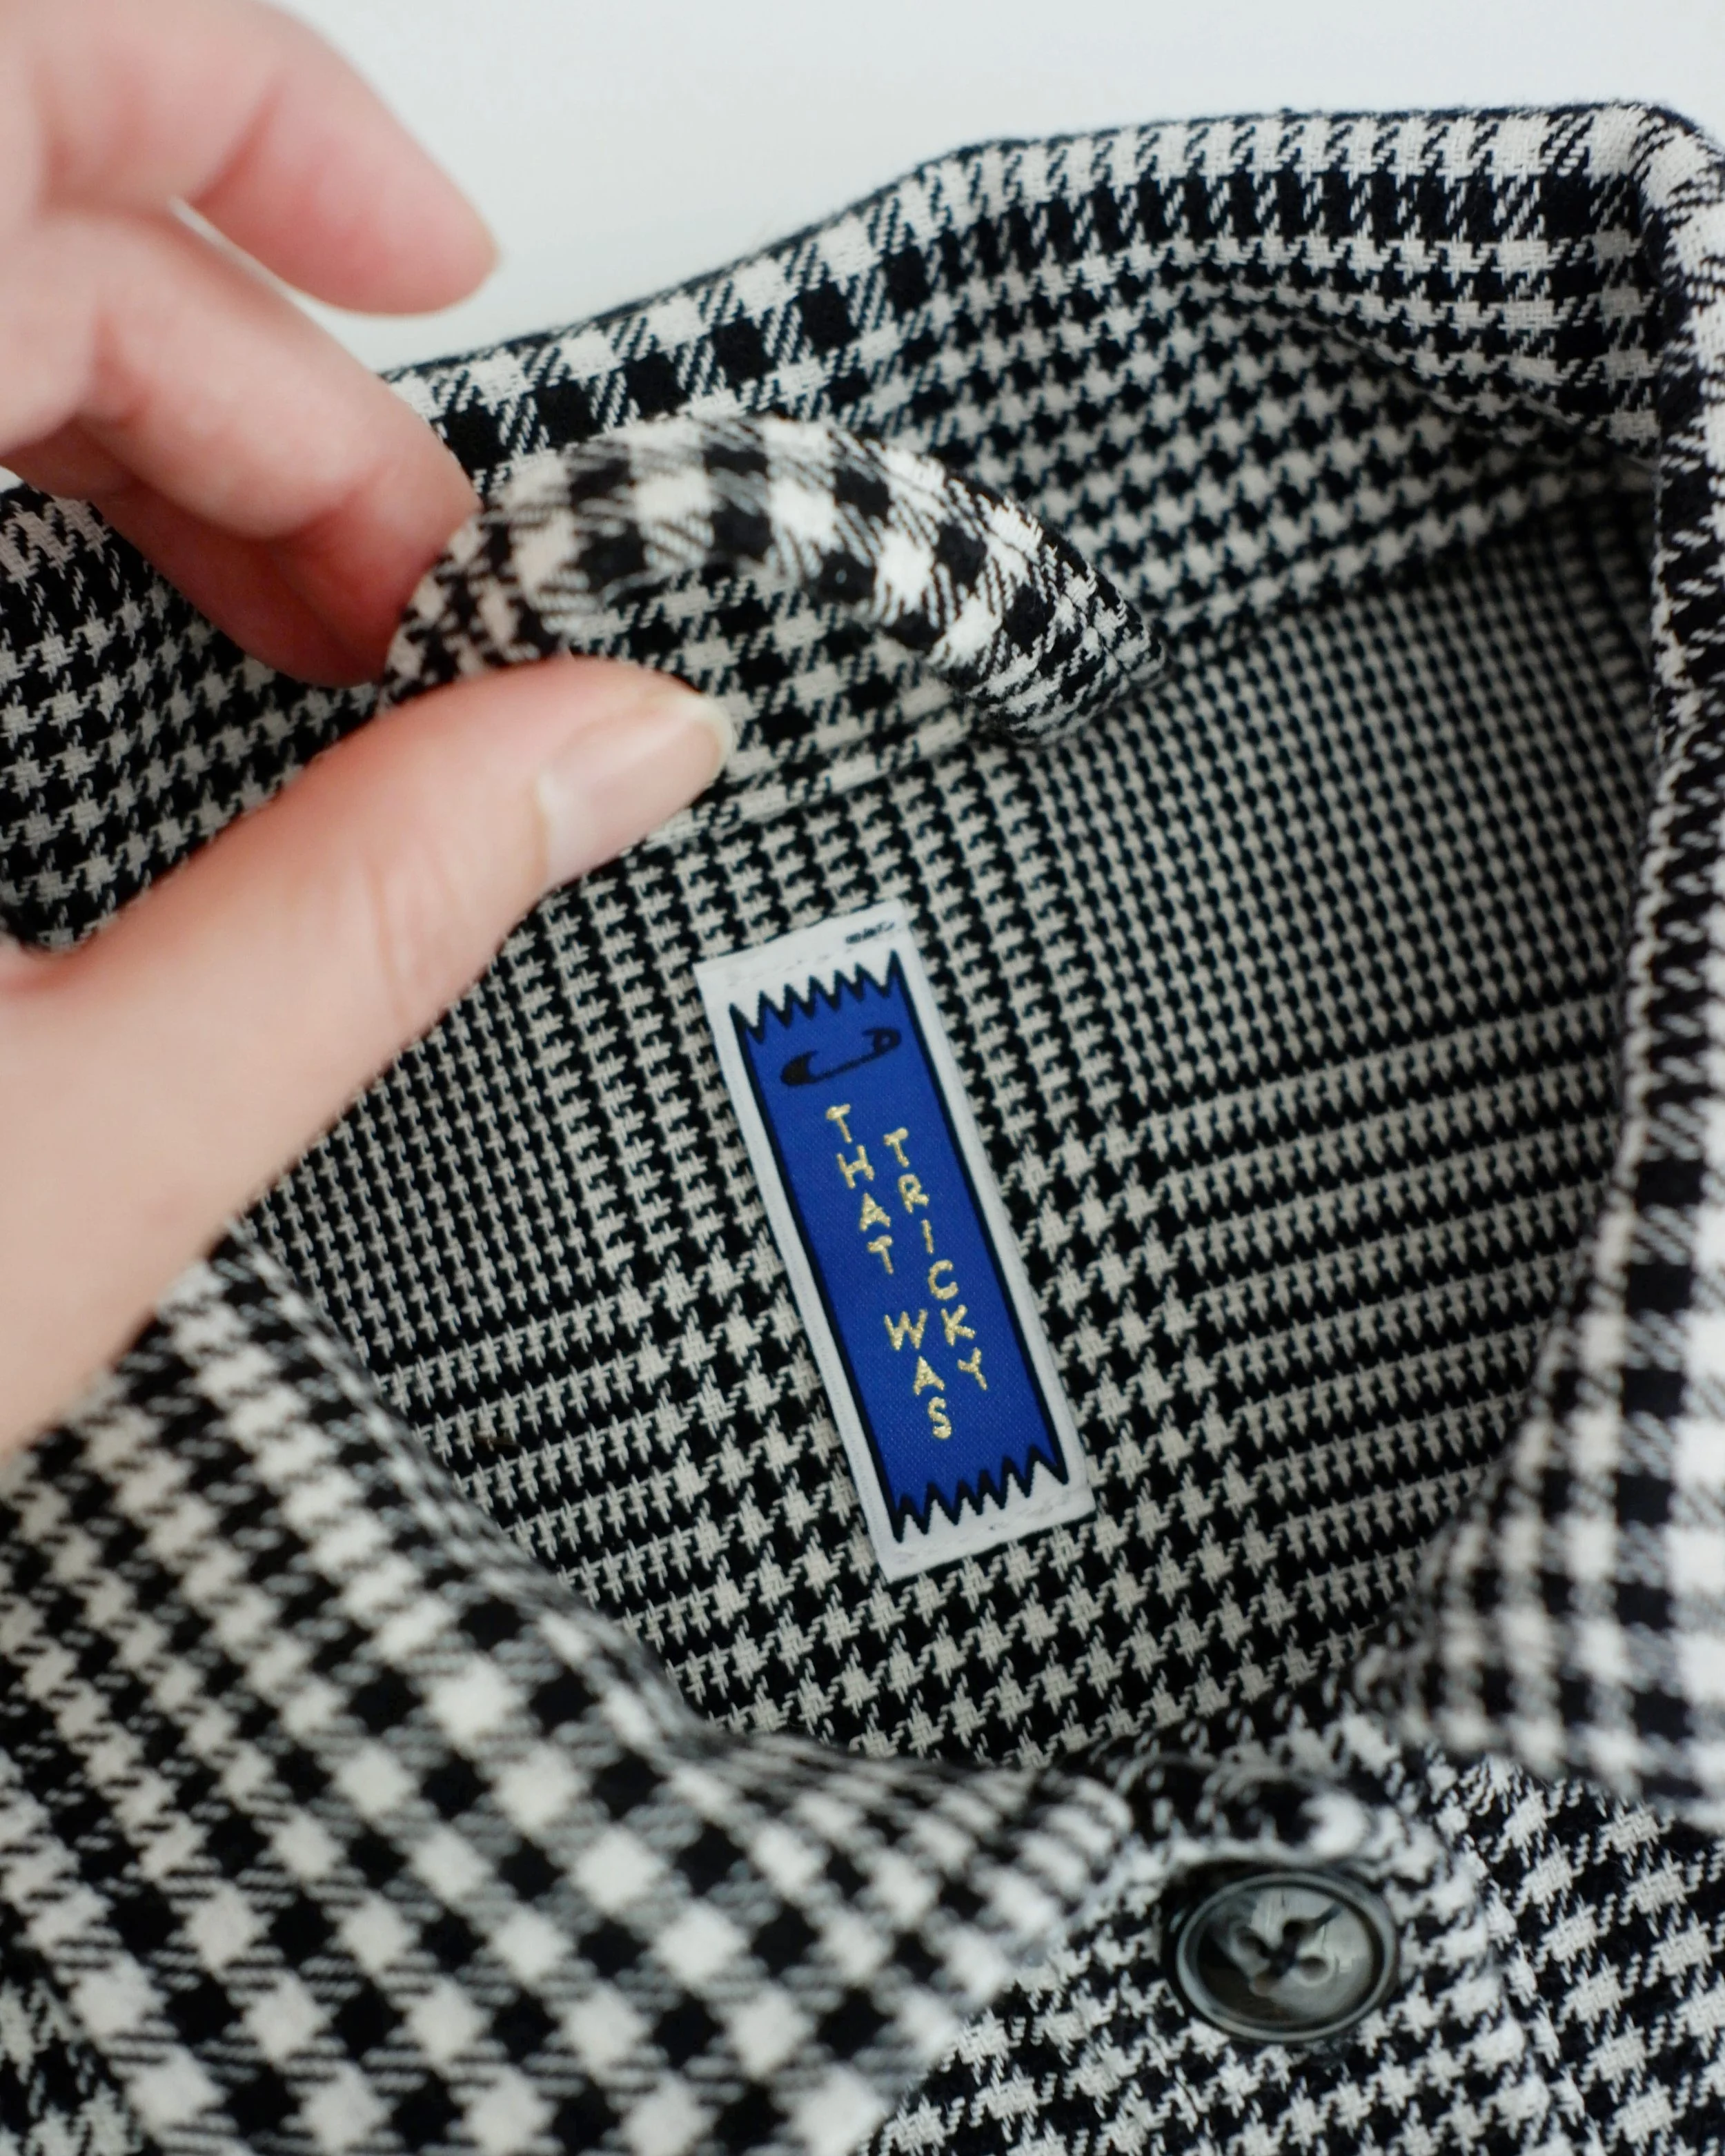
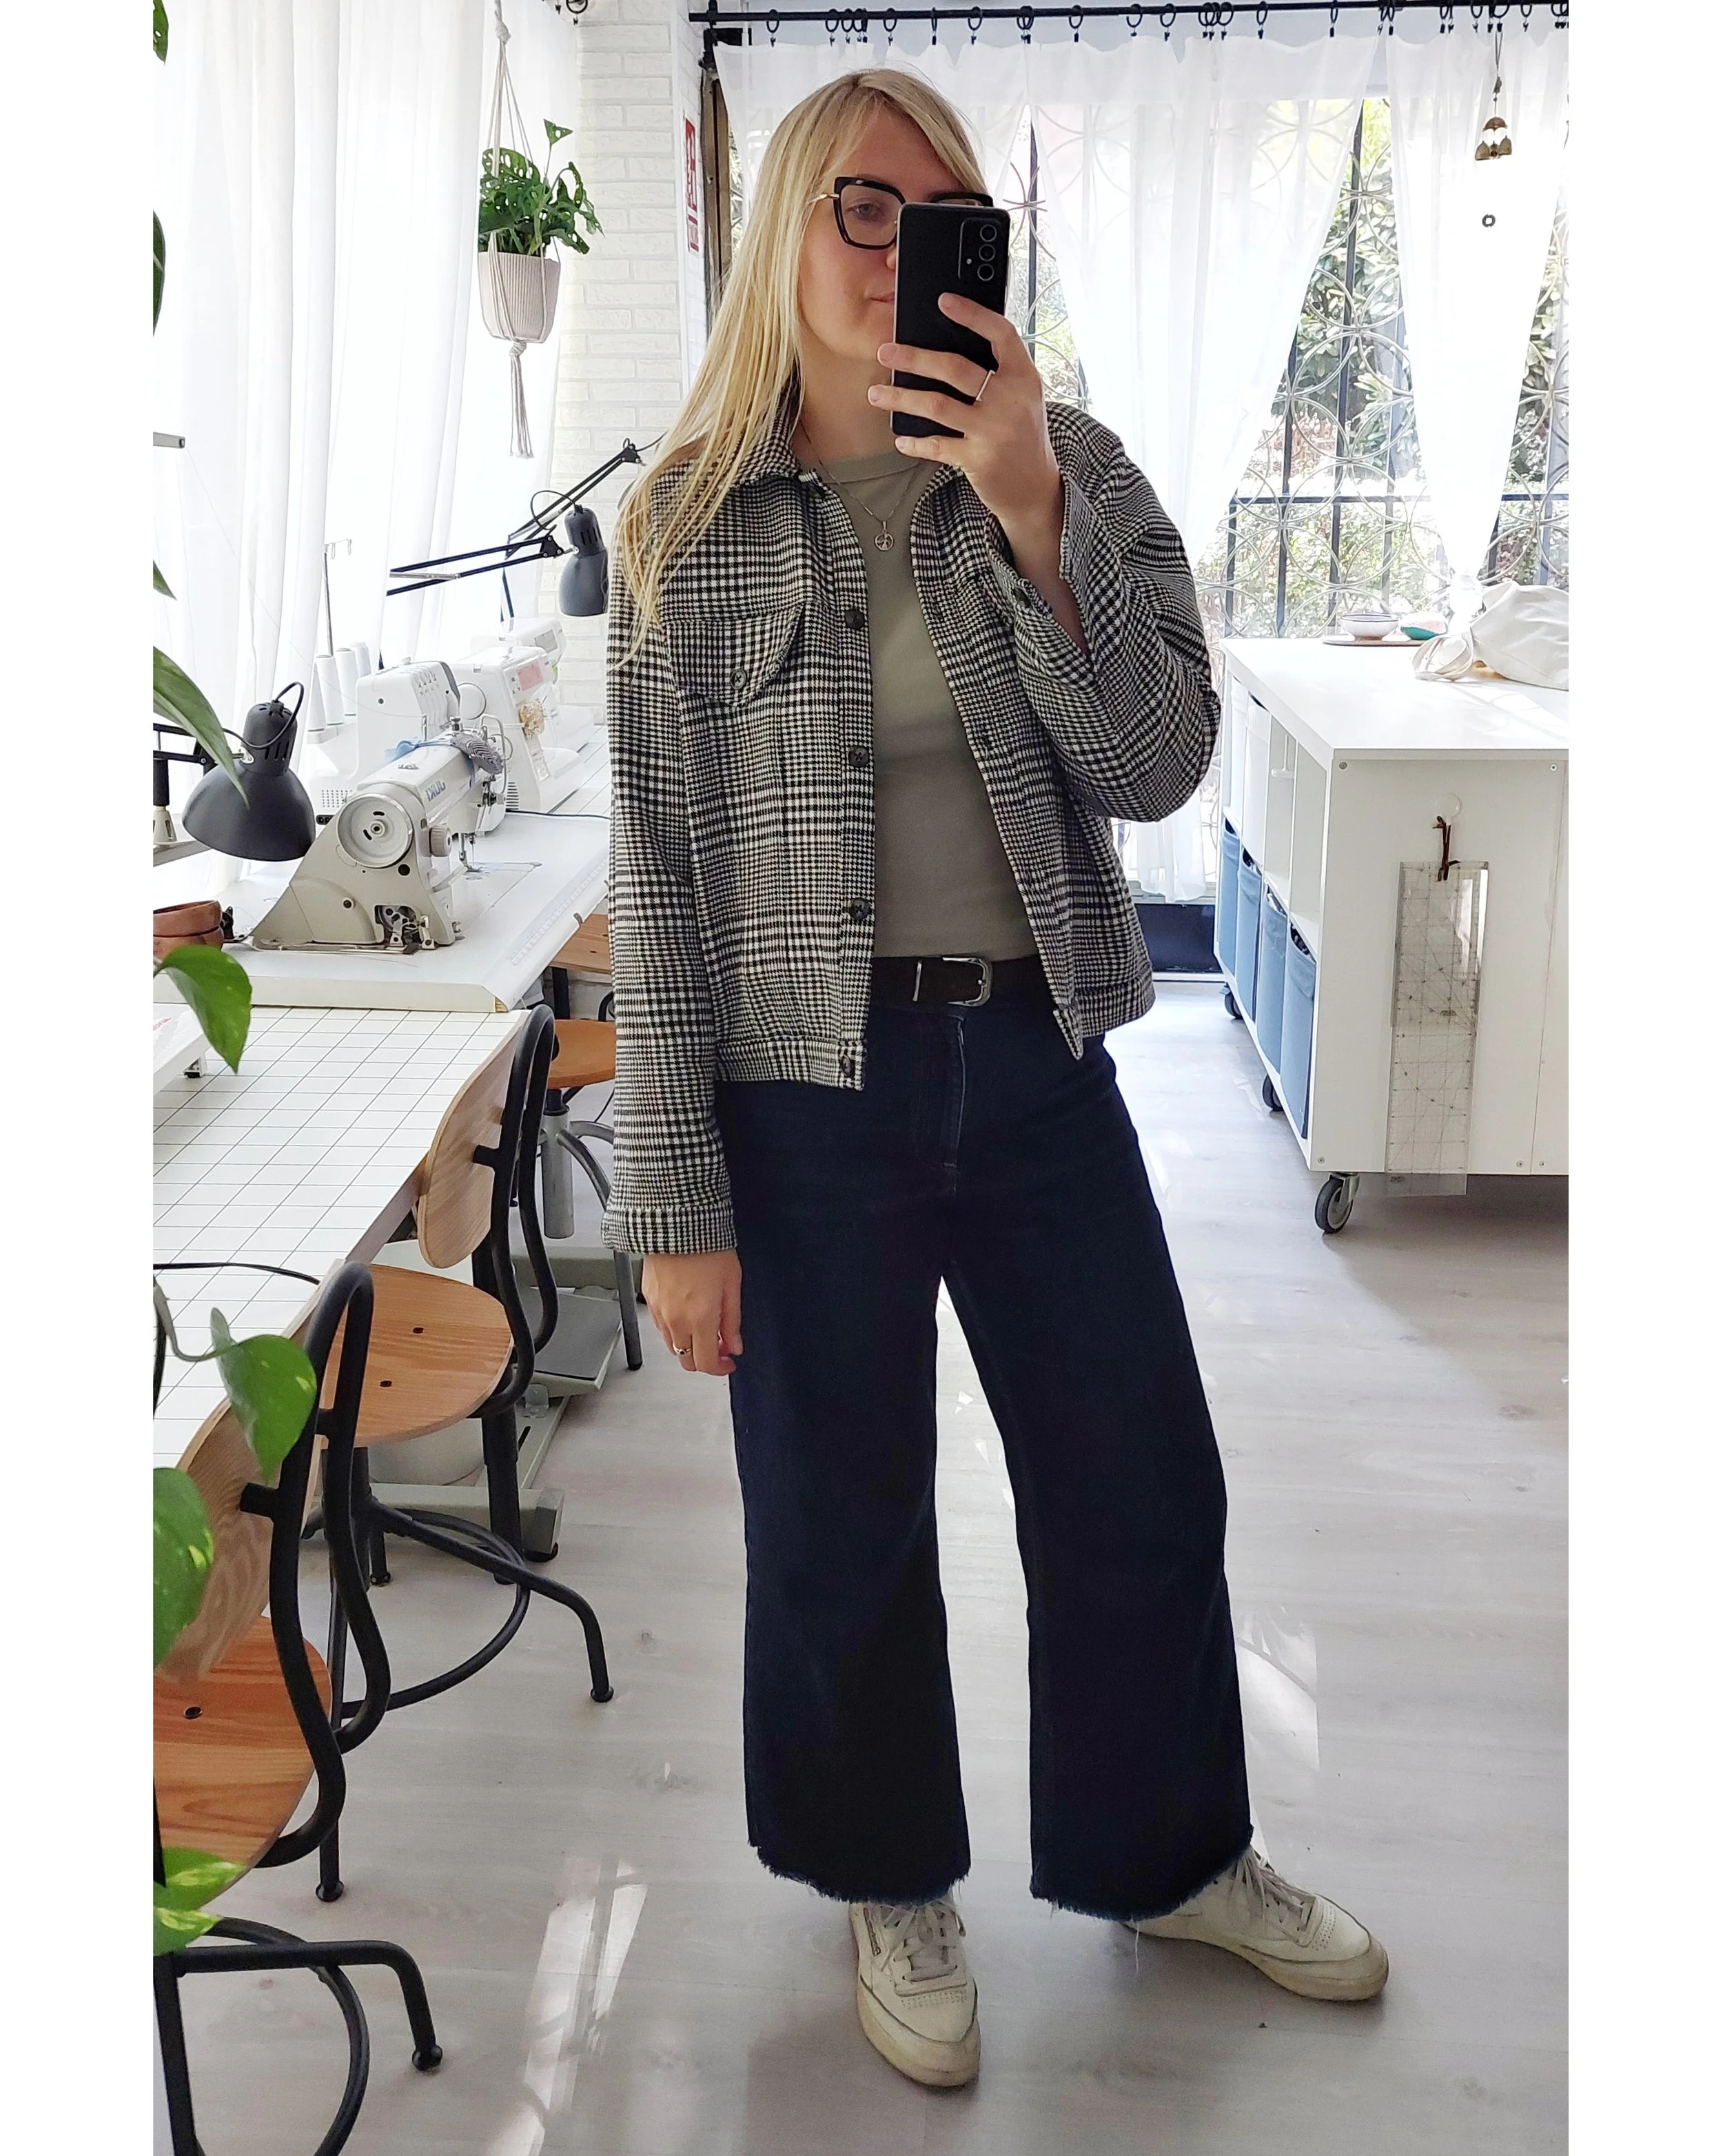
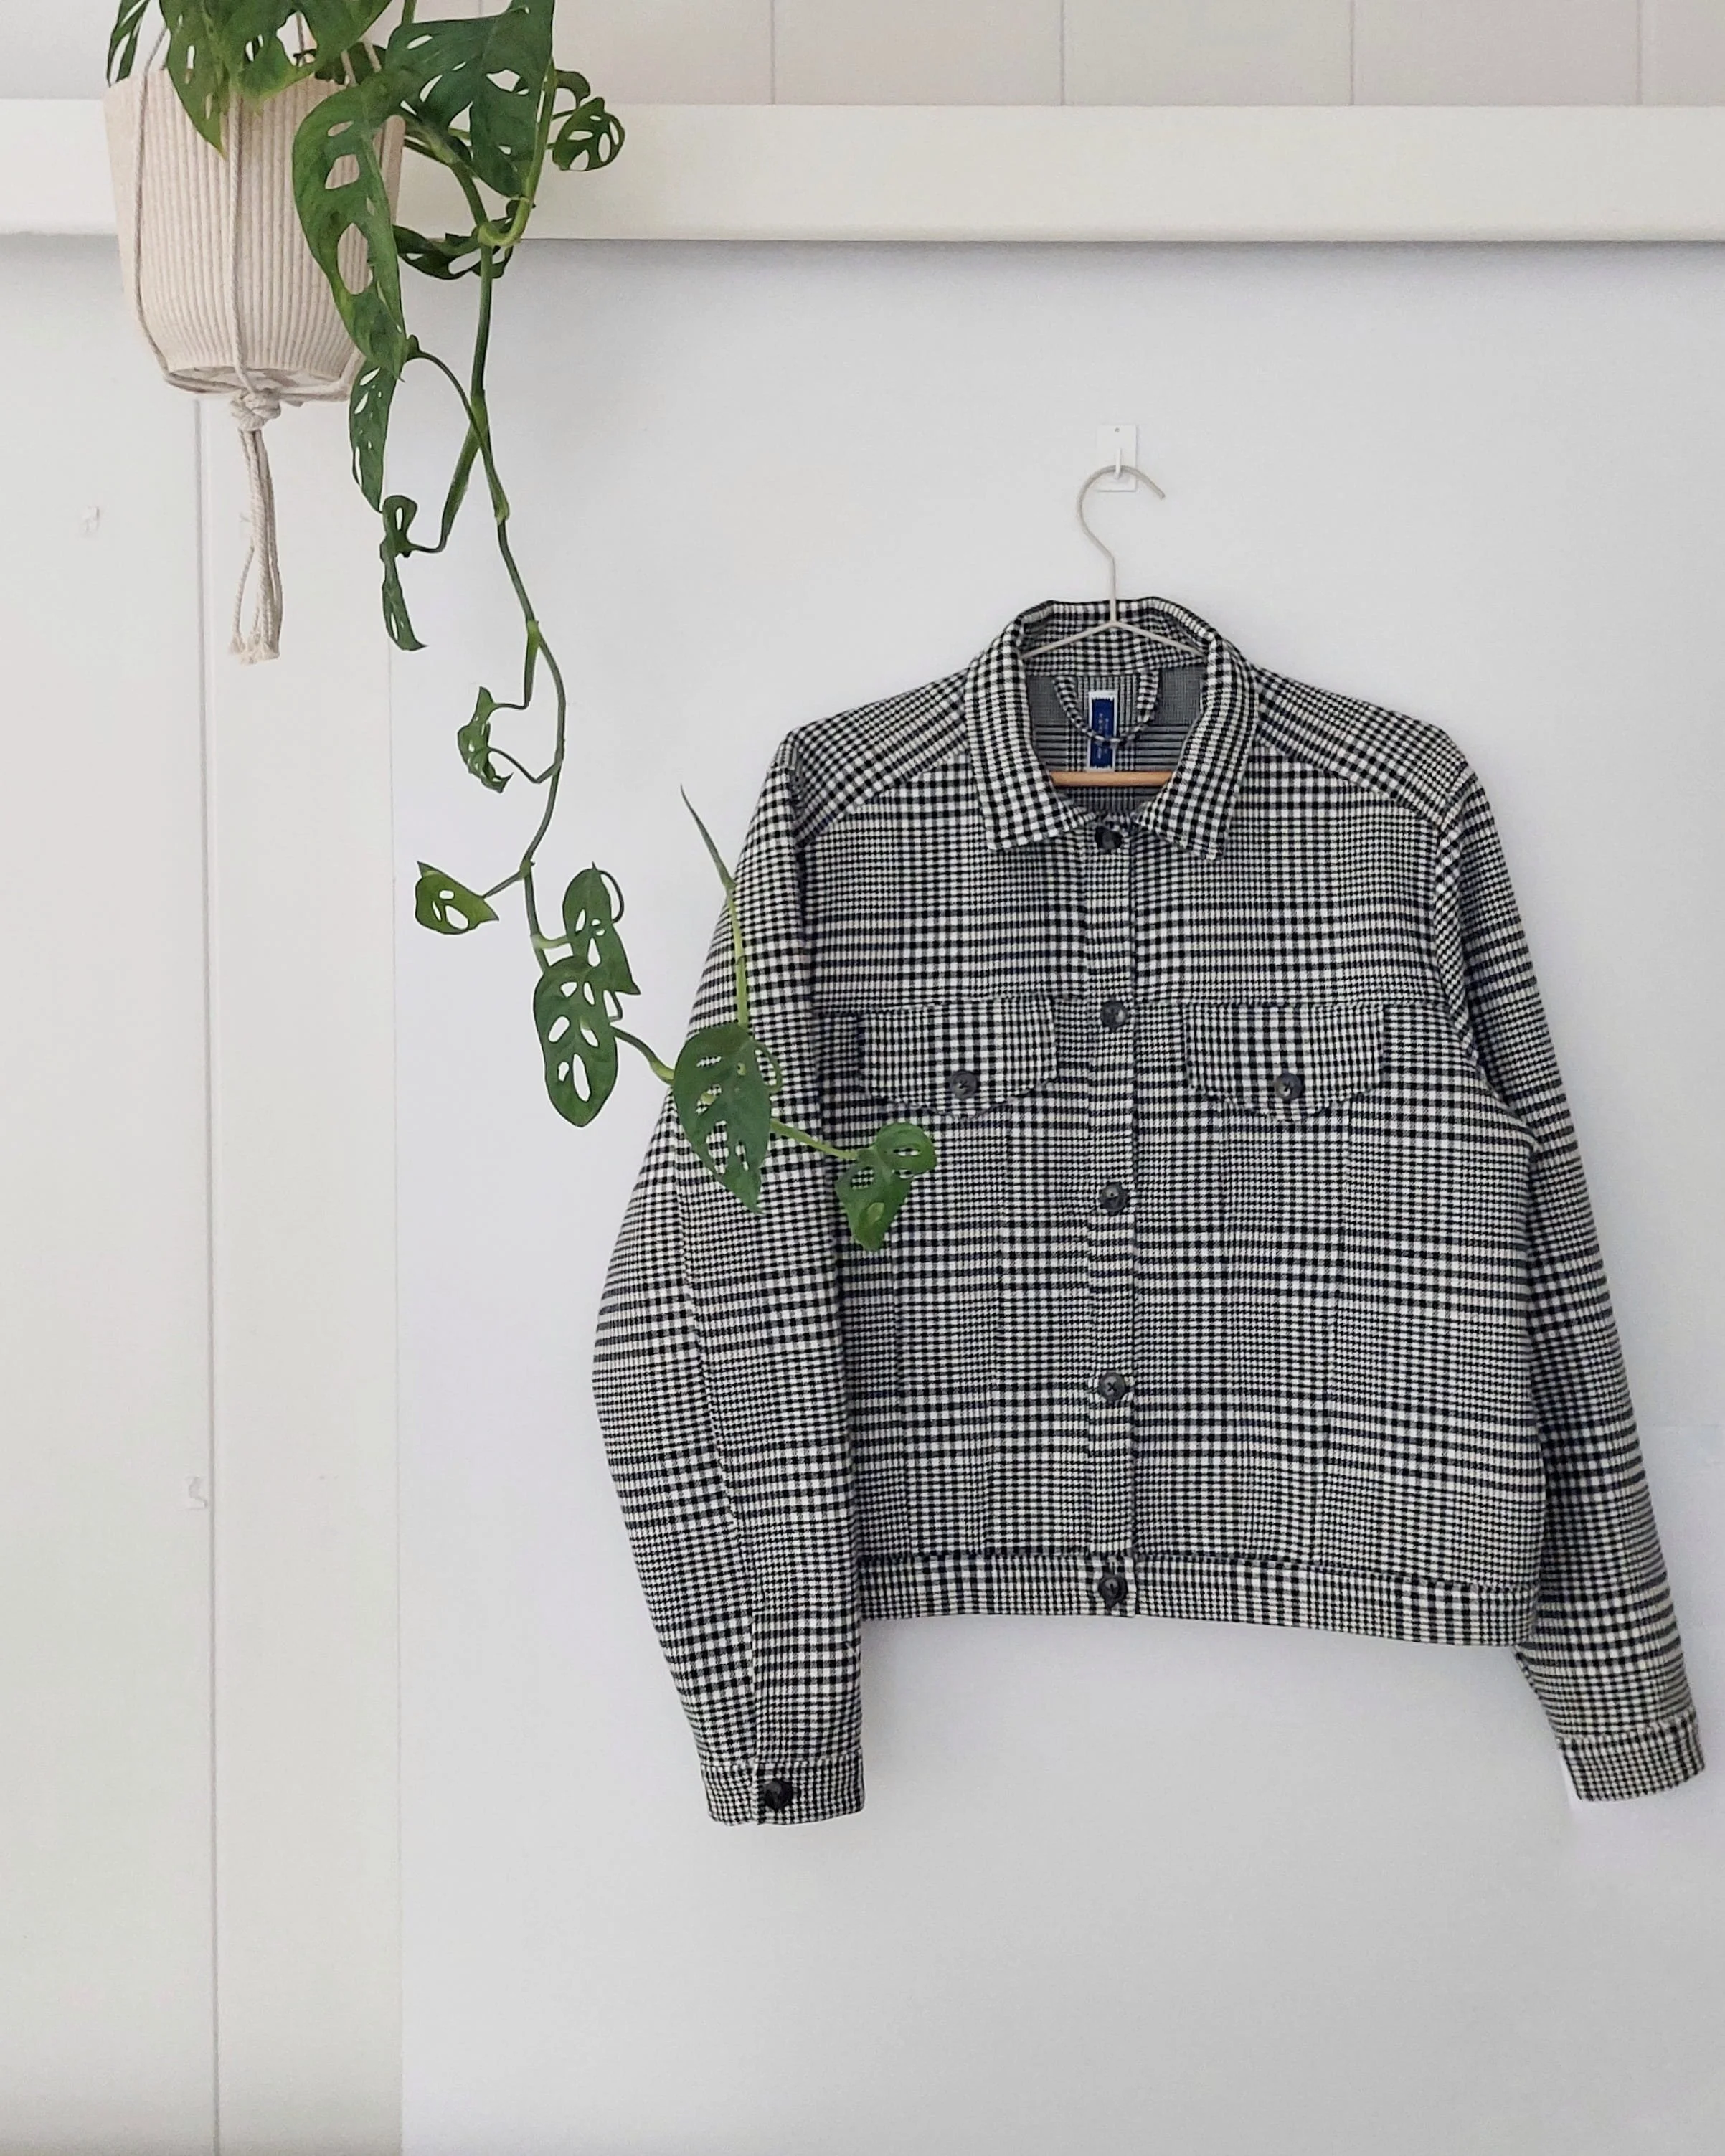
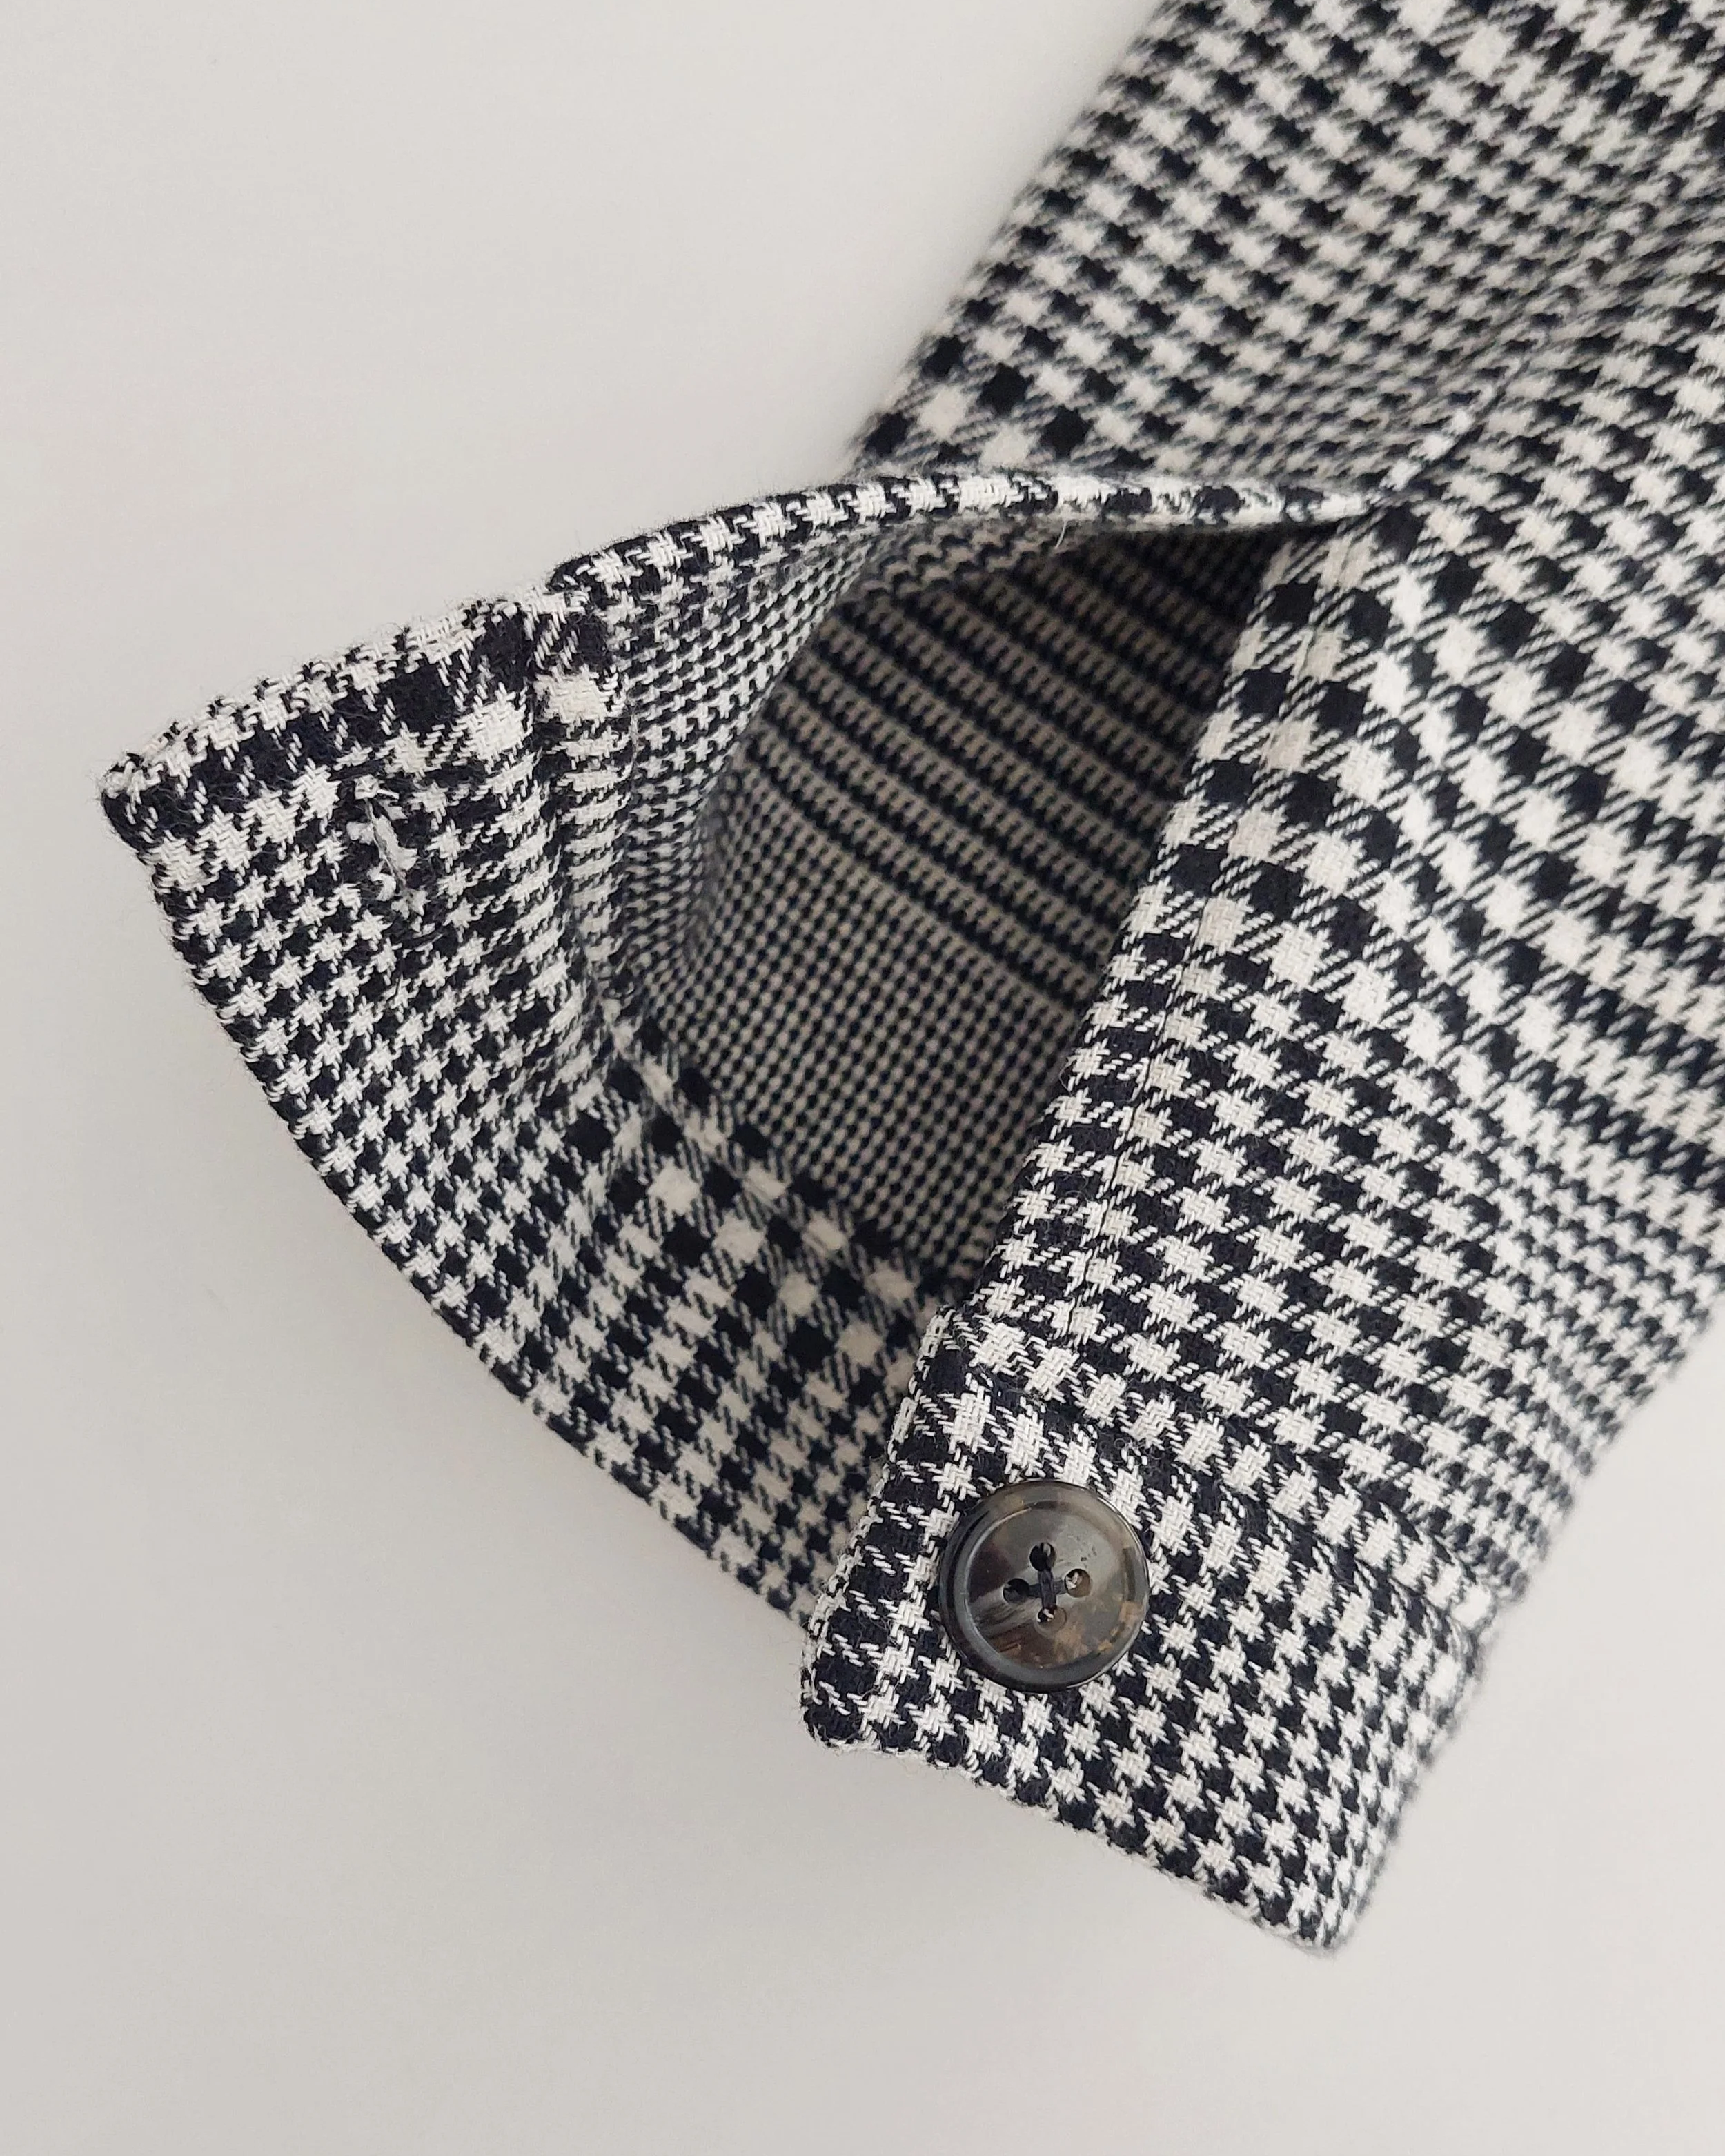
The “That was tricky” label (from KATM) came in handy for the finishing touch. As I mentioned, the fabric is a super-cheap remnant; I think it’s cotton with some polyester and is of medium weight. I like that the sleeves are wide enough to wear a sweater underneath, which extends its wearability by allowing for layering.
By the way, when I sewed it in the spring, I swapped out the chest pocket flaps for smaller ones and left the pockets as faux pockets. There are only outer flaps—there’s no pocket inside the jacket. It’s true that I don’t really miss these functional chest pockets either, but I would like it to have some welt pockets lower down. But I didn’t have the patience left to mess with that—I used everything I had so I wouldn’t have to throw the whole jacket away, haha. So this jacket always needs a good fanny pack.
La etiqueta de “That was tricky” (traducido como “esto fue complicado”, es de KATM), me vino de perlas para el remate. La tela como mencioné es un resto de stock baratísimo, creo que es un algodón con algo de poliéster y tiene un grosor medio. Me gusta que la manga sea suficientemente ancha para llevar debajo un jersey y así se le puede dar más tiempo de uso combinando capas.
Por cierto, cuando la cosí en la primavera, cambié las tapetas de los bolsillos de pecho por unas más pequeñas y dejé los bolsillos como falsos. Solo hay tapetas exteriores, no hay bolsillo dentro de la chaqueta como normalmente en chaquetas. Es verdad que estos bolsillos de pecho funcionales tampoco los echo de menos, pero sí me gustaría que tenga unos más abajo, tipo ojal. Pero ya no me quedaba paciencia para liarme con ese tema, la usé todo para no tirar la chaqueta entera a la basura, jaja. Así que esta chaqueta siempre necesita una buena riñonera.
Double face wool jacket / La chaqueta de lana de doble cara
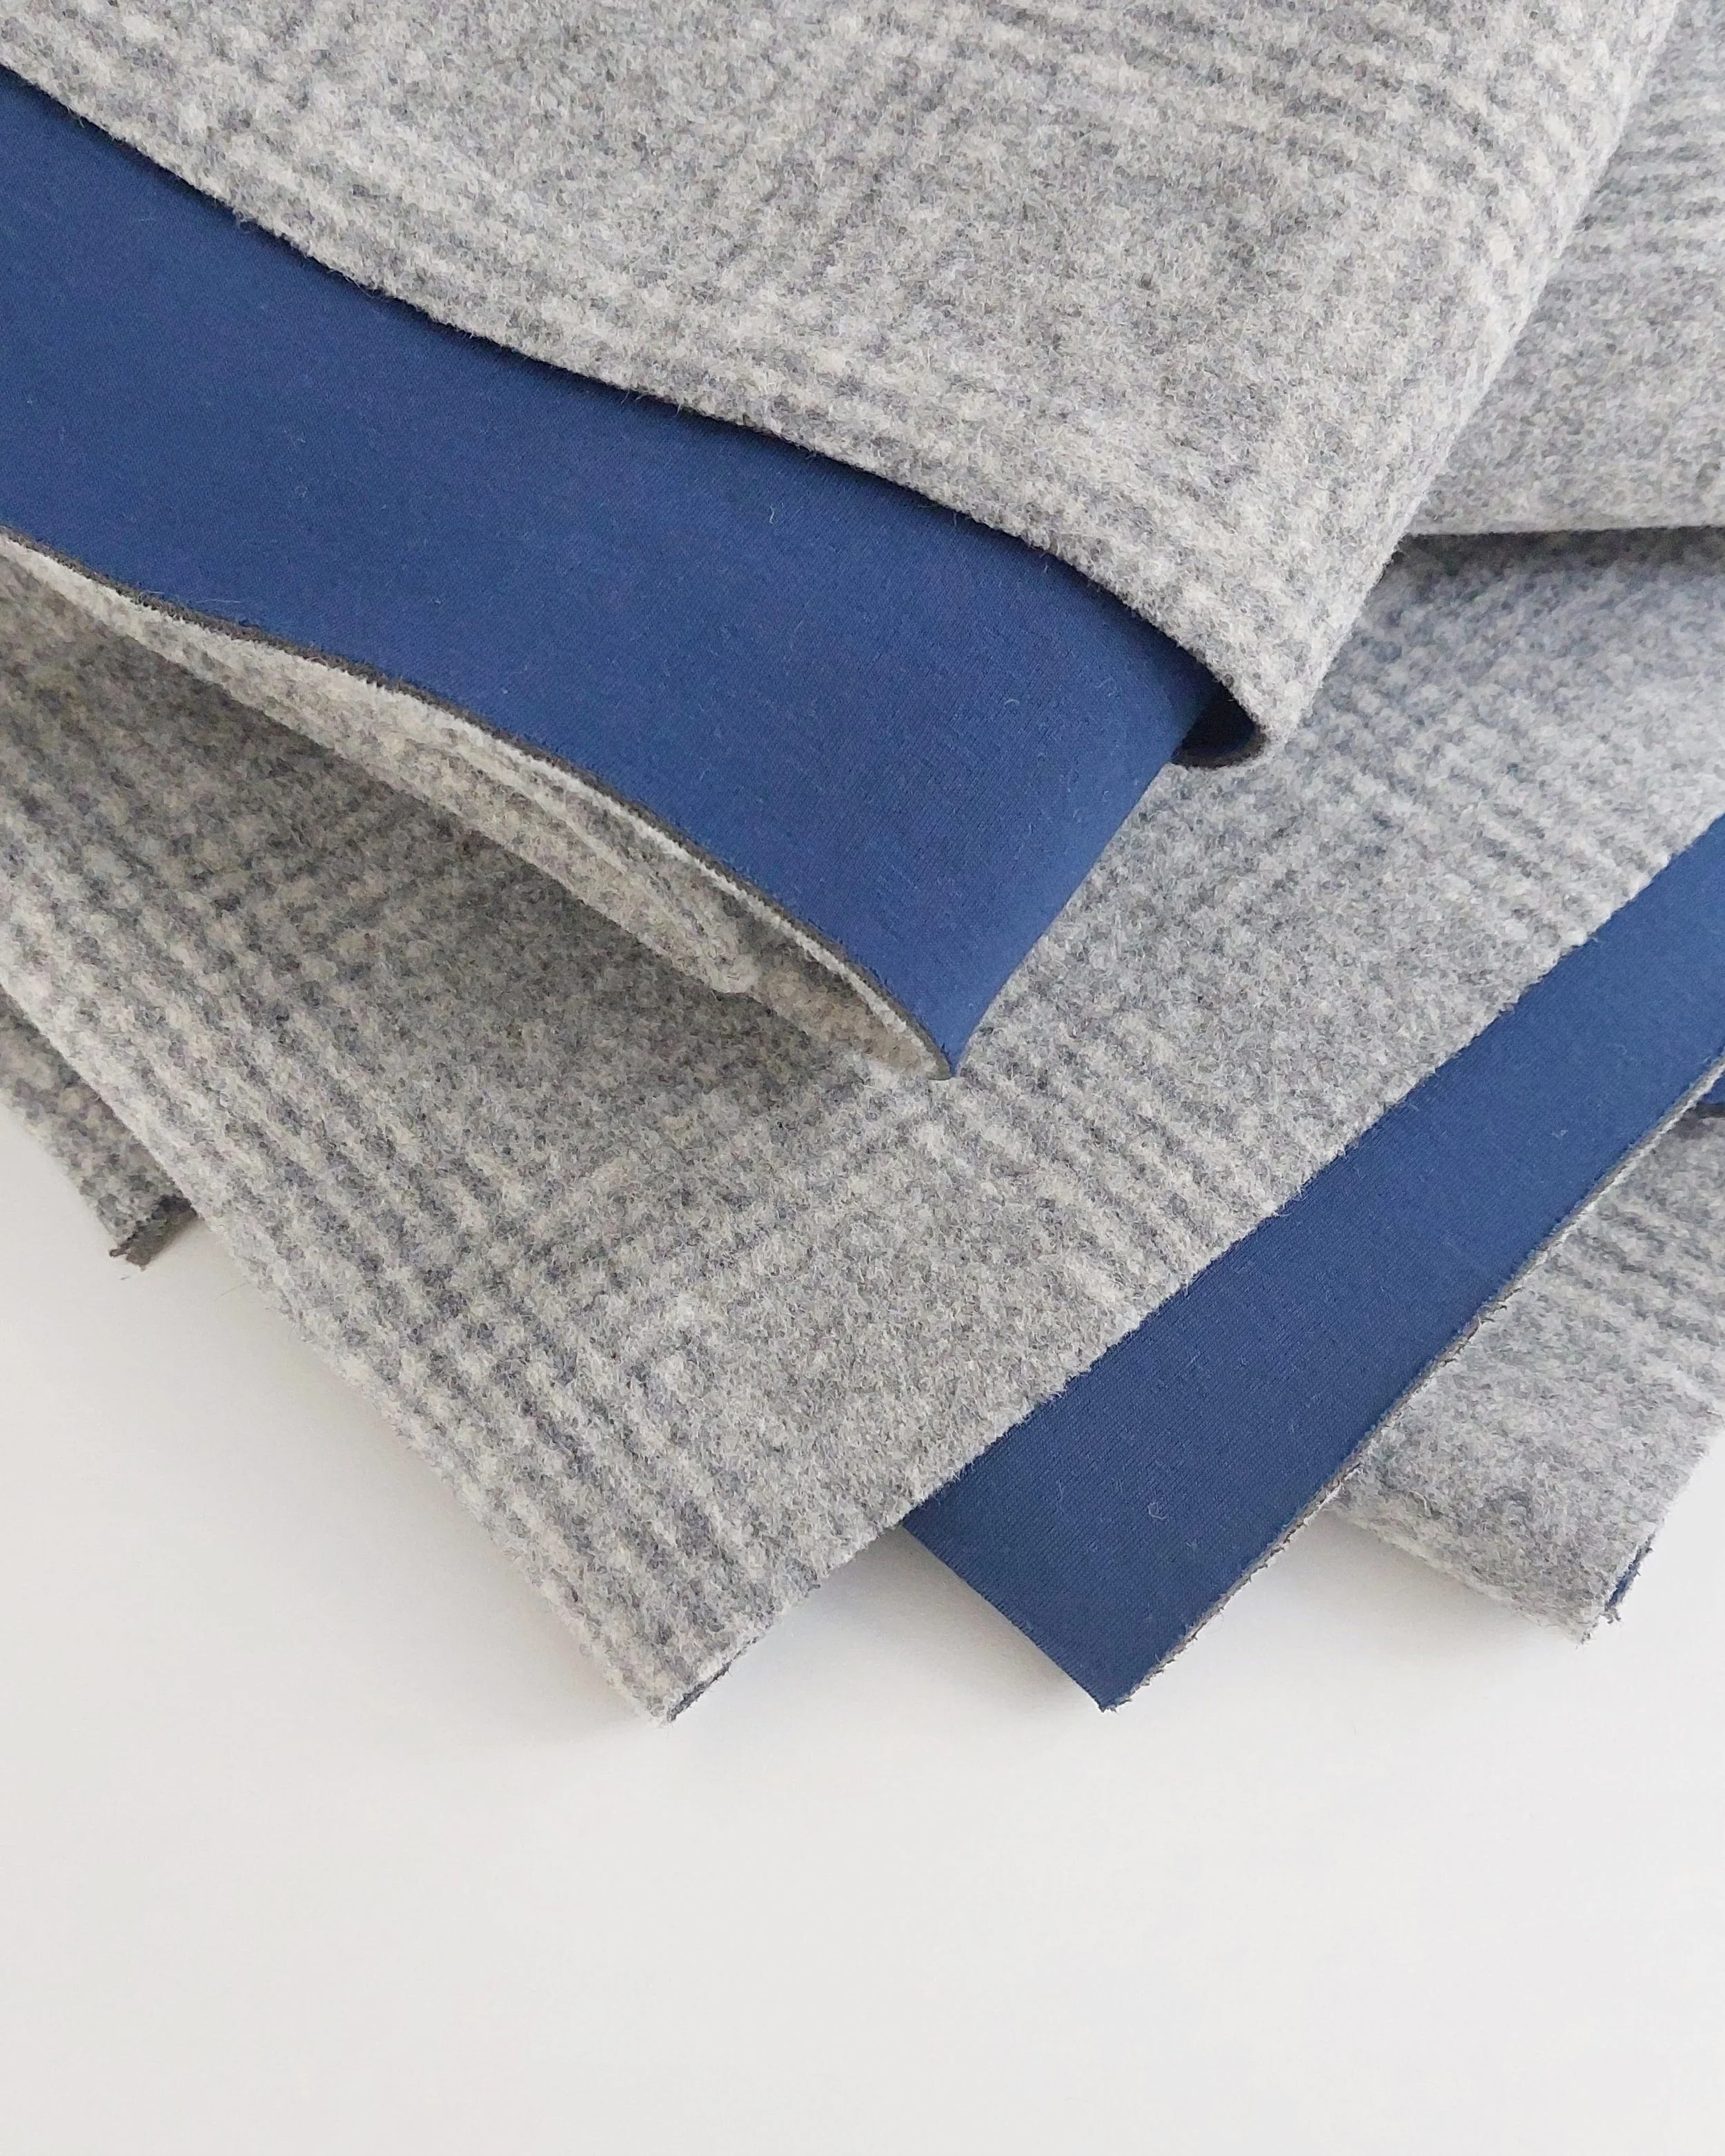
The sweet double face wool and jersey dream of a fabric. / La bonita tela de ensueño de doble cara: en un lado lana y en oro lado punto de viscosa.
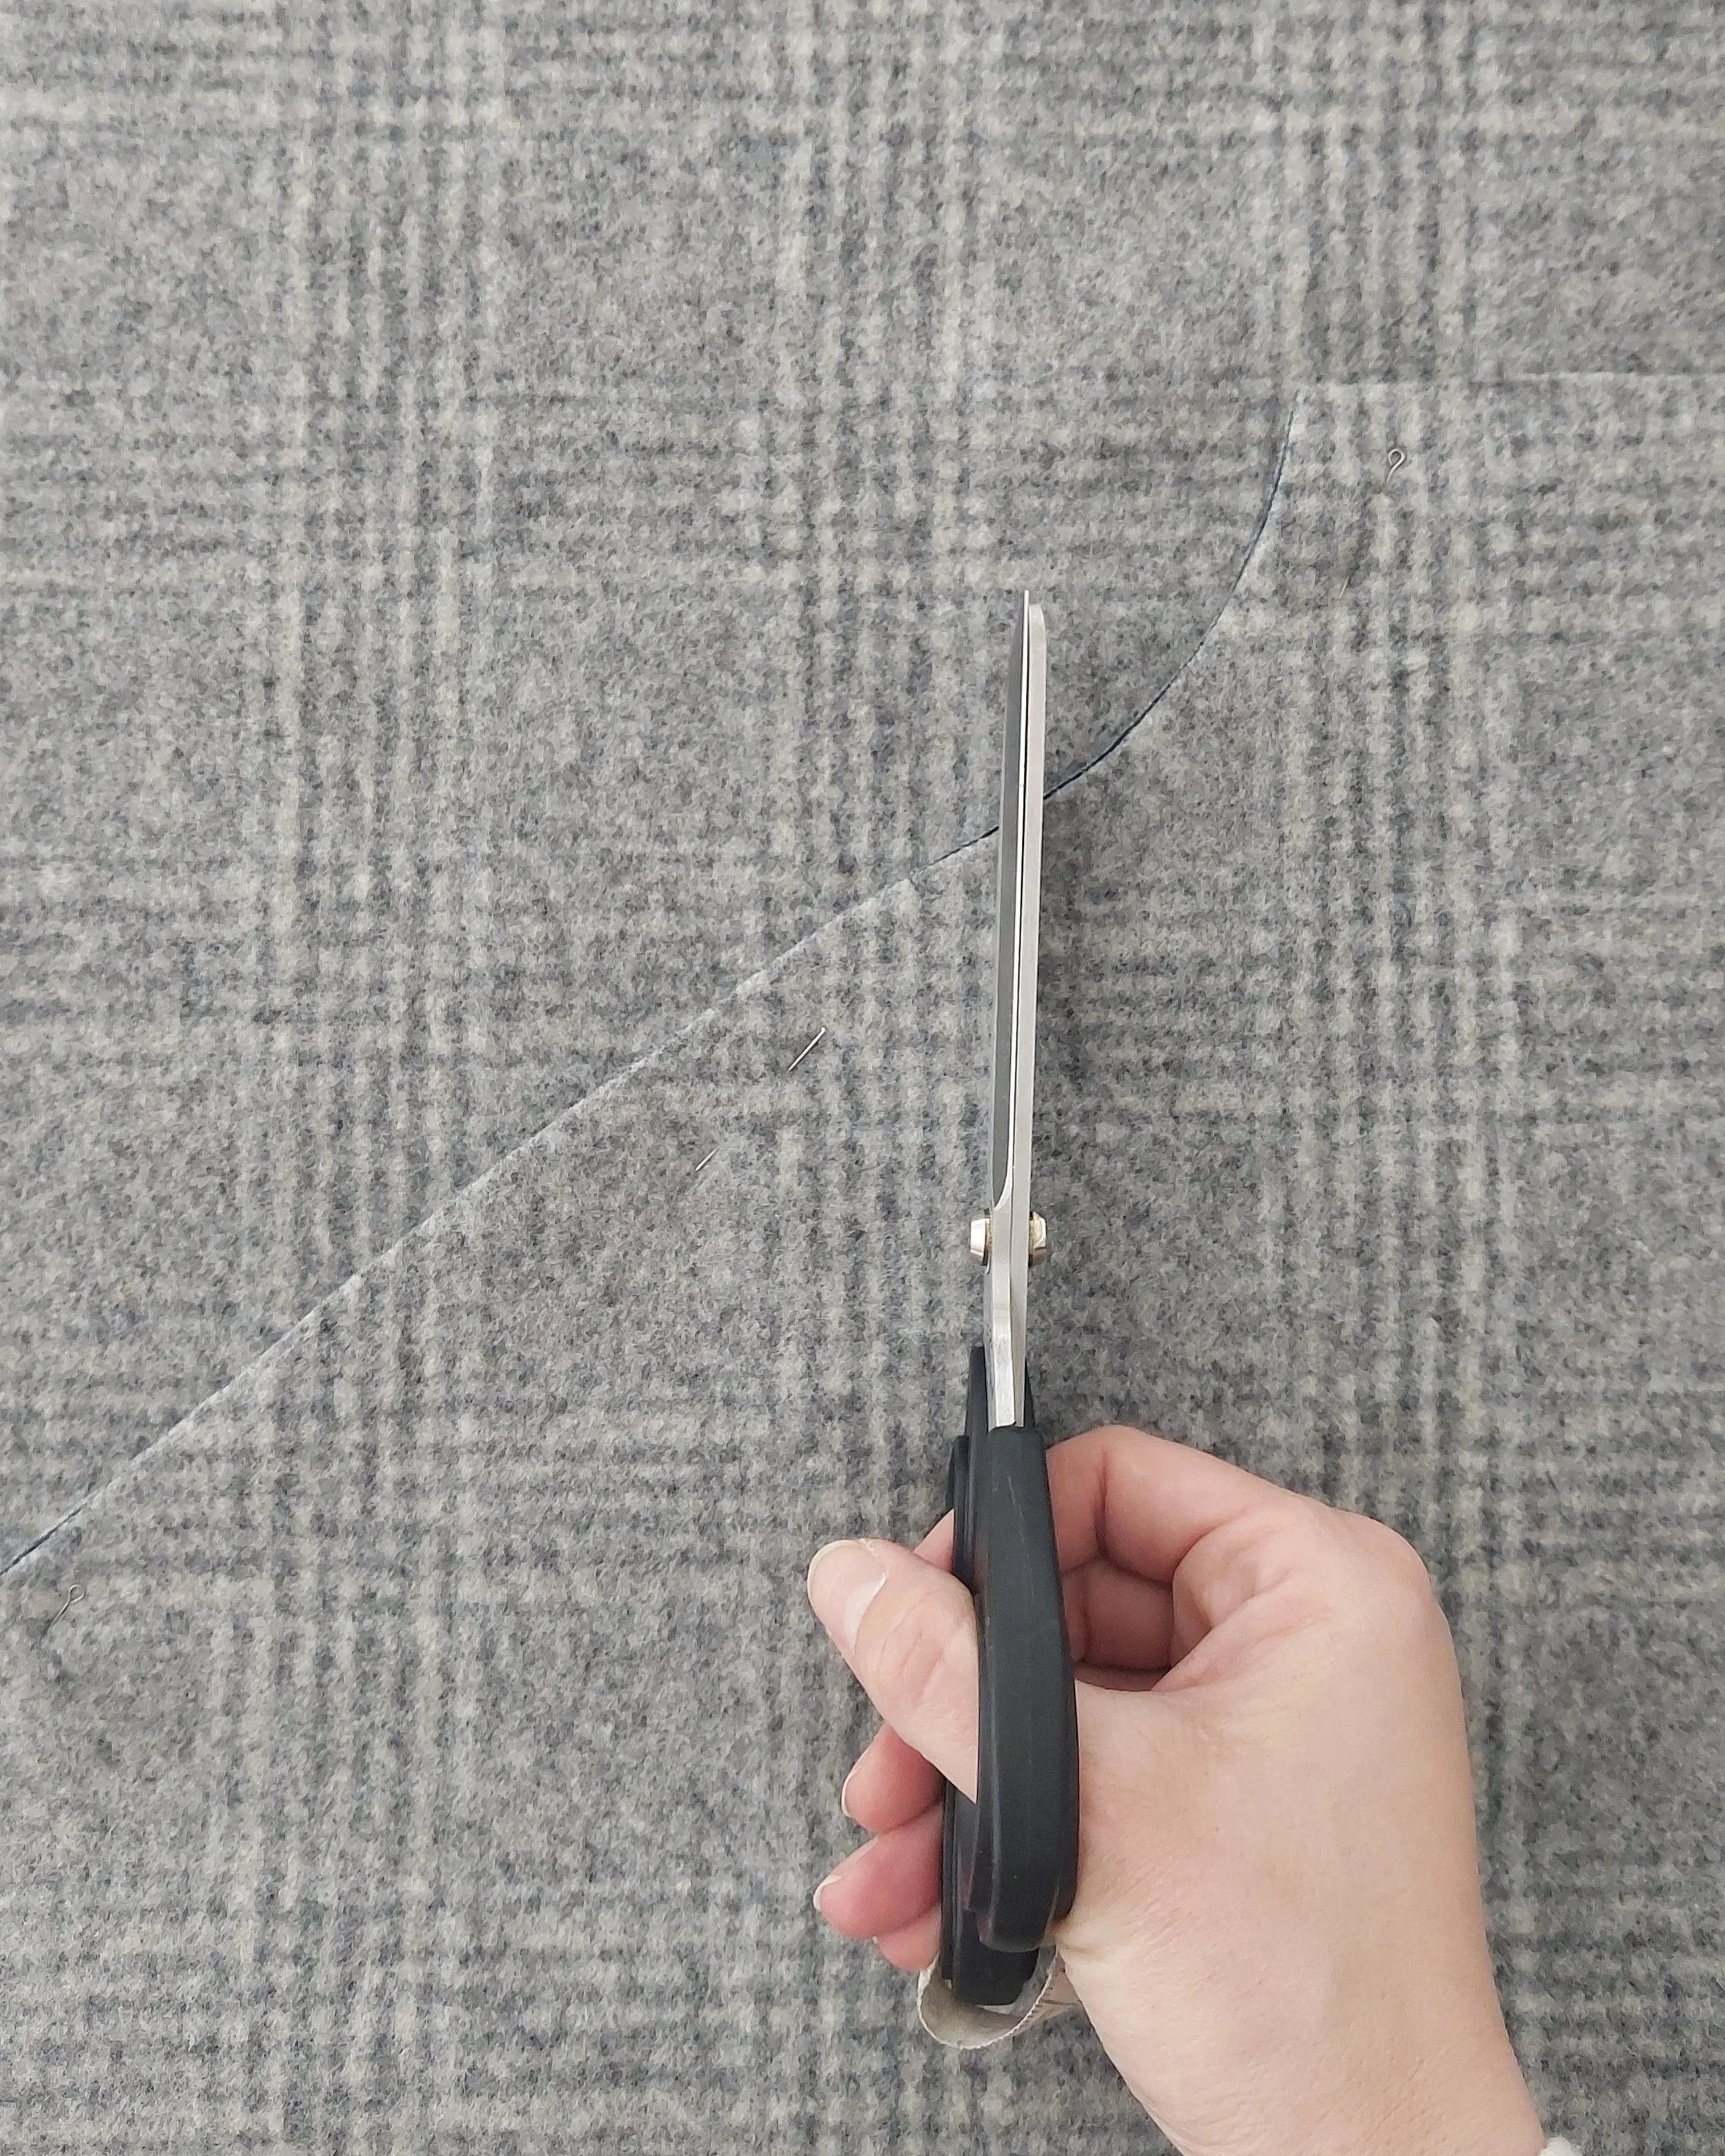
Matching plaids? This time, yes. / Casar cuadros? Esta vez, sí.
The next jacket started right where the first one left off: my Easter sewing break. This year I had a wonderful opportunity to take a few days off without classes or other obligations during that time, and I made the most of it: a true sewcation with no time limits. With my school in full swing, I have less and less time for my own personal sewing, and I miss it so much. I do manage to get things done here and there, and if I’m in class with a calmer group, I can always sew something by hand, unpick a seam, or prep projects, but that mindful, clear-headed morning time for sewing… I have very little of that. So I really enjoyed those days—spending one of them with my sewing friends, and another day and a half all to myself, using all the studio space for myself, which is also really great.
As I said, my first project of that sewcation was to finish the plaid jacket. If you sew, you’ll know that on the list of things we seamstresses tend to like more or less, starting something new clearly ranks way higher than fixing something old. I’m not saying it’s the most reasonable thing to do, but that’s just how it is, no matter how you look at it. So, since I’d fulfilled my responsible duty of finishing up the plaid jacket—and on top of that, saved it from its fate in the trash (a prize for successful adulting for me, please!)—I knew I deserved a new project.
La siguiente chaqueta empieza justo donde la primera acaba. En mis vacaciones de costura de Semana Santa. Este año tenía una maravillosa oportunidad de tener unos días libres sin clases ni más obligaciones en esas fechas, y usé ese tiempo de la mejor manera posible: cosiendo sin horarios. Con la escuela en marcha, cada vez tengo menos tiempo de costura personal para mí y lo echo muchísimo de menos. Voy haciendo cosas, y si estoy en clase y es un grupo tranquilo, siempre puedo también coser algo a mano, descoser o preparar proyectos, pero el tiempo de atención plena y lucidez de la mañana para costura…de eso tengo muy poco. Así que disfruté mucho de esos días, compartiendo uno de ellos con amigas costureras, y otro día y medio estuve en soledad y a mis anchas, que eso también mola mucho.
Como dije, mi primer proyecto de esas vacaciones fue terminar la chaqueta de cuadros. Si coses, sabrás que en el orden de cosas que suelen gusta más o menos a la gente que cosemos, está claro que empezar algo nuevo está muy por encima de arreglar algo viejo. No digo que es lo más razonable, pero es así, lo mires por donde lo mires. Por lo tanto, ya que había cumplido con mi deber responsable de arreglar la chaqueta de cuadros y encima lo había rescatado de su destino en la basura (una medalla de adulto para mí!), sabía que yo merecía un proyecto nuevo.
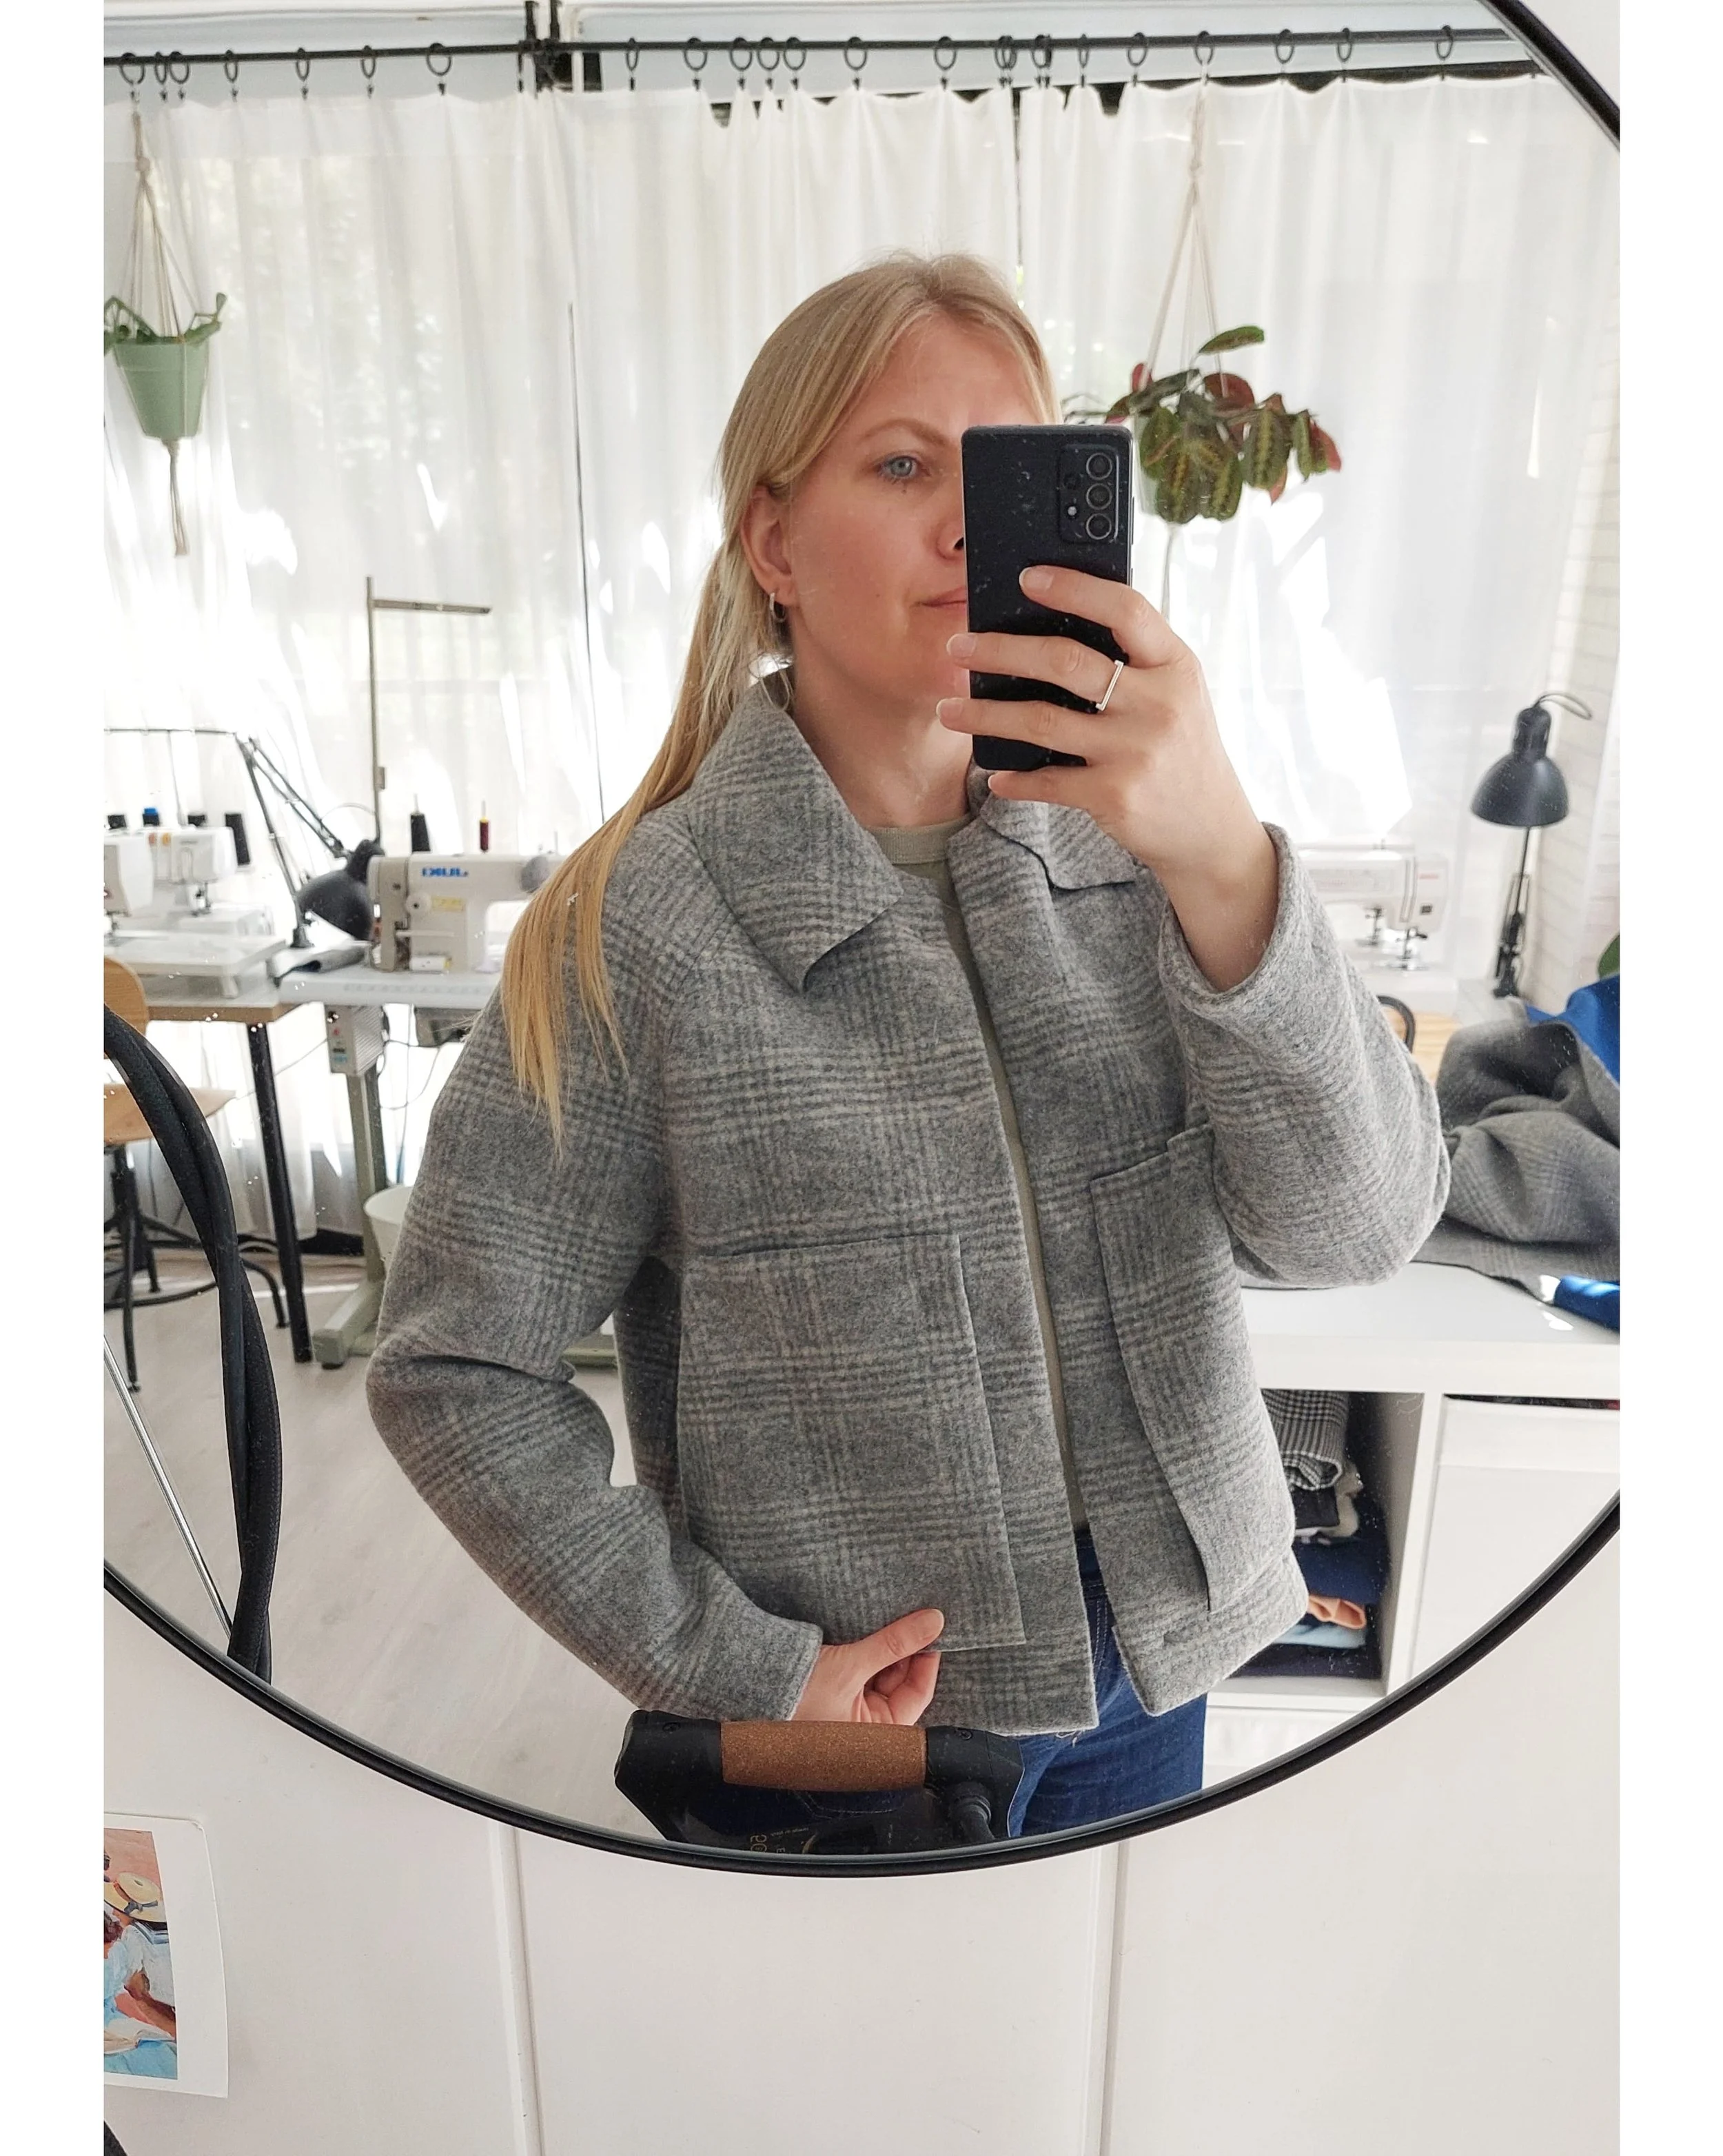
Pocket and collar test (it was already almost too hot to try it on, lol). / La prueba de bolsillo y cuello (casi ya tenía demasiado calor para probarlo, jaja).
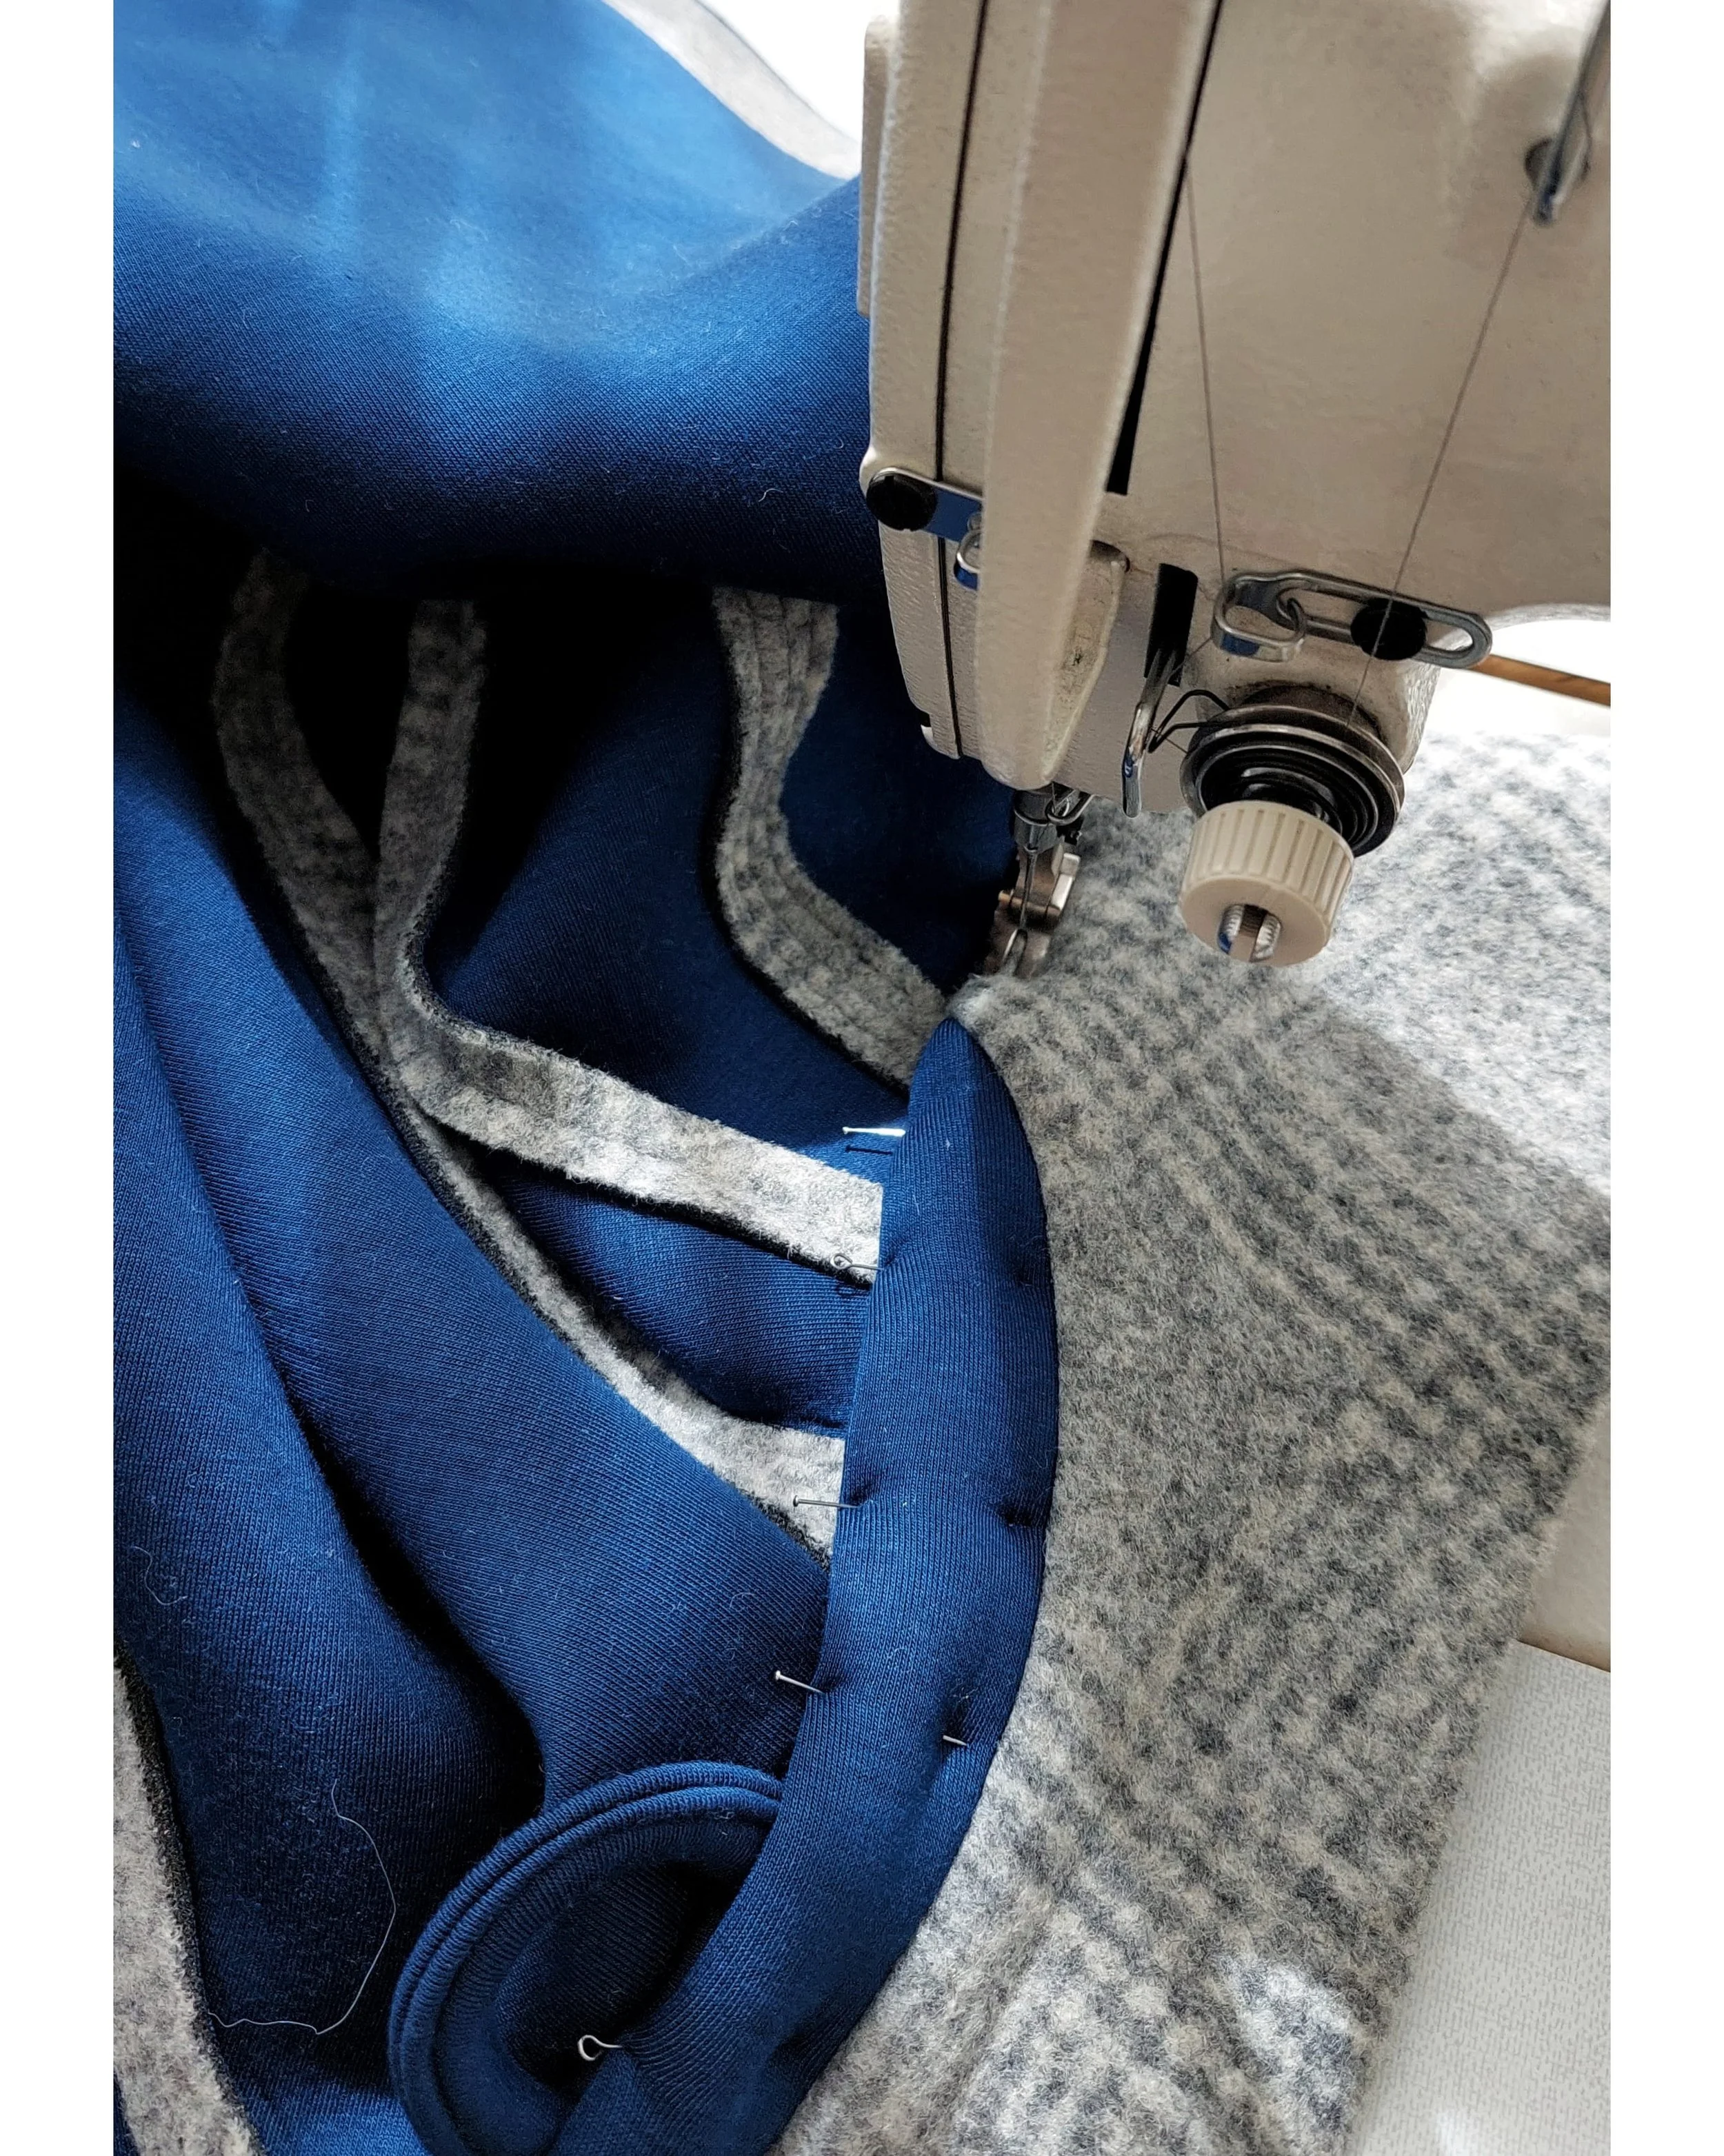
I love the insides with the contrasting color. The fabric was thick at the collar stand with all the layers, but my industrial Juki was as helpful as always. / Me encanta el interior con los colores en contraste. La tela fue gruesa en la parte del pie de cuello con todas las capas, pero mi Juki industrial como siempre ayudaba.
It was one of those spring days with warm 20 degree breezes, yet you still needed your wool sweaters too. And I had a gorgeous winter fabric that I wanted to use. So, contrary to what would be reasonable (you can see a pattern here, right?), I dove into my cold-weather project right in the middle of getting ready for the upcoming season of heat.
This fabric (and a few others) comes from Wasted Fabrics, an online store that’s kind of revolutionized the way I buy fabric. Irene recommended it to me when I met her at one of my lingerie classes last fall, and since then, my students and I have placed quite a few orders together—though just as many have been cancelled because the fabrics sold out before I could even react.
This Belgian shop works with leftover stock from European fabric mills and sells fabrics in three-meter lengths. The prices are already pretty good (we’re talking about wool, linen, and all kinds of clothing fabrics from renowned brands), but on top of that, almost every weekend they run sales that can be very generous if you time your purchase right (their newsletter brings you the latest updates—and temptations). That gray fabric, for example, cost me just 15 euros for the three-meter piece with the discount! These kinds of stores are pretty popular right now, and there are others as well, but so far, Wasted is where I’ve been shopping.
I’ve always said that people in Barcelona are incredibly lucky to have so many more fabric stores than in Madrid, where they offer a wider variety at great prices (here’s my guide to fabric stores in Barcelona and here’s the one for Madrid). Well, this store brings that world closer to us—and with the feature that excites me the most: they list the fabric composition! That’s my number one issue when shopping at remnant stores. Everything’s great and affordable, but with coat fabrics, for example, I don’t know if they contain wool or not—and that’s important to me. You do have linens, cottons, and viscose, which you can identify relatively well by touch, but when it comes to coating fabrics, it’s more complicated. Well, we’ve solved that problem with these online stores, because they actually list it there—along with the weight per square meter—so you can assess the thickness of each fabric. The only thing that sometimes falls short is that the photos aren’t always that high-quality, so you have to take a chance on the fabric lottery: the fabric you receive might not be exactly the scale you expected, the look you imagined, or the shade you saw. But if you think you’ll more or less like it—even if it’s not 100% like what you see in the photo (come on, you’ve got to go with the flow here a bit)—and the price is right… I don’t need any more convincing. You know I don’t do hidden advertising; this is my own opinion, and I’ve paid for every piece of fabric I’ve bought there.
Estábamos en esos días de primavera que de repente llegaban ya aires cálidos de veinte grados y al mismo tiempo todavía necesitabas los jerseys de lana. Y yo tenía una tela preciosa de invierno que quería usar. Así que al contrario de lo razonable (se ve un patrón aquí, verdad?), me fui a por mi proyecto de temporada fría en plena preparación para el calor.
Esta tela (y unas cuantas más) viene de Wasted Fabrics que es una tienda online que me ha revolucionado un poco la compra de tejidos. Me lo recomendó Irene cuando le conocí en uno de mis cursos de lencería el otoño pasado y desde entonces han caído unos buenos pedidos en conjunto con mis alumnas y otros tantos pedidos se han quedado en el camino porque las telas se vendían antes de que yo hubiera podido reaccionar.
Esa tienda de Bélgica trabaja con restos de stock de fabricas de telas europeas y vende tejidos en trozos de tres metros. Los precios ya de por sí están bastante bien (hablamos de lanas, linos y de todo tipo de tejidos para ropa procedentes de casas de renombre), pero encima casi cada fin de semana ponen unas rebajas que pueden ser muy generosas si llegas en el momento bueno de compra (su newsletter te trae las novedades y la perdición). Esa tela gris por ejemplo me salió con el descuento por 15 euros la pieza de los tres metros! Ahora se llevan bastante este tipo de tiendas y hay otras también, pero por el momento es en Wasted donde yo he comprado.
Siempre he dicho que las de Barcelona tienen una suerte tremenda de contar con muchas más tiendas de telas que en Madrid, donde venden más variedad con precios muy buenos (he aquí mi guía de tiendas de telas de Barcelona y aquí la de Madrid). Pues lo de esta tienda nos acerca ese mundo y con el detalle que más me emociona: te pone la composición de la tela! Es mi problema número uno al comprar en tiendas de restos de stock. Todo muy bien y barato pero por ejemplo en telas de abrigo no sé si lleva lana o no, y es importante para mí. Luego tienes tus linos, algodones y viscosas que se pueden identificar relativamente bien al tacto, pero justo el tema abrigos, es más complicado. Pues eso lo tenemos solucionado con esas tiendas online, porque allí sí que lo pone y el gramaje también para valorar el grosor de cada tejido. Lo único que a veces falla algo, es que las fotos no son tan cuidadas y tienes que atreverte con el casino de telas: puede que la tela que te llegue no sea exactamente con la escala que pensabas, el aspecto que imaginabas o el tono que tú veías. Pero si más o menos crees que te puede gustar, aunque no sea 100% como lo ves en la foto (a ver, hay que fluir un poquito), y el precio te sale barato…yo no necesito que me convencen más. Ya sabéis que no hago publicidad encubierta, esta es opinión mía y he pagado por todas las telas que he comprado allí.
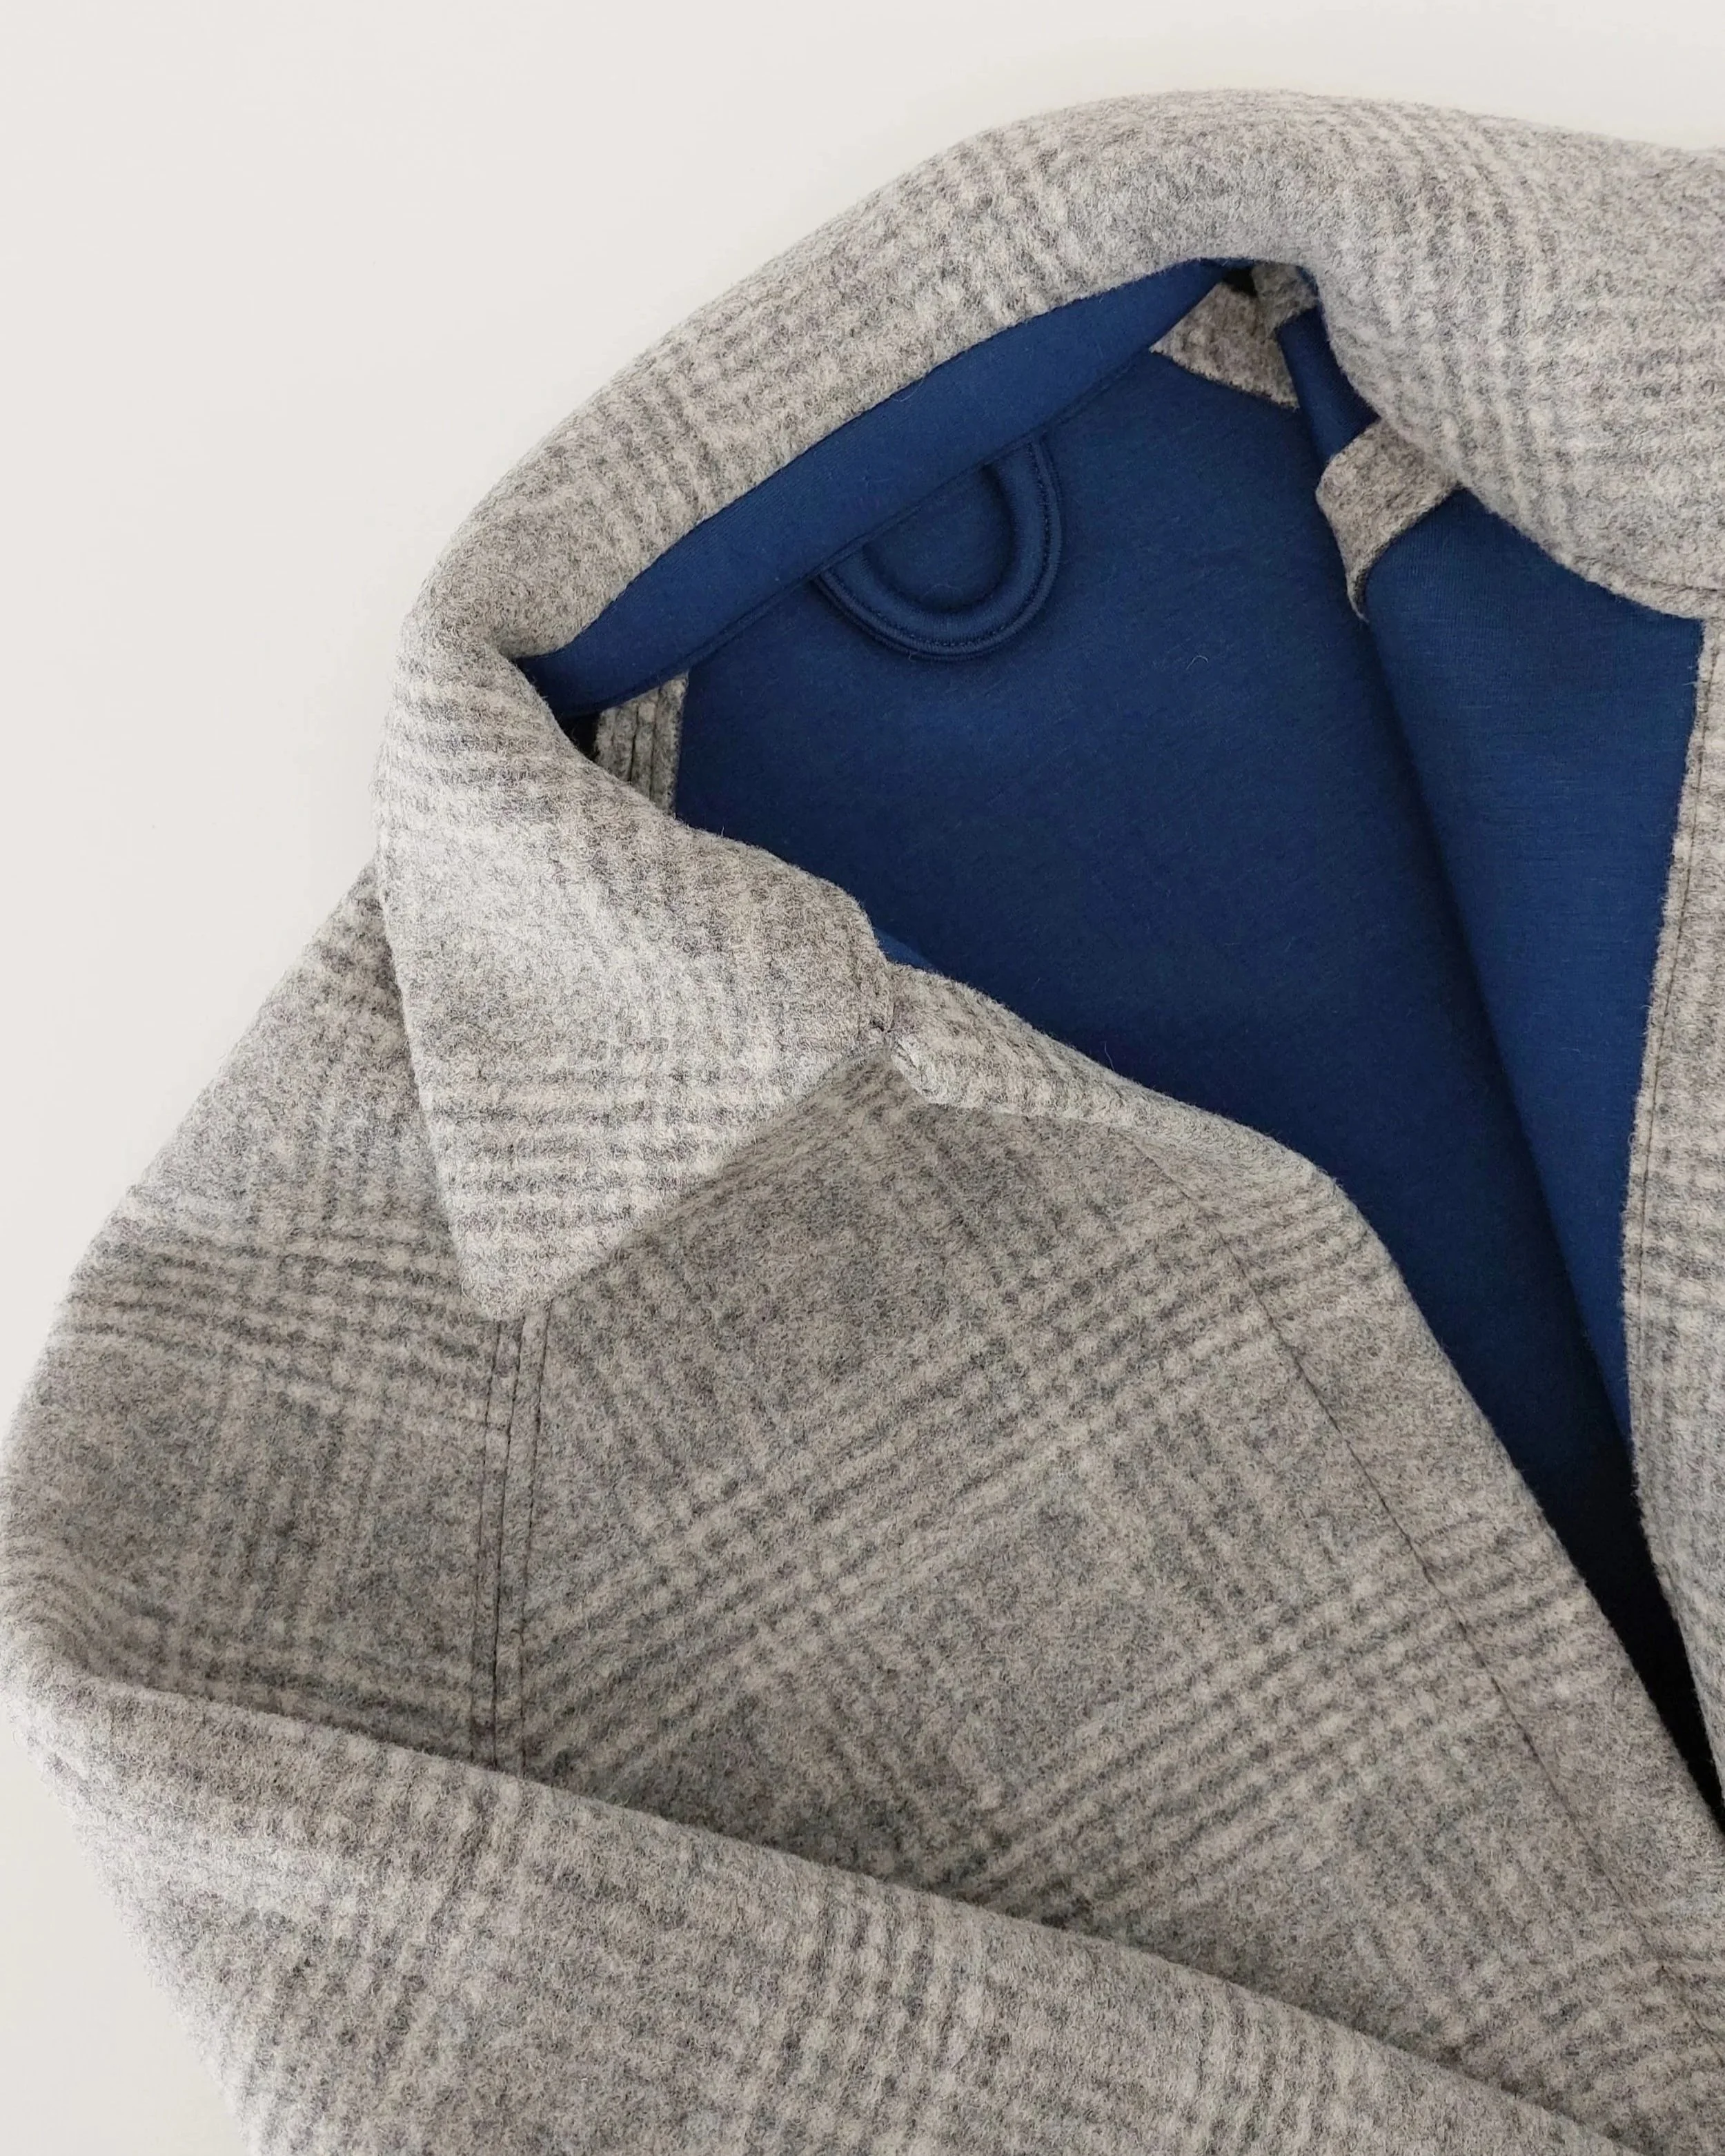
So, after writing so long about the store that’s brought me so many pleasant surprises (and that’s taken up a lot of space in my fabric closet since three-meter cuts take up quite a bit of room), let’s move on to the fabric for the jacket. When I saw that fabric in the store, I wasn’t quite sure what to expect, but the description made it sound like the perfect match for me: a double-sided fabric with wool on one side and viscose knit on the other, with a kind of foam in the middle (they call it “double face” at the store). So, without any prior experience with something like this, I took a chance—and luck was on my side: the fabric is wonderful! When it arrived, I still didn’t know how it would sew, but the feel was already great. The wool is soft and so is the knit; the thickness is like medium-weight neoprene, with good stucture. As I thought about what kind of jacket I could sew with it, I searched online to see if any brands had used it, but I didn’t find anything. I had a hunch it would work well with straight-cut styles, because the fabric has almost no drape and holds its shape well.
Another thing that worried me was how it would hold up in the wash. I’m not interested in making a casual jacket like this that can’t be washed at home—I don’t want to have to rely on dry cleaning. But usually, woolen winter fabrics can’t just be thrown into the washing machine as-is. I first tested a small piece of fabric to see what would happen when it got wet—if the layers would separate. Nothing happened. Since the fabric was inexpensive, I decided to wash it directly on the wool cycle to avoid tumbling it too much and see how it turned out. I wouldn’t lose much if it didn’t turn out well, and that way I could avoid any surprises later on. And sure enough, the fabric came out of the washing machine without any changes (aside from the fact that I suppose it did shrink a bit, as would be normal, but I didn’t specifically measure it before and after, and it wasn’t very noticeable).
Así que después de esta chapa sobre la tienda que me ha traído muchas buenas sorpresas (y que ha invadido mucho espacio en mi armario de telas ya que los cortes de tres metros ocupan bastante), vamos con la tela del abrigo. Cuando vi esa tela en la tienda, no sabía muy bien cómo iba a ser, pero la descripción la pintaba como algo que sería un match perfecto para mí: una tela doble cara con lana en un lado y punto de viscosa en otro, con una especie de foam en el medio (lo llaman double face en la tienda). Así que sin tener experiencia con algo así de antemano, jugué y me tocó la suerte: la tela es maravillosa! Cuando me llegó, no sabía todavía qué tal se iba a coser, pero el tacto ya estaba super bien. La lana es suave y el punto también, el grosor es como un neopreno mediano, con buen cuerpo. Al pensar qué tipo de chaqueta podría coser con ella, busqué por internet, por si salía alguna marca que lo haya usado, pero no encontré nada. Intuía que iba a quedar bien con patrones rectos, porque la tela no tiene apenas caída y se mantiene buena forma.
Otra cosa que me inquietaba era saber qué tal se lavaba. No me interesa hacerme una chaqueta informal de este tipo que no se pueda lavar en casa, no quiero depender del tinte. Pero normalmente telas de abrigo de lana no se pueden meter en la lavadora así tal cual. Probé primero en un trozo pequeño de tela para ver qué hacía al mojarse, si las capas se separaban. No ocurrió nada. Como la tela me salió barata y era un invento todo eso, decidí lavarlo directamente con el programa de lana para no agitarla mucho y ver qué salía. No iba a perder tanto si no salía bien, y así podría evitar sustos posteriores. Y efectivamente, la tela salió de la lavadora sin ningún cambio (aparte de que sí que supongo que encogió algo como sería normal, pero no lo medí expresamente antes y después, y no fue muy notable).
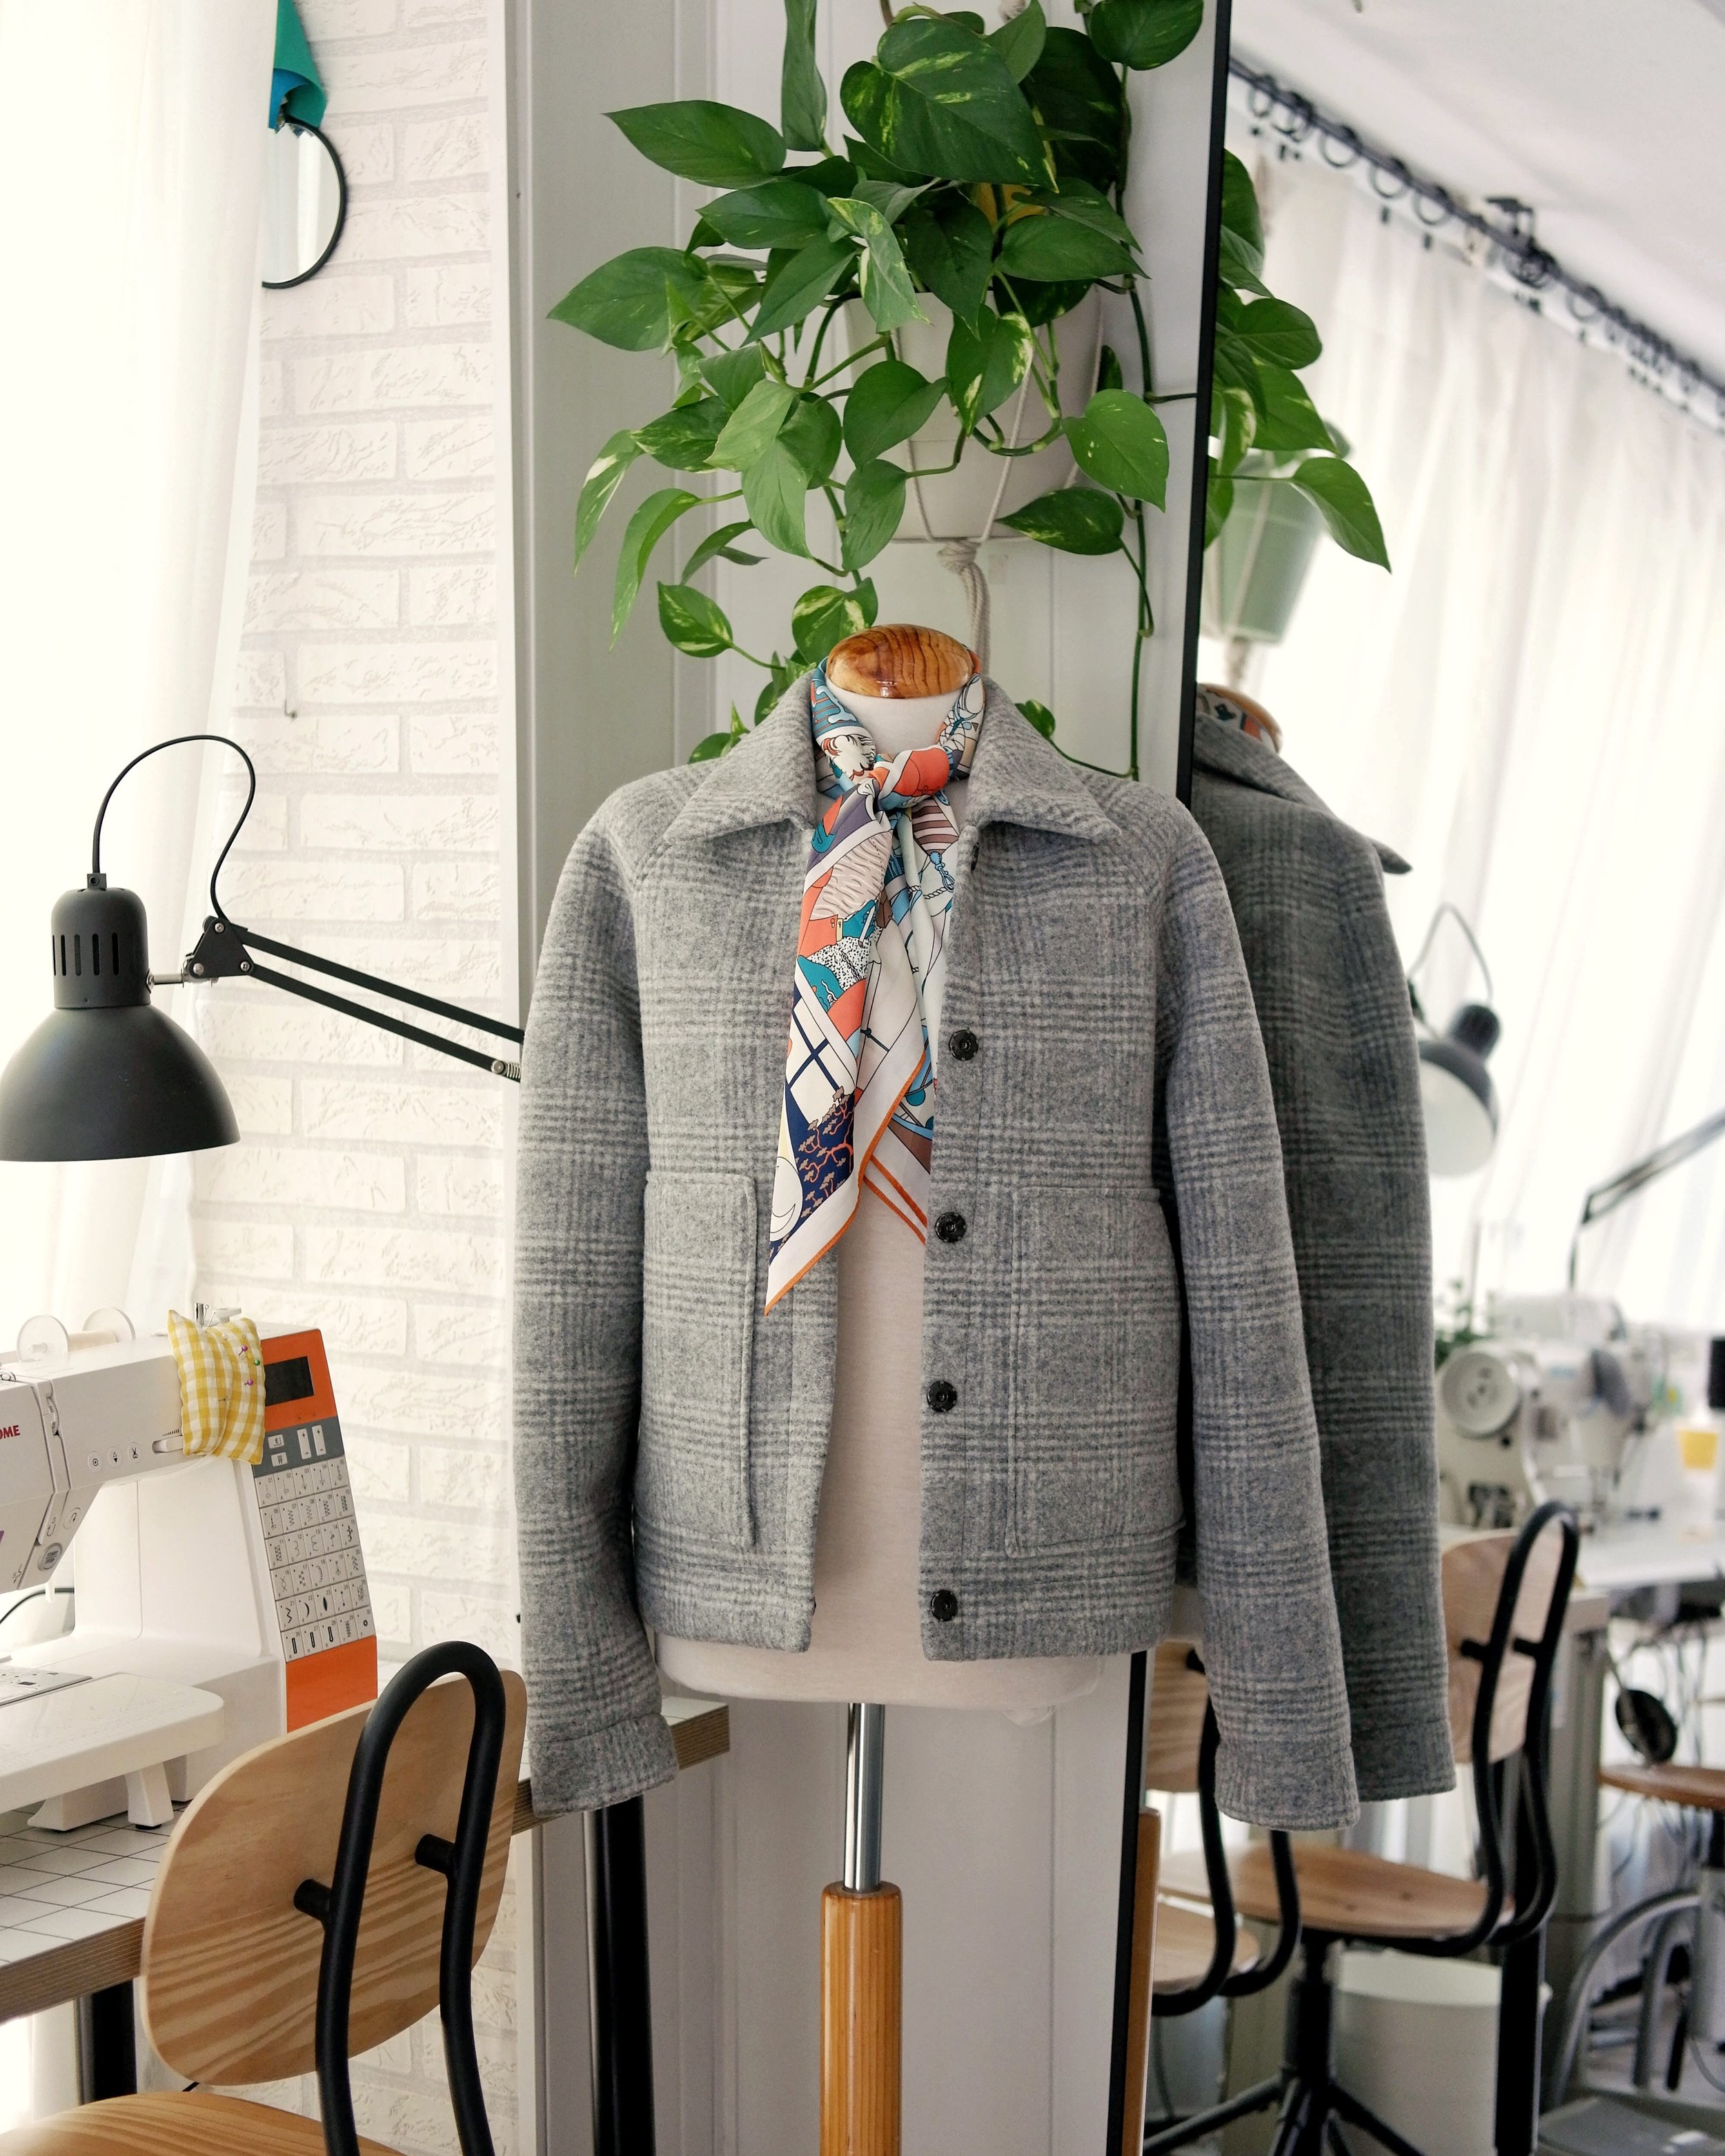
So when I finally had time to sew, I decided to create a pattern by modifying my custom base pattern to make a raglan-sleeve jacket with a loose fit, not too long, and a shirt-style collar with a collar band. The sewing experience was wonderful because this fabric doesn’t fray and is very easy to work with. It’s similar to working with softshell, but with the added advantage that it presses really well and everything stays in place. Sewing it made me really happy because it was so easy and enjoyable—nothing like the struggle of my previous project. And I matched the checks on the body and sleeves, too.
I made the pattern and the jacket in a day and a half. I was having so much fun sewing that I didn’t even want to stop for lunch, haha. Then the heat hit two days later (surprise!), and I wouldn’t be able to wear it until well into October. Just as I suspected, it’s totally my style. It’s worn like a casual jacket since it’s basically a knit fabric (think of a neoprene-style sports jacket), so it’s super comfortable. But the wool fabric and plaid pattern give it an elegant yet modern touch. And the wool provides really cozy warmth. The collar actually fits very well around my neck, and I hardly need to wear a scarf because it covers that area so well. I give this project a 10 out of 10: for finding good, inexpensive fabric (the casino!), for choosing the right pattern for the project, and for having such a rewarding sewing process. When I finished it, I knew it had become one of my all-time favorite projects, so you can imagine just how much I love it.
Así que cuando tenía por fin tiempo de coser, decidí crear un patrón modificando mi patrón base a medida, para hacer una chaqueta de manga ranglan, cuerpo con holgura, no muy largo y un cuello camisero con base de cuello. La experiencia de costura fue maravillosa porque esa tela no se deshilacha y se trabaja en este sentido muy fácil. Es similar de trabajar como softshell, pero encima con la ventaja de que se plancha super bien y todo queda en su sitio. Coserlo me hizo realmente feliz porque fue muy fácil y placentero, nada que ver con el sufrimiento del anterior proyecto. Y casé los cuadros de cuerpo y manga, eso también.
Hice el patrón y la chaqueta en un día y medio. De la contenta que estaba cosiendo, no quería ni irme a comer, jaja. Luego llegó el calor en dos días (sorpresa!) y no lo podría llevar hasta ya entrados en octubre. Como sospechaba, es muy a mi gusto. Se lleva como una chaqueta informal ya que es básicamente tela de punto (piensa en una chaqueta deportiva tipo neopreno), así que súper cómodo. Pero con la tela de lana y cuadros da el toque elegante y al mismo tiempo actual. Y la lana da calor super agradable. El cuello camisero de hecho está muy bien alrededor del cuello y casi no necesito llevar la bufanda, porque recoge esa zona muy bien. Le doy 10 de 10 a este proyecto: por encontrar la tela buena y barata (el casino!), por acertar con la elección de patrón para el proyecto, y por haber tenido un proceso de confección muy gratificante. Cuando lo terminé sabía que ha sido uno de mis proyectos favoritos de todos los tiempos, así que imaginad cuánto me gusta.
Softshell jacket / La chaqueta softshell
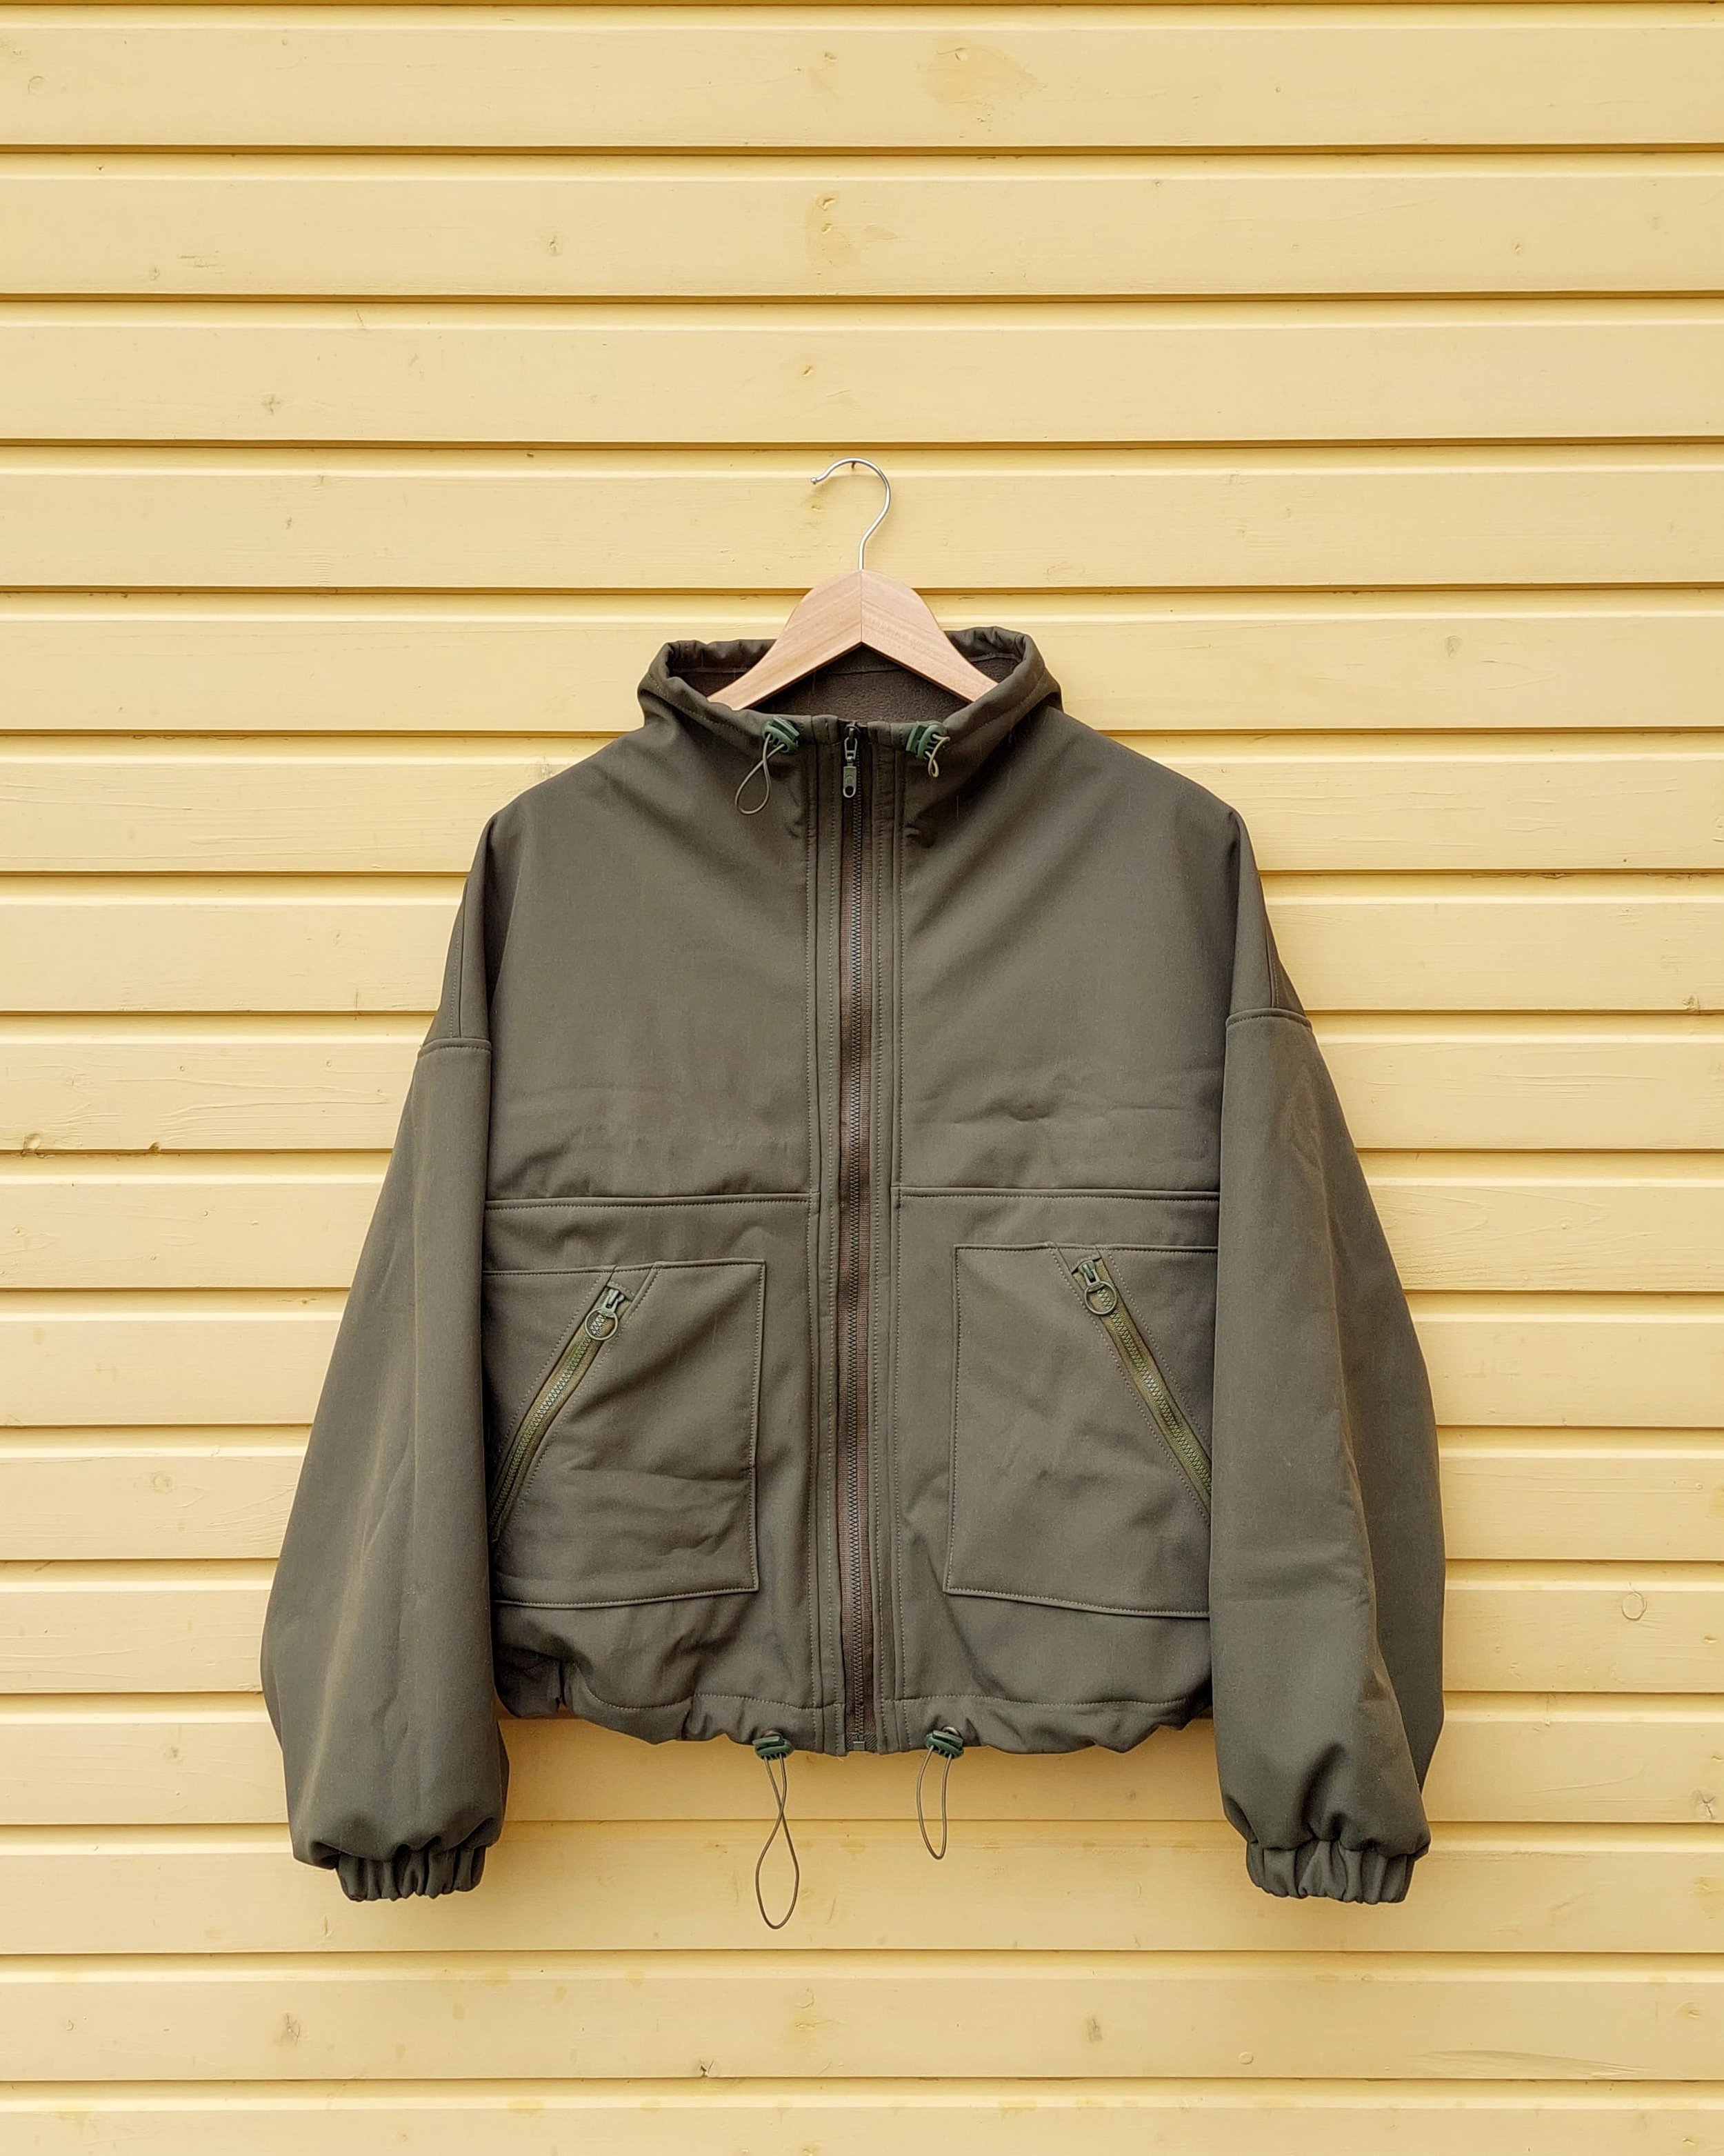
Softshell jacket with its first pocket version in August. / La chaqueta softshell con sus bolsillos versión uno en agosto.
Next up is a softshell jacket I made in August. That was, of course, in Estonia, since in Spain during the summer you couldn’t even try it on—you might get heatstroke just from trying to put the jacket on, haha. When I was there in the summer, I didn’t get to sew much because I wasn’t near my mom’s sewing machines, and in the end, I only managed to spend one day sewing during the three weeks I was there. It was the get-together I had with my sewing friends that we do once a year.
One day, while I was going through some fabrics I’d left there in past years, to see if there was anything interesting, I spotted some remnants of this military green softshell fabric. They were scraps from this jacket I made many years ago, along with other scraps of the same fabric that a student had used back then in class—also for her softshell jacket. She gave me the scraps, so I had enough fabric to make another jacket someday. Right now I can’t remember where I bought this softshell, but I’ve bought solid colors, for example, at Takoy (Slovakia) and at Tejidos Terrassa.
I was planning to bring the fabric back to Madrid to sew this fall, and I also just saw a new pattern and thought I could do a test it with that fabric. The pattern is Grasser No. 1360 and includes a funnel neck that I wanted to try. It’s not specifically designed for softshell—it’s meant for windbreaker-type fabrics and includes a lining. But I knew it would work fine for my wearable toile, and then I could use any fabric I wanted, because this jacket style actually works well with many different types of fabric, depending on personal preference.
La siguiente es una chaqueta de softshell que hice en agosto. Eso fue por supuesto en Estonia, ya que en España en verano ni lo podrías probar, te puede dar un golpe de calor solo por intentar ponerte la chaqueta, jaja. Cuando estuve en verano allí, no llegué a coser mucho, porque no estaba donde las máquinas de coser de mi madre y al final solo me quedé con un día de costura durante las tres semanas que pasé allí. Fue la quedada que tenía con mis amigas costureras que hacemos una vez al año.
Cuando un día estaba repasando telas que he dejado allí en años pasados, para ver si había algo interesante, vi unos restos de la tela softshell en verde militar. Eran retales de esta chaqueta que hice hace muchos años, junto a otros retales de la misma tela que usó una alumna en su momento en clase, también para su chaqueta softshell. Ella me regaló los retales y así tenía suficiente tejido para hacer otra chaqueta en algún momento. Ahora mismo no recuerdo de dónde compré este softshell, pero he comprado colores lisos por ejemplo en Takoy (Eslovaquia) y en Tejidos Terrassa.
Pensaba traer la tela de vuelta a Madrid para coser este otoño y además justo vi un patrón nuevo y me pareció que podría hacer una primera prueba con esa tela. El patrón es el número 1360 de Grasser e incluye un cuello chimenea que quería probar. No está hecho para softshell específicamente, es para tejidos tipo cortavientos y lleva también forro. Pero para mi prueba me iba a valer y luego ya podía usar cualquier tela, porque este modelo de la chaqueta la verdad es que admite muchos tipos de tela, según el gusto de cada uno.
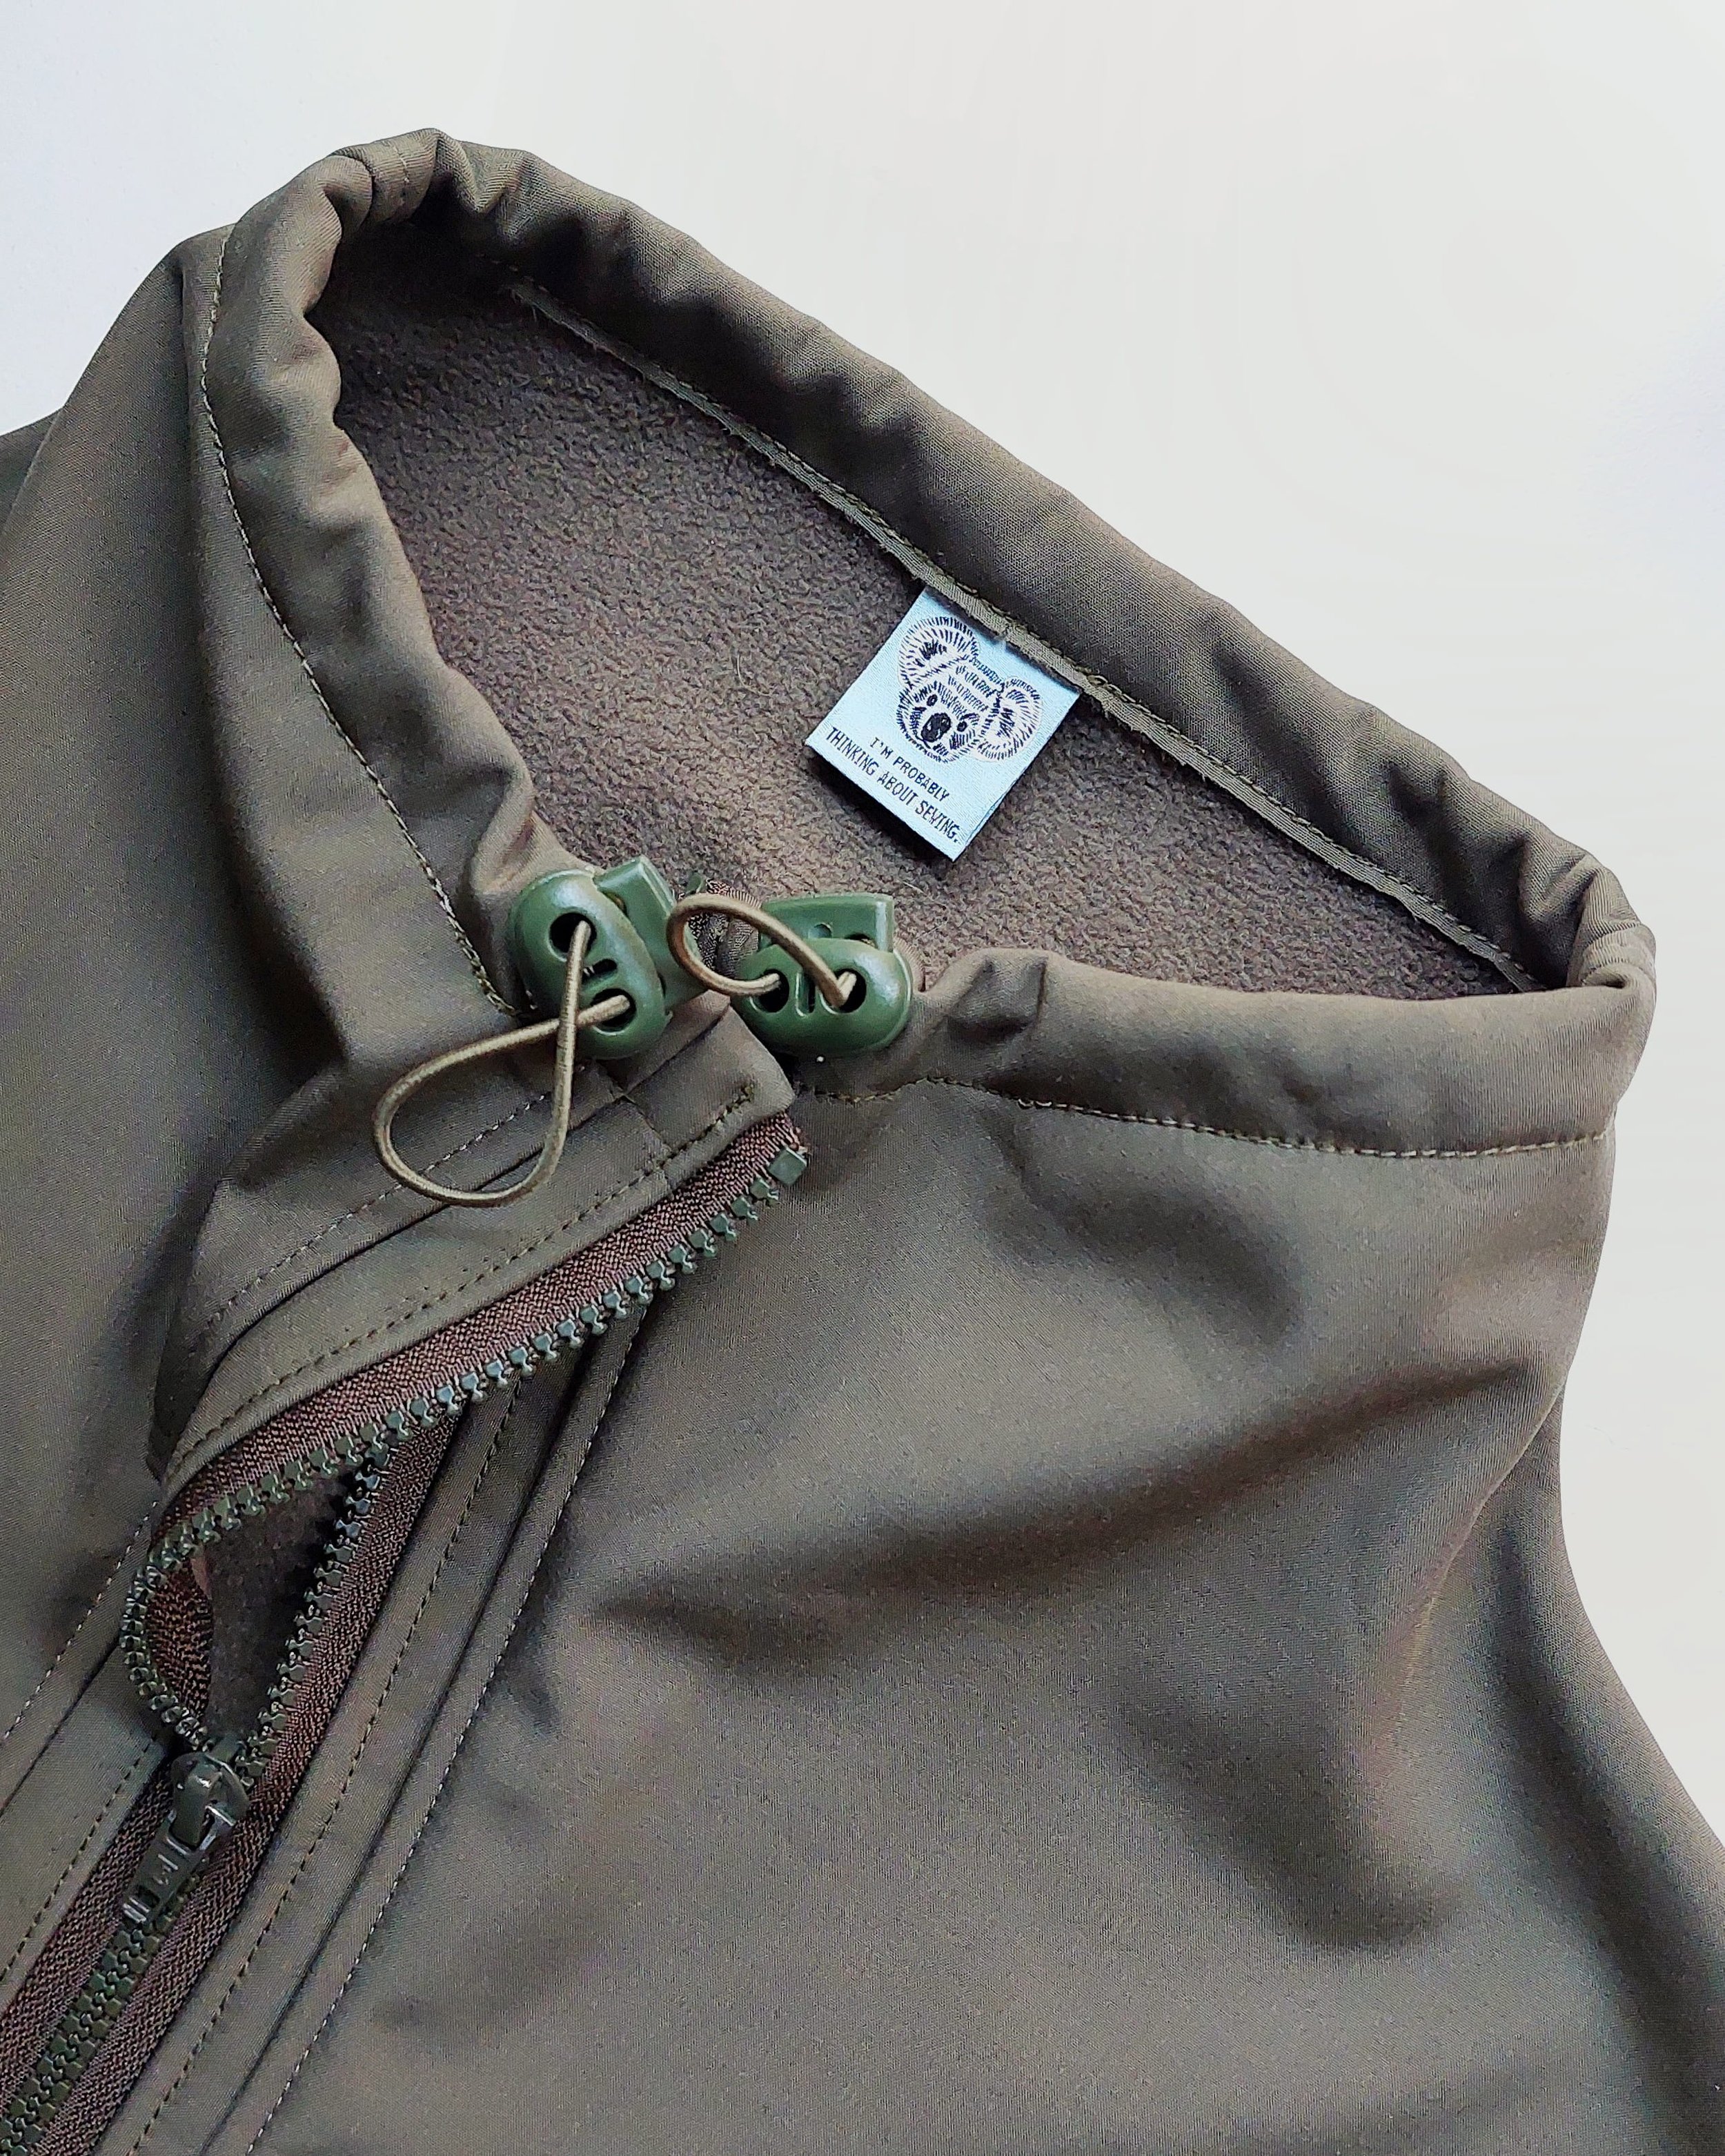
New zipper installed and a little cute label (this one is from KATM too). / Nueva cremallera puesta y una etiqueta mona (ésta también es de KATM).
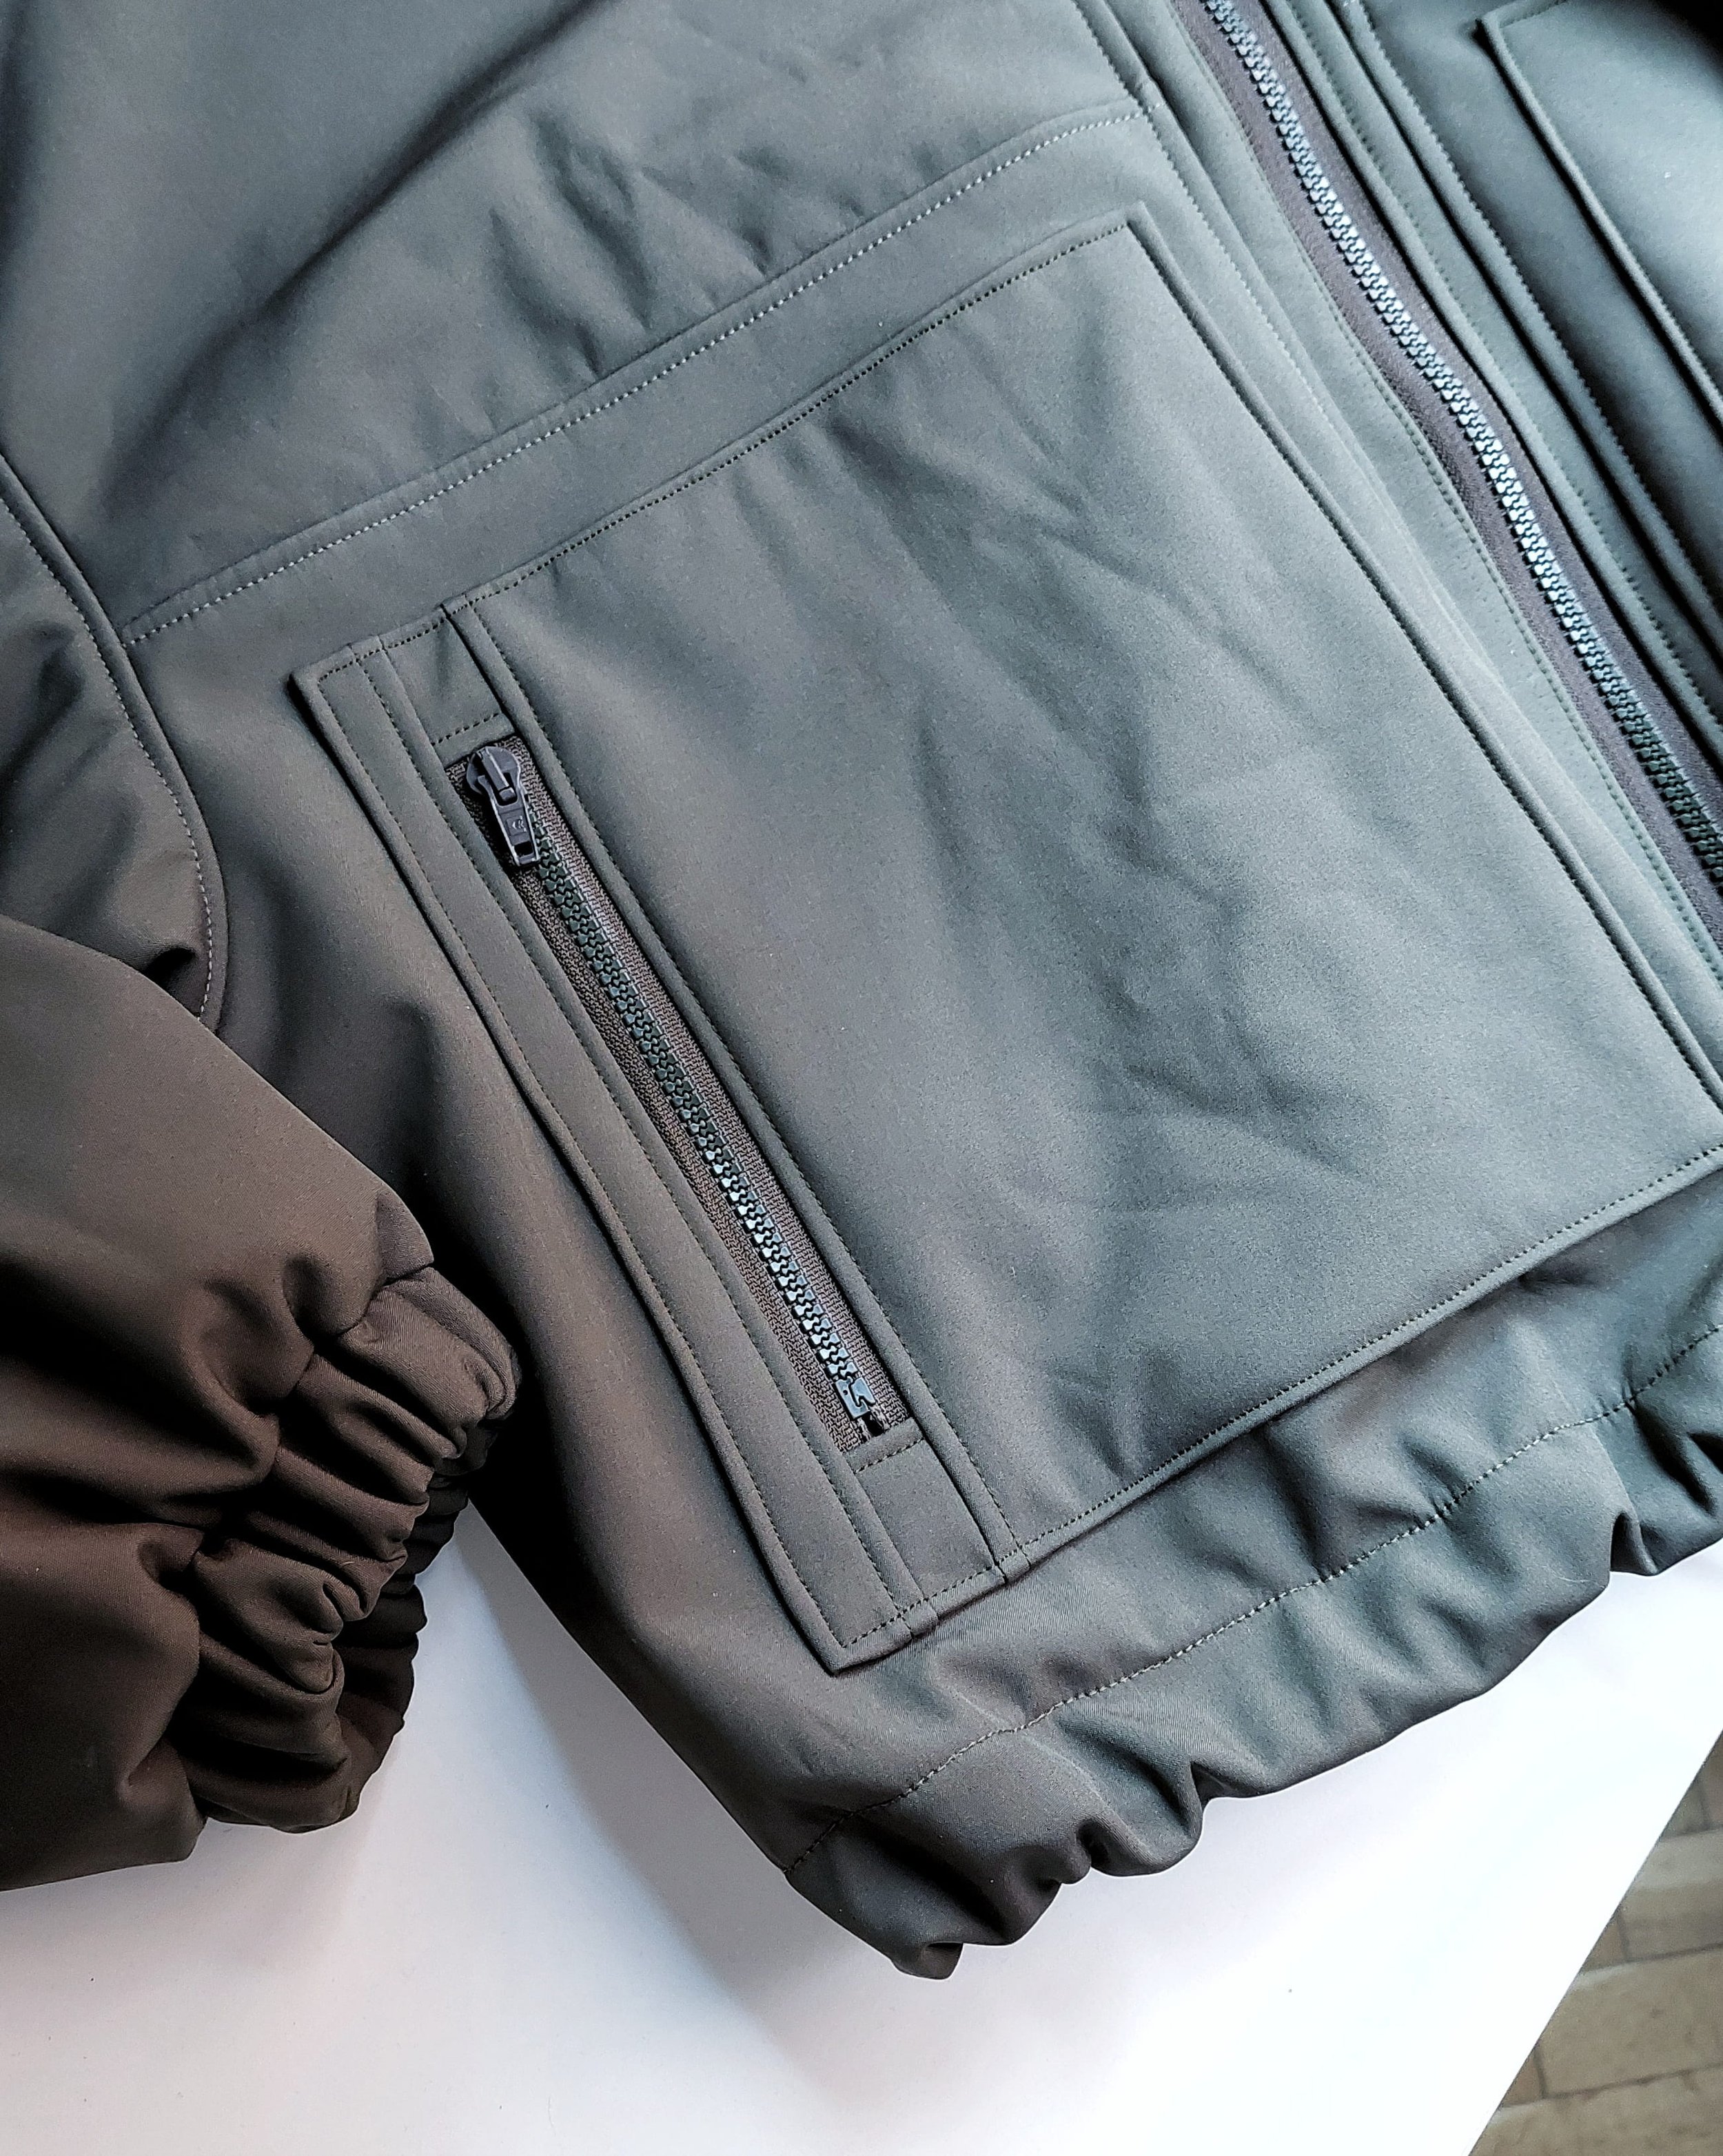
New pockets for more hand room. / Nuevos bolsillos para más espacio para las manos.
As my sewing day was approaching, and I was thinking about what project to sew there, I happened to go through my bag of softshell scraps and found zippers, elastic cord, and stoppers that my wise past self had prepared along with the fabric. Suddenly, I had everything I needed for the project right there, so I decided to sew it that day.
I made a few changes to adapt the jacket to the softshell fabric and materials I had on hand. For example, I didn’t use a lining, I changed the pockets, and I used a zipper instead of snap closures. I’d never used Grasser patterns before; they’re sold in single sizes instead of full size range, and I bought size 50-52 for this jacket (my current bust measurement is 100 cm). Since the jacket is very oversized (it has a 47 cm ease around the bust), I ended up taking in the sides and sleeves by a couple of cm after I’d already tried it on (I think it was 3 cm) so it wouldn’t be so big. But the style is cool because a sweater fits really well underneath, so again, it’s perfect for layering.
I didn’t make any other alterations, but next time I’d increase the pattern width at the point where my shoulder width falls (back width at the outer shoulder point) to allow for more room (even though it’s oversized, I need a bit more room at that specific spot if possible). I got completely confused in the silliest way when cutting out the pattern (in fact, it took me longer to tape the sheets together and fix my mistake than it did to actually sew it, I think, haha). I don’t know why I thought that since it said 50–52, the two lines on the pattern represented those two sizes. But no, it’s one size—the size that combines 50 and 52—and the seam allowance is the second line. I’d find a dotted line marking the seam allowance on the outside more intuitive (instead of two identical lines), but hey, every brand has its own way of doing things.
I finished the jacket that day, but since I went back to Madrid with the endless heat, I had to wait until last week to actually wear it. It turns out that my wise past self had set aside a poor-quality zipper along with that fabric, and when I was about to put on the jacket the other day, a tooth on the zipper broke and the zipper was no longer usable! So I went to my local haberdashery Pontejos to get a new zipper and just replaced it so I can finally wear the jacket. Since I’d improvised the pockets on the go that day in a bit of a rush (I was so eager to finish it even though I knew I couldn’t wear it yet—go figure), I decided to swap those out for bigger ones, too. I think it’s just a matter of being able to fully customize these things—the ones I put on first weren’t bad, but since I can have something exactly the way I like it, I can make that change in relatively little time and don’t mind doing it. My hands will thank me for it when the colder weather hits, haha.
Cuando estaba ya cerca de mi quedada, y viendo qué proyecto coser allí, por casualidad moví la bolsa de retales de softshell y encontré allí también cremalleras, cordón elástico y stoppers que mi yo inteligente del pasado había guardado junto a la tela. De repente tenía todo lo necesario para el proyecto allí mismo, así que decidí adelantarlo y coserlo ese día.
Cambié ciertas cosas para hacer la chaqueta con softshell y los materiales que tenía. Por ejemplo no usé forro, cambié los bolsillos y usé la cremallera en vez de tapetas con snaps. No había usado antes patrones de Grasser, se compran por unitalla y yo compré 50-52 para esta chaqueta (mi medida de pecho actual es de 100 cm). Como la chaqueta es muy oversized (lleva un desahogo de 47 cm en el contorno de pecho), al final terminé metiendo en el lateral y la manga un par de cm cuando ya lo había probado (creo recordar que eran 3 cm) para que no sea tan grande. Pero modelo mola al caber muy bien jersey abajo, así que de nuevo perfecto para llevar capas.
El resto no hice modificaciones, pero la próxima vez aumentaría en mi caso el ancho de patrón en el punto donde cae mi ancho de hombro (ancho espalda en punto de hombro exterior), para dar más espacio (aunque es oversized, en ese punto concreto yo necesito más medida si puede ser). Me líe de la manera más tonta al recortar el patrón (de hecho tardé más en pegar las hojas y arreglar mi error que al final coser, creo jaja), no sé por qué pensaba que como ponía 50-52 que las dos líneas en el patrón eran eso, las dos tallas. Y no, es una talla, que corresponde a la talla que unifica 50-52, y luego el margen de costura es la segunda línea. Igual una línea discontinua para marcar el margen por fuera lo vería yo como más intuitivo (en vez de dos líneas iguales), pero chica, cada marca a su manera.
Terminé la chaqueta ese día, pero como luego volví a Madrid y al calor interminable, tuve que esperar hasta la semana pasada para poder llevarlo de verdad. Resulta que mi yo inteligente del pasado había guardado una cremallera de mala calidad junto a esa tela y cuando me iba a poner la chaqueta el otro día, un diente de la cremallera se rompió y la cremallera ya no servía! Así que me fui a Pontejos a por la nueva cremallera y acabo de cambiarlo para poder por fin llevar la chaqueta. Como los bolsillos me los inventé sobre la marcha ese día con un poco de prisas (las ganas de acabarla aunque sabía que no me lo podía poner, vaya), decidí también cambiar estos por unos más grandes. Creo que ya es la cuestión de privilegio de poder customizar 100% esas cosas, porque tampoco estaban mal los que puse primero, pero ya que puedo tener algo exactamente como me gusta, pues hago ese cambio en relativamente poco tiempo y no me da pereza. Que luego mis manitas me lo agradecen cuando llegue el frío de verdad, jaja.
Quilted jacket / La chaqueta acolchada
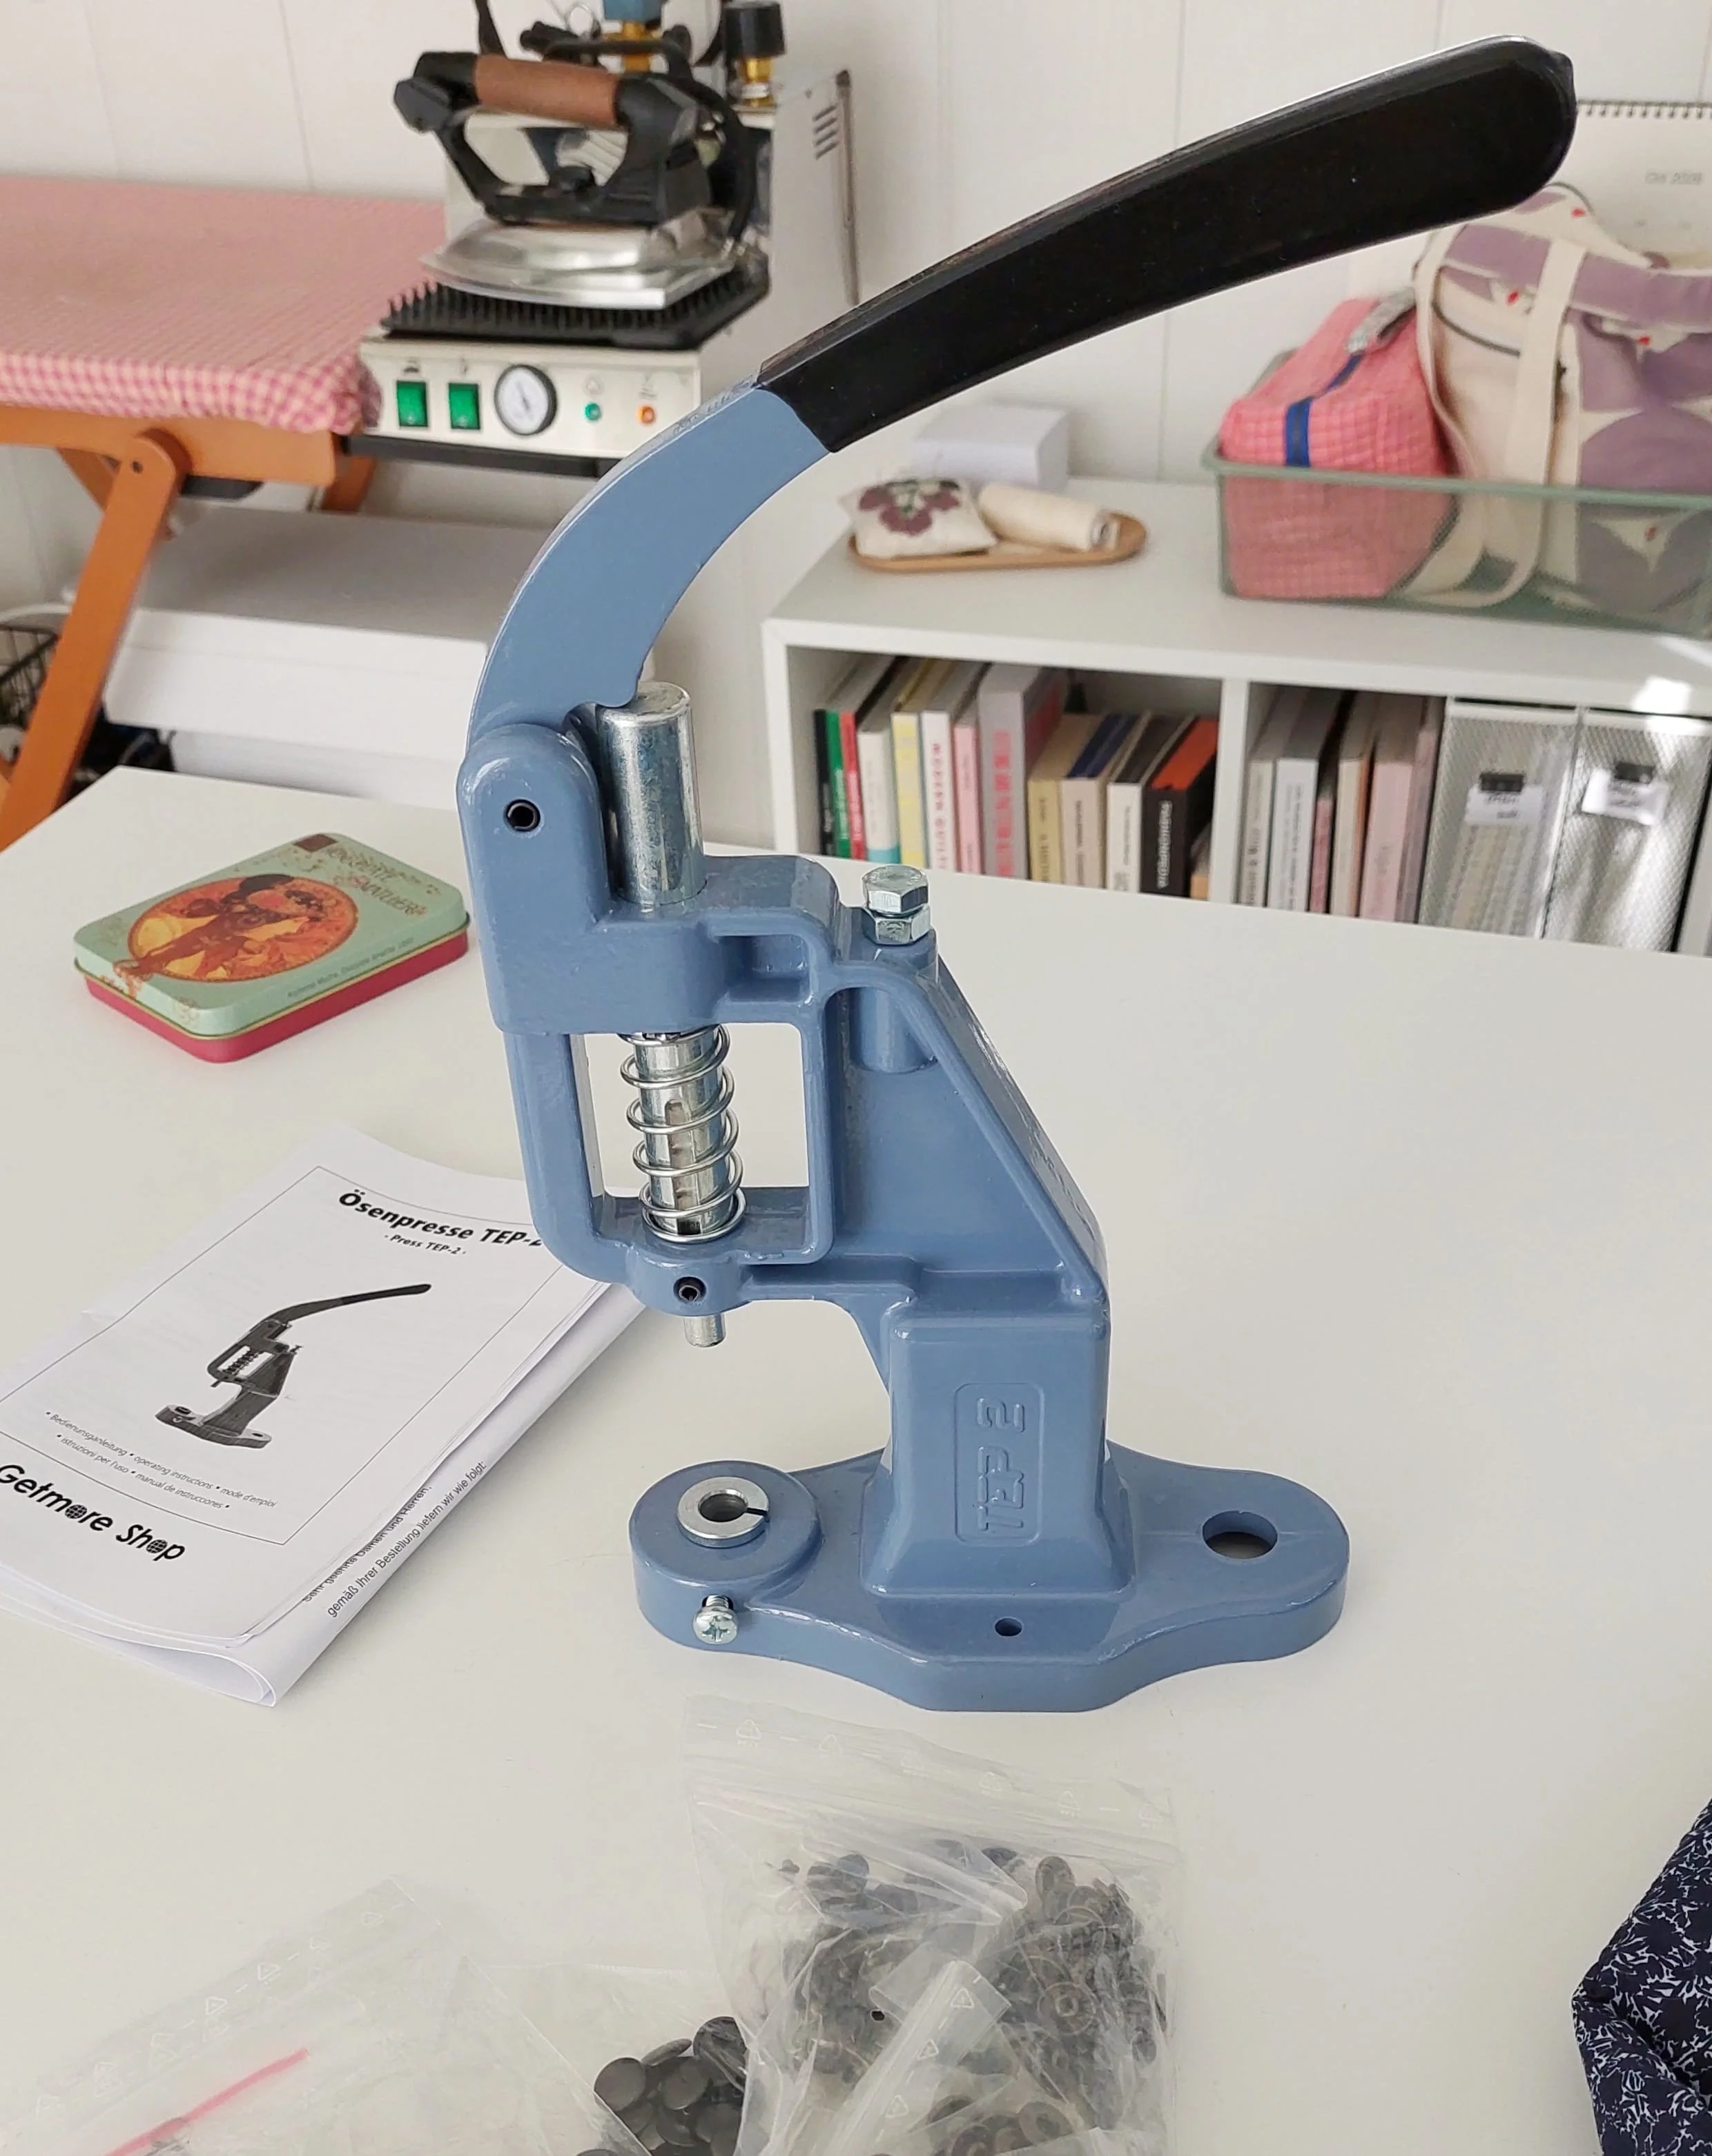
Tep-2 press to install all kinds of cool stuff. / La prensa de remaches TEP-2 para instalar todo tipo de cositas guays.
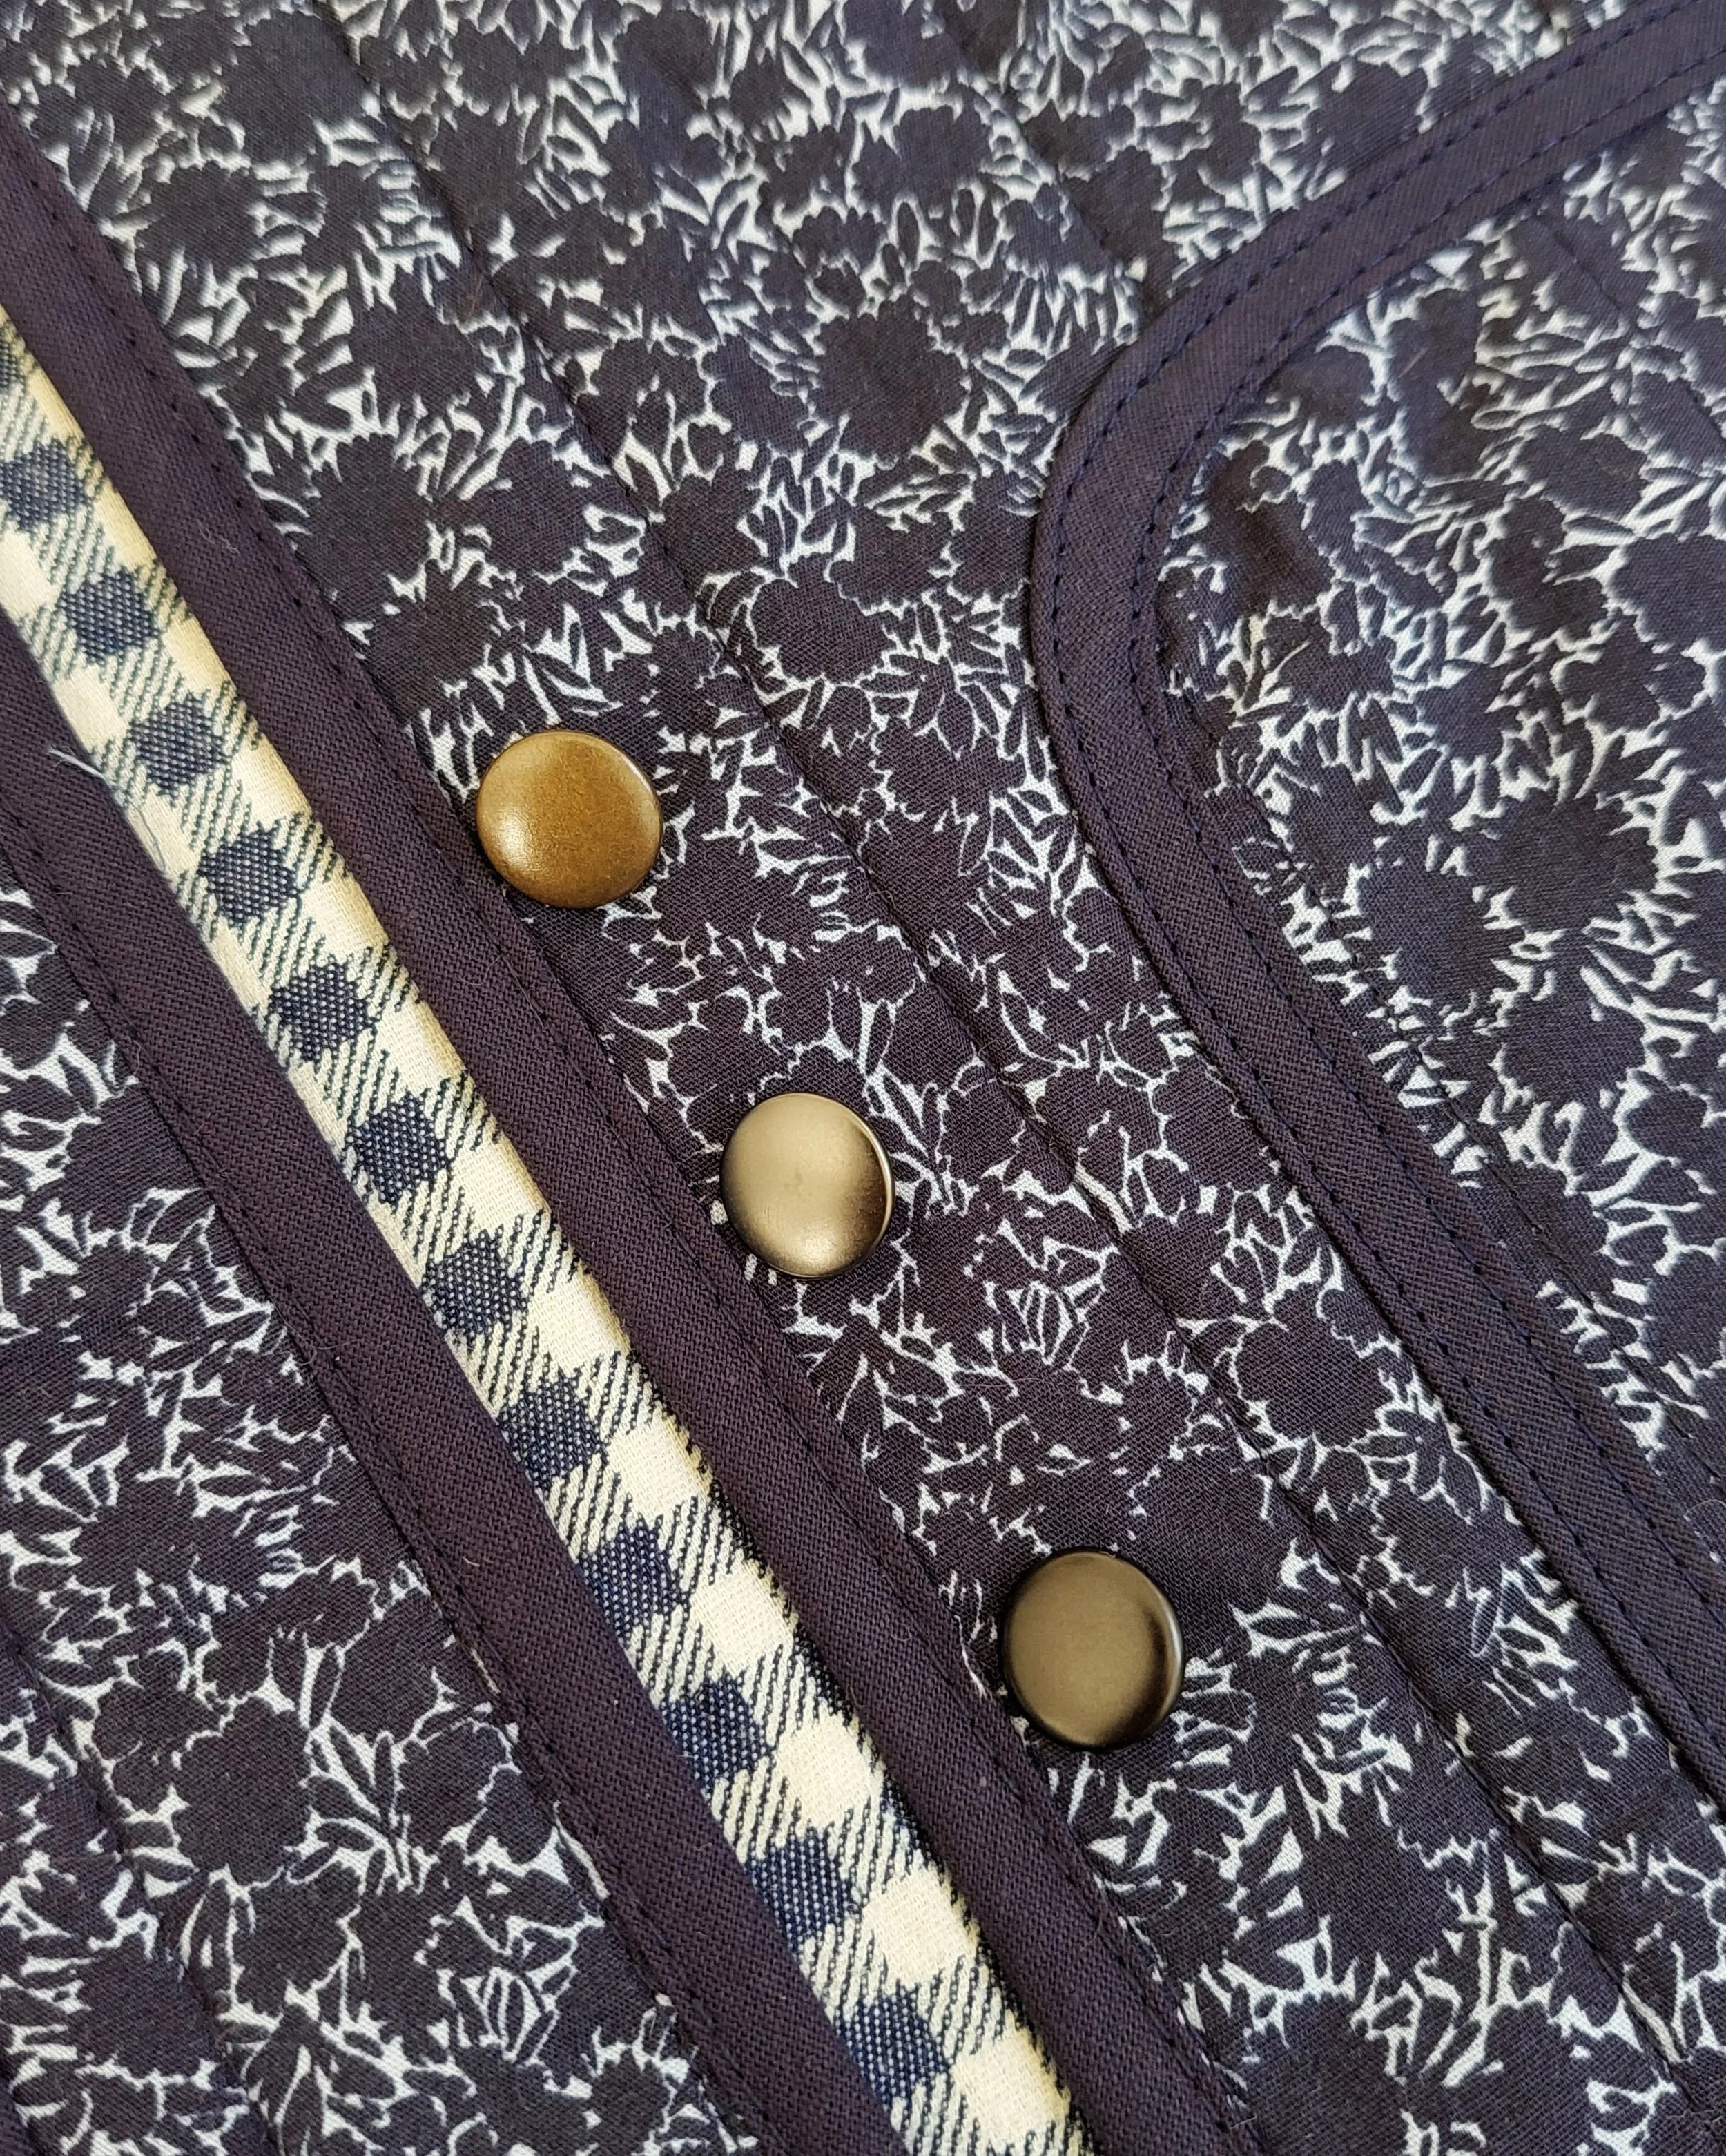
The colors I got are antique, antique silver and black. / Los colores que pedí son antique (tipo bronce), antique silver (tipo plata antigua) y negro.
And last but not least, here’s this super-simple pattern that features some quilting. And the snaps. It all really starts with the snaps and my new toy—the press for setting this type of rivets. I’d been planning to buy a more professional press like this for the studio since last year, but between one thing and another, it finally arrived now. And since I wanted to put it to good use right away, I made this quilted jacket with snap closures.
Until now, I’ve handled snaps of different sizes and shapes with two options. On one hand, I have a set of Prym pliers that come with a case containing different types of snaps and eyelets—from larger ones for jackets to smaller ones for T-shirts (you can then add the small packs of all kinds of snaps to use with the same tool). It works pretty well, but I found it a hassle to figure out which attachment to use each time, and in the end, I just couldn’t be bothered to use it. Of course, the less I used it, the longer it took me to identify the right parts etc. The other option I used was to go to the shoerepair shop to have the snaps installed, if my project was something that would have more intensive use, like a jacket. I didn’t trust that they wouldn’t come loose during use if I installed them myself.
After talking to Mari-Liis in Estonia—she had bought her own press and uses it, for example, to attach buttons to denim jackets—I decided to buy one too, since at the studio I could justify the purchase by saying we’d all use it together (that is true, I promise, haha). After doing some research and figuring out that I’d mainly be using it for snap fasteners and eyelets on jackets, I decided to buy it from this German website. They sell press kits (the type of press I was looking for was the TEP-2), individual dies, as well as snap fasteners, eyelets, and other loose parts. I decided to get the press kit for 12.5 mm snap fasteners (S-spring type), and then I also bought the die set for 7 mm eyelets, as well as snap fasteners and eyelets in different metal finishes with those measurements. The order arrived quickly and everything was in good condition; they also include videos showing how the press works, and honestly, it’s much easier and more intuitive than fiddling around with pliers. I’m very happy with the result and plan to order from that store again soon, since I’d also like to get the 15 mm snaps and smaller eyelets (so I’ll need to buy the dies for those sizes as well).
Y para lo último, traigo este modelo super sencillo que tiene la gracia en el acolchado. Y los snaps, o automáticos a presión. Todo empieza realmente por los snaps y mi nuevo juguete, la prensa para poner este tipo de remaches. Yo estaba pendiente de comprar una prensa más profesional de este tipo para el taller desde el año pasado pero al final entre una cosa y otra ha llegado por fin ahora. Y como había que darle un buen primer uso, cosí esta chaqueta acolchada con el cierre de automáticos.
Hasta ahora he solucionado el tema de automáticos a presión de diferentes tamaños y formas con dos opciones. Por un lado tengo unas tenazas Prym con un maletín que lleva diferentes tipos de snaps y ojetes, desde más grandes para abrigos a más pequeños para camisetas (luego puedes complementarlo con los paquetes pequeños de todo tipo de remaches). Va bastante bien pero me parecía un lío ver cada vez qué cabezal hay que usar y al final me daba pereza usarla. Mientras menos la usaba, más tardaba en identificar los cabezales también, claro. La otra opción que usaba era ir al zapatero a que me instale los automáticos, si mi proyecto era algo de un uso más intensivo como una chaqueta. No me fiaba yo de que no se salgan durante el uso con mi autoinstalación.
Hablando con Mari-Liis en Estonia que había comprado su propia prensa y lo usa por ejemplo para poner los botones a las chaquetas vaqueras, me animé a comprarla también ya que en el taller podría justificar la adquisición con el pretexto de que lo vamos a usar todos juntos (cosa que es verdad, jaja). Después de mis investigaciones y sabiendo que principalmente lo iba a usar para automáticos a presión y ojetes para chaquetas, opté por comprarlo en esta tienda alemana. Ellos venden kits de prensa (el tipo de prensa que buscaba era TEP-2), cabezales sueltos y también automáticos, ojetes y demás cosas sueltas. Yo opté por coger el kit de prensa para automáticos (tipo S-spring) de 12,5 mm y luego compré el cabezal también para ojetes de 7 mm y automáticos y ojetes en diferentes tonos de metal con esas medidas. El pedido llegó rápido y todo estaba bien, además te incluyen videos sobre cómo funciona la prensa y la verdad es que es mucho más fácil e intuitivo que estar liando con las tenazas. Estoy muy contenta con el resultado y voy a pedir en breve de nuevo en esa tienda, ya que me gustaría tener también los automáticos de 15 mm y ojetes más pequeños (por lo tanto tengo que también comprar los cabezales para estos tamaños).
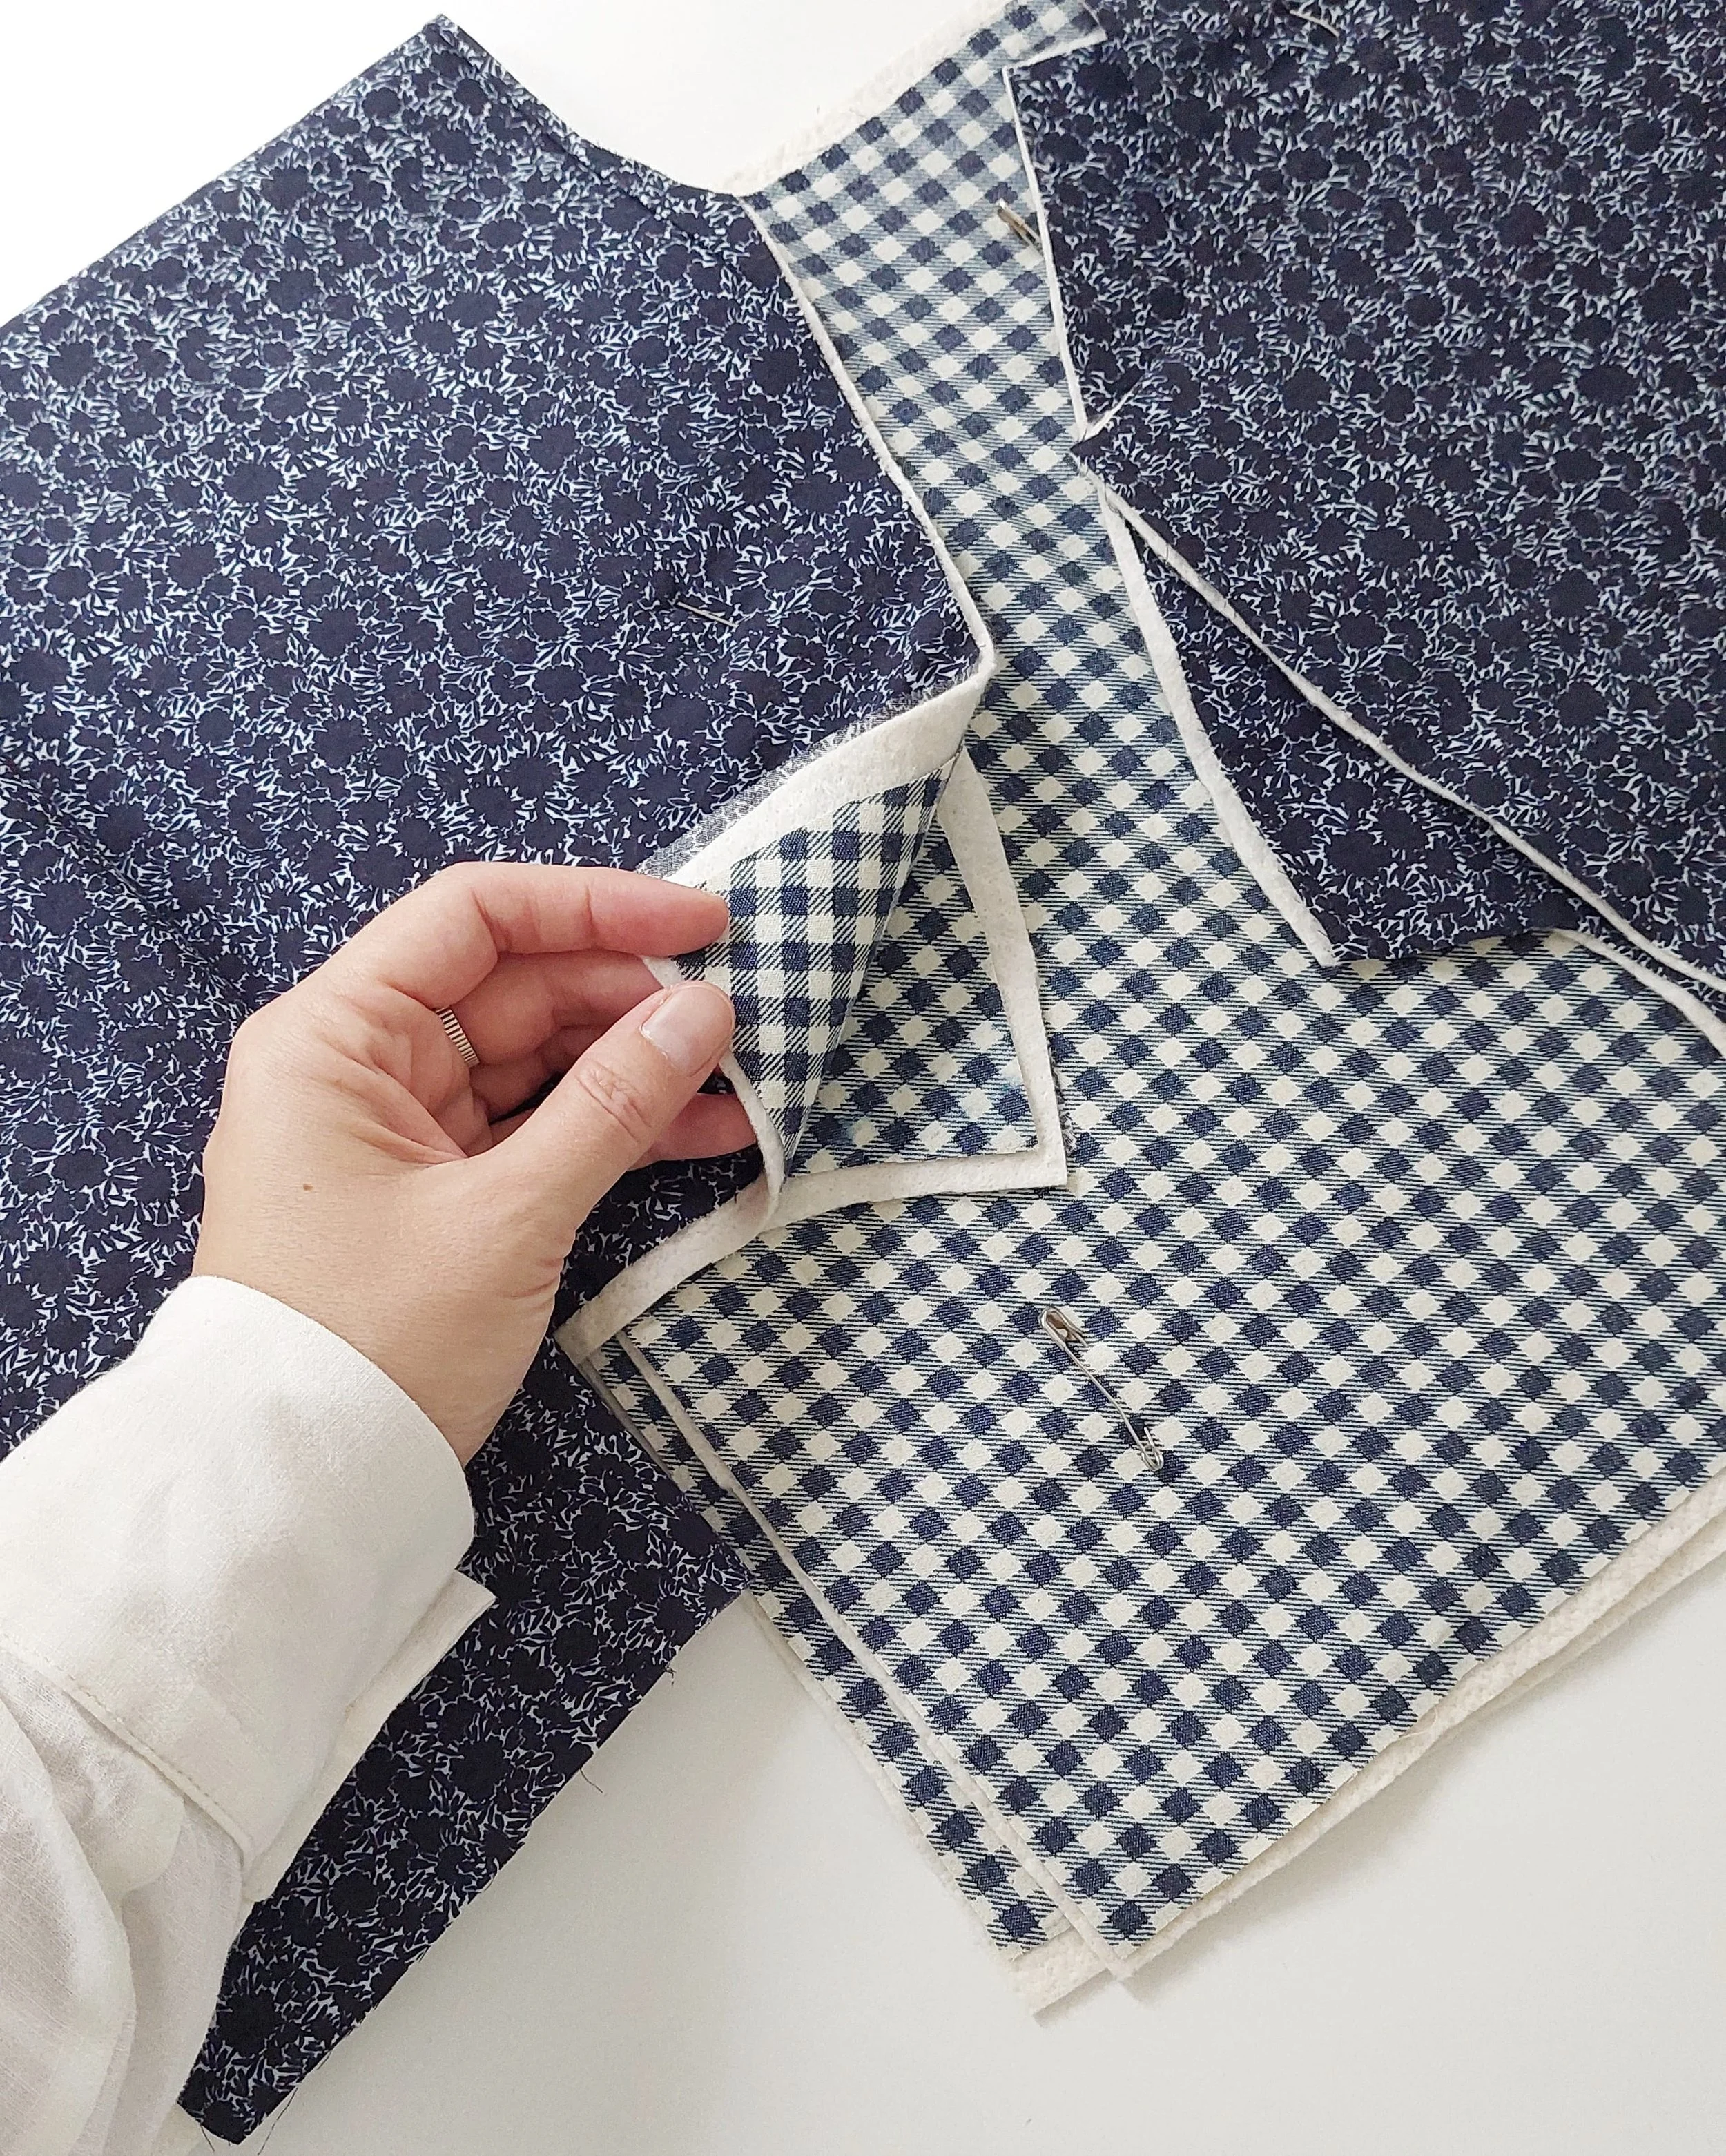
Pieces before quilting with big seam allowances. / Las piezas antes de acolchar con márgenes de costura amplios.
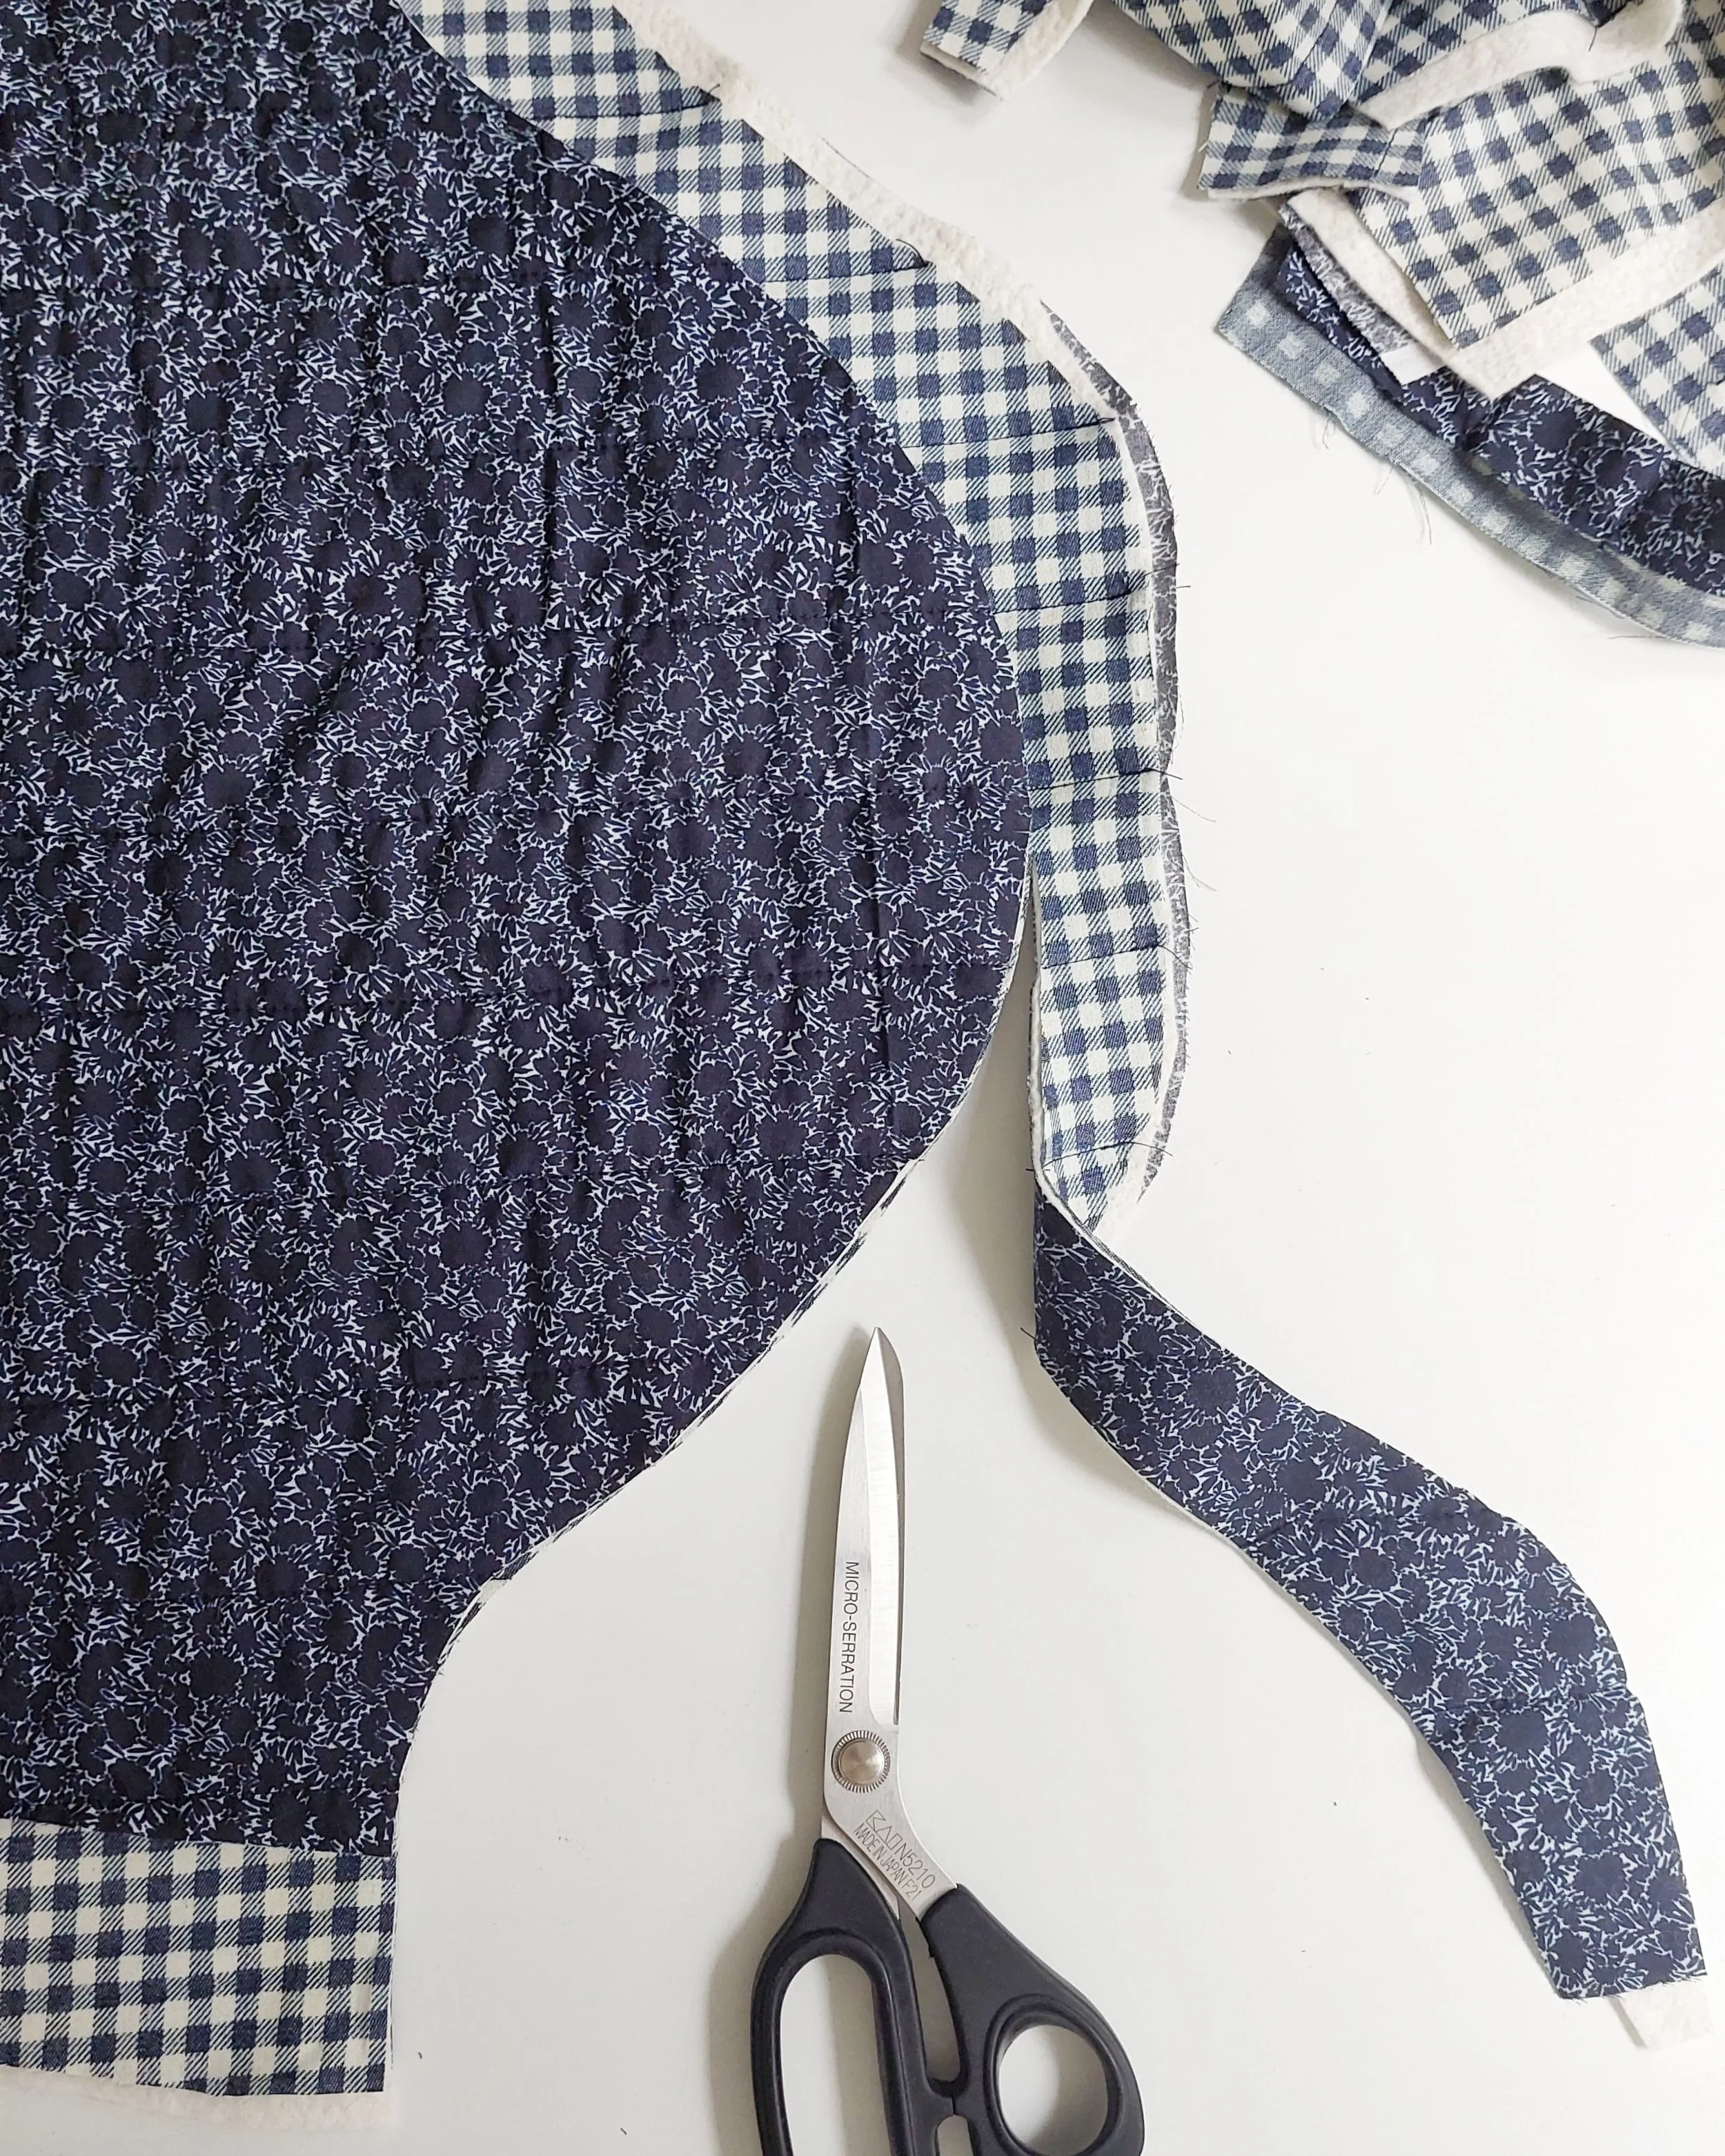
Cutting out the final pieces after quilting. / Cortando las piezas definitvas después del acolchado.
I wanted to make this jacket to test out my new press, but also to create a simple pattern for my students for this fall season. So it wasn’t just for the snaps, hehe. It’s a simple base that we’ll then adapt to other fabrics in class—we can add collars or a hood, change the pockets, and so on.
This particular jacket is made by quilting two cotton fabrics with a thin batting (it’s the Soft Cotton Mix 80/20 by Vlieseline I bought at Seoane Textil). The dark blue fabric is from Encants, and the gingham one has been sitting in my fabric stash for quite a while. First, I cut out the pieces with plenty of extra seam allowance from both fabrics and the batting. I quilted with vertical lines every 4 cm—it was all very simple, since this was meant to be a quick sample and I didn’t plan on making things too complicated for myself. Once the pieces were quilted, I cut them out again using the pattern, with a standard 1 cm seam allowance. If you use pre-quilted fabric, you can skip these steps, of course. Since the students are now starting to make this pattern in class, I’ve looked around in stores, and for example, at Mondial Tissus they have some really pretty quilted fabrics.
Quería hacer la chaqueta para probar mi maquinita pero también para crear un patrón sencillo para mis alumnas para esta temporada de otoño. Así que no fue solo por los snaps, jeje. Es una base simple que luego en clase vamos a adaptar a otras telas, podemos añadir cuellos o capucha, cambiar bolsillos etc.
Esta chaqueta en concreto está hecho acolchando dos telas de algodón tipo patcwork con una guata finita (es el Soft Cotton Mix 80/20 de Vlieseline comprado en Seoane Textil). La tela azul oscuro es de Encants y la de cuadros ya lleva mucho rato entre mis telas. Primero corte las piezas con bastante margen extra de las dos telas y la guata. Acolché con líneas verticales cada 4 cm, todo muy simple, porque iba a ser una muestra rápida y no tenía pensado complicarme mucho la vida con eso. Una vez acolchadas las piezas, las corté de nuevo con el patrón, con margen normal de 1 cm. Si usas una tela ya preacolchada, te ahorras estos pasos, claro. Como las chicas ahora empiezan a hacer este modelo en clase, he mirado en tiendas y por ejemplo en Mondial Tissus hay telas acolchadas bastante bonitas.
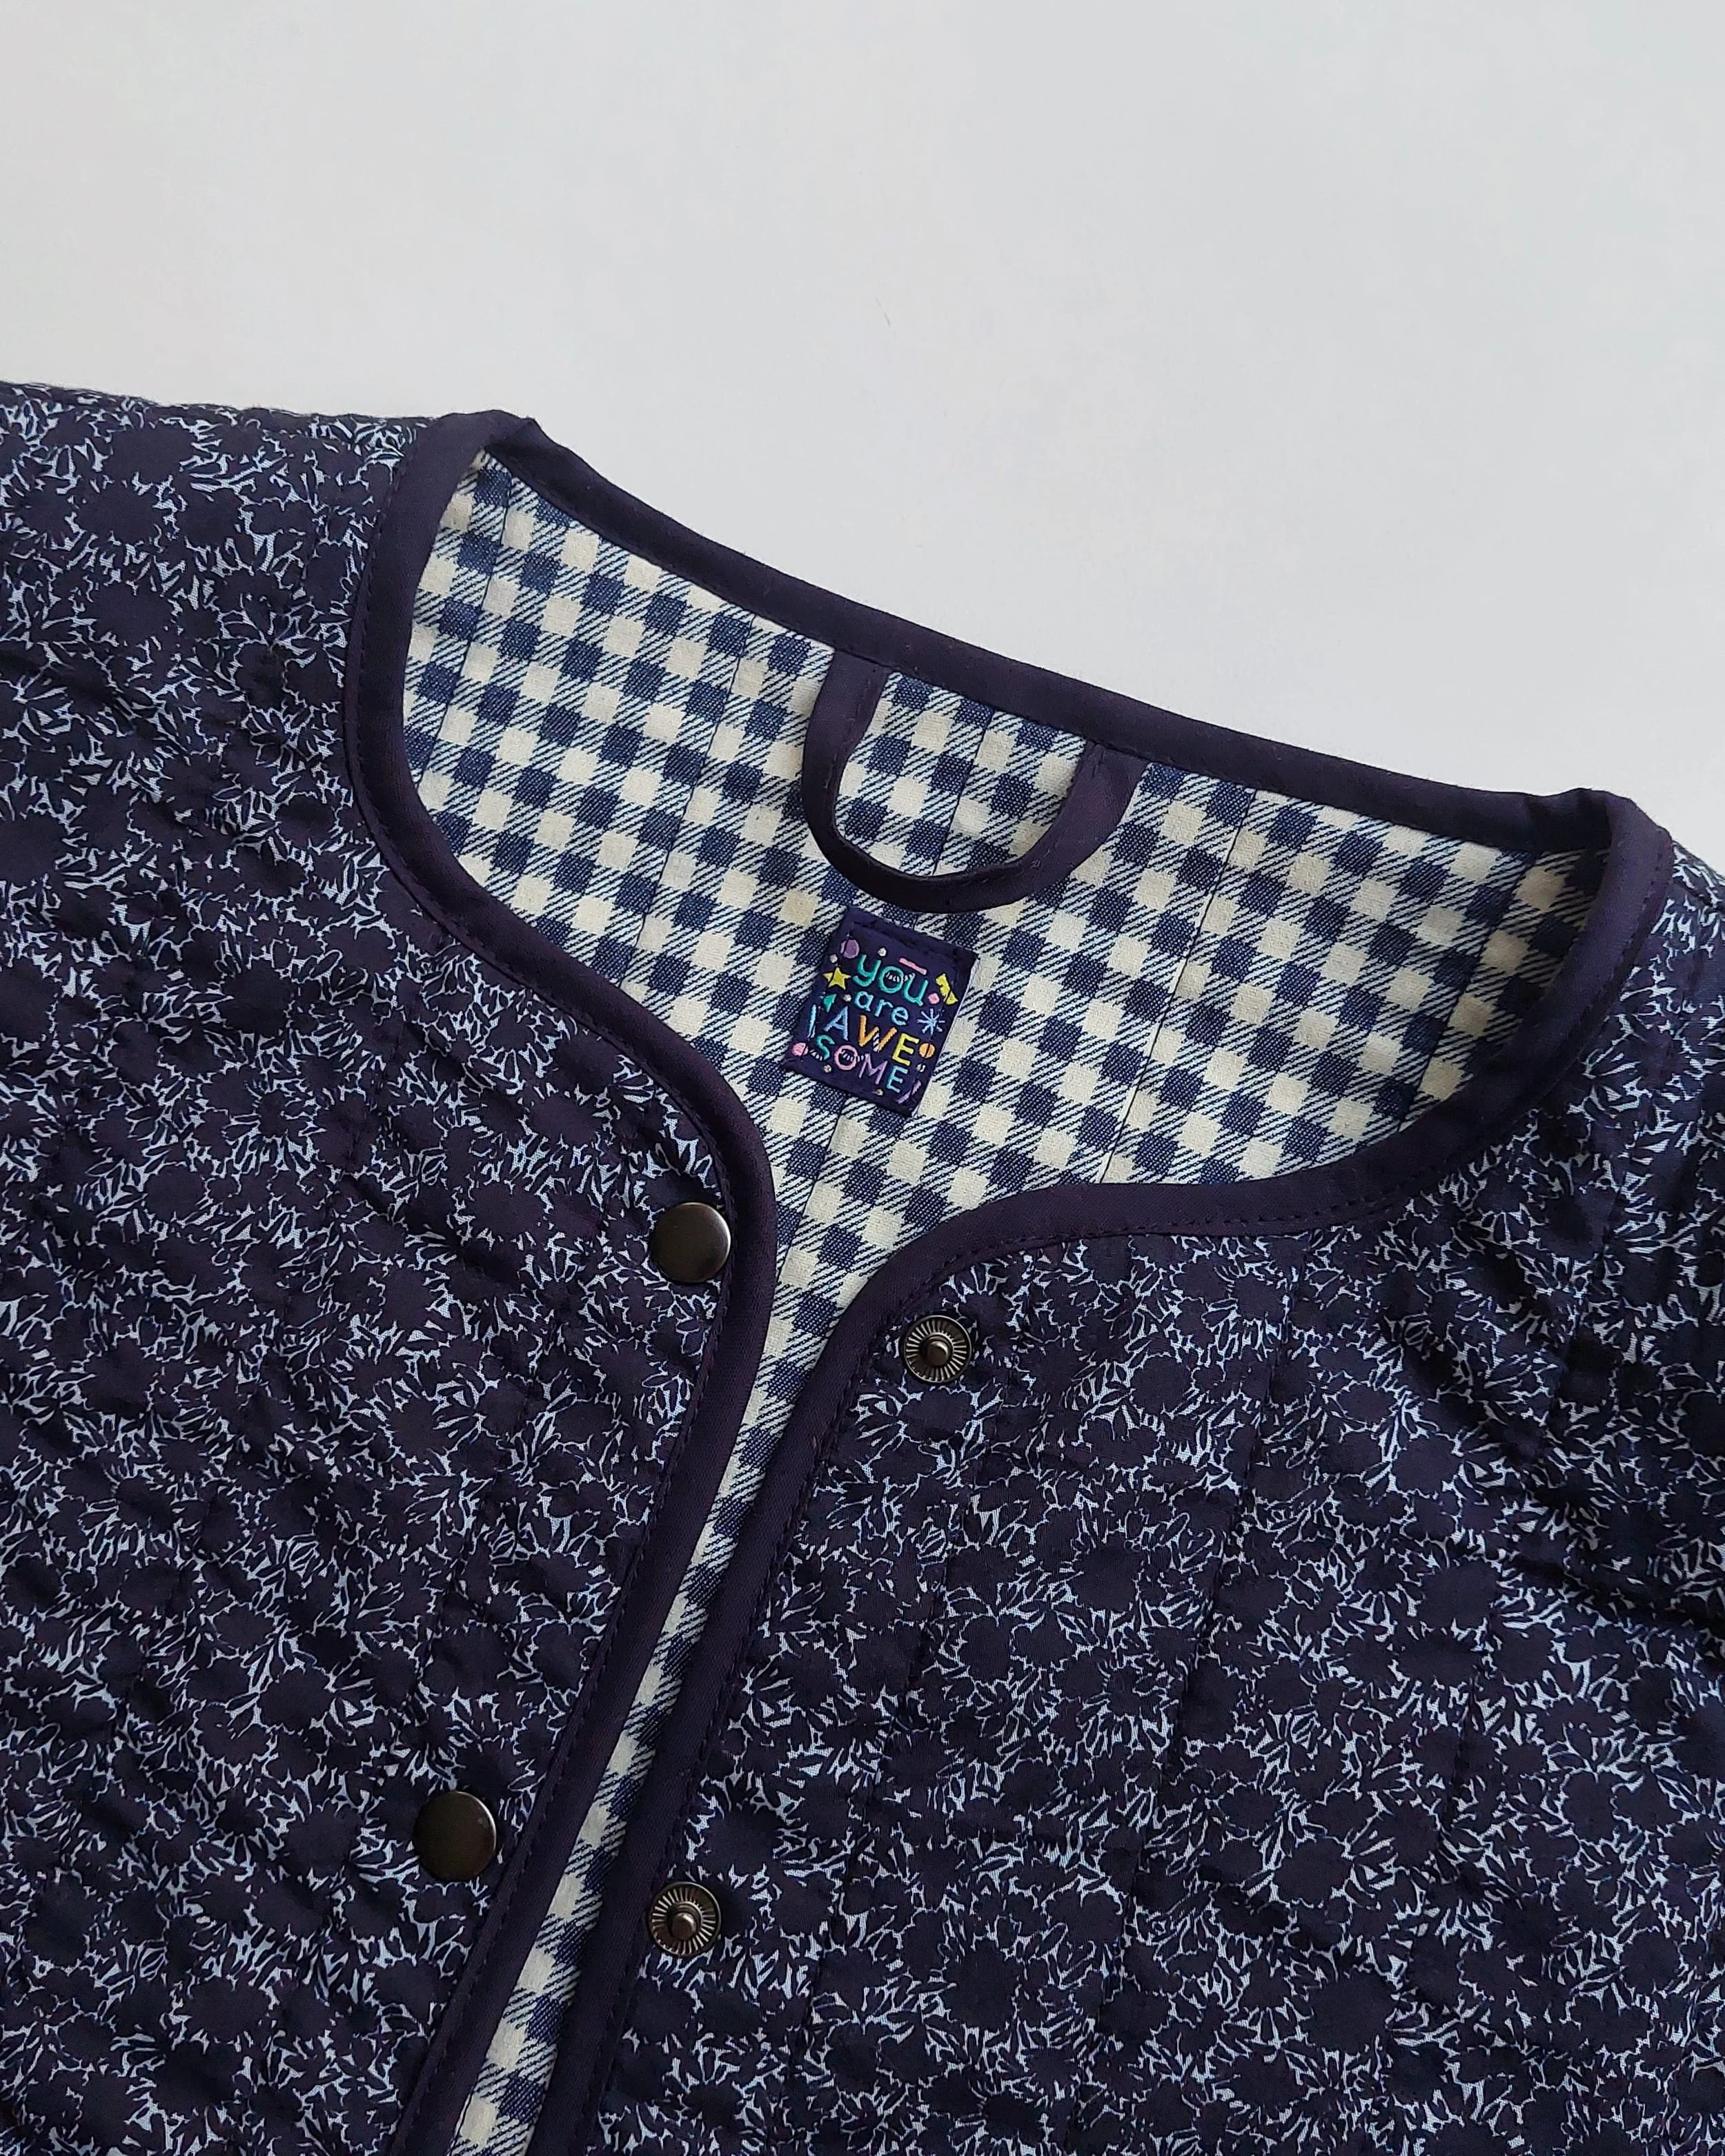
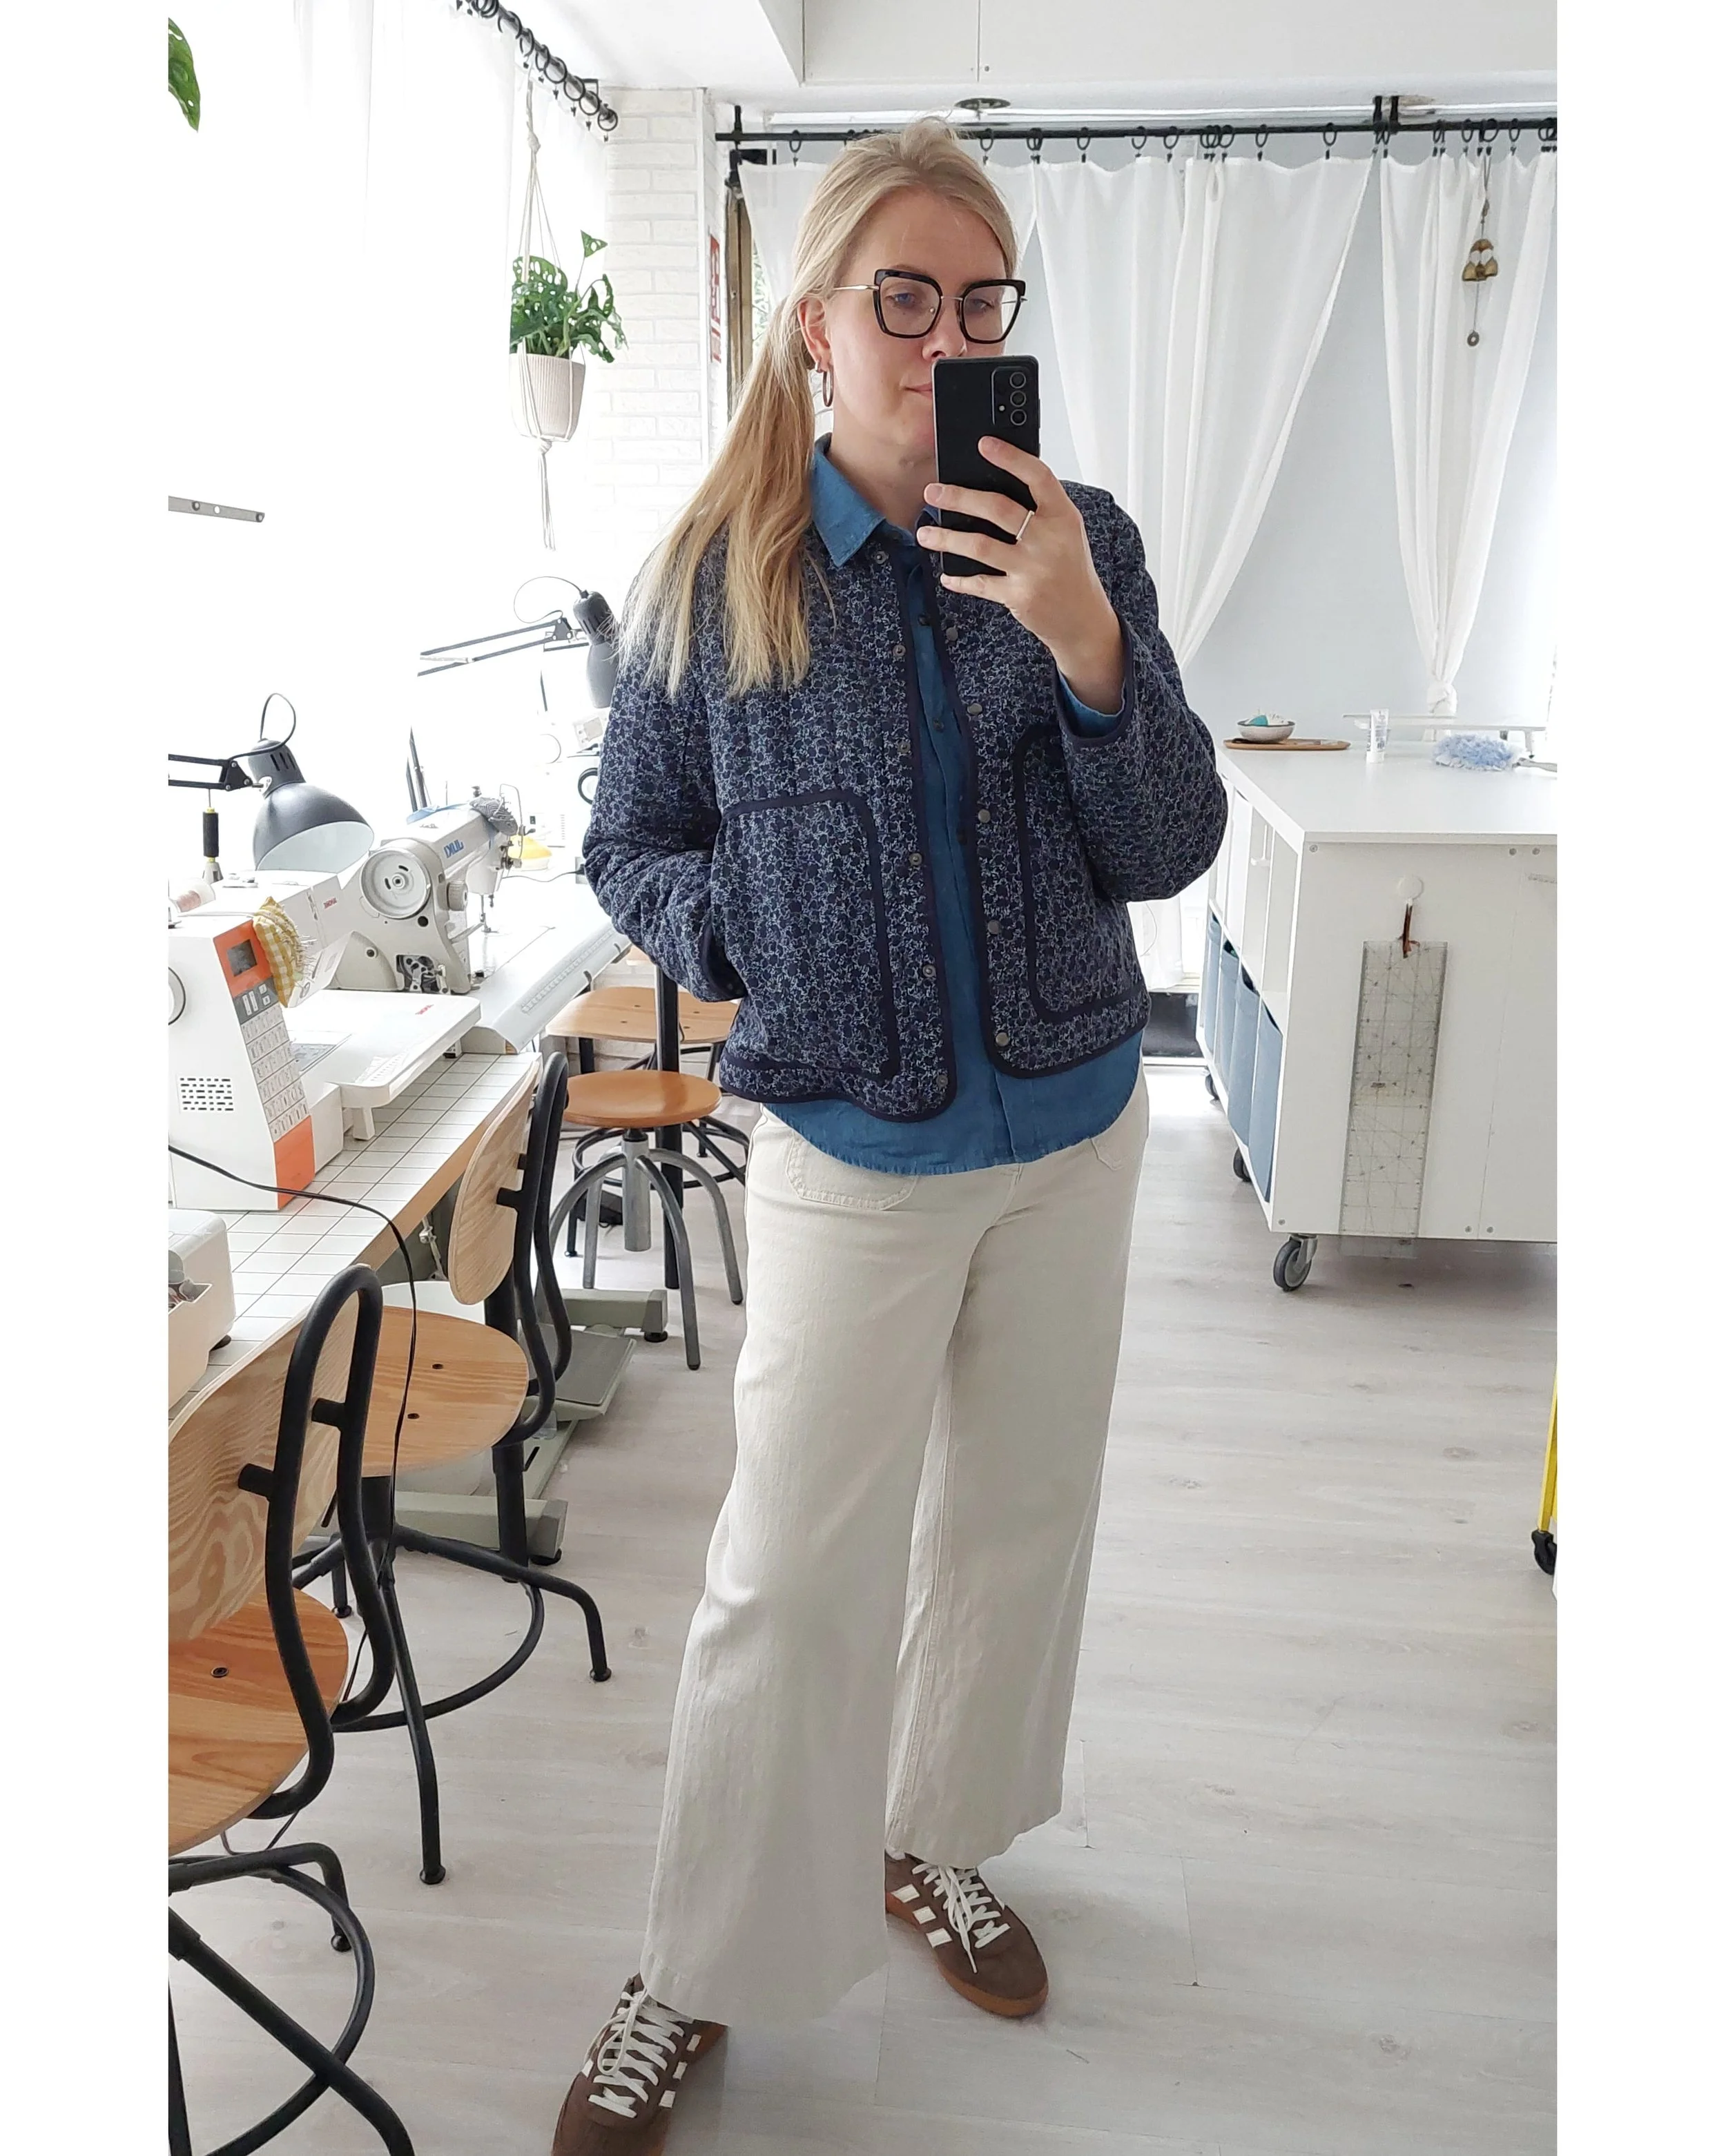
Then I sewed the pieces together, serged the seam allowances (if I’d had more time, I would have used bias tape there as well), and finished all the edges with bias tape. I quilted the pockets but without batting; I also used bias tape on their edges. Since I was quilting the fabric myself, I could have also created a completely clean finish on the inside by attaching the batting to just one layer of fabric and leaving the other as a lining, but this time I was racing against the clock and opted for simpler finishes.
I’ve worn the jacket a couple of times, and I think it’s a great transitional piece that leaves plenty of room to experiment with different fabrics, finishes, and design elements like pockets, collars, etc. For now, I’m keeping it as a class sample, and in spring I’ll add it to my wardrobe.
Luego ya uní las piezas, remallé las costuras de unión (con más tiempo hubiera usado bies allí también) y cubrí con bies todos los bordes. Los bolsillos los acolché pero sin guata, también usé el bies en los bordes para ellos. Al acolchar la tela yo, hubiera podido también hacer un acabado totalmente limpio en el interior, uniendo la guata a solo una capa de tela y dejar la otra como forro, pero esta vez iba contra reloj e usé acabados más sencillos.
He llevado la chaqueta un par de veces y me parece una buena pieza de entretiempo que deja mucho margen para probar diferentes telas, acabados y añadidos de diseño como bolsillos, cuellos etc. Por el momento lo dejo como muestra de clase y así ya para primavera lo adopto para mi armario.
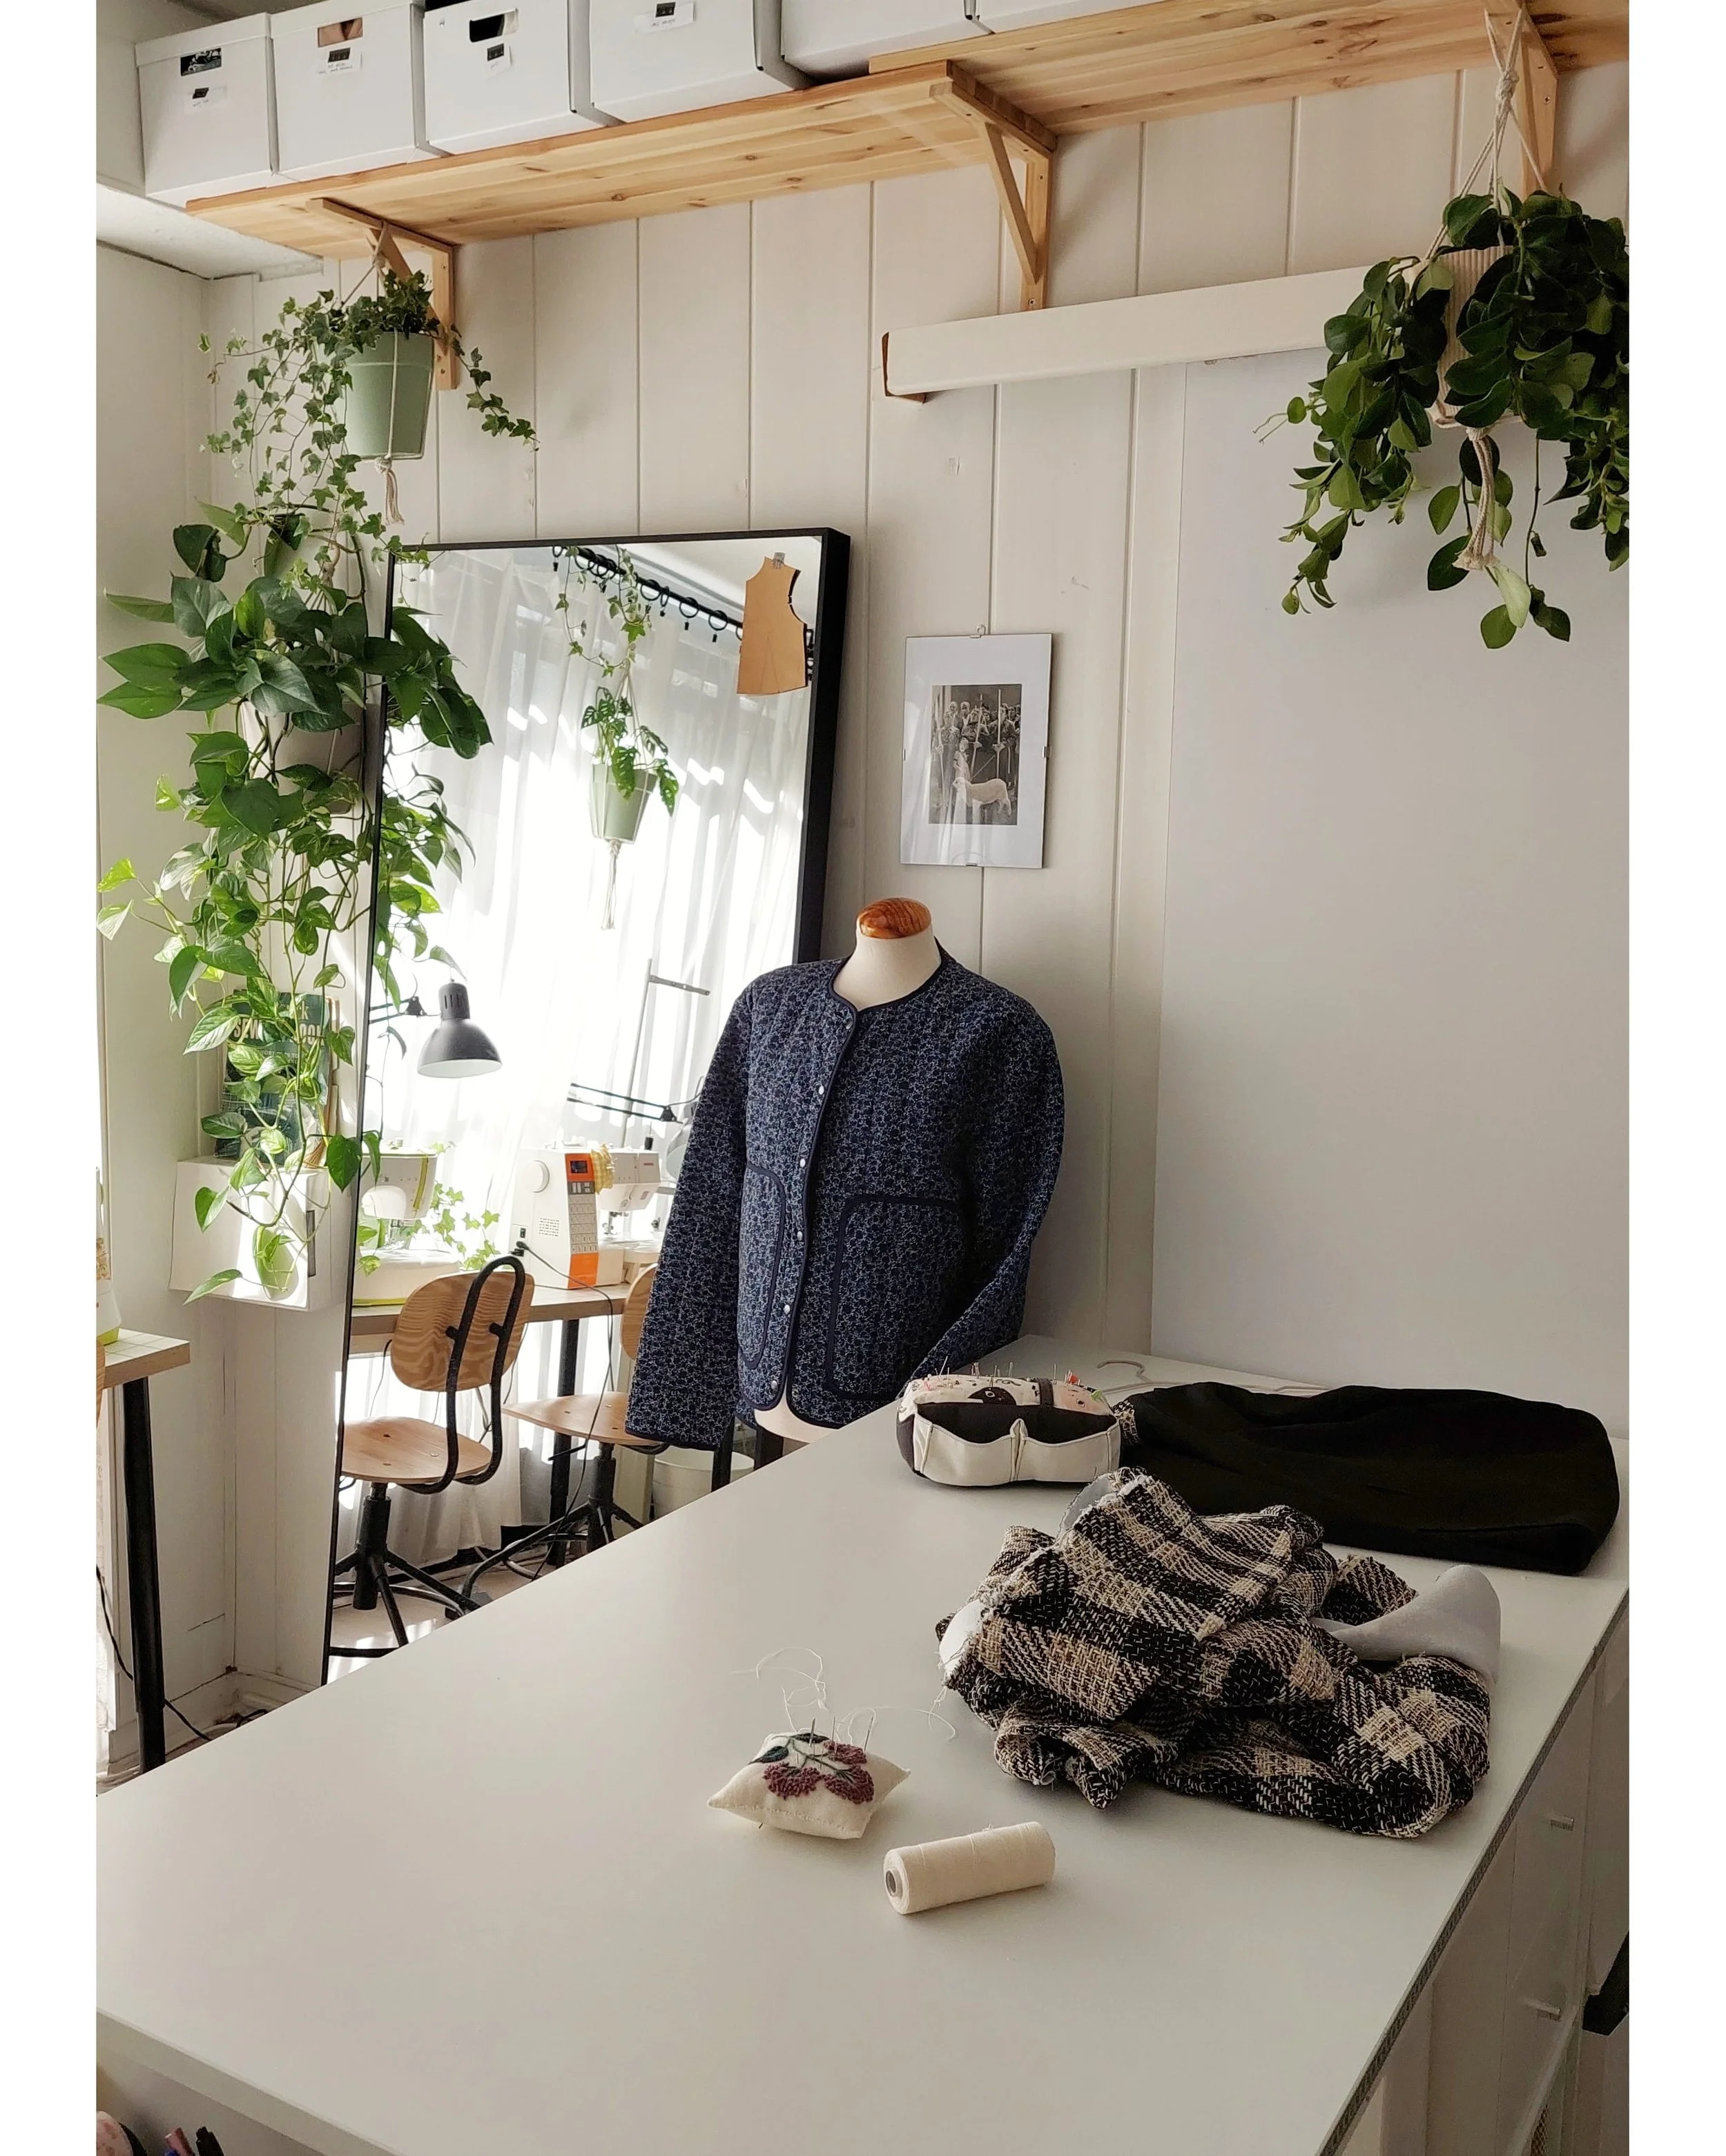
A sneak peek of another project featuring matching plaids, I just can’t avoid it, haha. / Se asoma otro proyecto con enfoque principal en casar cuadros, no puedo evitarlo, jaja.
And that wraps up my little novel about jackets. My next make I’ll have to write about is this coat on the photo!
If you’ve read all the way to the end, thanks for sticking around. If you haven’t signed up for the newsletter yet, you can do so here, and my blog posts will arrive straight to your inbox (usually along with some more personal reflections that I don’t share on other platforms, haha).
And if you are interested in more posts like this, check my blog archives where you can find 10+ years of posts. See you around!
Y hasta aquí va mi novela sobre las chaquetas. El siguiente proyecto que tengo que compartir es este abrigo en la foto!
Si has leído hasta el final, gracias por estar aquí. Si no estás apuntada a la newsletter, puedes hacerlo aquí y te llegarán mis entradas del blog directamente a la bandeja de entrada (normalmente junto a alguna reflexión más personal que no comparto en otro tipo de medios, jaja).
Y si te interesan entradas como ésta, te recomiendo echar un ojo al archivo de este blog donde puedes encontrar 10+ años de costuras. Hasta la próxima!